QloApps Social Feeds
QloApps Social Feeds is an add-on for QloApps.
It helps you to easily show all the Instagram posts on your website.
So, that you can easily highlight offers/ discounts you are giving and also leaves a lasting impression on customers.
In today’s digital world, promoting on popular social media platforms will grab the attention of customers.
And hence increase sales.
Hence, to increase the visibility and sales of your website we are here with QloApps Social Feeds.
Features of QloApps Social Feeds
- You can display on multiple pages of your website the feeds posted on Instagram.
- There is an option to display posts/ feeds as slider or pagination view.
- Either display the caption on the image just when the cursor is hovering or never.
- Customize the view of posts by choosing a colour for caption background, caption & heading.
- Set the context opacity from 0 to 1. according to your convenience.
- Choose to show the publishing time of the posts on the image.
- Enable/ disable slider autoplay and set its time.
- Set the number of posts you want to display in one row.
- Enable image thumbnail to show border & padding around images.
- The installation of any module is very simple in QloApps.
Installation of QloApps Social Feeds
The installation of any module is very simple in QloApps. For installation of QloApps Social Feeds.
- Go to the “Module and Services” tab.
- Click on “Add New Module”.

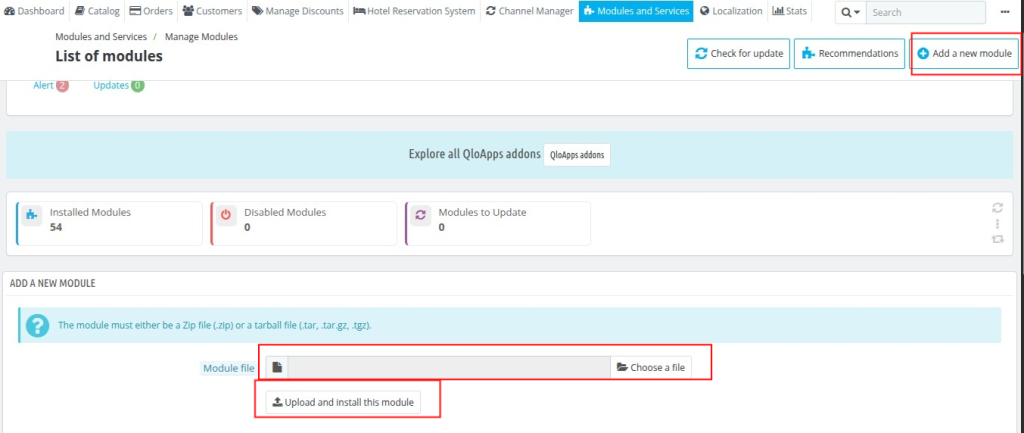
Now upload the Zip file of the module and click on install.

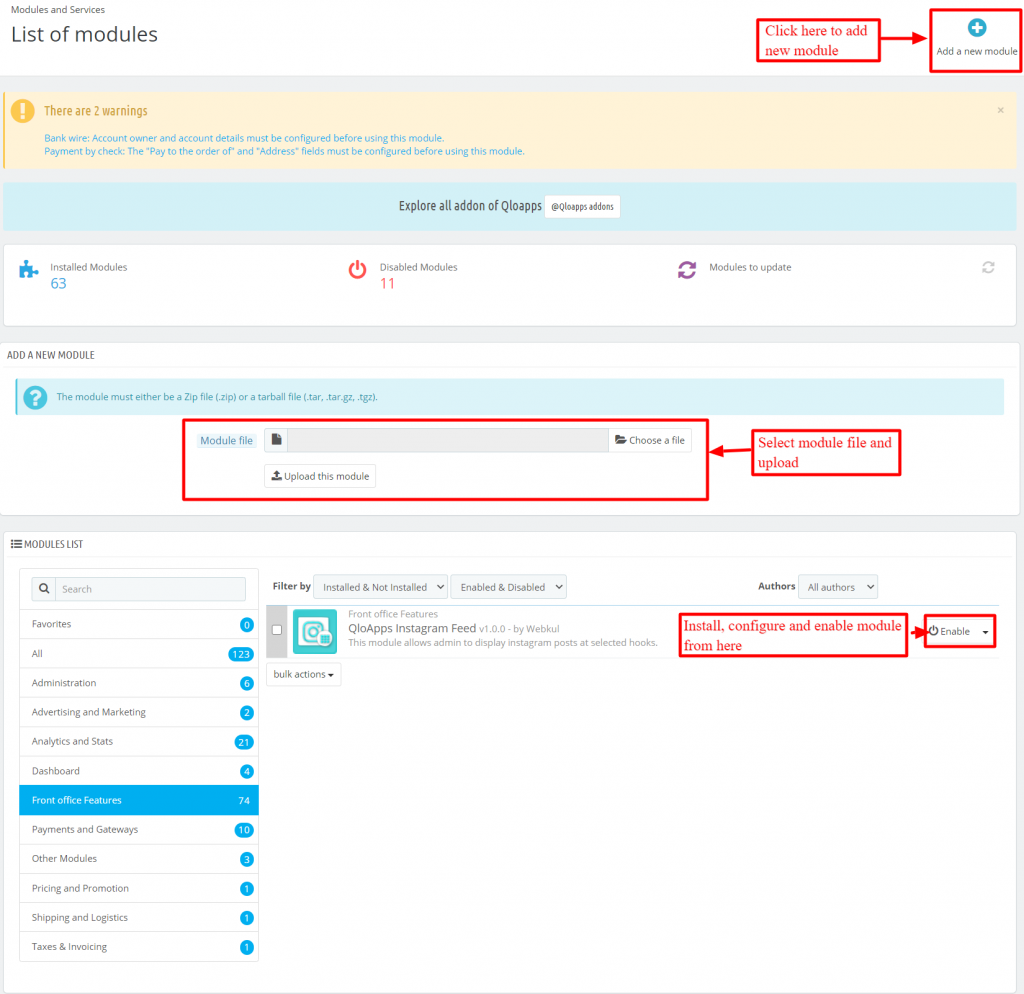
Now you have installed the module. So let’s check how to configure it.
Configuration of Social Feeds

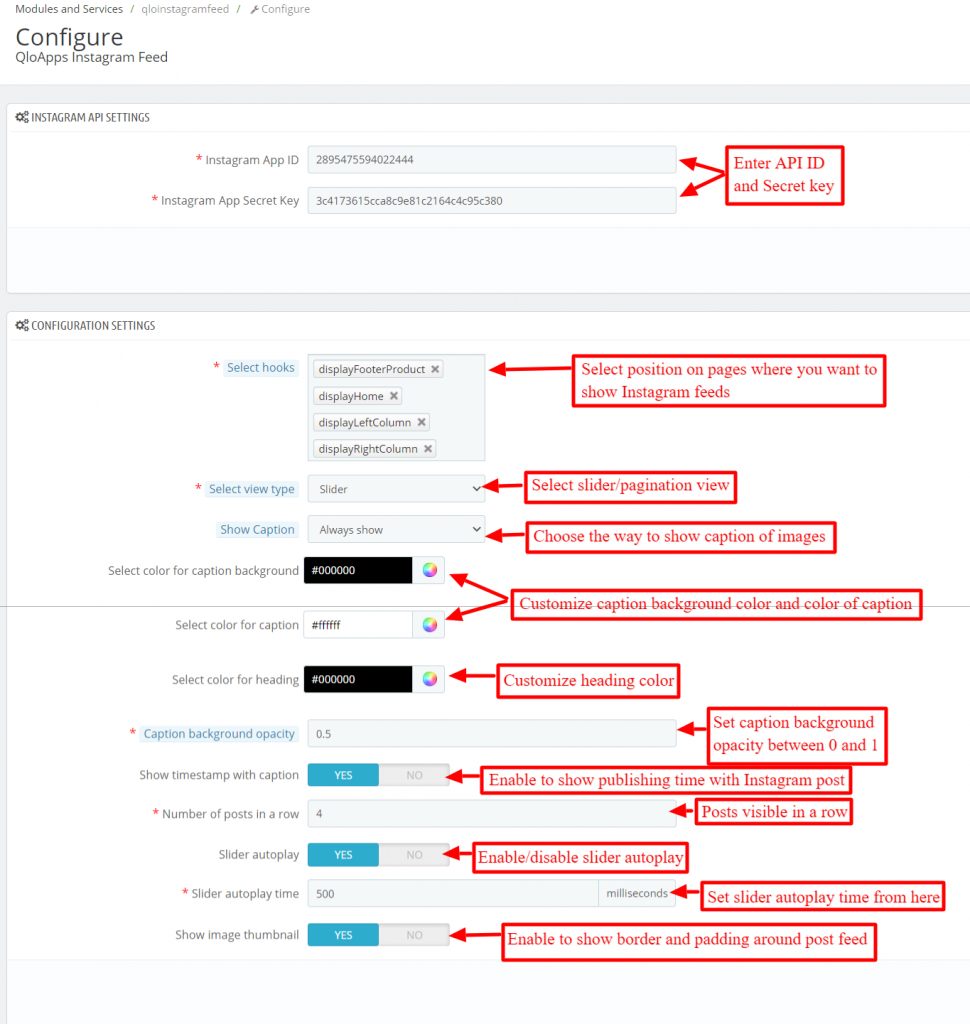
You need API keys to configure the module.
Further, let’s see details of configuration settings
Select hooks: Select the position and the pages on which Instagram feeds are to be viewed.
Select view type: Select to display the feeds in slider or pagination mode.
Show caption: Choose to show caption on the image on hovering the cursor. Moreover, choose to always or never display the caption on the image.
Color for caption background: Select the color of the caption text background.
Select color for the caption: Select the color of your choice for the caption text that is displayed on Instagram feeds.
Select color for heading: Customize the heading color of Instagram feeds.
Caption background opacity: Set caption background opacity between 0 and 1.
Show timestamp with the caption: Choose to show or hide publishing time of post on the Instagram feeds.
A number of posts in a row: Enter the number of posts you want to show in one row.
Slider autoplay: Enable or disable slider autoplay.
Slider autoplay time: Set slider autoplay time.
Show image thumbnail: In order to show border & padding around images, enable this option.
How to Get Instagram API Keys and Access Token
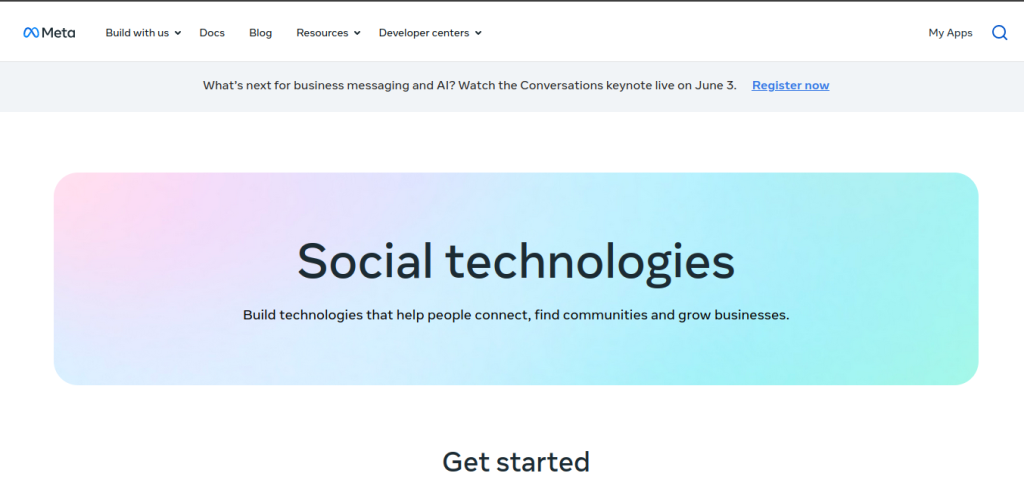
To get API keys, visit developers.facebook.com and log in using your credentials
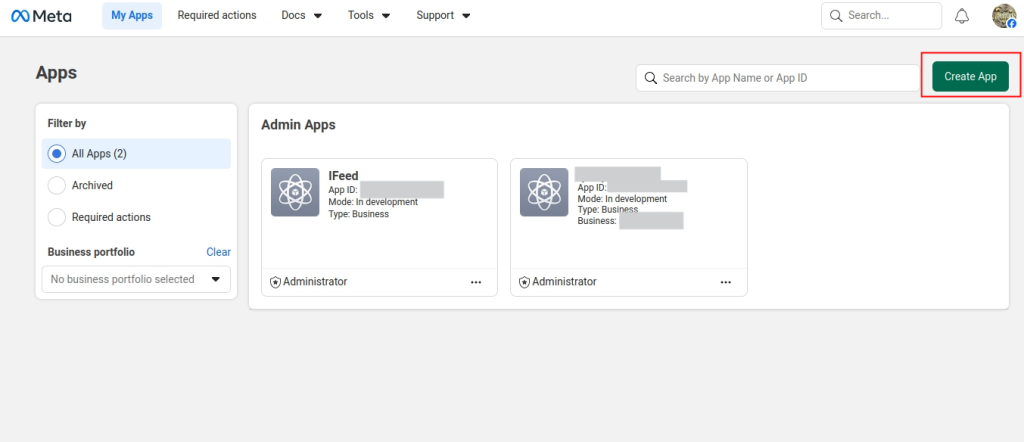
Once you are logged in, click on the “My Apps” button available at the top-right corner of the dashboard.

After clicking on it, you will be redirected to Apps section, where you can see the list of previously created apps.
Now, click on the ‘Create App‘ button to create a new app.

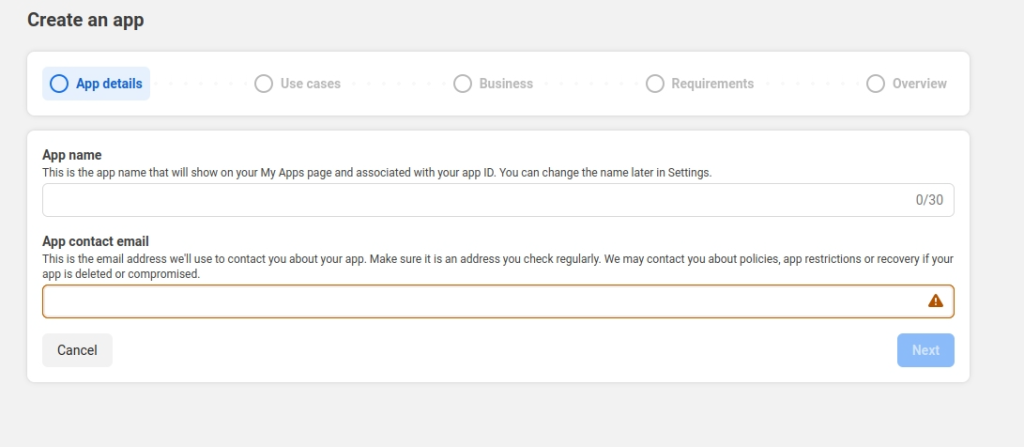
Enter your preferred App Name and a valid App Contact Email Address in the required fields. After filling in the details, click on the “Next” button to proceed with the app creation process.

After the creation of app, you will land on its dashboard.

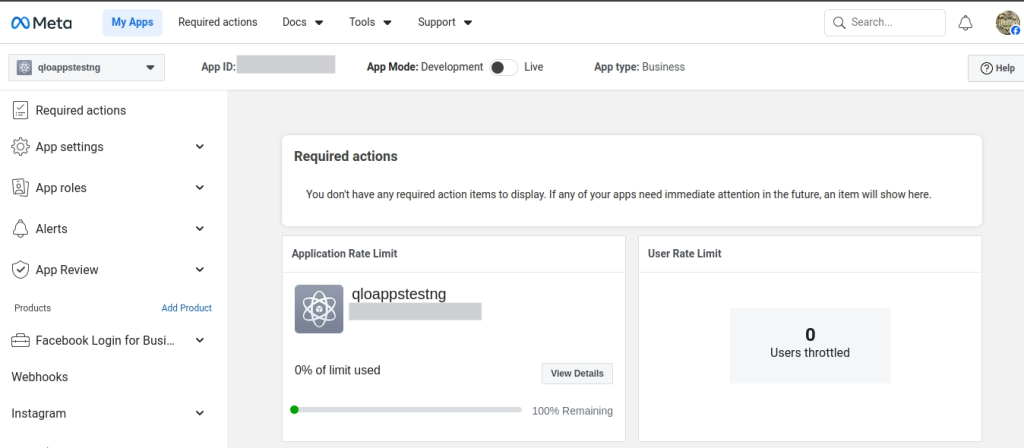
Scroll down on the page, click on the “Add Platform” button, and then select Instagram from the available platform options.
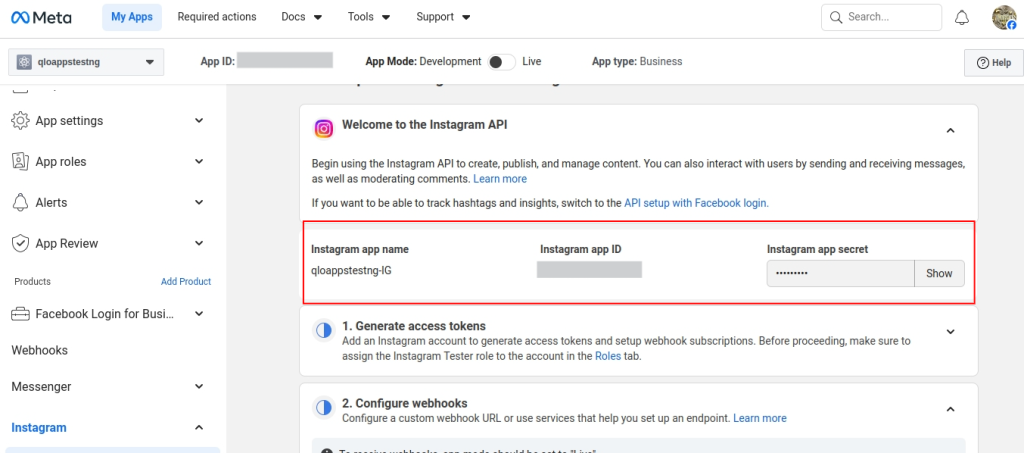
After successfully creating the Instagram app, you will receive the following credentials from the Meta Developer Dashboard:
- Instagram App ID
- Instagram App Secret

Scroll down to the “Instagram Business Login” section and click on “Business Login Settings” to continue the configuration process.
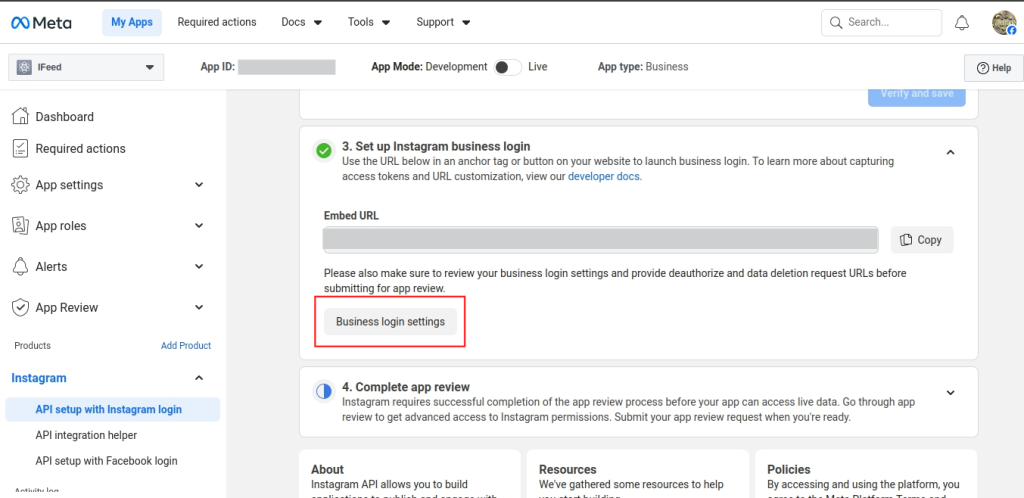
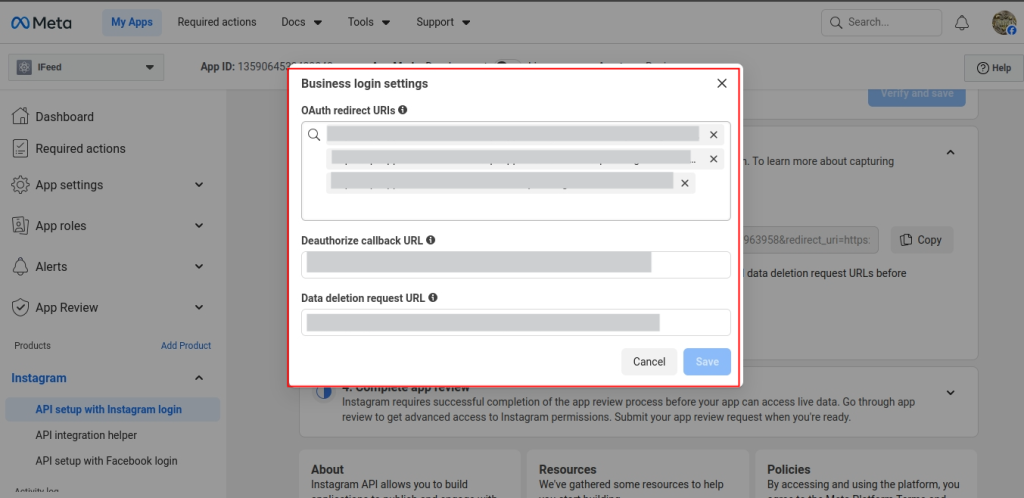
You can copy this redirect URL directly from the QloApps Instagram Feed module configuration page and paste it into the Set the OAuth Redirect URIs field in the Meta Developer Dashboard.
How to Add Front-End URL in Meta Developer Dashboard for Instagram Feed Display
First, click on “App Settings” from the left-side menu and then open the “Basic” settings section.
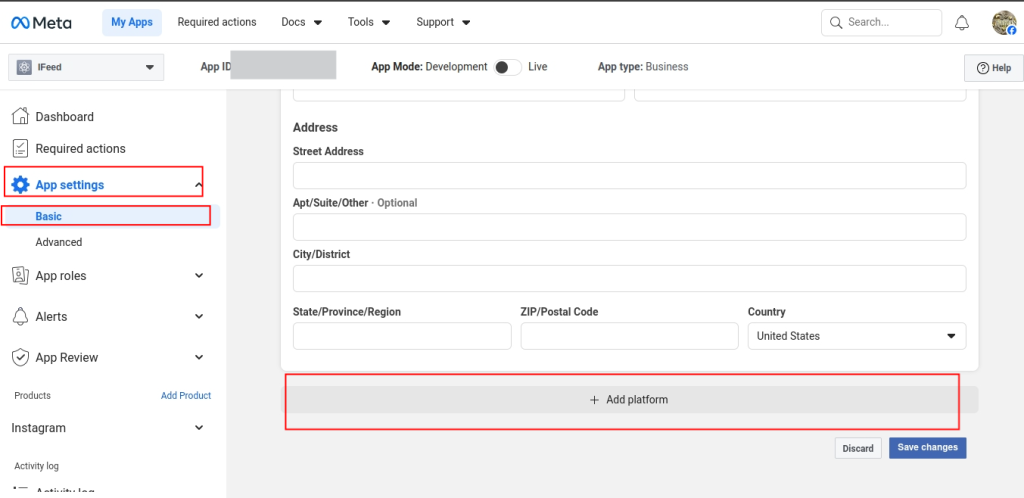
After that, scroll down to the bottom of the page, click on “Add Platform”, and choose “Website” from the available options.

Now enter your website URL in the “Site URL” field under the Website platform settings.
Make sure you add the correct front-end URL of your QloApps website where the Instagram feed will be displayed.
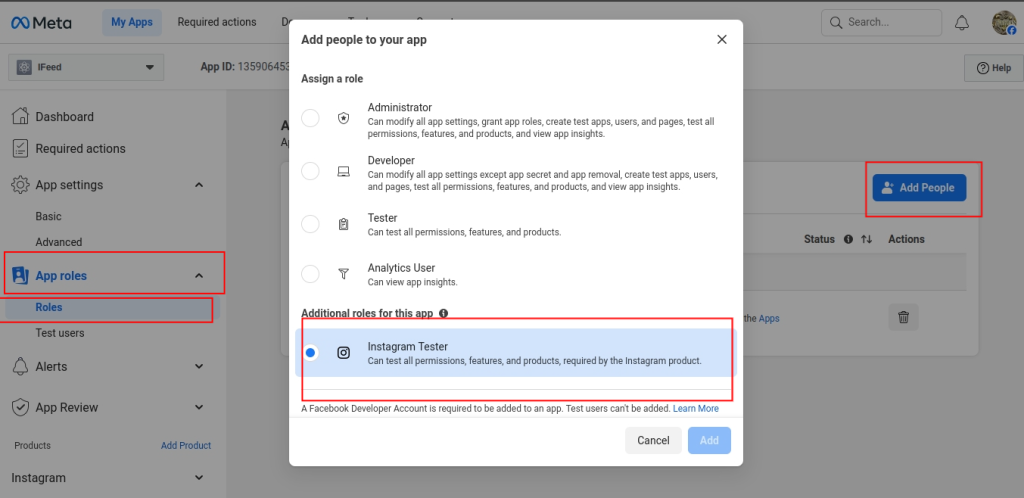
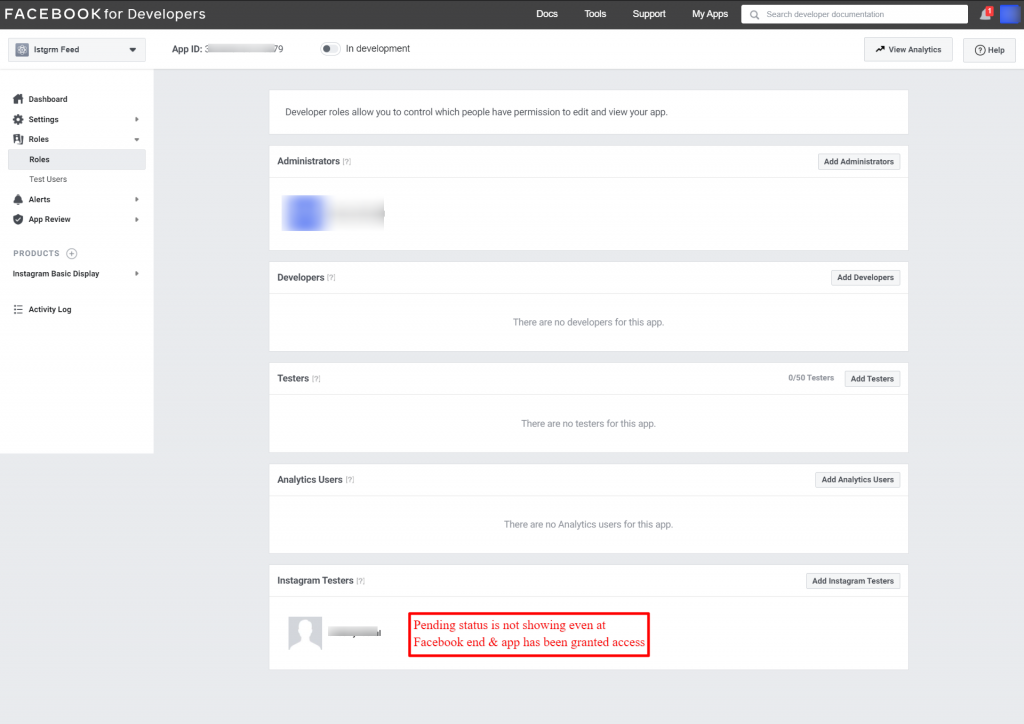
A popup will open when you press the ‘Add Instagram Tester’ button.
Here, type the Instagram account username that you want to add as an Instagram tester.
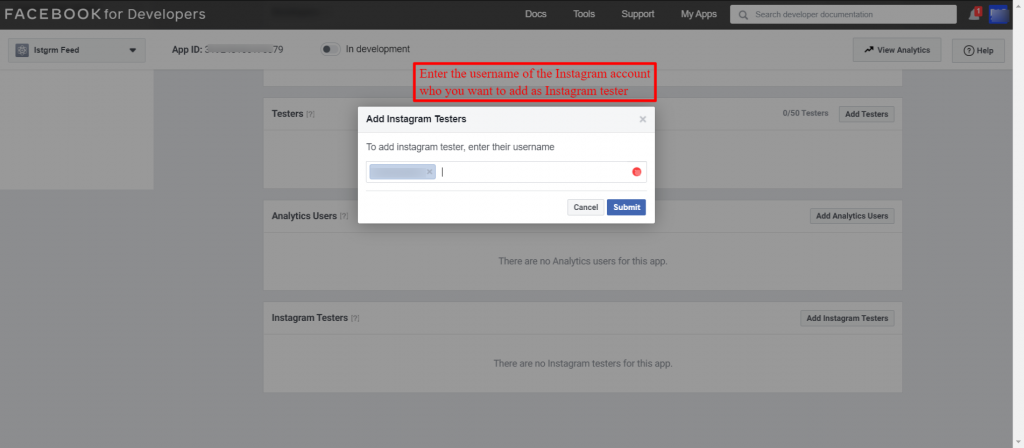
After selecting the user & clicking on the “Submit” button, the Instagram user will be added as tester.

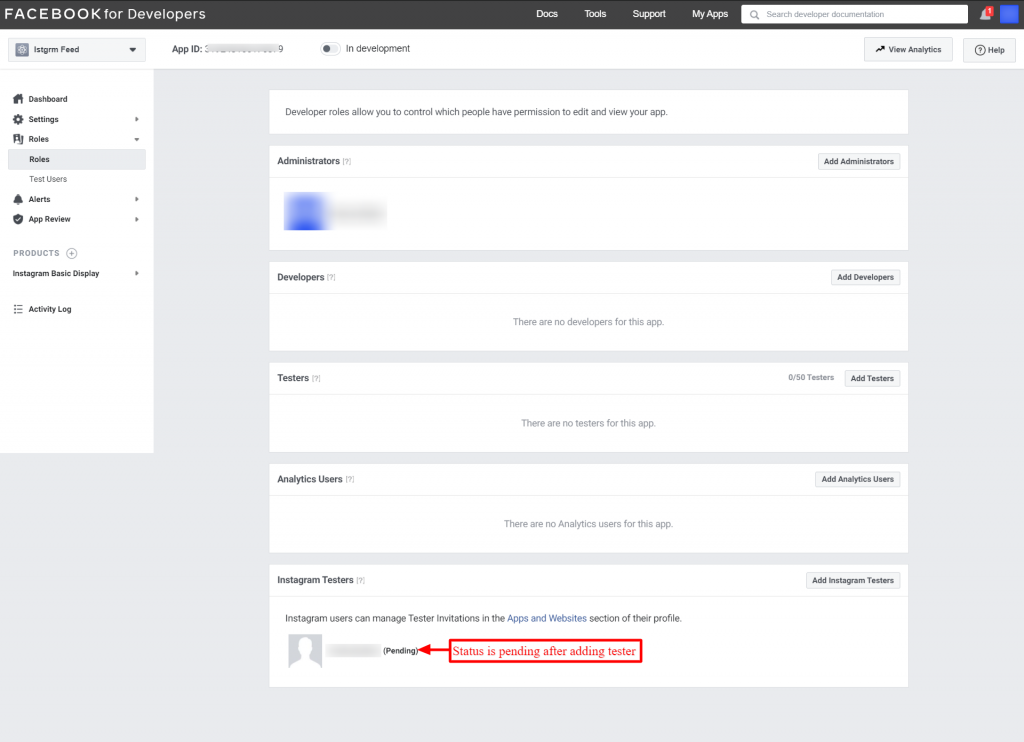
Now go to Instagram. After that navigate to “Apps and Websites” section under “Settings“.
You now need to go to “Tester Invites” to access all the requests for testers.
Here, either you can accept/decline the tester request of the Facebook app via which you sent the request.
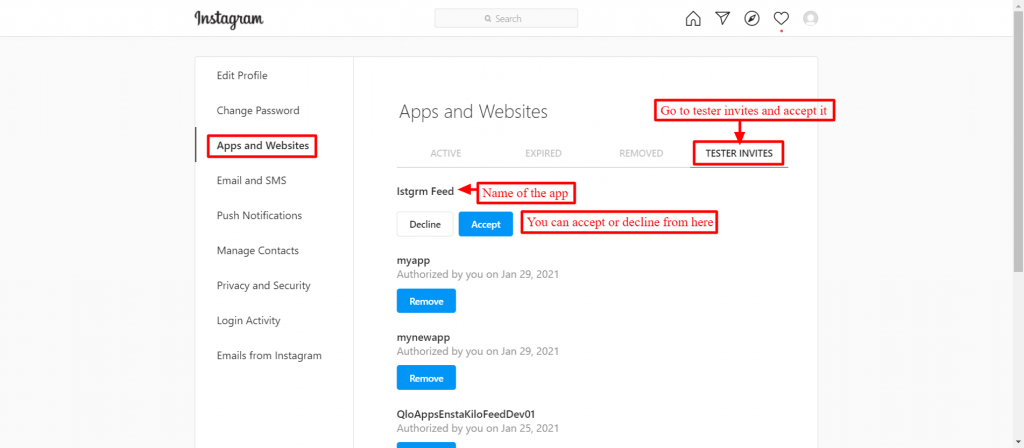
You approve the Facebook app as an Instagram Tester by pressing the “Accept” button.
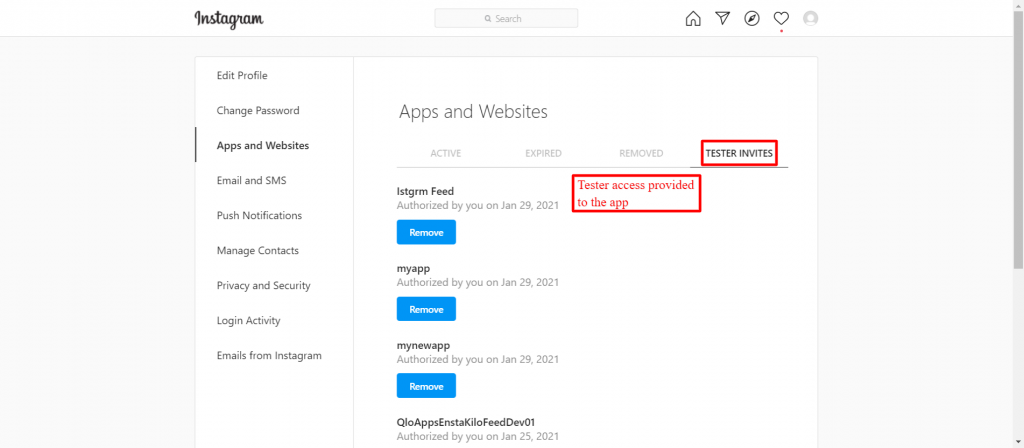
Hence, you will not see the pending status after accepting it.

Social feeds at the front end
After the successful configuration of the module, you will find a new section of Instagram posts on the selected pages.
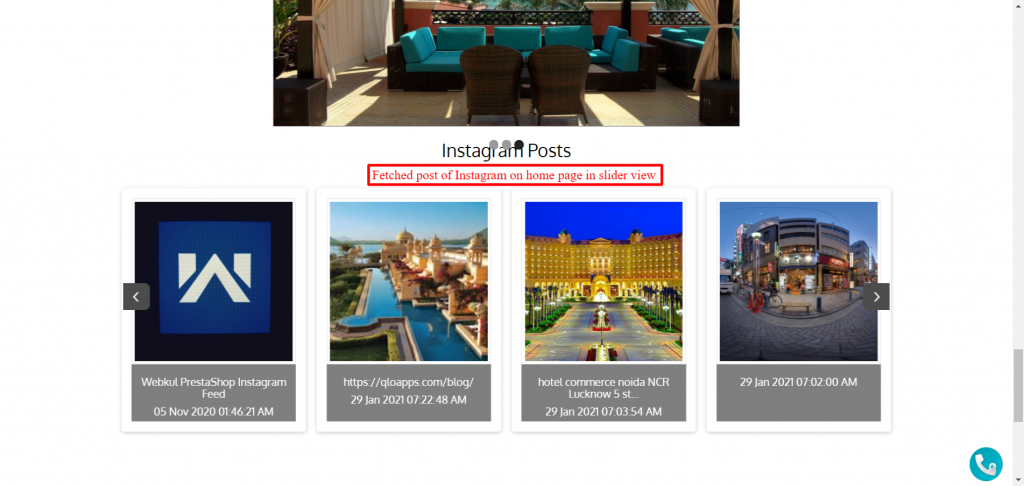
Landing page
On the landing page, you will find Instagram posts in slider view, which will look like this.

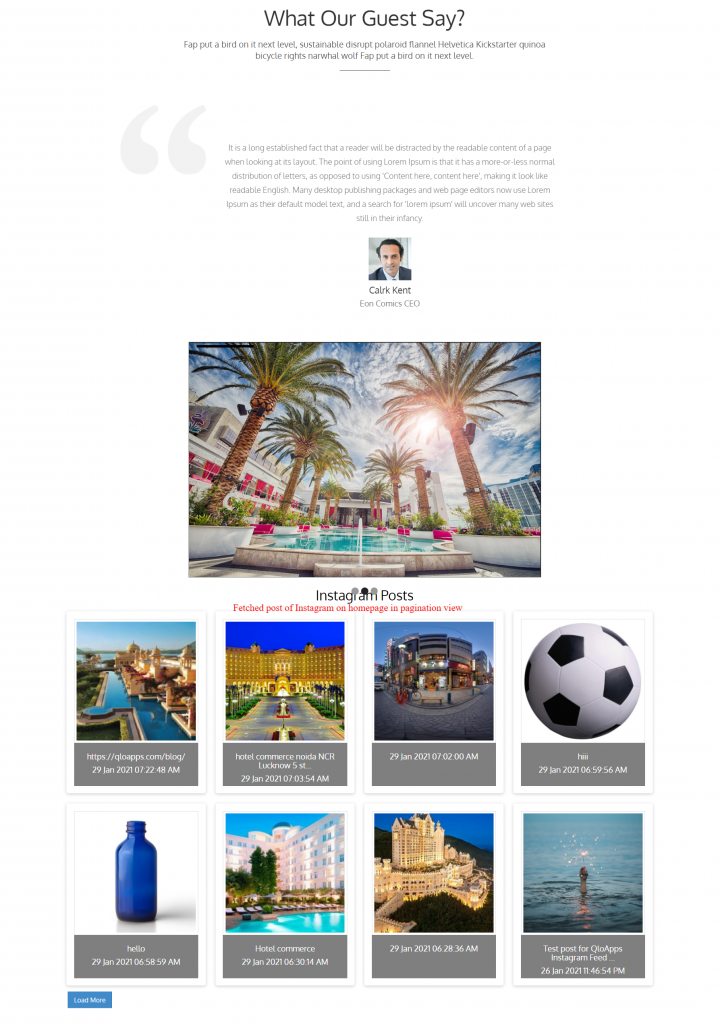
Similarly, you will find Instagram posts on the landing page in pagination view.

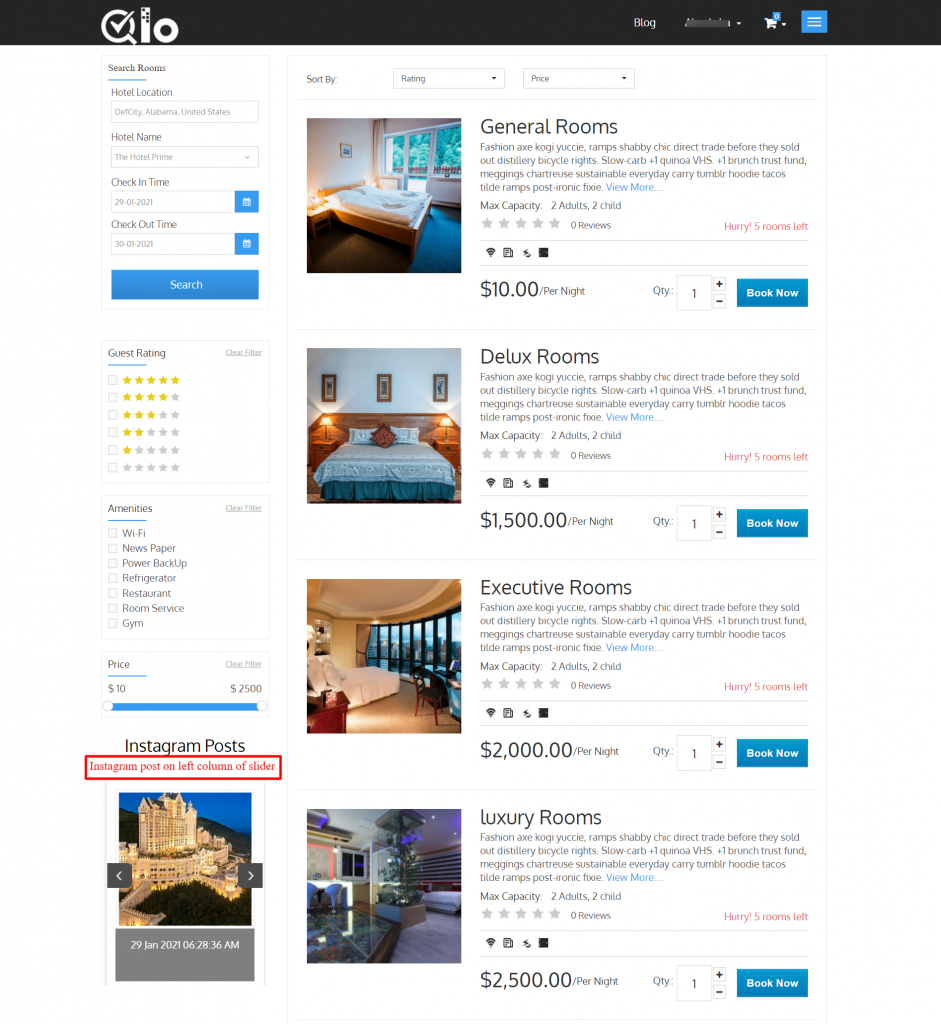
Search result page
You can see images in slider view as set by the admin from the backend.

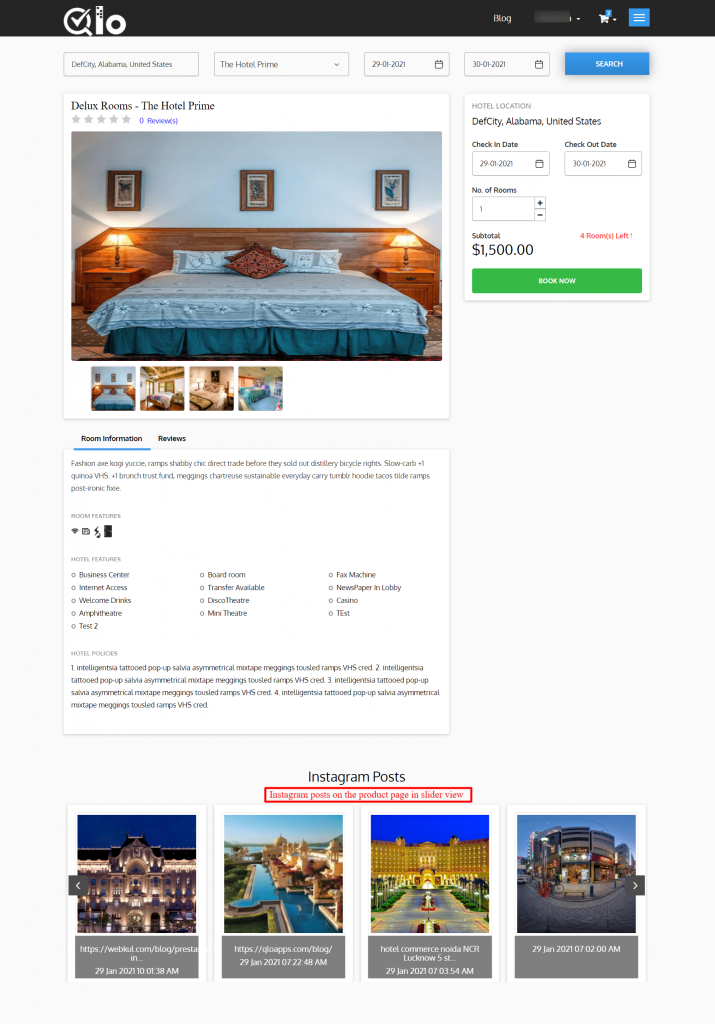
Room type details page

Conclusion
That was all from QloApps Social Feeds.I hope I was able to clarify the add-on in the best possible way.
If you want to learn about the functionality of QloApps then you can visit this link: QLO Reservation System – Free Open-Source Hotel Booking & Reservation System
In case of any query, issue, or requirement please feel free to raise it on QloApps Forum
Current product version: v 1.0.3
Supported framework version: 1.7.x & 1.6.x