QloApps is a powerful hotel management software designed to create a comprehensive ecosystem.
It includes a Property Management System, a Booking Engine, and an appealing Booking Website.
As an admin, you can effortlessly add your hotel details, including room descriptions, features, pricing, and images.
Guests can check room availability and make instant bookings with just a few clicks.
Additionally, you can monitor the booking status and update site information in real-time.
This User Guide will help you explore the various functions and features of QloApps, enabling you to maximize its potential for your property management needs.
Key Features of QloApps
- Easily launch a user-friendly website integrated with a booking engine to drive direct reservations.
- Manage both online and offline bookings from a unified platform, ensuring efficient inventory management.
- Provide secure payment options through multiple gateways for safe transactions.
- Cater to international guests by supporting multiple languages and currencies.
- Use a dynamic dashboard with insights on reservations, occupancy, revenue, performance metrics, and module updates for better decision-making.
- Manage staff roles with hotel-specific permission controls, ensuring necessary access only.
- Store and manage customer data to deliver personalized guest experiences.
- Implement advanced pricing strategies for groups, room types, date ranges, or specific days.
- Integrate seamlessly with third-party platforms through a robust API.
- Enhance online visibility with a fully SEO-optimized platform.
- Manage multiple properties and room types from one centralized platform.
- Create discounts, offers, and coupons to attract guests and increase bookings.
- Oversee hotel operations with control over room types, amenities, pricing, availability, and booking restrictions like length of stay (LOS) and max order dates.
- Set flexible refund policies with dynamic rules for managing cancellations, refunds, and overbookings.
- Gain full control of bookings with detailed management, order notifications, and invoicing.
- Collect and manage guest reviews to boost credibility and improve your reputation.
- Ensure GDPR compliance with secure data handling and privacy adherence.
- Offer service products for guests to book additional services alongside rooms.
- Provide customer service to promptly address guest queries and improve their experience.
- Leverage the module catalogue to customise and expand your QloApps experience.
- Add or update multiple rooms directly from the room type page.
- Create advanced price rules for multiple room types in a single step, and apply multiple booking restrictions under one rule for smarter pricing control.
- Add or edit service products during booking/order creation or editing.
- Email Configuration Options:
- Include/exclude website name in subject lines
- Skip confirmation emails for back-office bookings
- Our Properties page is available in the front office, making it easy to display multiple properties.
- Define bed types (e.g. king, queen, twin) for each room type.
- Enjoy a highly customizable platform tailored to your unique business requirements effortlessly.
How to Install QloApps ?
You can refer to the QloApps Installation Guide for detailed instructions on how to successfully install QloApps.
This guide provides step-by-step procedures to ensure a smooth installation process.
Hotel/Property Management
Add Hotel in QloApps
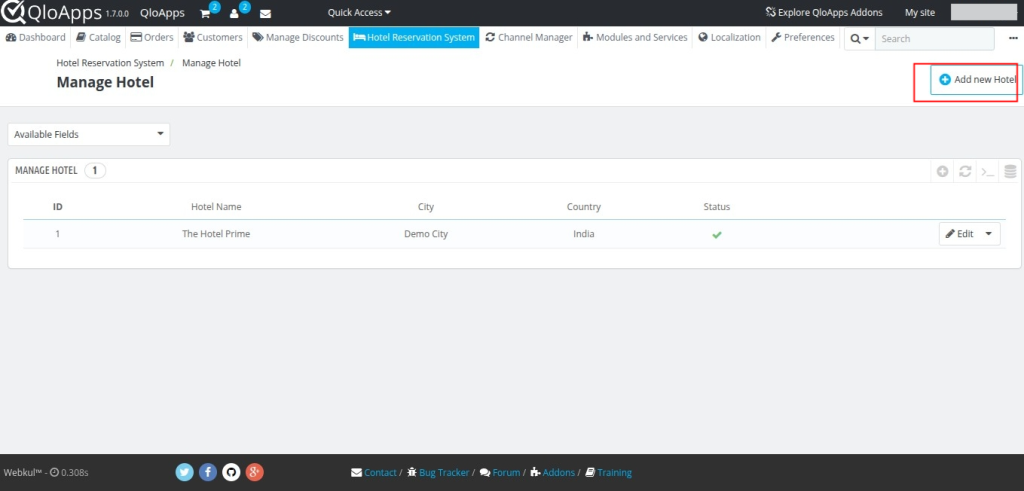
When you install the QloApps hotel reservation system, the first thing you should do is Add a Hotel.
To Add Hotel, Go to Hotel Reservation System> Manage Hotel in the main menu. Click on Add new Hotel.
When you click on Add New Hotel, you have to fill in the details in the various below-mentioned sections to add the hotel.
Information Section
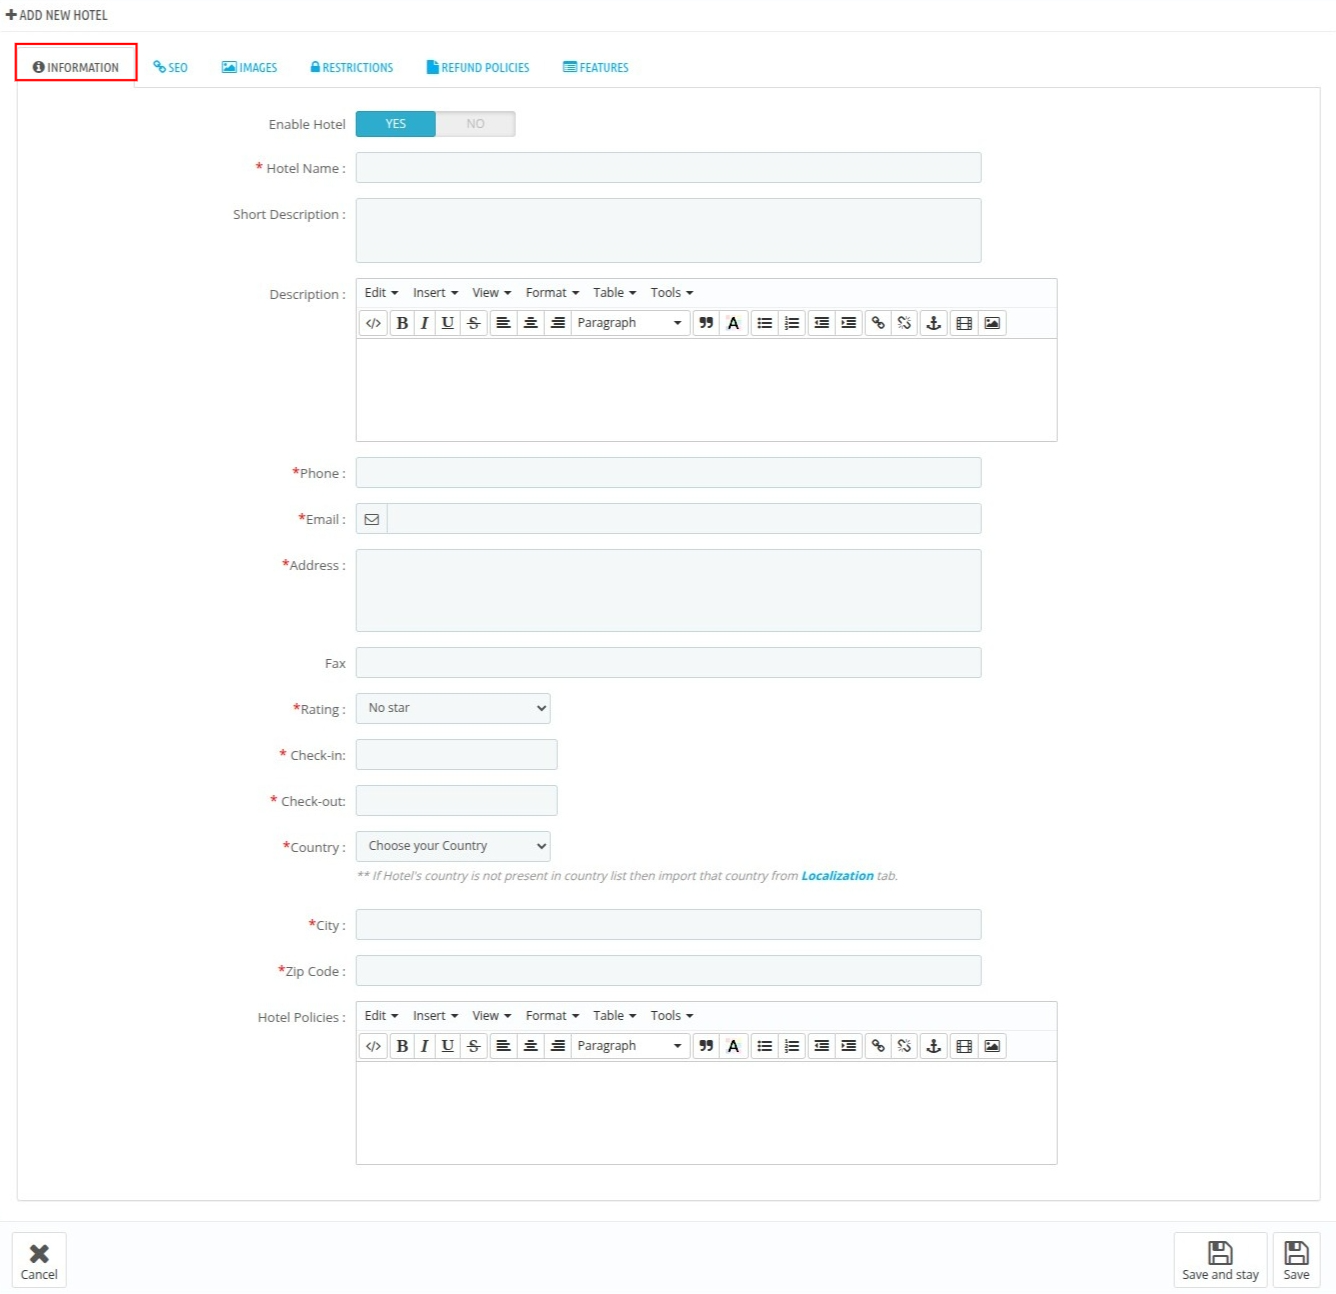
In the Information panel fill in the details as explained below:
- Enable Hotel: You can enable the hotel for the bookings.
- Hotel Name: Enter the name of the hotel.
- Short Description: To give brief give a short description of the hotel.
- Description: Give a long description of the hotel.
- Phone: Enter the contact number dedicated to the hotel’s front desk (preferred), so guests can easily reach your team for inquiries or assistance.
- Email: Provide the official email id of the hotel.
- FAX: Enter the FAX Number for your hotel.
- Address: Give the registered address of the hotel.
- Rating: Select the rating from the drop-down.
- Check-in / Check-out: Set the check-in and check-out time in hours and minutes.
- Country: Select the country of the hotel.
- State and City: Select the state and city from where the hotel belongs.
- Zip Code: Enter the Zip Code of the hotel
- Hotel Policies: Write the vital policies of the hotel.
Click on save to save the information.
SEO Section
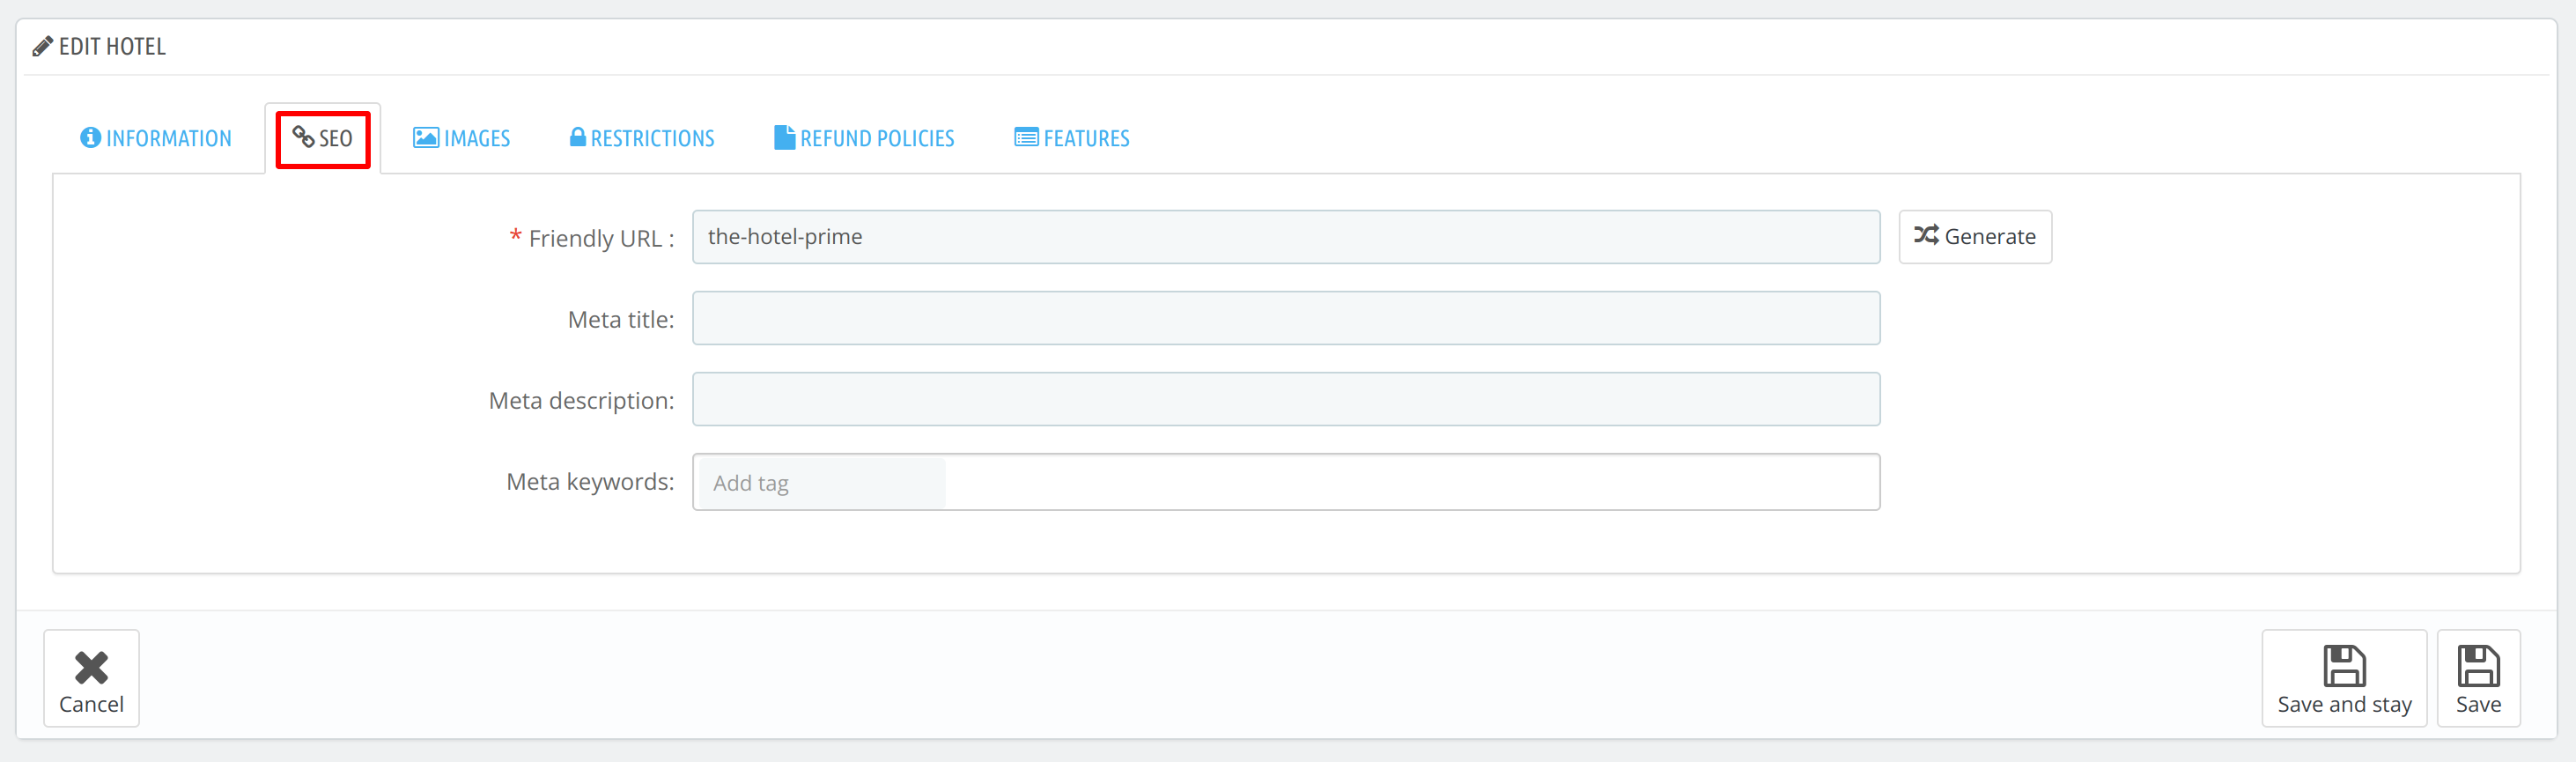
In the SEO Section fill in the details as explained below:
- Friendly URL: Click on the generate button to create a URL against a hotel name that is easily readable by humans. You can edit it if you want.
- Meta Title: Add the meta title of the Hotel in 70 characters. It will be the title of the public page.
- Meta Description: Enter the description of the hotel in 160 characters, which will appear in the search engine.
- Meta Keywords: Add multiple tags related to your hotel in this option.
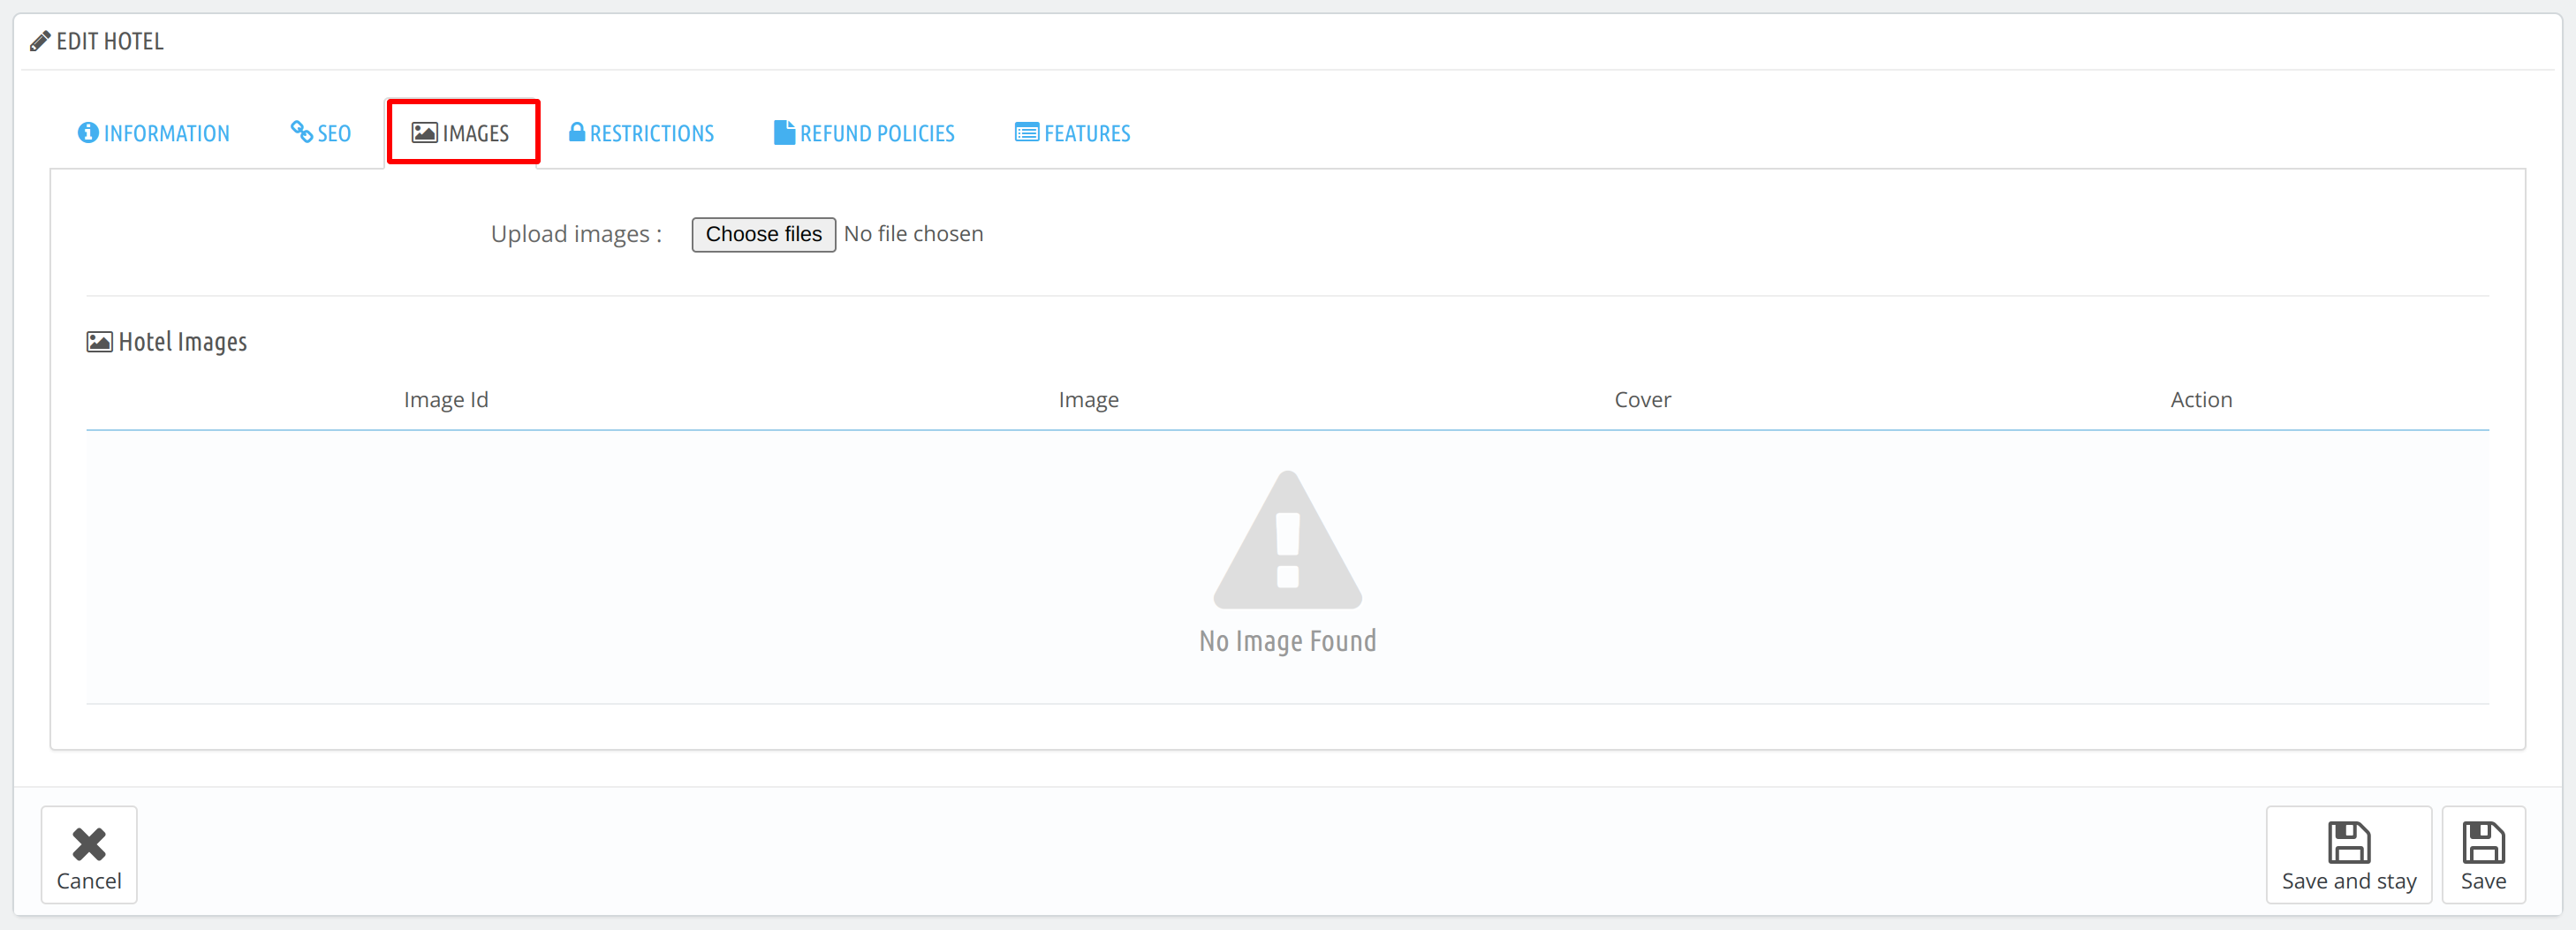
Images Section
In the Images panel, upload the image of the hotel, here you can choose any image as the cover image and prioritize accordingly. Then click on save.
Restrictions Section
Now go to the Restriction panel, here you set the maximum date to book the room and minimum booking offset. For more please refer image below.
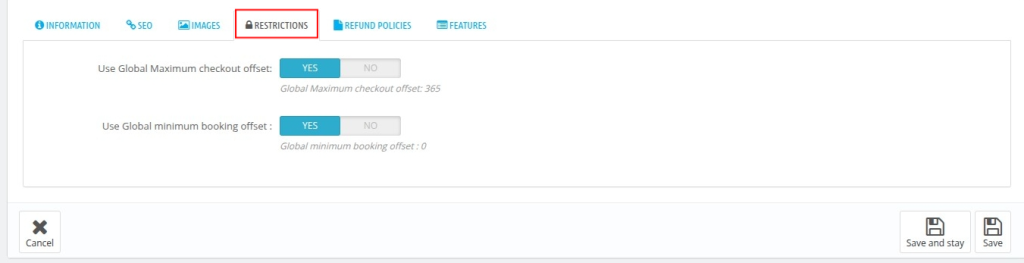
- Use Global Maximum checkout offset: When you set the Global maximum checkout offset to No, then does not enforce any global checkout limit for the room.
- Use Global minimum booking offset: Enter the number of days after which the booking will be accepted
To set the Global maximum checkout offset go to Prefrences> orders

- Maximum Global Checkout Offset: Set the maximum number of days allowed between booking and checkout.
- Minimum Booking Offset: Set the minimum number of days in advance required to accept a booking. Set to 0 to disable this feature.
Now you can move to the Refund Policies Panel.
Refund Policies

To Enable the refund select Yes. From here you can select the refund rules which are created in the manage order refund rules. Click on save to update the refund policies.
Features
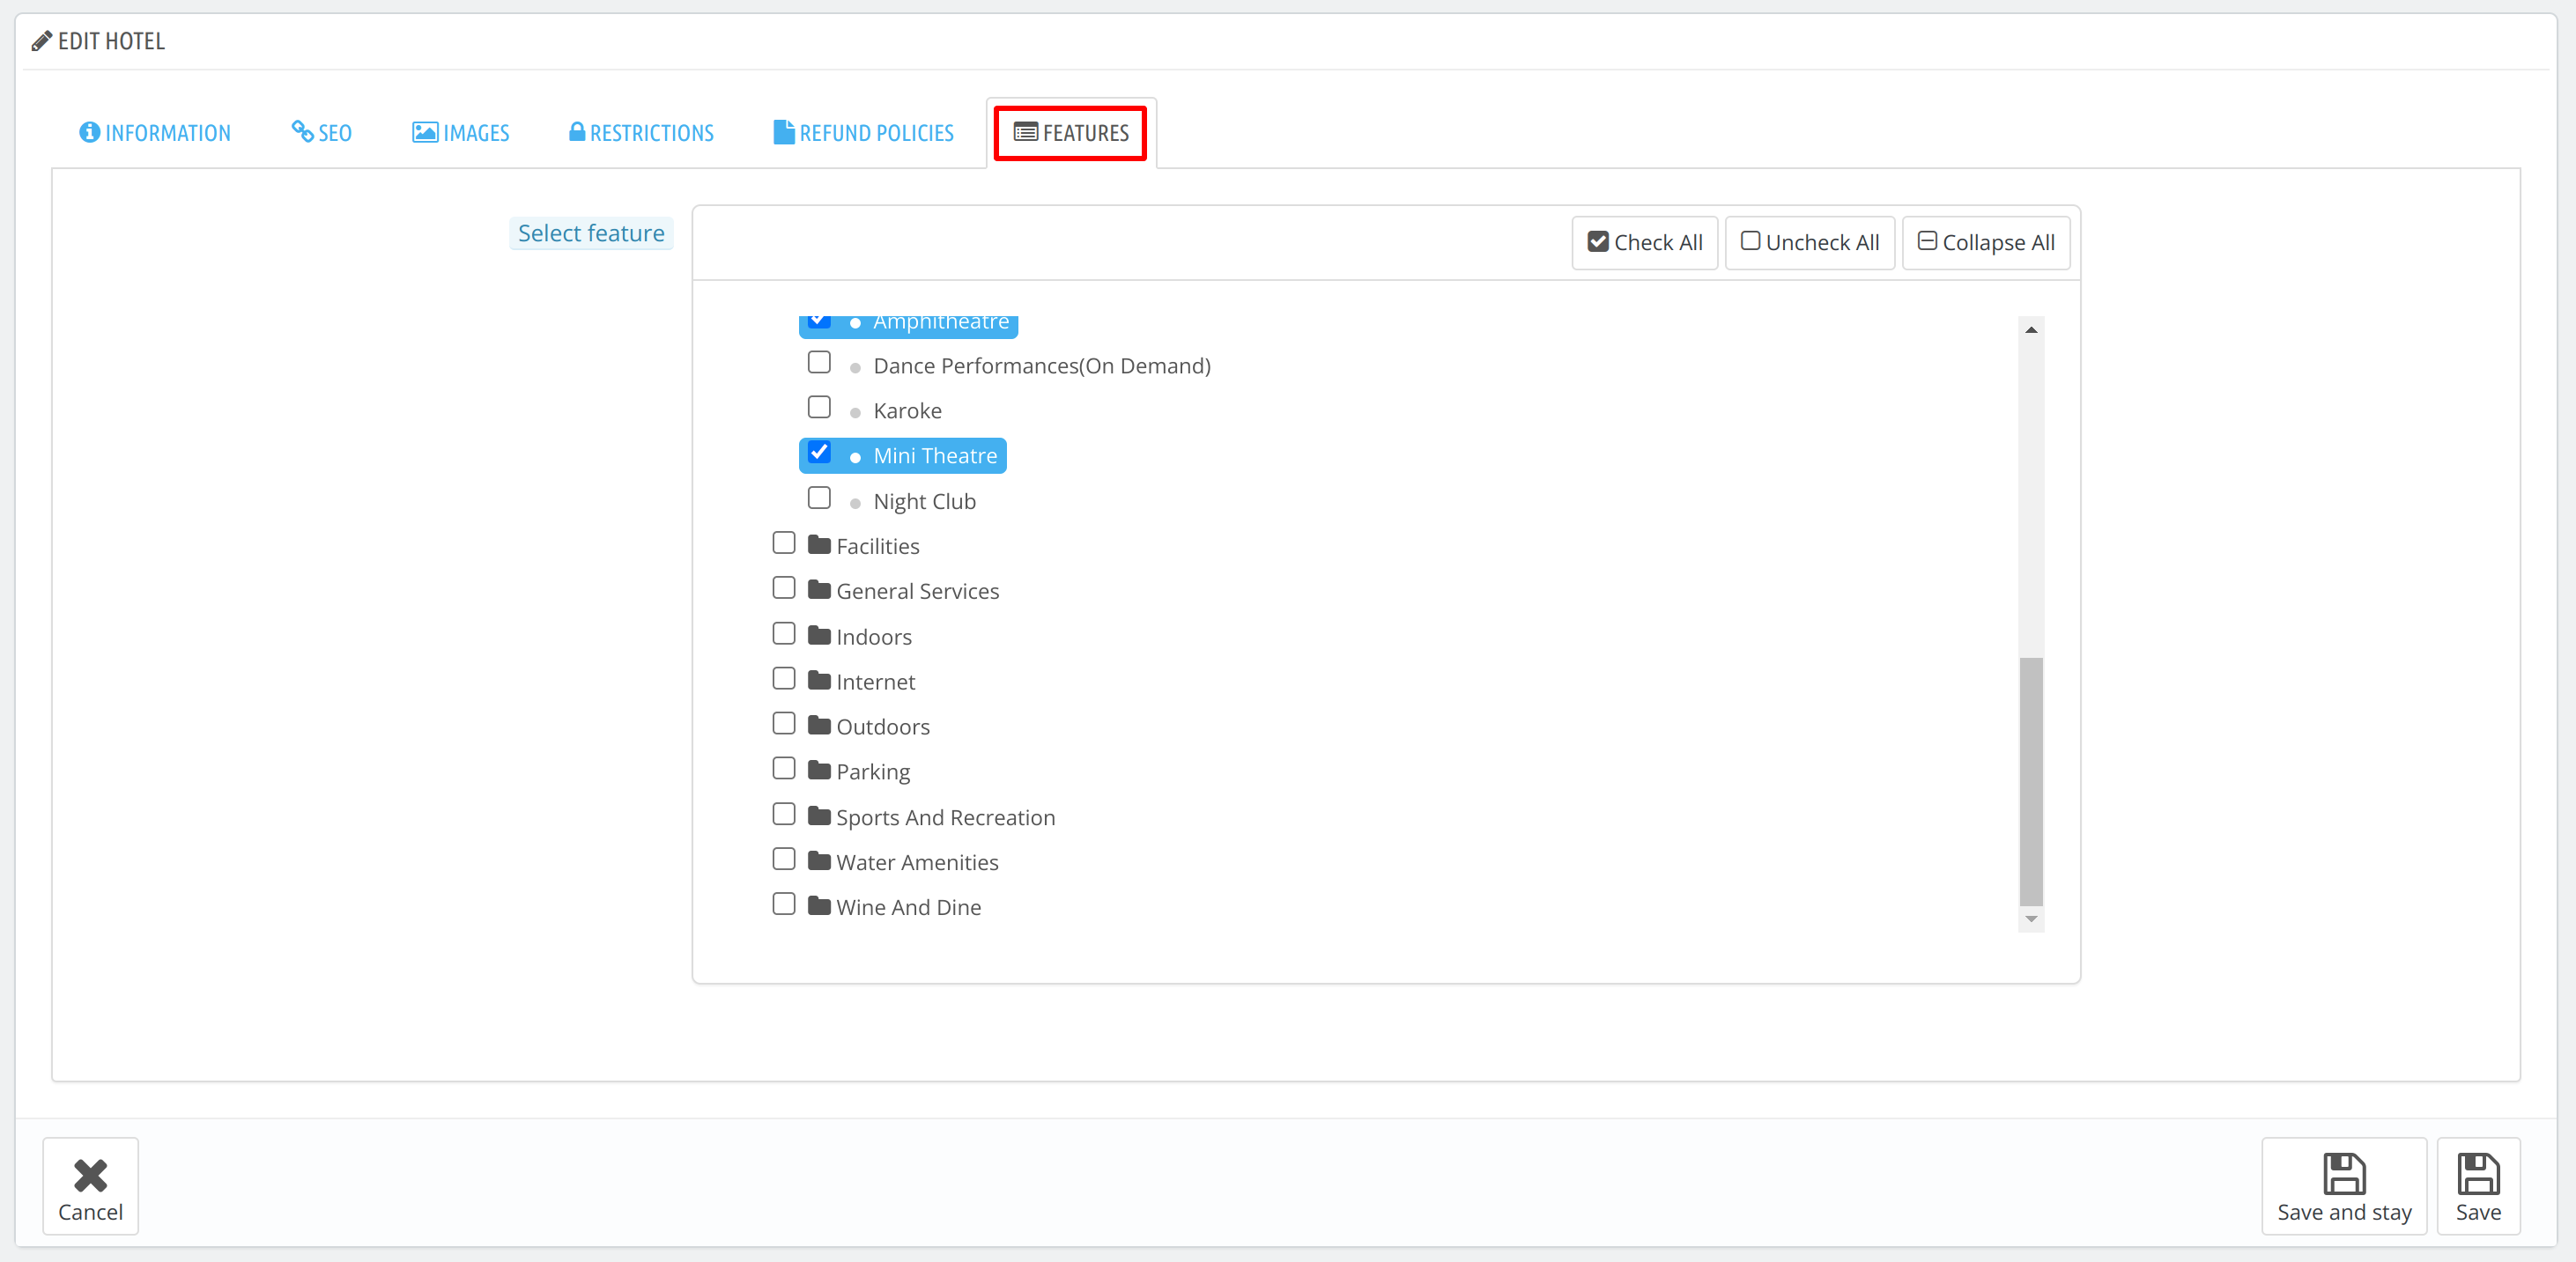
The admin will assign all the relevant features that this hotel offers by selecting the features from various parent categories.
Once the hotel is added successfully then you can add the room in it easily.
Room Type Management
Add Room Type
To add a room type in QloApps, go to Catalog > Manage Room Types as given in the below image. Then click on Add new room type.
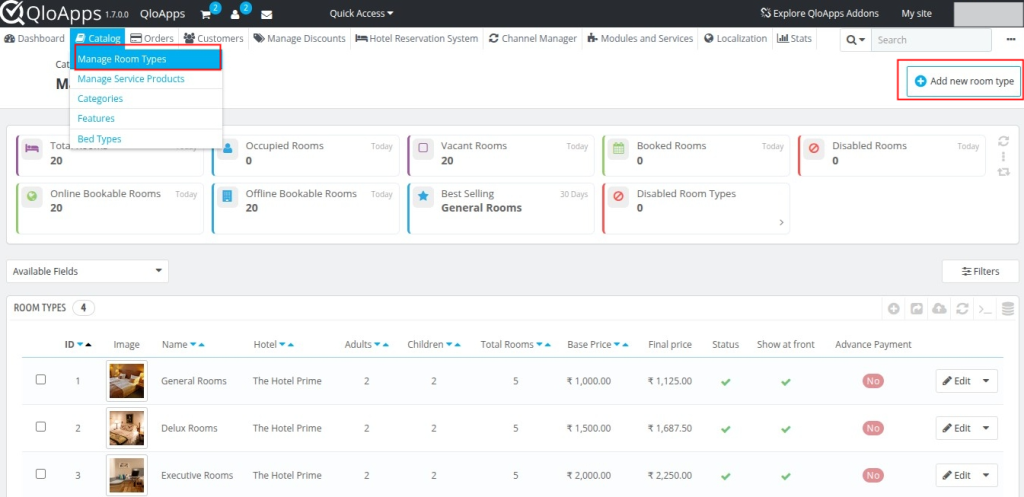
When you click on Add new room type then you can add the room types easily as given below by filling in information about the room type in each section.
Information Section
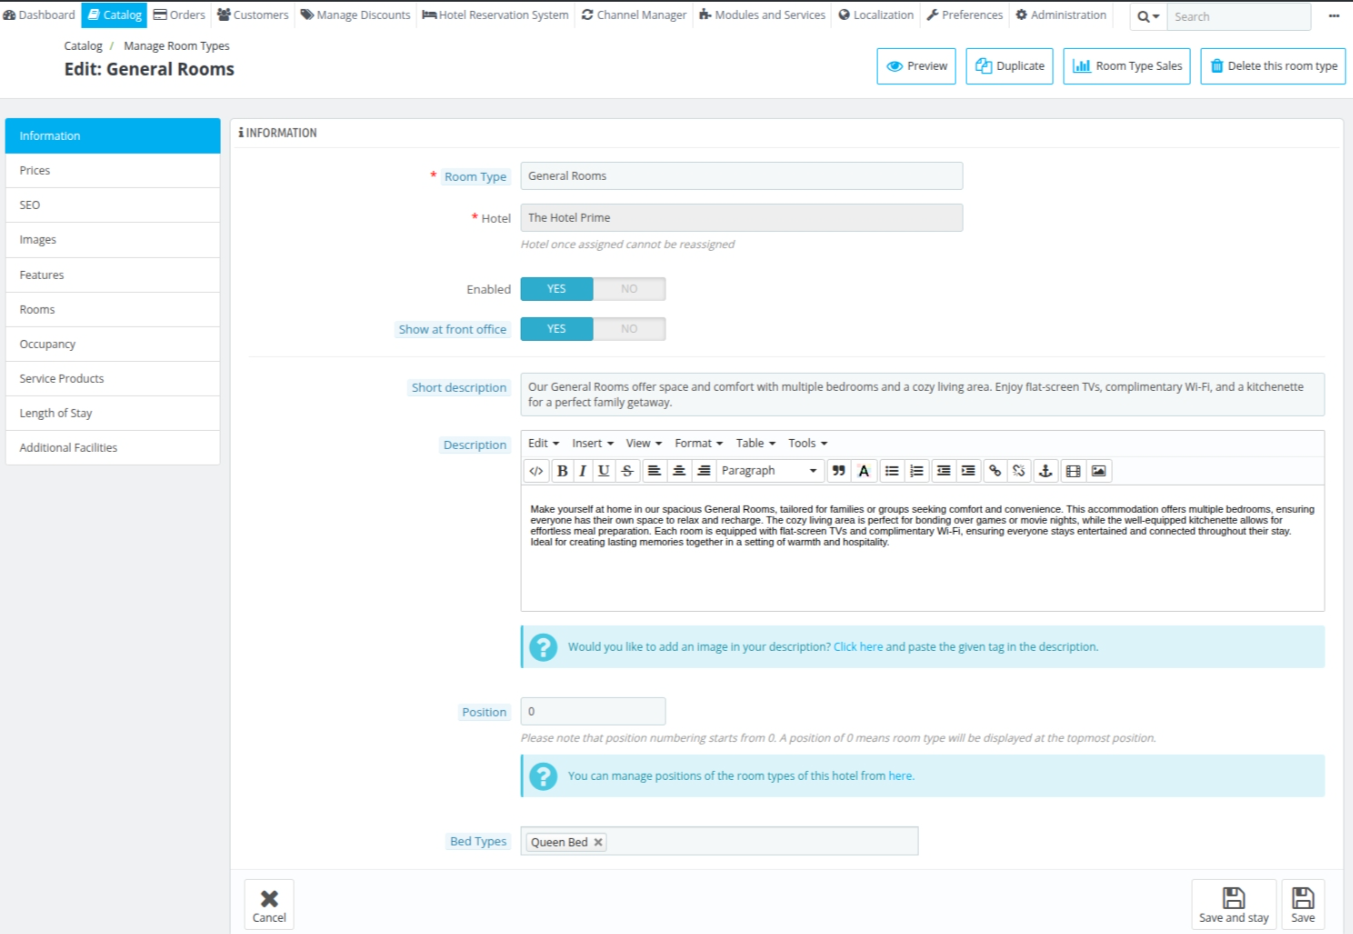
- Room Type: Write the type of room you want to add. For example general room, the AC room, and the executive room.
- Hotel: Select the hotel from the drop-down in which you want to add the room type. The Hotel once assigned cannot be reassigned.
- Enabled: Select yes to enable the room type. If you want to disable the room type then, redirect it to the selected dropdown options.
- Show at front office: The admin can decide whether he wants his guests to be able to book this room type through the front office website or not.
- Short Description: Give a short description of the hotel room you are adding.
- Description: Give a detailed description of the hotel room you are adding. Here you can add the images to this description.
- Position: The admin can assign the position at which this particular room type will appear on the search result page of the website.
- Bed Type: Give Bed Type Information (e.g. king, queen, twin)
Price
You can manage the room prices in QloApps as discussed below:
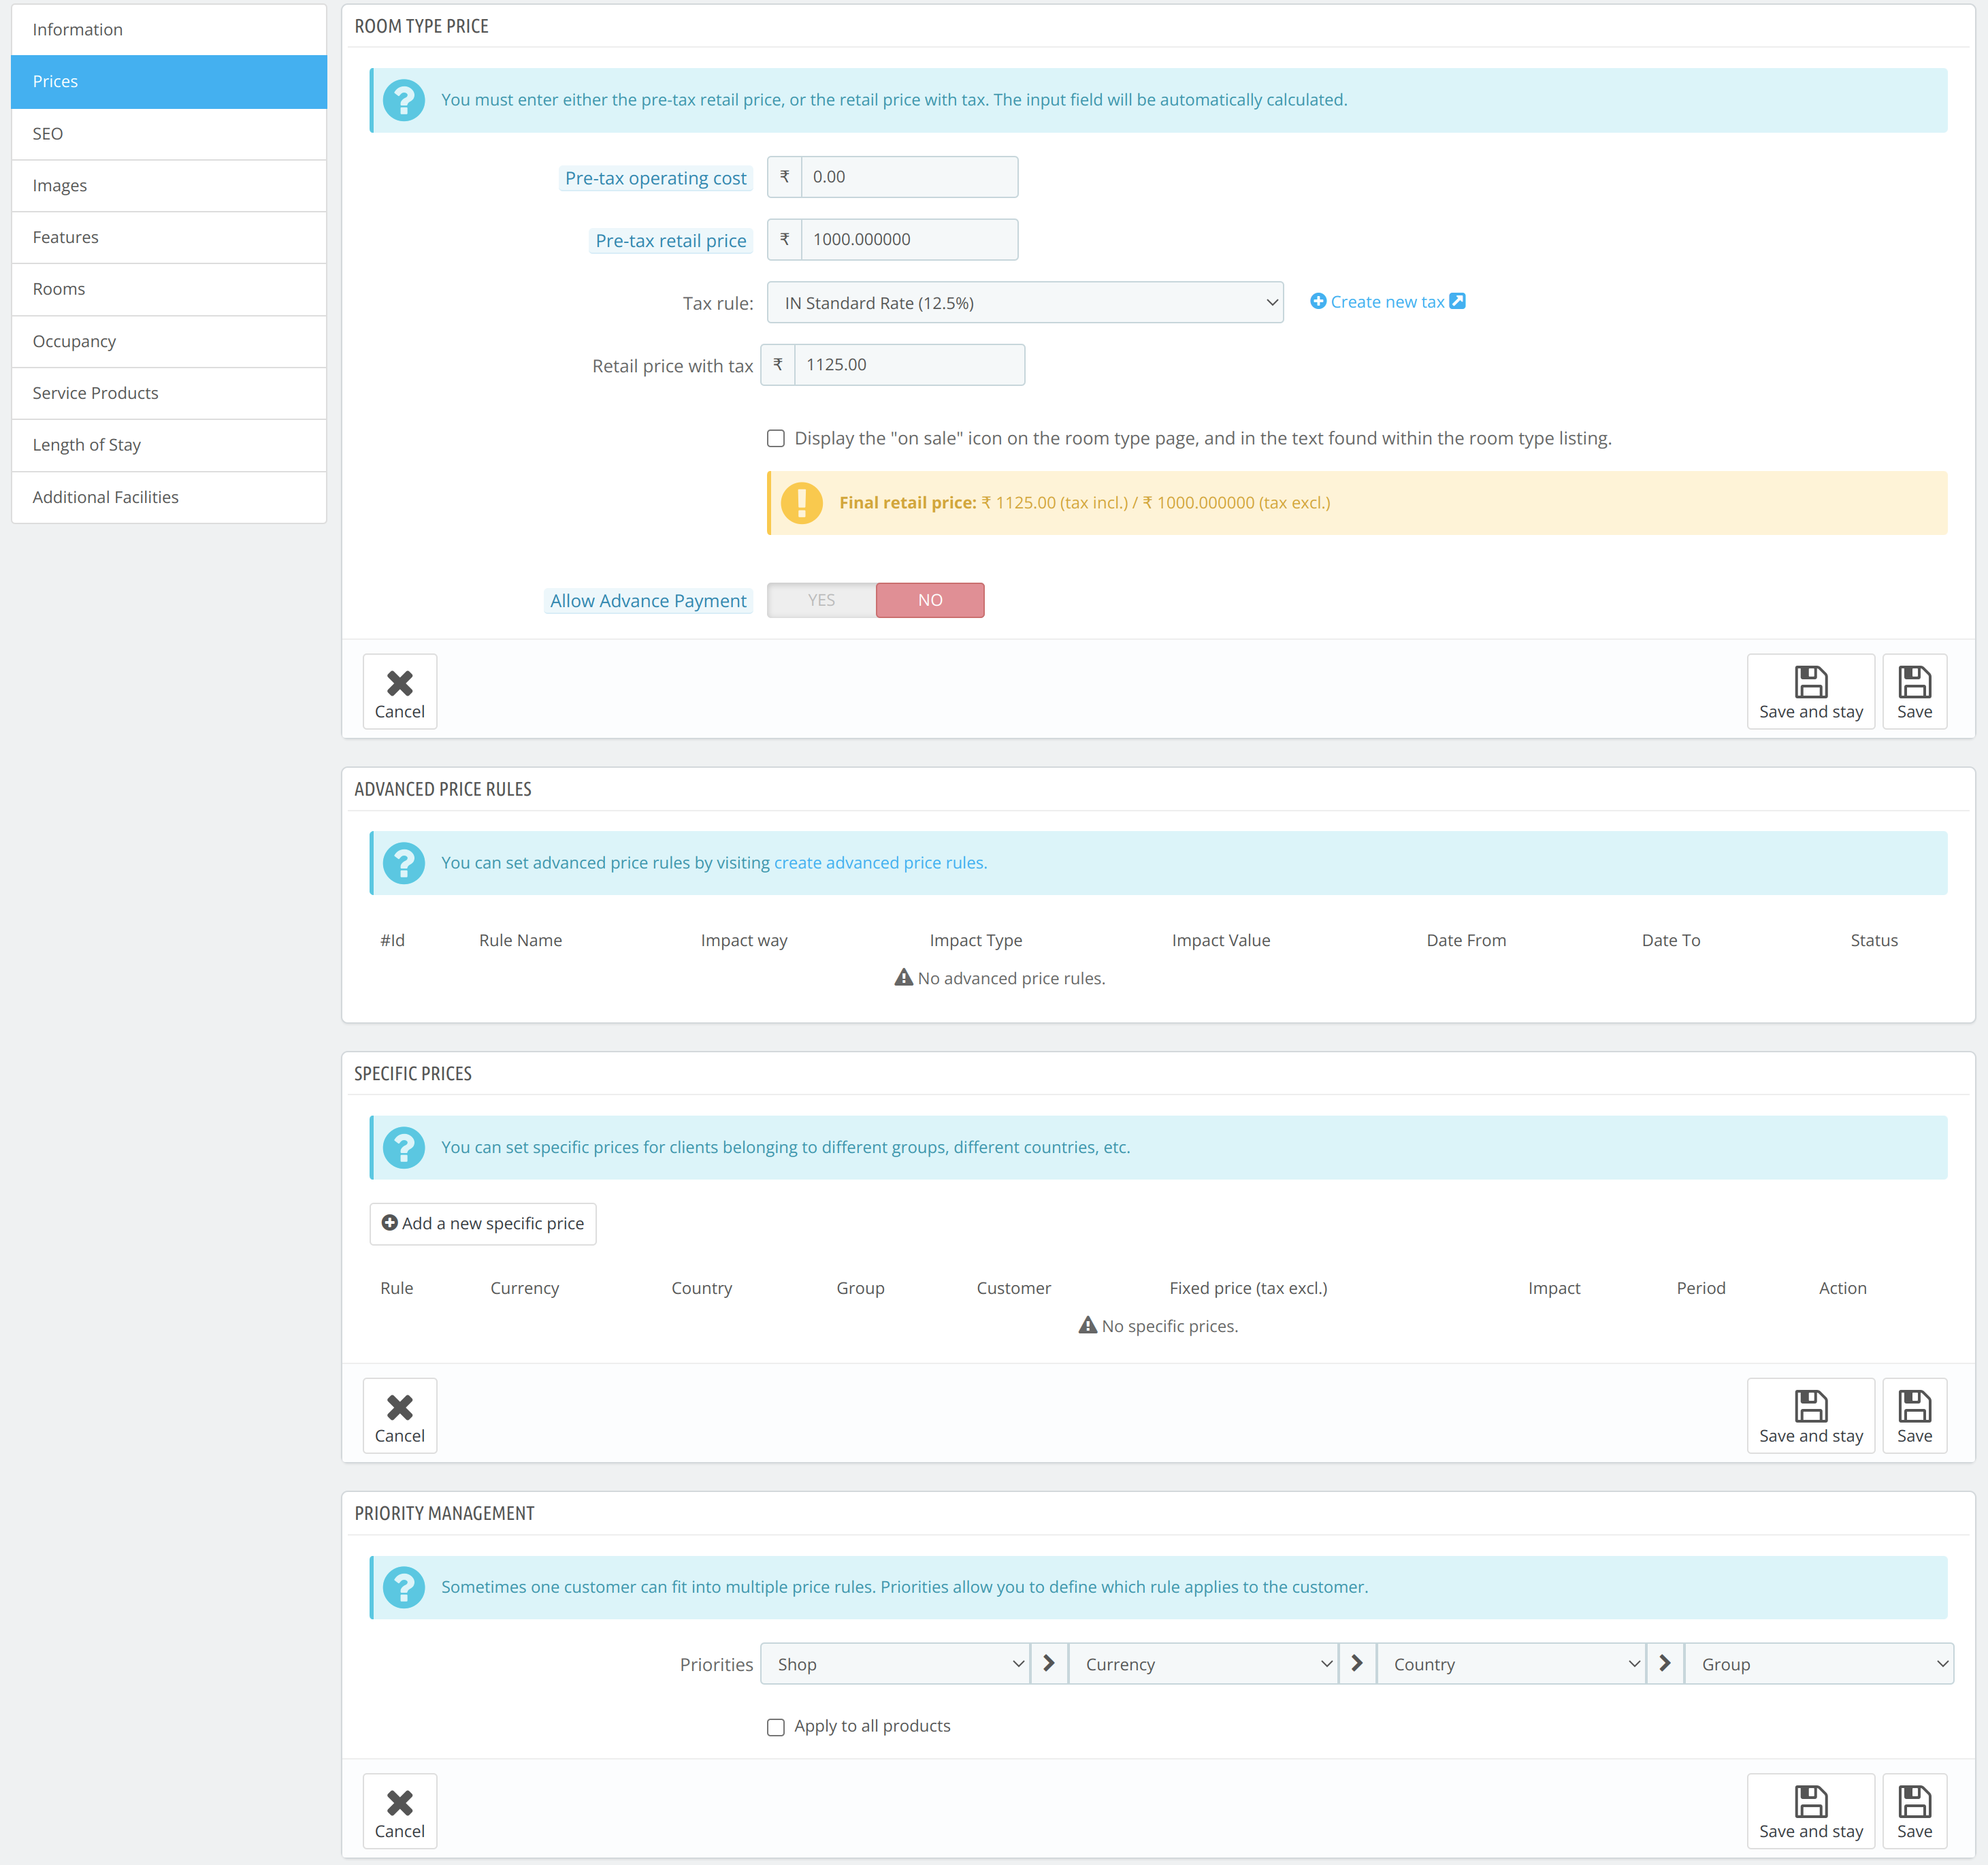
Room Type Price
- Pre-Tax Operating Cost: This includes the operational cost of the room type
- Pre-Tax Retail Price: Pre-tax retail price is the price for which you intend to sell this room type to your customer. It should be higher than the pre-tax operating cost. The difference between the two will be your margin
- Tax Rule: Select the tax rule from the drop-down you want to apply in the invoice. Here you can add the new rule by clicking on Create new tax.
- Retail Price with Tax: Enter the retail value of the room type that is included with the tax.
In case of sale click on the check box “Display the “on-sale” icon on the room type page, and in the text found within the room type listing.“
- Allow Advance Payment: Enable this option to allow advance payments for this specific room type. If you disable it, the system won’t apply any advance payment requirement to this room type
- Apply Room Type Advance Payment Setting: If the room type advance payment setting is disabled then the global advance payment setting is applied. If enabled then you can apply it in percentage or fixed value. Also, you can include tax in it.
Advanced Price Rule
Here you can add the advanced price rule for the room type. If the advanced price rule is not created here then you can create a new one by clicking on Create advanced price rules as shown below
Specific Price Rule
The specific price rule is set for clients belonging to different groups, different countries, etc. You can click on add a new specific price to add a new rule

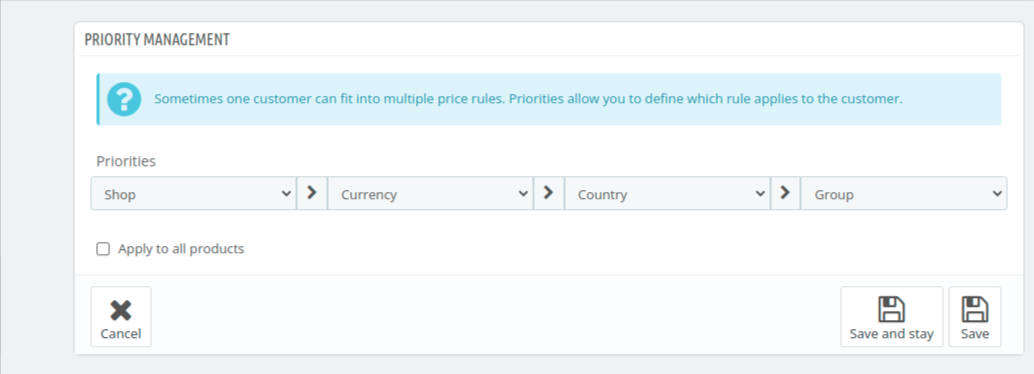
Priority Management
Priority management of price defines which rule applies to the customer first. You can set the priority among shop, currency, country, and group.
SEO
SEO details are the search engine optimization details used for the room type.
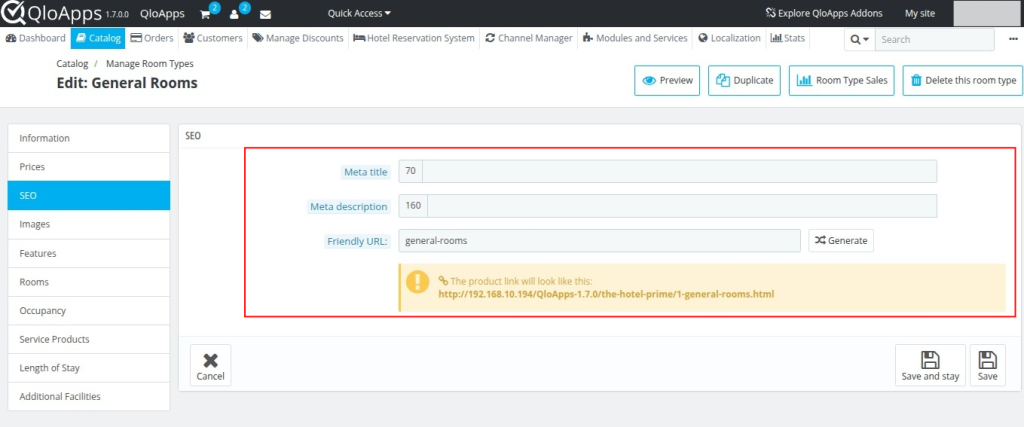
- Meta Title: The meta title of the room type should be 70 characters. It will be the title for the public page
- Meta Description: Enter the description of 160 characters, that will appear in the search engine.
- Friendly URL: These are the human-readable URL, that is generated against the room type name. You can change it if you want.
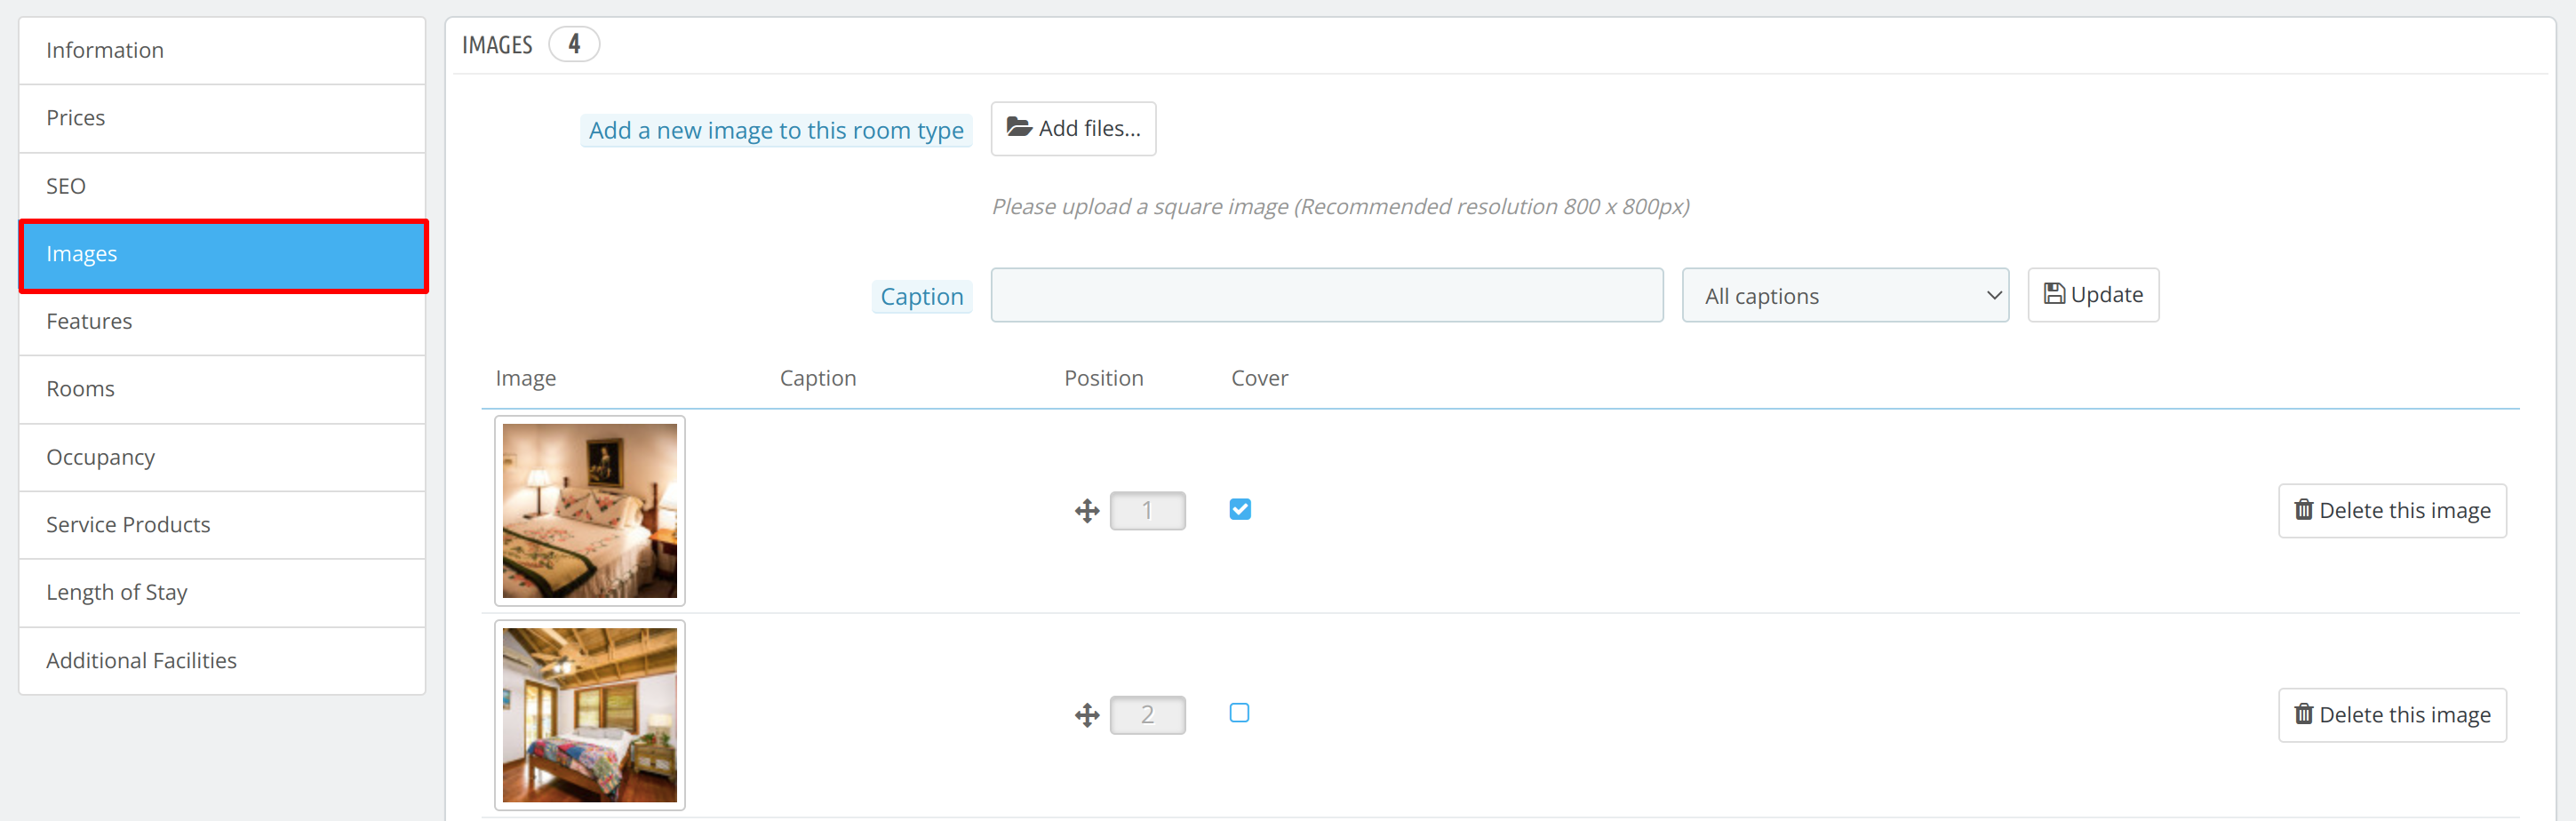
Images
In QloApps you can easily upload as many images as you want in the room type. Also, you can select one image as the cover image. Along with this, you can give a caption to each image separately
Features
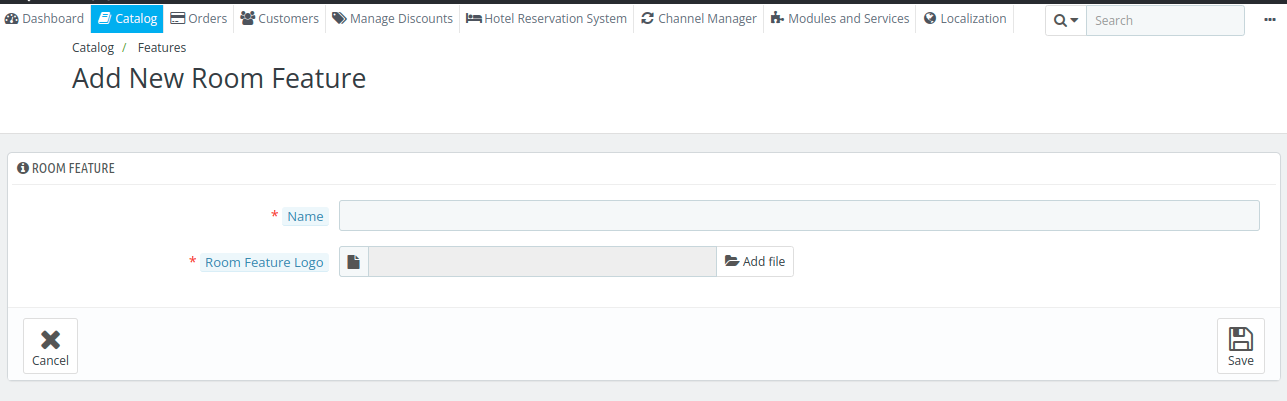
Using this section, you can assign features to the room types in QloApps. To add a new feature click on Add a new feature
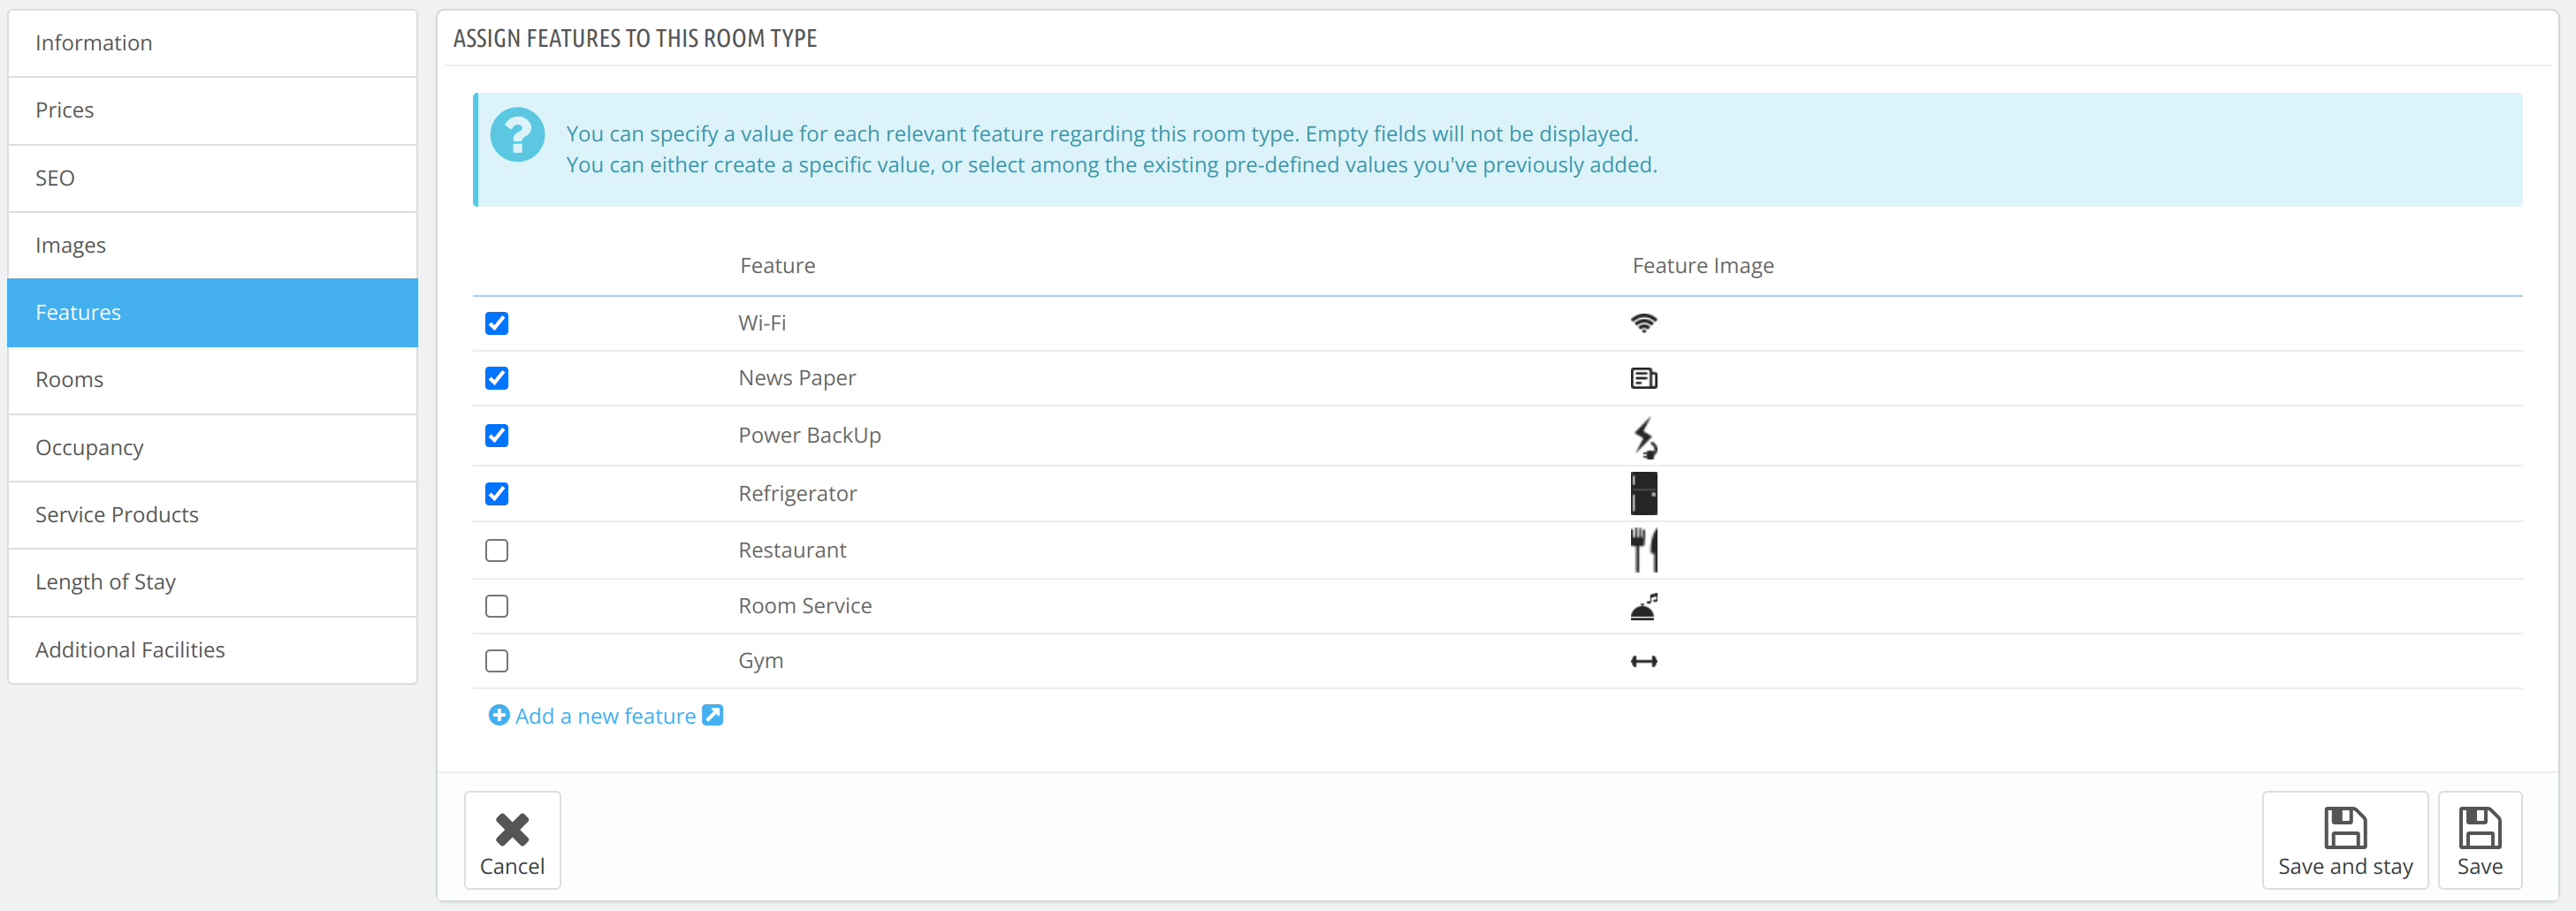
When you click on add a new feature you will be redirected to the feature page as shown below
Rooms
In the rooms section of the room type, you can add the room in the room type. As well as you can activate, inactive, and temporarily inactivate the room.
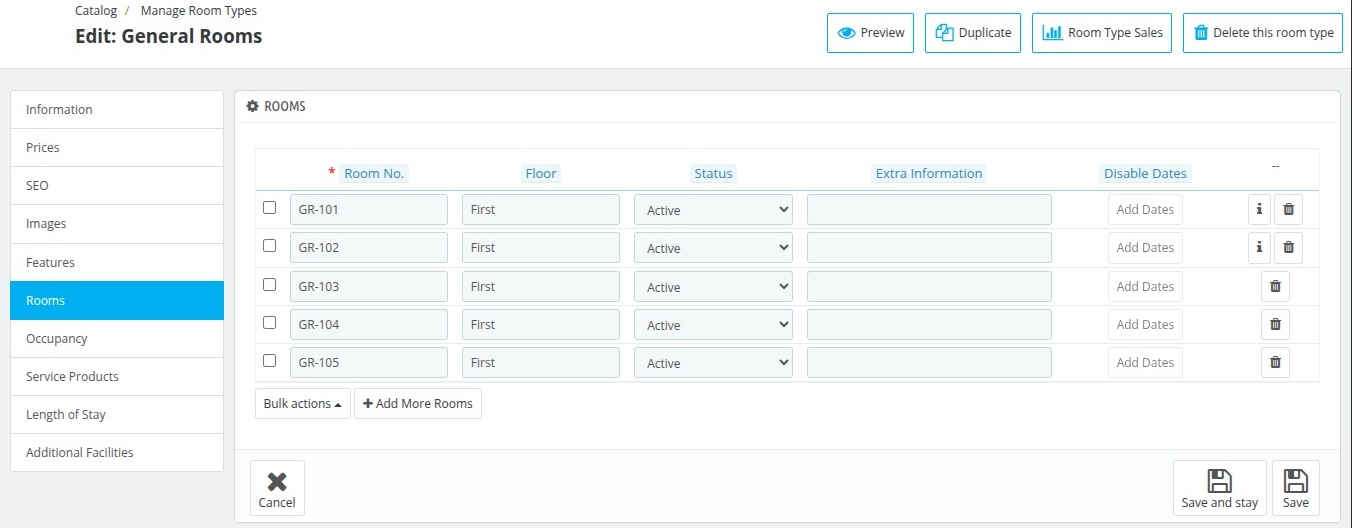
Also, you can perform bulk actions on rooms, such as creating, updating or deleting multiple rooms at once, directly from the Room Type page
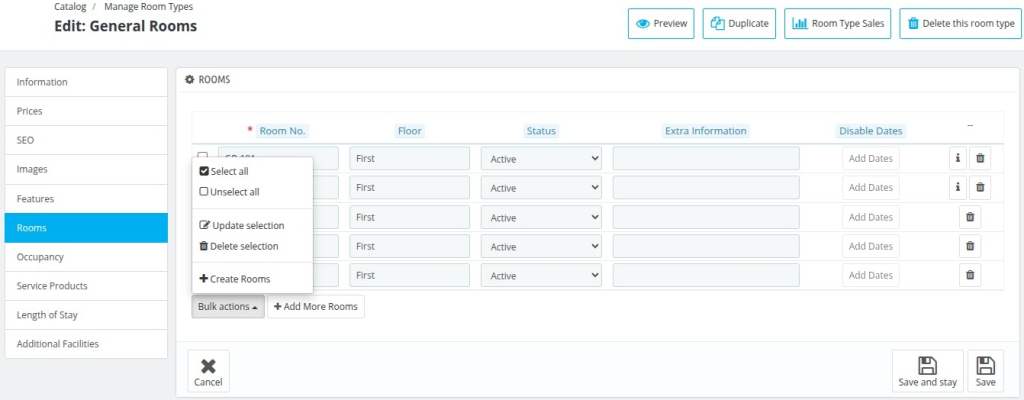
When the status is temporarily inactive then you can set the disable dates of the room using an interactive calendar interface.
Click on Add Dates and select the date range using the calendar or by clicking on the Add Dates button.

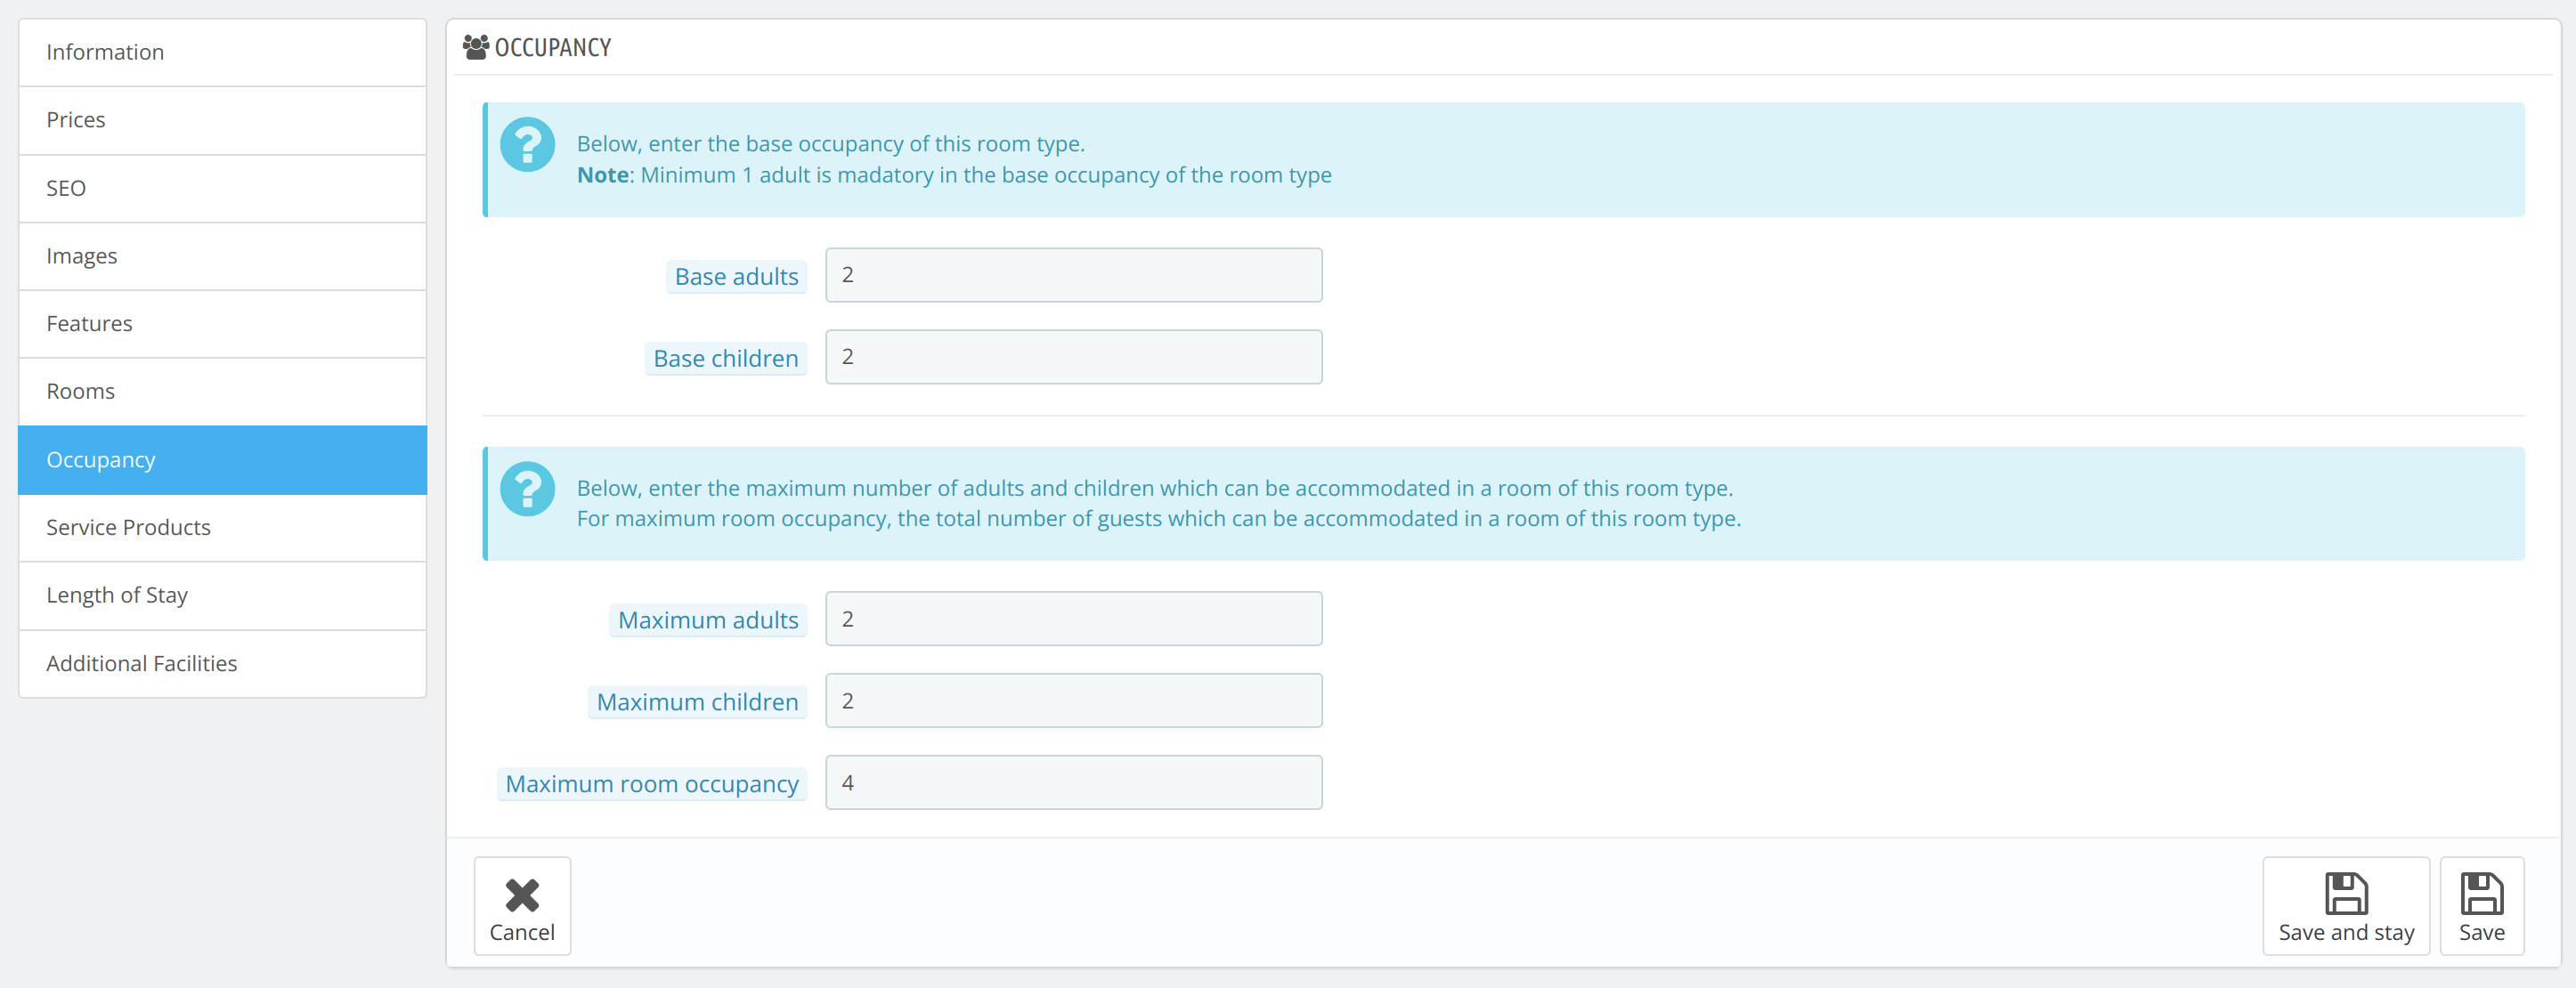
Occupancy
The occupancy of the hotel room is the maximum number of headcounts that can stay in the room.
Here you can mention the number of base adults, base children, maximum adults, and maximum children, and then save.
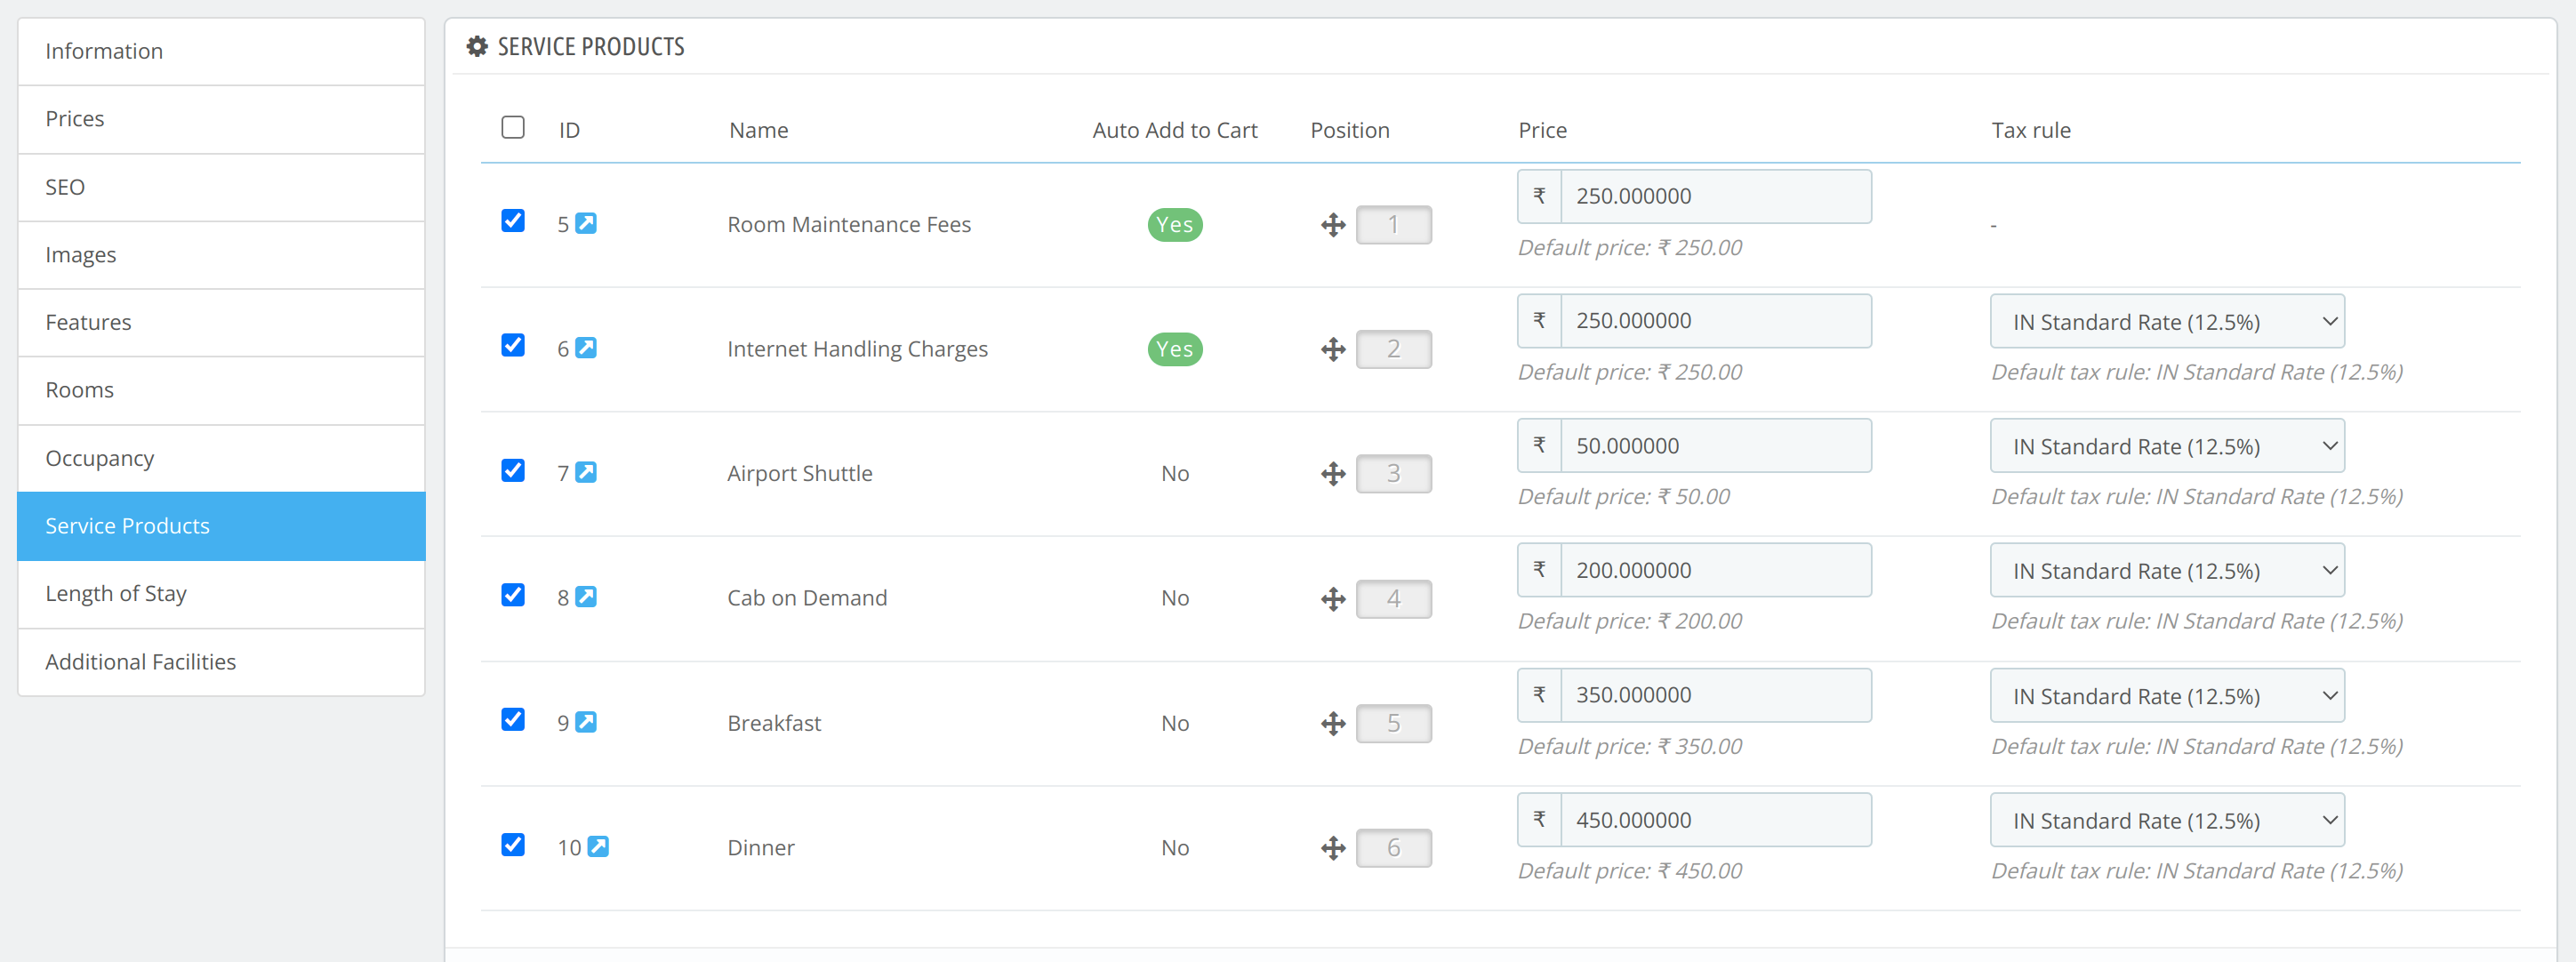
Service Products
The services given in the room are the service products.
Here you can assign the available service products with the room type and set their position in case there is more than one service product listed.
These are those services that are attached to the room type. Here you can set the price of the service. As well as select the tax you want to implement on the service.
Length Of Stay (LOS)
The duration of the stay in the number of days is termed as the length of stay.
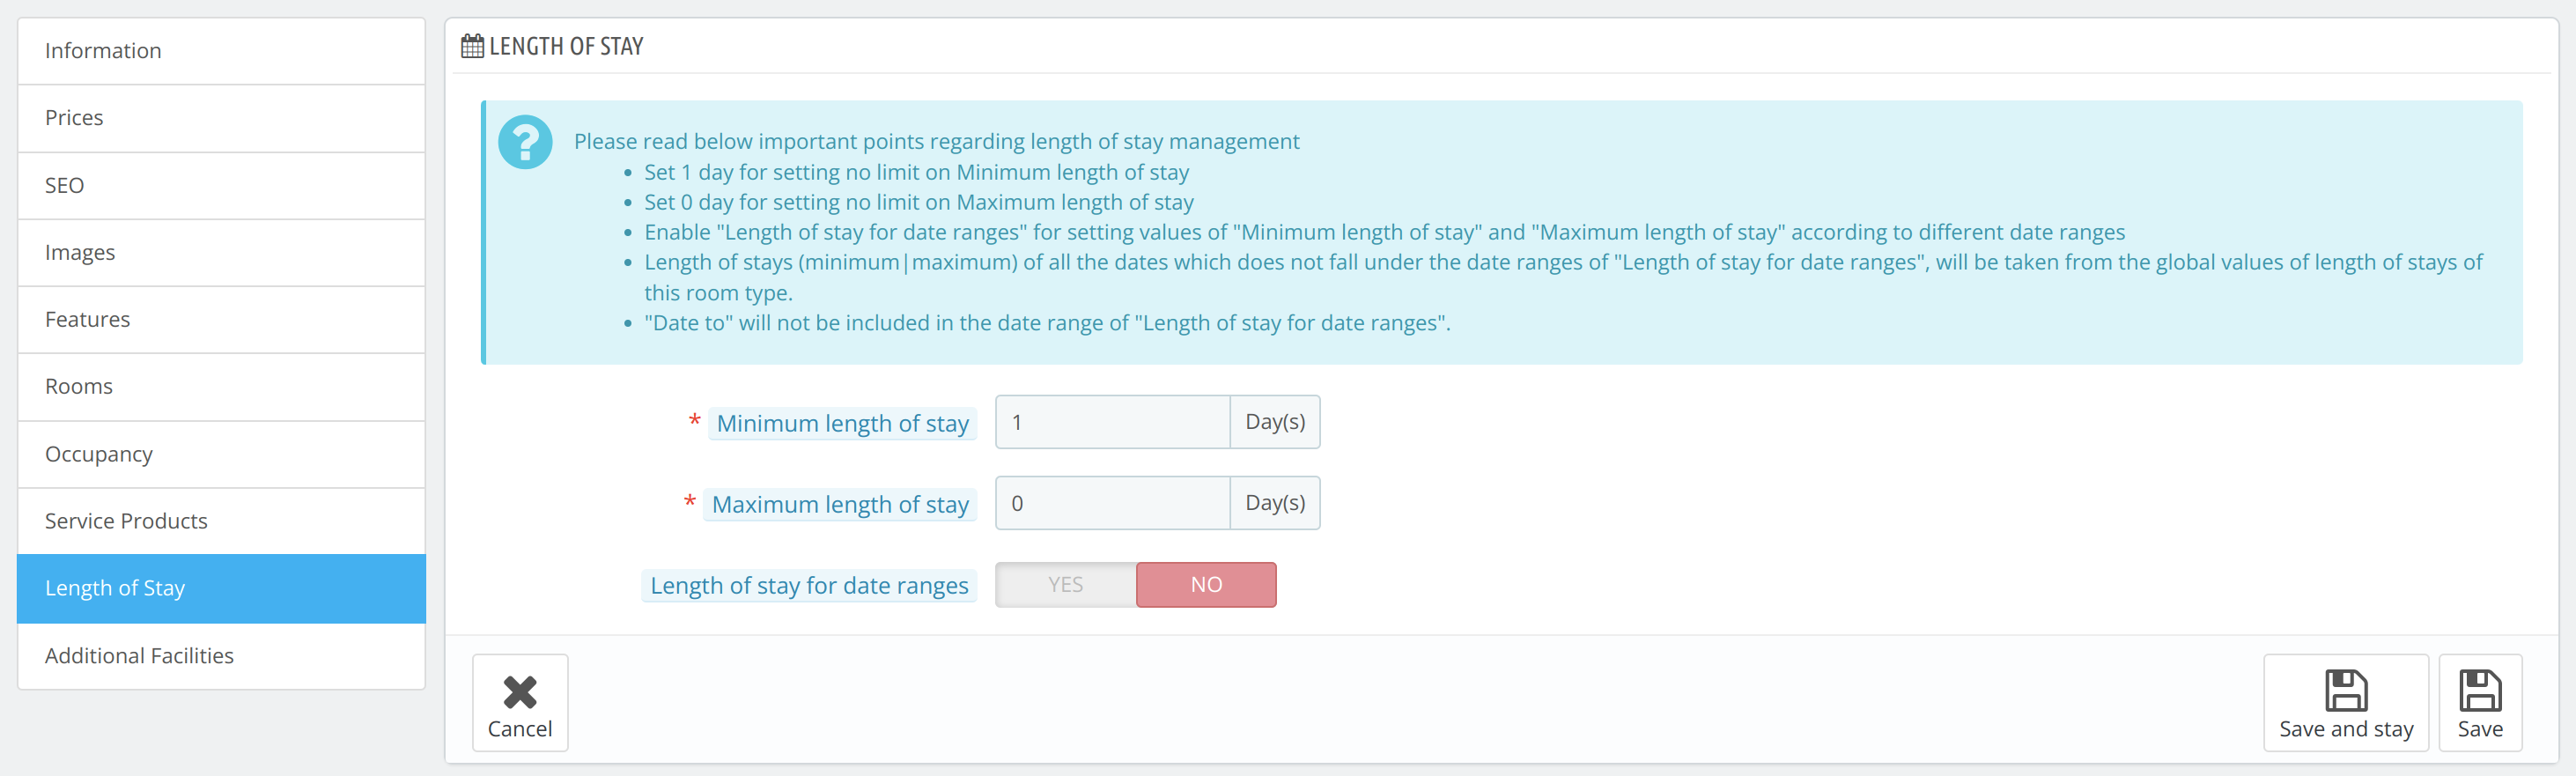
- Set 1 day for setting no limit on the Minimum length of stay.
- Set 0 days for setting no limit on the Maximum length of stay.
- Enable “Length of stay for date ranges” for setting values of “Minimum length of stay” and “Maximum length of stay” according to different date ranges.
- Length of stays (minimum|maximum) of all the dates which does not fall under the date ranges of “Length of stay for date ranges”, will be taken from the global values of length of stays of this room type.
- “Date to” will not be included in the date range of “Length of stay for date ranges”.
Additional Facilities
The facilities provided with the room can be avail on the per day price basis or for the entire booking.
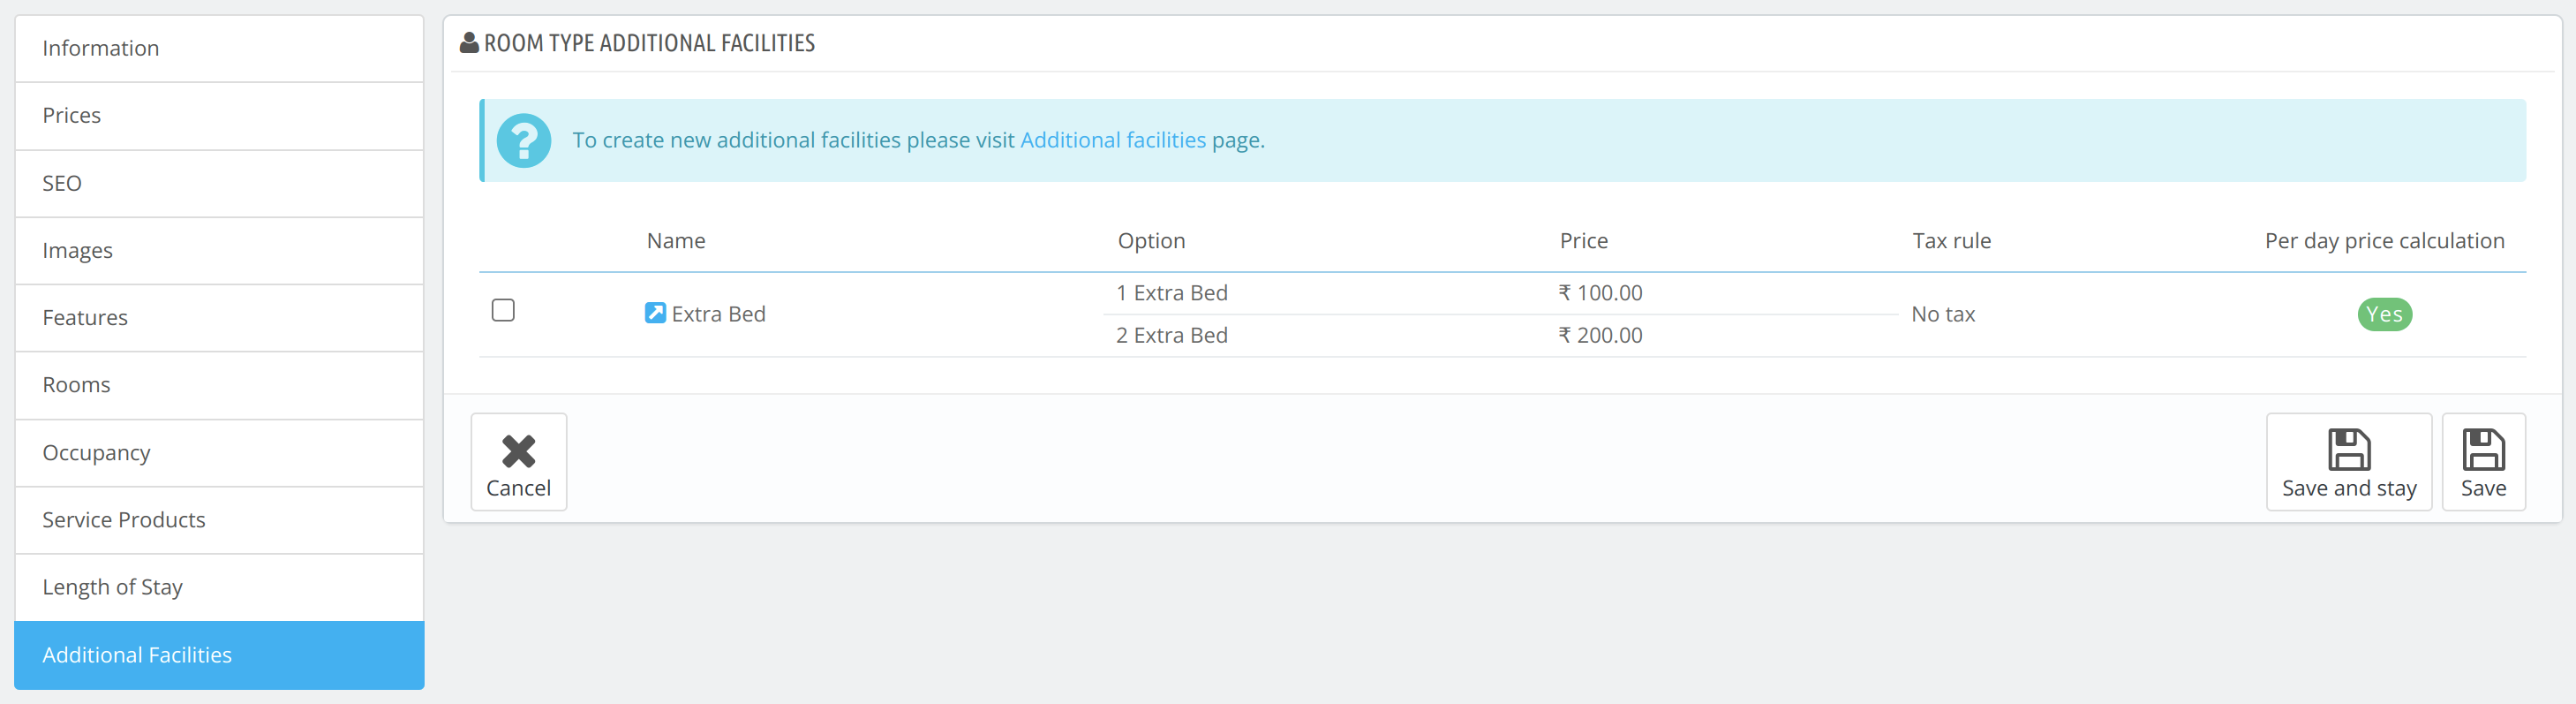
You can change the price of the facility after selecting the facility. If you want to add the new facility then you can click on “create new additional facility click here“
Manage Additional Facility
When you click on “create new additional facility click here” the manage facility page will appear as shown below
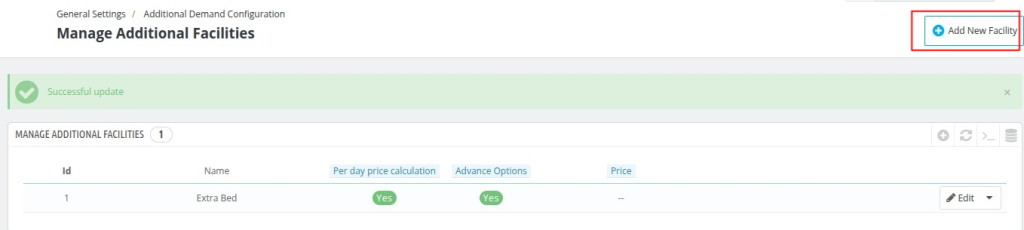
When you click on Add new facility then you can add new facility.
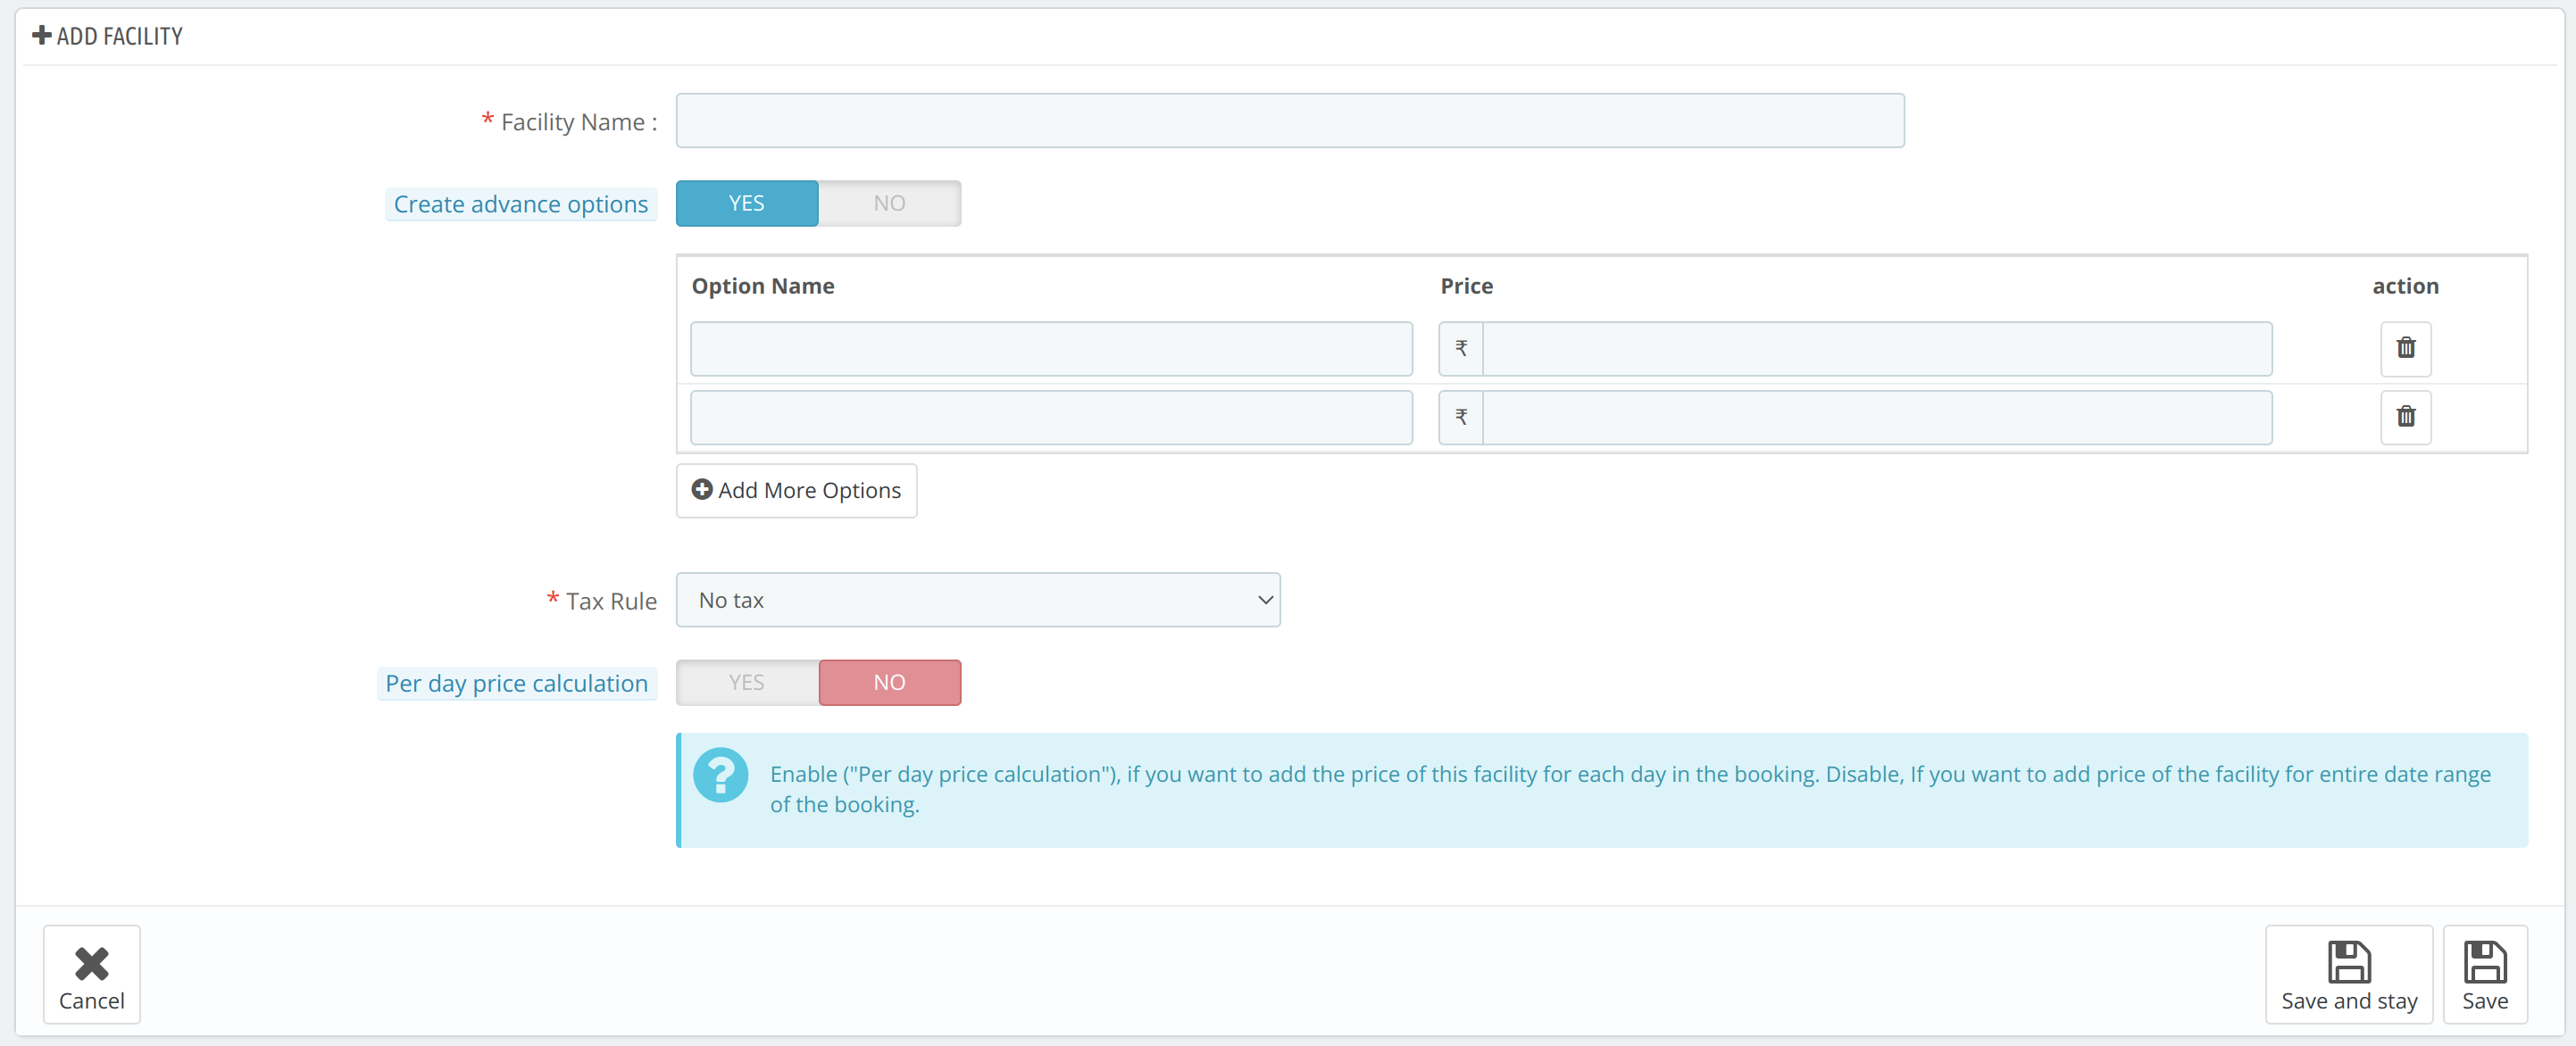
Facility Name: Give a name to the facility you want to offer.
Create Advance Option: If you want to add the options in the facility with different prices you can add to it.
Tax Rule: Select the tax rule from the drop-down you want to add to the additional facility.
Per-day Price Calculation: Calculate the price of the facility either on per day basis or for the entire stay tenure.
In the below image, we can see the facility for the room type:
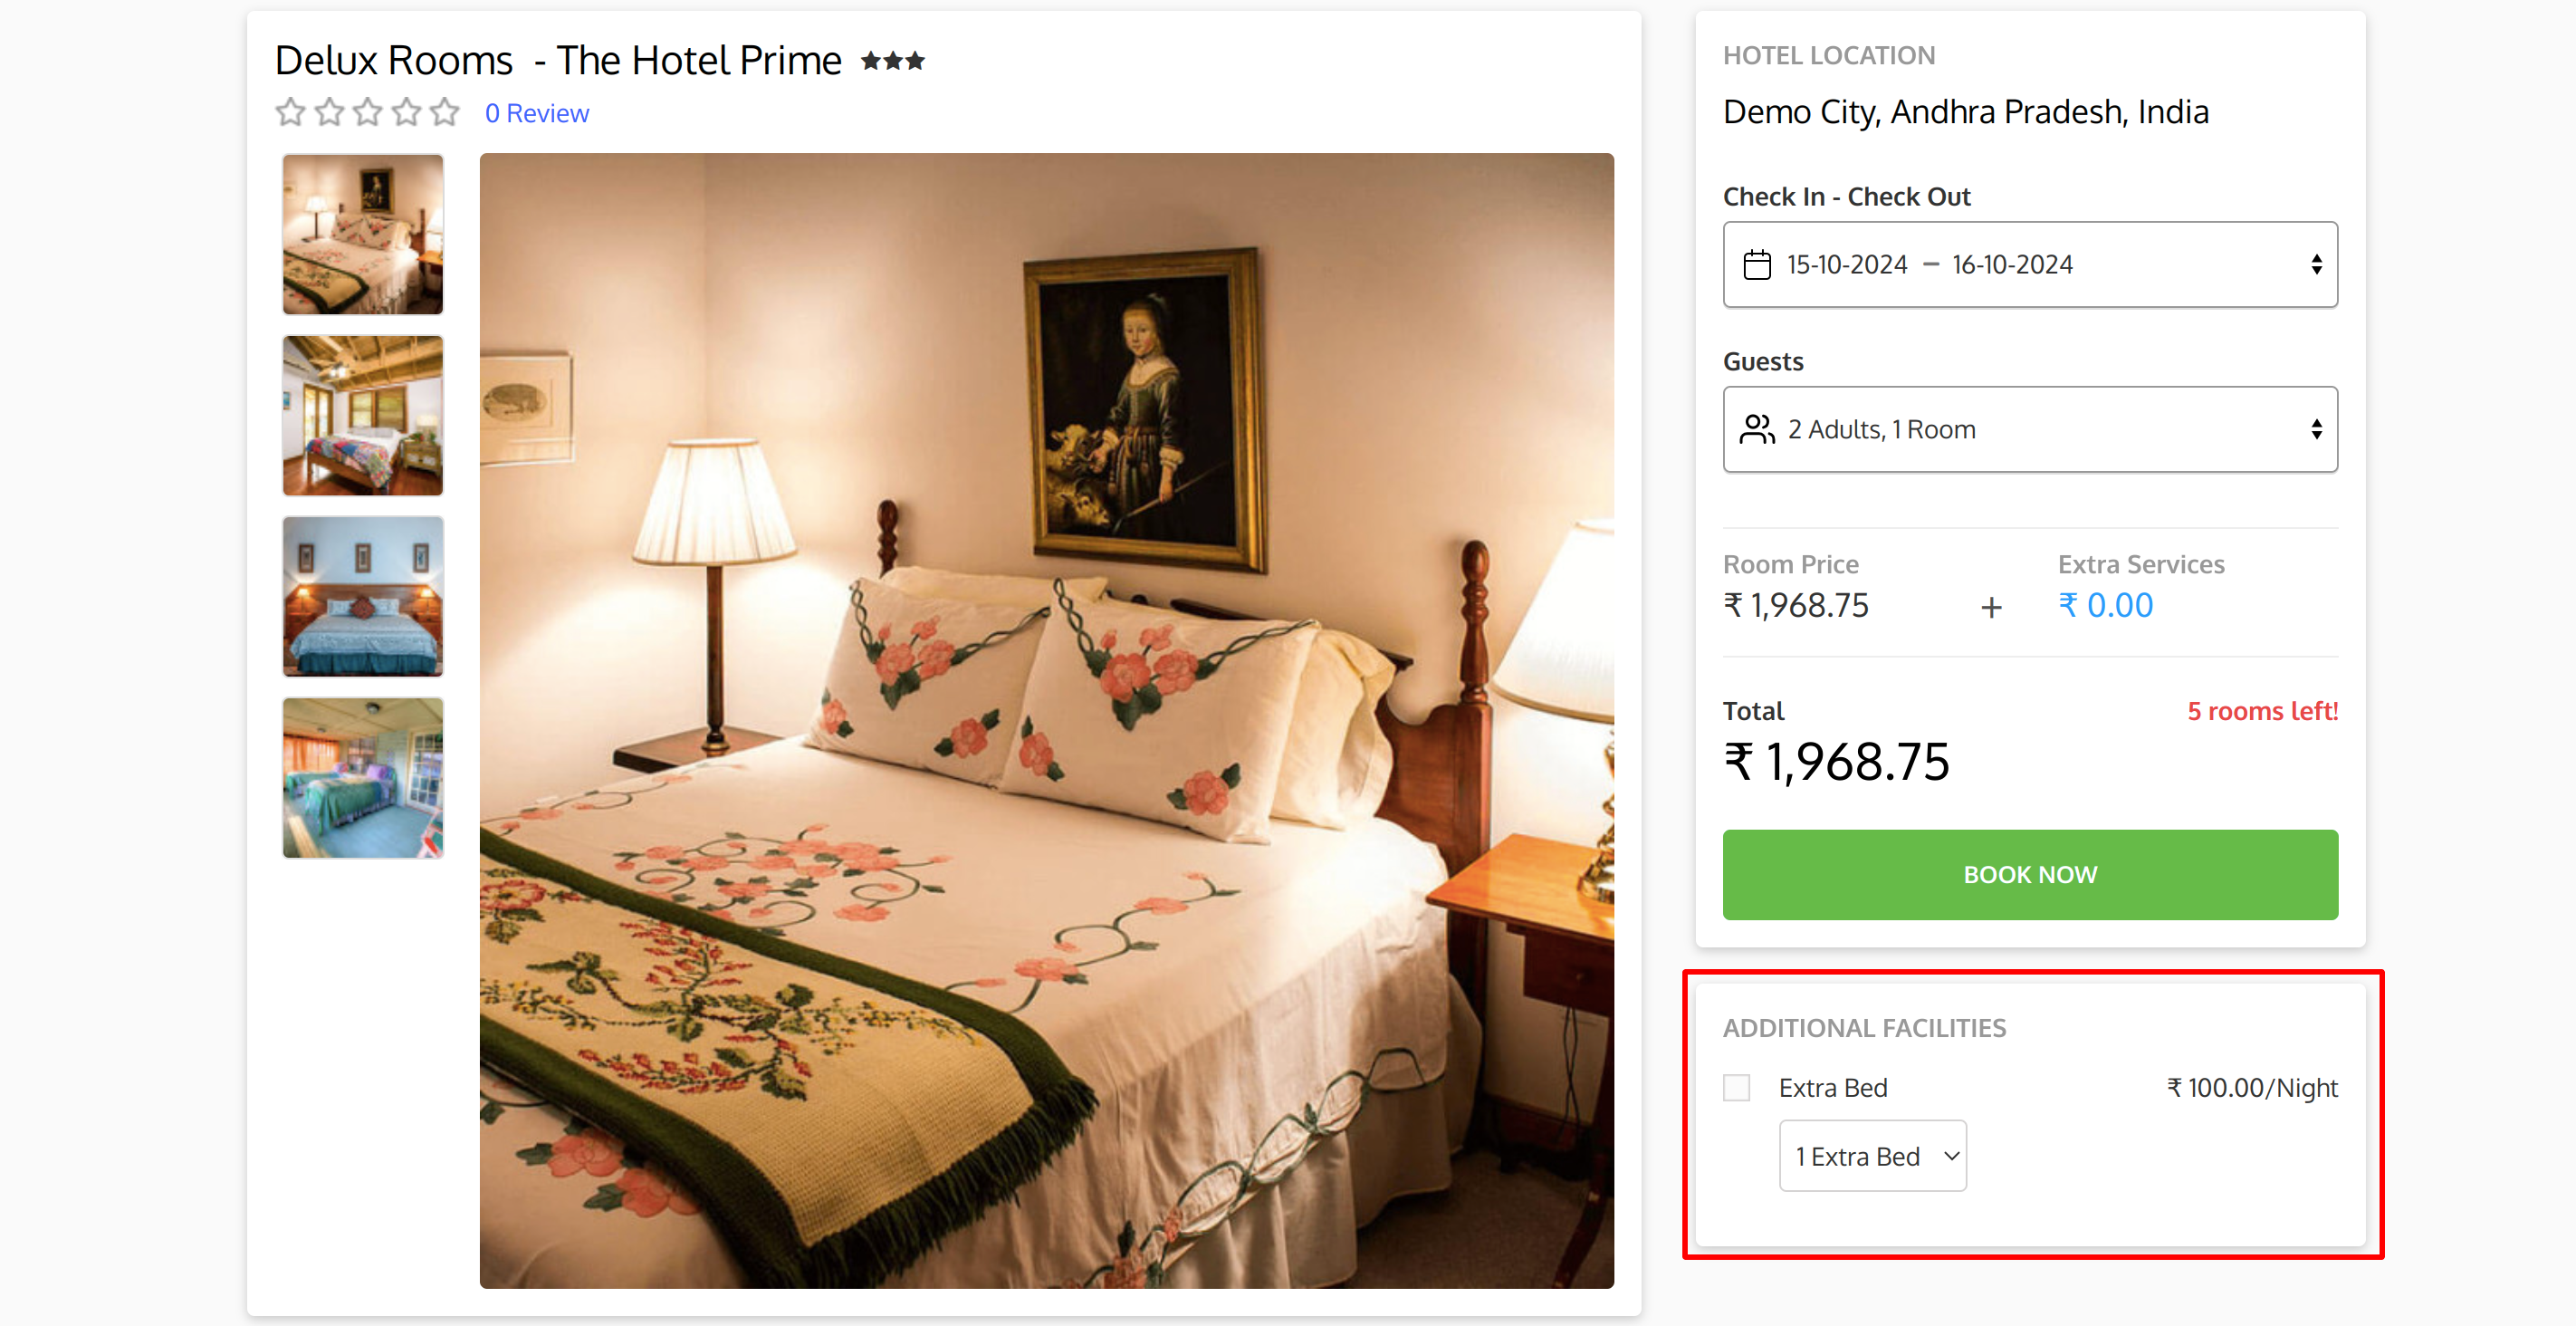
These service products are attached to the room type in QloApps and are visible on the room type page.
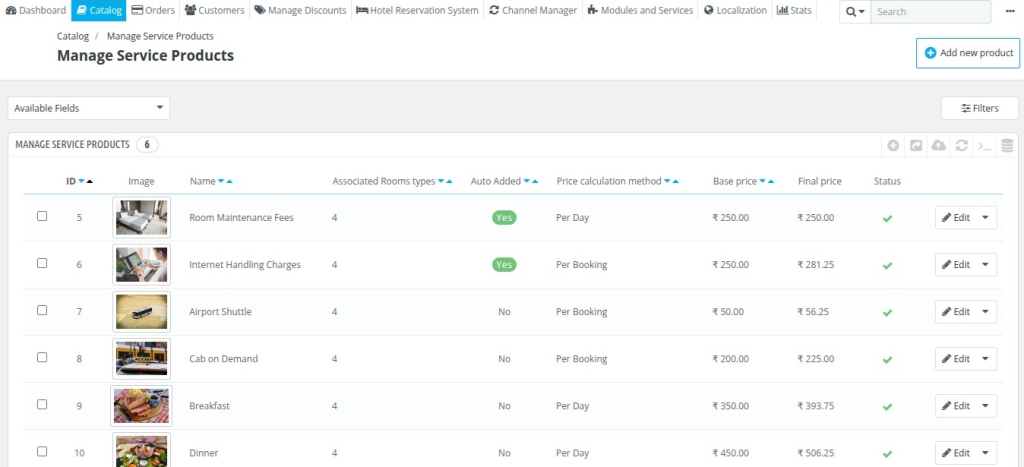
Service Products Management
To Manage service products go to catalog > manage service product. Click on Add New Product and then fill details in the following section:
Information Section
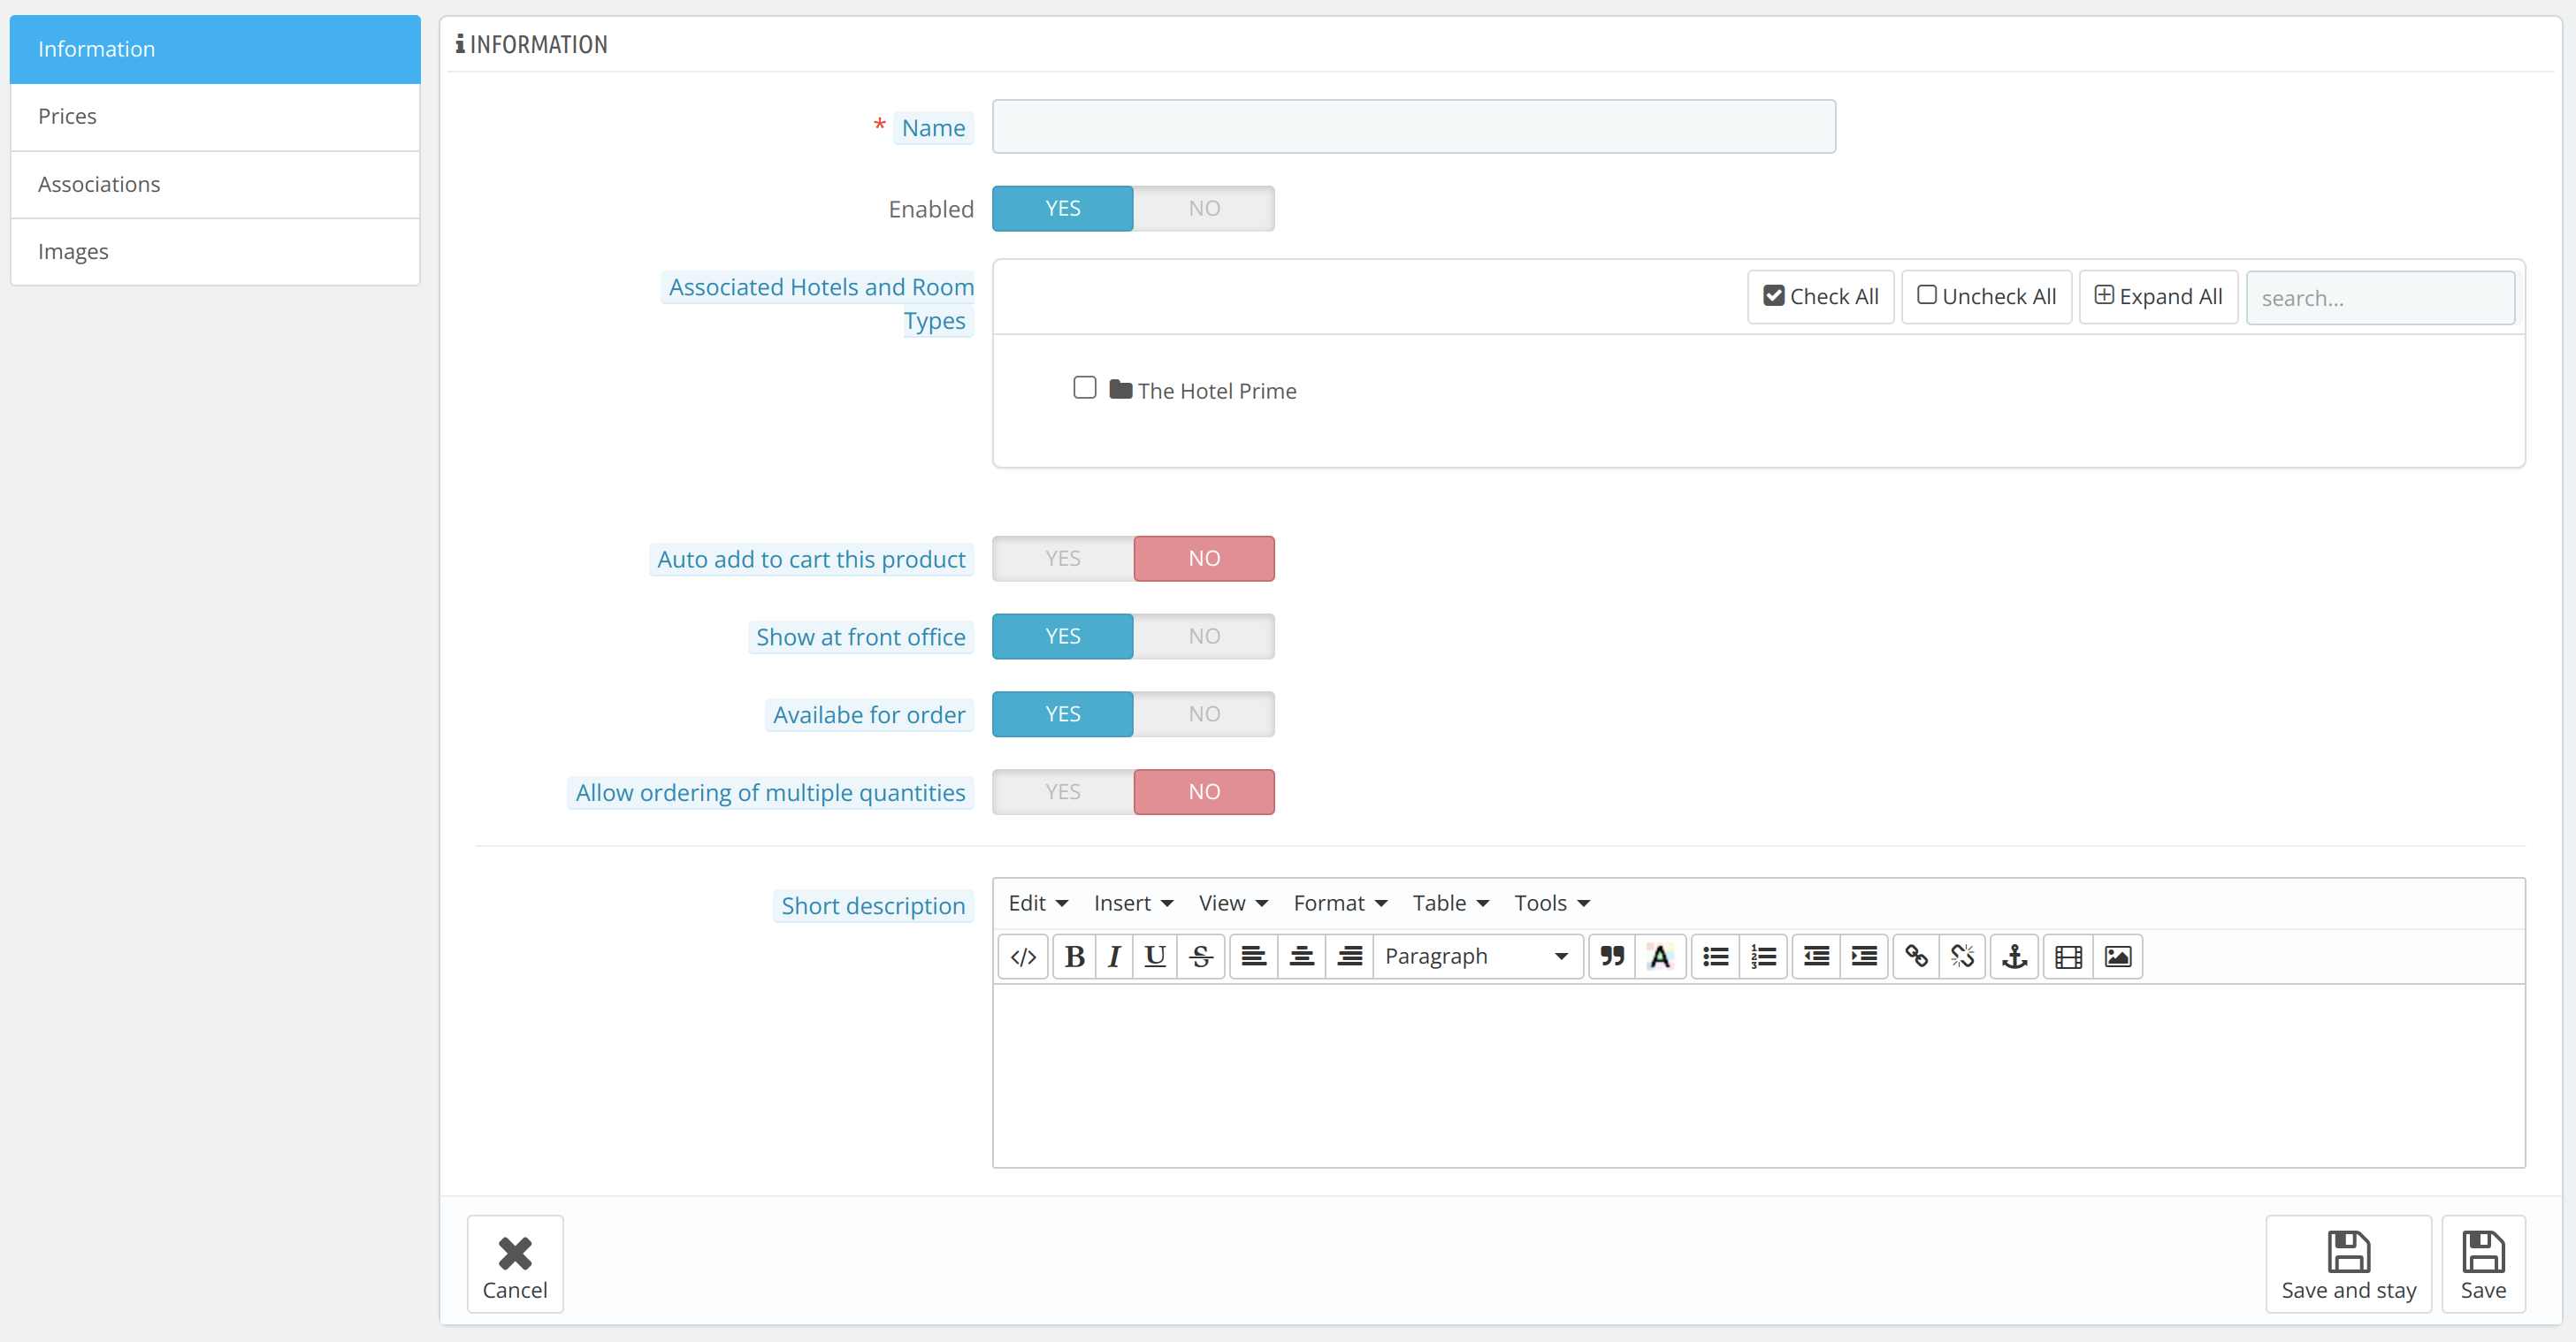
In the Information panel fill in the following details
- Name: Give a name to your service product.
- Enabled: Select yes to enable your service.
- Associated Hotel and Room Type: Select the hotel or its room type which gets associated with the service.
- Auto Add to cart this product: Select Yes or No to add the product to the cart.

- When you select Yes the product gets added to the cart automatically. In the drop-down you will get two options as given below:
- Add price in room price: The service price will be added to the room base price.
(e.g., Room price: 500, service price: 50, final room price: 550) - Add price as convenience fee: Service price will be displayed in the order summary as “Convenience Fees”.
- Add price in room price: The service price will be added to the room base price.
In auto add to cart product is not visible to the customer and the price is added to the final total.
- When you select No you will get the following option:
- Show at the front office: Enable if you want this product to be visible at the front office
- Available for order: Enable if you want this product to sell from the hotel website
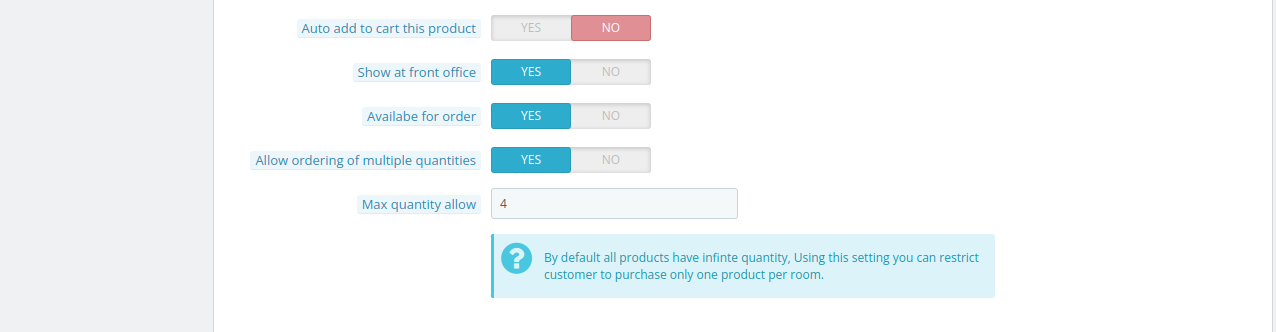
- Allow ordering of multiple quantities: Enable it to order multiple quantities of the product for one room.
- Max quantity allow: Enter the maximum quantity you want to get oderd. The default quantity to order is 1.
- Short Description: Mention the short description regarding the service.
Price
Here you will mention the price of the service product that you want to add to QloApps.
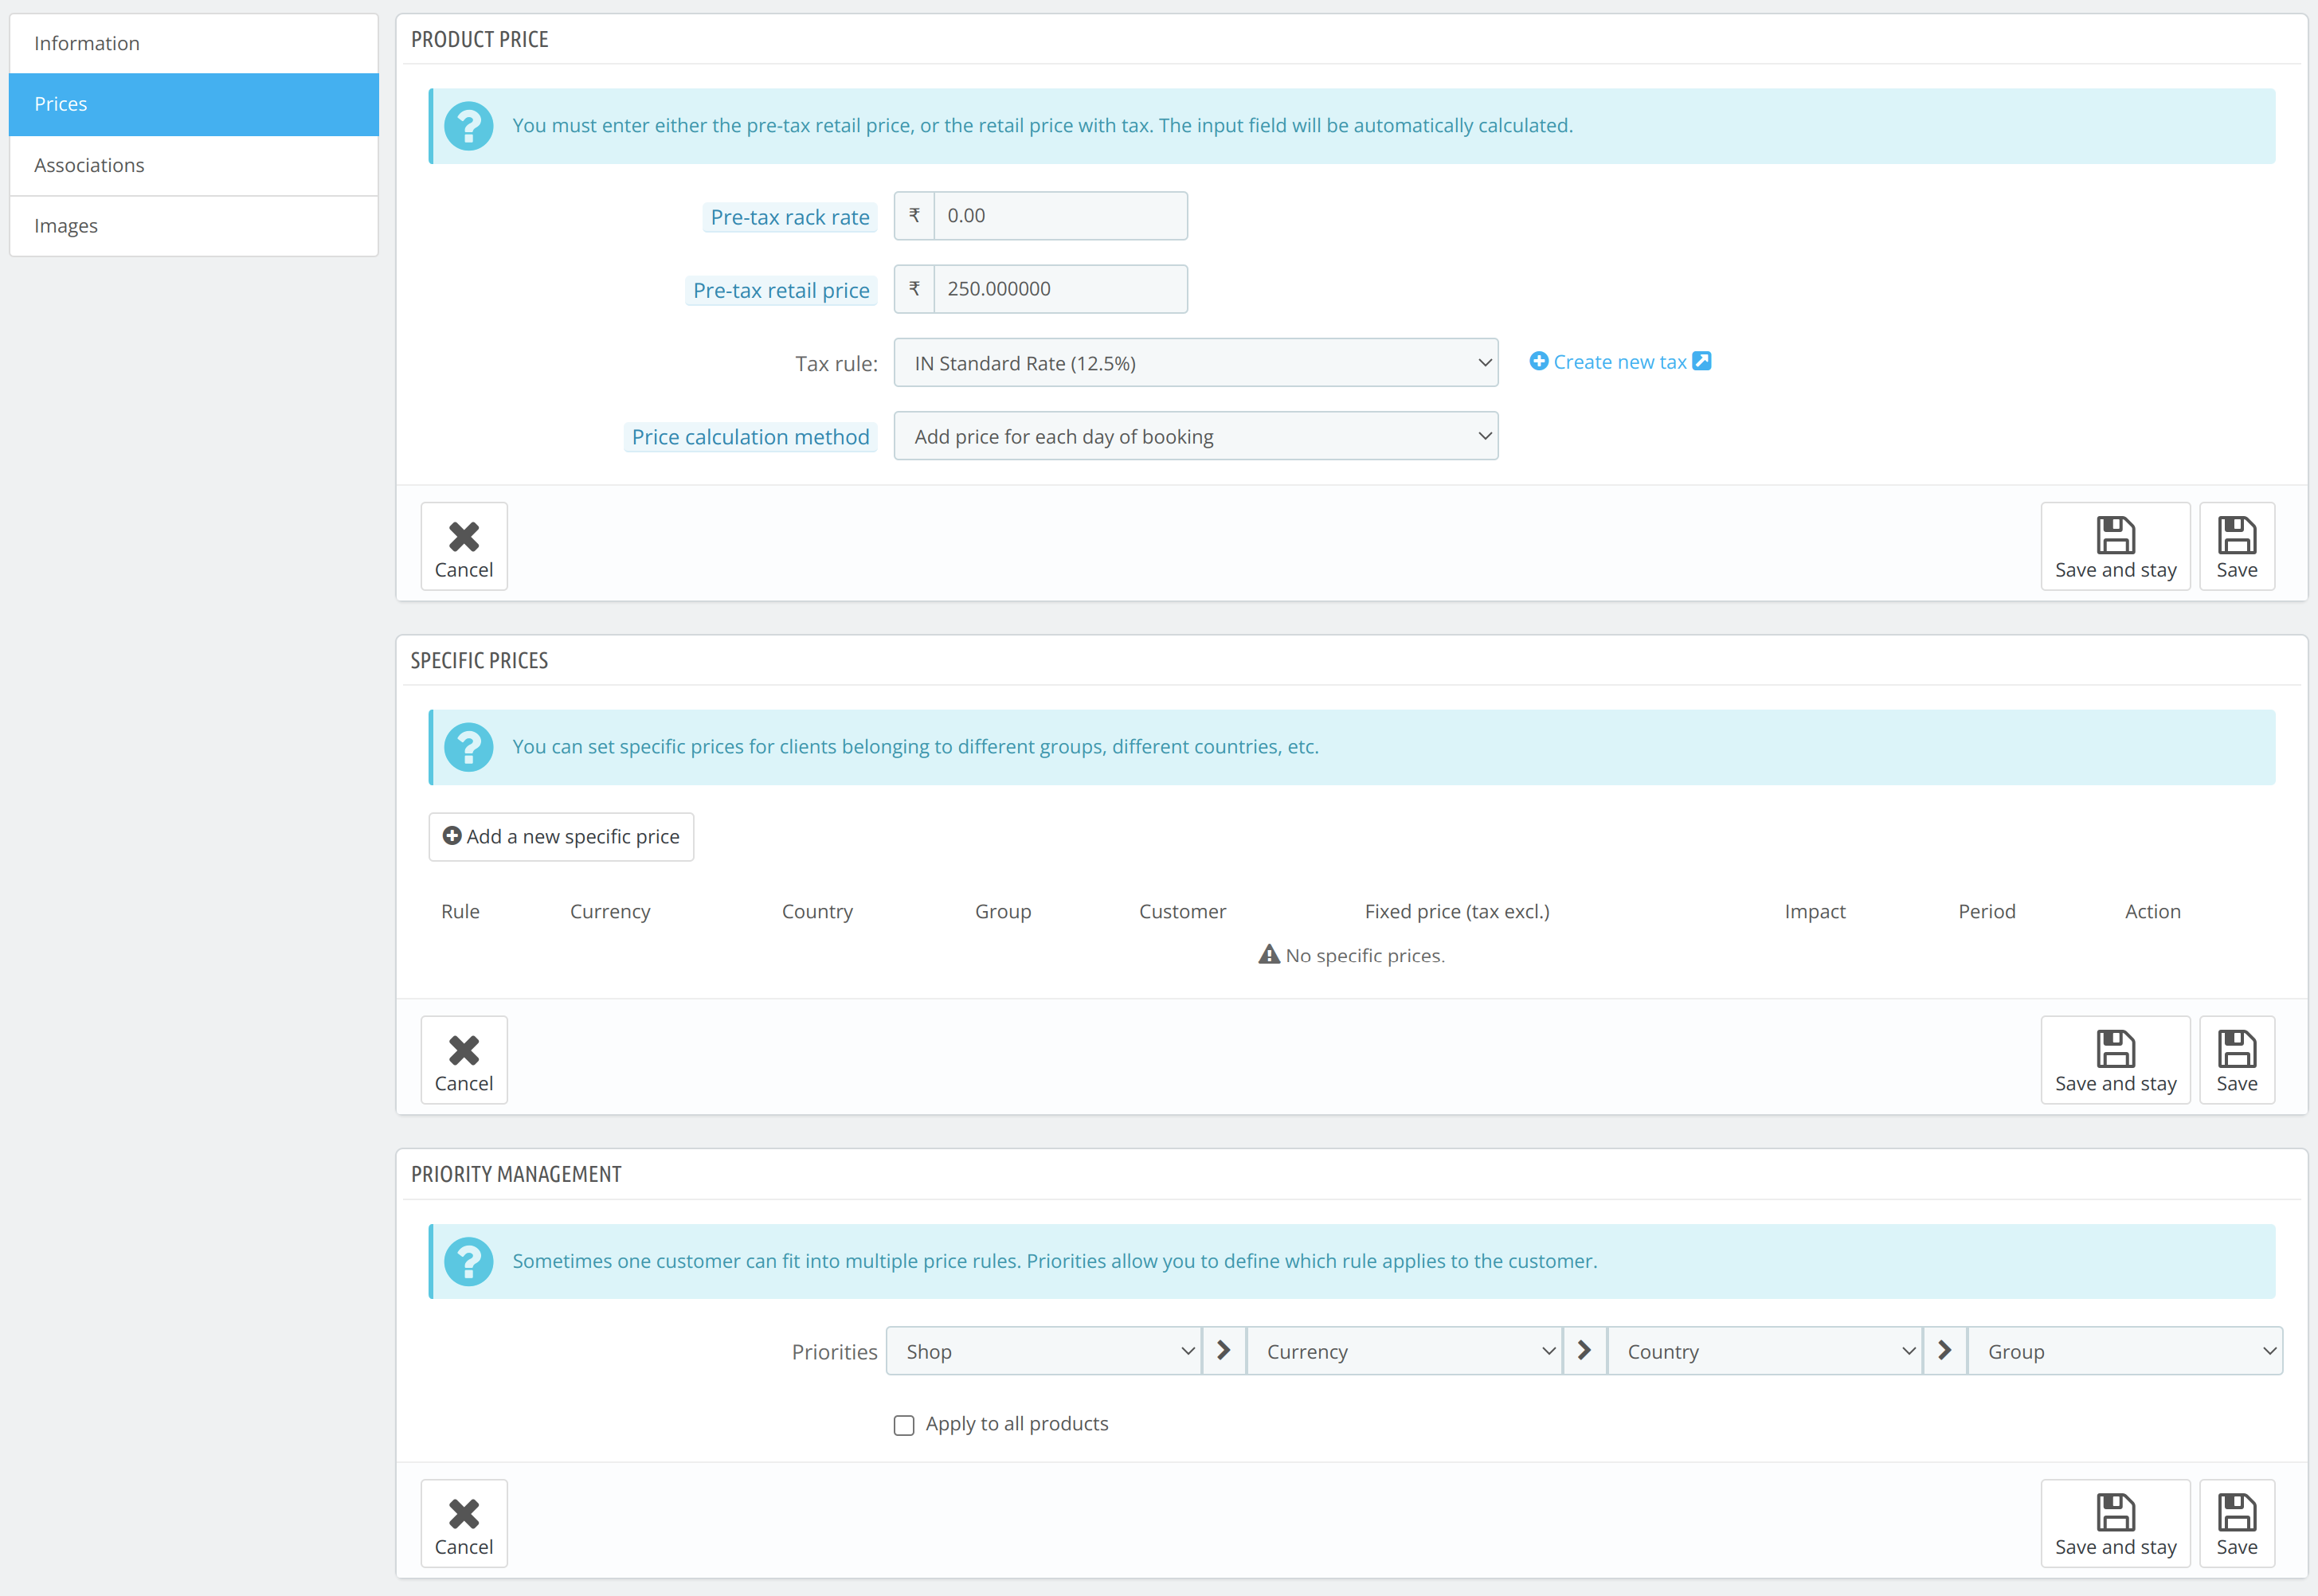
- Pre-Tax rack rate: This includes the base cost of the service product
- Pre-Tax Retail Price: Pre-tax retail price is the price for which you intend to sell this service product to your customer. It should be higher than the pre-tax operating cost. The difference between the two will be your margin
- Tax Rule: Select the tax rule from the drop-down you want to apply in the invoice. Here you can add the new rule by clicking on Create a new tax..
- Price calculation Method: Calculate the price of the service product on two bases. Firstly per day calculation or the price for the entire stay.
- Specific Price: You can set specific prices for clients belonging to different groups, different countries, etc.
- Priority Management: Priorities allow you to define which rule applies to the customer if multiple price rules are applicable.
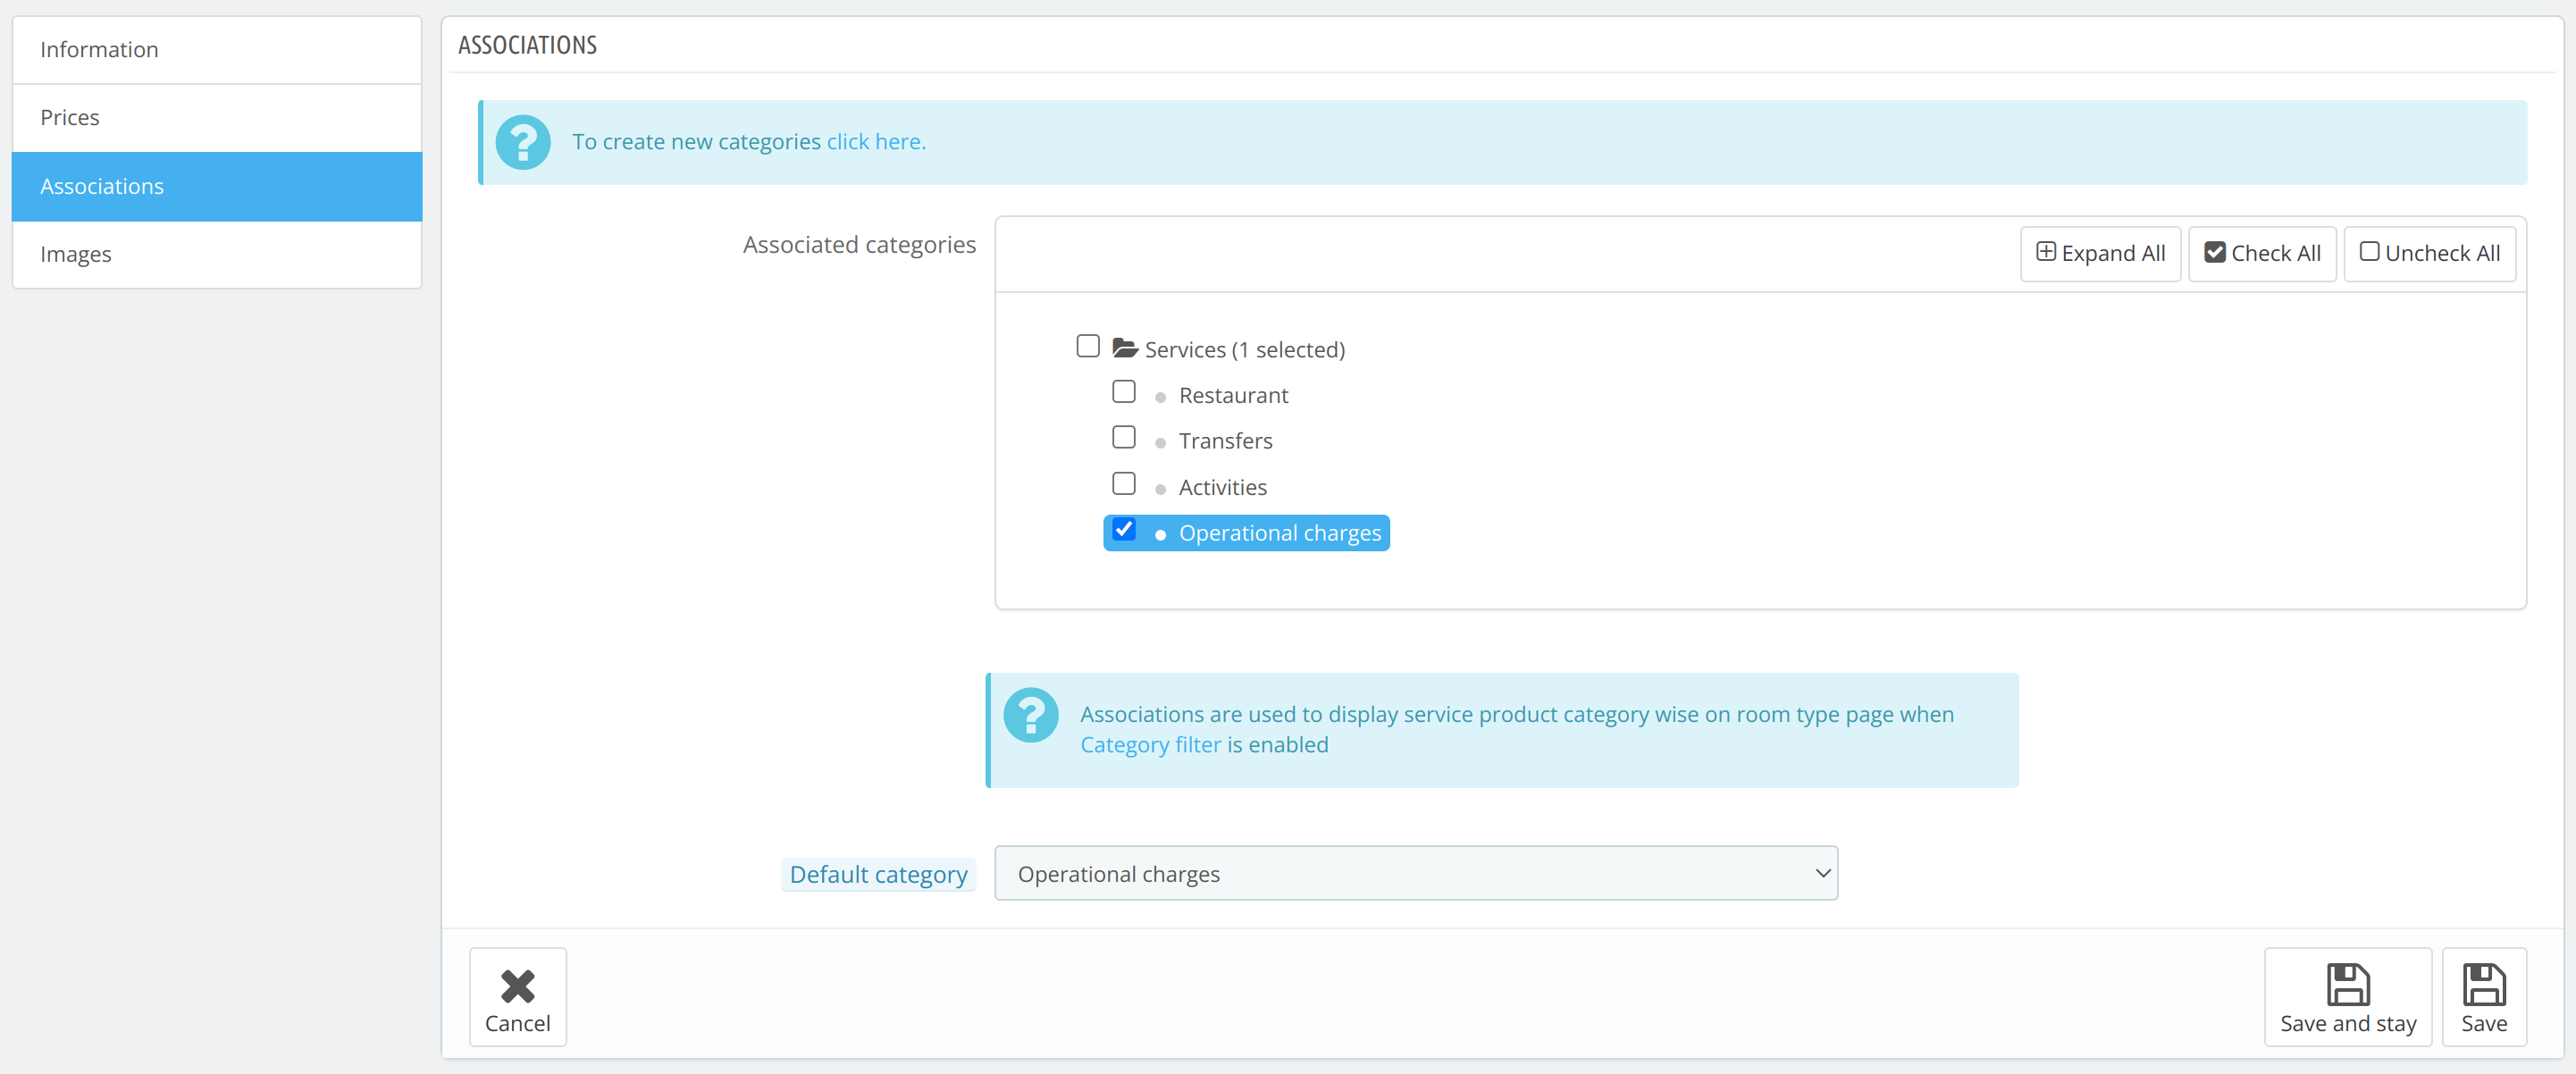
Association
The services are associated with the categories defined in it. For default, the default category is there.
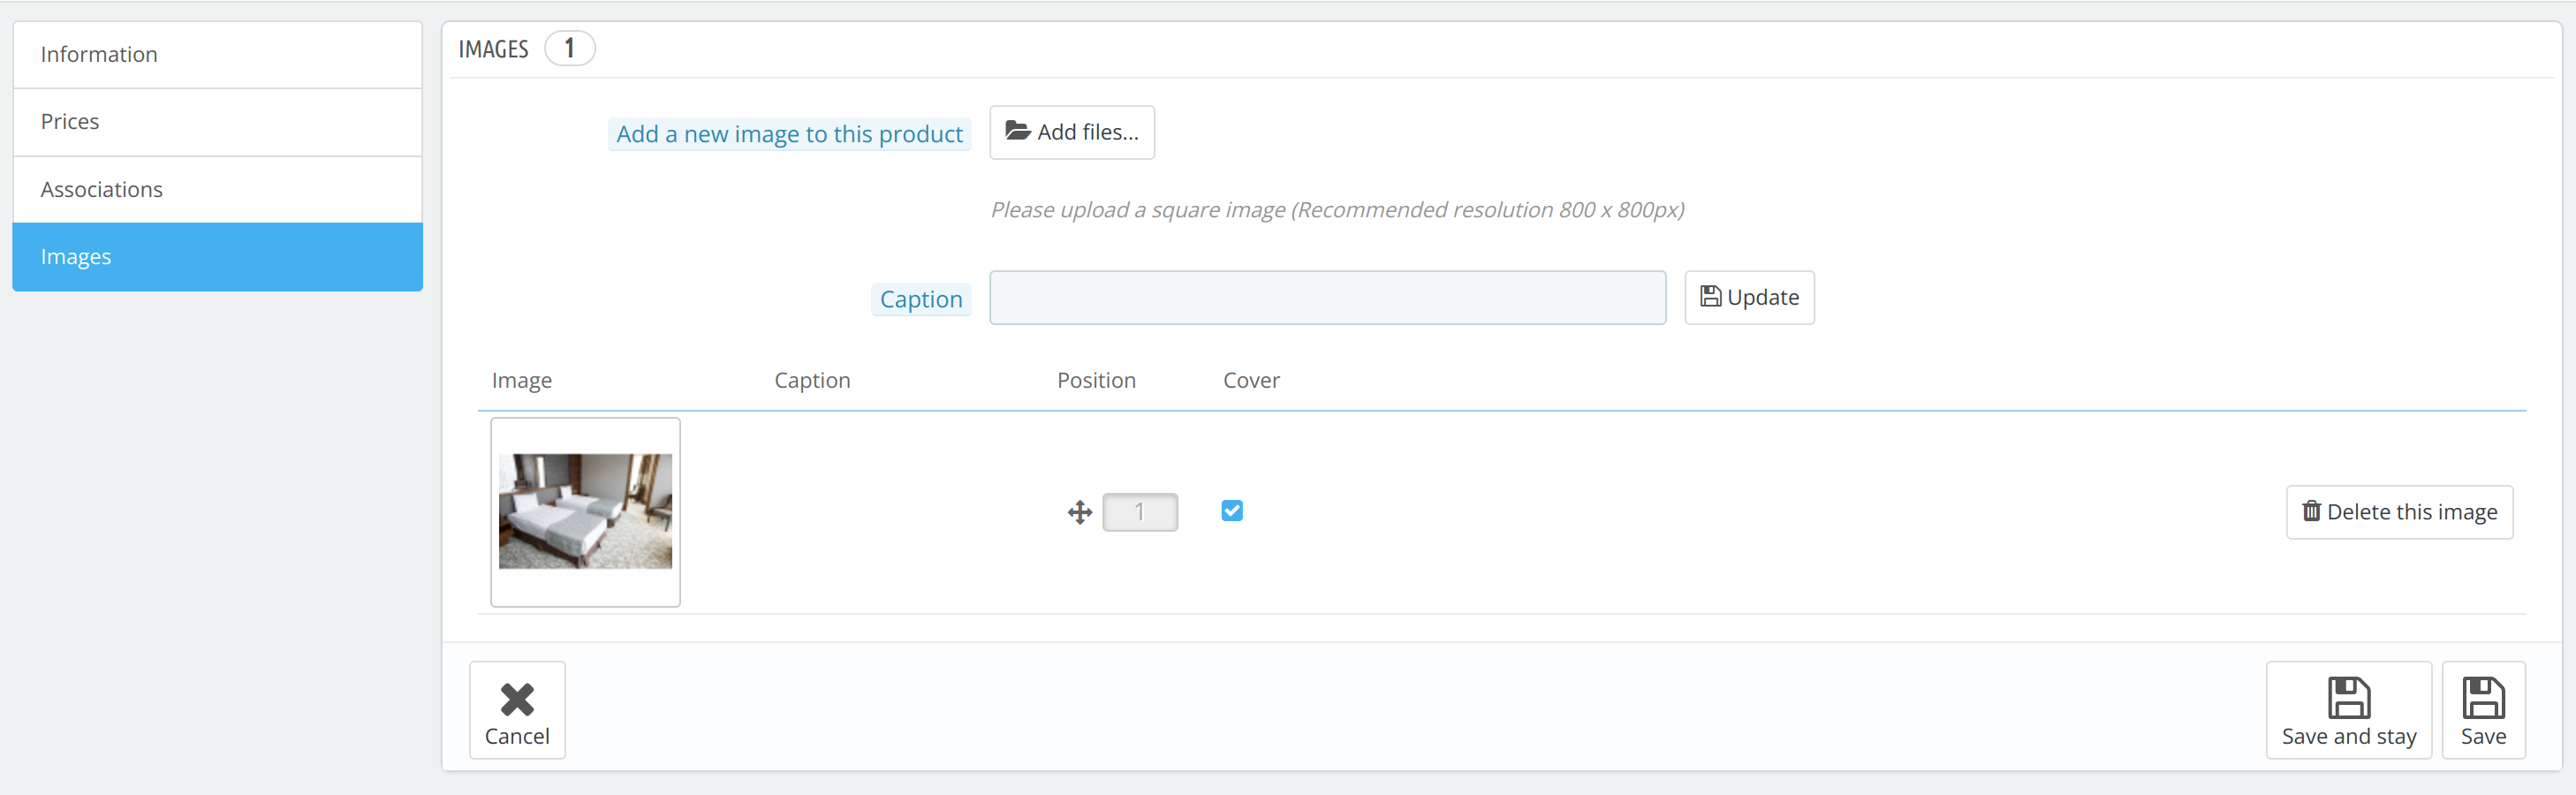
Images
Add images for the service product in the images section. You can also add suitable captions for each image.
In QloApps, bed types are linked to the room type and are displayed on the room type page for better clarity and guest preference visibility.
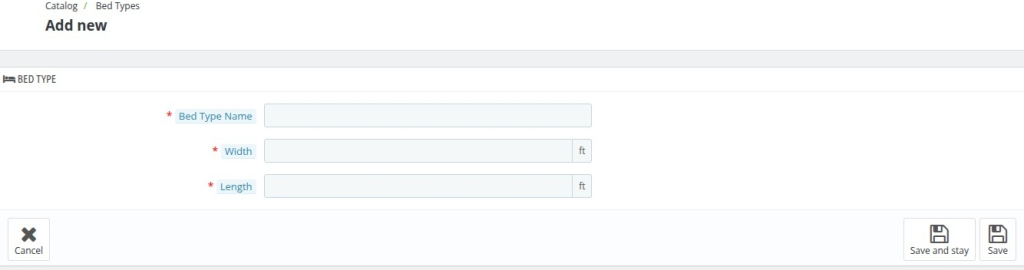
Bed Types
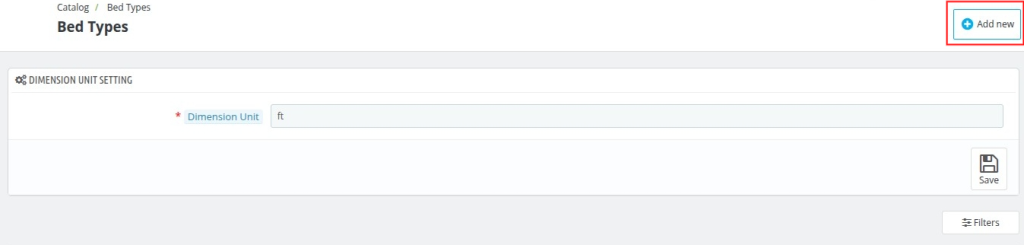
To create a new bed type in QloApps, go to Catalog > Bed Types in the admin panel.
Here, you can also see a complete list of existing bed types.
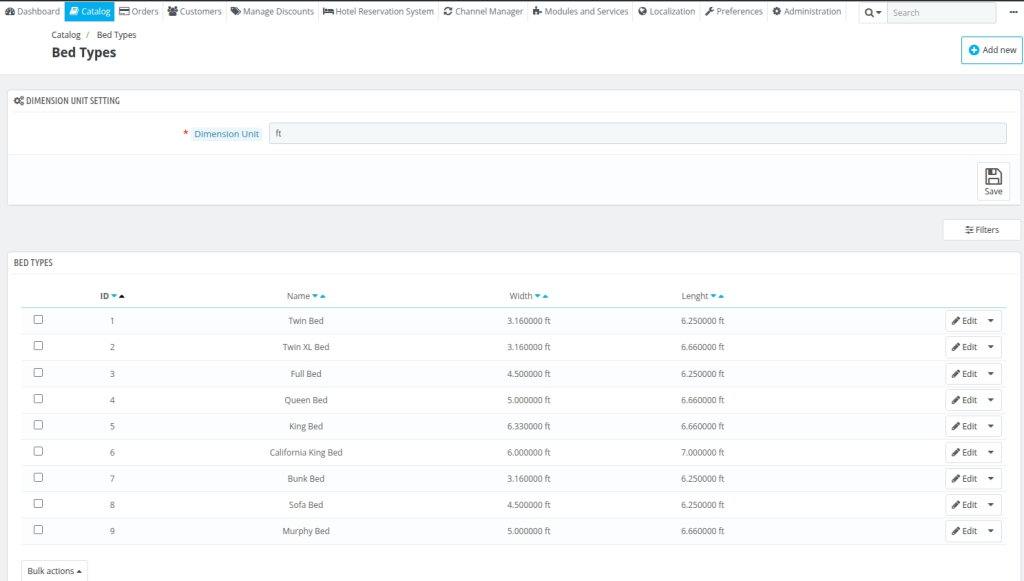
Click on “Add New Bed Type” to create and define a new bed type by specifying its name, width and length and saving it to your list.
Front End Flow of QloApps After Adding Hotel and its Room Types:
Go to My site to see the front-end workflow: Here is the first landing page of your website.
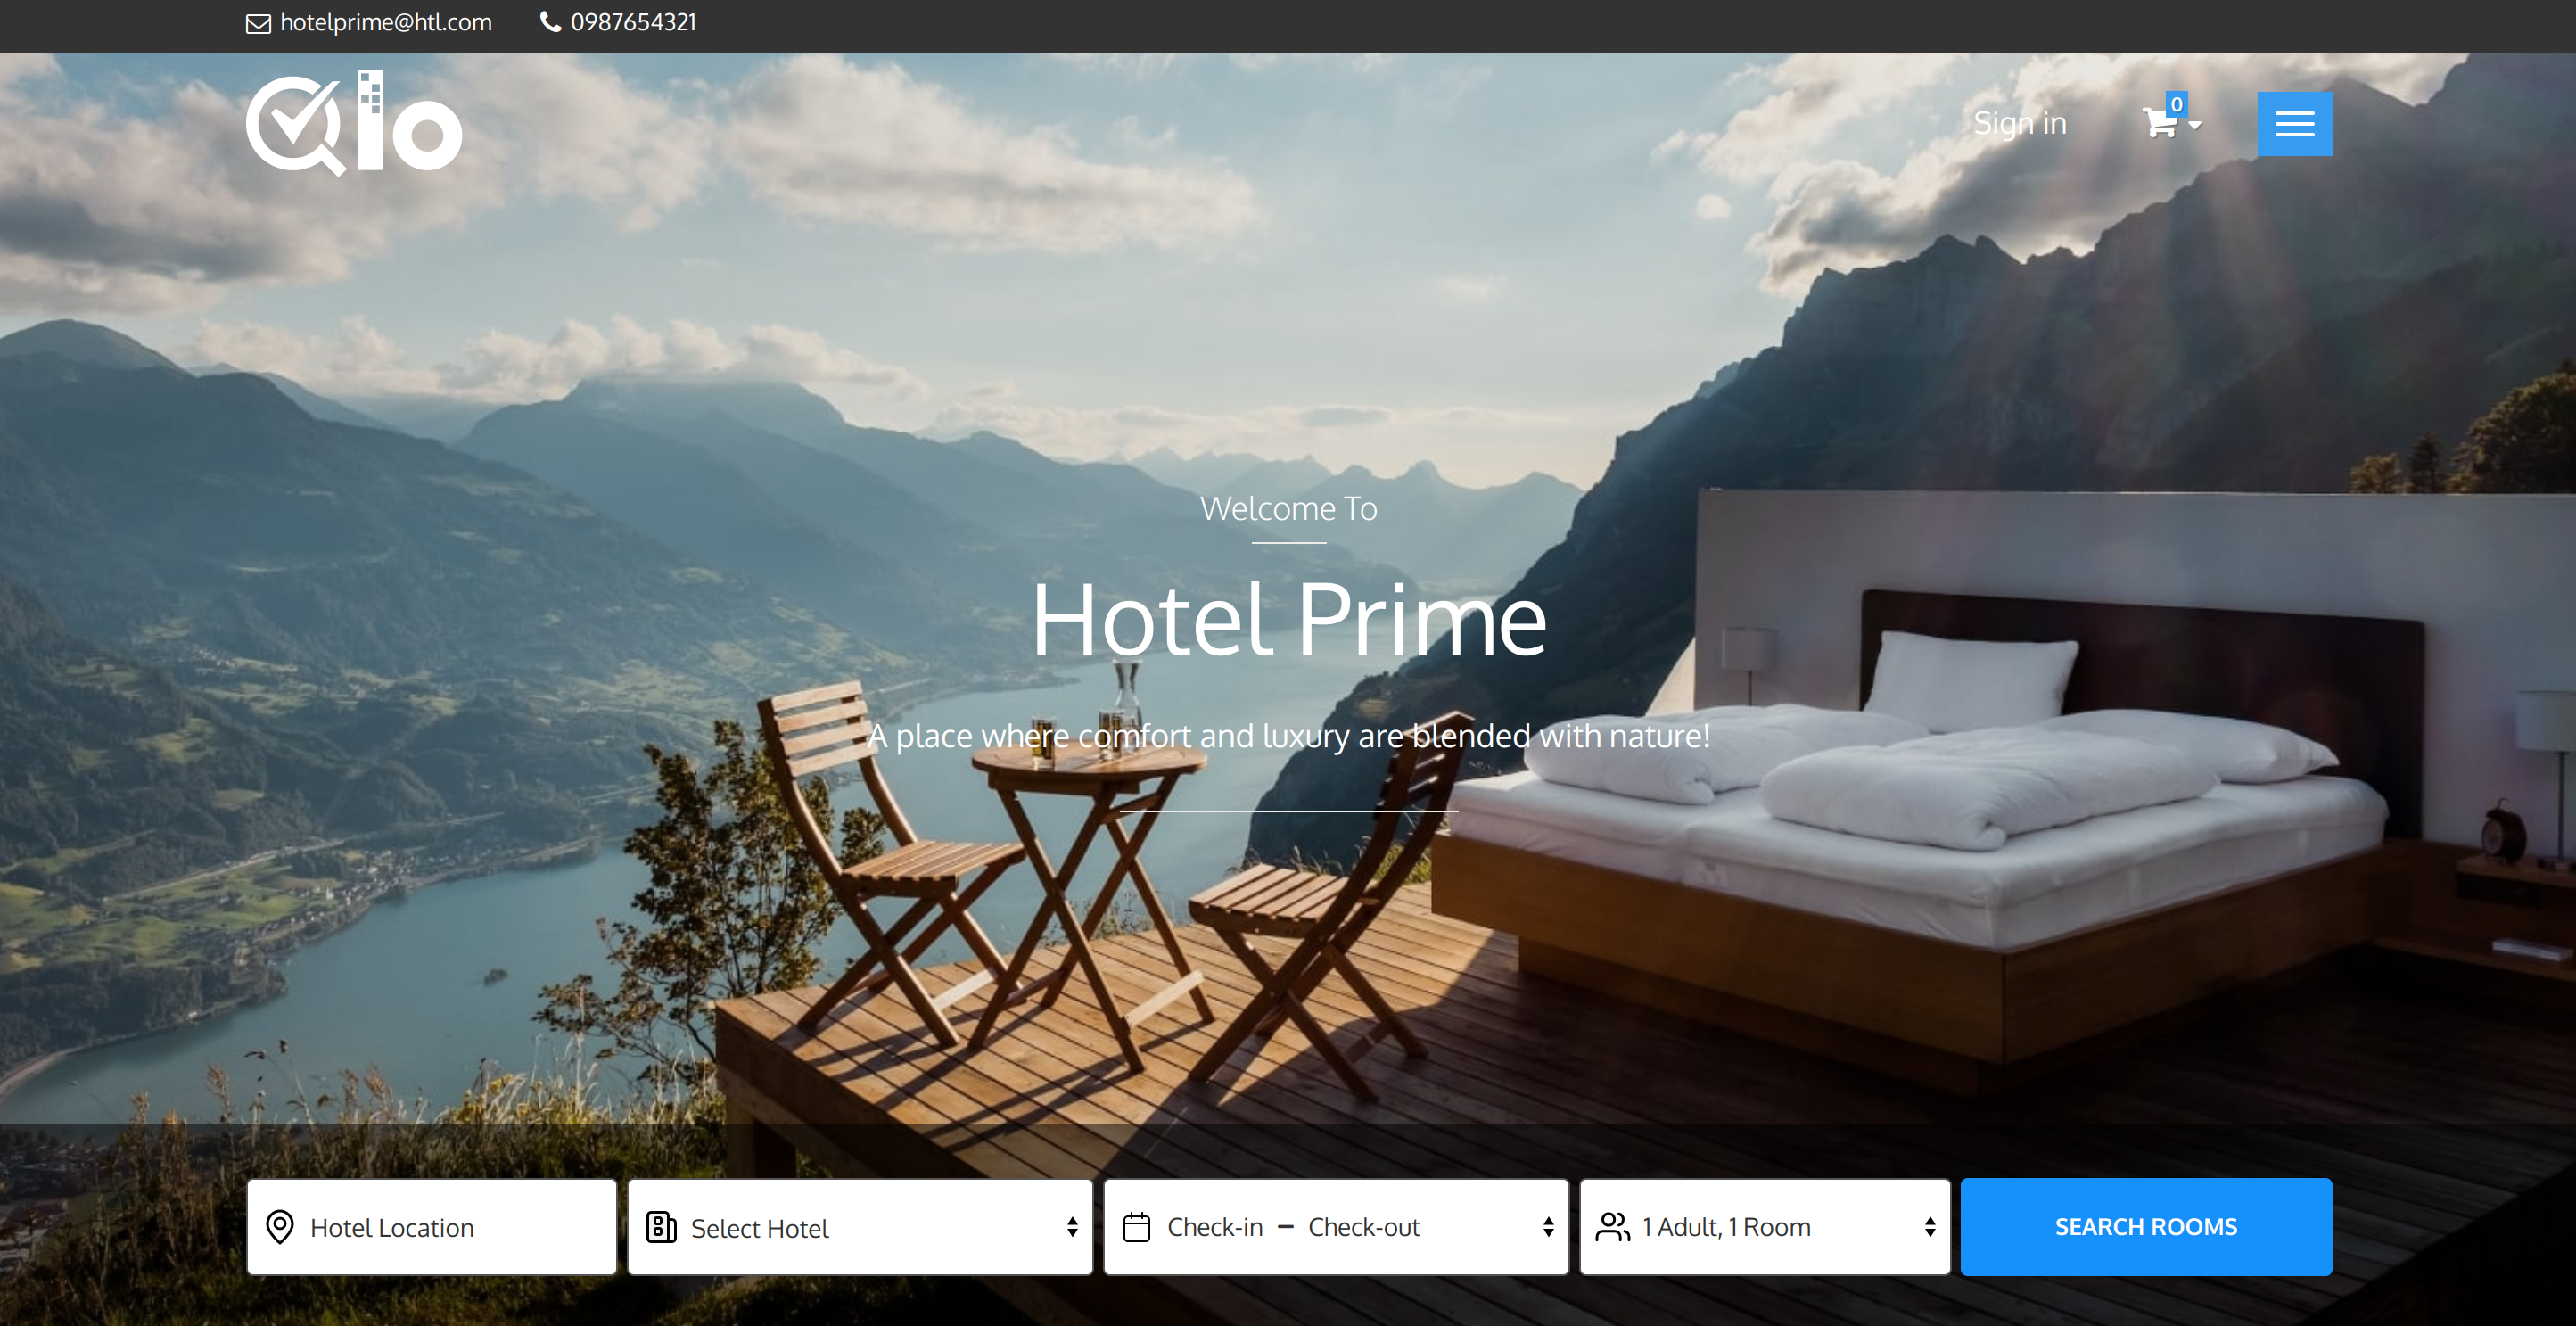
Search for Rooms
Hotel Location: Select the location of the hotel from the drop-down.
Select Hotel: Select the hotel from the drop-down where you are planning to stay.
Check-in –Check-out: Select the date in the calendar for check-in and check-out.
Occupancy: Select the number of adults and children.
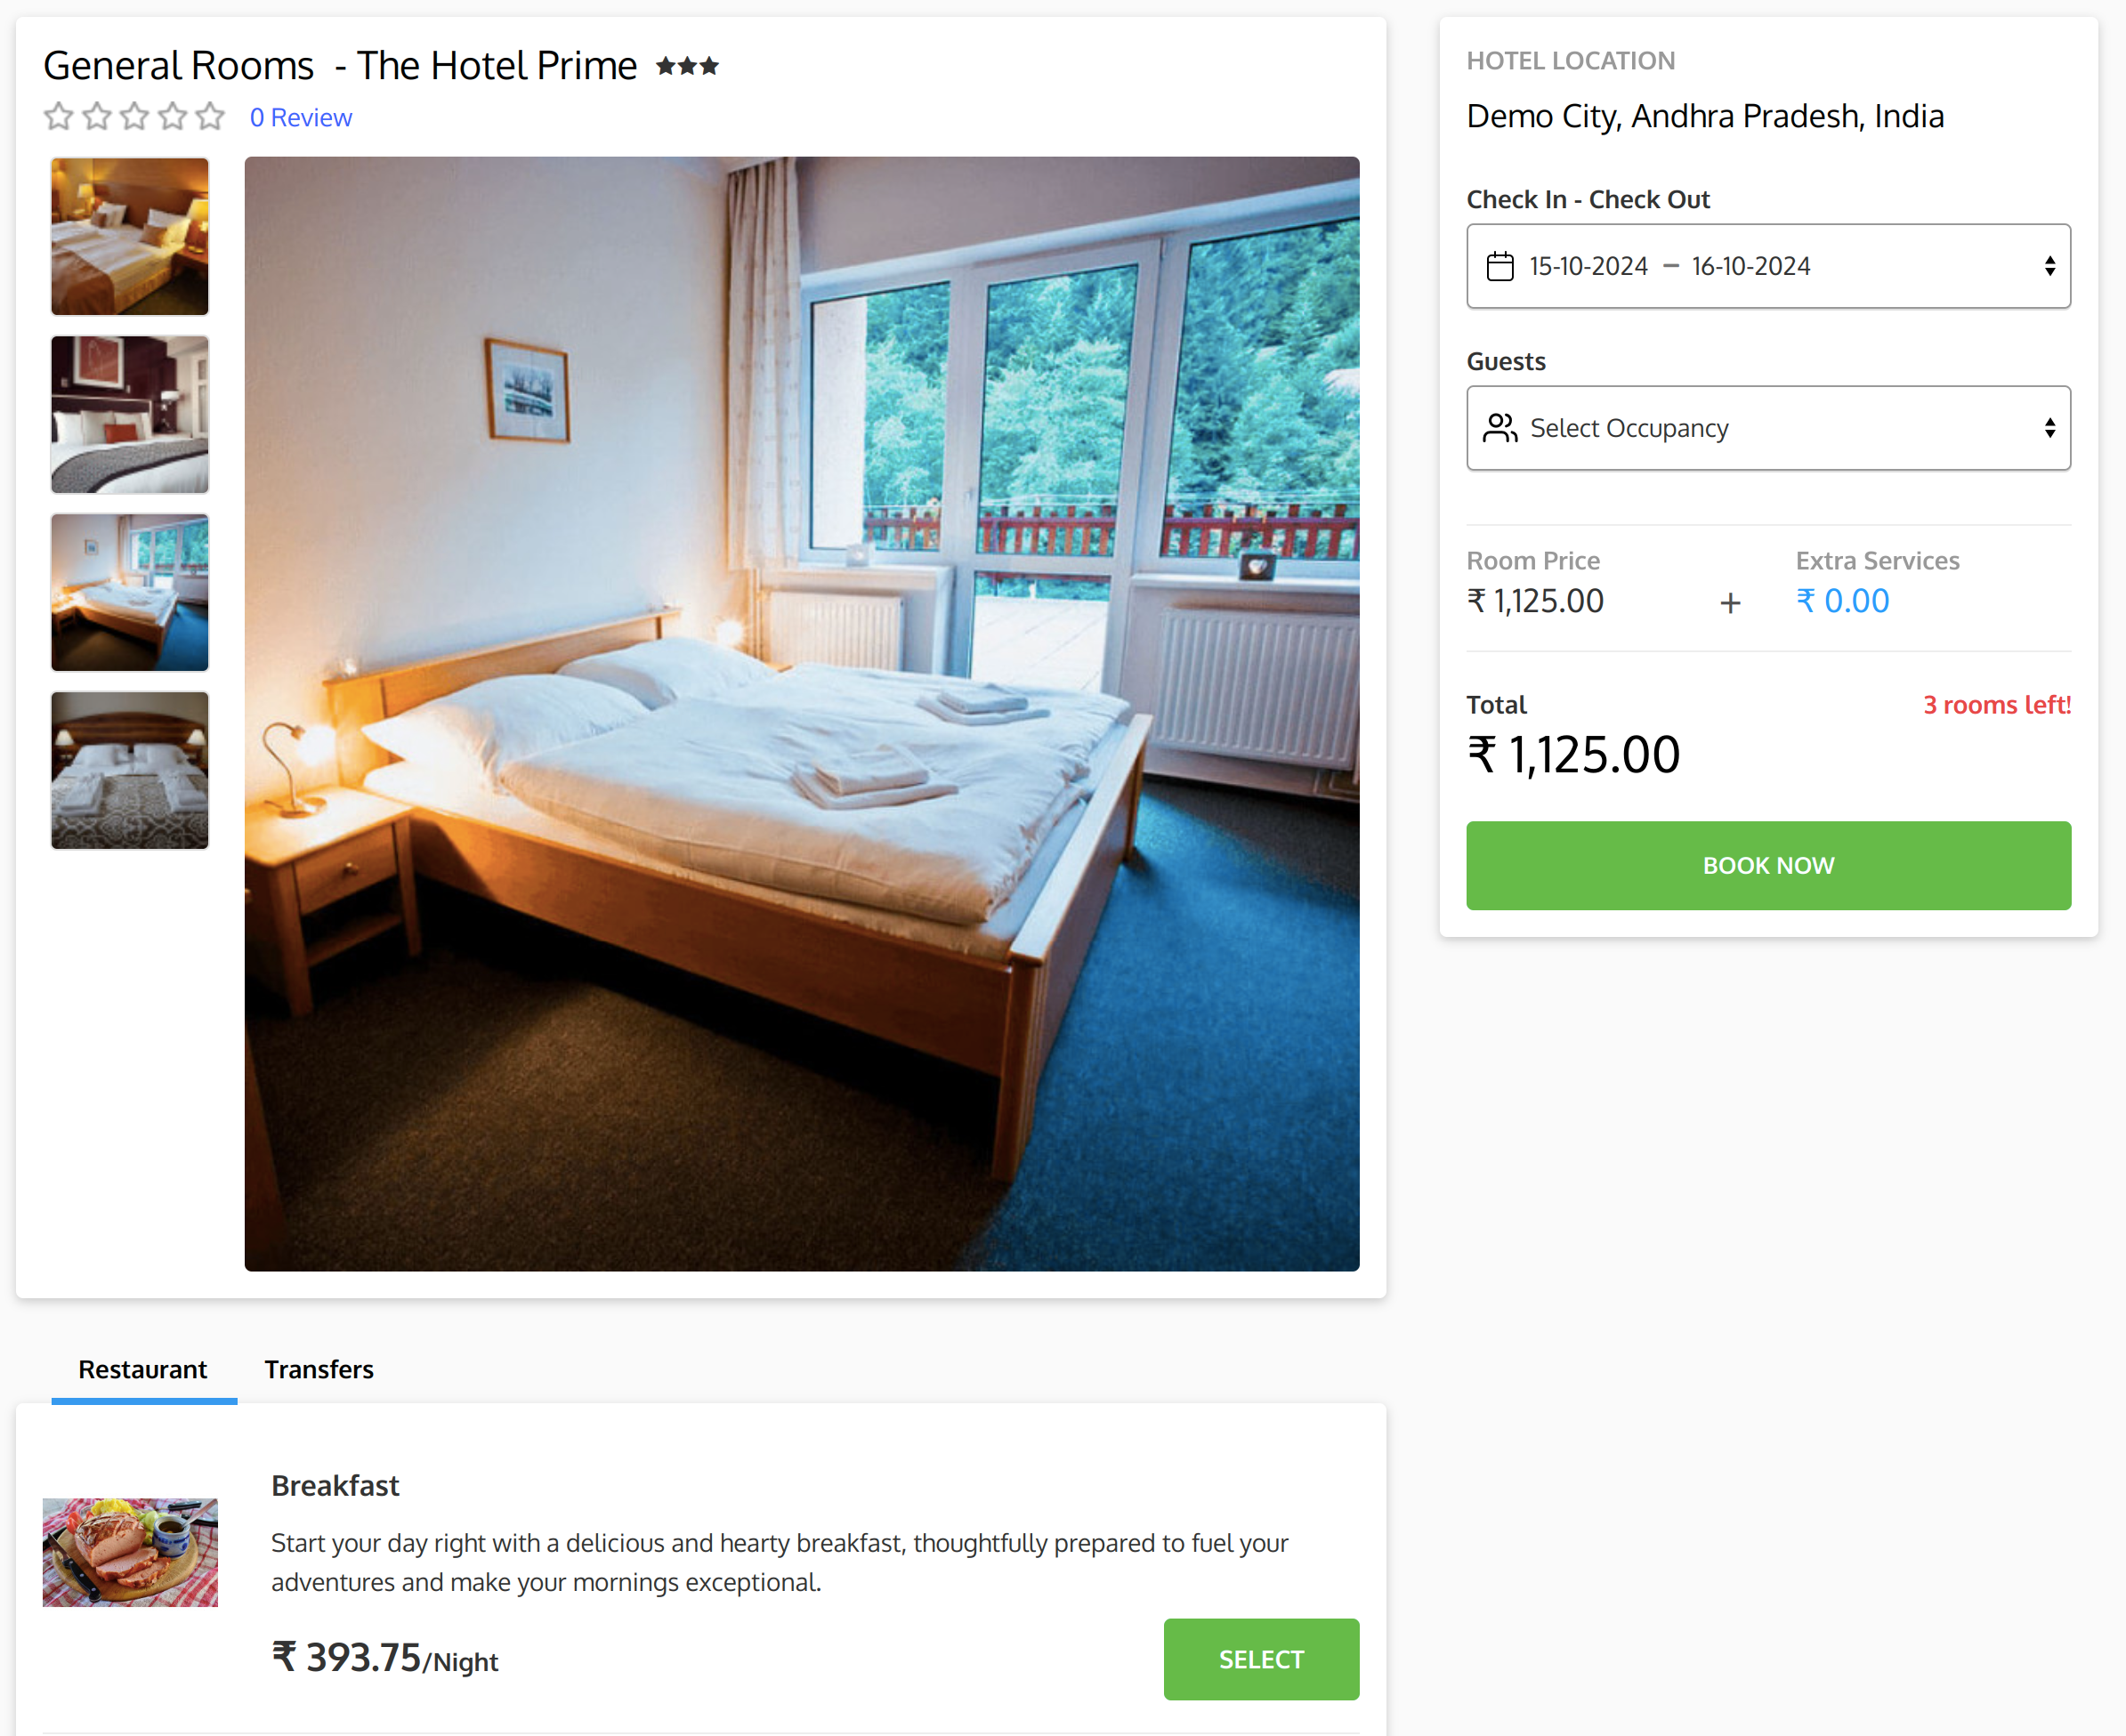
Room Type Wise Search results page
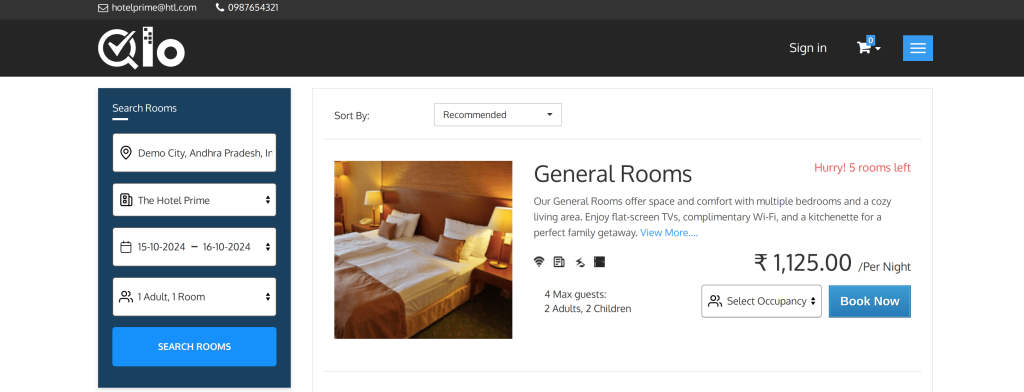
Select occupancy by adding child and adult separately. Here you can add the additional room while creating the booking and add the occupancy in that room separately. Then click on Book Now.

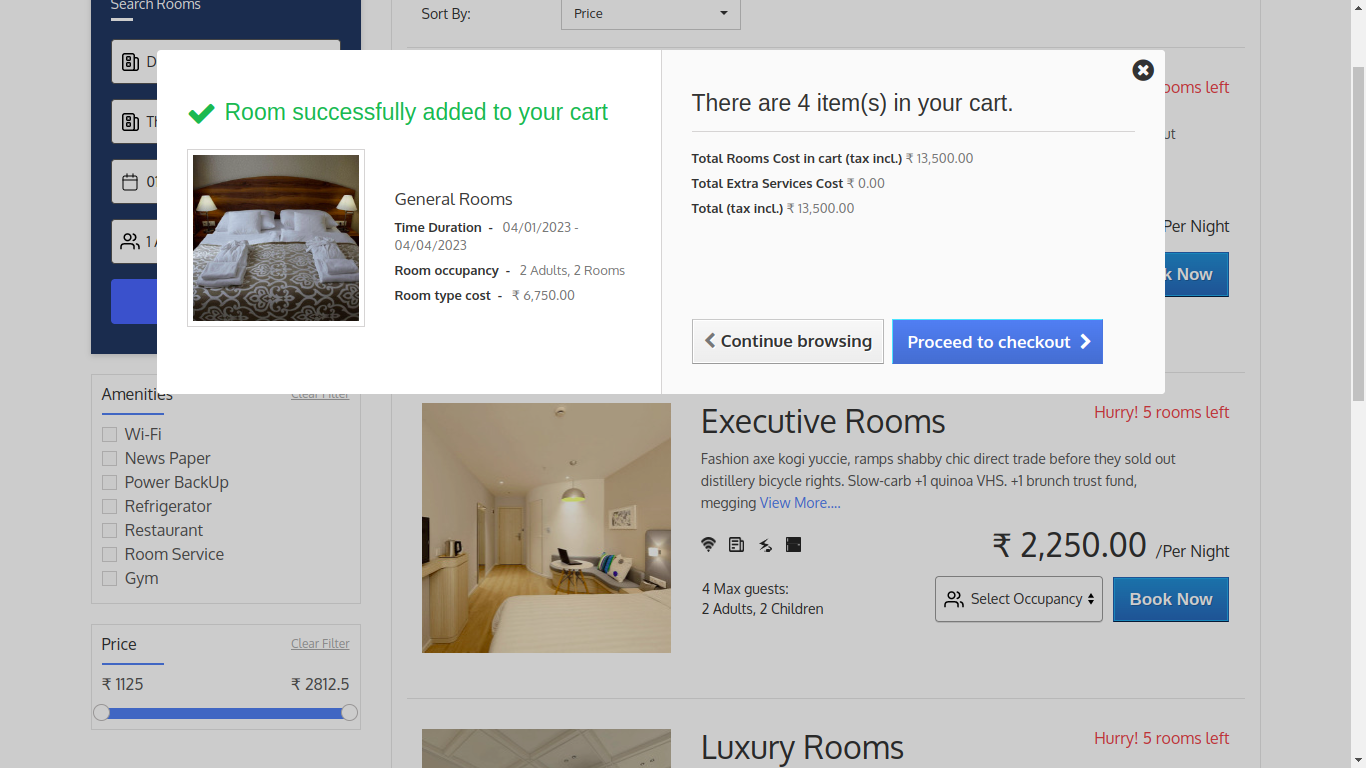
Then you can proceed with the booking after checking your room and adult details. Here below are your cart details.
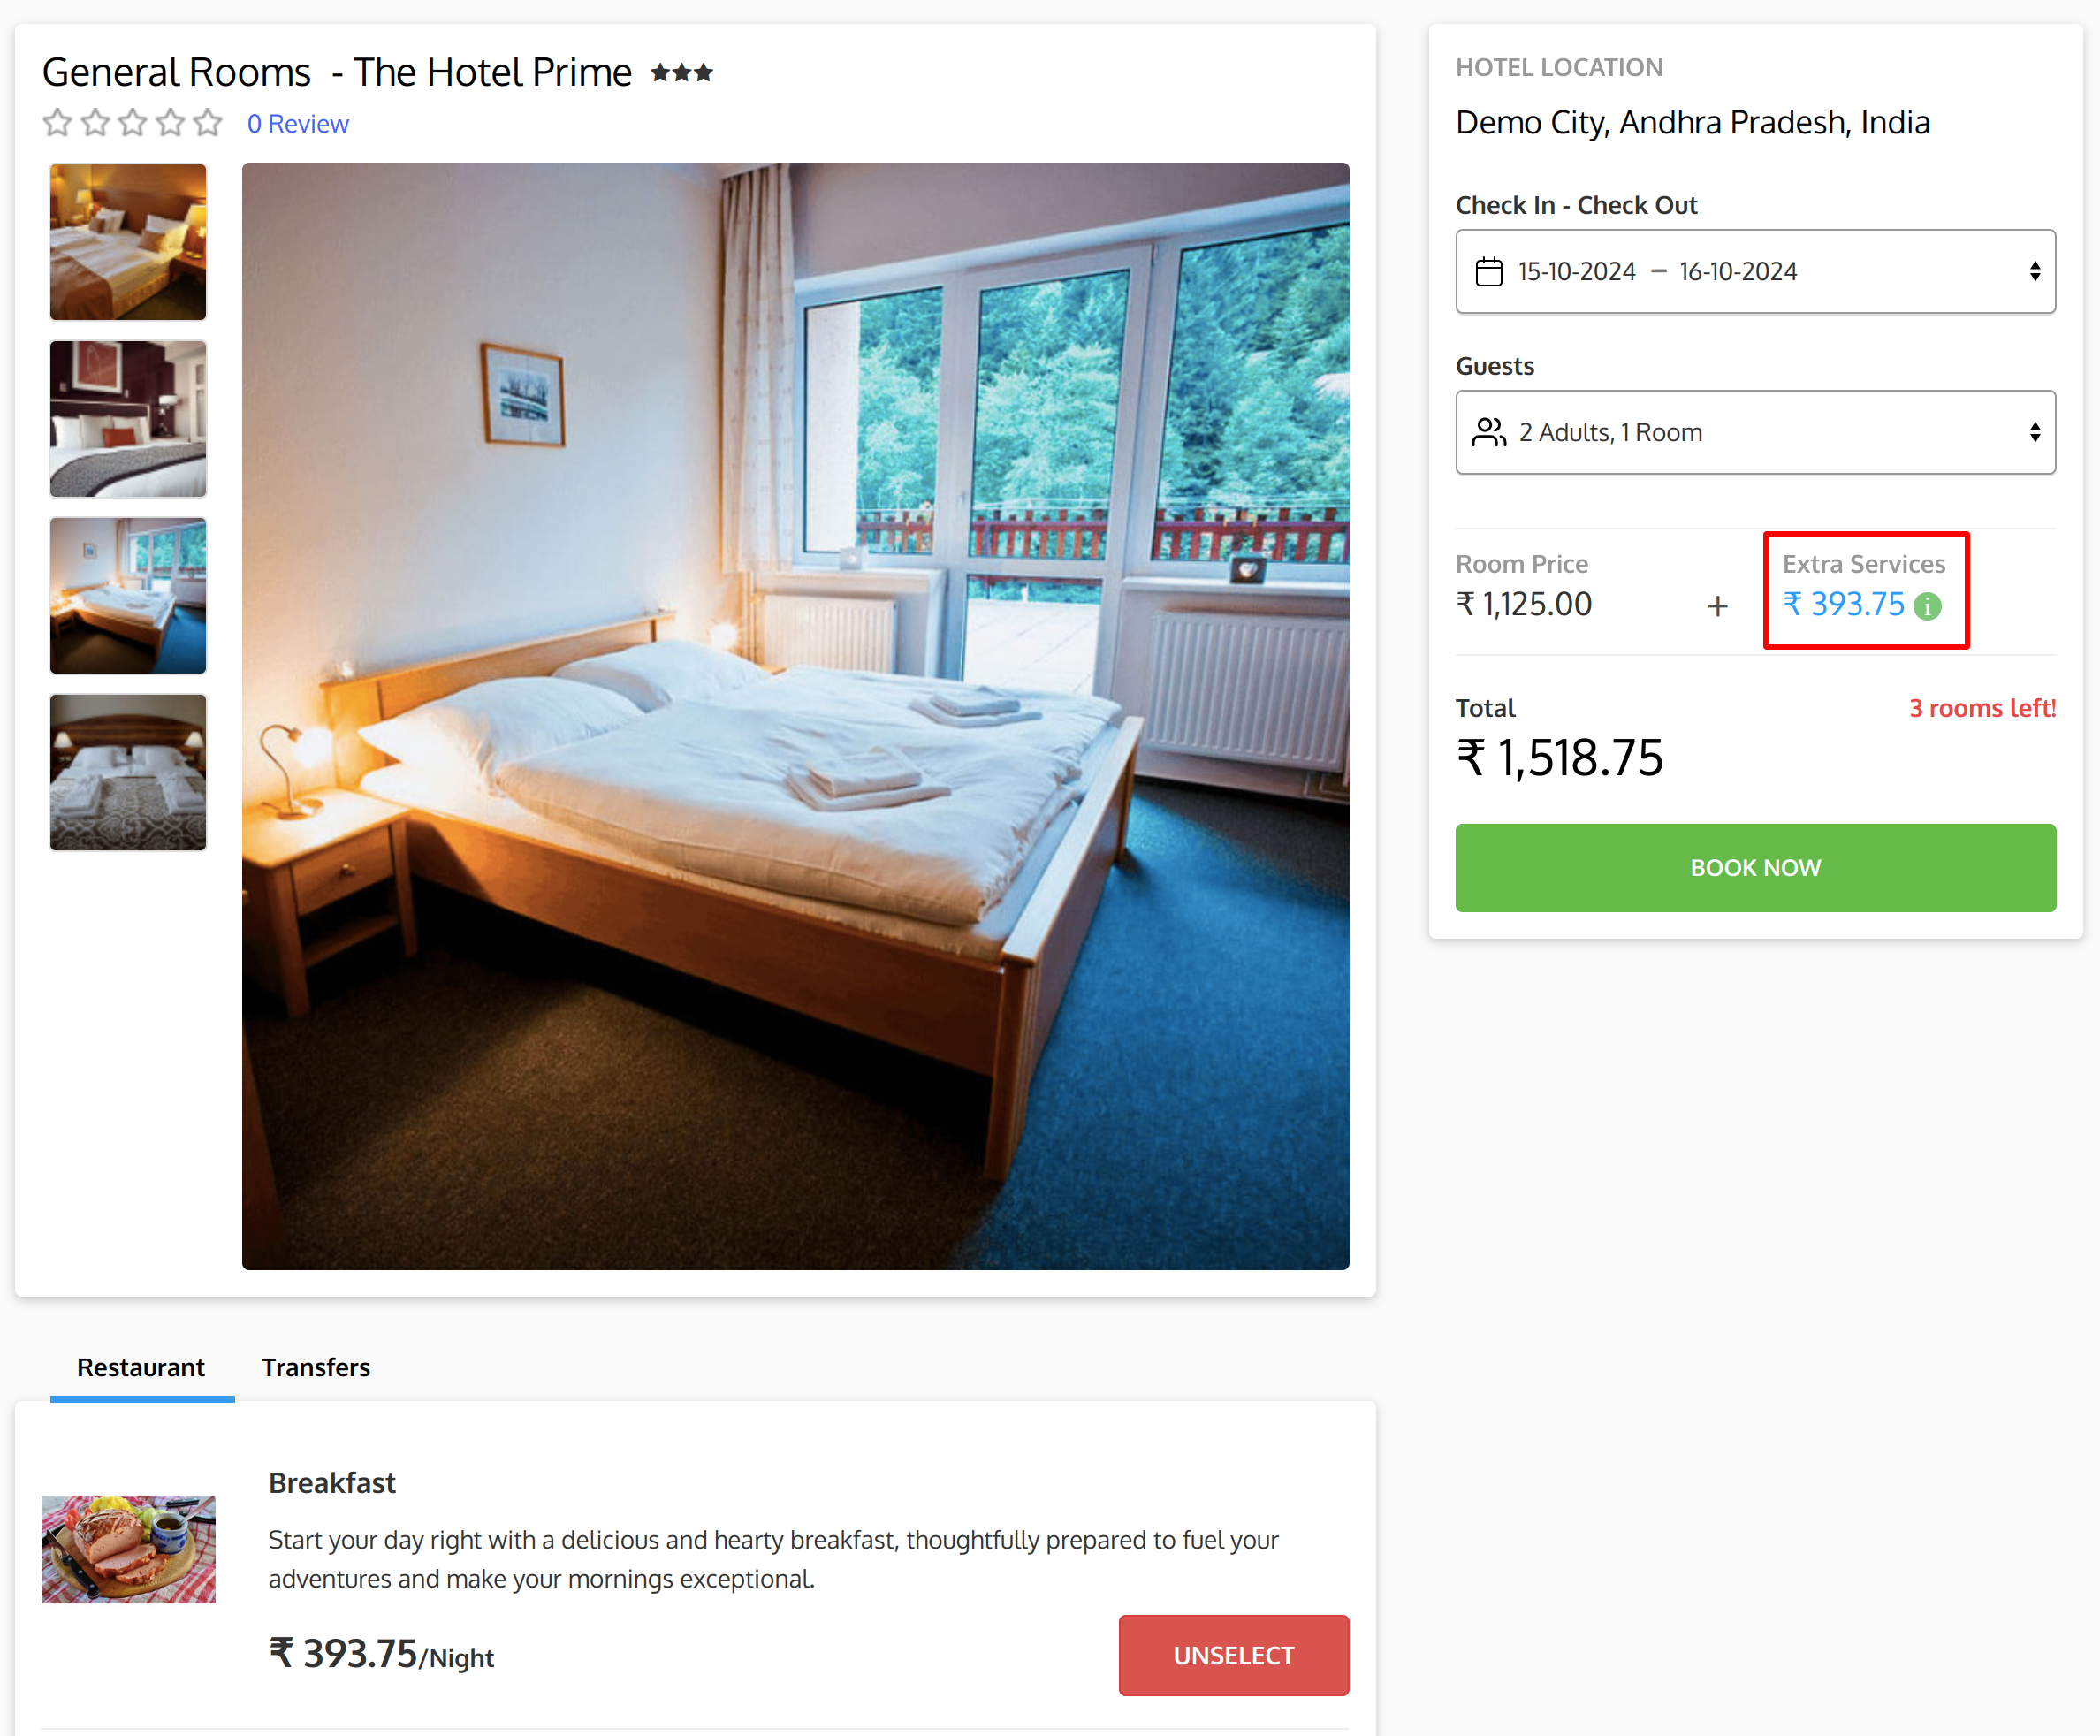
On Room Page, you can add the extra services to the room you want to add as shown below. From here you can add the extra facilities you want
When you add the extra service you can see the added price in the subtotal as shown below.
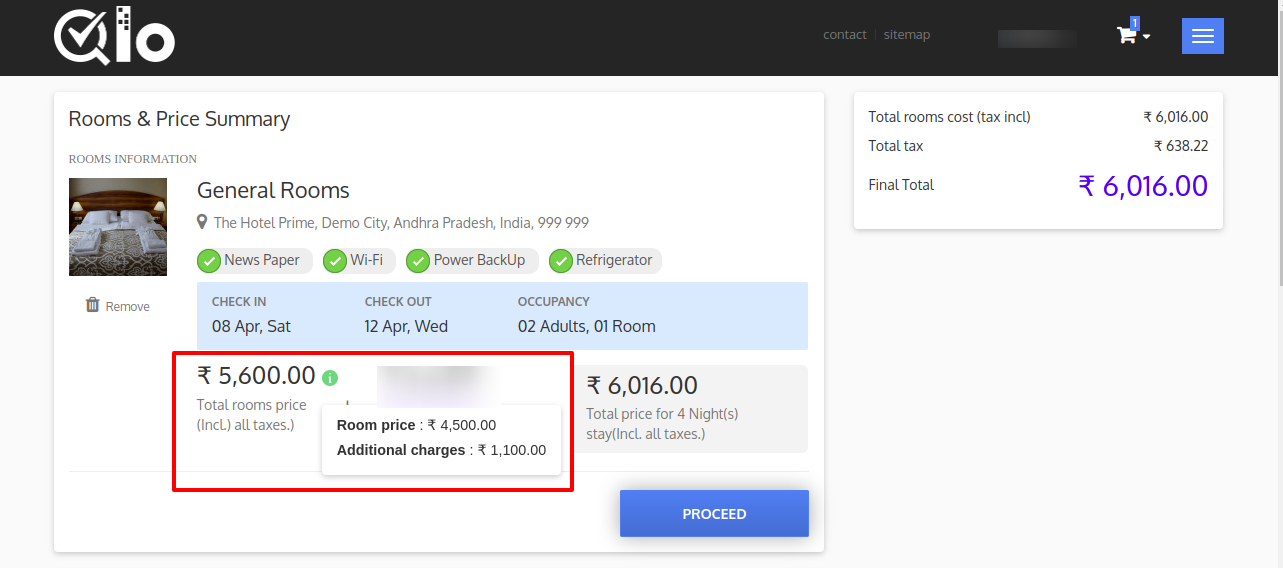
On the Room and Price Summary page, when the customer clicks on “Extra Services,” a popup will appear. From there, they can conveniently add any additional services to their booking.
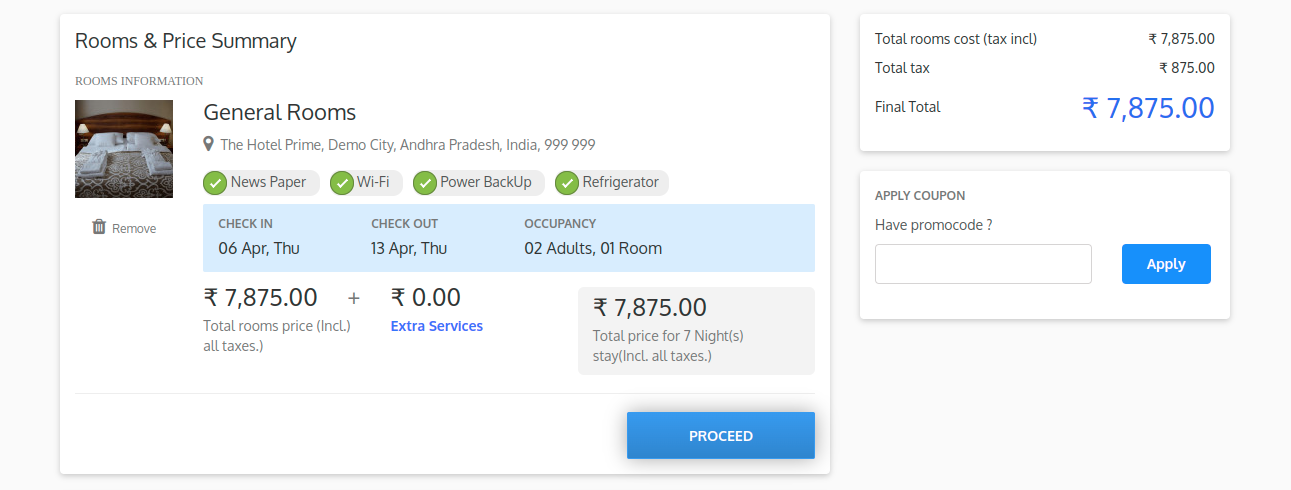
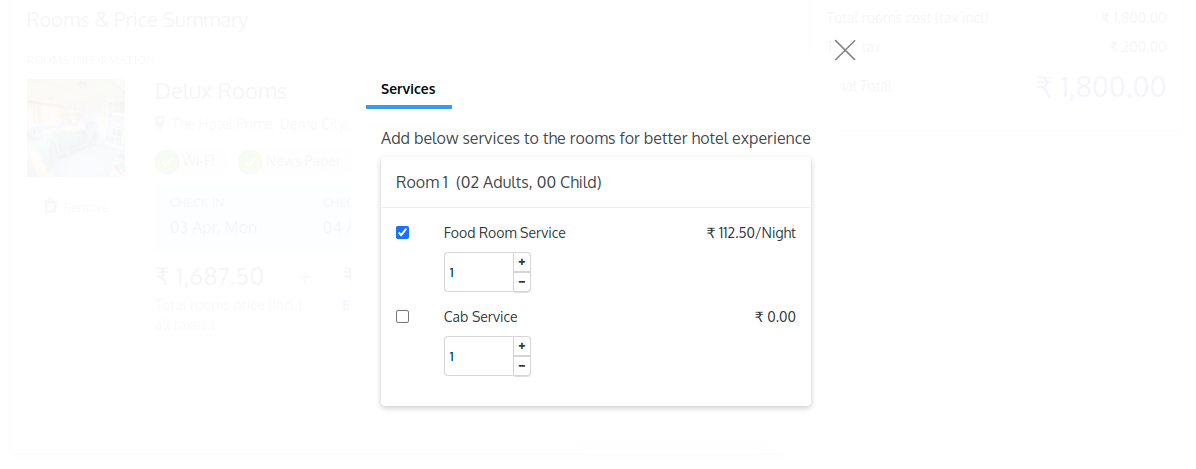
Here we can see that the extra service price is added to the total fare.
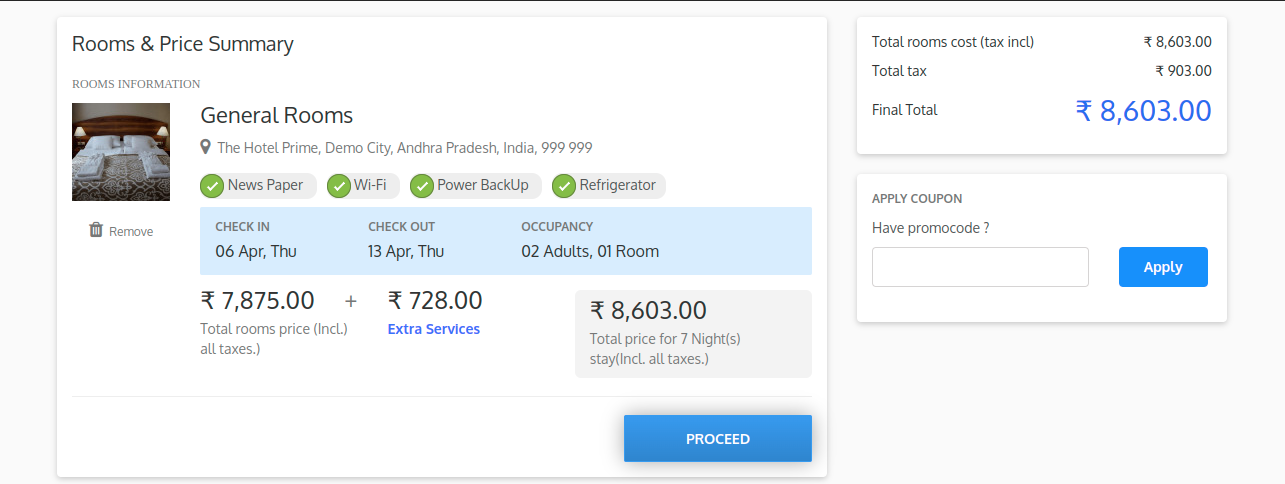
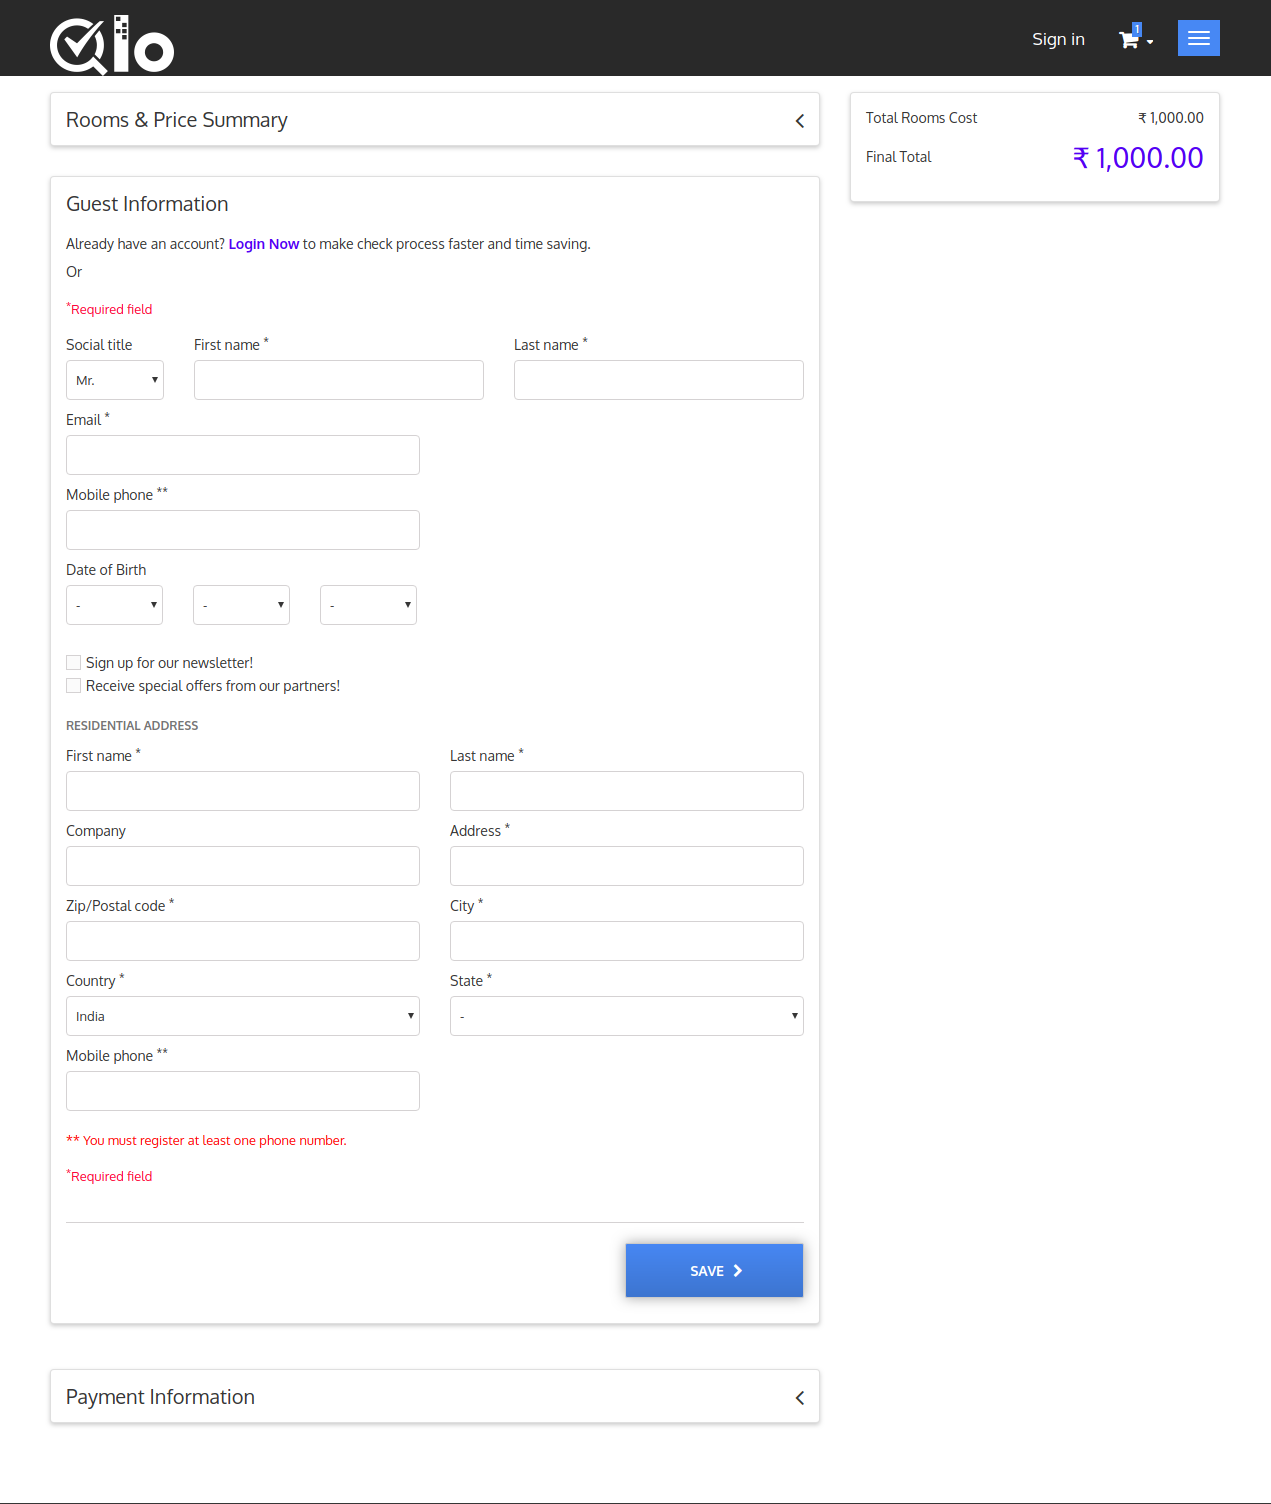
After clicking on proceed you will be redirected to the Room and Price summary page. Here you have to login into your account.
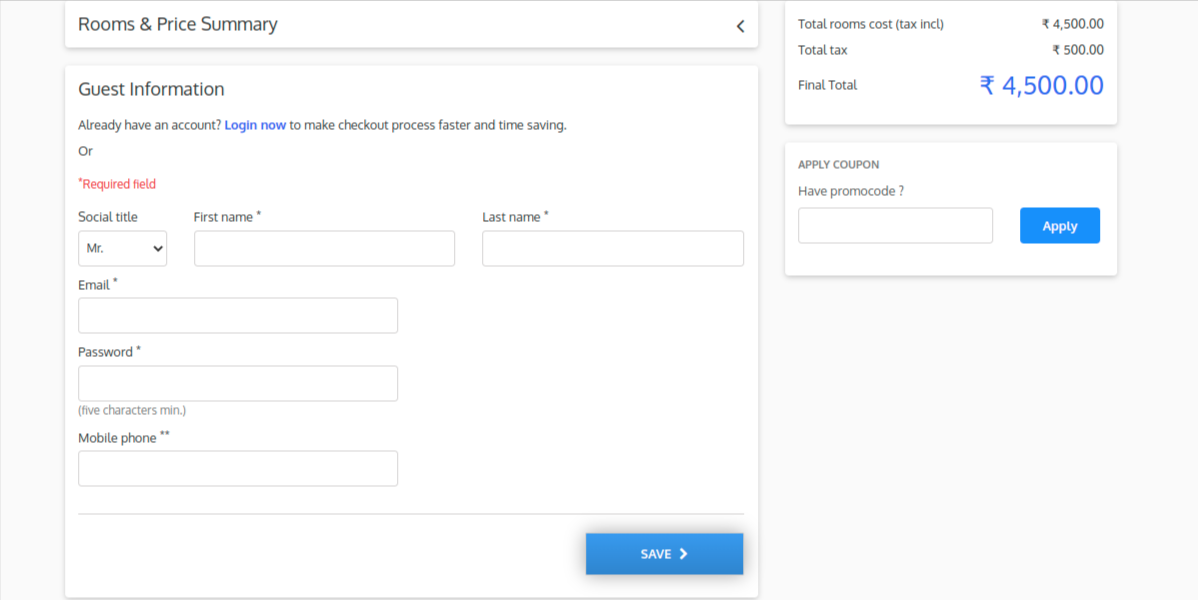
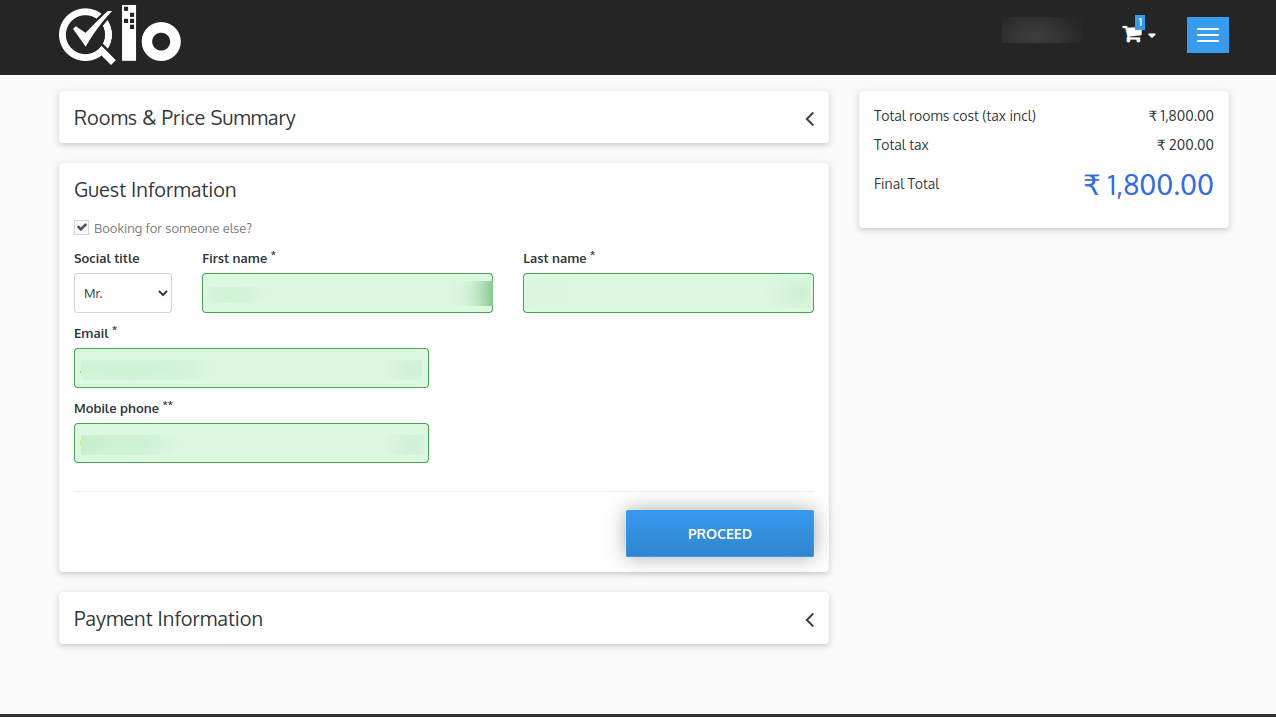
Here you will get the option of booking for someone else.
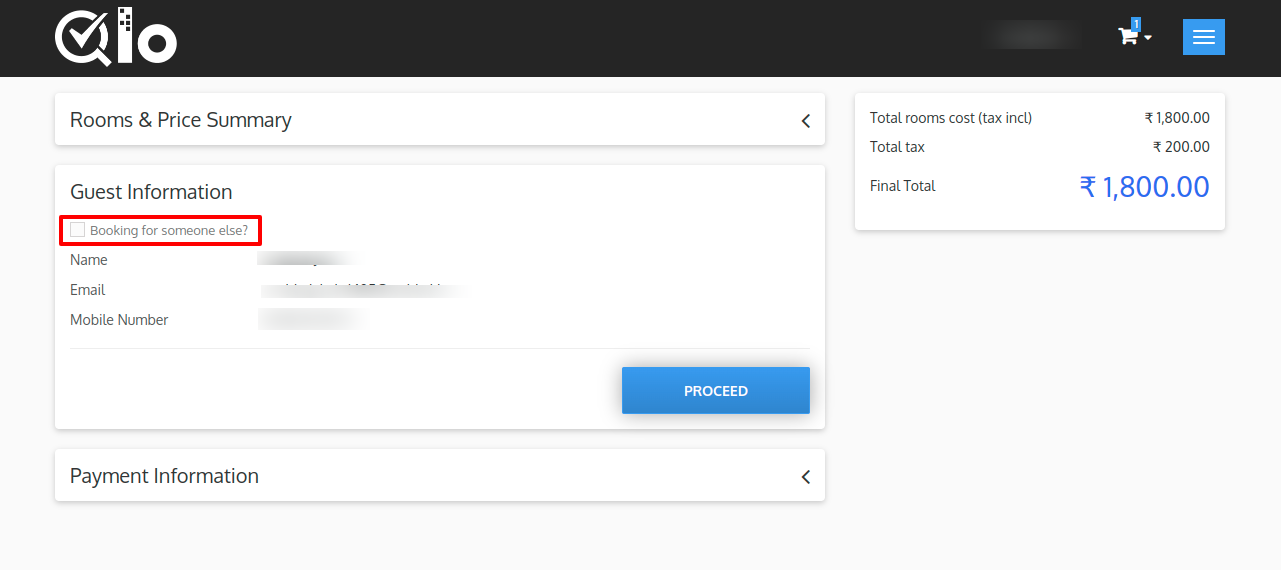
When you click on Booking for someone else then you will get the page to enter the details of the guest and click to proceed with payment.
You can make the booking by choosing the desired payment option.
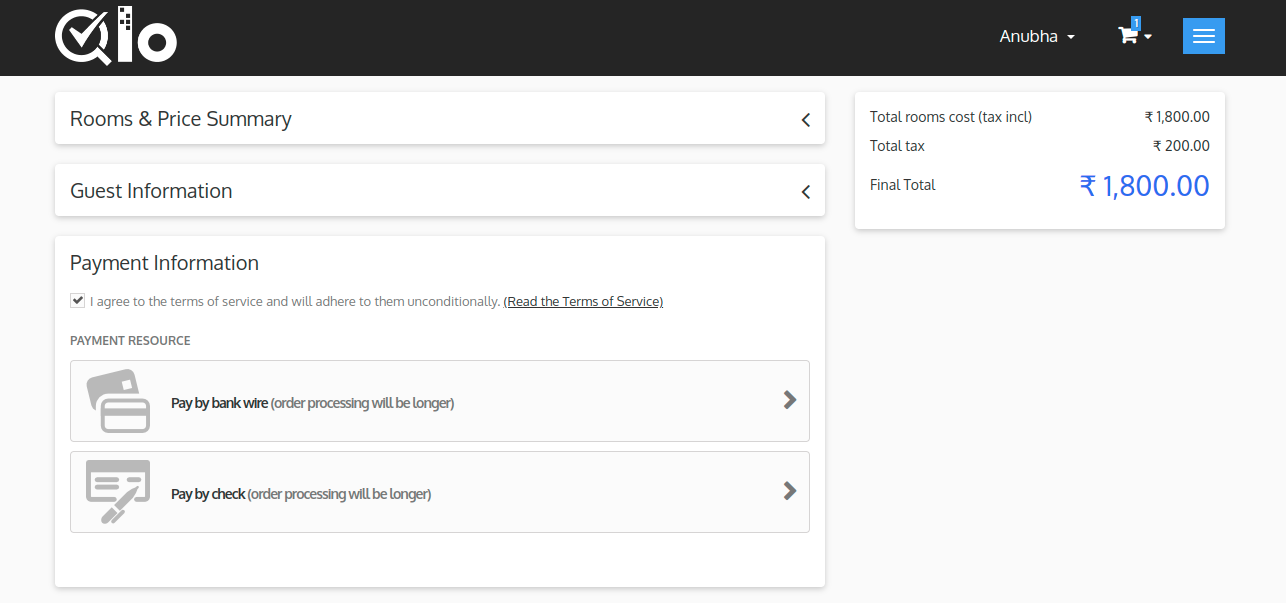
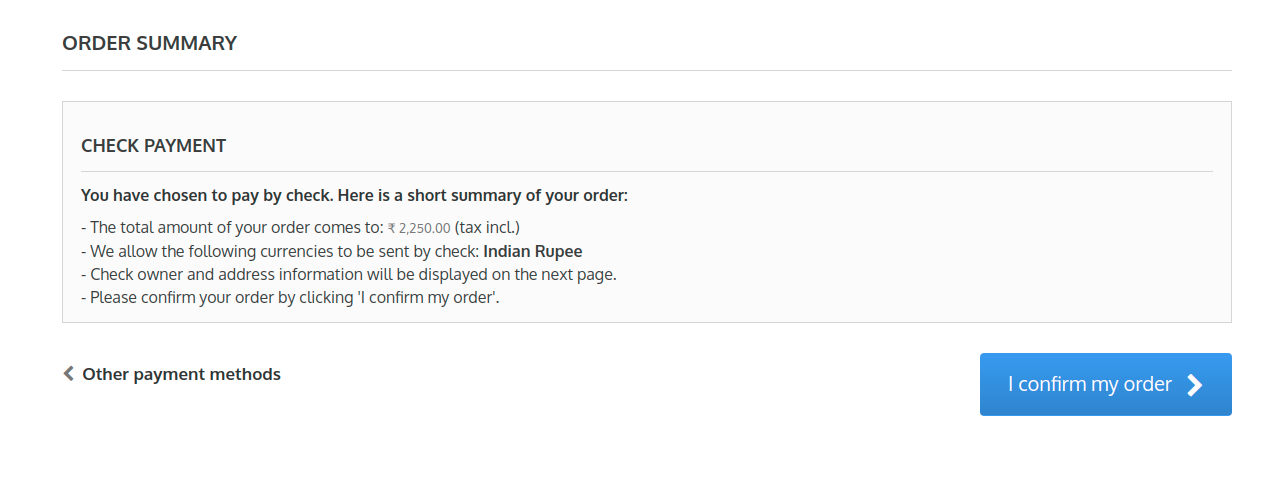
Here for now we have selected Pay by check as the payment method. Now the order summary page will appear. Then click on I confirm my order.
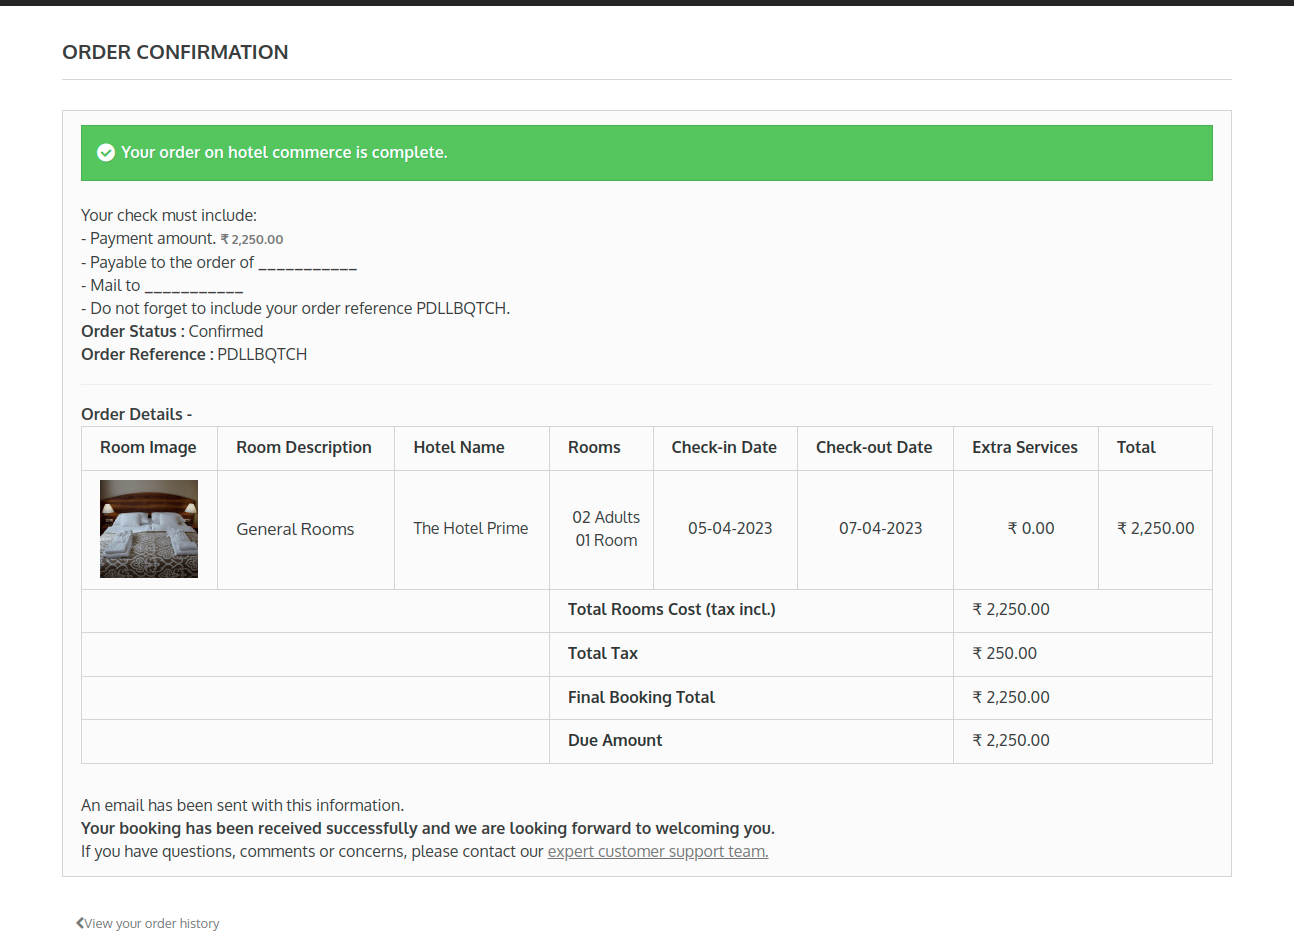
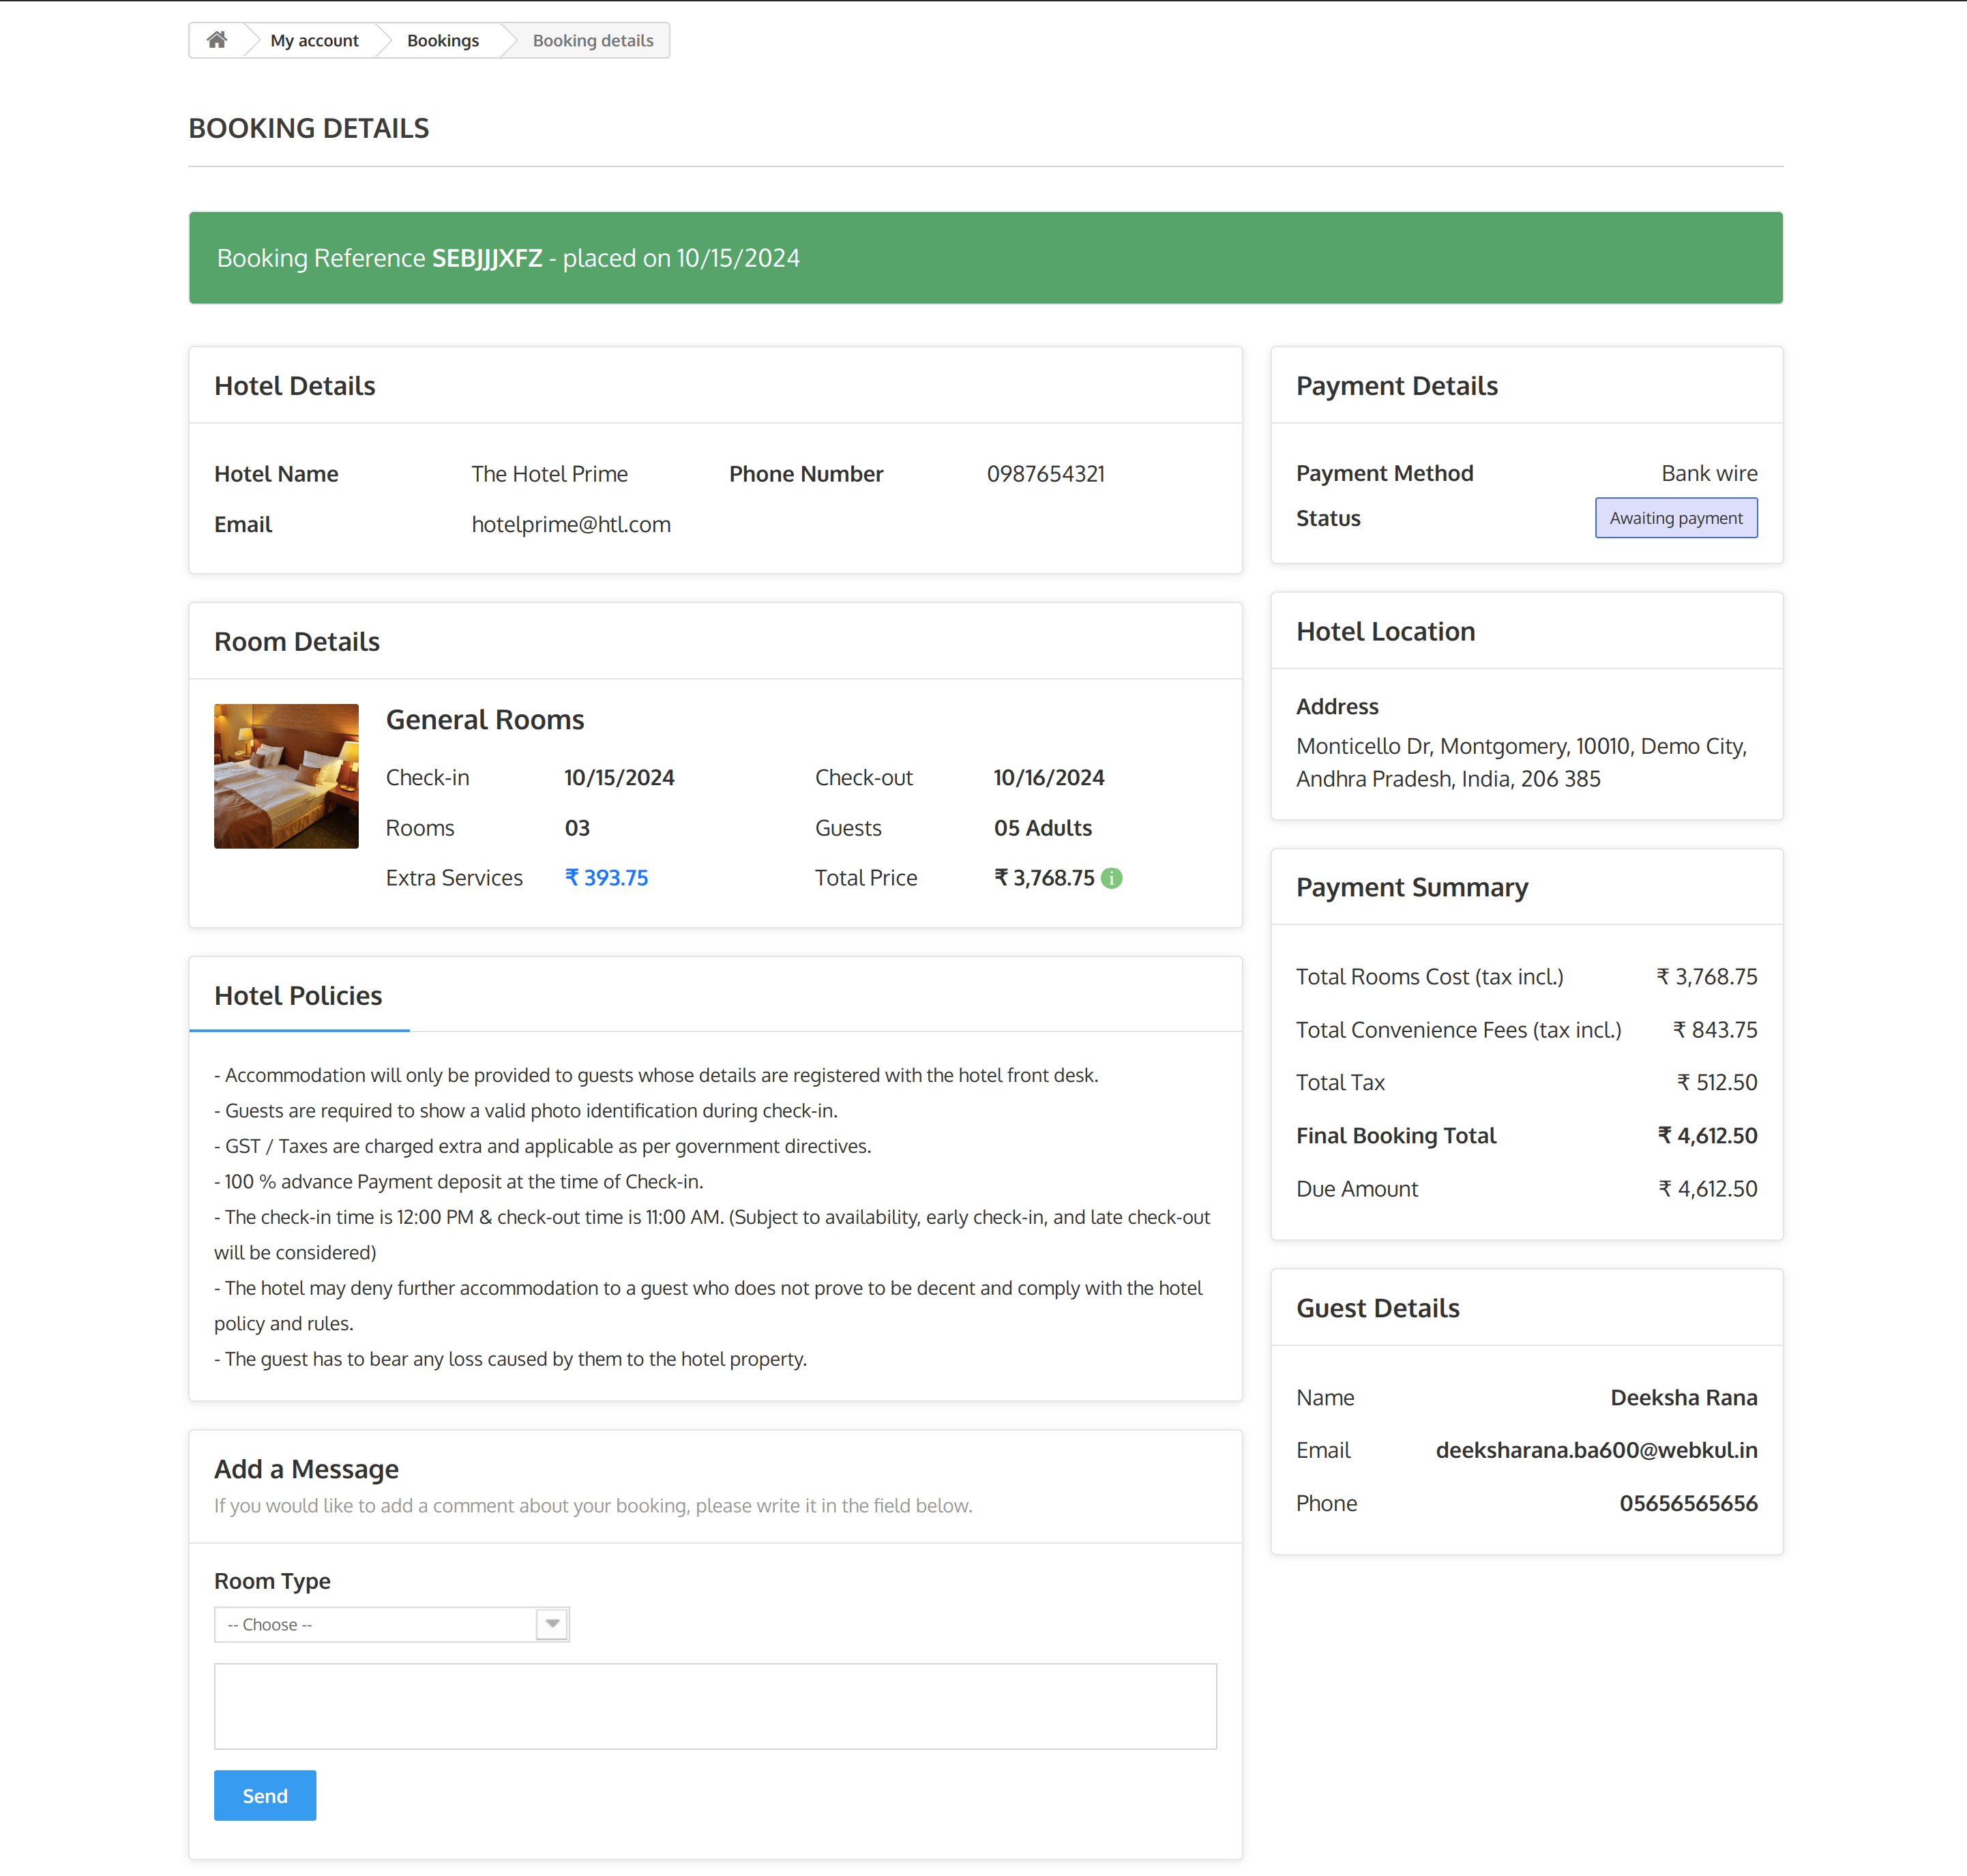
Now you will get the order confirmation with the booking details.
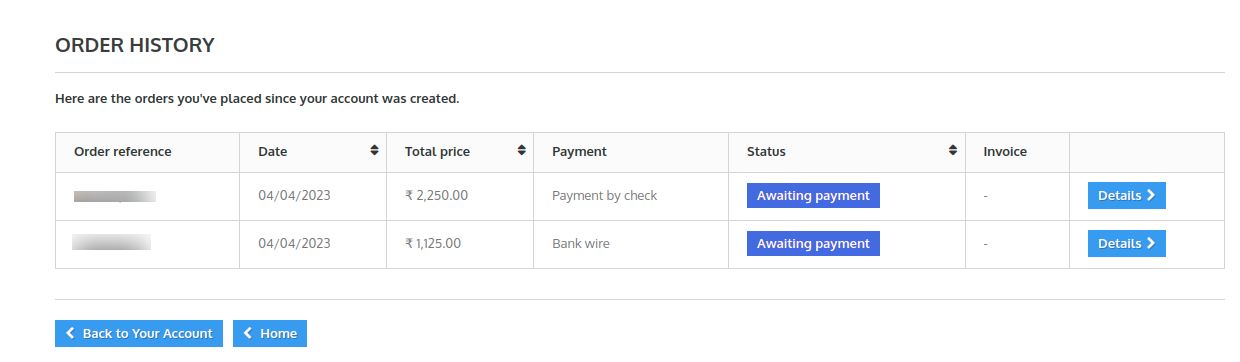
By clicking on view your order history, you can see your booking details on a separate booking details page.
Note:
- The user can add several rooms from different hotels in a single cart.
- A user can add several rooms of different dates in a single cart.
- The user can make a full or partial payment for the booking if set by the admin from the back end.
Finally, the user has successfully booked rooms. The user will get the confirmation mail.
Order Creation Process in QloApps From the Back Office
To create an order from the backend Go to Hotel Reservation System> Book Now section.
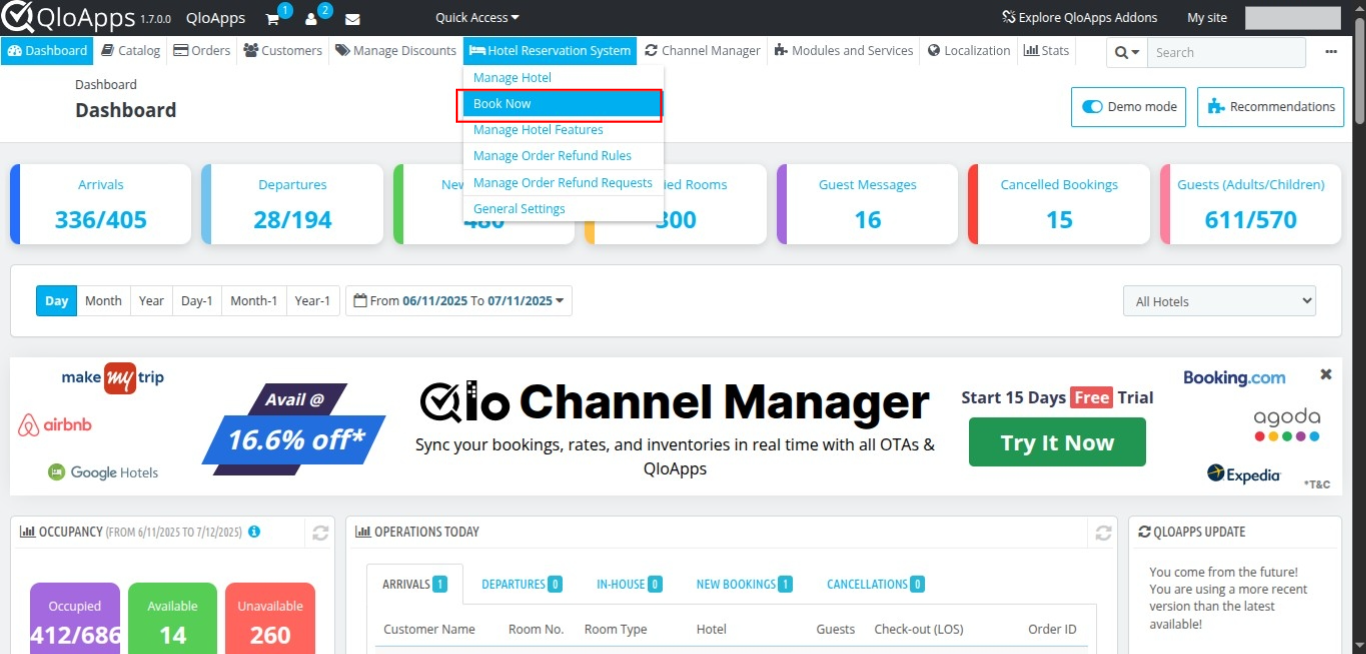
When you click on add Book Now Button, the below window will appear.
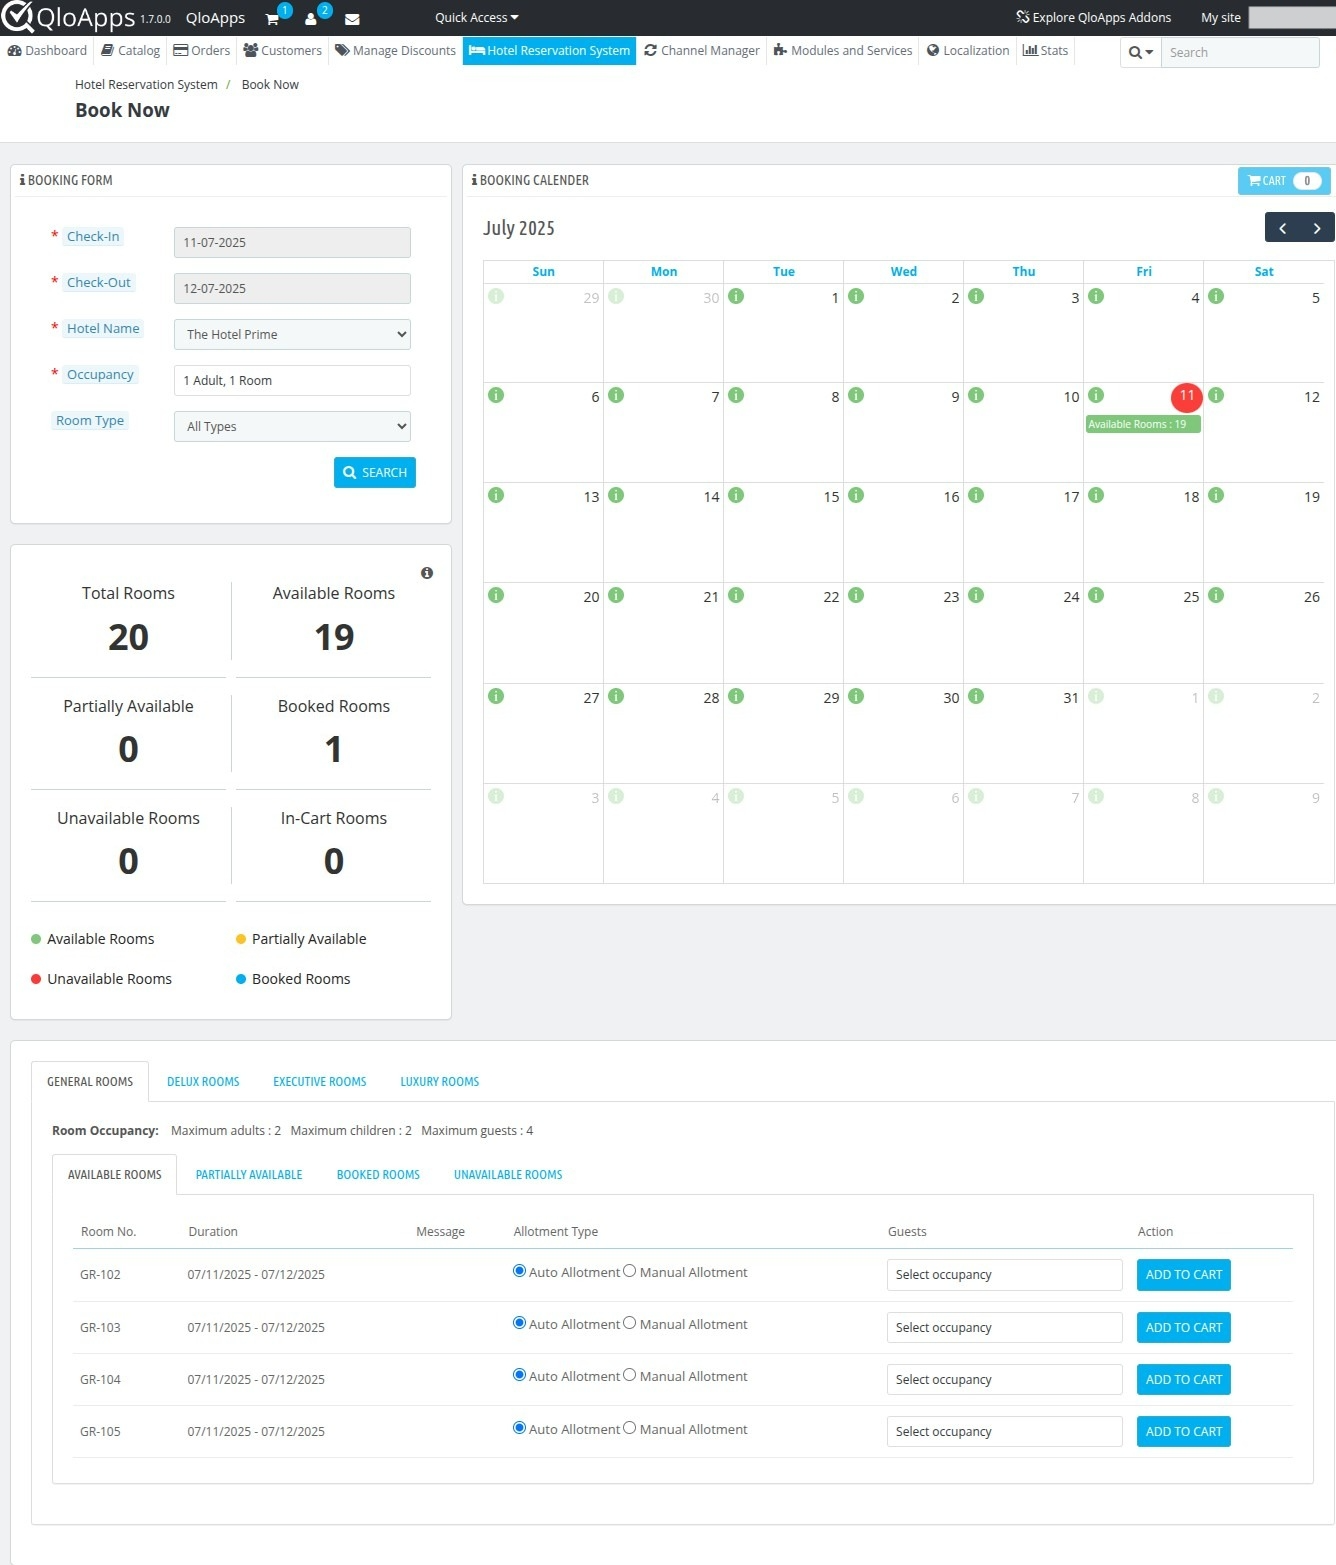
Click on select occupancy to add the number of rooms, adults, and children to the cart.
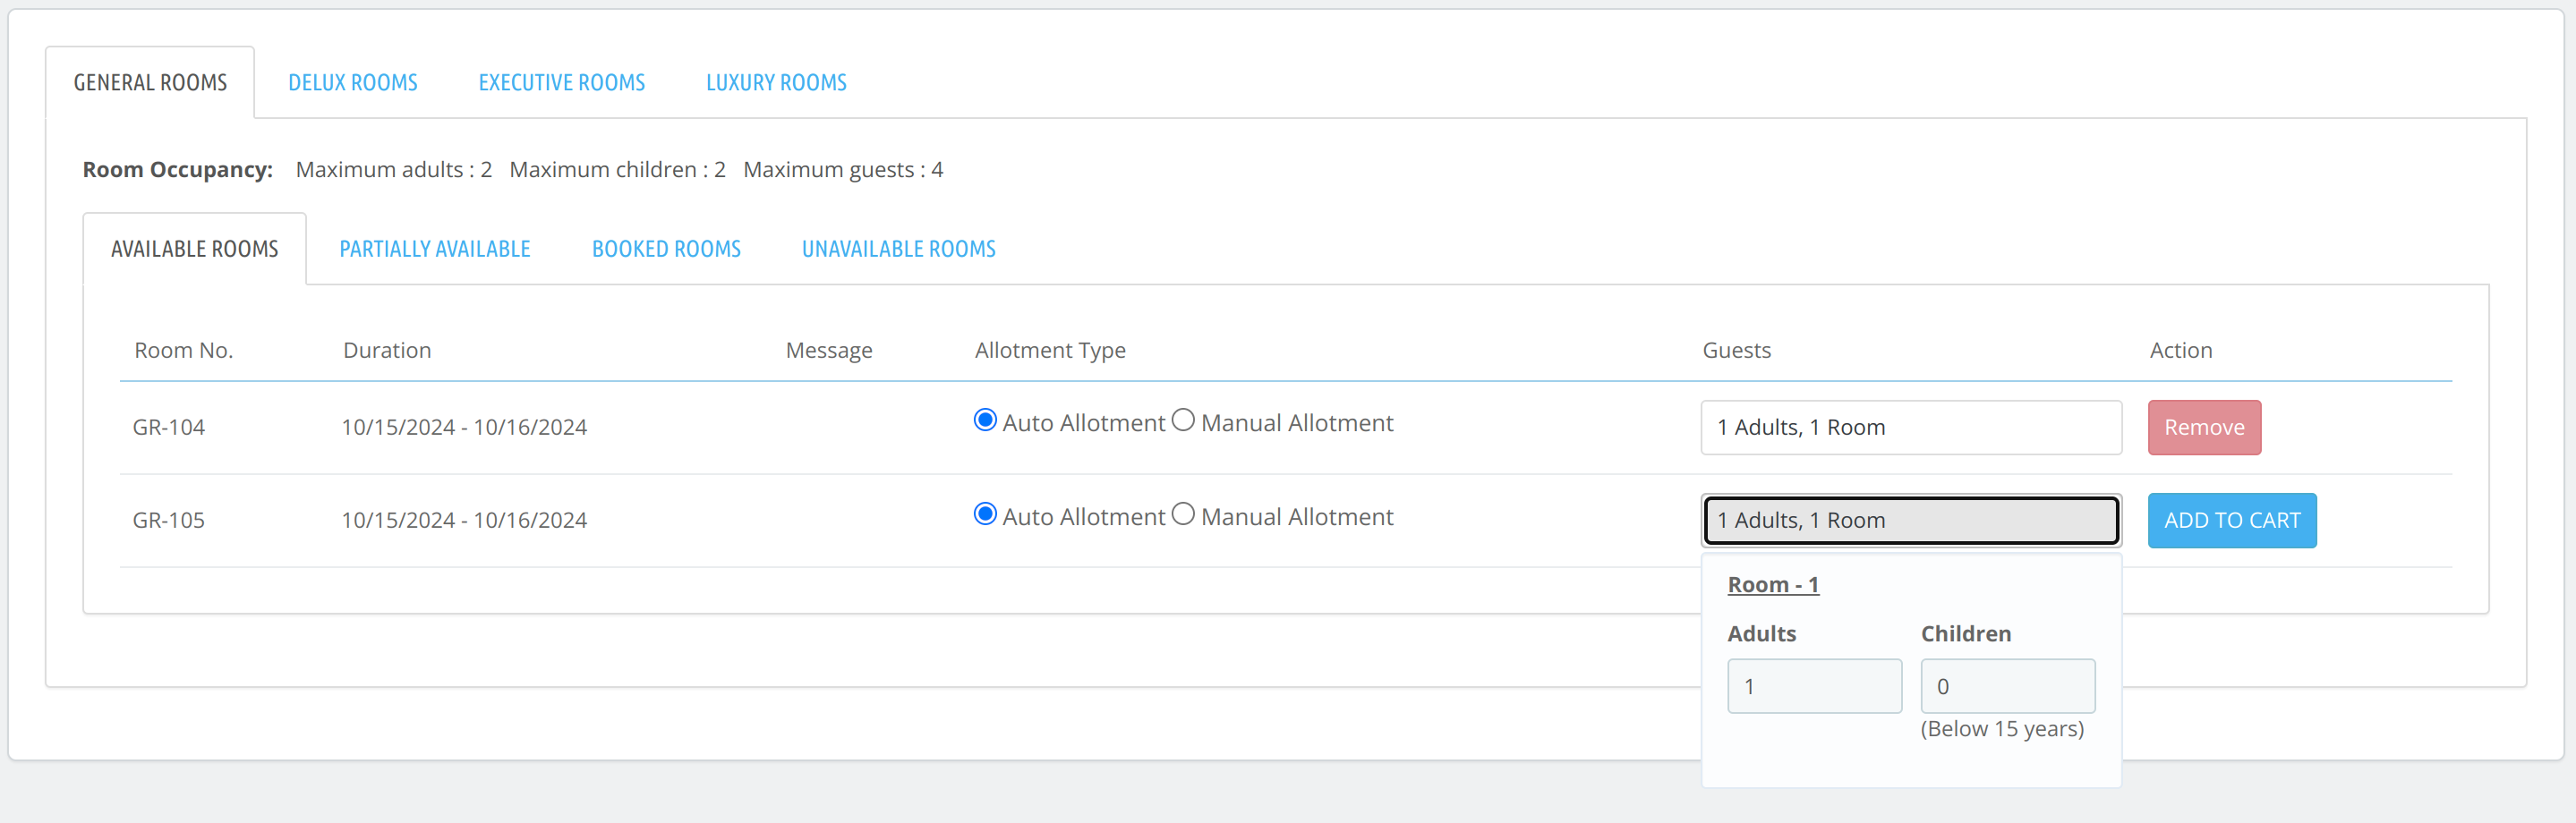
Then click on ADD TO CART to add a room to the cart. Now go to the cart on the top of the order page as shown below.
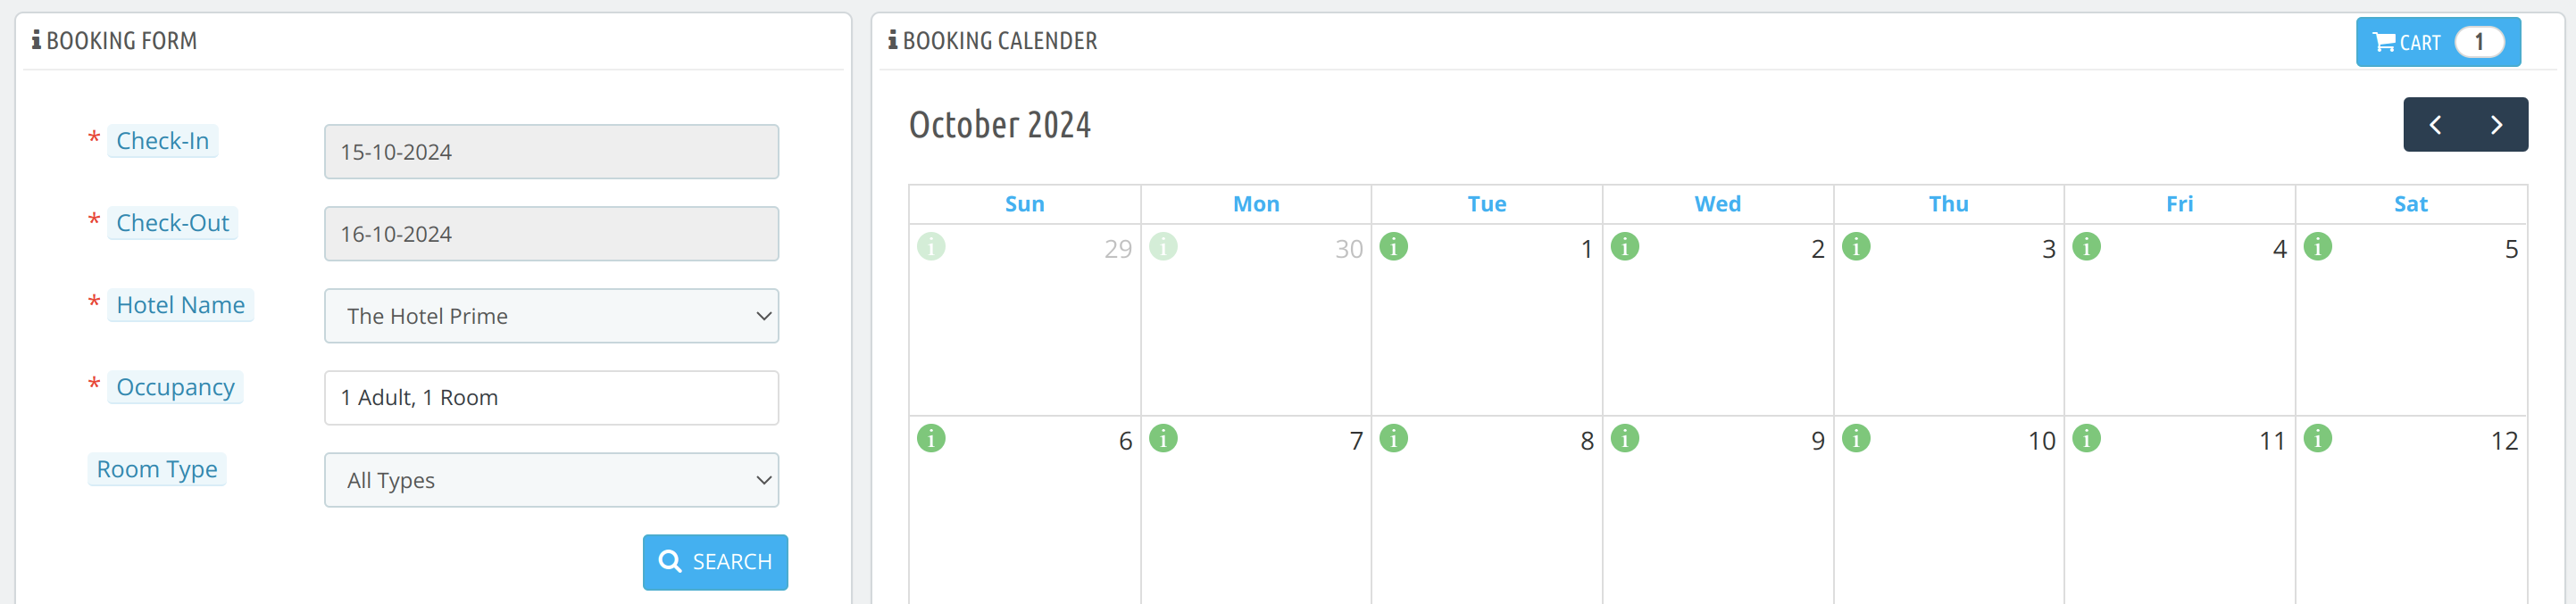
Click on Book Now to proceed with booking.
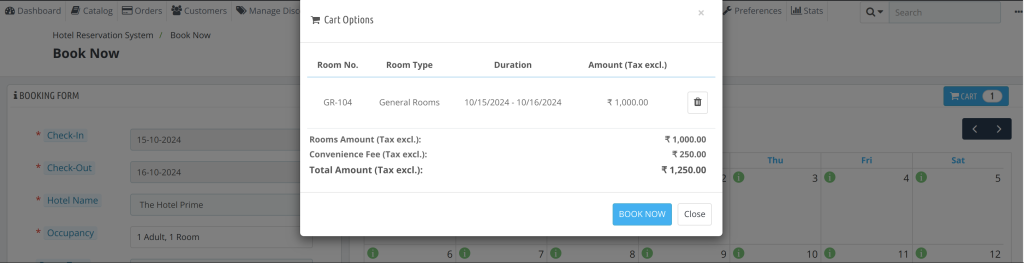
Cart Detail Page
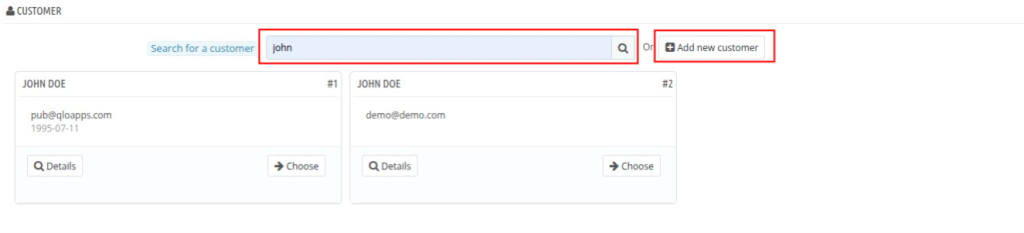
Now the Cart Details page will appear. Here, you can search for an existing customer or, if it’s a new customer, click on “Add a New Customer” to create their profile.
Room Services
Here, you can add services to the order from the existing list.
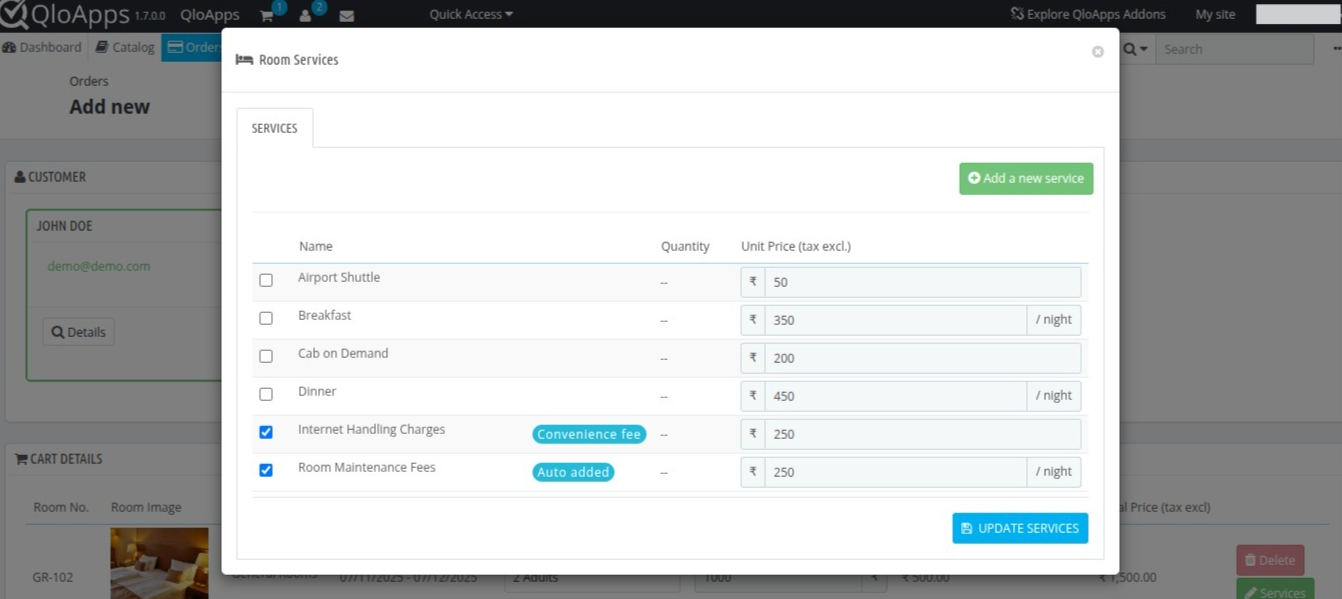
Or if needed, click on “Add New Service” to create and include a new service on the spot.
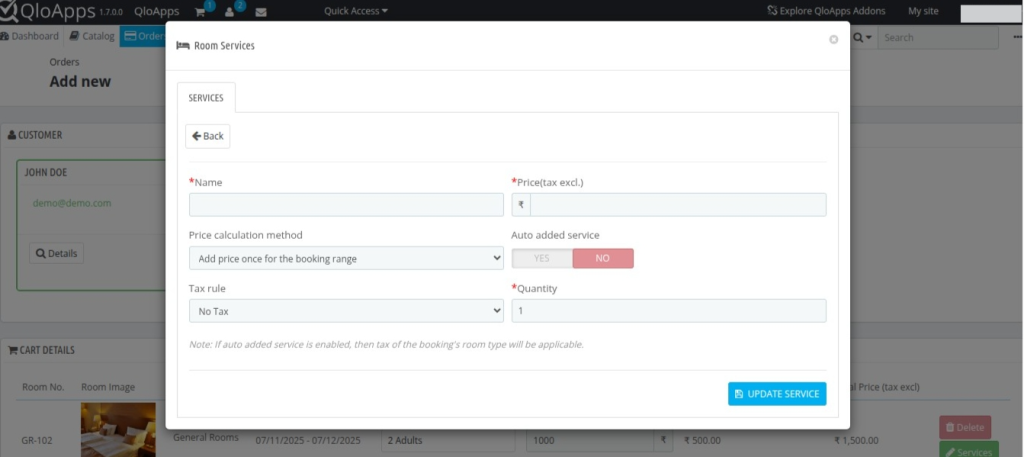
- Name: Enter the name of the service (e.g., Airport Pickup, Extra Bed, Breakfast).
- Price (tax excl.) ₹: Enter the base price of the service excluding taxes.
- Price Calculation Method : Choose how the price is applied to the booking:
- Add price once for the booking range – the service is charged once per booking, regardless of the stay duration.
- Add price for each day of booking – the service is charged daily, based on the number of nights.
- Auto Added Service (Yes / No):
- Select Yes if the service should be automatically added to every booking.
- Select No to add the service manually when needed.
- Tax Rule: Choose the applicable tax rule for this service (e.g., No Tax, 5% GST, 18% VAT).
- Quantity: Define the default quantity of the service to be added.
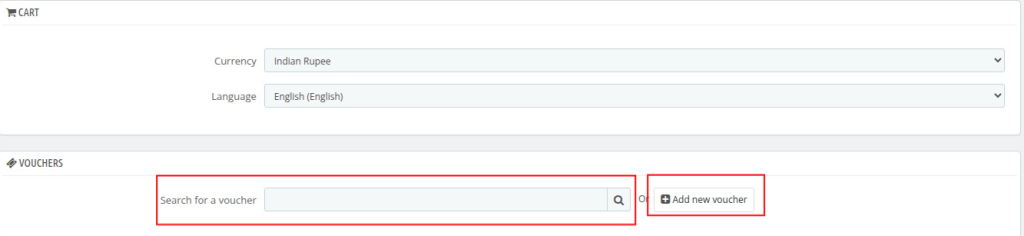
Now you can check or change the currency and language for the customer.
If you want to offer a discount, you can search for an existing voucher or create a new one directly during the booking process.
Next, you can review the Order Summary, which displays all booking details including selected rooms, services, prices, taxes, and the final amount to be paid.
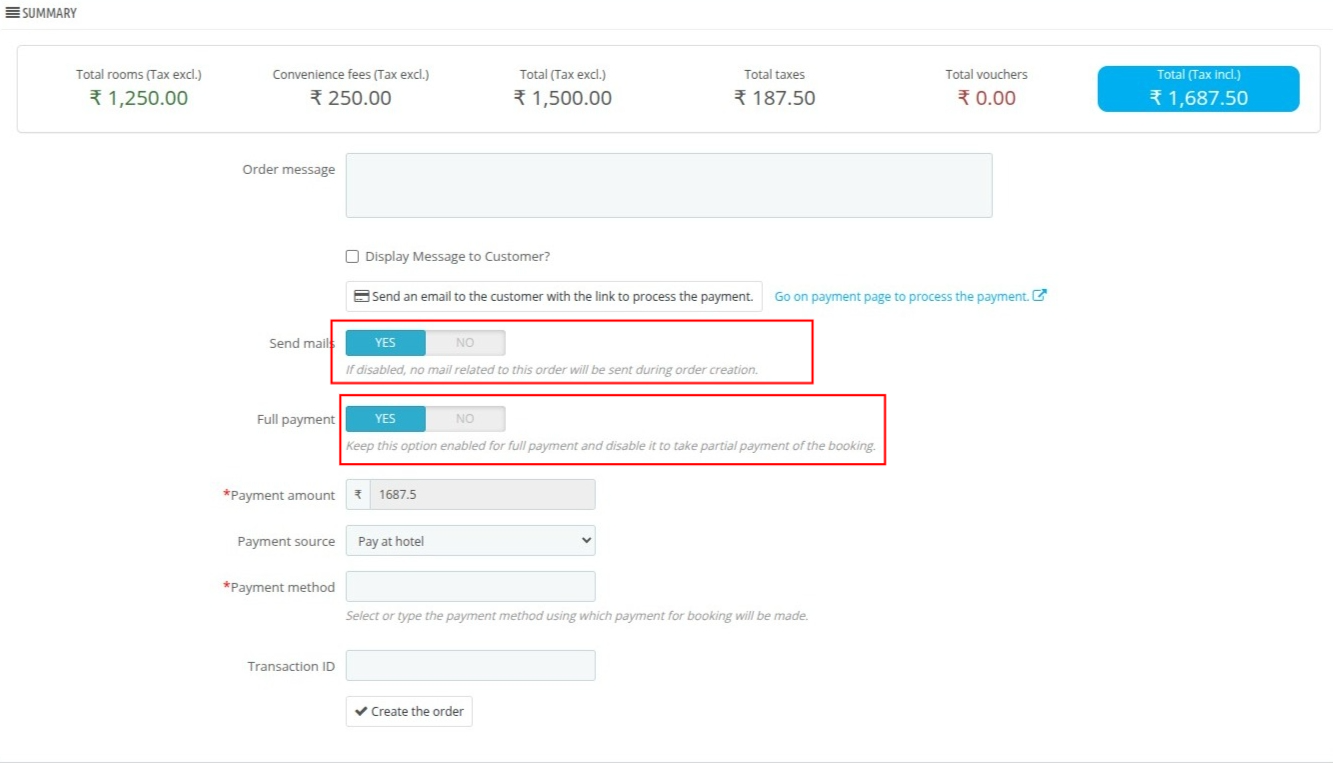
Additionally Send Mail options allow you to skip sending order confirmation emails when creating booking.
You can select whether the order is completely or partially paid. Select the source of the payment, whether it is paid online or at the hotel.
Lastly, you have to add a new payment method or select from existing methods and complete the payment by adding the transaction ID.
The admin can also click on the ” Go on Payment Page to Process the Payment” link to complete the payment on behalf of the guest from the website.
Edit Or View Order in QloApps
To edit or view an existing order, go to the Orders section in the admin panel and search for the specific order you want to modify.
Once opened, the order details page will display multiple panels.
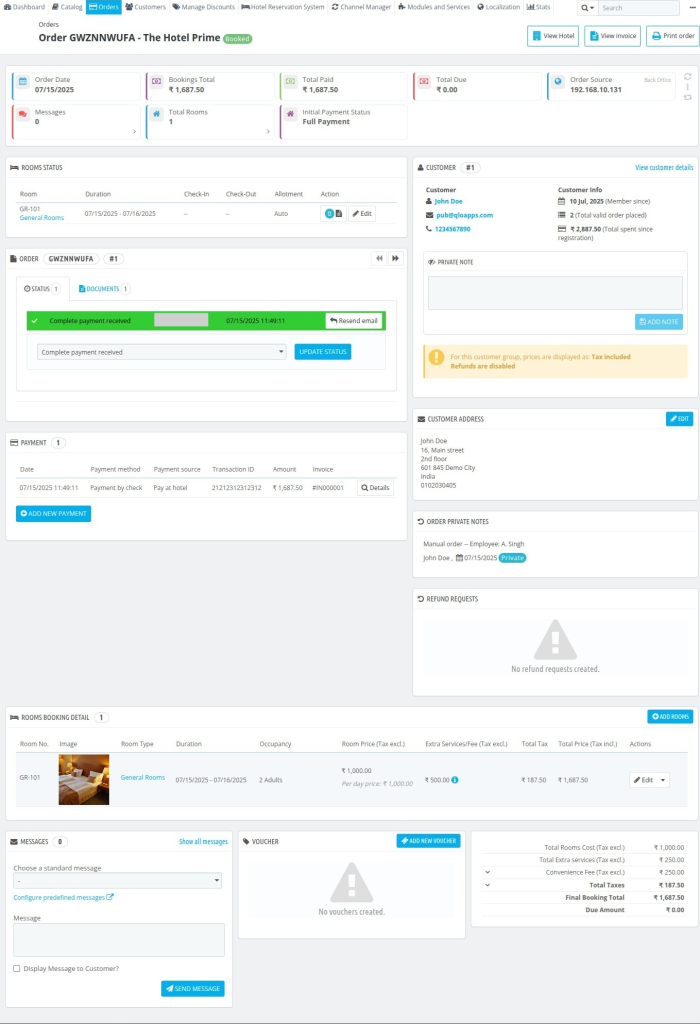
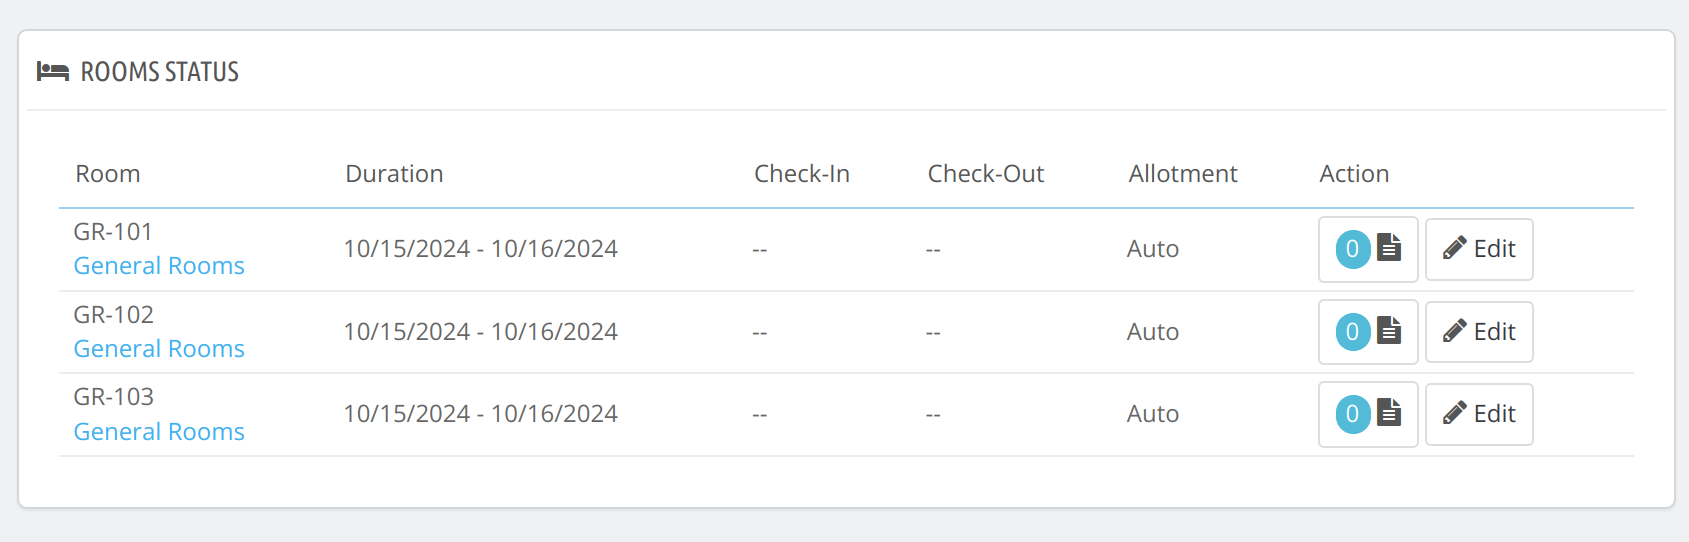
The Room status of the order can also be updated in QloApps.
The three options are there to update the room status, Allotted, check-in, and check out.
Here also the user can upload the documentation needed with the order.
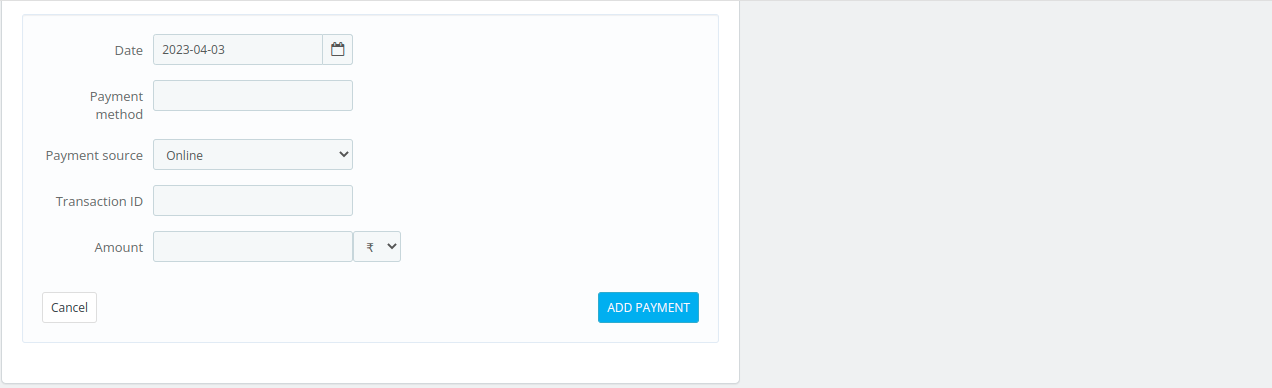
In the payment method, you can add the payment method for creating the booking as shown below:
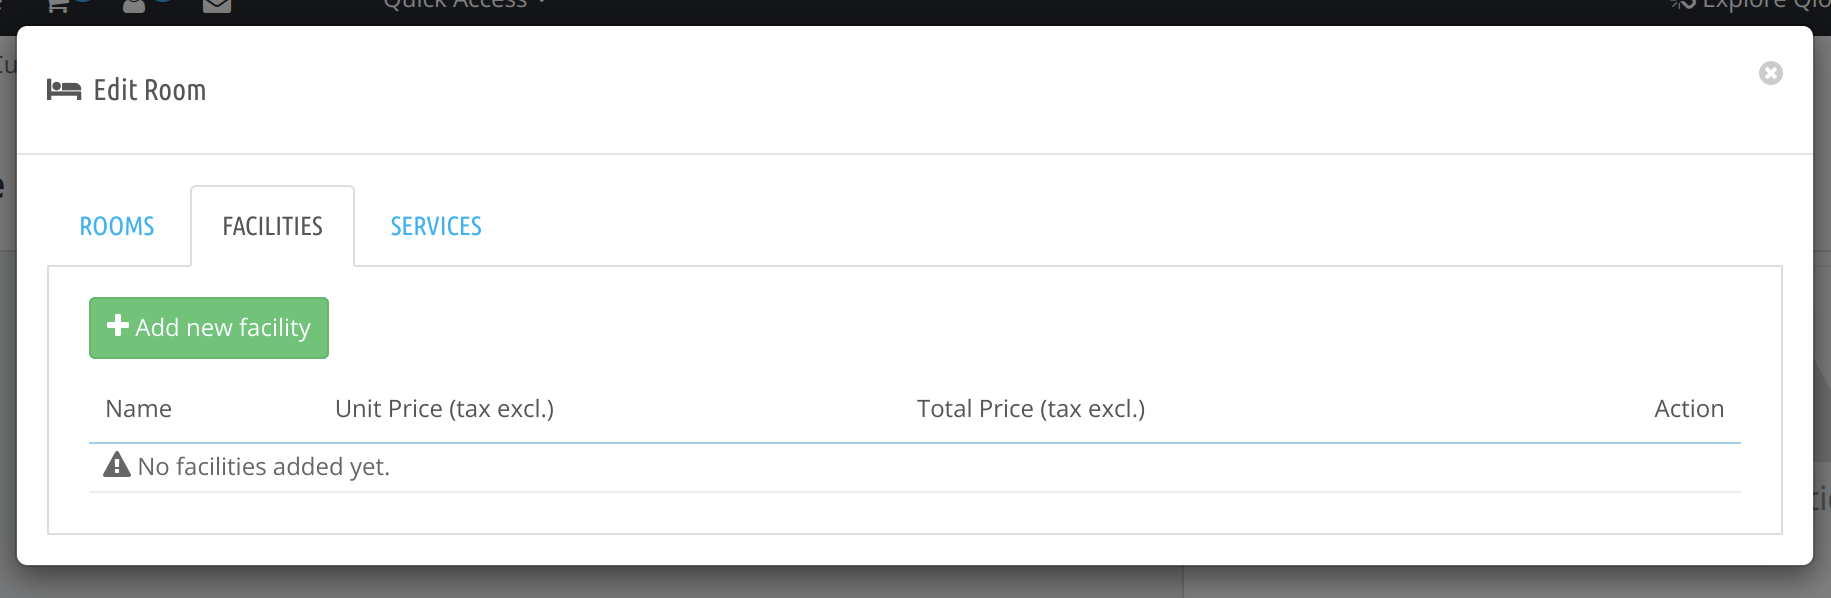
In the order detail panel, you can change the check-in and check-out time of the room, occupancy, facilities, and service and price by clicking on the edit button, and then updating the details.

By clicking on the facilities and services option in the pop-up, you can edit the facilities of the order.
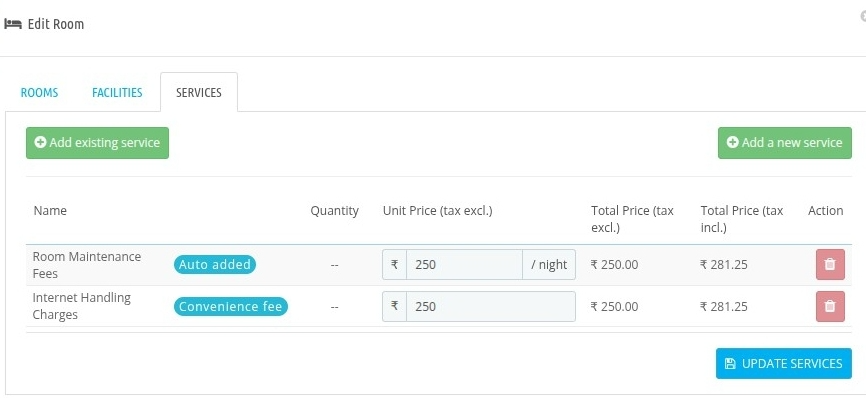
You can also edit the price of additional facilities and service products directly while editing the order.
Additionally you can add New Services.
Here you can see the option of Add New Rooms in the order detail panel.
Click on the add room button and the details of Room Type, check In check out occupancy in the pop-up and then click on add roon button.

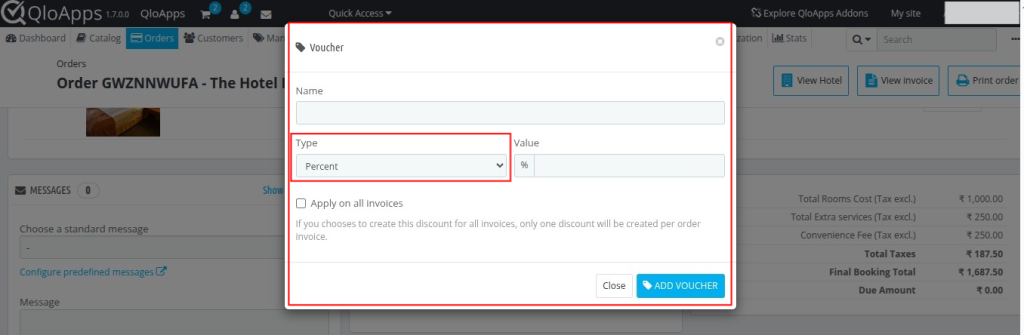
In the Voucher section, the admin can create vouchers to offer discounts on orders.
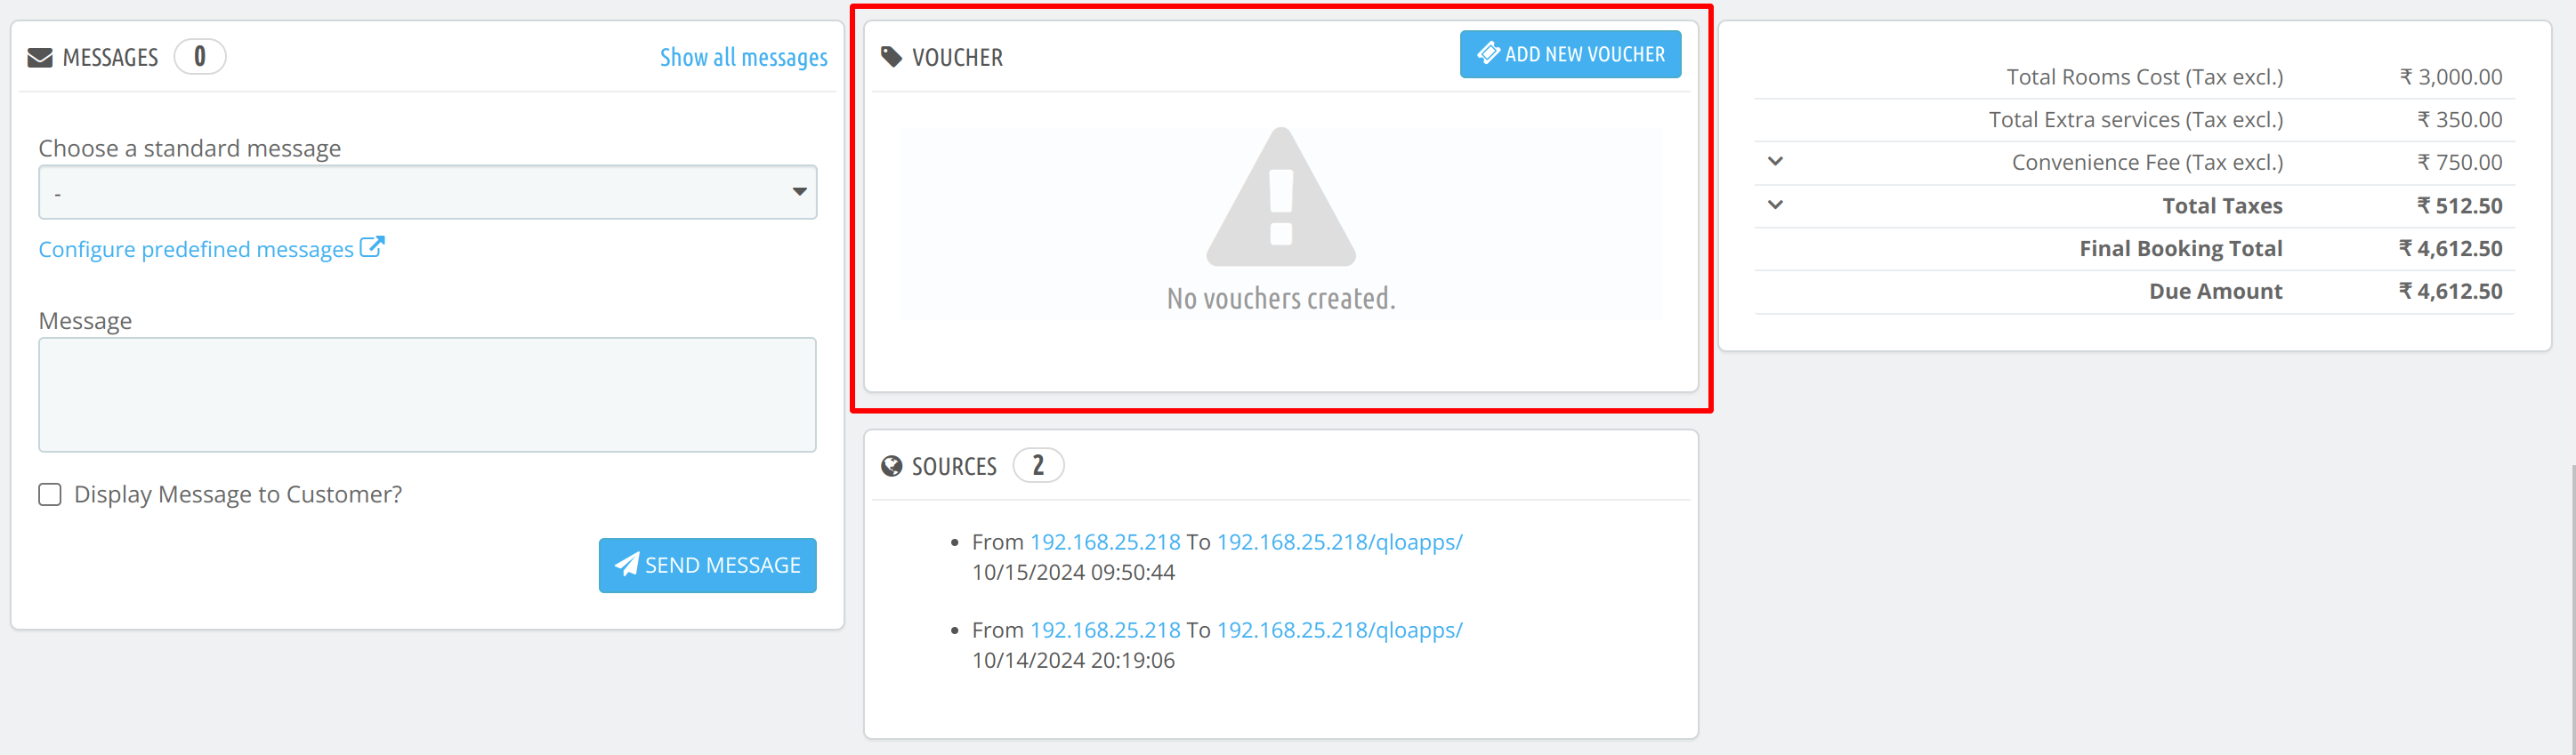
To add a new voucher, click on the add new voucher button and fill in all the details.
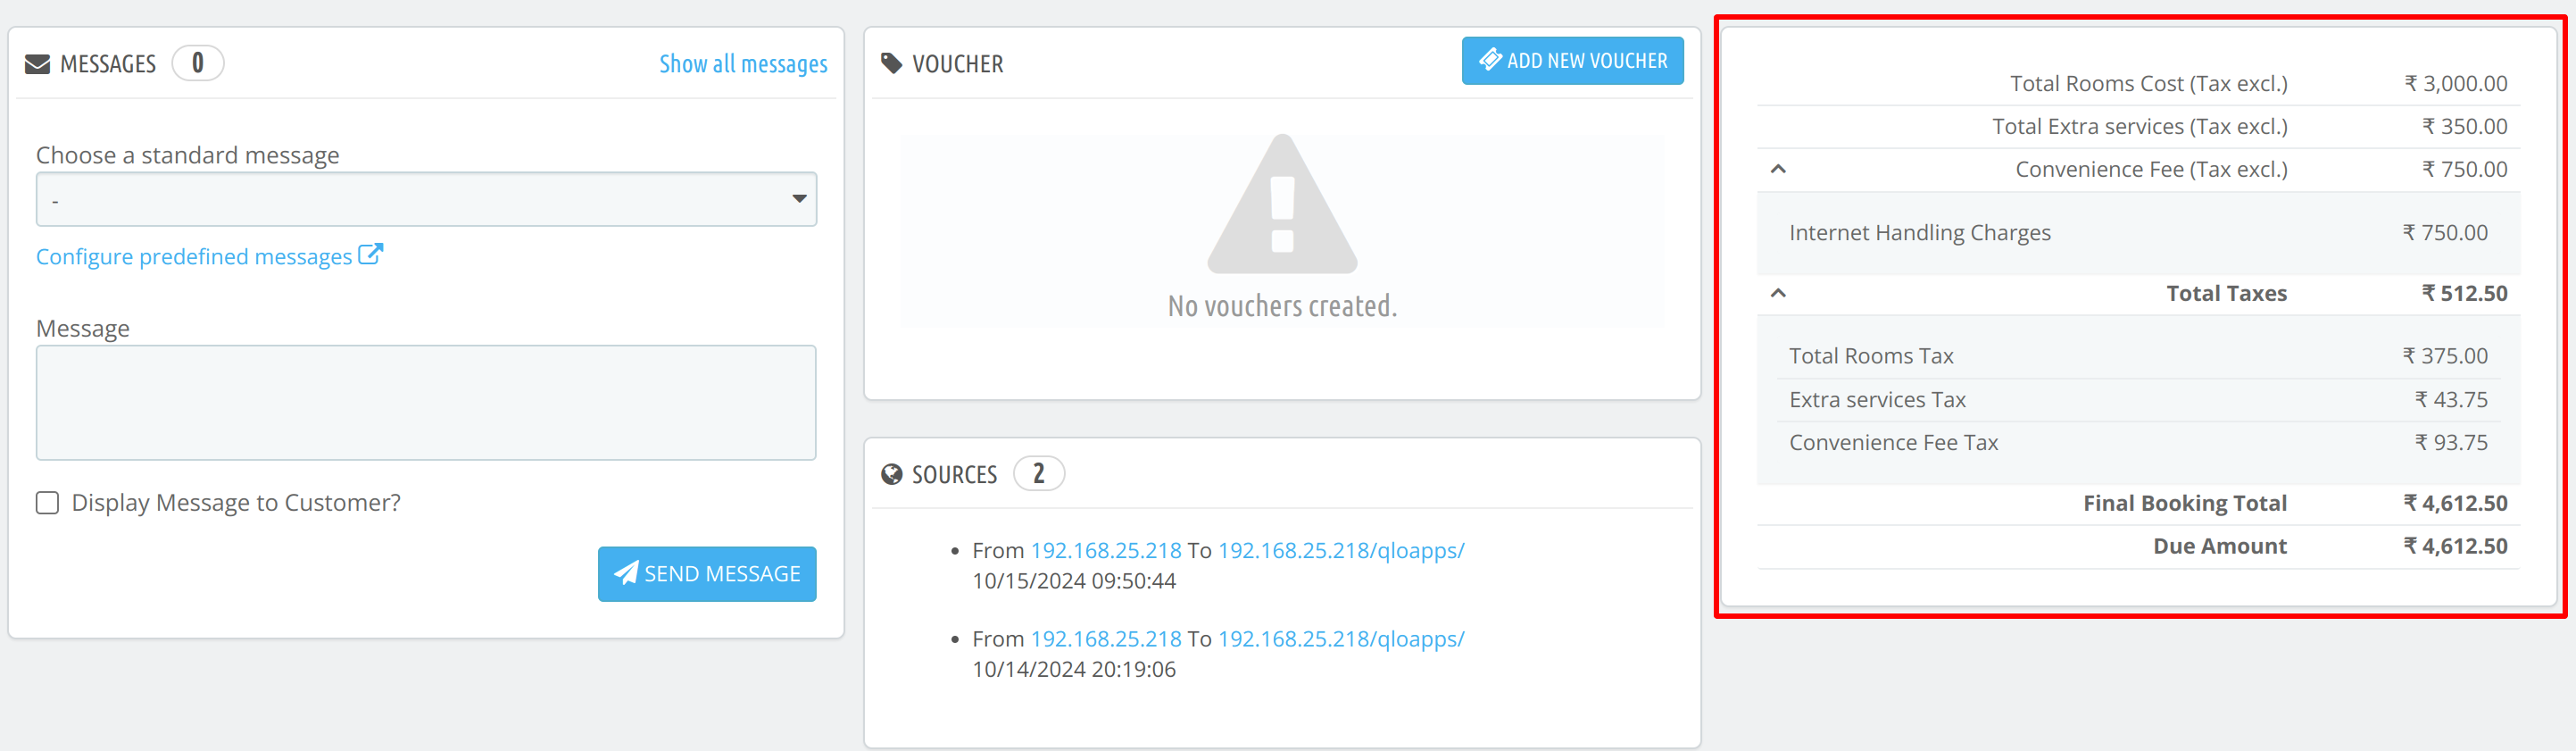
The order price summary will show a complete breakdown of all charges and taxes.
Guest Check-Out Process in QloApps
Enable Guest Check-Out
If the admin has enabled the guest check-out then the User can book the room without registration.
To enable the guest check-out, go to Preferences> Orders
Guest Check-Out at Front-end
Once the user proceeds with the booking, then on the checkout page he will be asked whether he wants to log in or make a guest checkout.
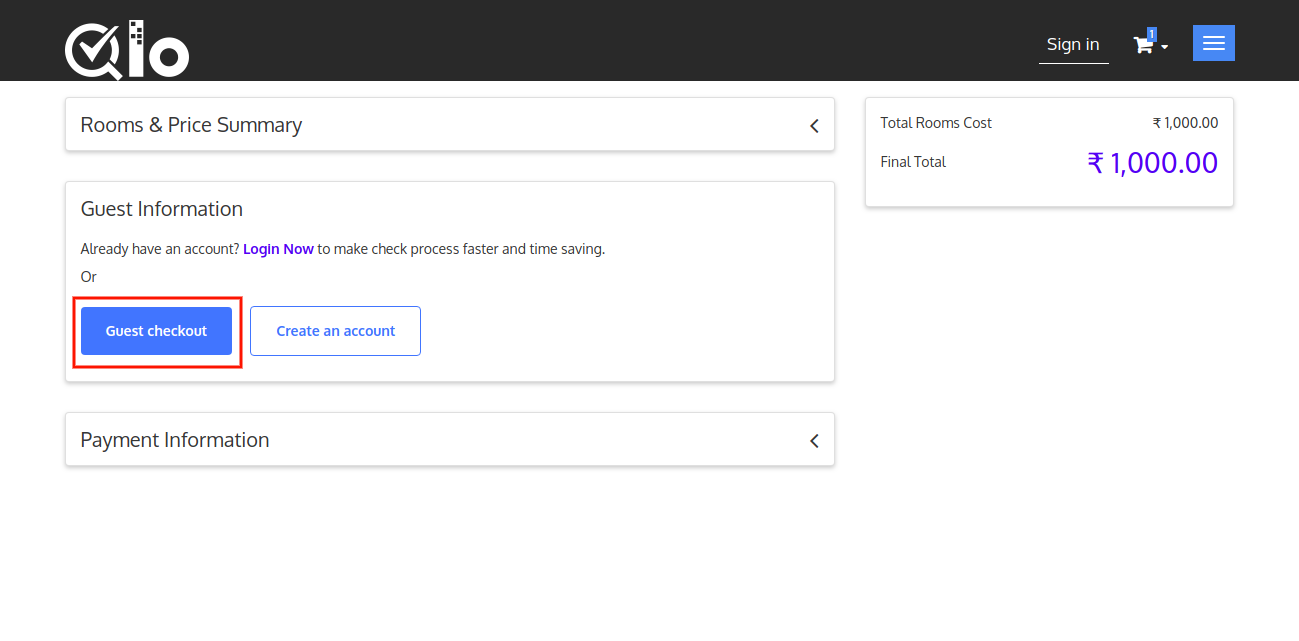
Once the user clicks on Guest Check-Out he will be taken to the Guest Checkout Page.
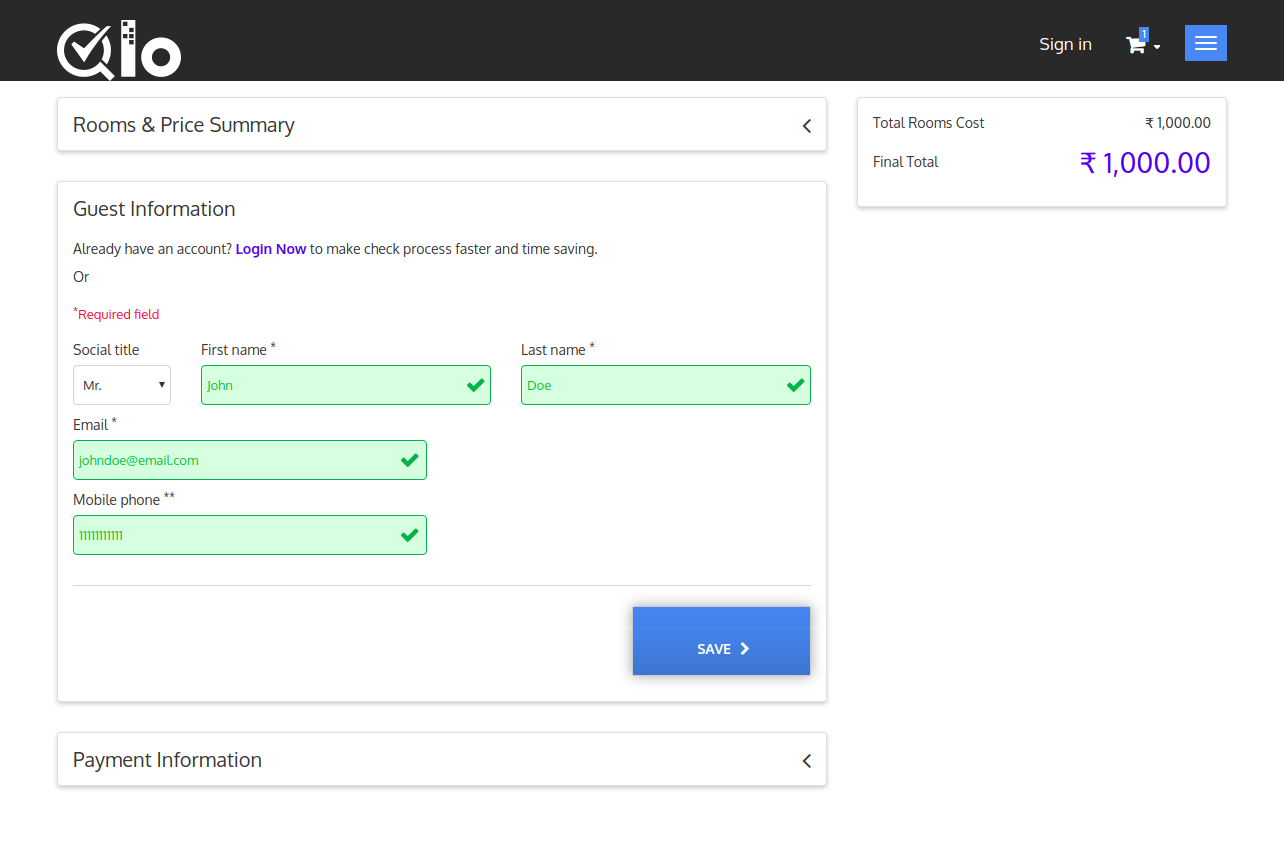
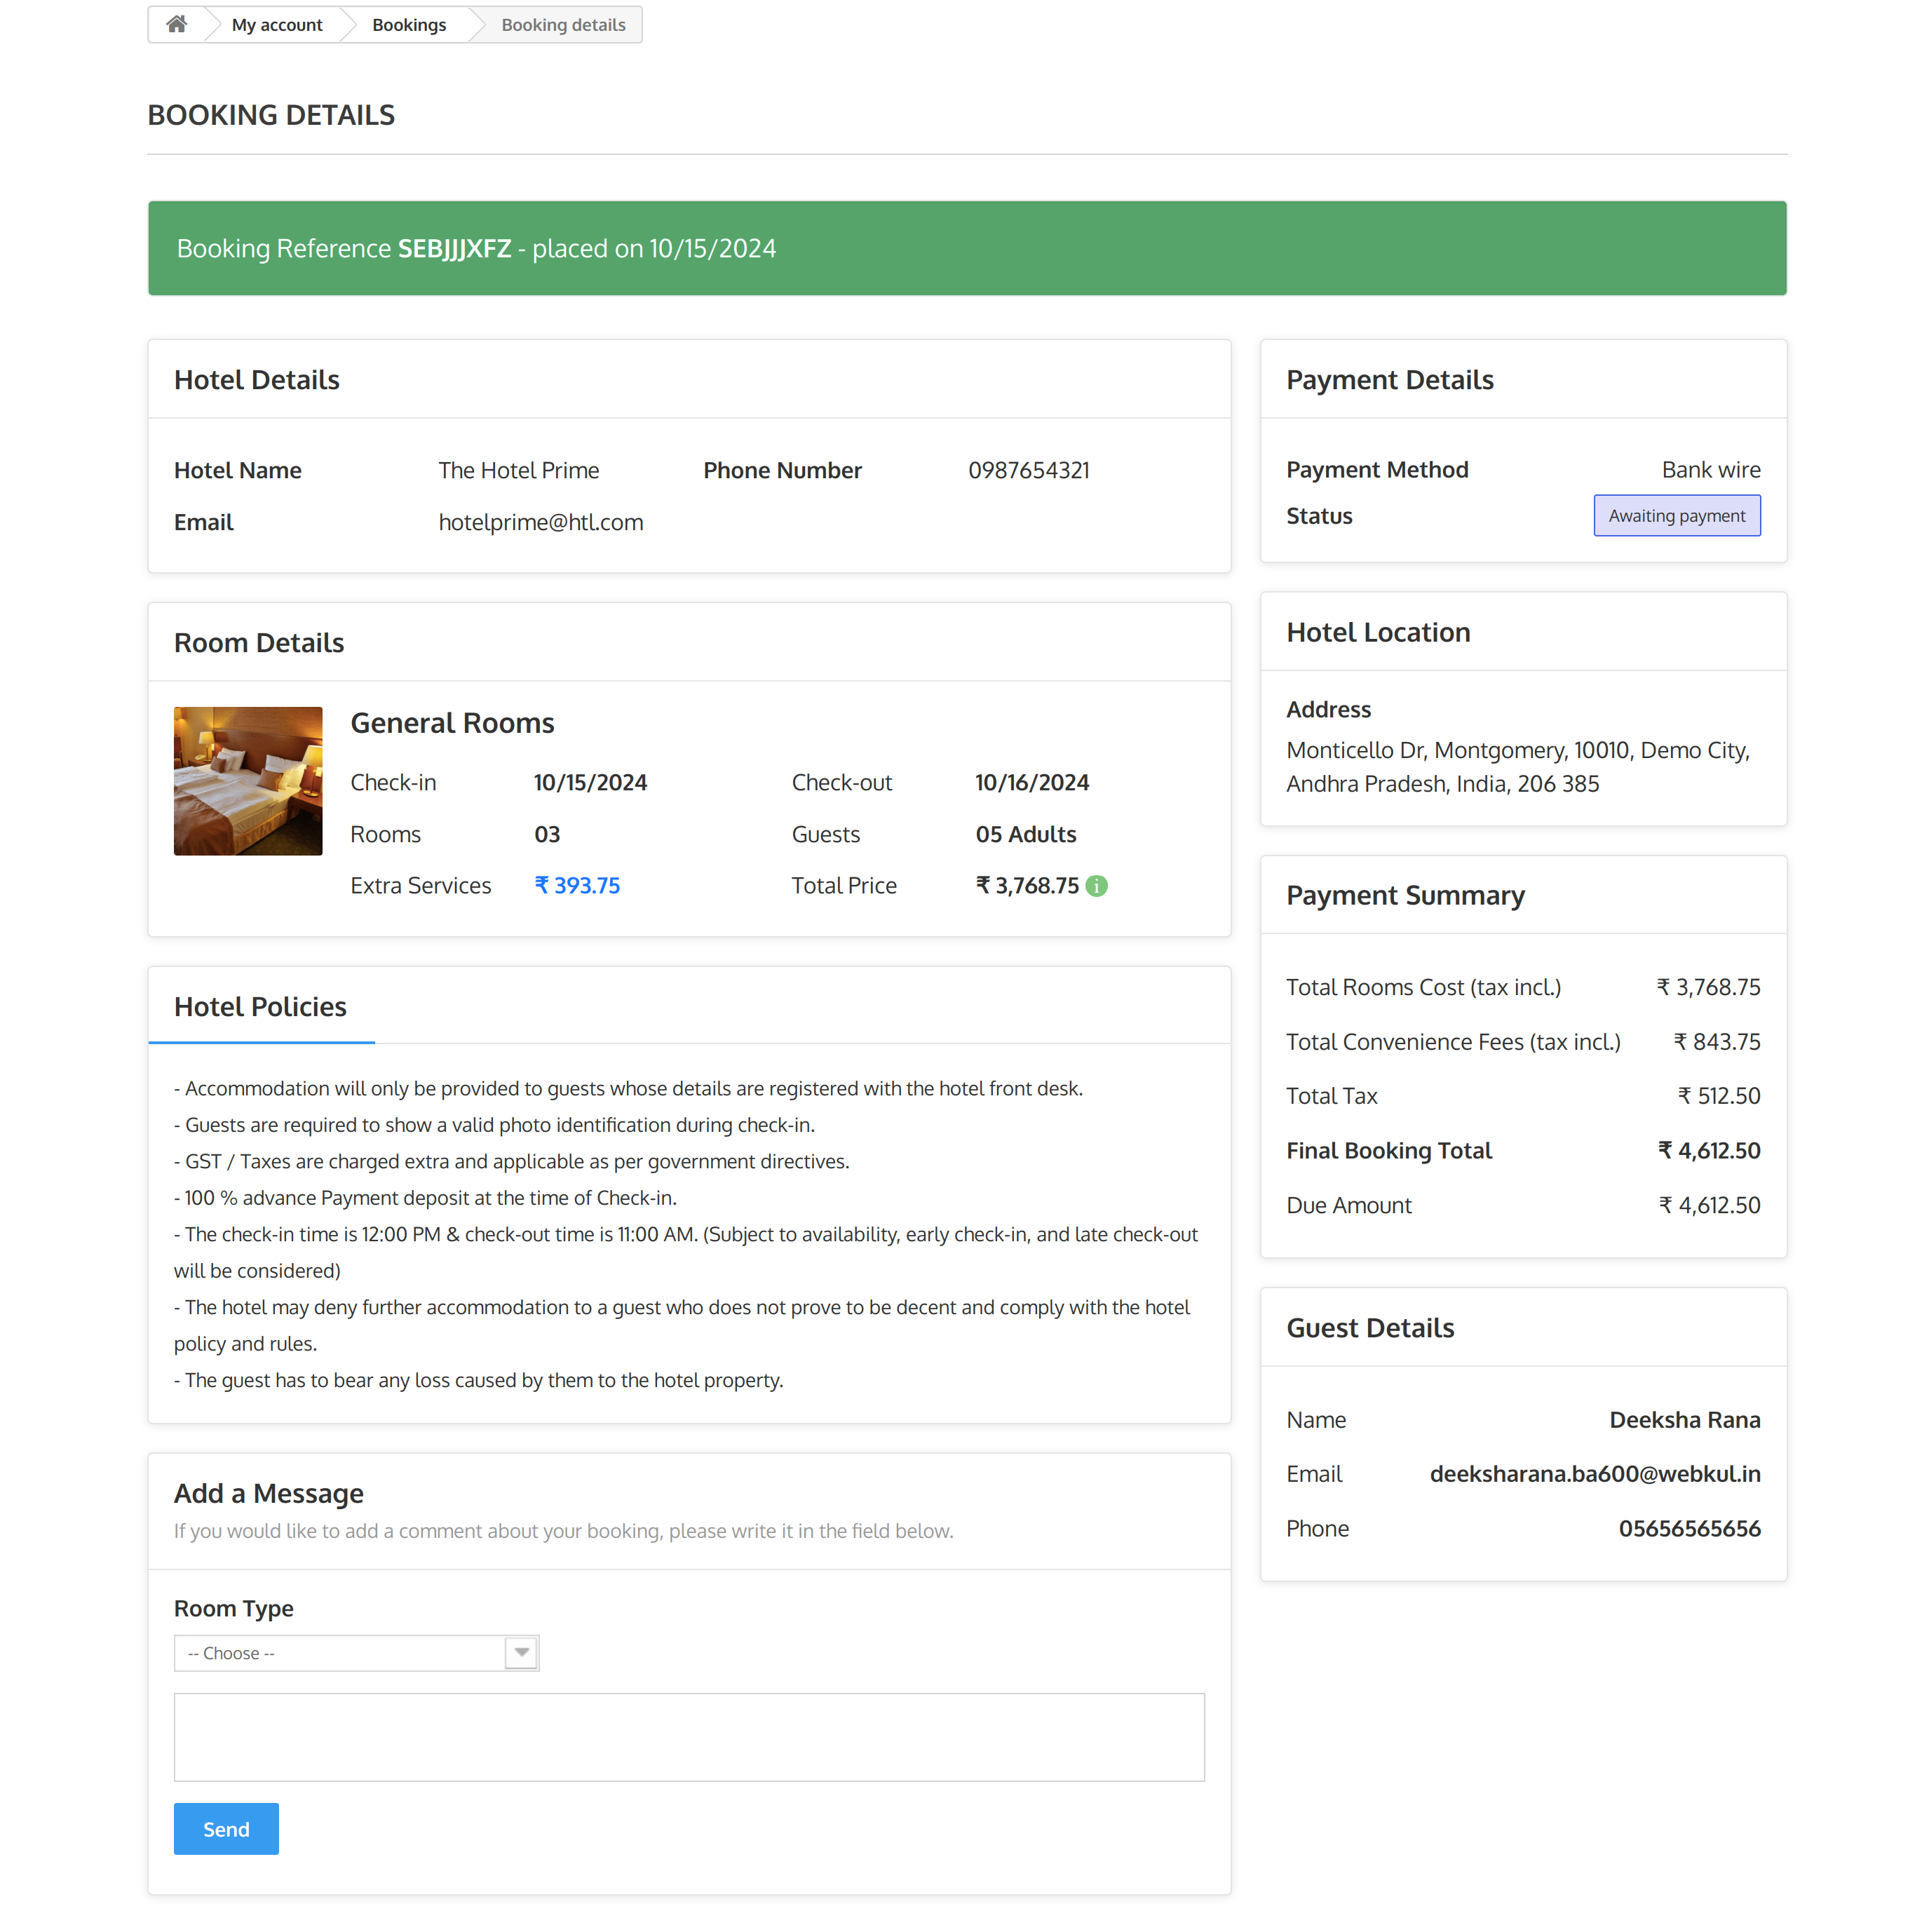
After Saving these details and making the Payment the Guest will get the Order Id.

On clicking the Follow my order button the guest can track his order.
Admin can also make the customer enter his address otherwise the hotel address will be taken as the customer’s address.
Enabling The Customer Address At The Guest Check-Out or Registration Process in QloApps
To make the customer enter his address at the time of guest check-out or registration process, go to Preferences–> Customer
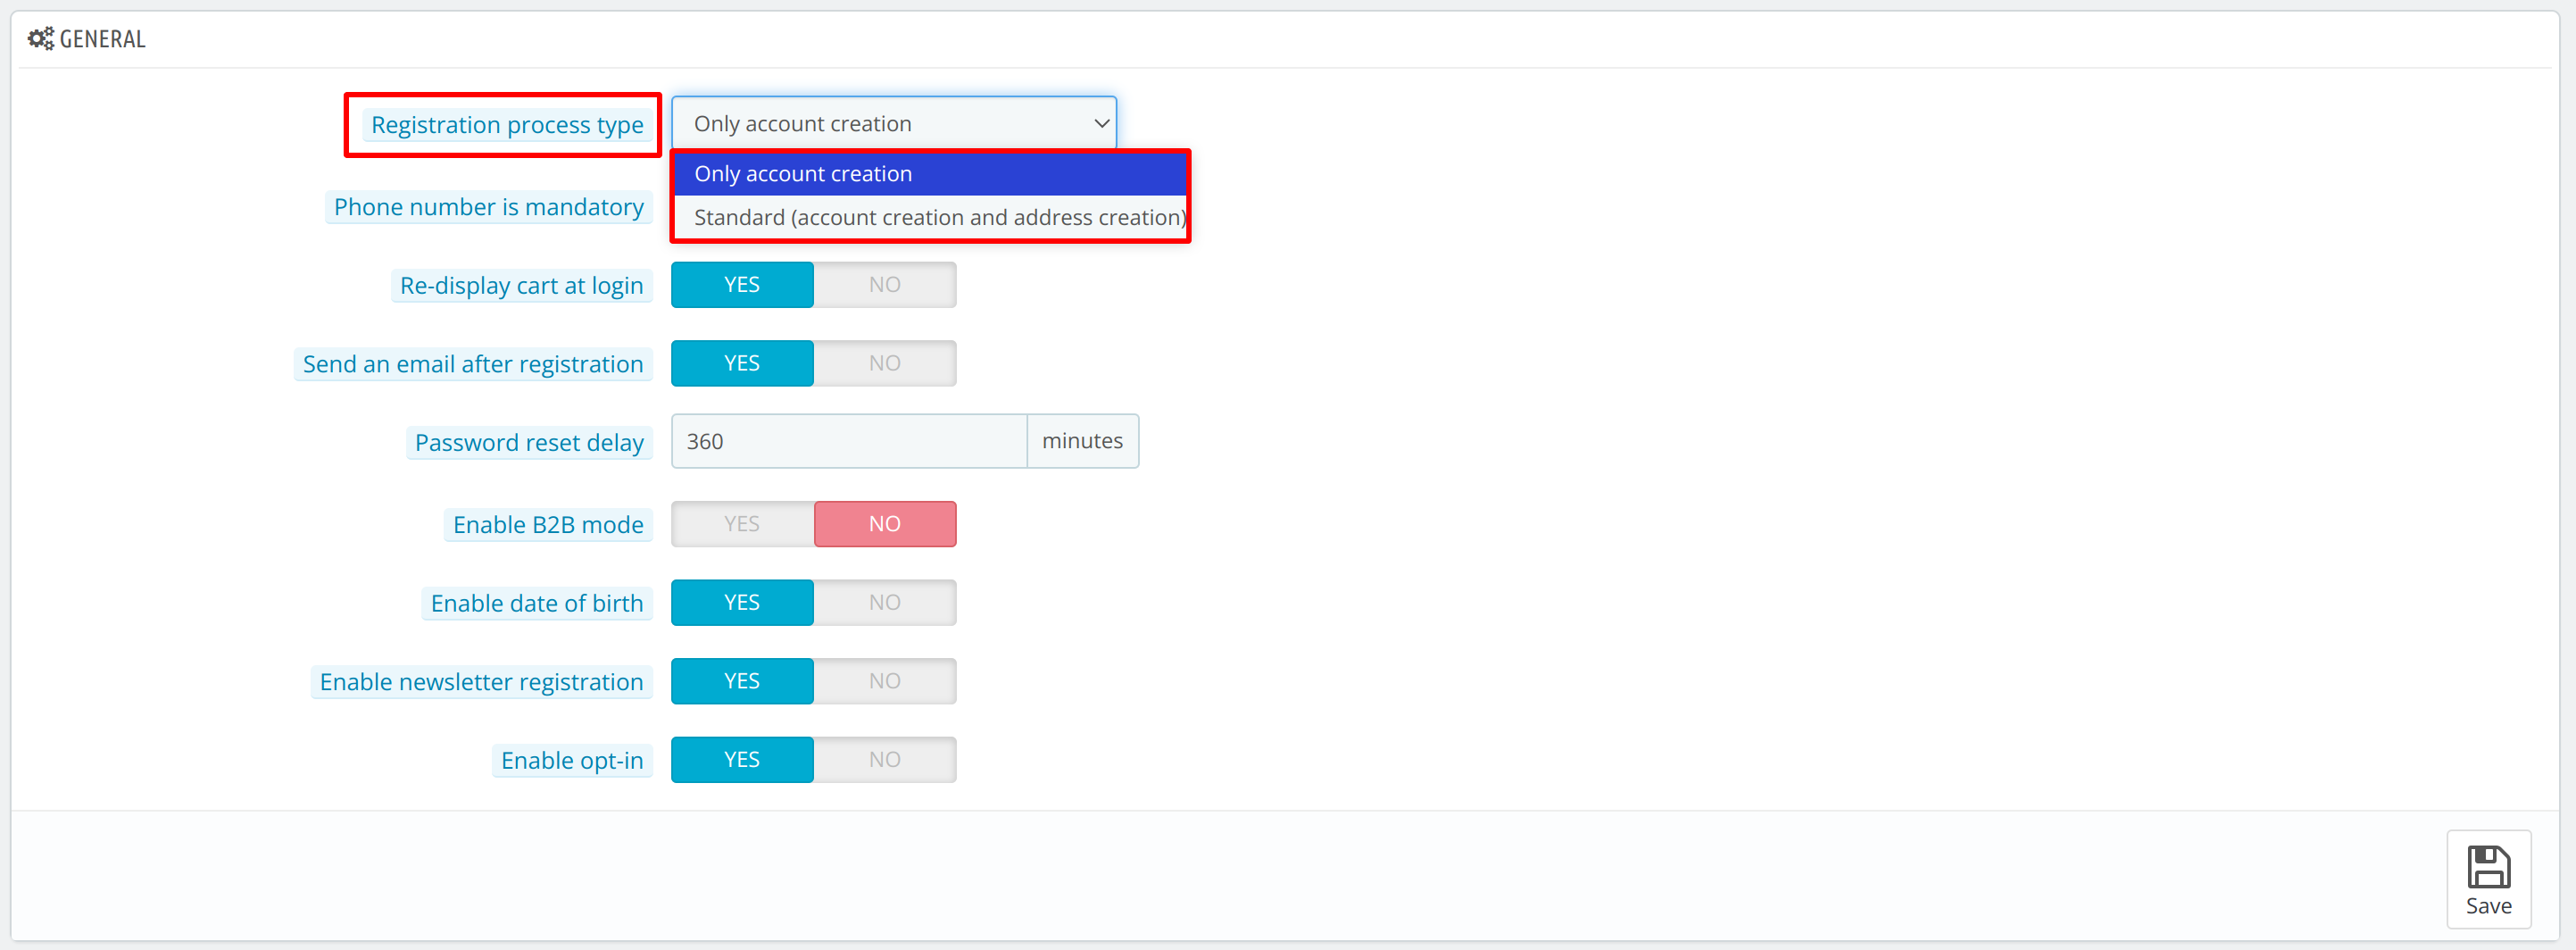
Now select the “Only Account creation” option to allow the customer to register or place an order without adding an address.
Alternatively, select the “Standard” option to allow customers to register and place bookings directly on the website, including the ability to add their own address during registration.
Reallocate Rooms in QloApps
The user can reallocate the booked room of any order. For this Go to the hotel reservation system > Book now.
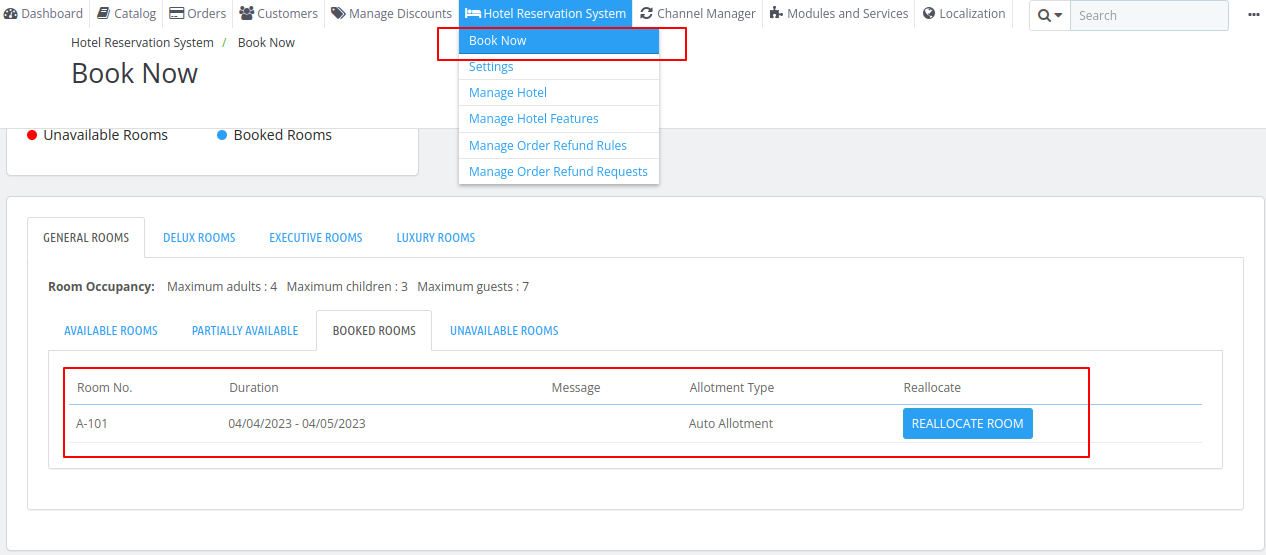
Go to Room type( select any room type) and then Booked room. Here you will get the option of Reallocate Room. Click on reallocate room.
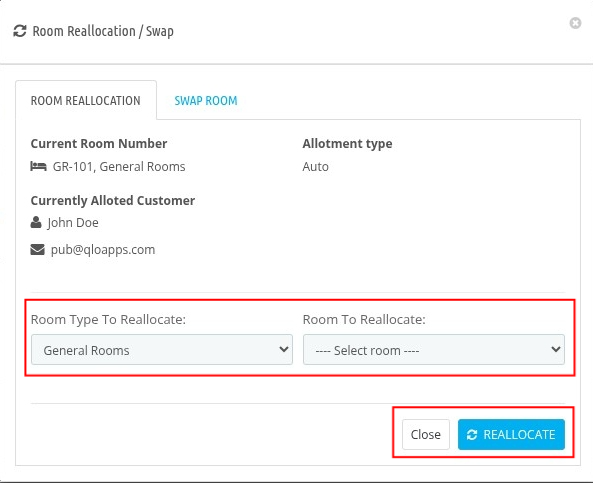
Here select room type and room from the drop-downs Room type to reallocate and rooms to reallocate, then click on Reallocate for reallocation.
Here in the other panel, there is the Swap option. Select the room to Swap, and click on Swap for final swapping.
Hotel Settings Page in QloApps
To manage the hotel settings Go to Hotel Reservation System > General Settings
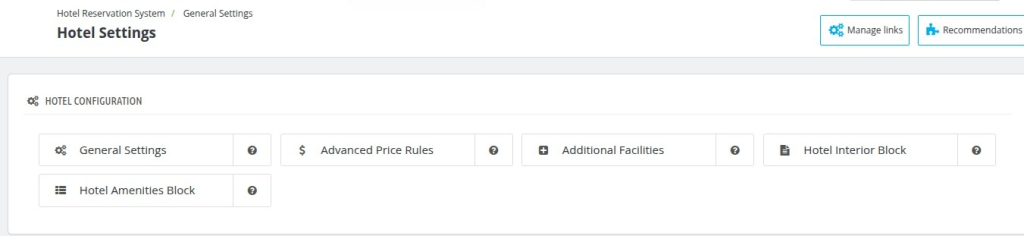
General Settings
To make the General Setting Go to General Settings.
Search Panel Setting
From here admin can set the heading and content of a header block with the image in QloApps. Admin can define the hotel chain name and the contact details in QloApps.
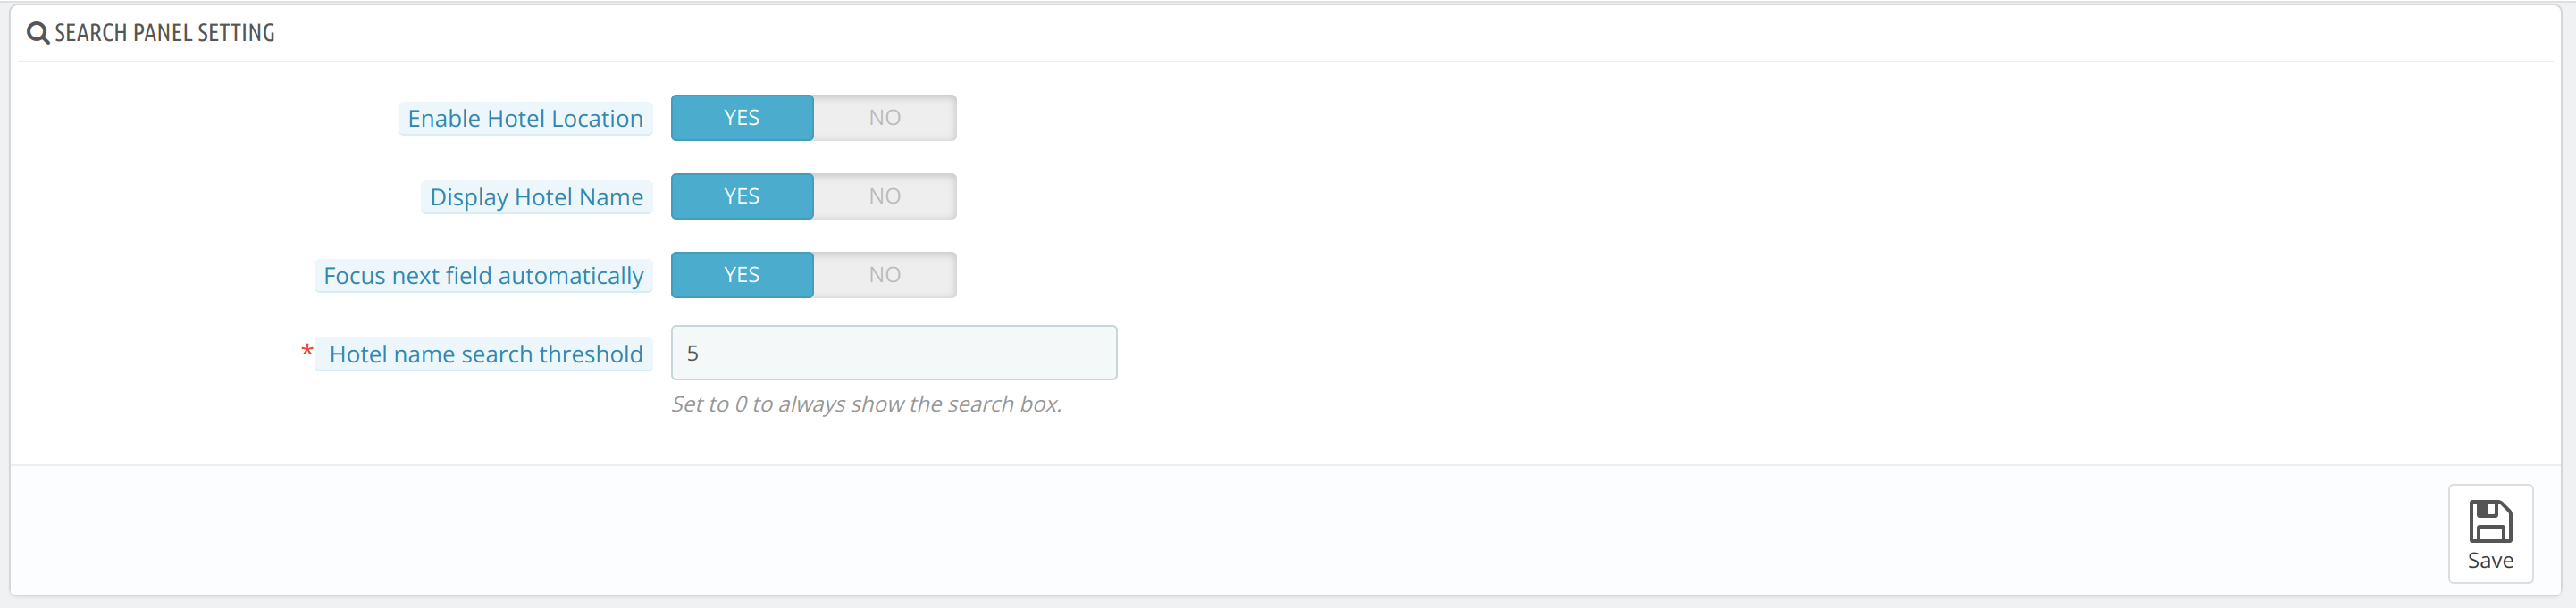
Enable Hotel Location: Enable it to display the hotel location search field or disable it to hide it
Display Hotel Name: The name of the hotel can be enabled and disabled in the case of one hotel. If the hotel is more than one the hotel name will be display in the search panel.
Focus Next Field Automatically: Enable this option to allow your guests to move to next field in search panel as soon as he selects the previous field data.
Hotel Name Search Threshold: Allow your guests search for hotel in case the number of hotels added are more than your selected threshold value.
Website Configuration
In the website configuration, the panel updates the details of the hotel as shown below:
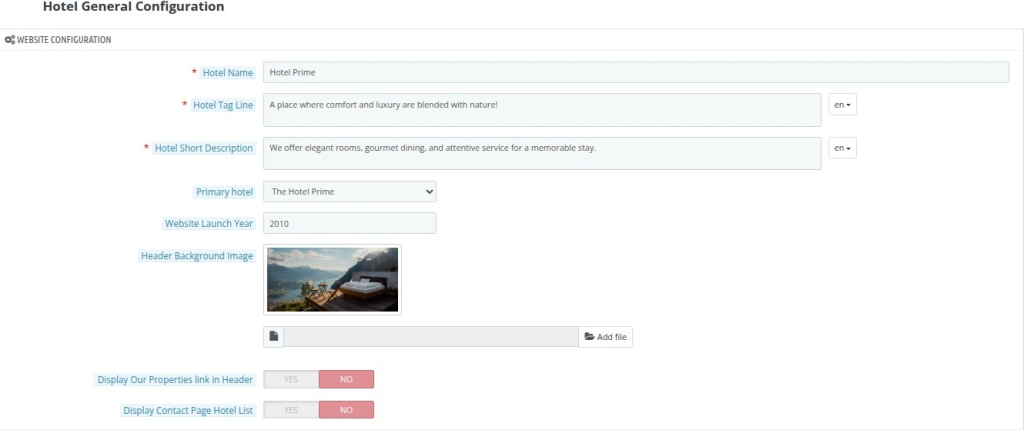
- Hotel Name: Enter the name of the hotel.
- Hotel Tag Line: Give the hotel tagline to your hotel
- Hotel Short Description: Give the description of your hotel and it should be less than 220
- Primary hotel: The primary hotel of or the registered hotel
- Website Launch Year: The year when the website of the hotel became live.
- Header Background Image: It appears as the banner image of the hotel
- Display Our Properties link in Header: Enable this option to display the property in “Our Properties” tab, which opens a new page showing all listed hotel locations.
- Display Contact Page Hotel List: Enable this on to show a list of hotels on the contact page.
Support Contact Details
Enter the Support Phone Number and Support Email to provide contact details for guest assistance.

Website Contact Details
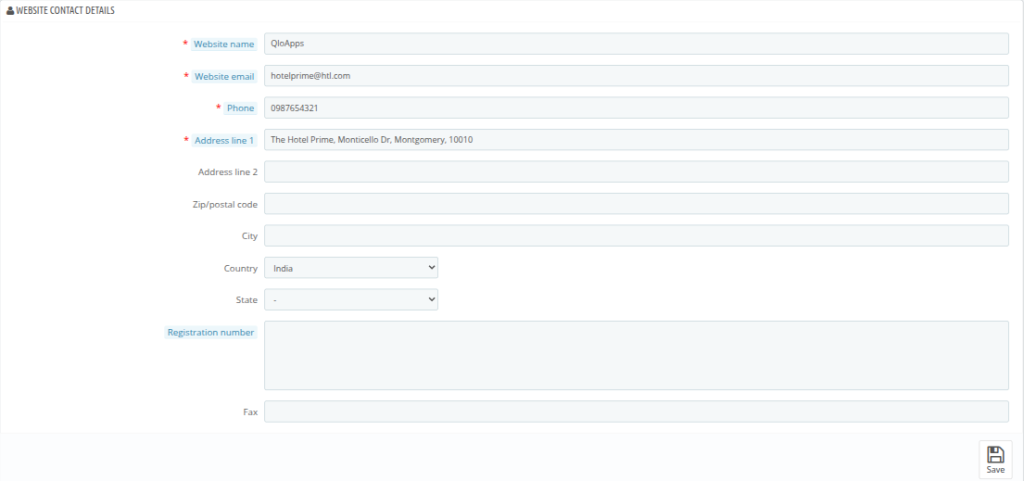
- Website Name: Enter the name of your hotel website.
- Website Email: Provide the official email address for website communication.
- Phone: Add the primary contact number for the hotel.
- Address Line 1: Enter the main address of the hotel.
- Address Line 2: Use this for additional address info like landmarks or building names.
- Zip/Postal Code: Enter the postal or ZIP code of the hotel’s location.
- City: Add the city where the hotel is located.
- Country: Select the country of the hotel.
- State: Choose the corresponding state/region.
- Registration Number: Enter your hotel’s official registration or license number.
- Fax: Provide a fax number for formal communication.
Advance Payment Global Setting
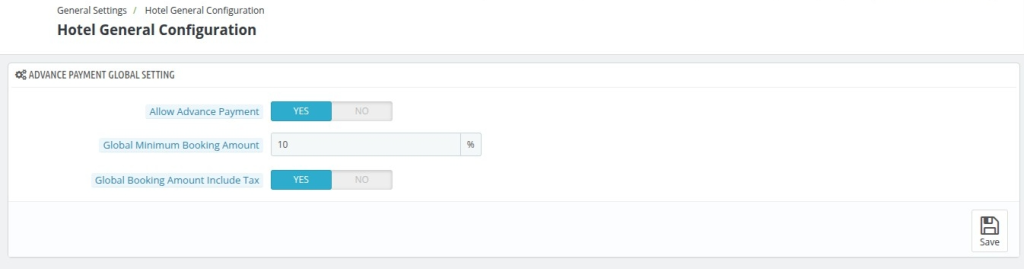
- Allow Advance Payment (Yes/No): Enable this to allow advance payments for all bookings globally; disable to turn off advance payment across the platform.
- Global Minimum Booking Amount: Set the minimum percentage (e.g., 10%) of the total booking amount required as an advance.
- Global Booking Amount Include Tax (Yes/No): Choose Yes to include tax in the advance payment calculation, or No to exclude tax from it.
Occupancy Setting
Consider guests as children below age: Enter the age of the guest, and that guest will be considered a child.
Maximum children allowed in a room: Enter the number of children allowed in the room.

Google Map Setting
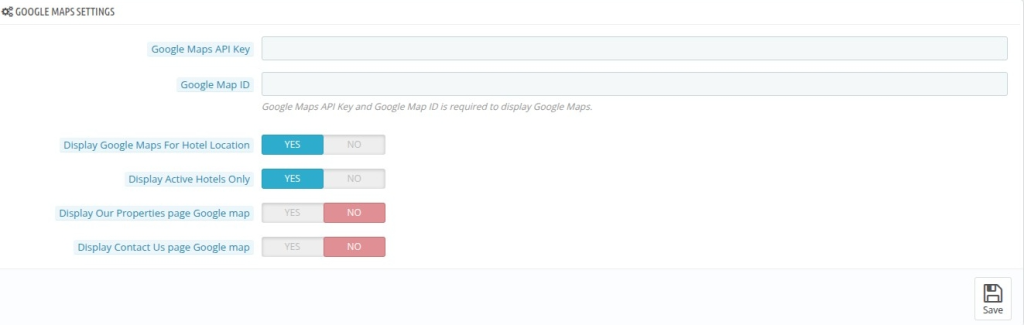
- Google Maps API Key: Enter your API key to enable Google Maps functionality on your website.
- Google Map ID: Provide the Map ID linked to your Google Maps configuration.
- Display Google Maps For Hotel Location (Yes/No): Enable this to show a map on individual hotel pages showing their location.
- Display Active Hotels Only (Yes/No): Show only hotels marked as active on the map to avoid displaying inactive properties.
- Display Google Map on “Our Properties” Page (Yes/No): Turn this on to show a map on the Our Properties page.
- Display Google Map on “Contact Us” Page (Yes/No): Enable this to embed a map showing hotel location(s) on the Contact Us page.
Advanced Price Rule
Admin can set different price plans for the customers depending on the dates and days.
This is possible with Qlo’s Feature Price function through which Admin can set different price plans as per:
1. Specific Date 2. Weekend or Special days 3. Date Range
Moreover, Admin can also make feature price rules for different customer groups.
Admin must Go To -> Hotel Reservation System -> Settings -> Advance Price Rule.
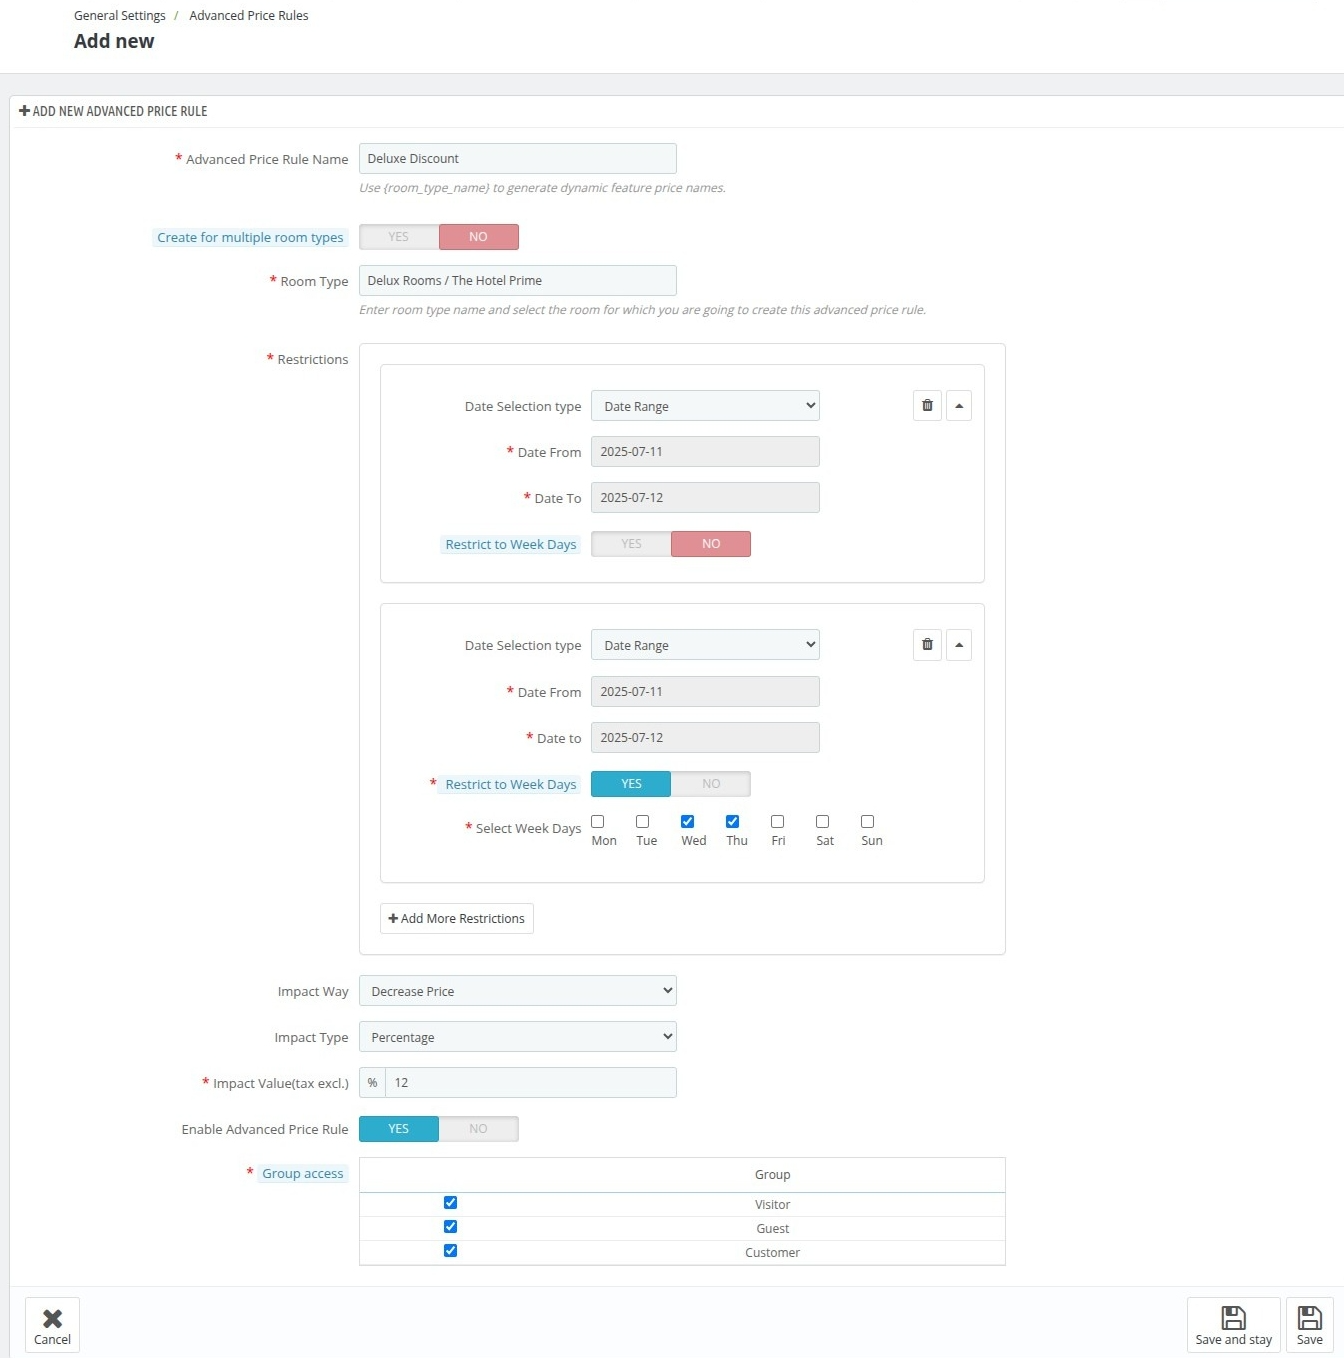
To add a new price plan click on ‘Add Feature Price‘ On the Add Feature Price page, Admin has to configure the price plan settings.
Here you can set the advance price rule for specific dates.
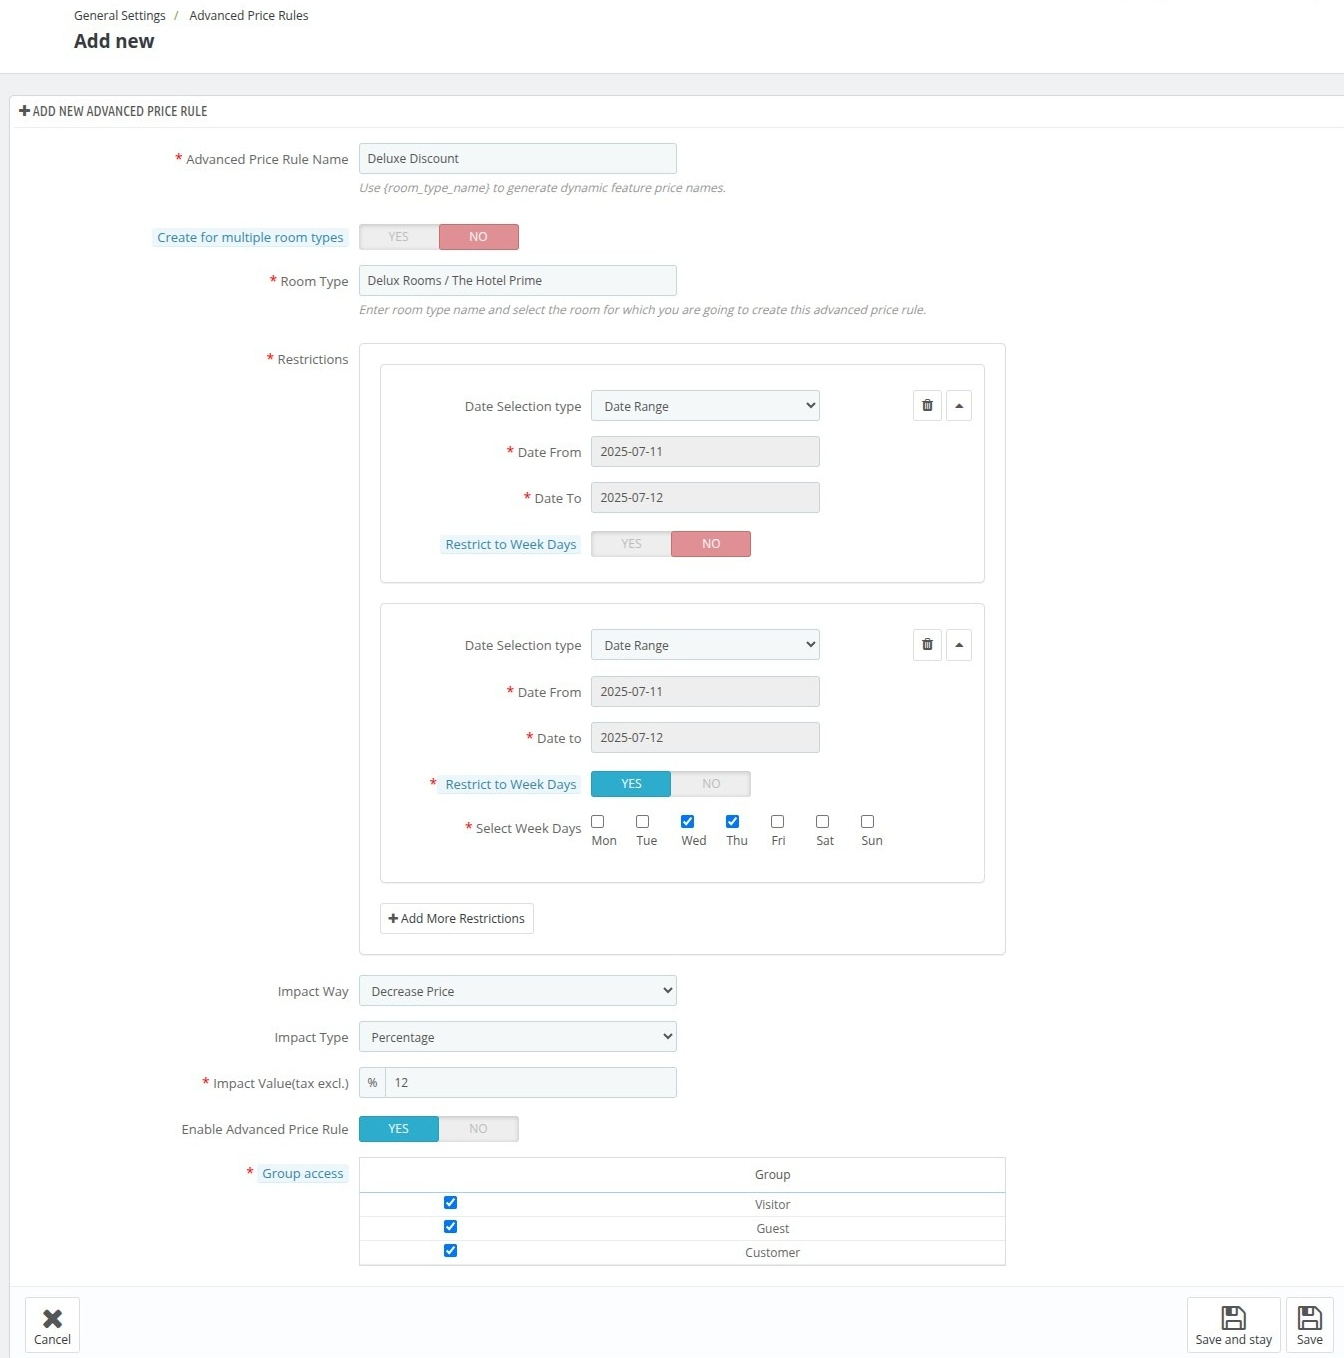
- Advanced Price Rule Name: Set the new price rule for the advanced price setting.
- Room Type: Enter the room type name and select the room for which you are going to create this advanced price rule.
- If you enable the option, create for multiple room types you can create pricing rule by selecting them from the Room Types list.
- Date Selection Type: Here you can set the date range and the specific date for advance price setting.
- Restrict to week days: Click on the check box and select any day of the week.
- Impact Way: Select from the drop whether to increase the price, decrease the price, or fix the price.
- Impact Type: Select from the drop-down whether to change the price by a percentage or by a fixed value.
- Impact Value(tax excl.): Mention the impact value either in percentage or fixed value.
- Enable Advanced Price Rule: Select Yes or No to enable or disable the price rule respectively.
- Group Access: Select the group you want to apply the advance price rule.
Additional Facility
Here you can add the extra facilities offered by the hotel. Here you can add the facility and assign it to each room type separately.
The process of adding the facility is the same as discussed while adding the room type.
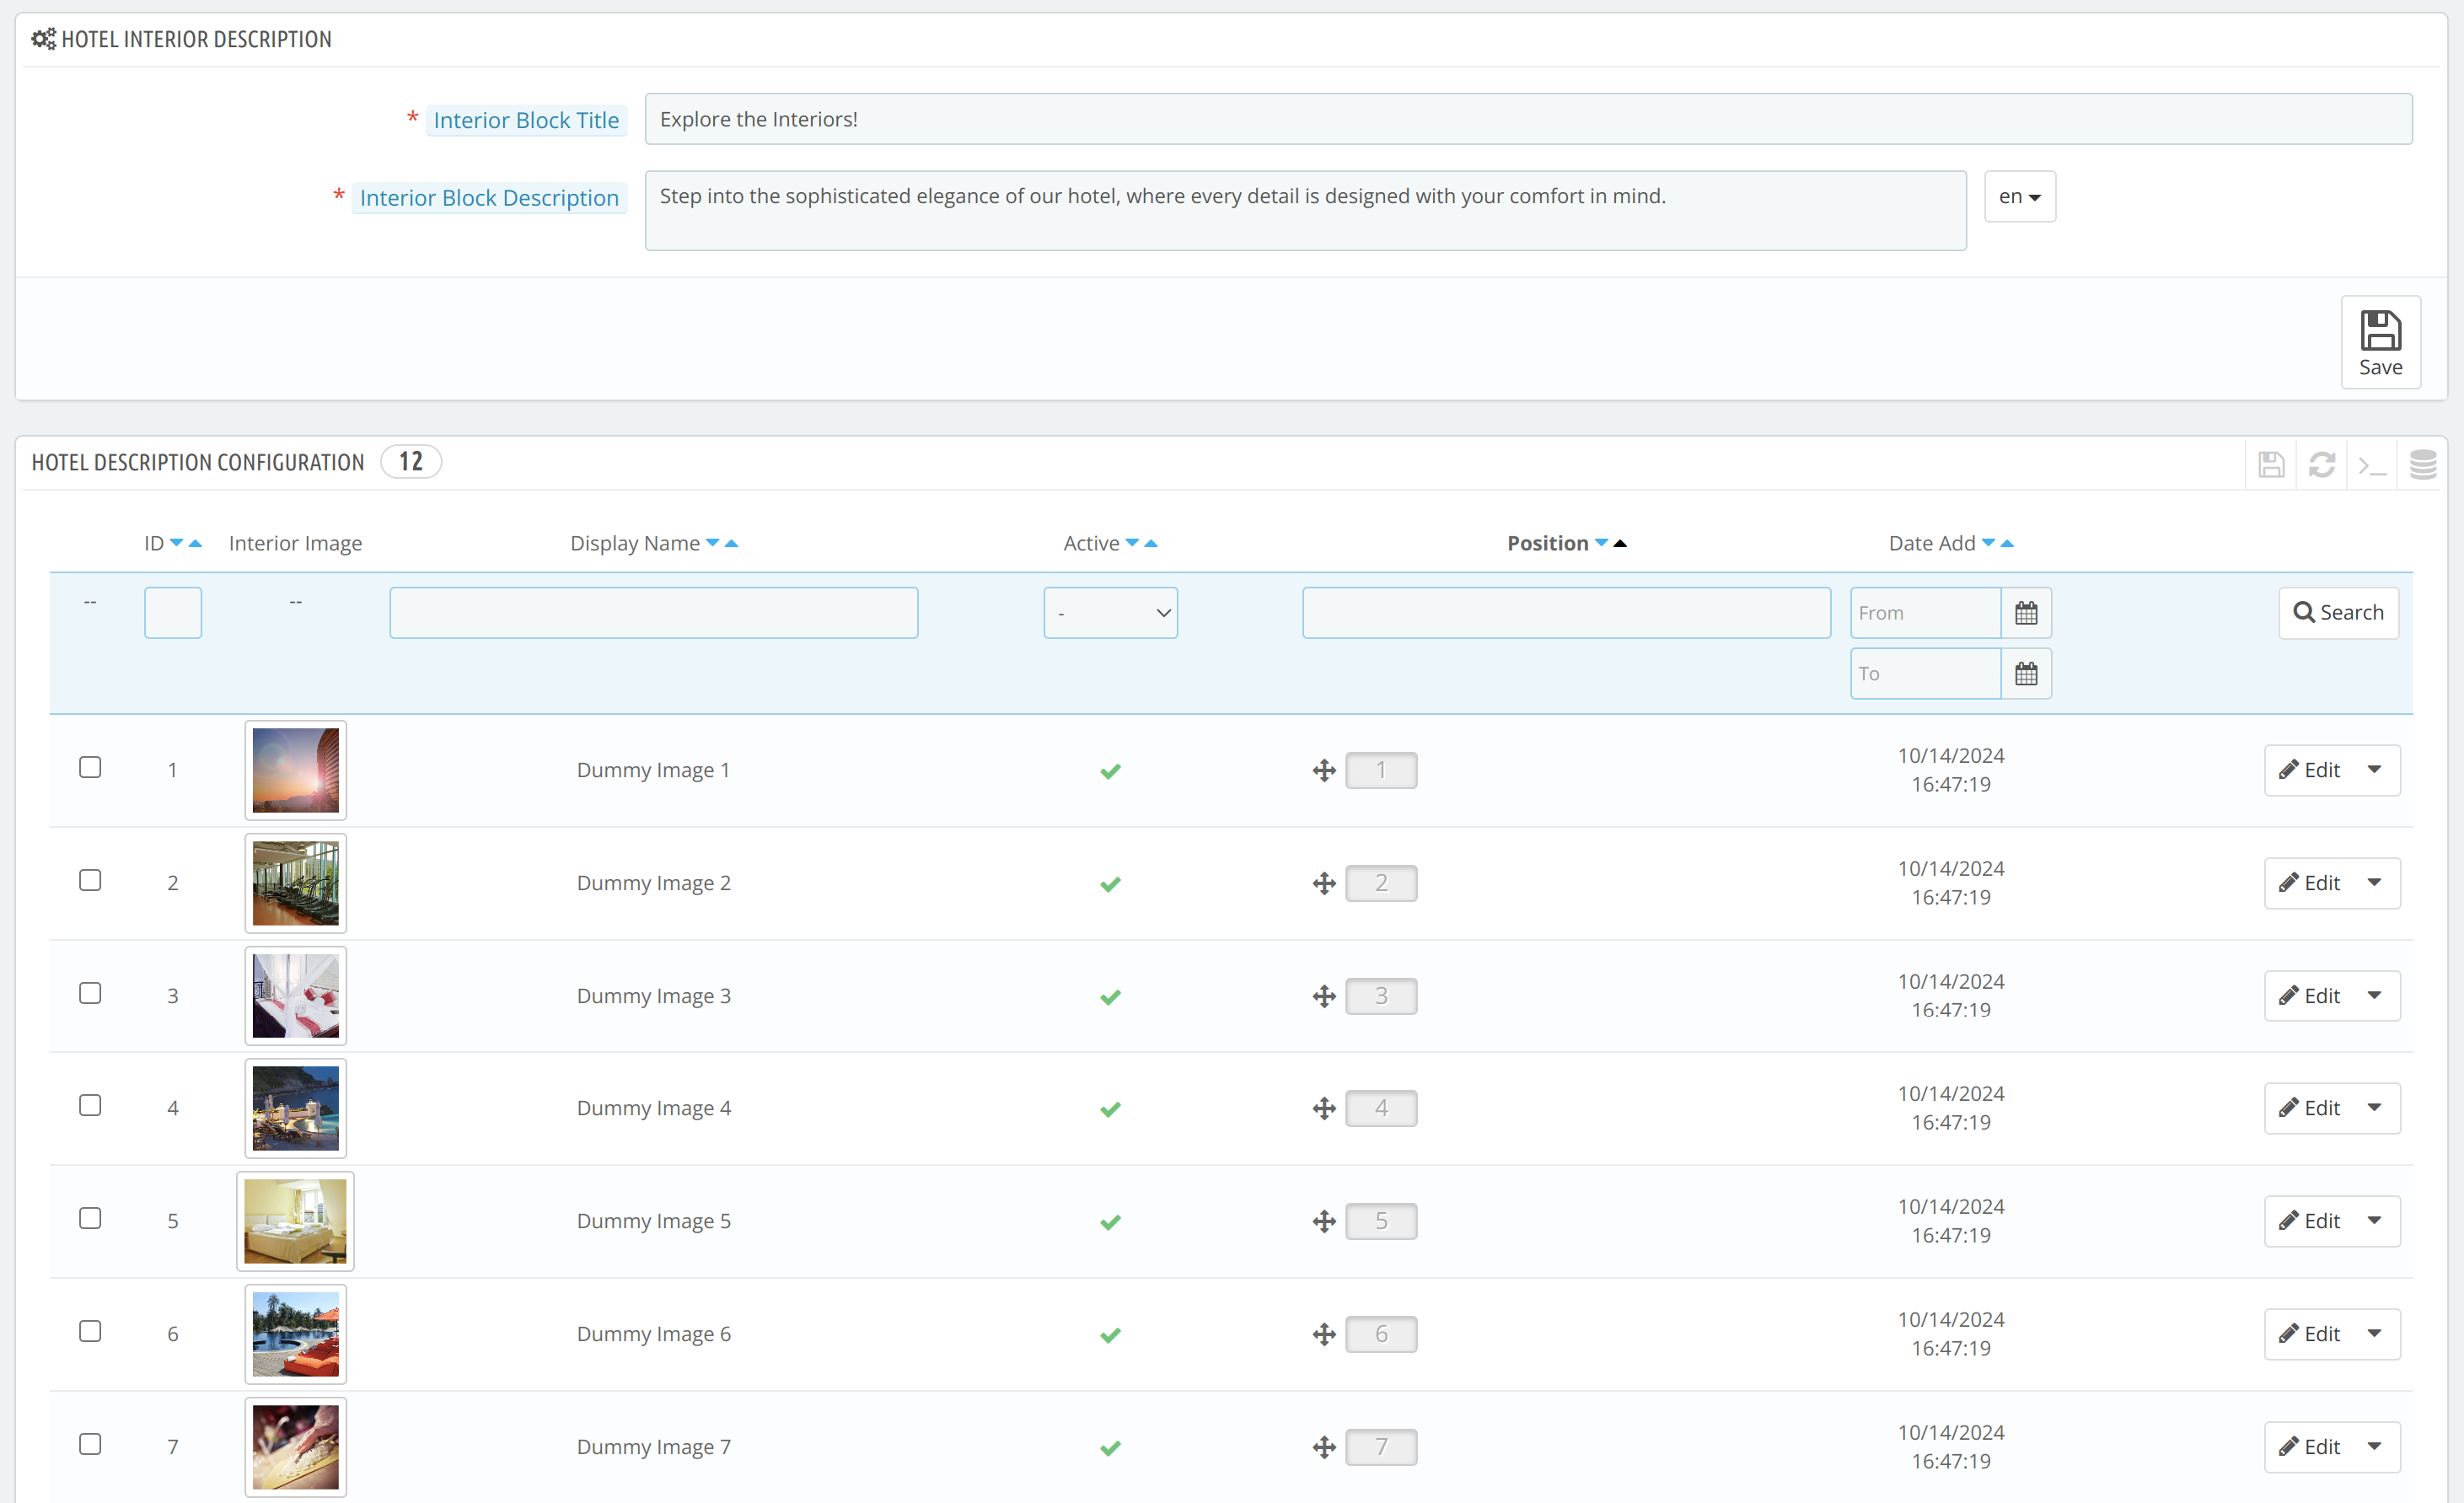
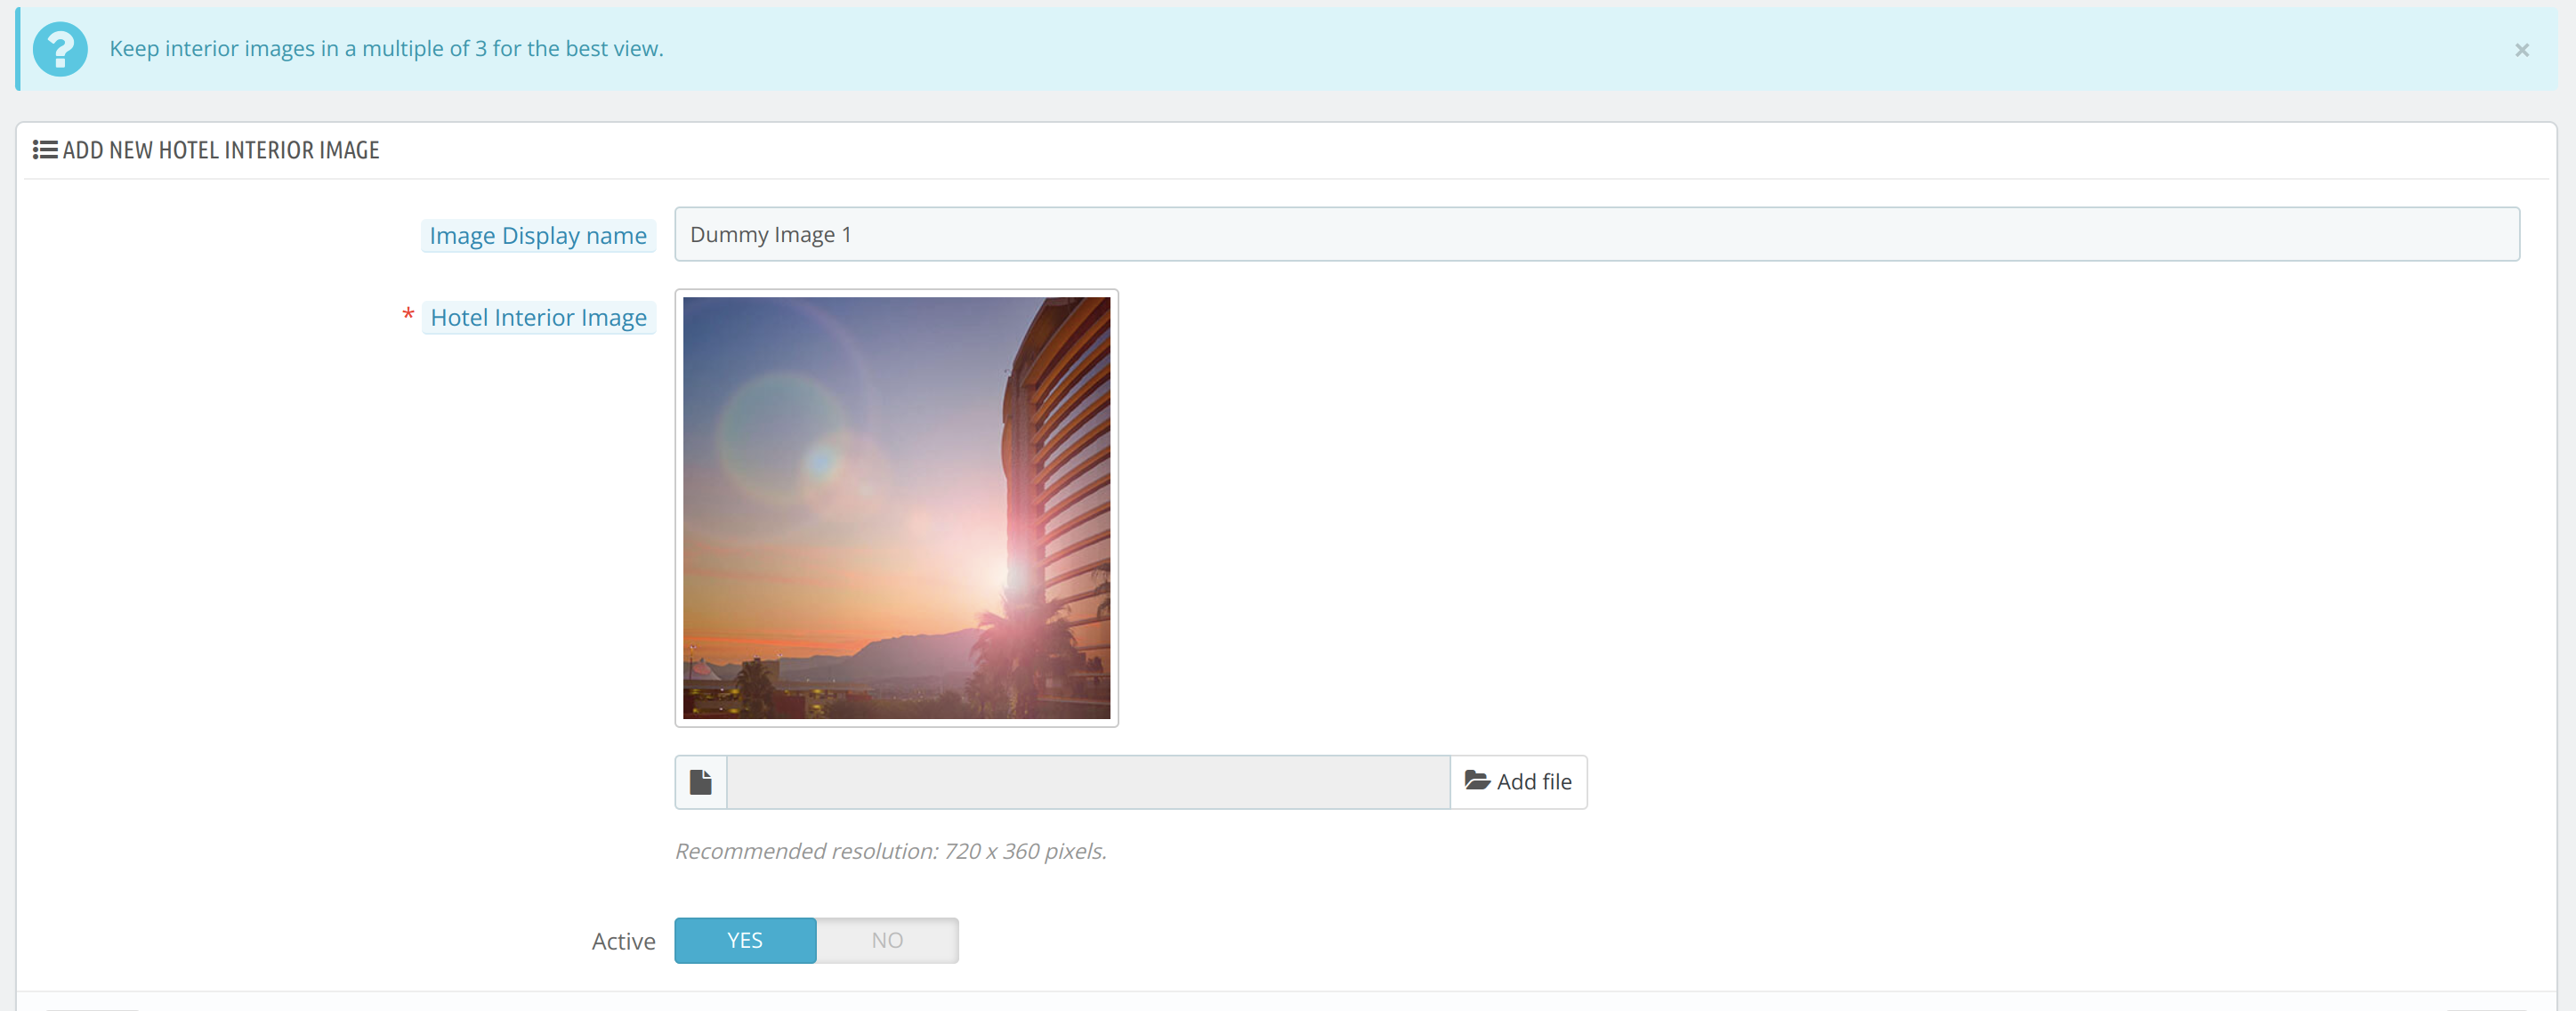
Hotel Interior Block
An “Hotel Interior” block is provided on the landing page to help admin to display their hotel images in the slider.
Admin can add various hotel images to the slider on the landing page by visiting “Hotel Interior Block Setting”. Go To Hotel Reservation System–> General Setting –>Hotel Interior Block Setting
Adding a new Image to the Interior Block
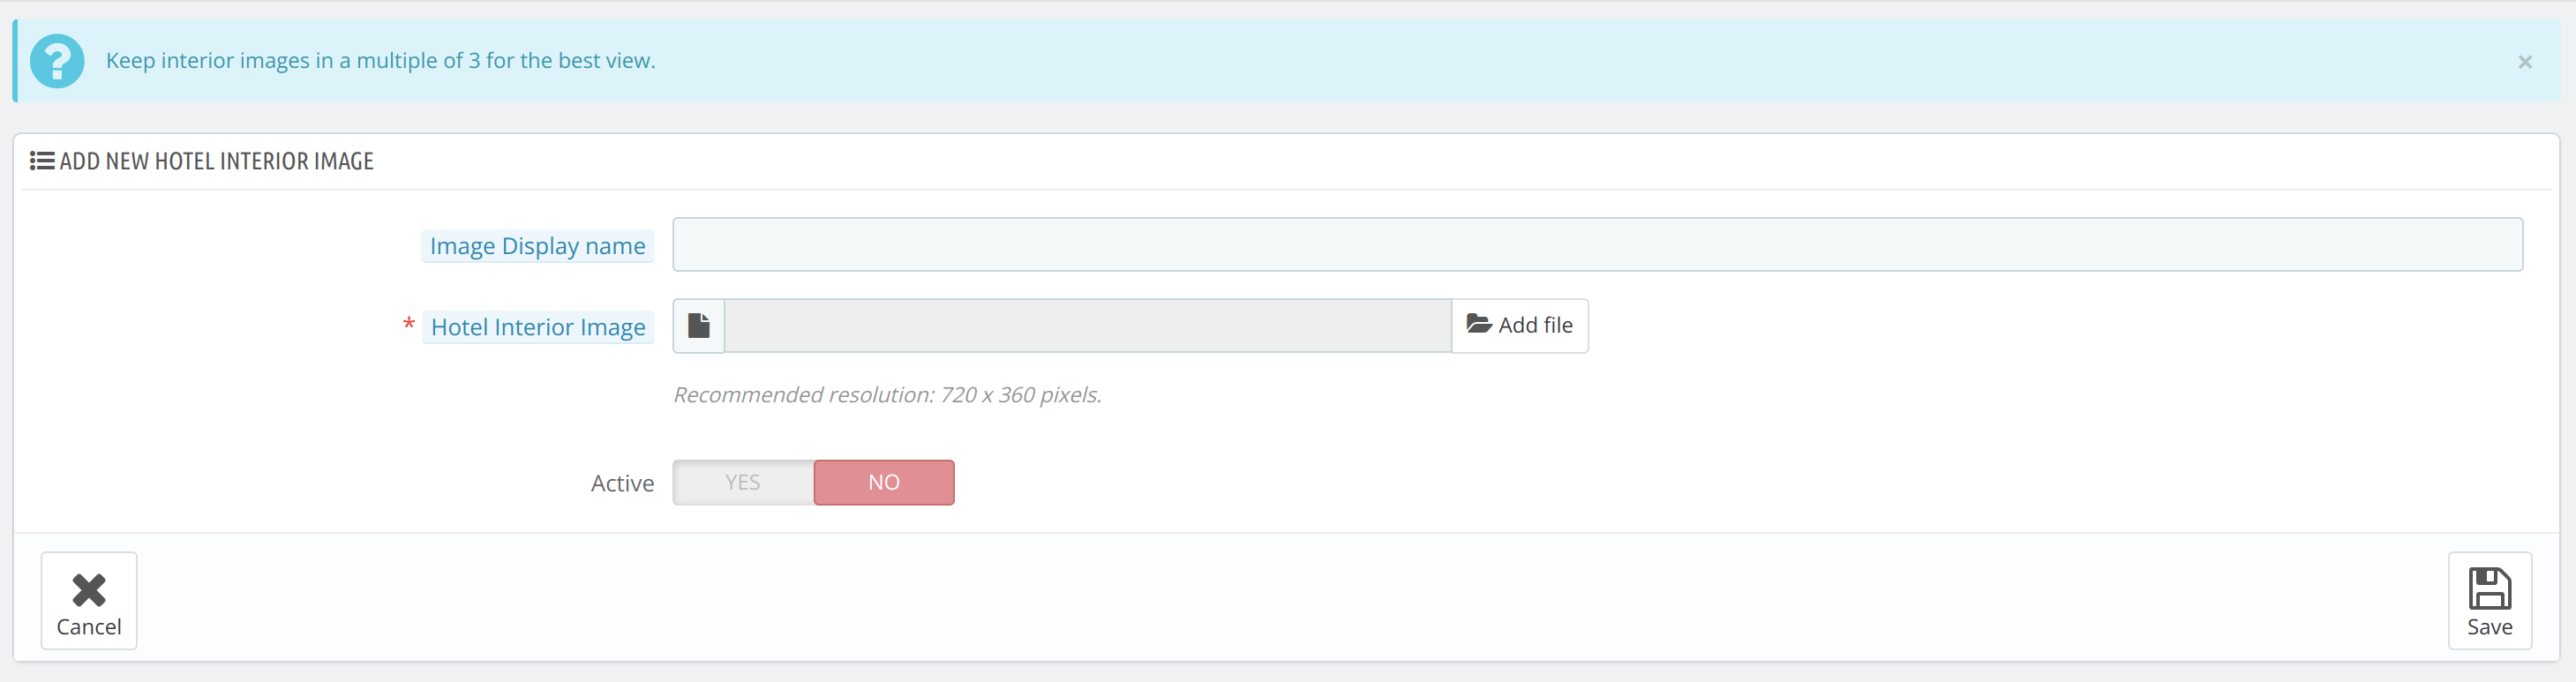
When you edit an Image in the Interior Block Setting:
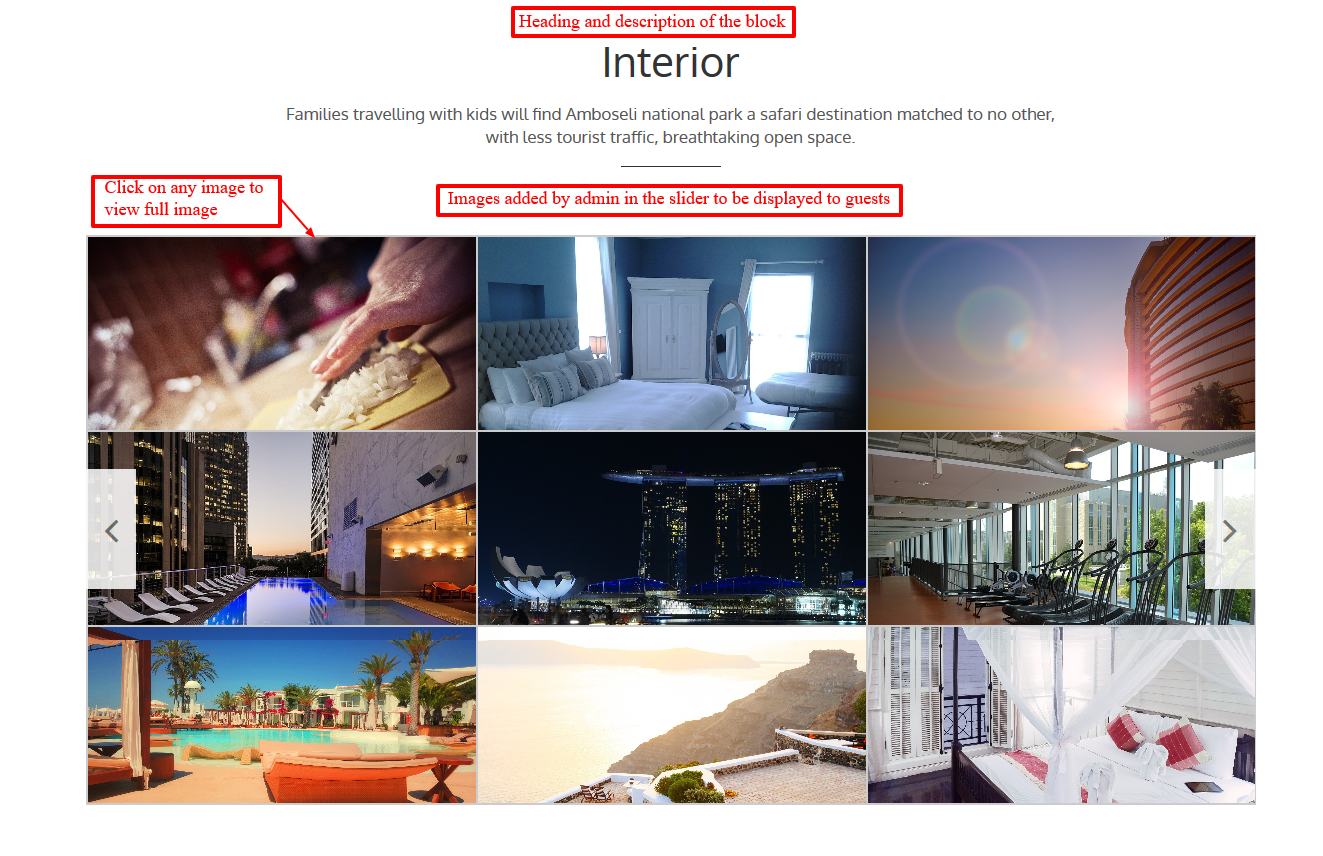
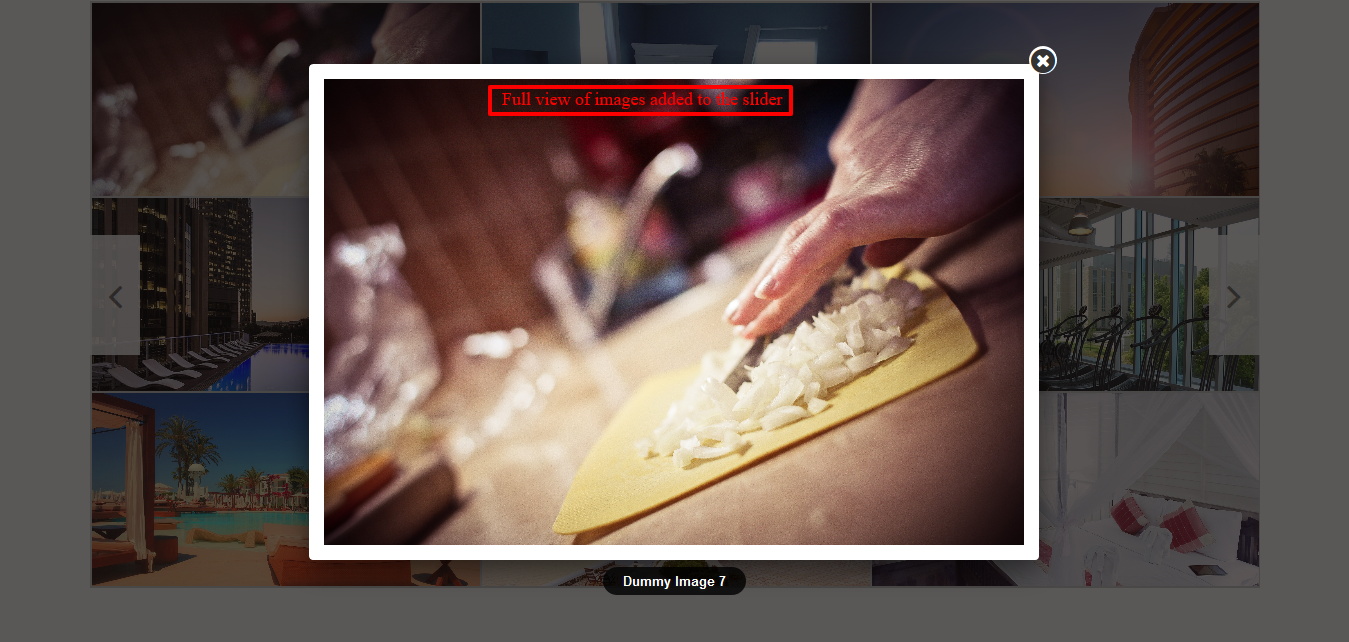
Effect of Hotel Interior Block Setting on the Front Page of QloApps Booking Website
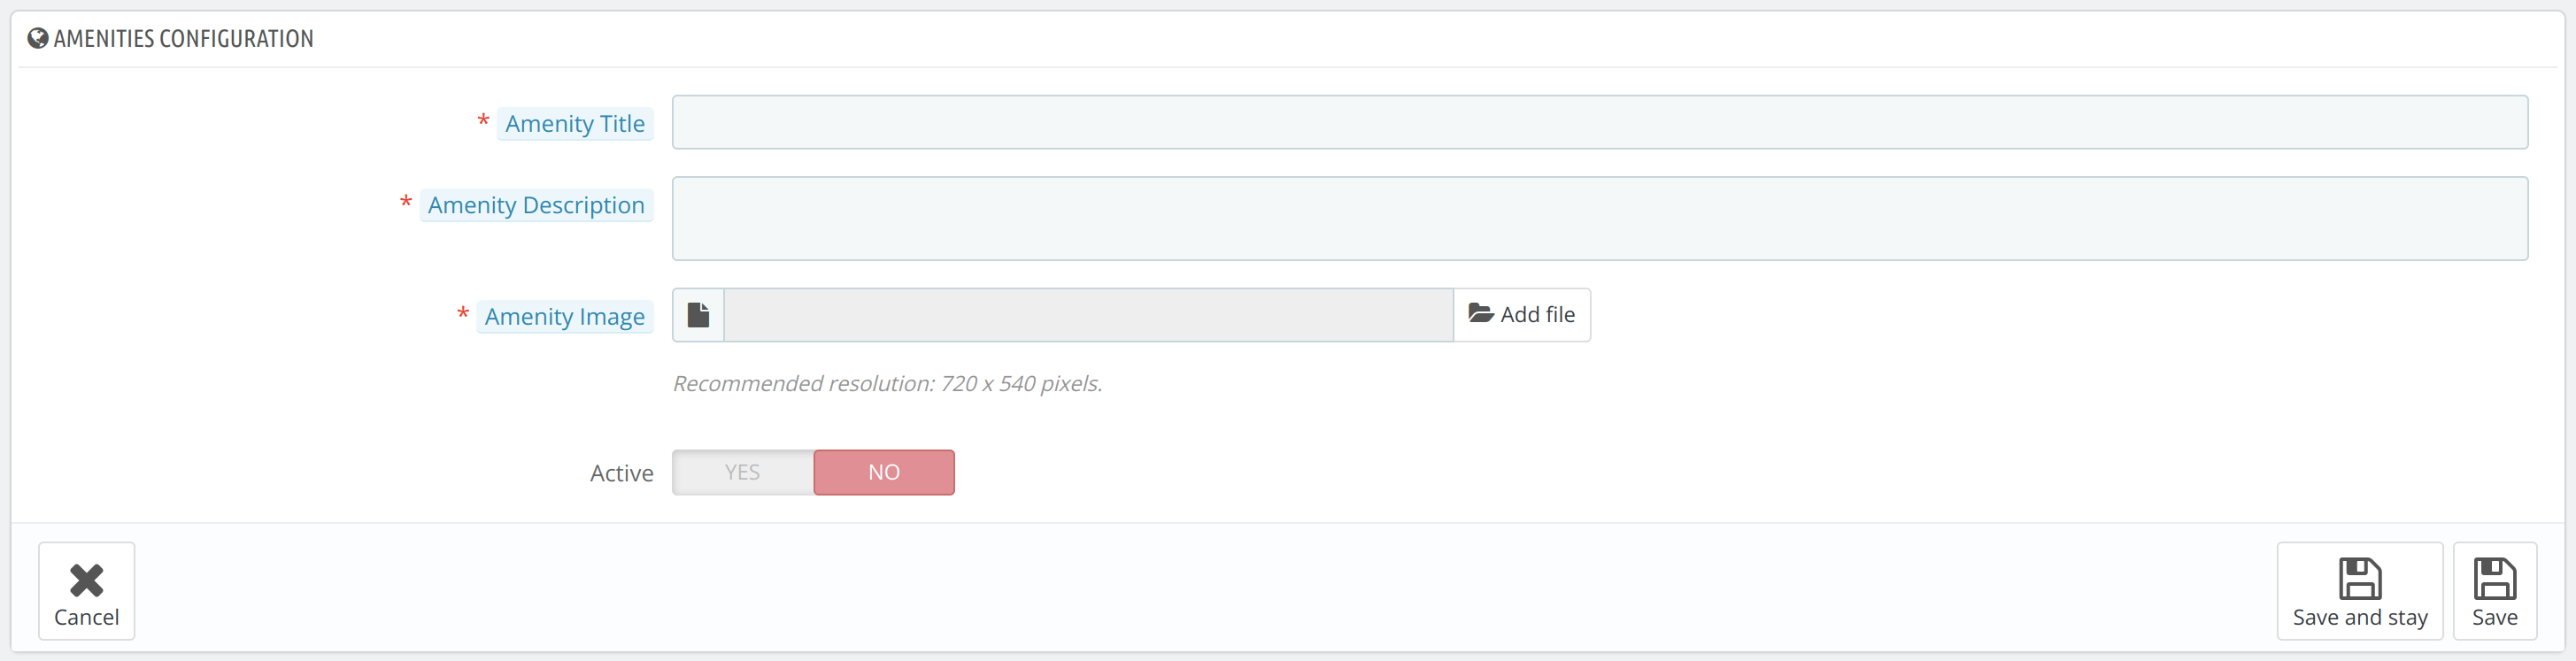
Hotel Amenities Block
Now, the admin can move towards the display of Hotel amenities on the landing page.
Admin can add as many images as per his desire with the description from the back end. Go to Hotel reservation system> Settings> Hotel Amenities Block Settings
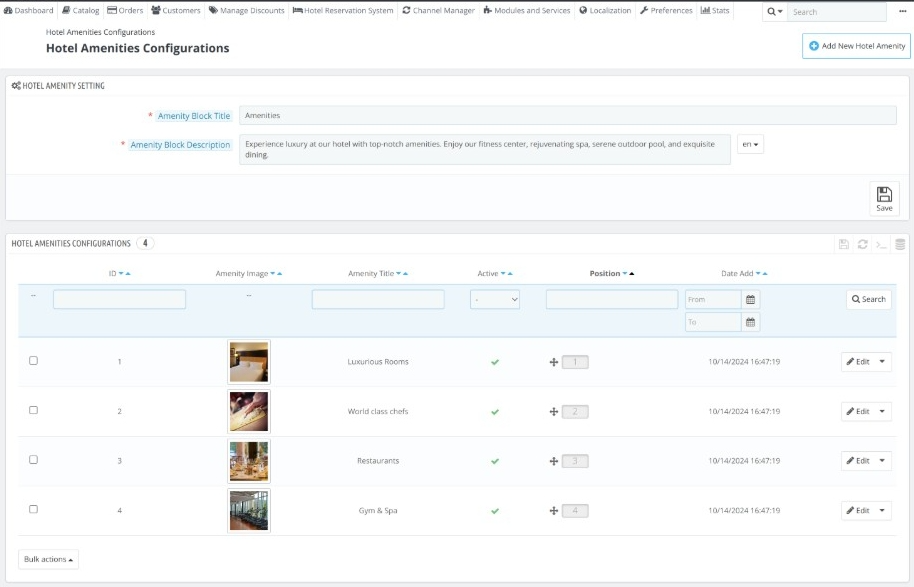
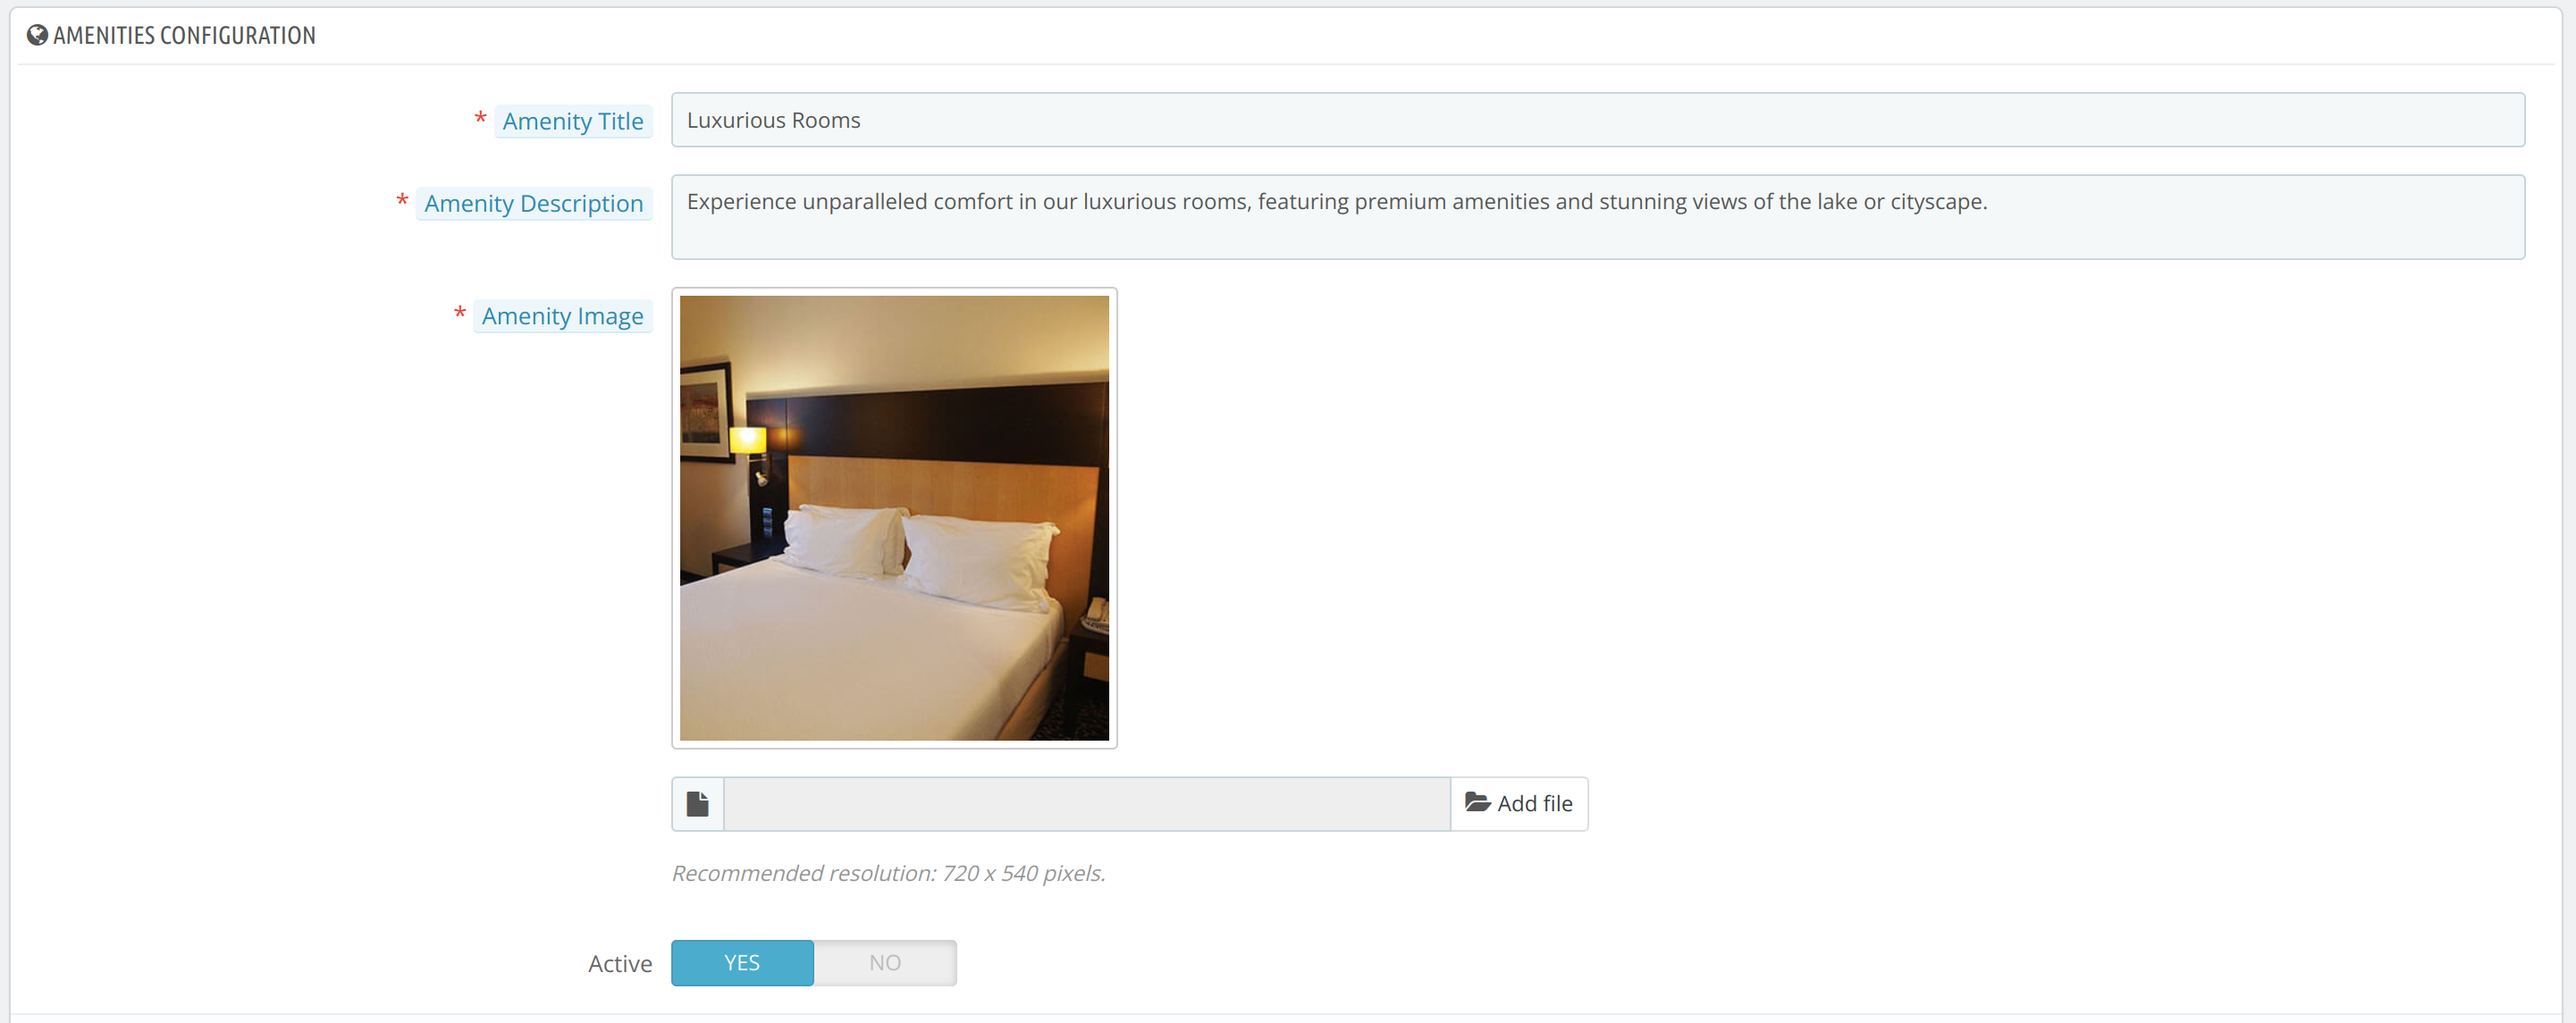
Click on “Add new hotel amenity” to add new amenities to the hotel.
Edit an existing Amenity
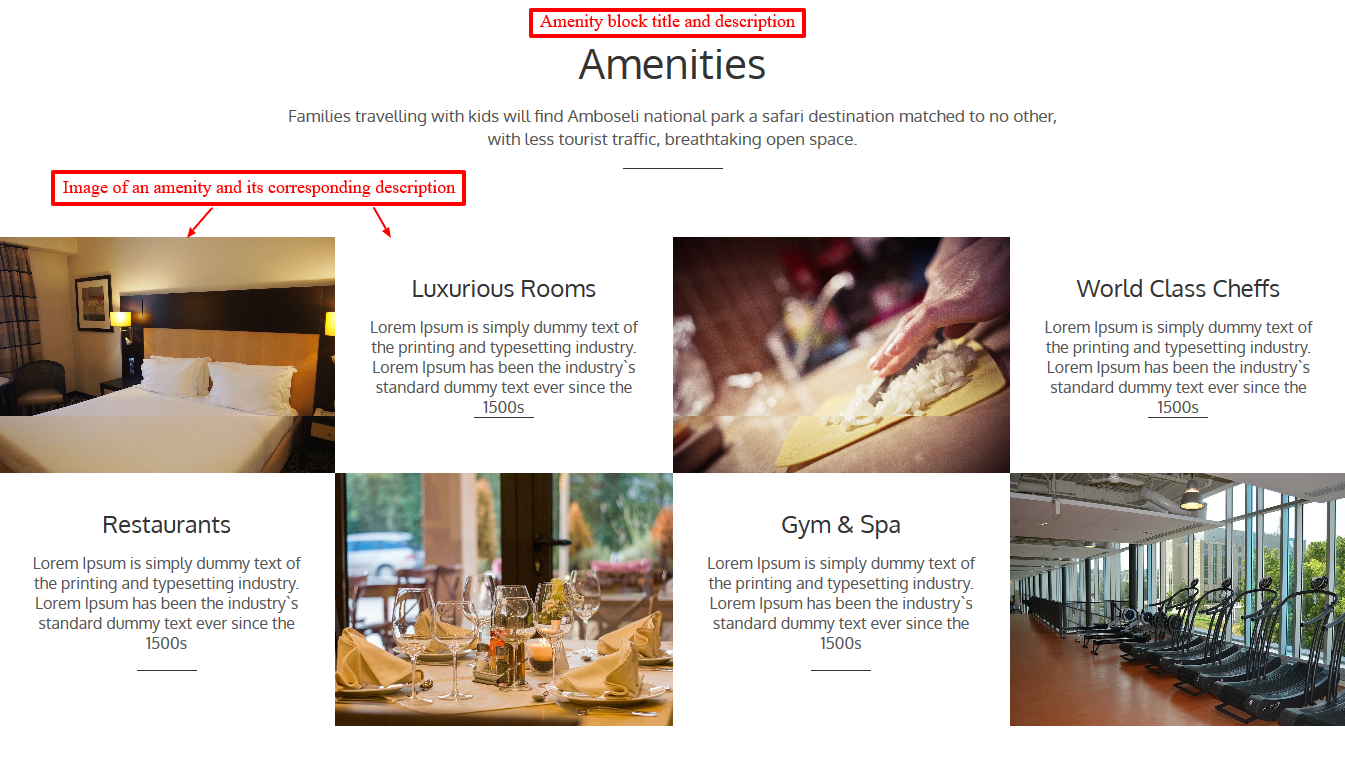
Effect of Hotel Amenities Block Settings on the Front Page
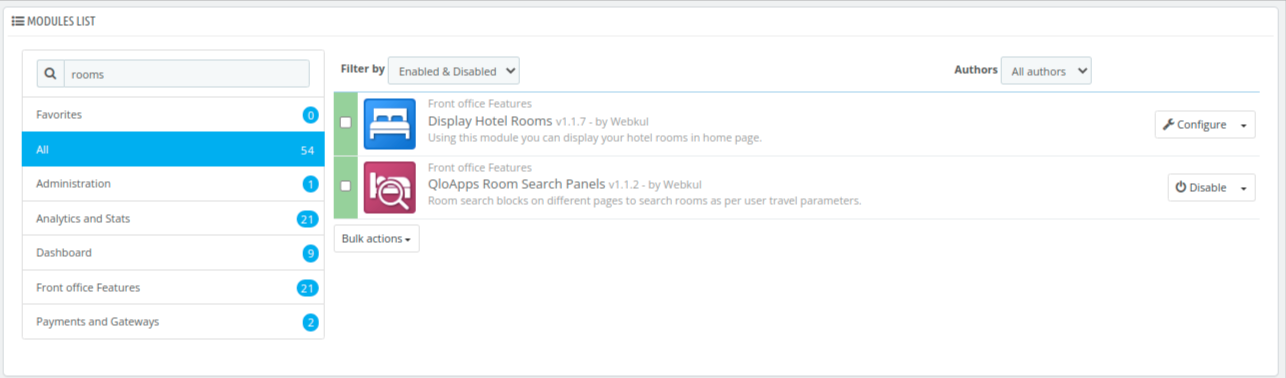
Display Hotel Rooms on QloApps Booking Website
Go to modules and services>manage module. Search for display hotel room in the module search bar.
Configuration of the module
Click on Configure to manage the configuration of the module.

Click “Add New Room Type” to create and display a new room in the Display Rooms block on the website.
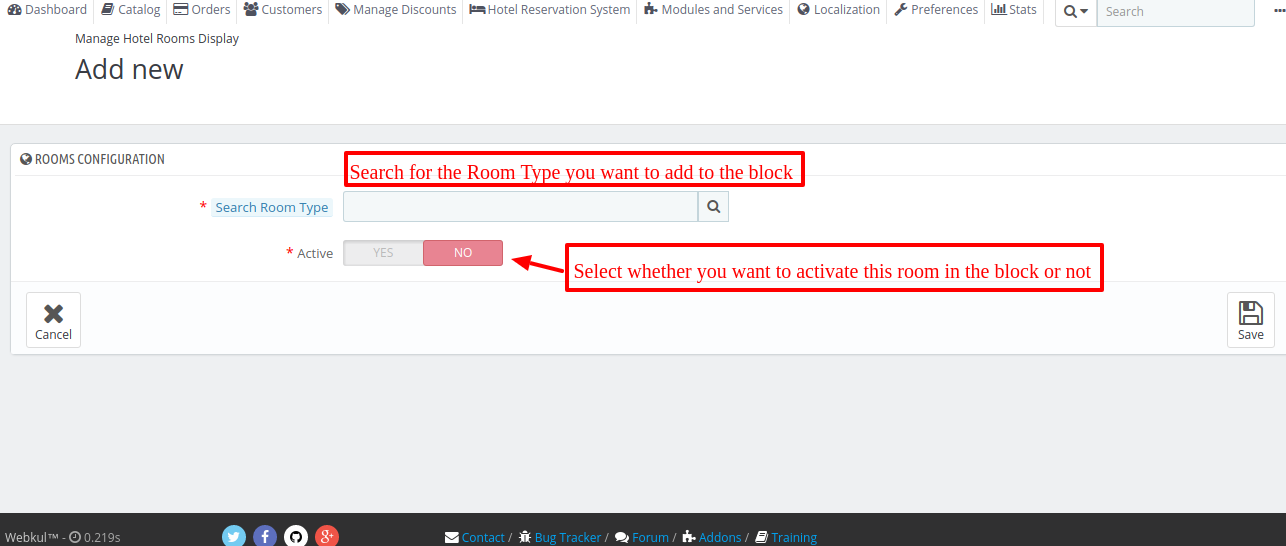
Note: You will be able to add only those rooms which you have already in the Manage Room Type Section as per the procedure described above
Effect of Display Rooms Block Settings on the Front Page
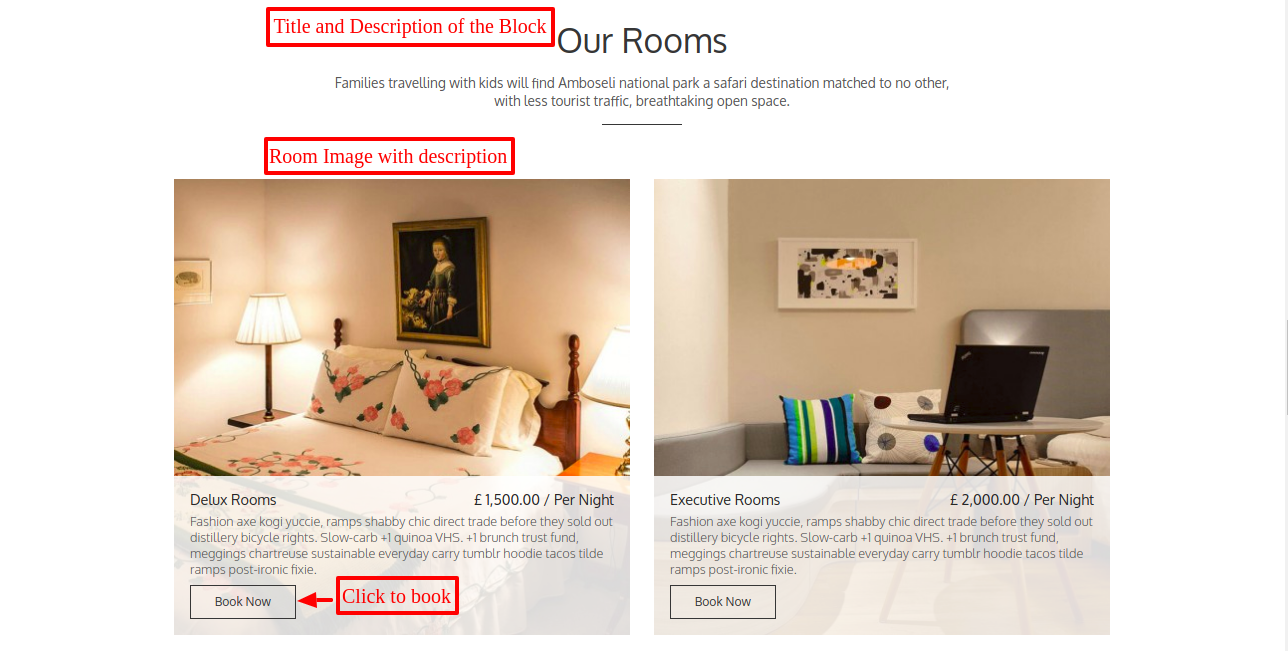
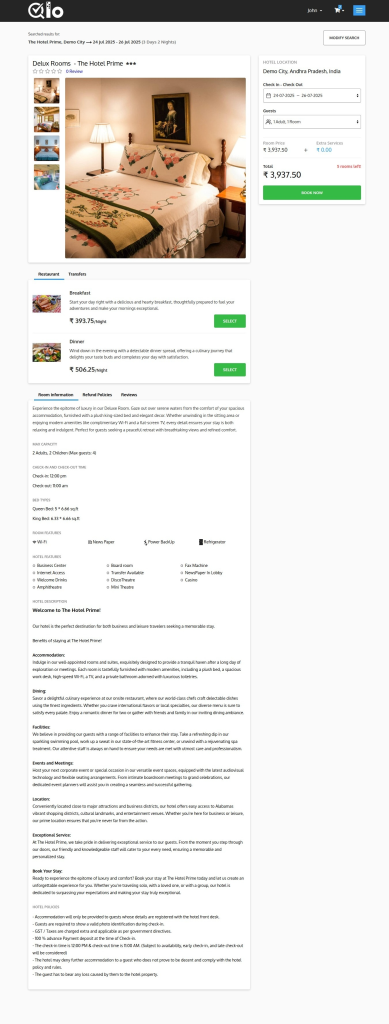
When the guest clicks on “Book Now,” they will be redirected to the Room Detail page to view full information and proceed with the booking.
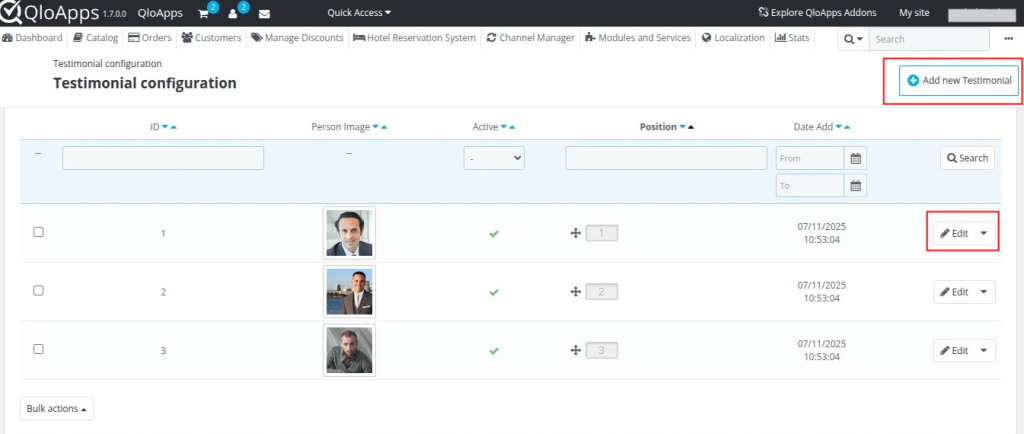
Hotel Testimonial Settings
Go to module and services> manage module –> Hotel Testimonial. Admin can create a slider on the landing page showing the testimonials for the site.
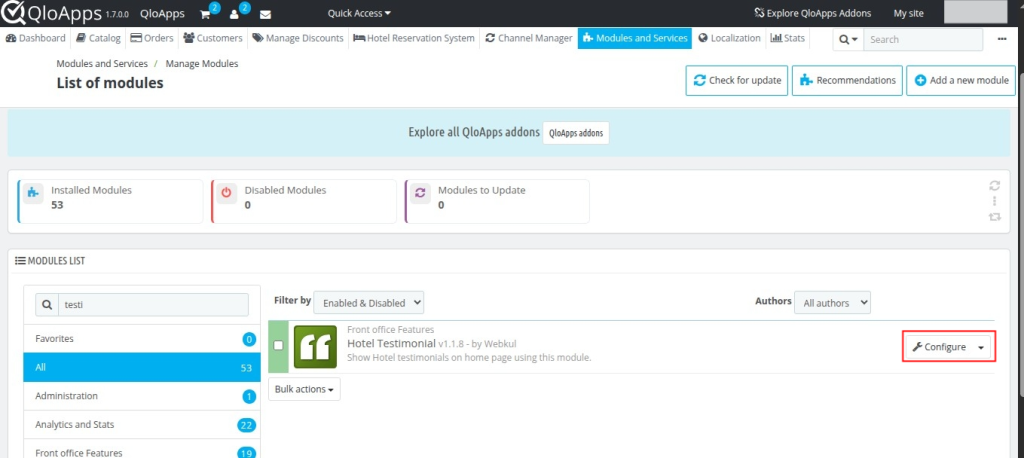
Configuration Of Module
Click on “Configure” to manage testimonial settings—you can add a new testimonial, edit an existing one, or disable the entire testimonial section if needed.
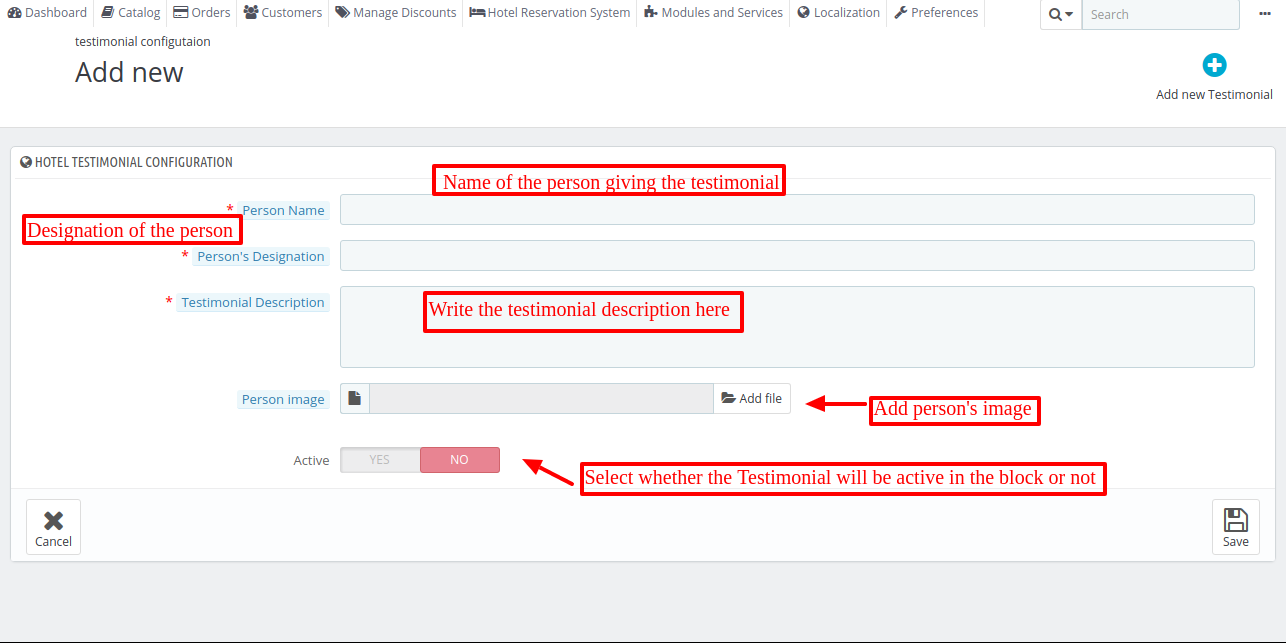
Adding a New Testimonial
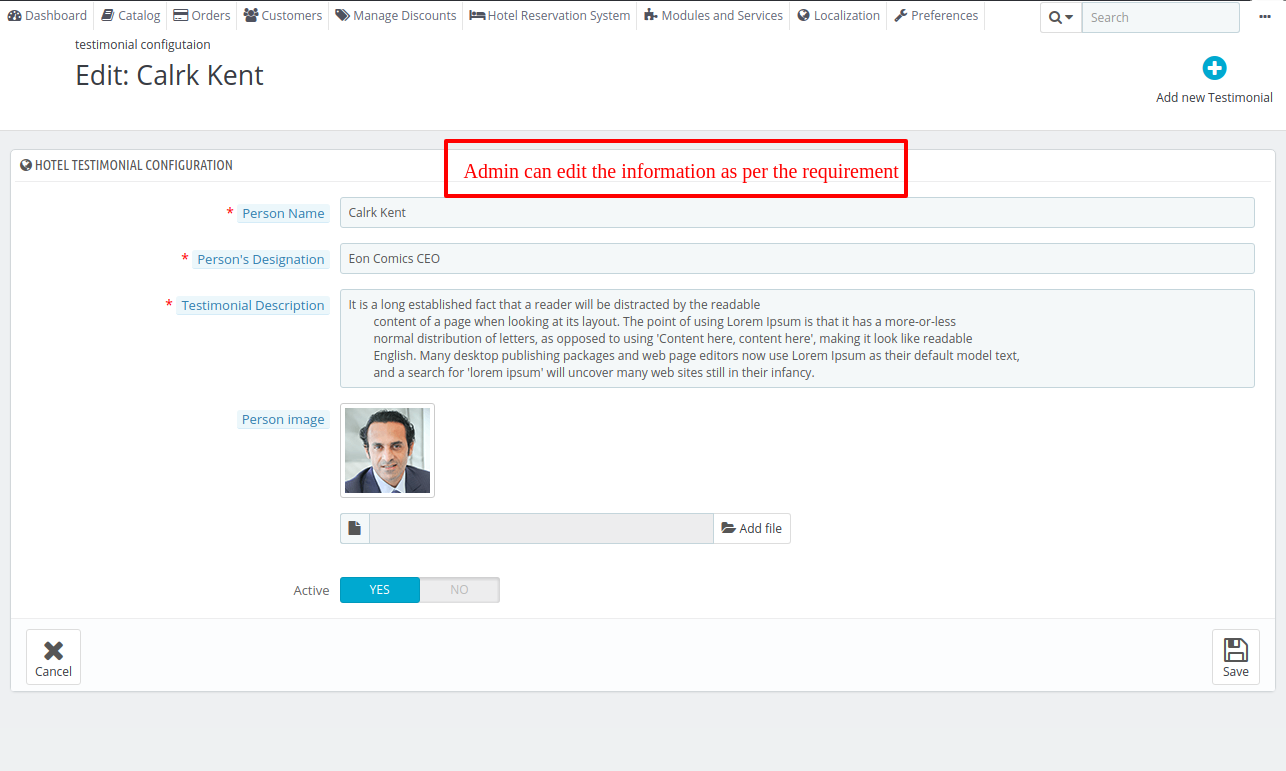
Editing a Testimonial
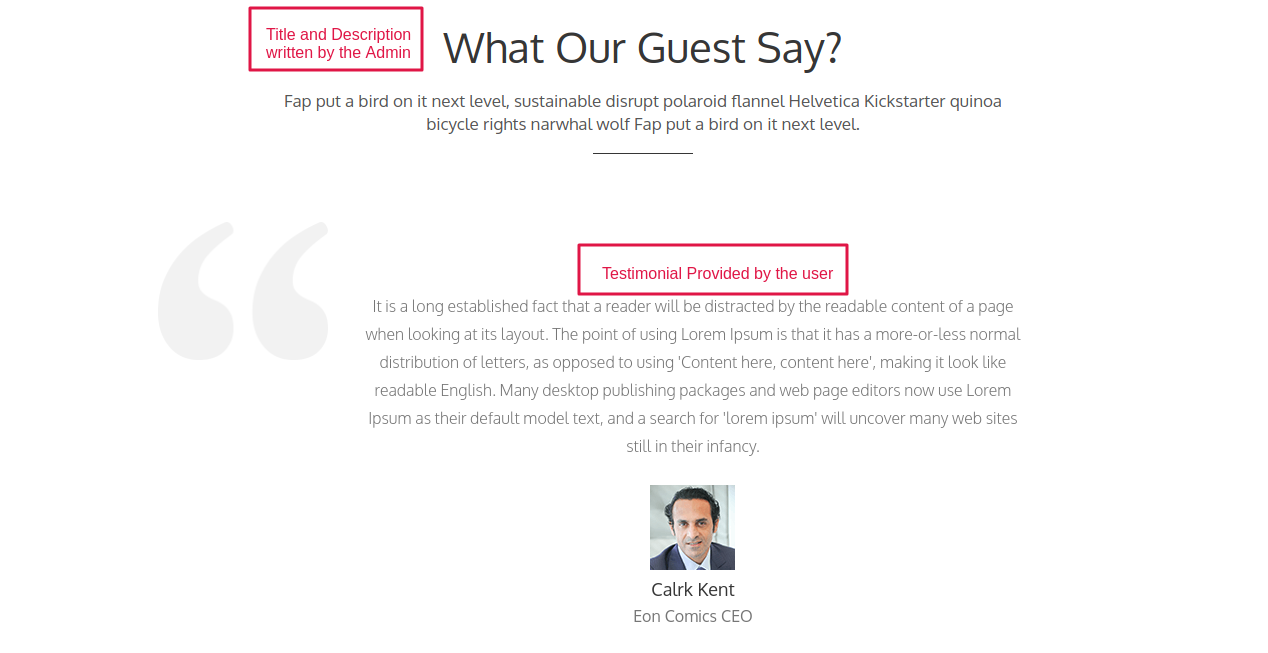
Effect of Hotel Testimonial Settings on the Front Page
Footer Payment Block Setting
To configure the Footer Payment Block, go to the Modules section, search for “Footer Payment Accepted Block,” then click on “Configure” to manage the payment icons displayed in the footer.
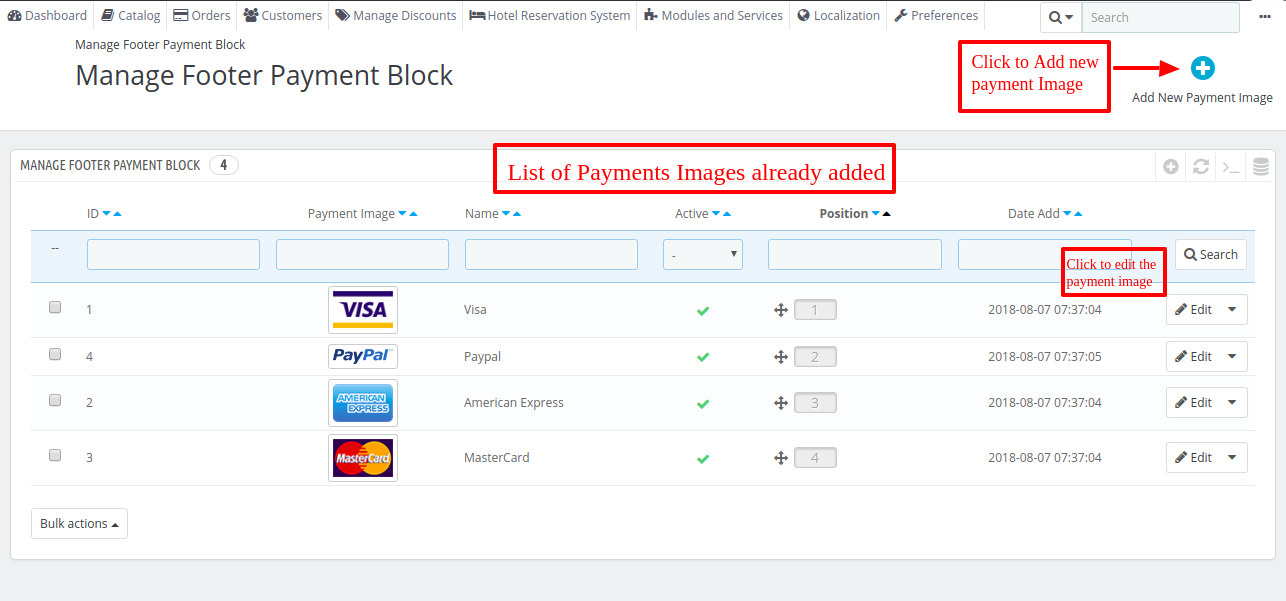
Configure Payment Method Display
Click on “Edit” to manage the configuration of an existing payment method. To add a new one, click on “Add a New Payment Image”, then upload and configure the new payment method.
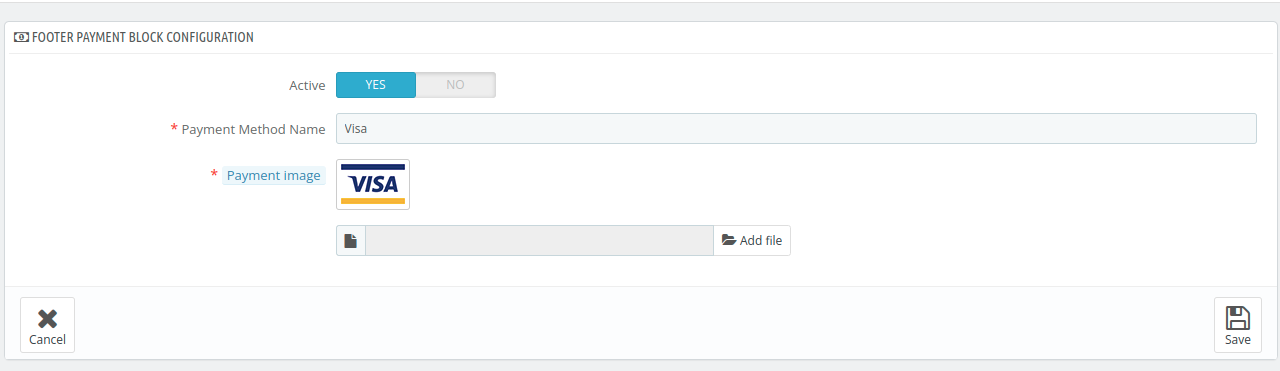
Active: Select yes to active the payment method
Payment Method Name: Give the name of the payment method
Payment Image: upload the logo of the payment method
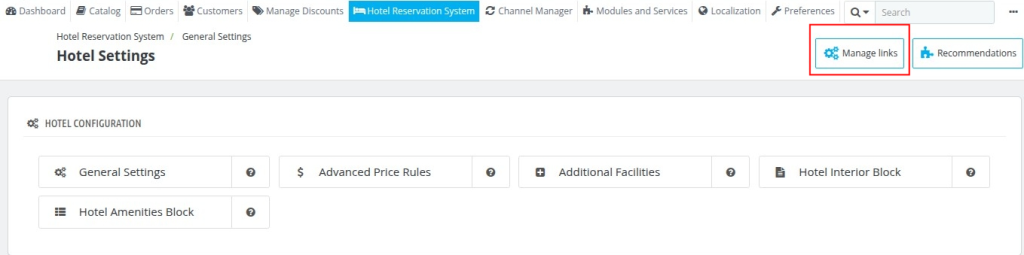
Manage Links
On the hotel setting page, you can add the module and links by clicking on Manage links.
When you click on the manage links the settings link page will open. From here you can add the new link here. Click on Add New link.
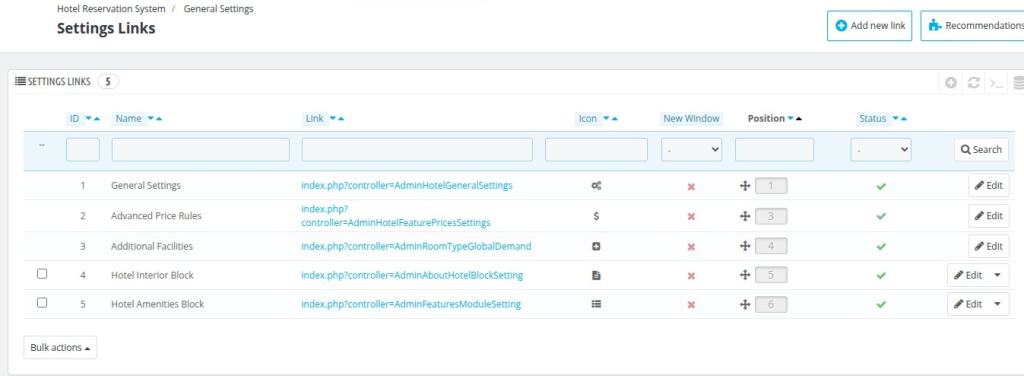
Here you can add the details of the link you want to add on the hotel setting page.
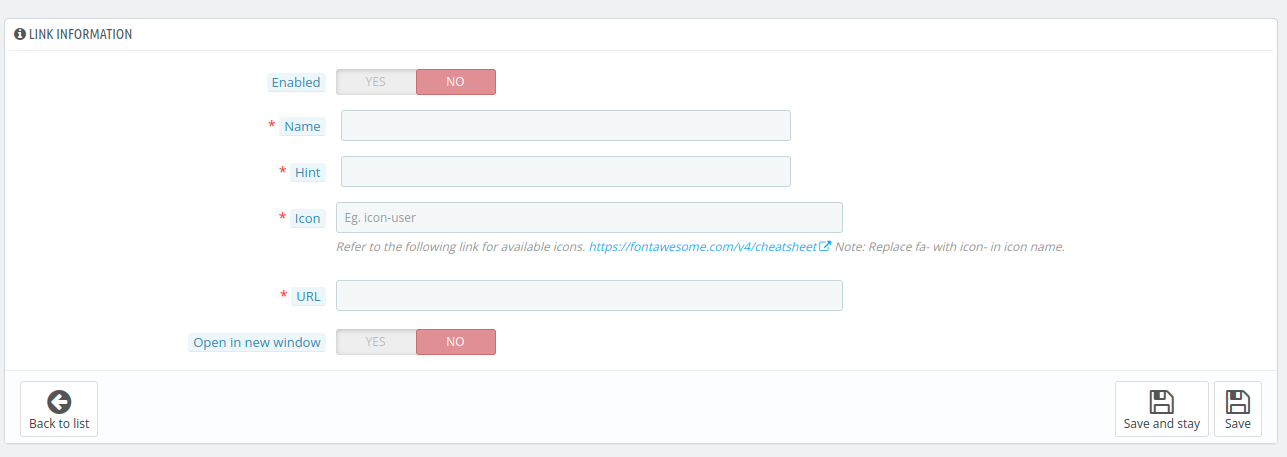
- Enable: Select yes or no to enable or disable the link.
- Name: Give a name to the link.
- Hint: Give hint a brief about the link.
- Icon: Add a favorable icon to the link or refer to the following link for available icons https://fontawesome.com/v4/cheatsheet.
- URL: Set the URL of the desired page. If it is a Back office URL. Please remove the token from it.
- Open in new Window: Click the check box to open the link in the new window.
Custom Navigation Link
This set of options allows you to show your desired pages in the Navigation Menu and Footer Menu. Go to Module and Services> Module> Custom Navigation Link to manage this.
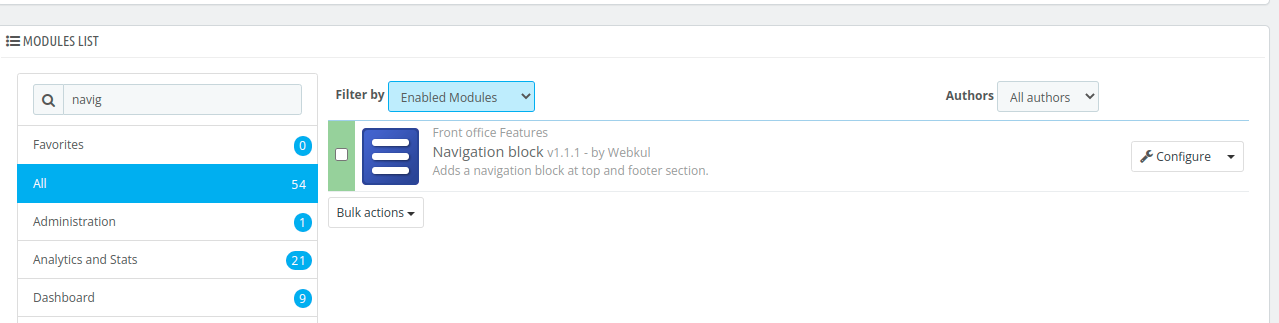
Configuration
Click on Configure to manage the module.
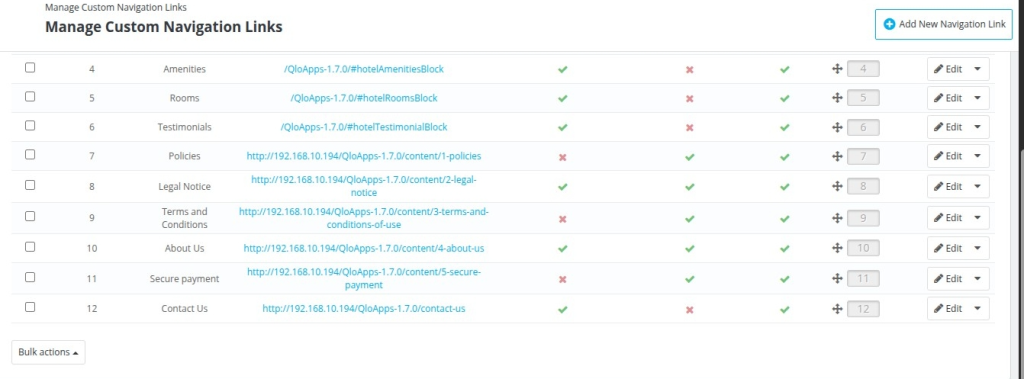
You can add the listed links to the navigation menus or can create one by clicking on the add new navigation link.
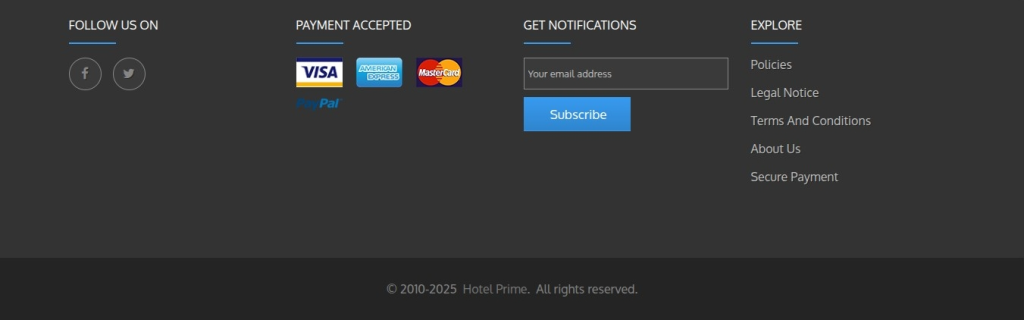
Frontend View
Navigation Menu
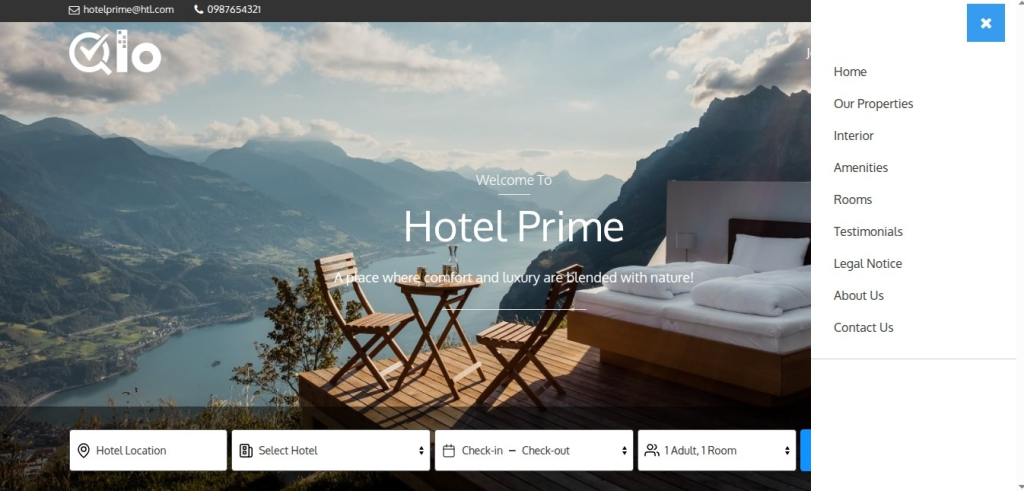
Footer Menu
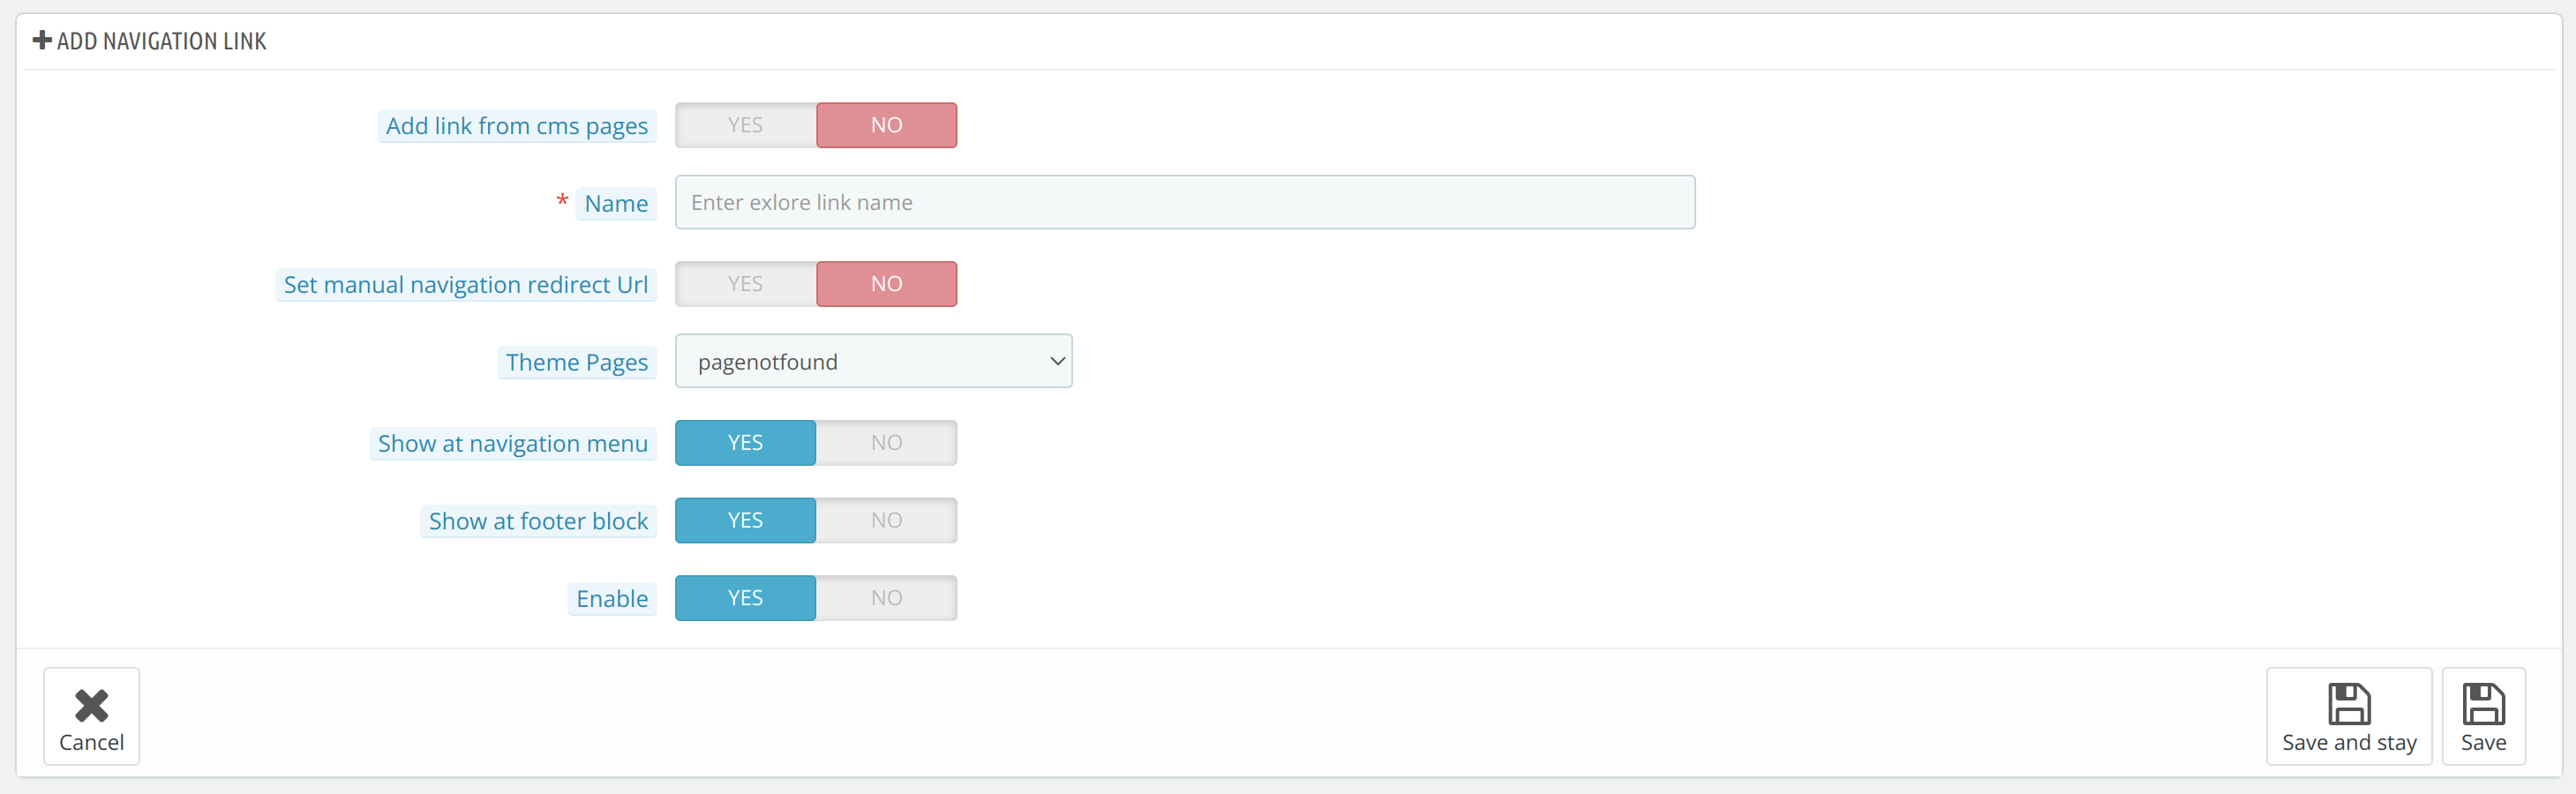
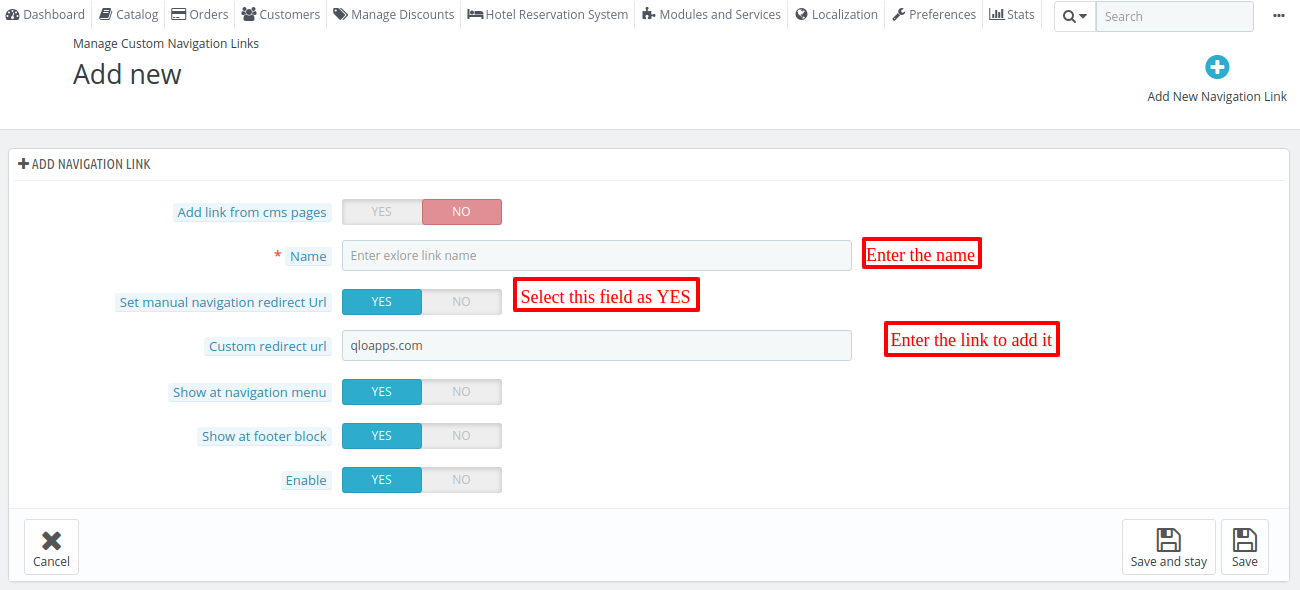
Adding A New Link In The Navigation Menus
QloApps allows adding CMS pages, Theme Pages, and other links to your Navigation menus.
Once you click on the Add New Navigation Link you land on this page.
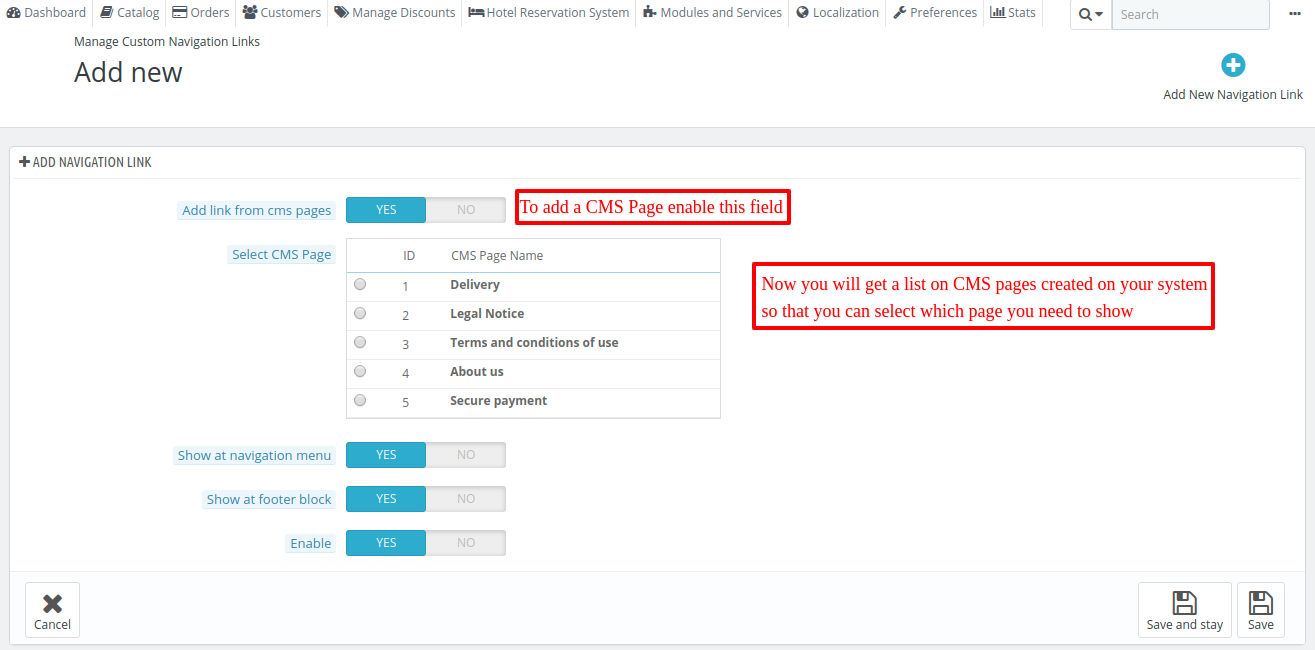
CMS Page
Theme Page
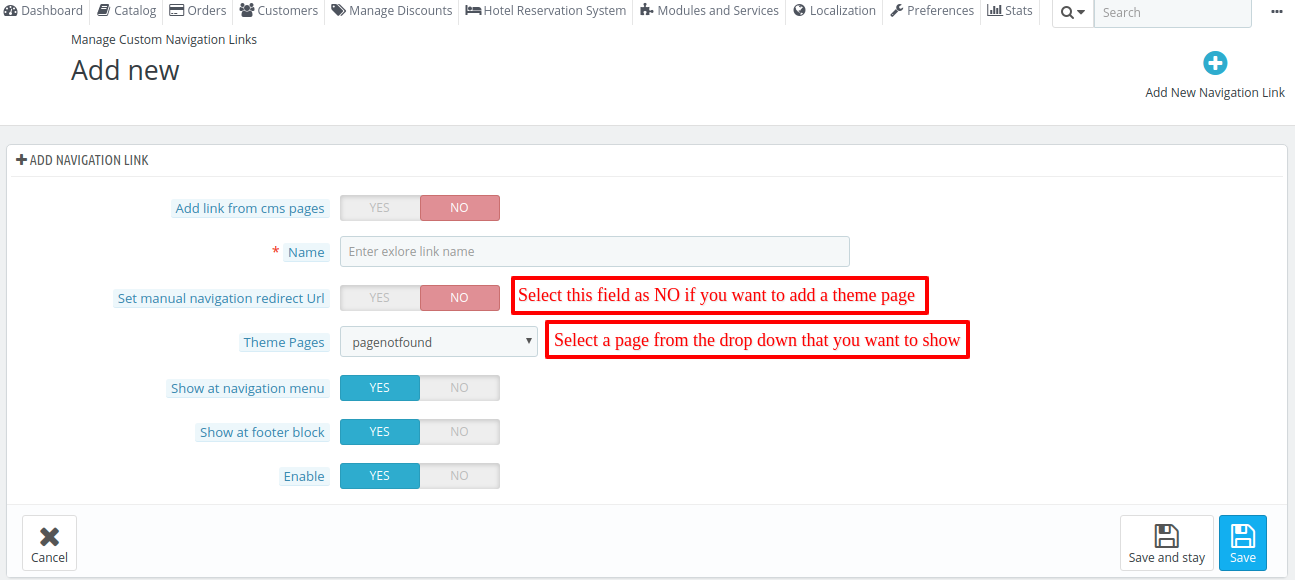
How to Add Links?
Module Catalog
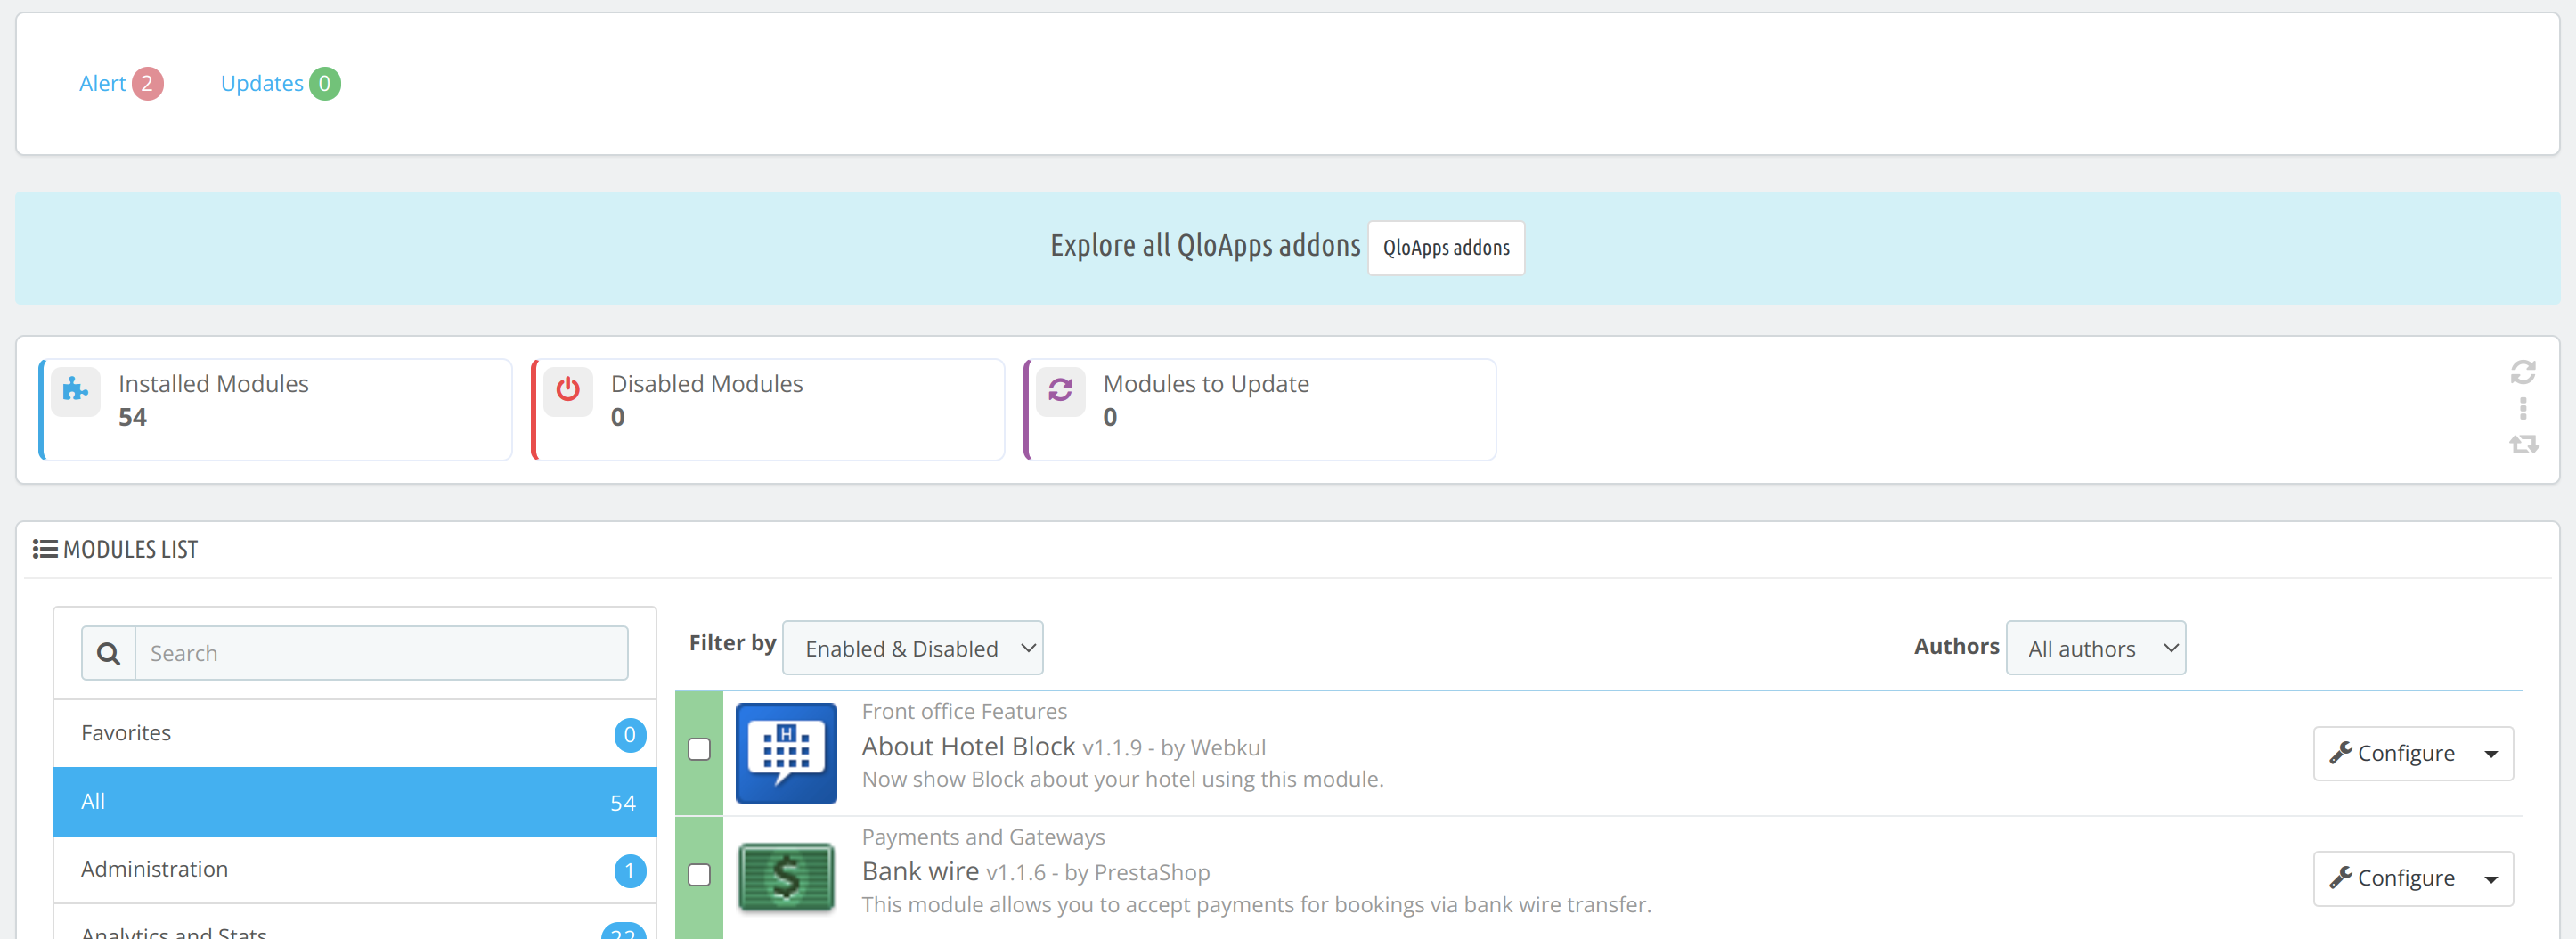
On the hotel reservation setting page, you can add a module in your hotel reservation system as per your need. Go to module and services> module catalog.
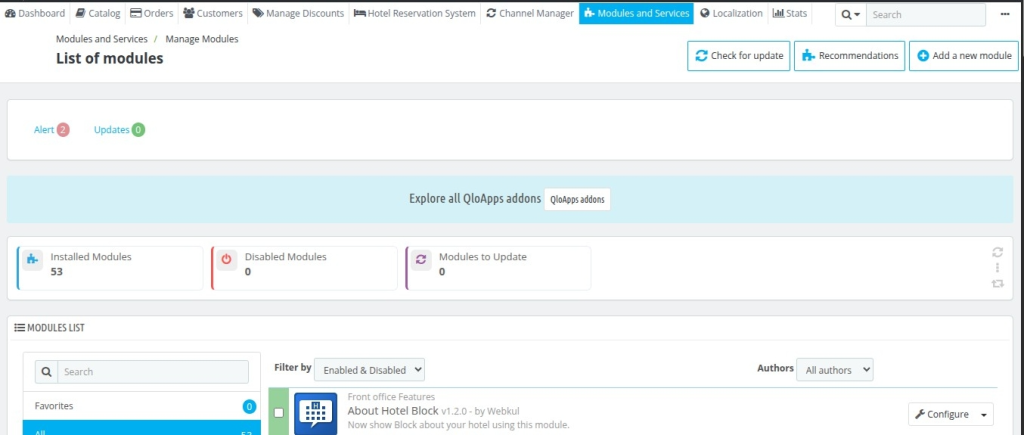
When you click on add a new module then you will redirect to the modules and service page.
After that, you can configure the module. The module installed in QloApps, will be managed from the manage modules page. By clicking on explore you can buy the module for yourself.
Refund Process
If there are cancellations of the booking, the refund gets credited to the customer. To manage the refunds. Go to Hotel Reservation System> Manage Order Refund Rule.
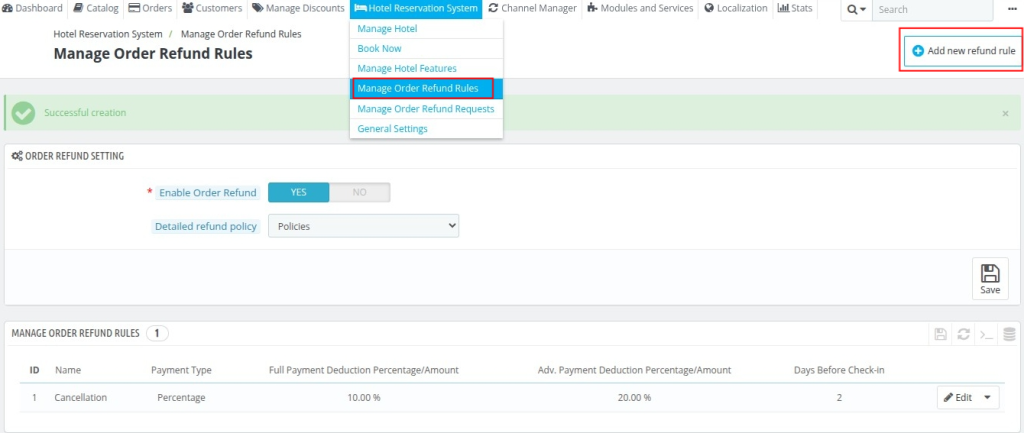

Add New Refund Rule
Click on Add new refund rule to create a refund rule.
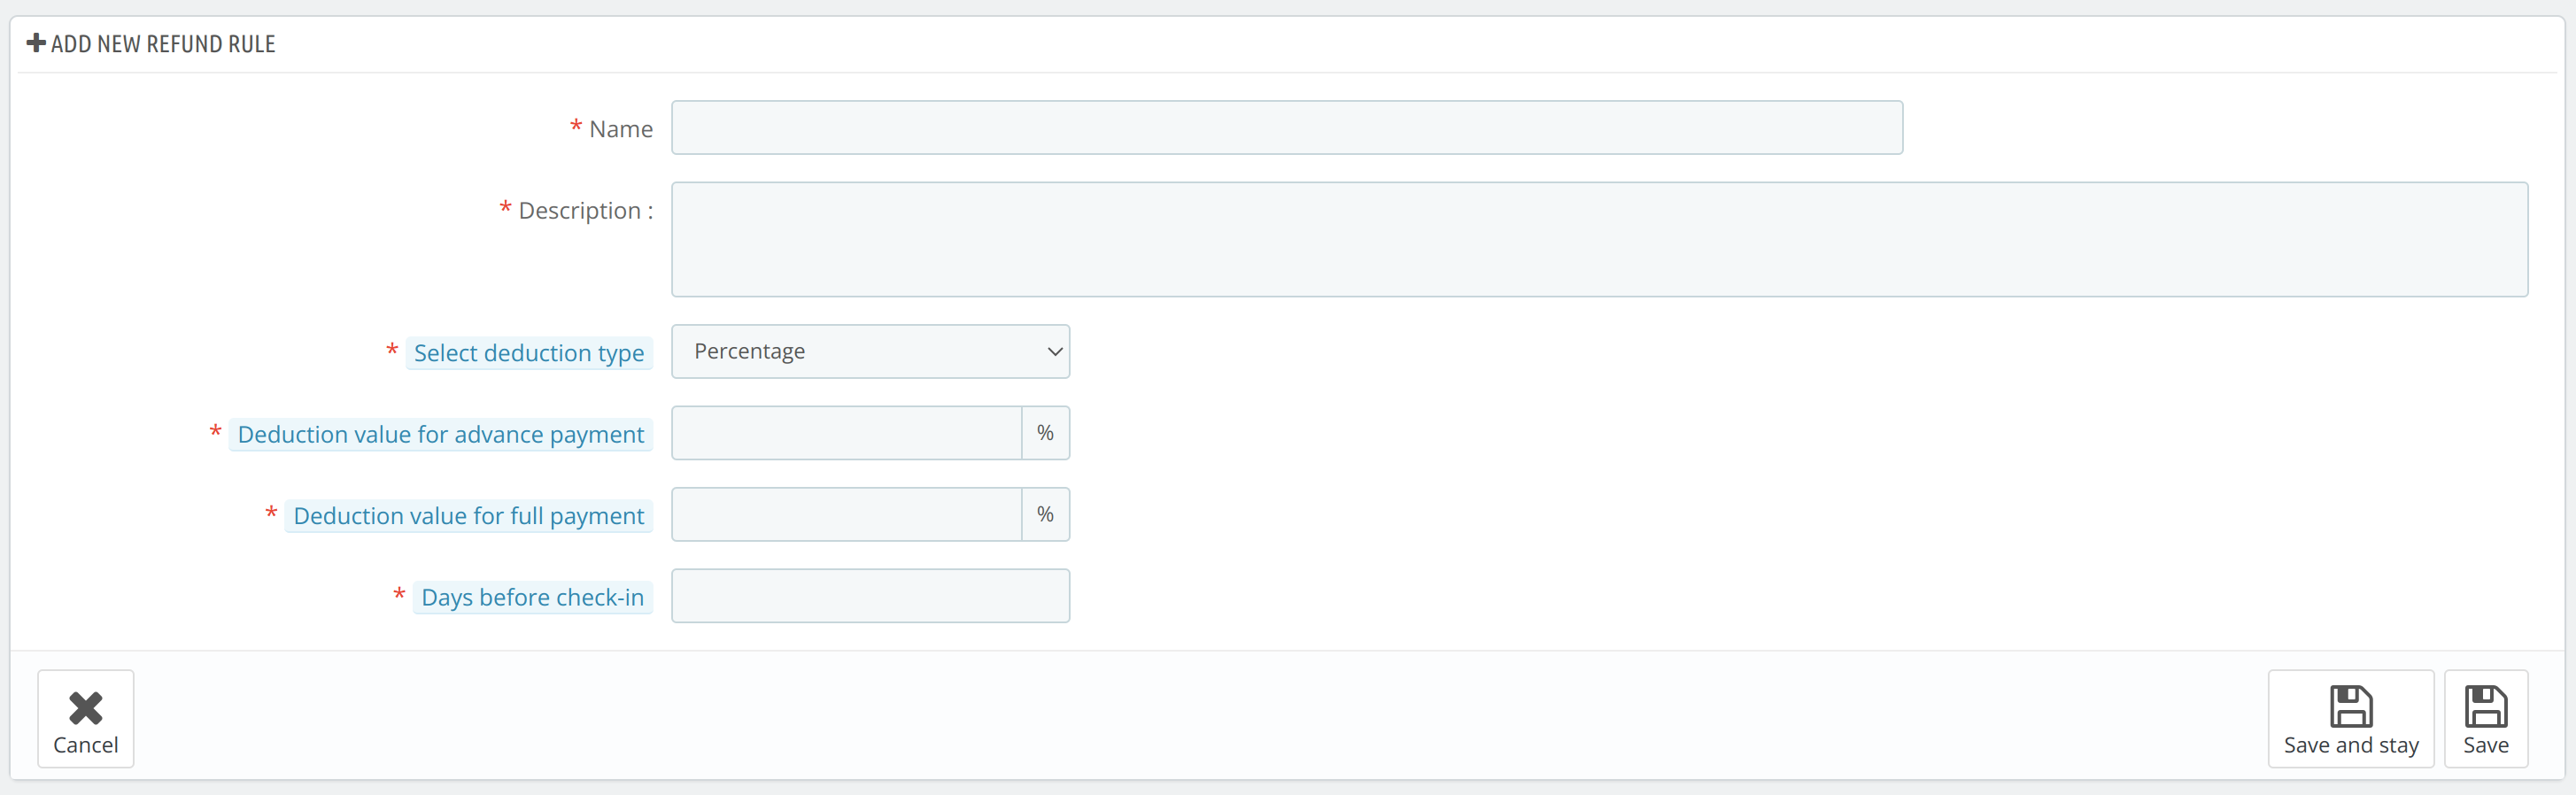
- Name: Enter the name you want to give to the refund rule
- Description: Give a description of the refund rule and how the refund will be calculated
- Select Deduction Type: Select from the drop-down that the deduction will be a percentage of the amount or fixed value.
- Deduction Value for Advance Payment: Enter the value that should be deducted if the customer has made only an advance payment for the booking.
- Deduction Value for Full Payment:Specify the deduction value if the customer has paid the full amount at the time of booking.
- Days Before Check-in:Define the number of days prior to check-in when a booking can still be canceled and a refund will be processed.
Cancel The Booking And Initiate A Refund in QloApps
Customer Initiate Refund
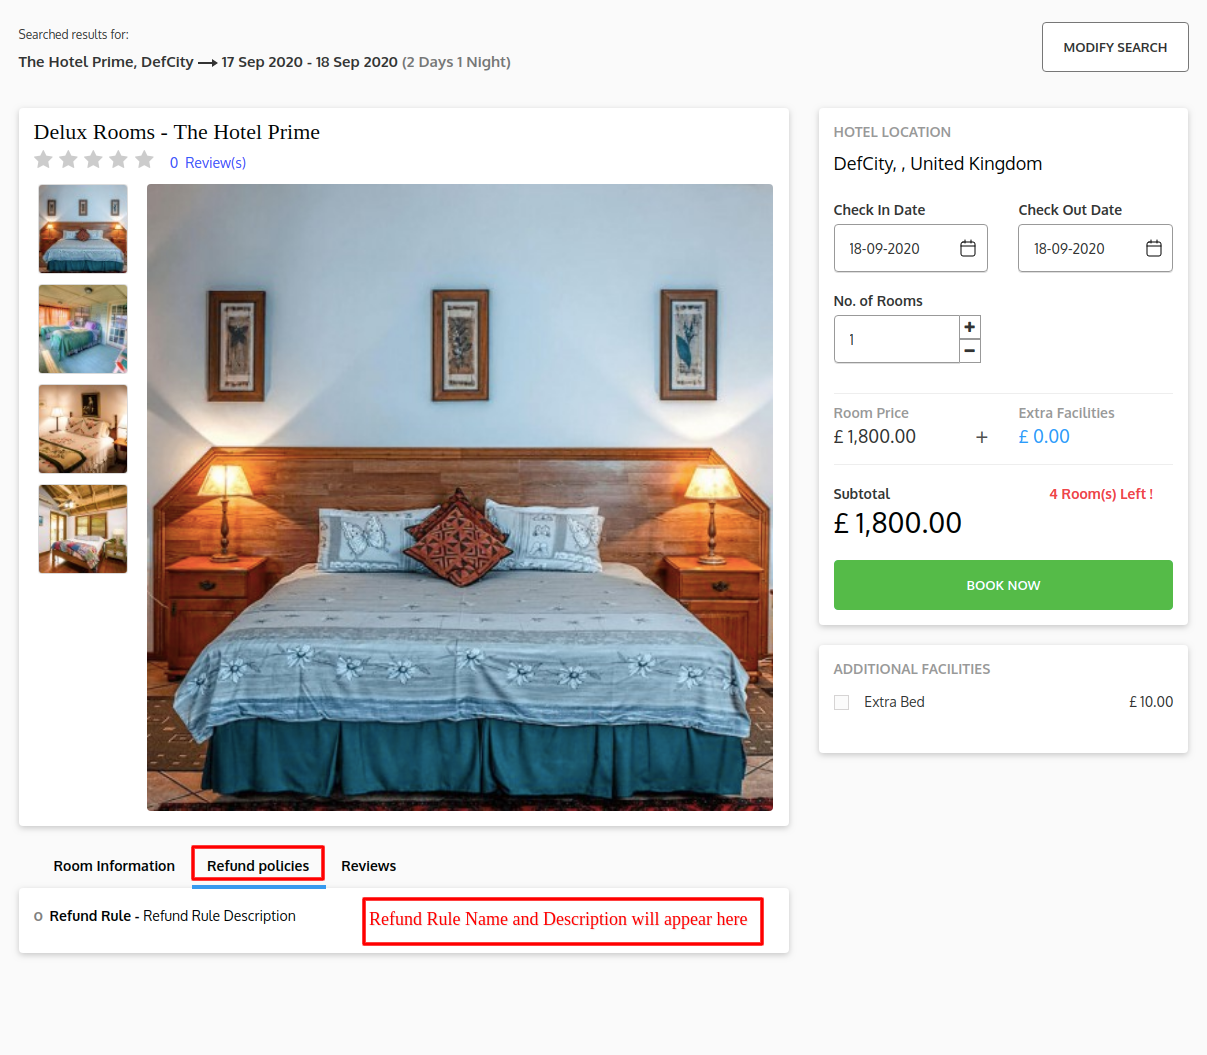
The customer can check the Hotel Refund Policies on the room type page.
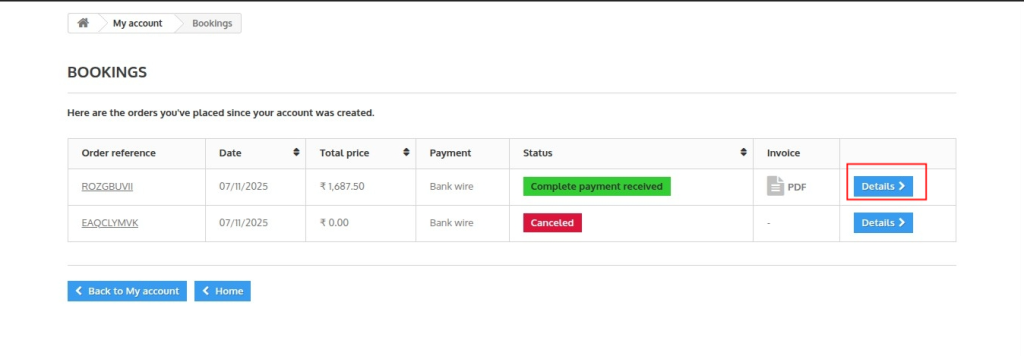
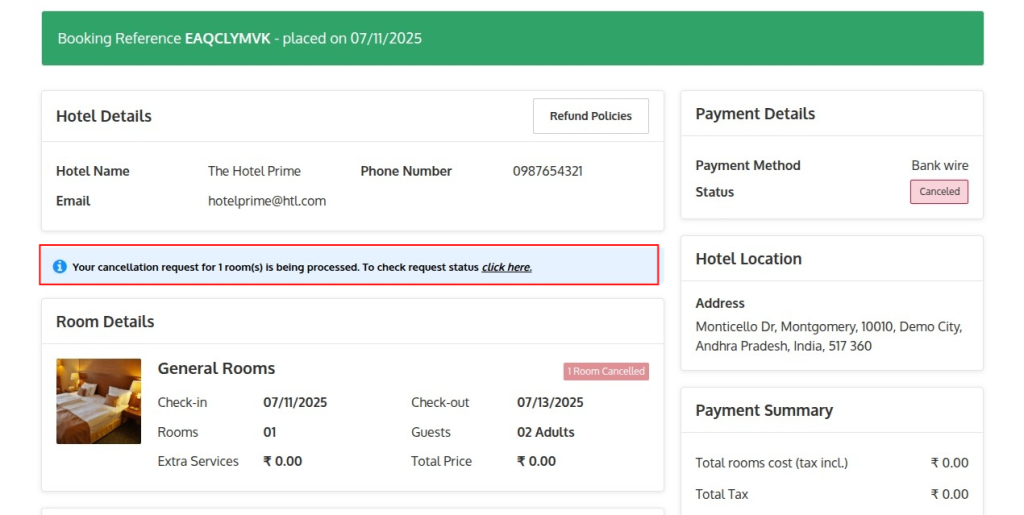
Now the guest can visit the Order/Booking page to send a refund request to the admin. From there, they can select the specific booking and click on “Details” to proceed with the request.
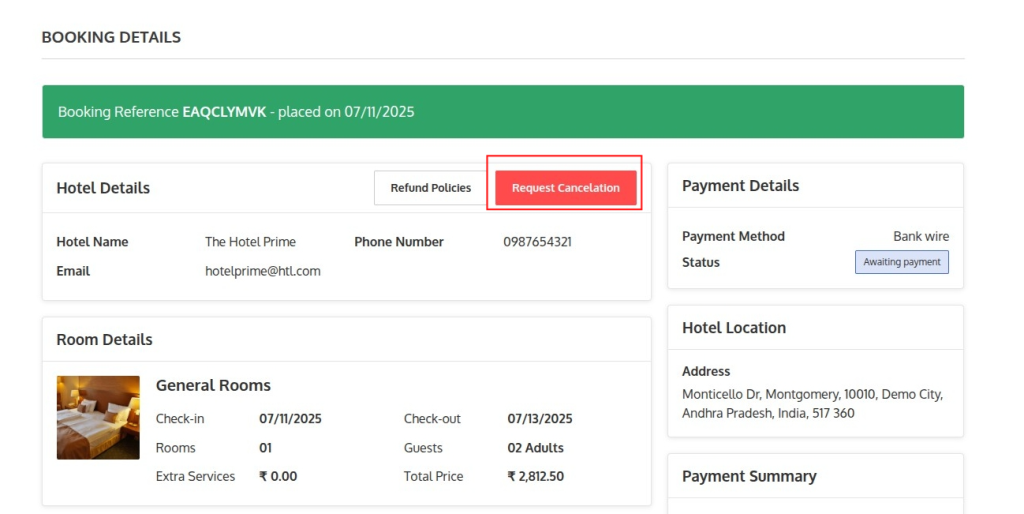
Once the customer clicks on “Details,” the Booking Detail page will appear. From there, they can click on “Request Cancellation” to initiate the refund process.
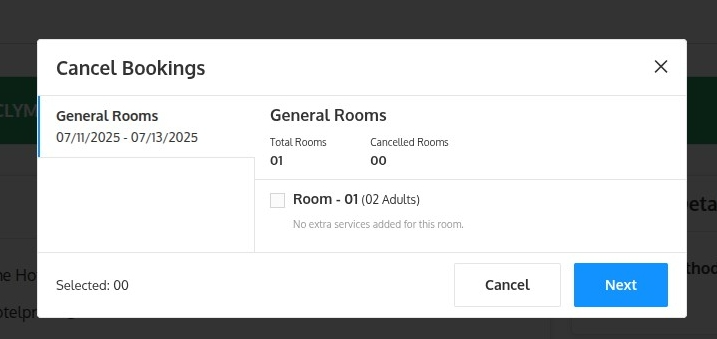
After the customer clicks on “Request Cancellation,” a list of booked rooms will appear. They can then select the rooms they want to cancel.
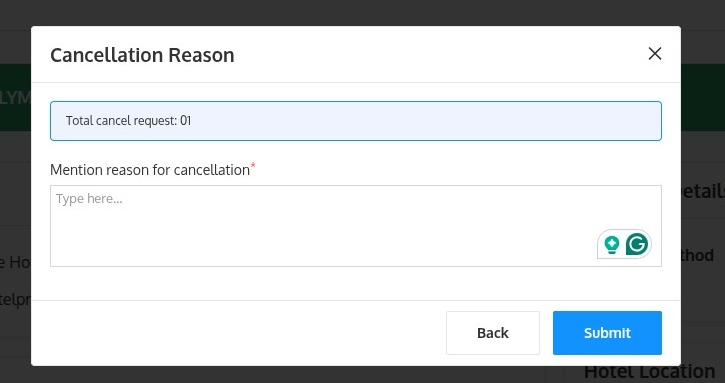
Now provide a cancellation reason to complete the request.
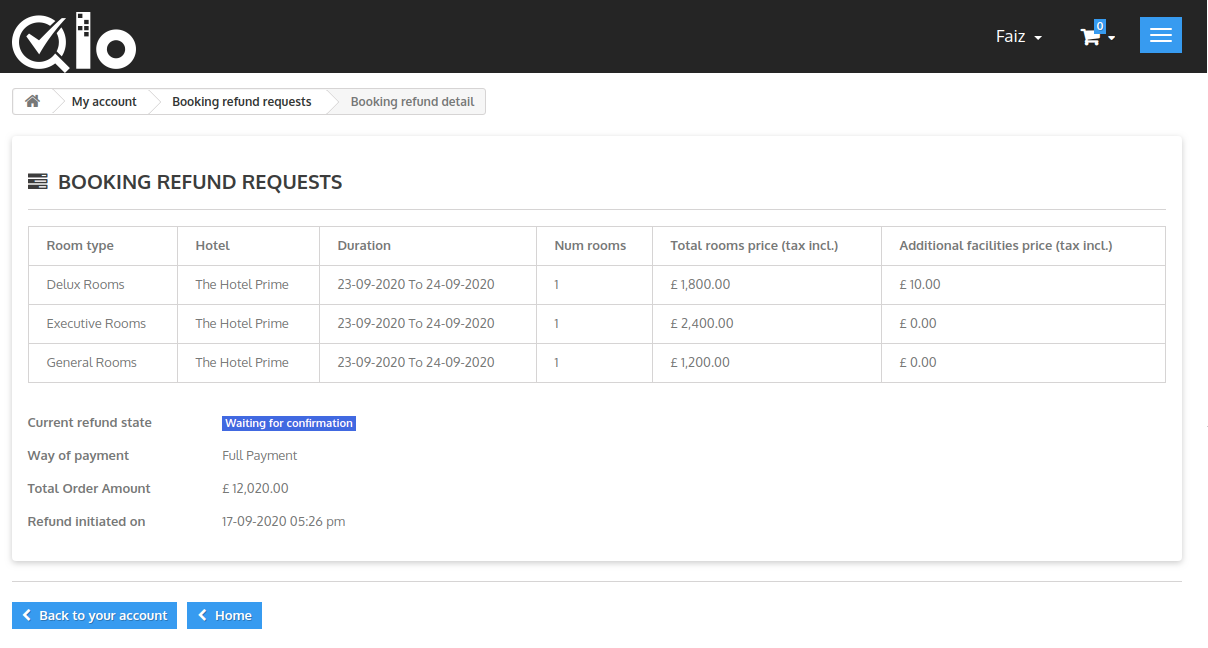
Refund Request History
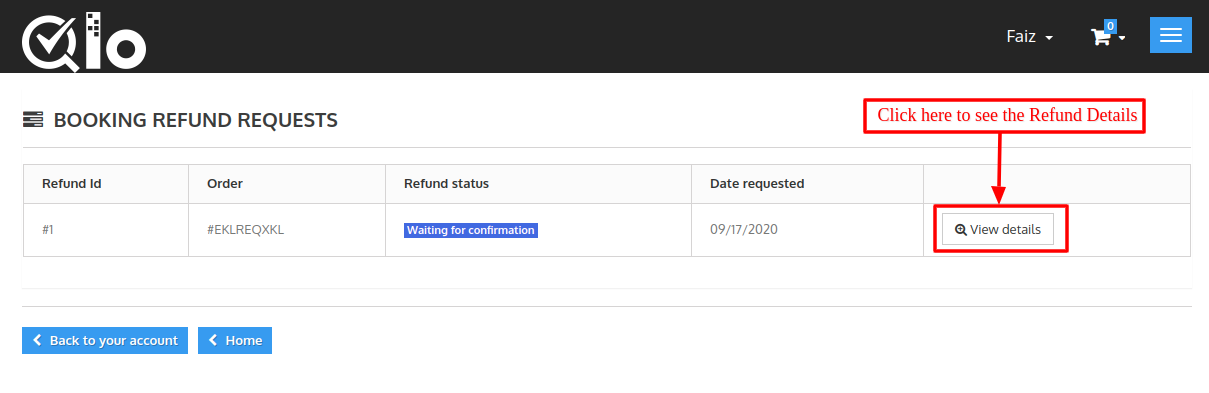
The user can track his refunds in the order details or Booking Refund Request Tab in My Accounts.
Now the customer can see his Refunds Requests.
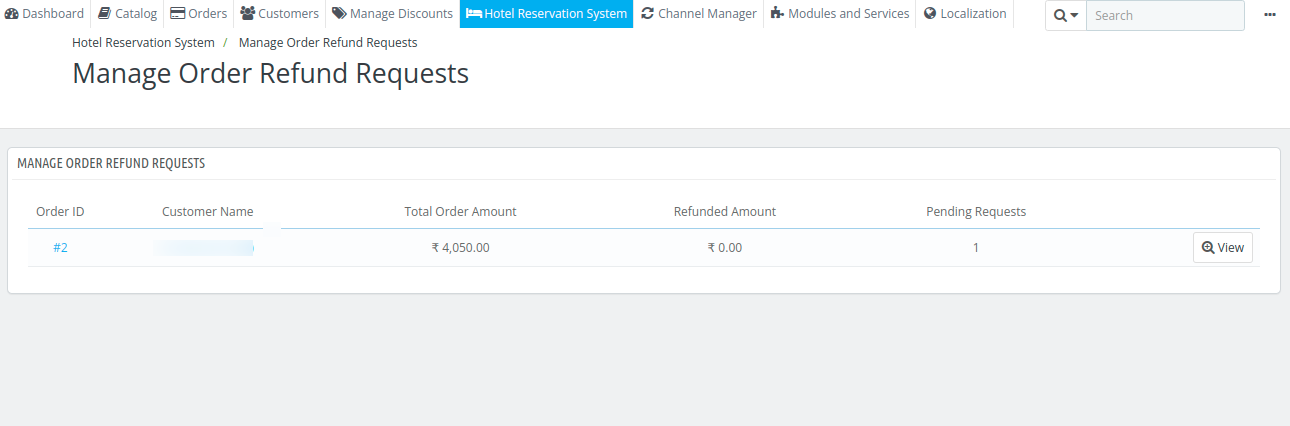
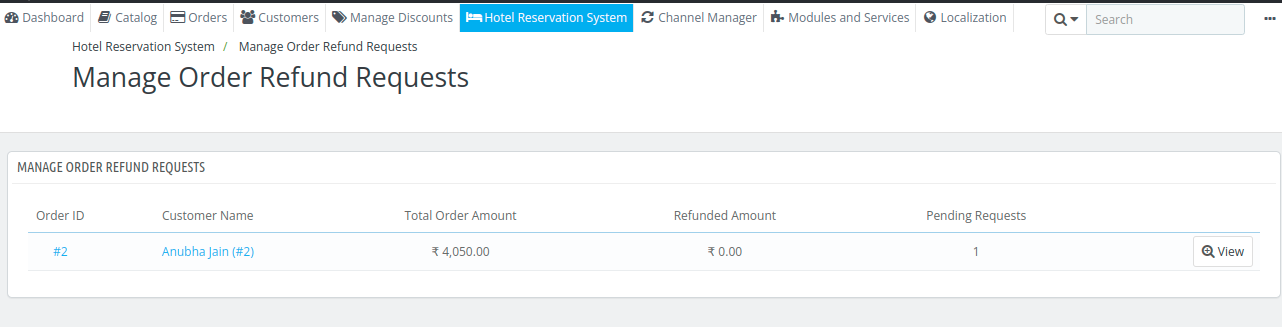
Manage Order Refund Request
Go to the hotel reservation system > manage order refund request. Here you will get the log of refund requests as shown in the below image. To know about the refund click on view.
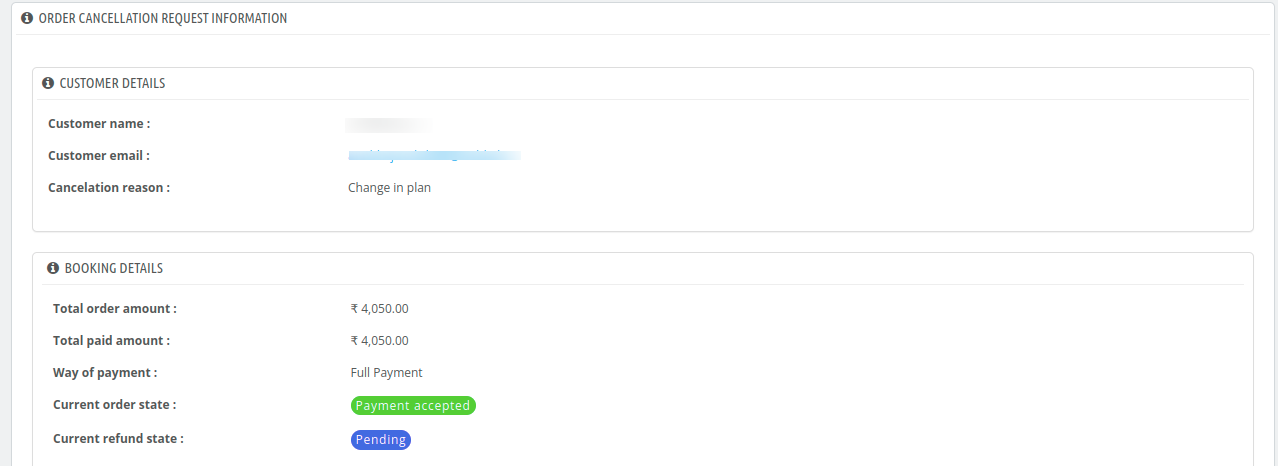
Here you will get the customer details and the amount of the booking. Along with this, you can also see the current order state, whether the amount is paid or not.
The room refund status can be changed from here easily. The status of the refund is pending, denied, an completed.
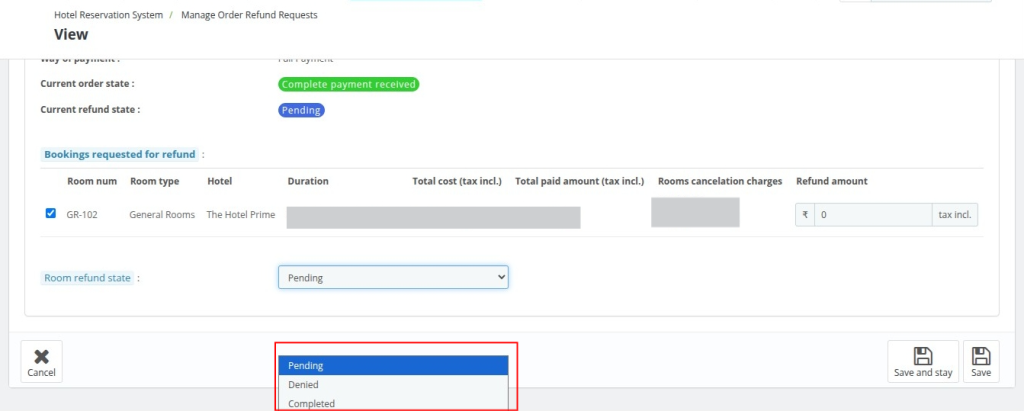
When the status of the order is changed to refund completed, then you can generate a refund in the form of create credit slip, refund transaction amount or create voucher.
Among creating vouchers and credit slips you can generate only one.
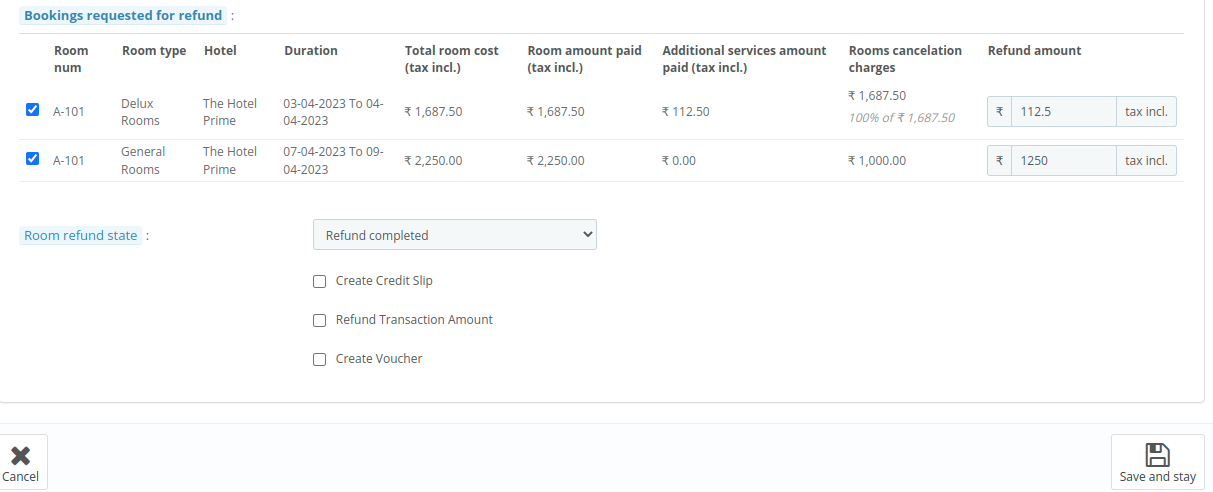
In case when the order is not paid or advance payment is not done, then in cancel bookings, the refund is not generated as shown below.
Order Preferences Configuration
To manage the global settings of order Go to Prefrences>Order
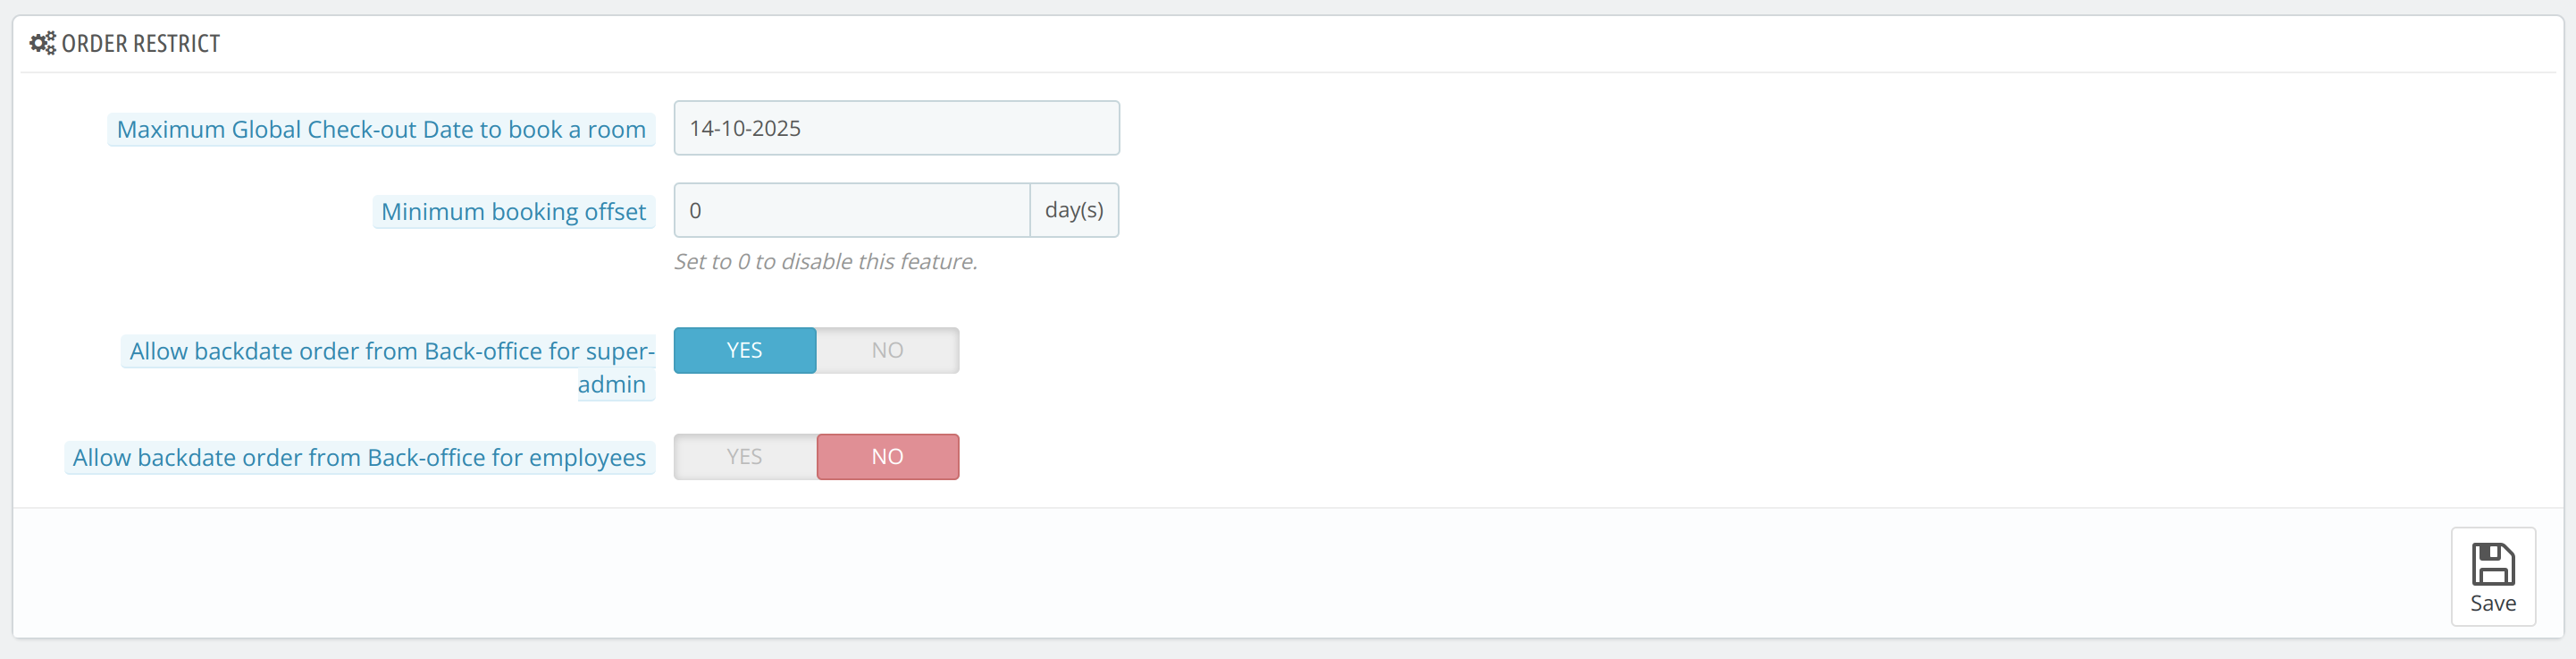
Order Restrict
Here in the order restriction, you can set the maximum global date to book the room. If the hotel restricts date is disabled this global date will work as the default order restrict date.
Minimum Booking Offset: Number of days needed to prepare any room.
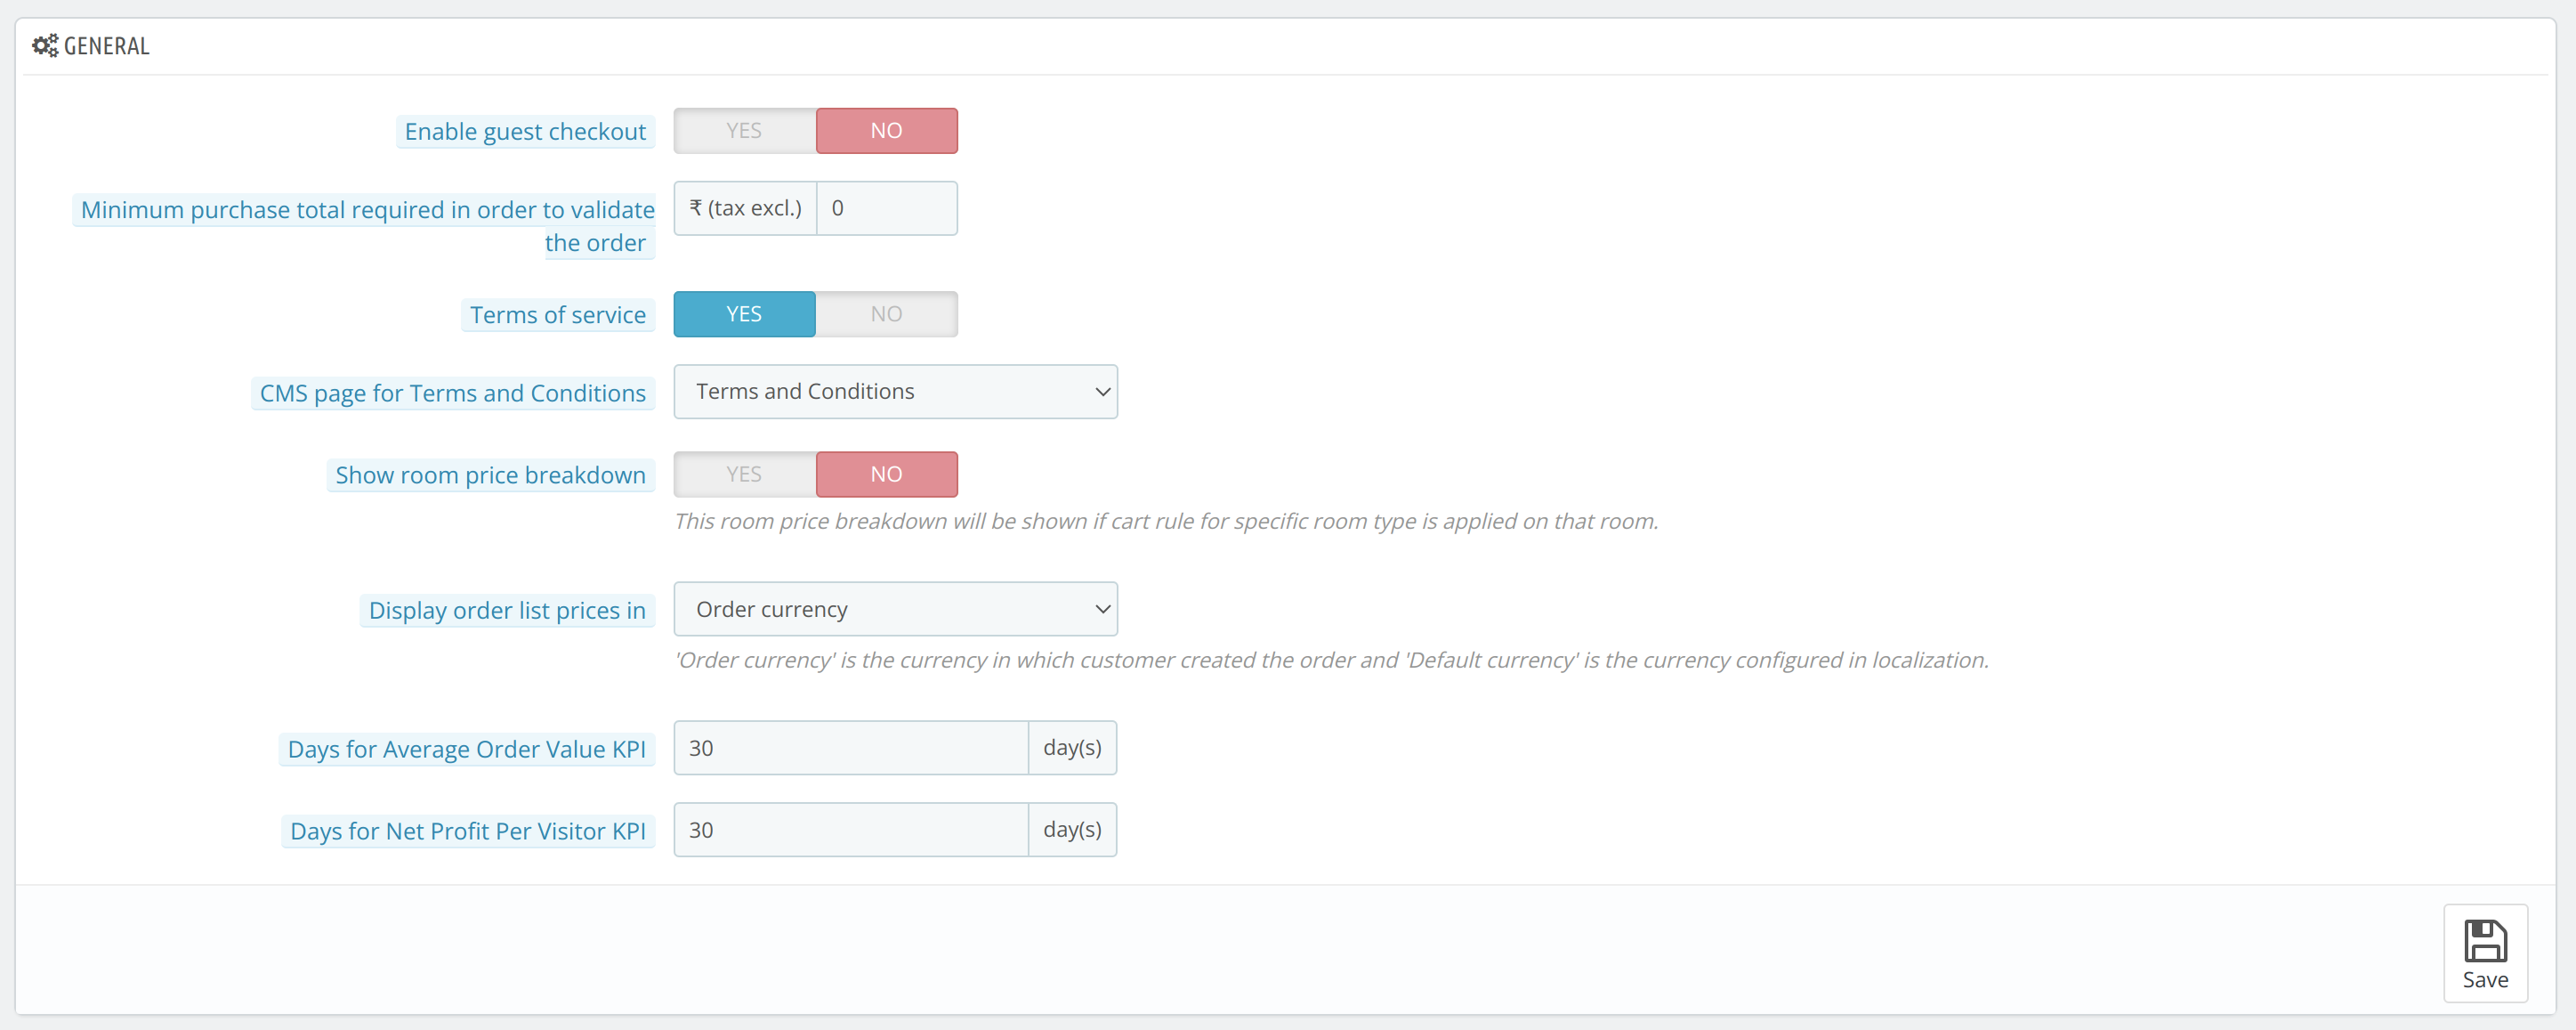
General
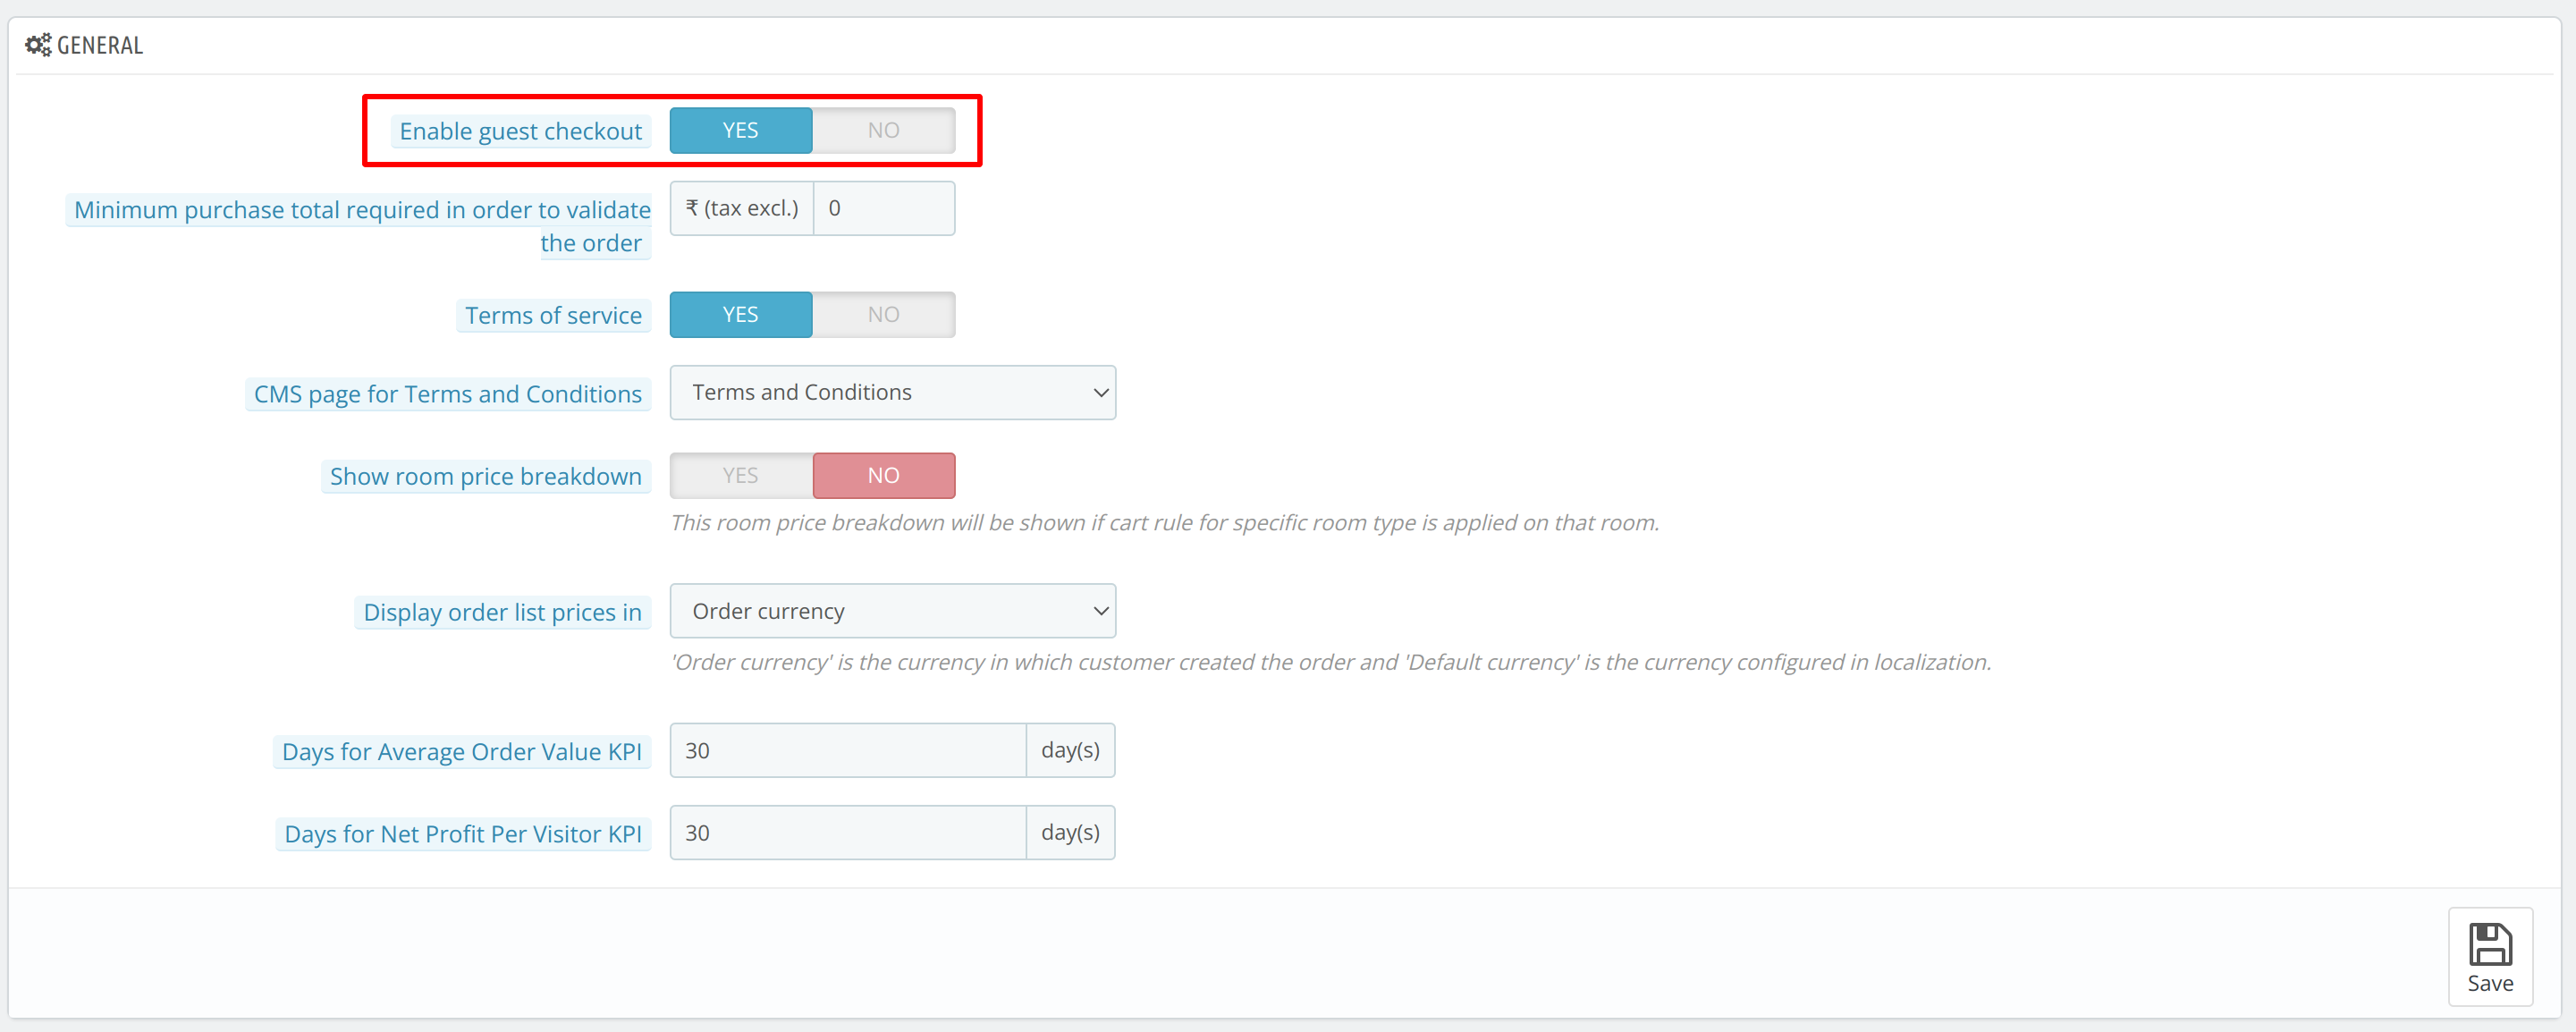
In General Setting Configure the given fields
Enable guest Checkout: Enable the guest checkout to book the room.
Minimum purchase total required to validate the order: Enter the minimum purchase to book the order. Set 0 to disable the order.
Terms of service: Require by the guest is to accept the terms of service to place the order.
CMS page for Terms and Conditions: Select the CMS page for terms and services.
Showroom price breakdown: Show the breakdown of the auto-added services added with room type in the cart.
After this, the breakdown will be shown below:
Display Order List Price in: Display the order price in order currency and default currency
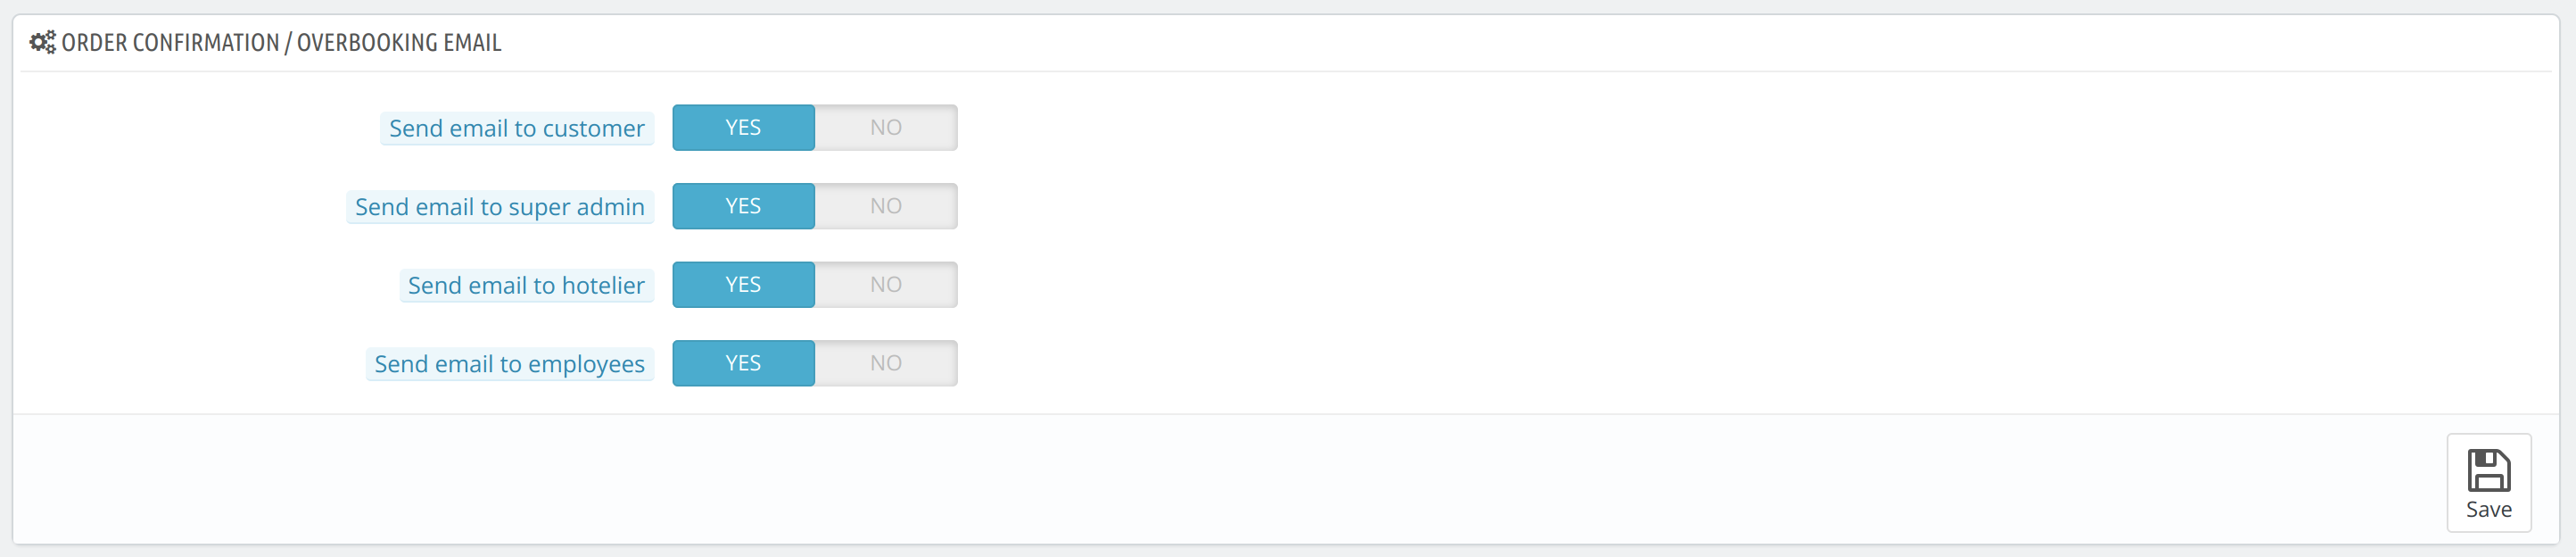
Order Confirmation/Overbooking Email
In the Email Setting the user will get the email of order booking on the following parameters if enabled.
- Send Email to customer
- Send Email to super admin
- Send Email to hotelier
- Send Email to employees
Occupancy Wise Search Configuration
The user can manage their search configuration to search the hotel room. The search can be managed as discussed below:
- Front End search type: Select the search type for the front end. In “Occupancy wise search”, the occupancy field will be shown in the search panel and the search will be based on the required occupancy by the guest. In “Search without occupancy”, All available room types will be shown for the search dates without any occupancy filter.
- Front End Occupancy wise search algorithm: In an occupancy-wise search at the front end, you want to display only room types which are fully satisfying searched occupancy or you want to display all the available room types for the dates searched
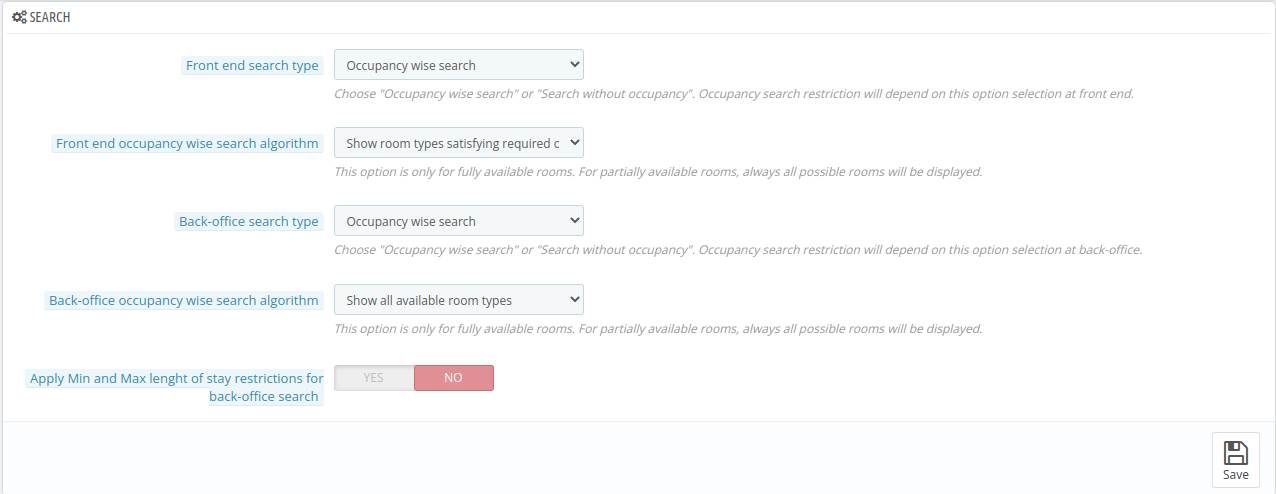
- Back-office Search Type: Select the search type for Back-office. In “Occupancy wise search”, the occupancy field will be shown in the search panel and the search will be based on the required occupancy by the employee. In “Search without occupancy”, All available room types will be shown for the search dates without any occupancy filter.
- Back-office occupancy-wise search algorithm: In an occupancy-wise search at the back-office, you want to display only room types which are fully satisfying searched occupancy or you want to display all the available room types for the dates searched.
- Apply Min and Max length of stay restrictions for back-office search: While searching for available rooms from the back-office, apply the minimum and maximum length of stay restrictions
Manage Reviews in QloApps
With the QloApps hotel reservation system, the customer can write a review. They can share their experience of stay and services.
That means either all rooms in order have been checked out or the last checkout date has passed.
How guests can post the review?
From my account go to orders Here the guest can see the list of orders as shown below
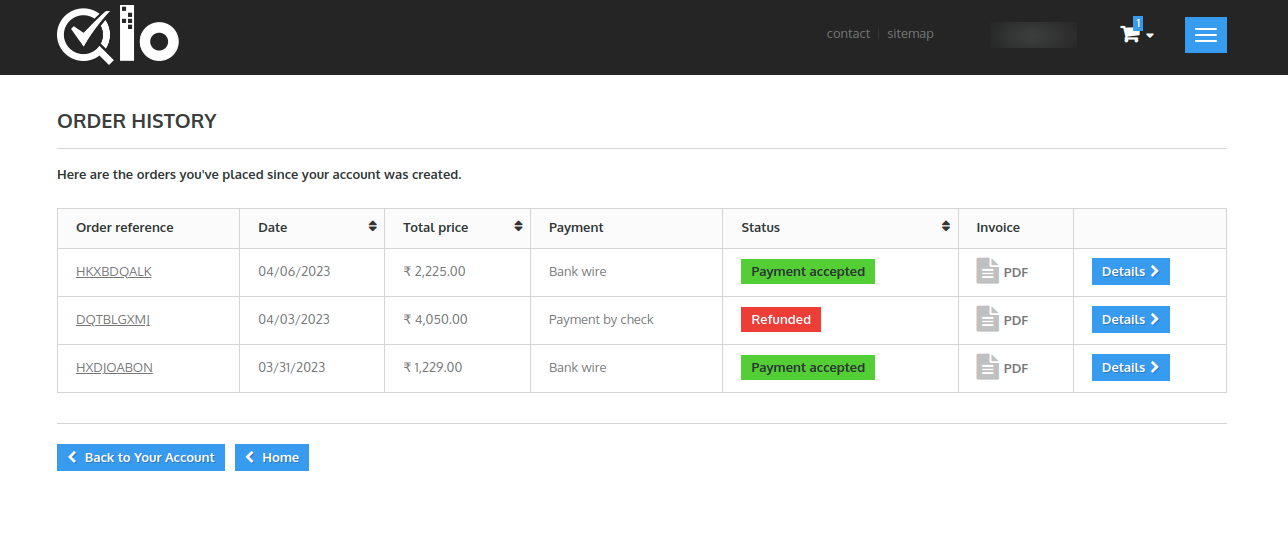
Click on Details then on the same order history page the details of the order are seen, as shown below:
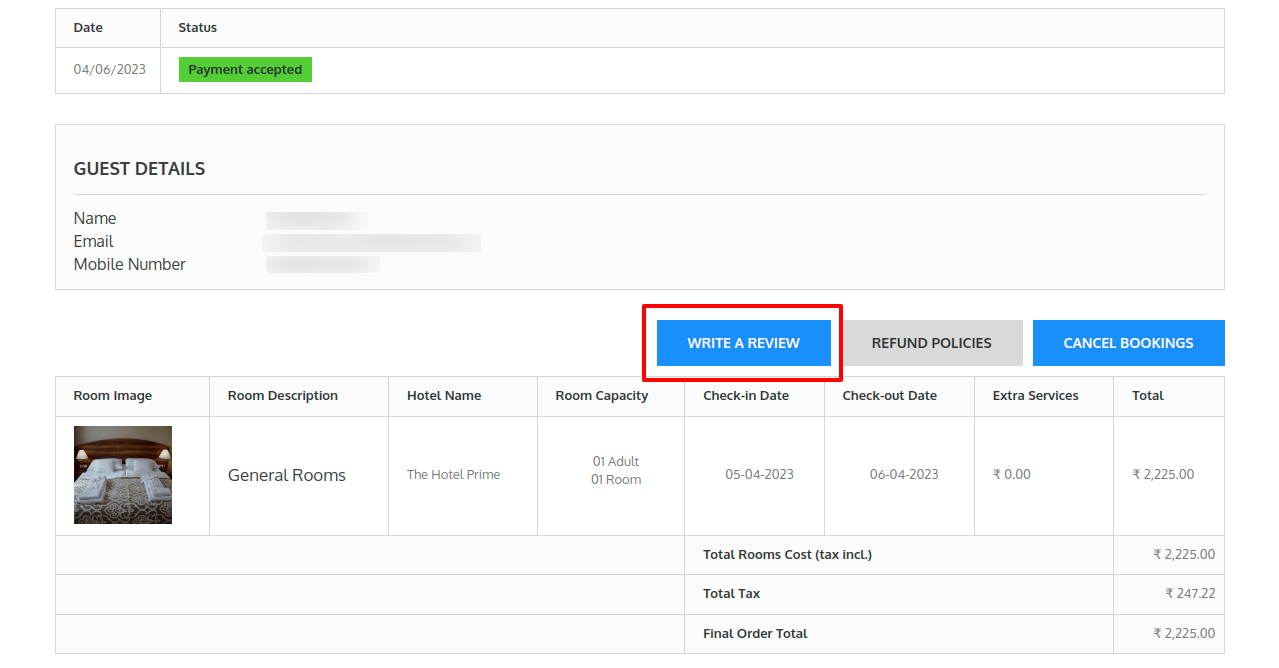
Click on Write A Review. Then review pop-up will appear. Here guests can write reviews and share their stay experience.
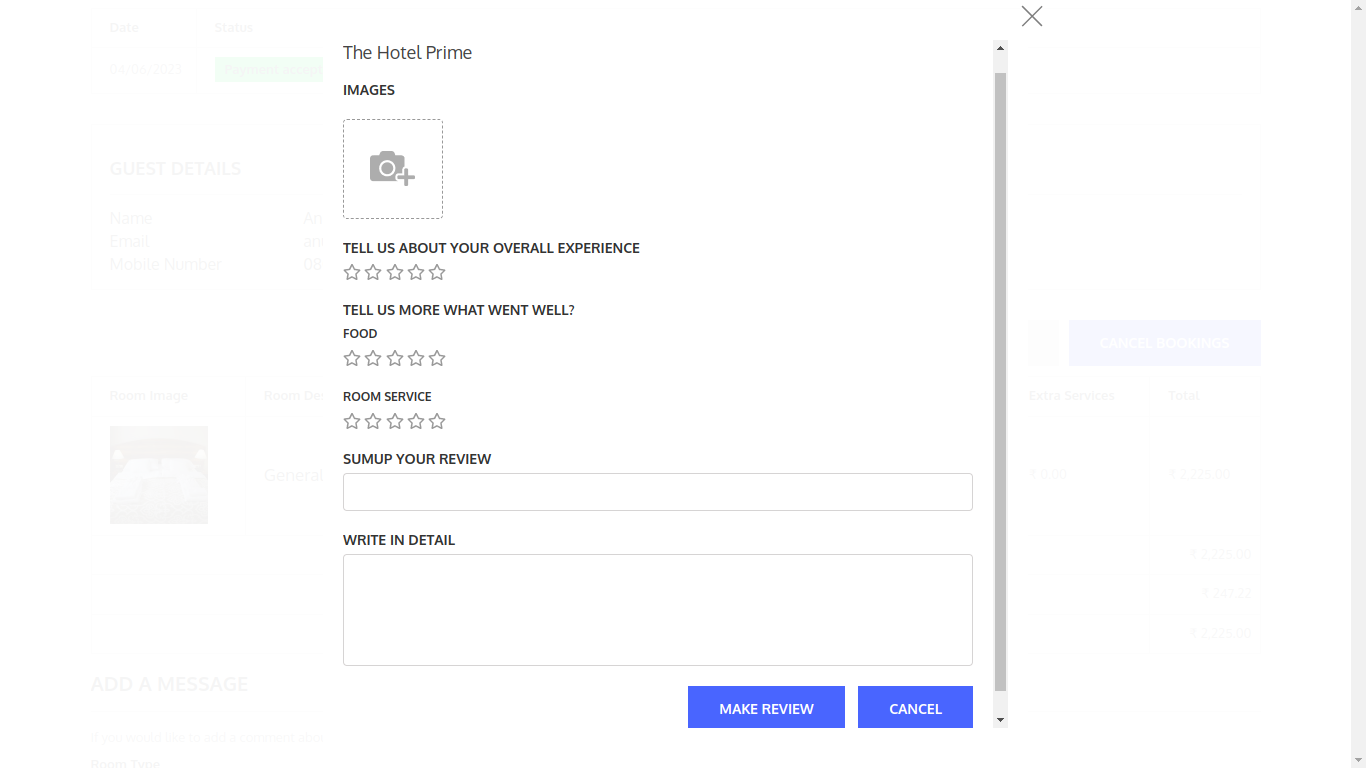
While making the review guest can upload the image. Guests can rate the overall experience and rate the experience of each category separately.
Here the customer can write the overall experience in the Sumup Your Review in a few words, and share their detailed experience in the Write in Detail field. Then click on Make Review.
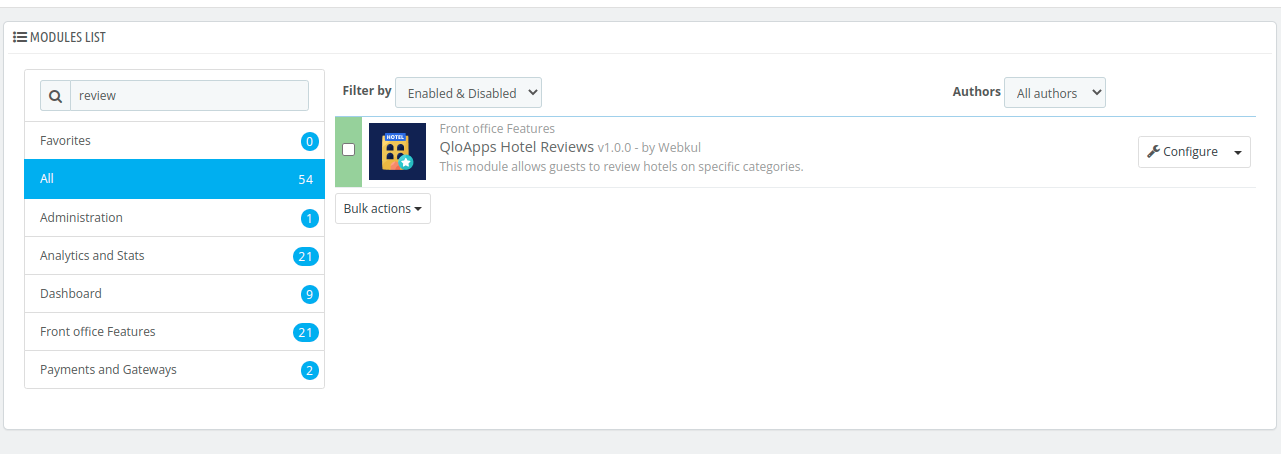
Manage review from the backend
Go to module and services > manage module. In the search panel search hotel review. Click on configure for managing reviews.
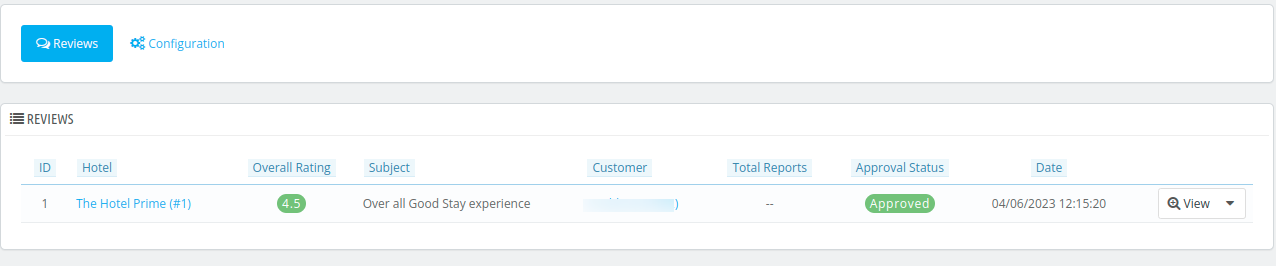
Then the reviews page will appear. Here you can see the reviews and configuration tab. In the reviews tab, there is a list of all the reviews.
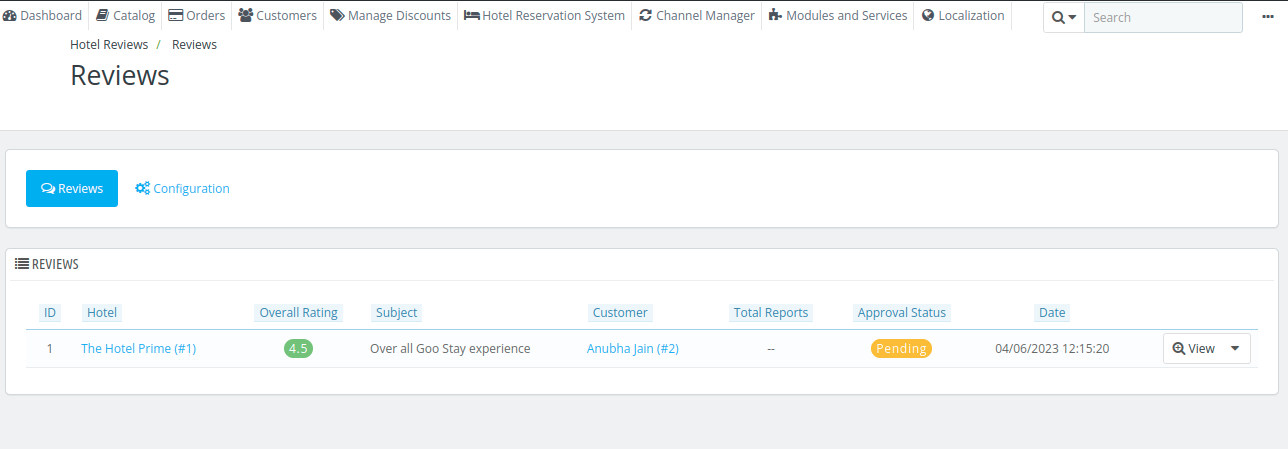
Click on view to see the review.
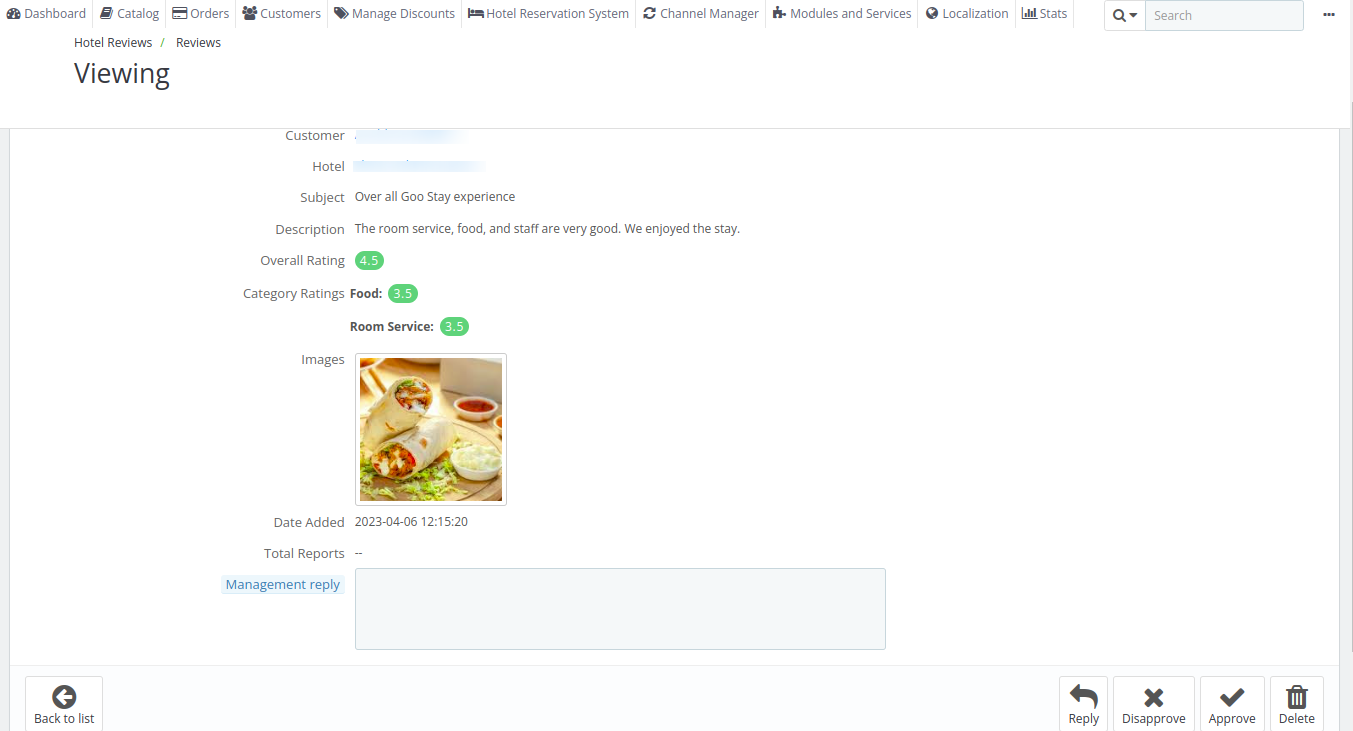
Here management team can reply to the review and approve it. After approval, the review will be displayed on the front end of the room page.

When the review gets approved, the approval status is seen as approved on the review logs.
Admin Configuration
The admin can configure the review settings as shown and discussed below:
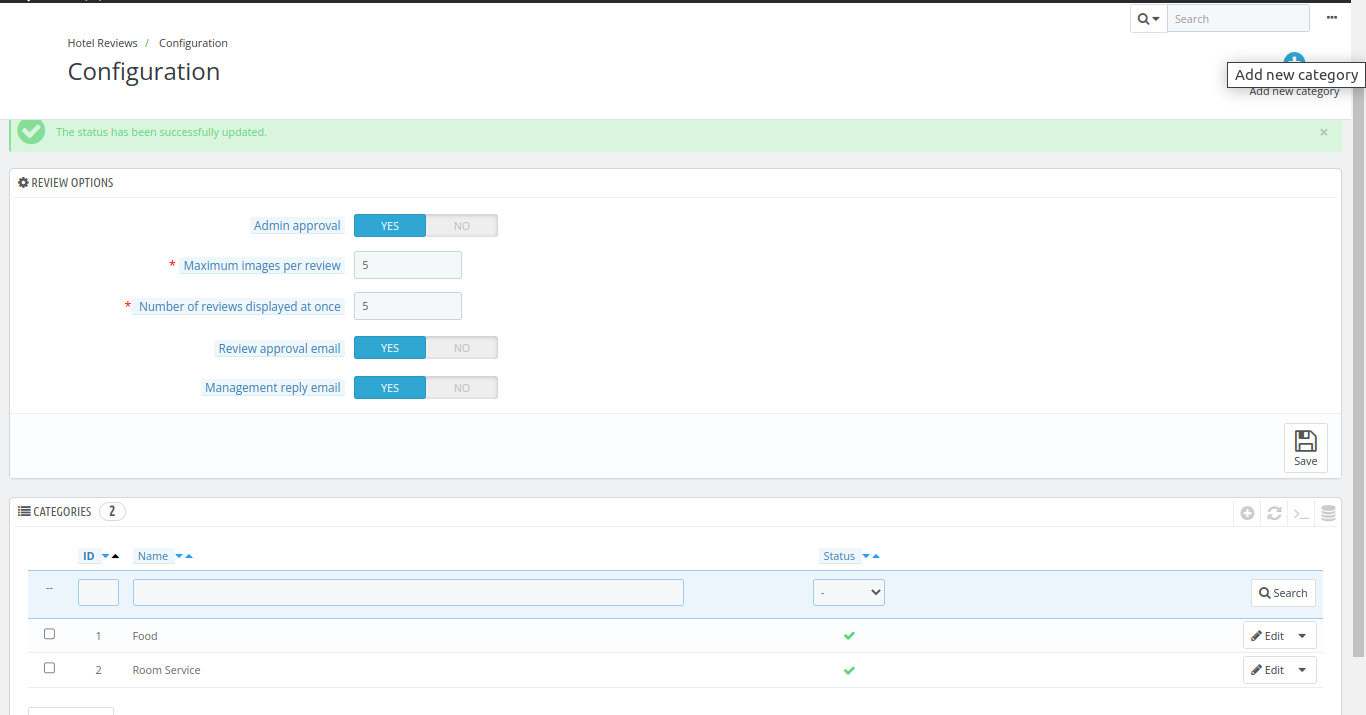
Review Option
In review option:
- Admin Approval: Enable if you want each review to be approved by the admin.
- Maximum images per review: The number of maximum images that can be uploaded with a review.
- Number of reviews displayed at once: The number of reviews that are displayed at once when listing them.
- Review approval email: Enable if you want to send an email to a customer when his review is approved.
- Management reply email: Enable if you want to send an email to a customer when a management reply is posted to his review.
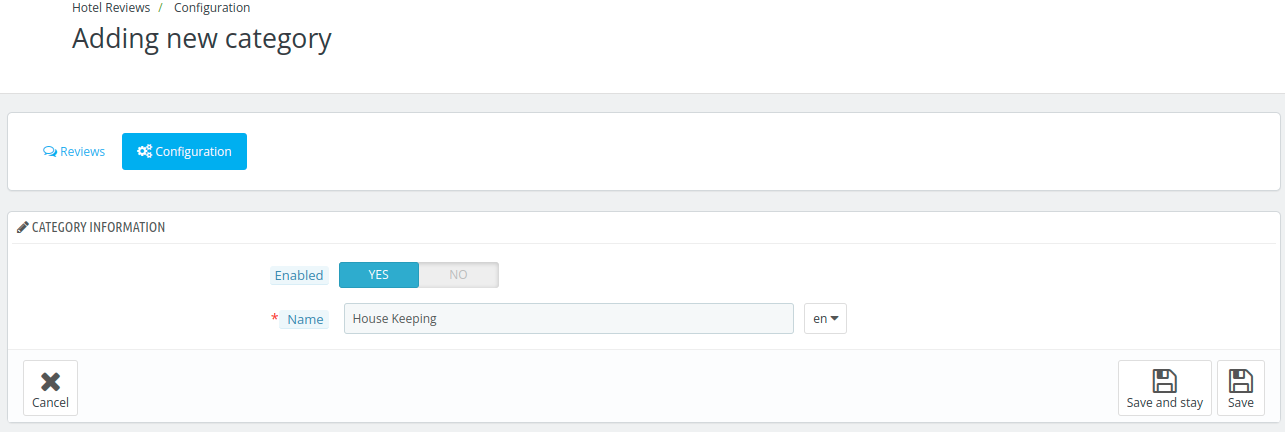
Categories
If you want a review of each category then you can create the category of each type.
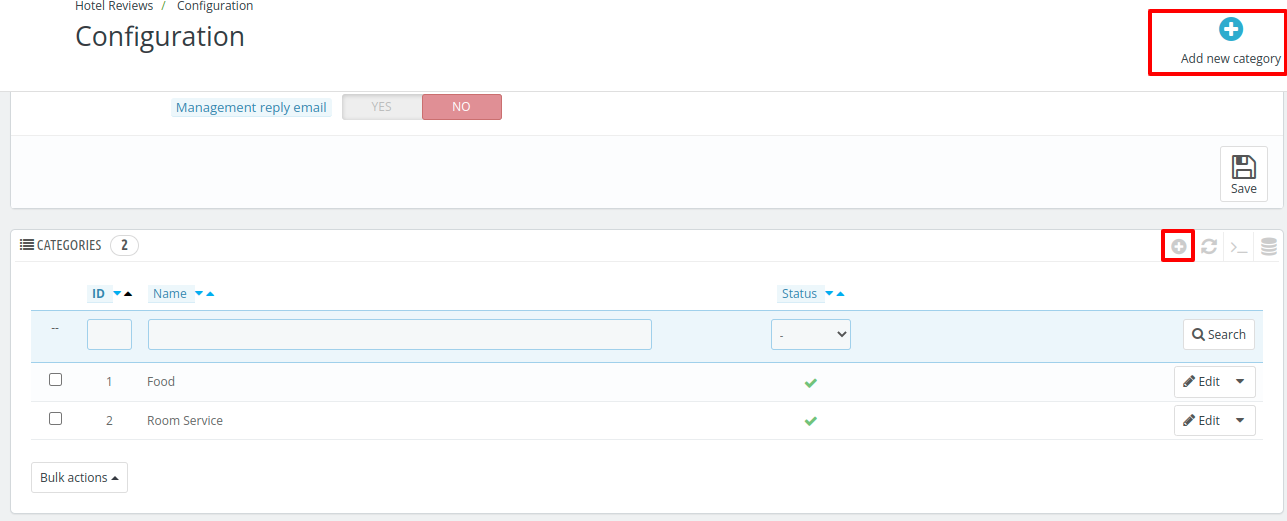
Click on add new category as shown in the above image. Then enable the category and enter the name of the category.
On the front end, the viewer can see the reviews and their replies on the room page as shown below
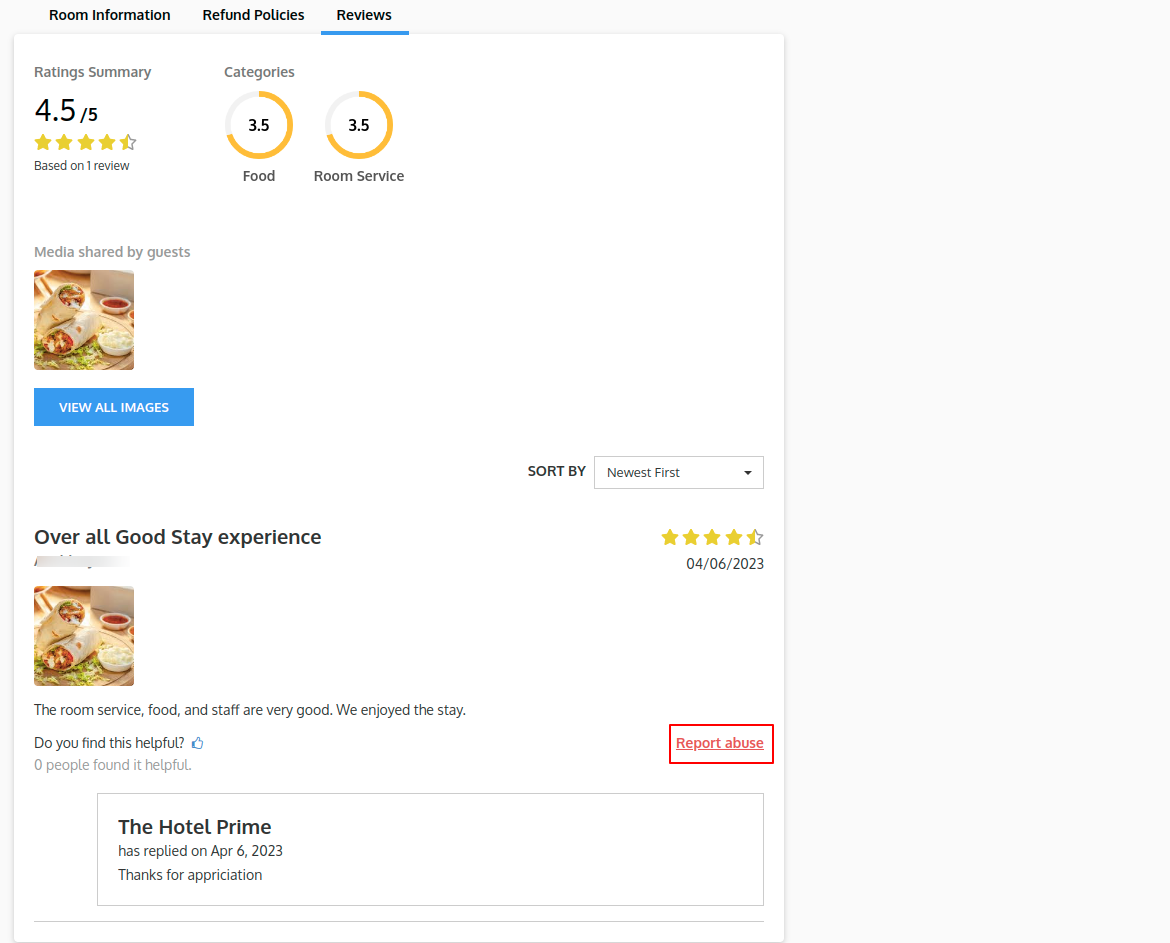
Here we can see the rating is shown in category wise and the total media shared by the guest of all reviews.
Here customers can sort the review by newest first, oldest first, negative first, positive first, and most relevant.
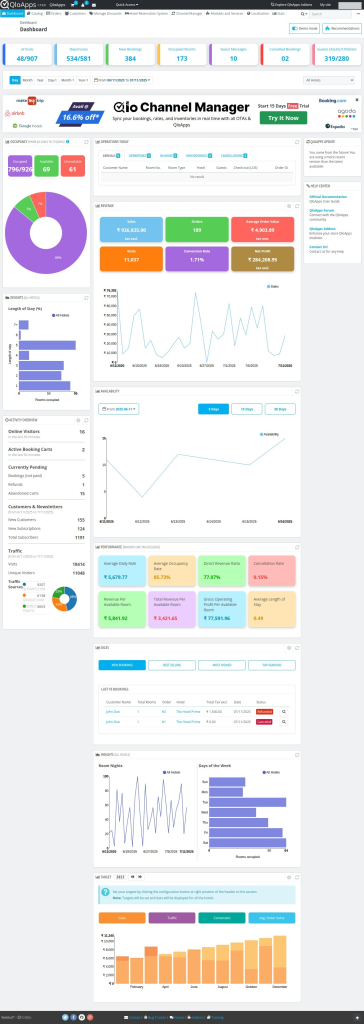
QloApps Back Office Dashboard
The dashboard of your hotel gives you a glance view of your hotel.
Let’s discuss each component of the dashboard in brief. Here select the hotel and the date range to see the analytics on the dashboard.
Horizontal Tab
- Arrival: Current status of arrived guests.
- Departures: Number of guests depart till now.
- New Bookings: Current status of a new booking.
- Stay Overs: Number of refused checkouts.
- Guest Messages: Messages received from the guests.
- Cancel bookings: Bookings cancel so far.
- Guests: Total number of adults and children.
Occupancy Tab
Details under the ‘Occupancy’ tab:
- Occupied: The total bookings of rooms.
- Available: Rooms available for booking.
- Inactive: Rooms currently not available for booking.
Revenue Tab
Under the Revenue Tab, we have:
- Sales: Sum of revenue generated within the date range by orders considered validated.
- Bookings: Total bookings received within the date range.
- Average order Value: Total price of the room booked to the number of rooms
- Visits: Total number of visits within the date range.
- Conversion Rate: It shows the percentage of visits converted into bookings.
- Net Profit: See the net profit after all the calculations.
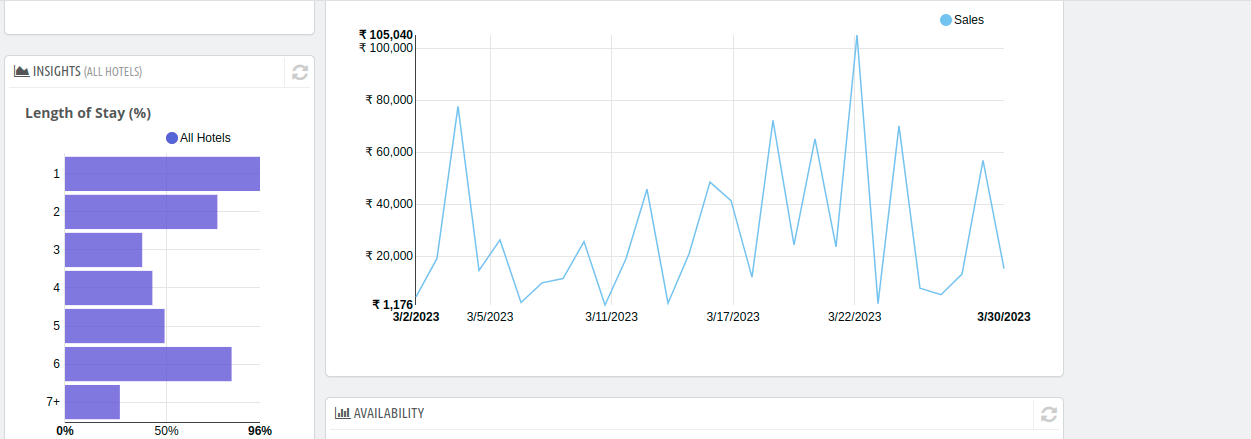
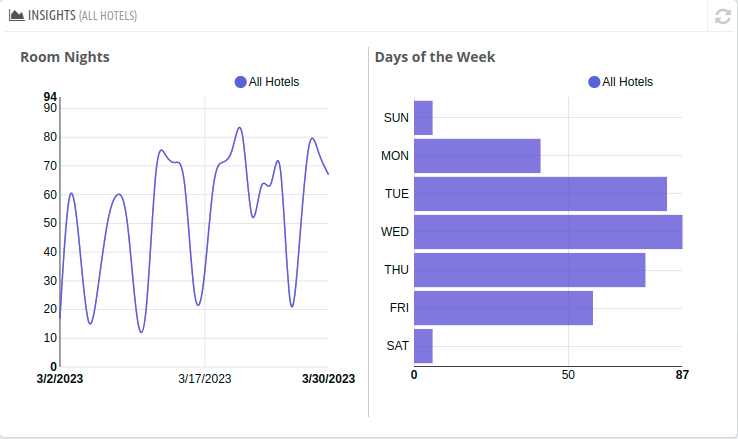
Insights Tab
Length of Stay
Here you can see the maximum number of bookings for how many days. Also, the total sale conducted on each date.
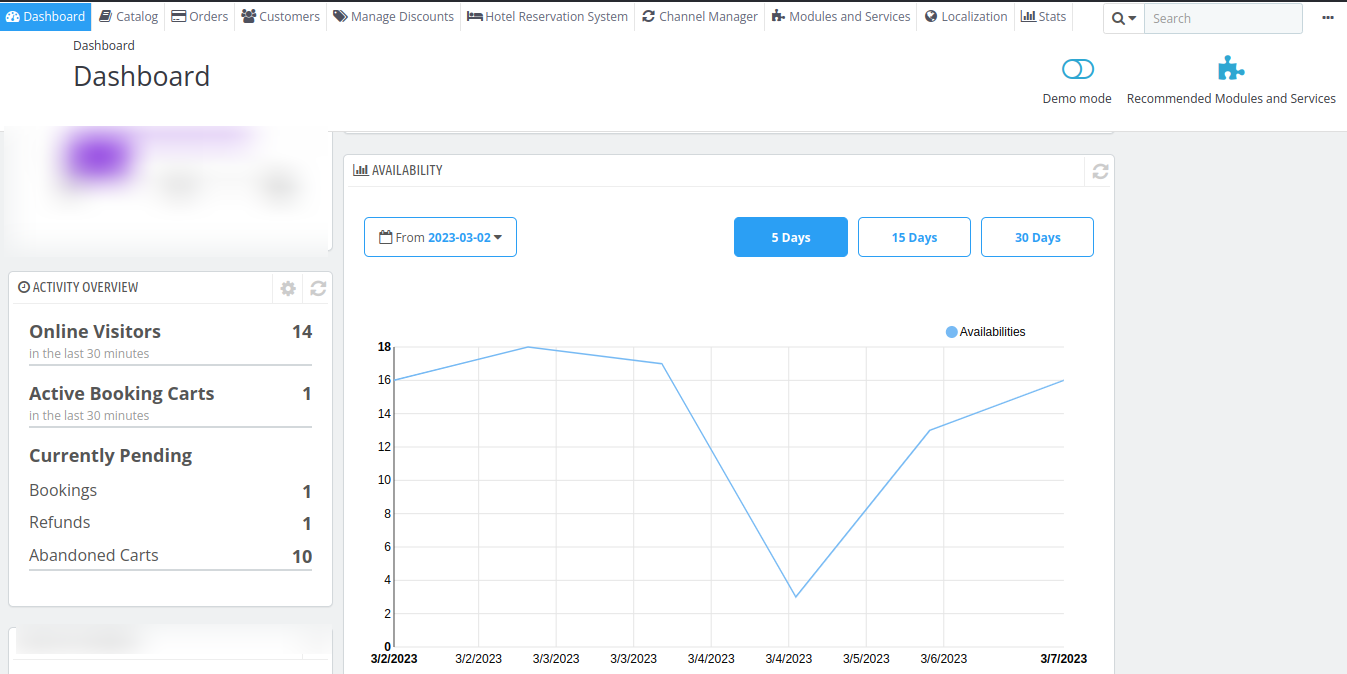
Activity Overview Tab and Availability
Under the activity overview tab, you can see the activity of the hotel website. like online visitors, active booking carts, and pending bookings.
In the availability graph, you can see the number of available rooms in the given date range
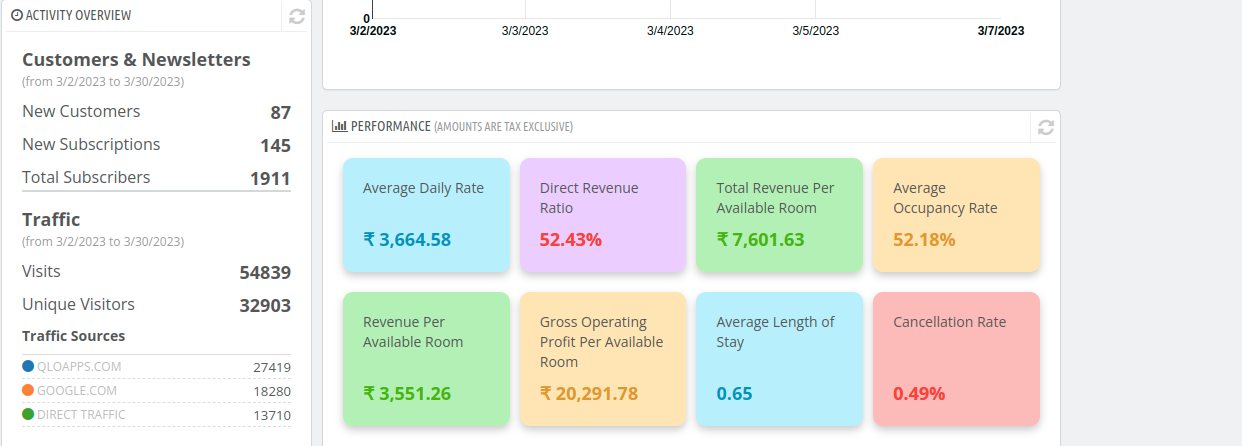
Performance Tab
In the Performance tab, the hotelier can see the vital statics of the hotel.
Average Daily Rate: Average rental income of the occupied room over a given period.
Direct Revenue Ratio: It measures the percentage of online revenue that comes directly from your hotel’s website vs. third-party channels.
Total Revenue Per Available Room: It measures the total revenue being generated per available room including additional facility and service products.
Average Occupancy Rate: Average percentage of rooms booked over a given period
Revenue Per Available Room: It says how many rooms are booked and how much revenue those bookings are generating.
Gross Operating Profit Per Available Room: It tells how much gross operating profit comes from each room.
Average Length Of Stay: Average amount of days guests stay in a hotel over a given period.
Cancellation Rate: Percentage of cancelled orders to the number of bookings in a certain period.
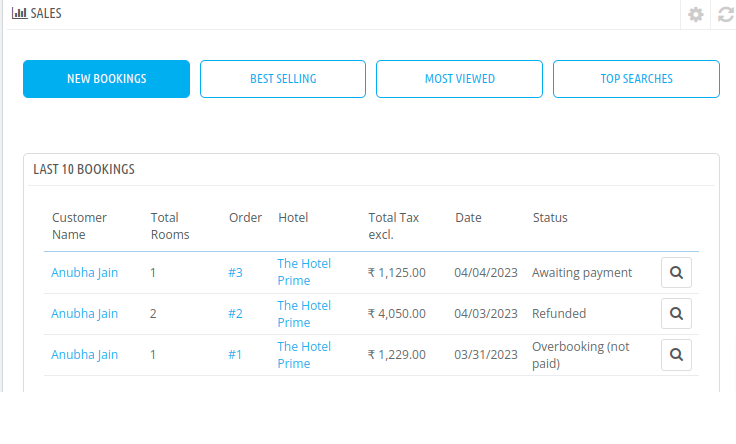
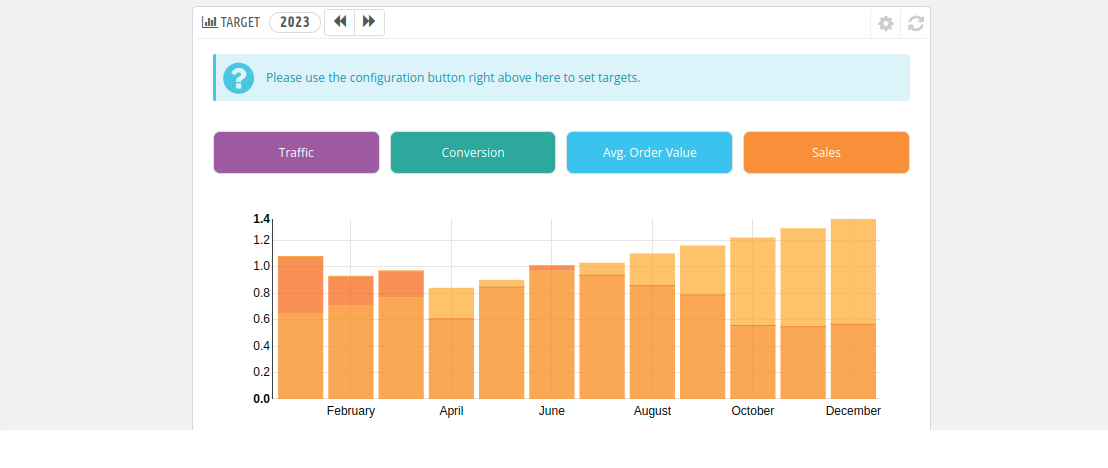
Sales, Insights, and Set Targets
Other statics and graphs given in the dashboard are Sales, Insights, and set targets.
Employee Management in QloApps
QloApps allows you to add employees so that you do not have to do everything on your own.
You can permit your employees and restrict them to use certain menus and modules.
You can also create hotel-wise permissions. So that the employee managing a hotel does not see the other hotels.
For employee management, we have three options under the Administration Tab. These tabs are Employees, Profile, and Permissions.
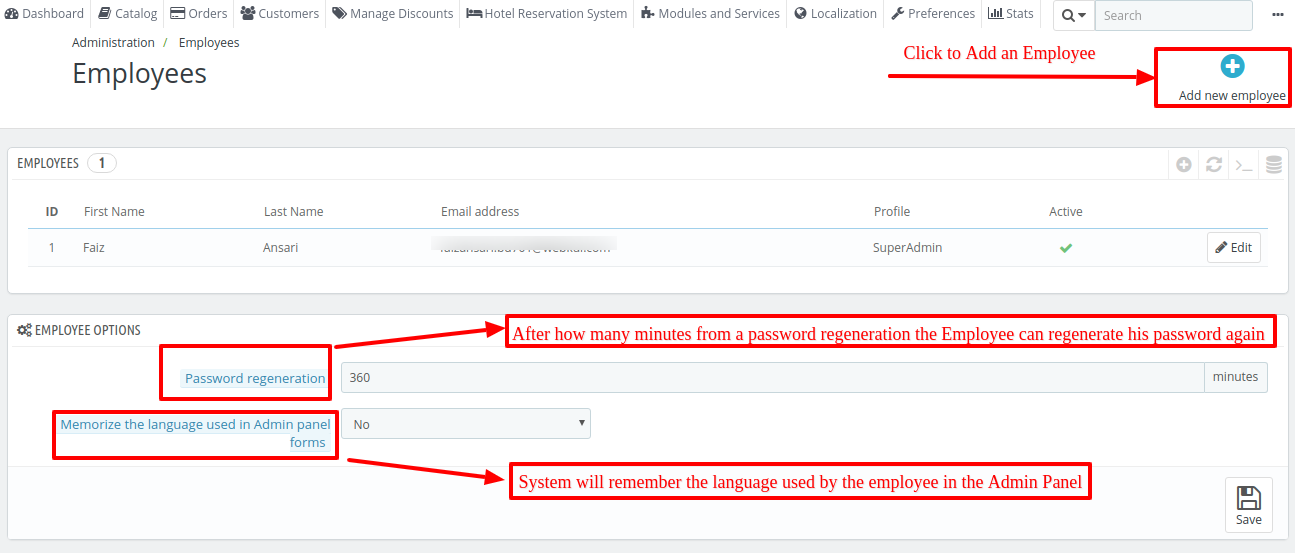
Employees
With the help of this Menu, you can create, edit, and delete employees in your system.
One employee gets created in the system when you install it. This is the super admin of the system. You cannot delete this employee.
To add an Employee click on Add New Employee.
Then you also have two options on this page,
- Password regeneration: If an employee regenerates his password then after how many minutes he can do it again
- Memorize the language used in Admin panel forms: The system will memorize the language used by the employee in his admin panel
Adding An Employee
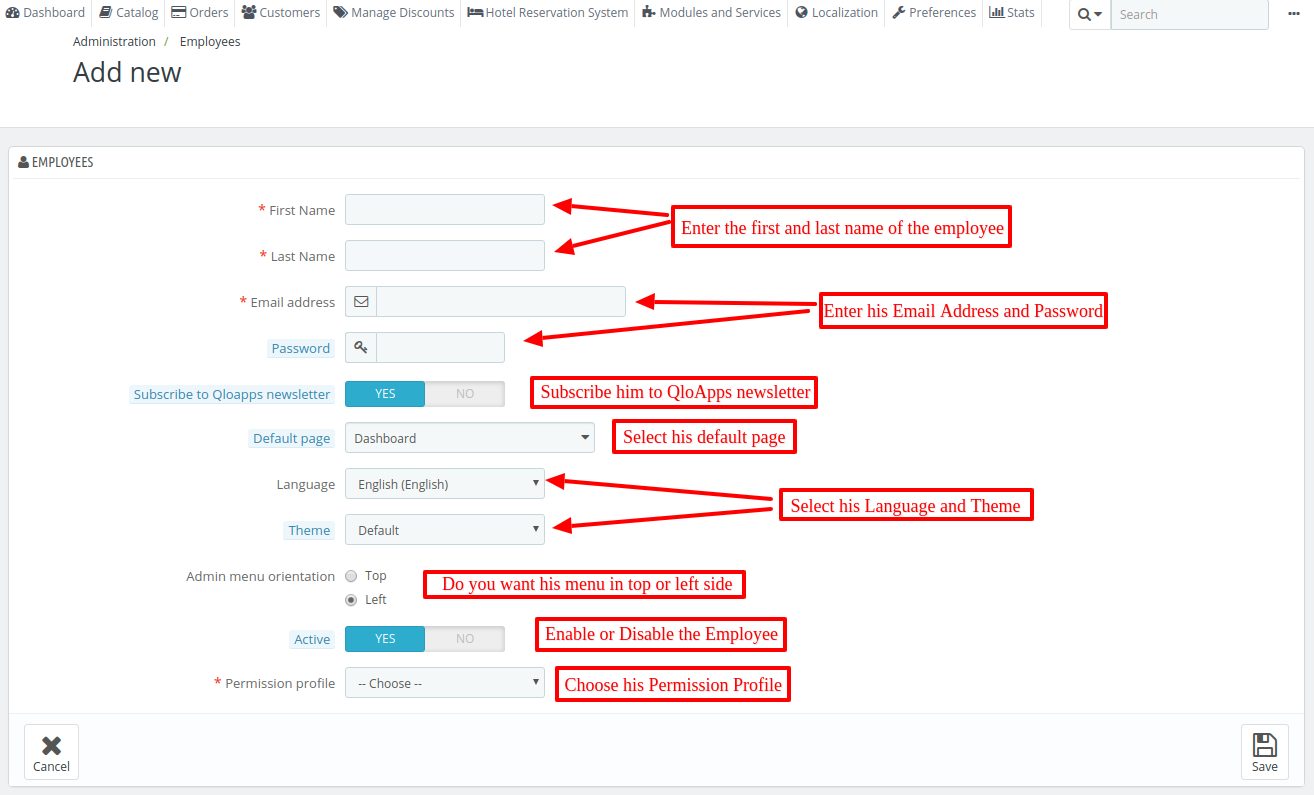
Once you click on Add New Employee then you will have to fill in his details and click on Save.
First Name: Enter the first name of the employee
Last Name: Enter the last name of the employee
Email address: Enter the email address of the employee
Password: Create a password for him
Subscribe to QloApps newsletter: Subscribe to the QloApps newsletter
Default page: Decide his default page
Language: Select his language
Theme: Select his theme
Admin menu orientation: Decide his menu orientation
Permission profile: Select his profile which will be discussed next
Now click on Save and your profile will be there.
Permission Profiles
Here you can create profiles in your hotel so that you can create permissions for them. There can be any profile in your hotels like Order Manager, Translator, or Content Developer.
Some profiles are already there in the system which you can delete. But you can never delete the Superadmin profile.
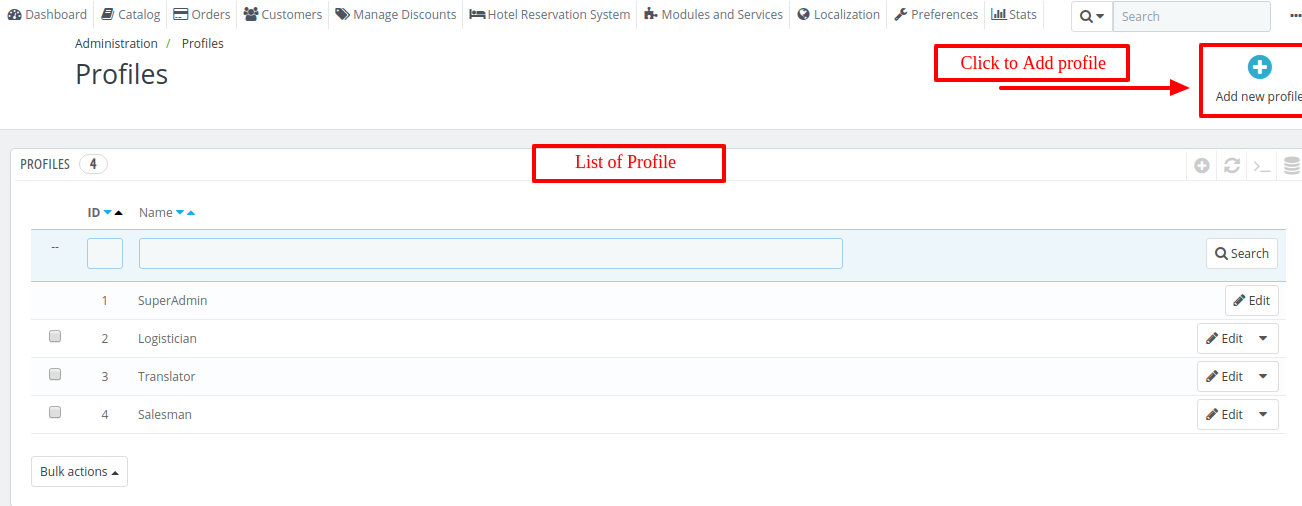
Once you click on Add New Profile, you will have to enter the name and create the profile.

Permissions
Once you have created the Profile you will have to design its permissions. Go to the Administration →Permissions
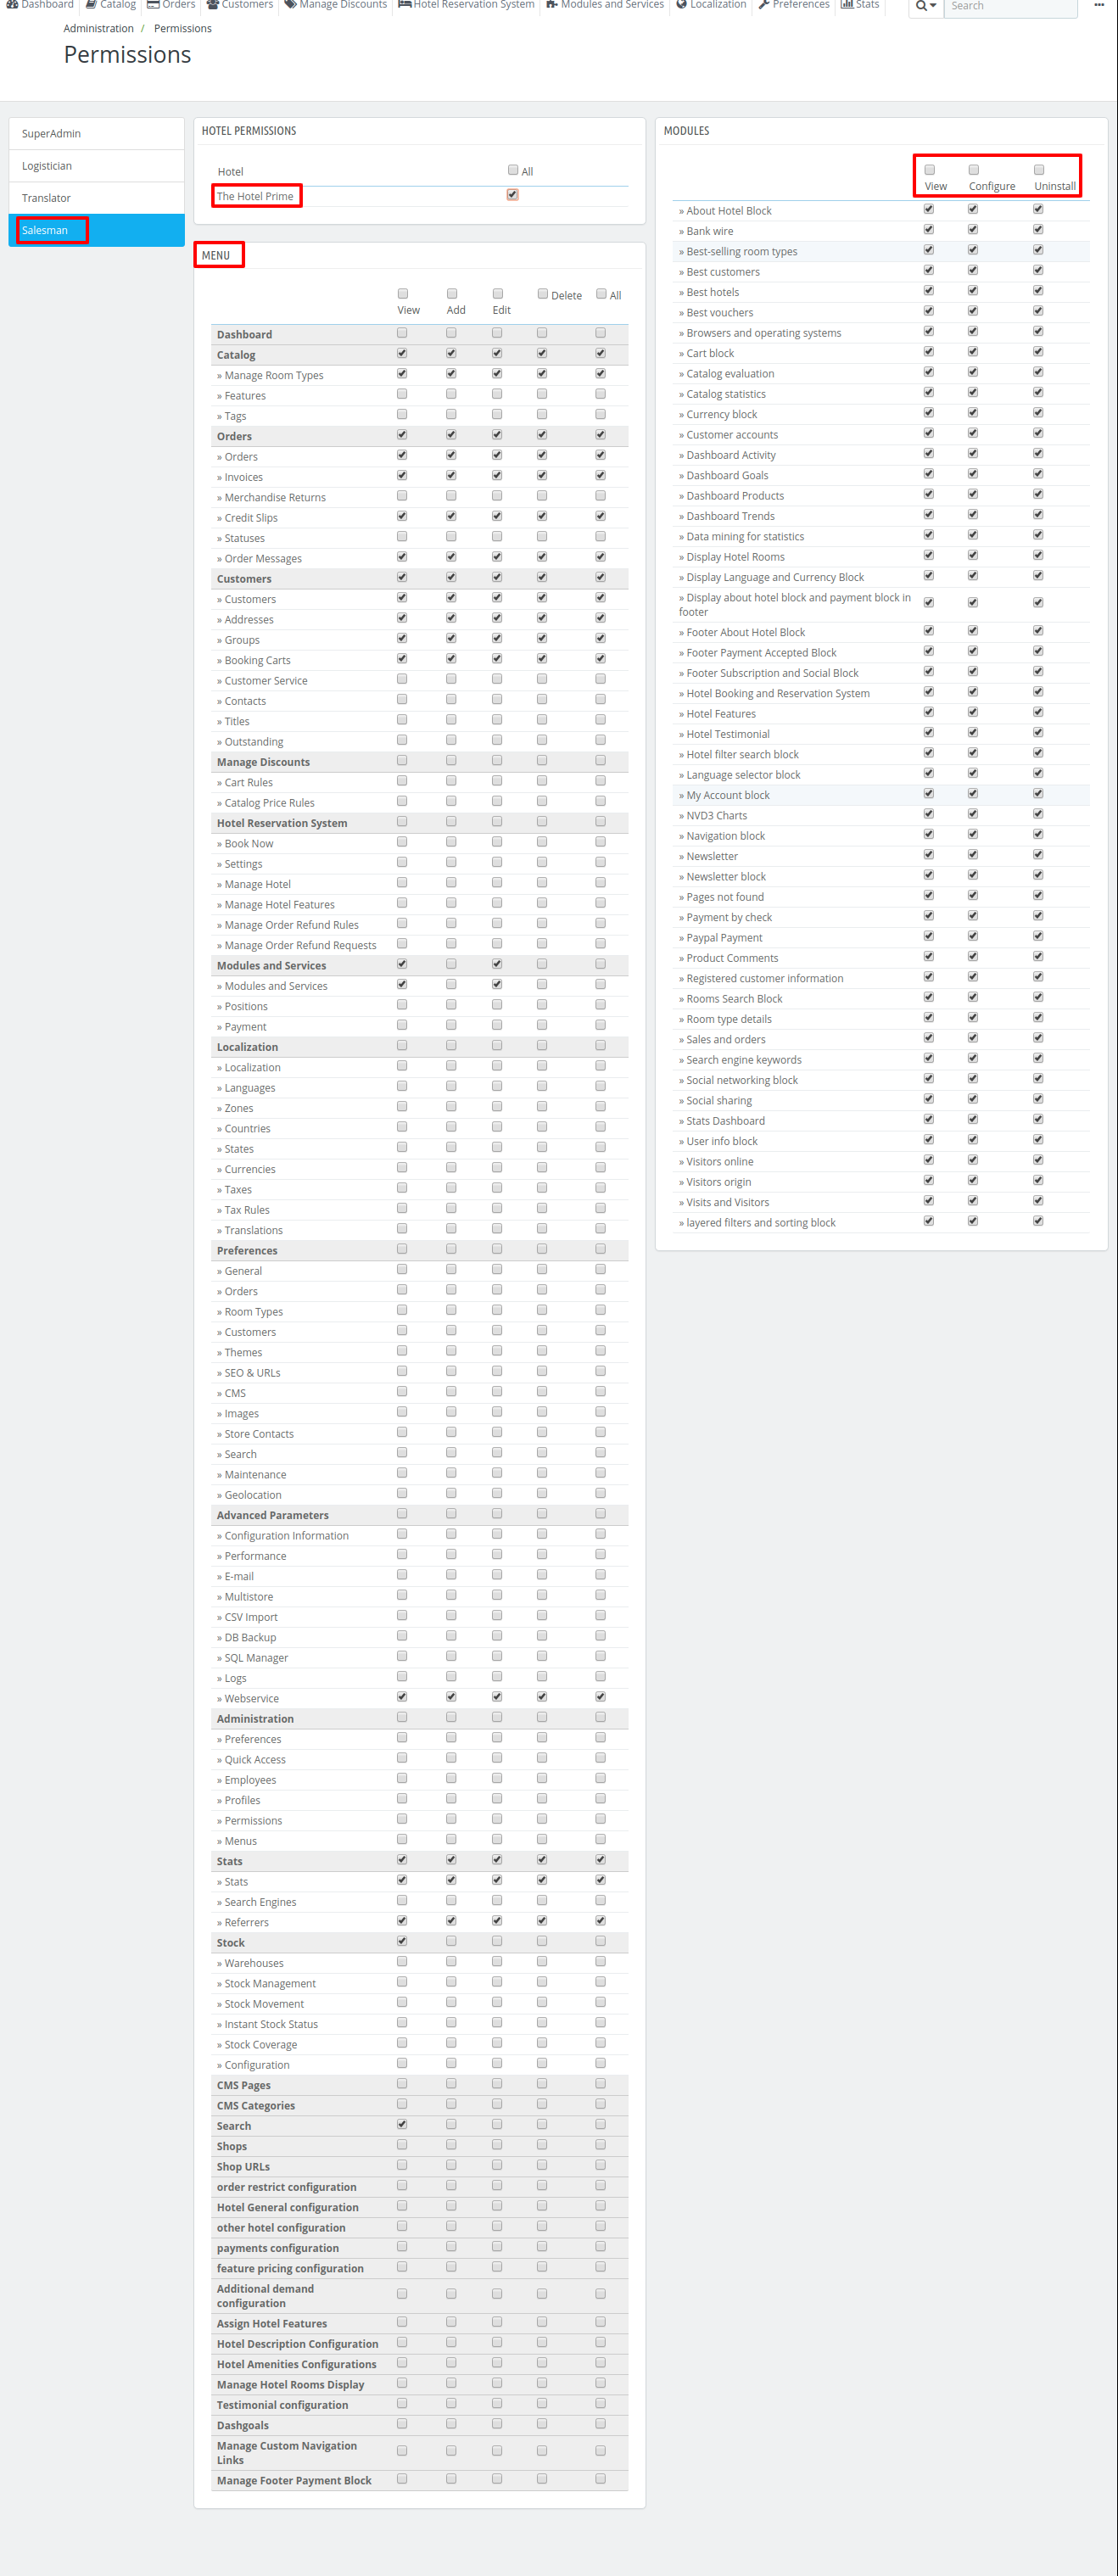
When you design the permission then first you select the Profile then you give him the following permission.
Hotel Permission: You can decide which hotel this profile can access. If you assign a profile to a profile for one hotel.
Then the employee of that profile will not be able to see any other hotels. He checks the room types, orders, price rules, and customers of his hotel only.
If there is a price rule in which there are room types of multiple hotels.
If this employee’s room type is also there then he views that price rule and edits only those fields that are related to his hotel.
Menu Permissions: In this section, you can decide the menu permissions per profile. For each of the menu criteria, you have 5 options:
- View: view information.
- Add: add new information.
- Edit: change information.
- Delete: delete information.
- All: all the above options for the current row.
Based on the above criteria, you can decide on the menu and sub-menu permission. Module Permission: In this section, you can decide which module the employee can access based on three criteria.
- View: The employee can view the module’s configuration.
- Configure: The employee can configure the module.
- Uninstall: The employee can uninstall the module
But remember that if you are giving them permission for any module then give him the permission of module and service tab or any other relevant tab then only he will be able to access it.
Conclusion
That’s all for the user guide of QloApps: A free and open-source hotel reservation and booking system.
You can also refer to our QloApps Tutorial course on Udemy to explore more about the features, functionality, and usage of QloApps.
This course will guide you on how you can set up and use QloApps for your property.
If you want to launch your hotel website then download QloApps hotel booking software.
Current Product Version -
Supported Framework Version -