QloApps GDPR Compliance | Data Protection & EU Cookie Law
The European Union regulations are effective from 25th May 2018 you need to comply with your hotel booking website with General Data Protection Regulation.
With the QloApps GDPR Compliance module, you can comply with new regulations.
That is, GDPR & European Union cookie law and ensure your customers of data protection.
You can allow your customers to update or delete their personal data present on the website whenever they want.
Fetures of QloApps GDPR compliance
- This module allows admin to make his website General Data Protection Regulation Compliant.
- This module allows admin to comply with EU cookie law.
- Admin can enable/disable the auto-approval of personal data deletion of the customers.
- The Admin can configure GDPR email notification settings.
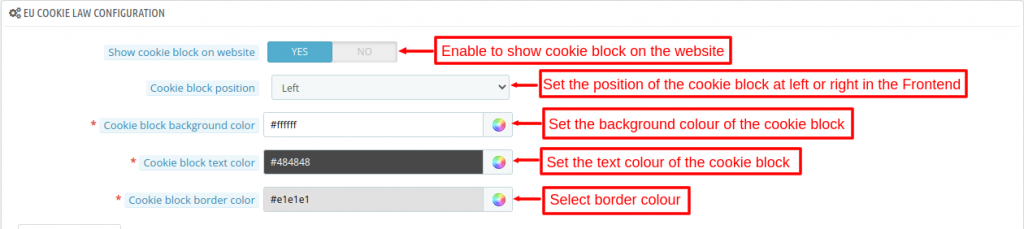
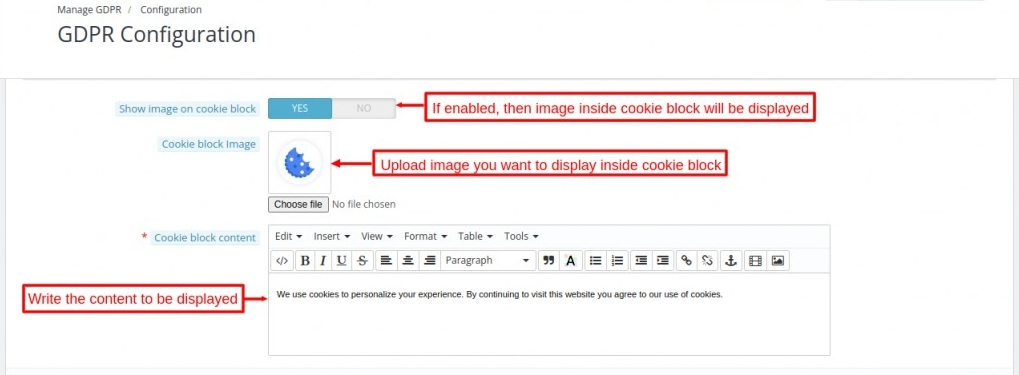
- Admin can configure the position, image, and text of a cookie block at the Front End.
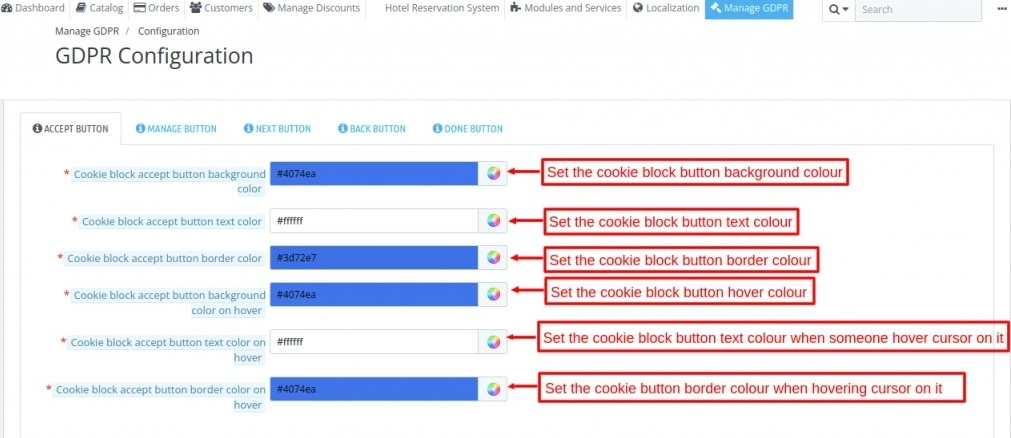
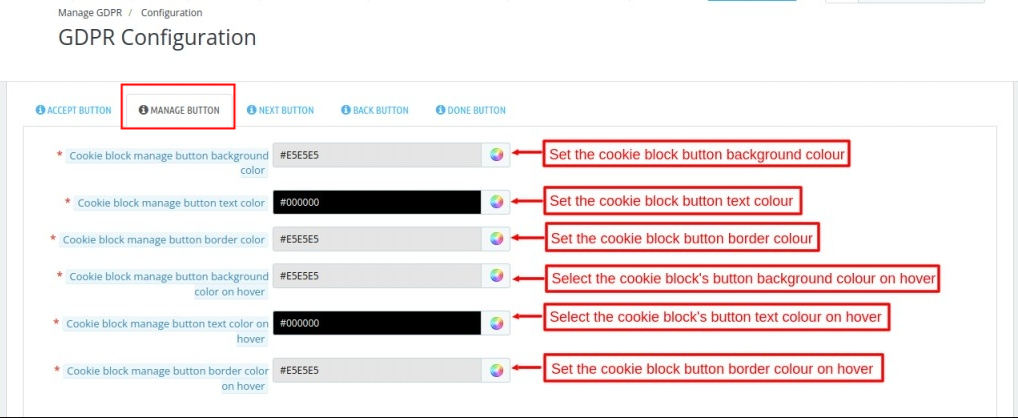
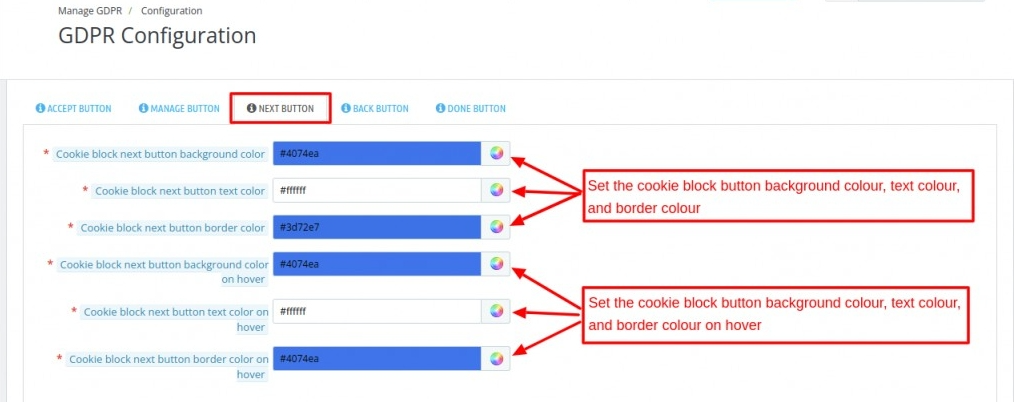
- Set the colour of cookie block buttons like accept, manage, next, back and done button.
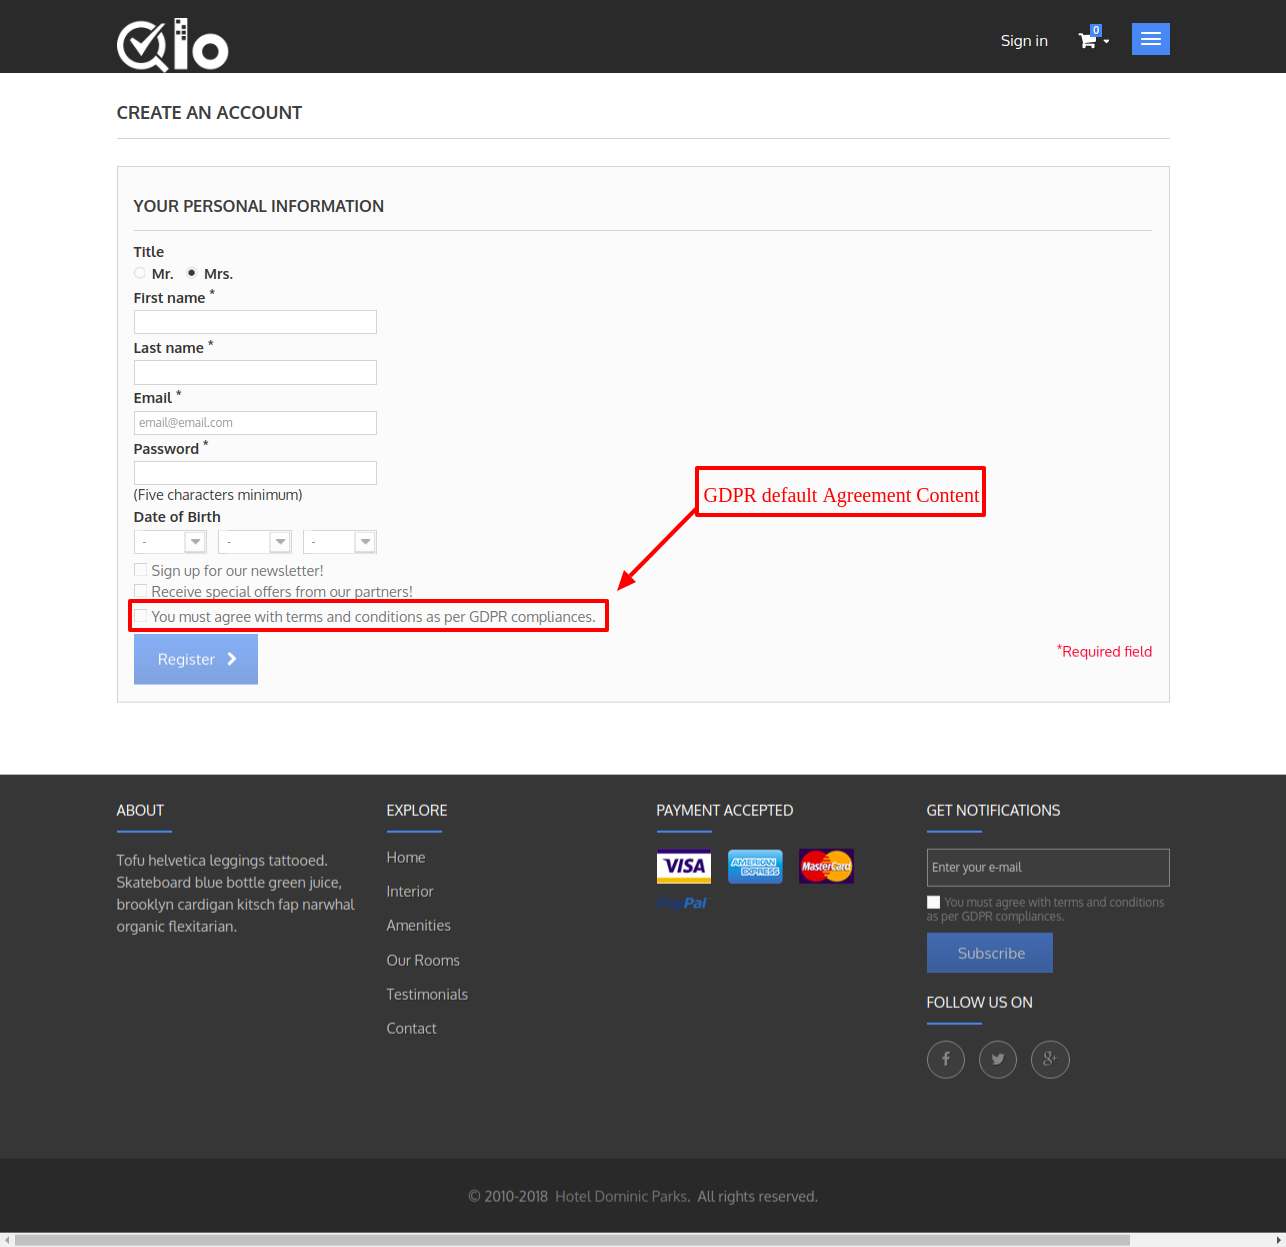
- The Admin can enable/disable the display of GDPR agreement checkbox on Customer Registration form.
- Admin can enable/disable the display of GDPR agreement checkbox on Customer Personal Information Form.
- The Admin can enable/disable the display of GDPR agreement checkbox on Customer Contact Form.
- Admin can enable/disable the display of GDPR agreement checkbox on module’s form.
- The customers can download their personal data on the website in PDF format.
- Customers can e-mail their personal data to their desired email address
- The customers can update their personal/address information.
- The Customers can access, update, and delete their personal data on the website.
- Admin can manage all the requests placed by the customer for data erasure.
- Admin can download or delete the personal data of a customer.
- The customers will receive an email notification regarding the confirmation of data deletion.
- The customers will receive an email notification with the attached PDF file containing the updated personal information.
- Admin can manage cookies and cookies categories.
- Admin can control module functionalities through cookies.
- Customers can accept or reject cookies related to the module.
Note: The minimum compatible version of QloApps for the GDPR compliance module is 1.2.0.0
Installation of QloApps GDPR compliance
Installing a module on QloApps is very simple. Just follow these steps:
Go To ‘Modules and Services’ and Click on ‘Add a New Module’.

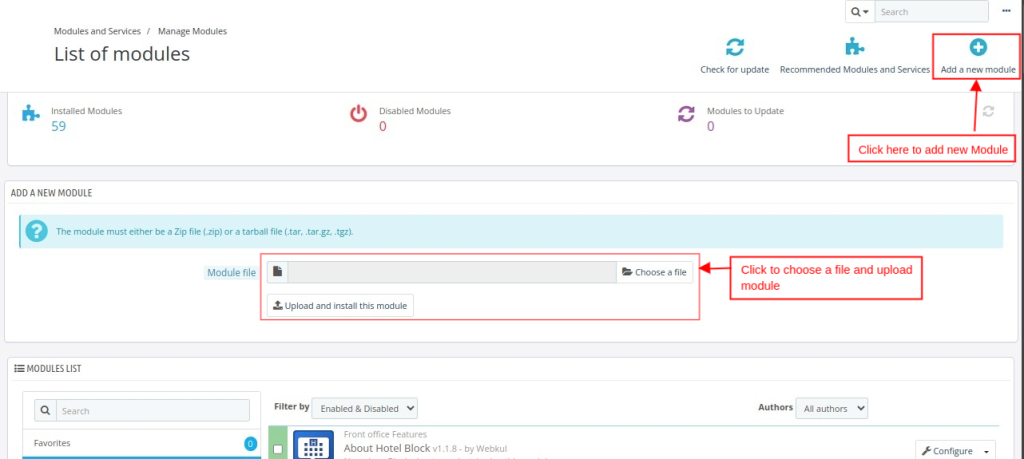
Now upload the Zip file of the module and click on install.
Now you have installed the module. So let’s check how to configure it.

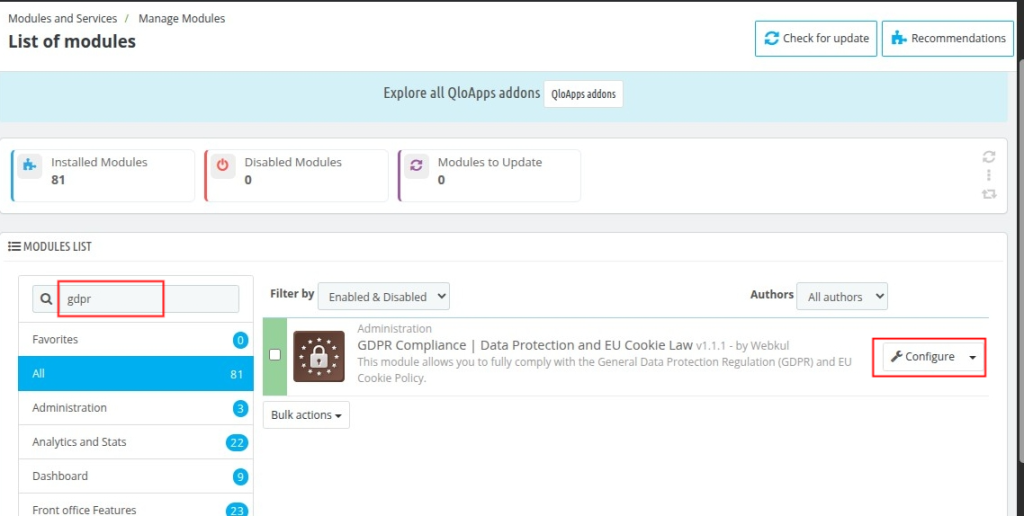
Configuration of QloApps GDPR compliance
After the successful installation of the module, the admin can view the Manage GDPR tab from where he can manage the module.

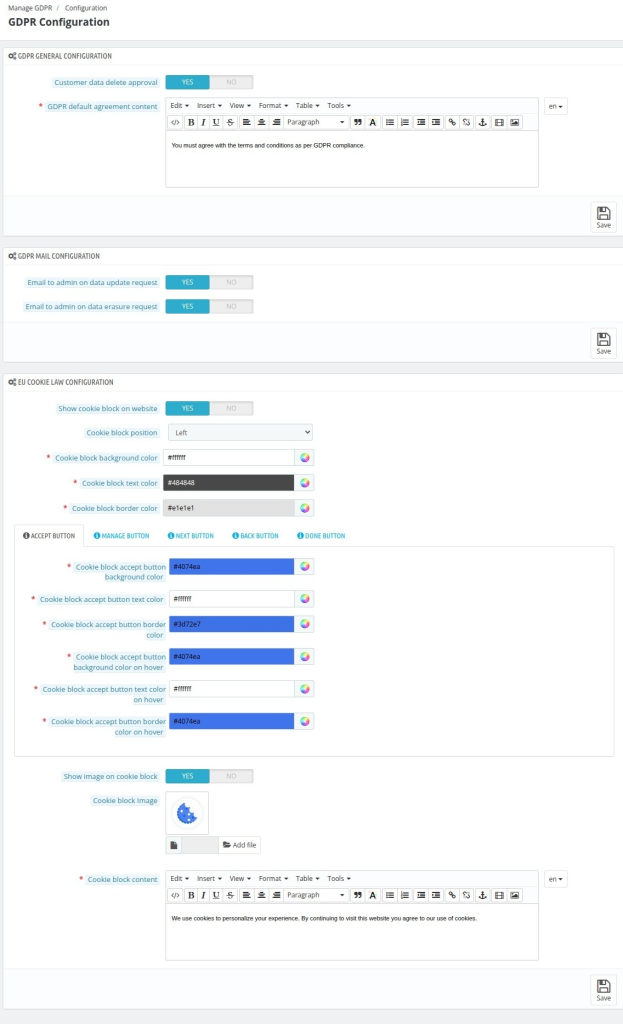
GDPR General Configuration

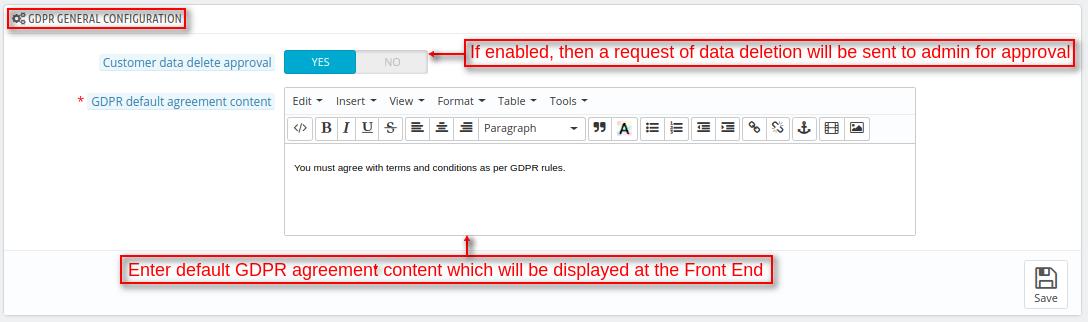
- Customer data delete approval – If you enable the option, the admin will get a request for data erasure. If disabled, then the customer can delete his data himself.
- GDPR default agreement content – Here, the admin will enter the text which will be visible at the front end with the agreement checkbox

GDPR Mail Configuration


EU Cookie Law Configuration

Accept Button

Manage Button

Next Button

Back button


Done Button

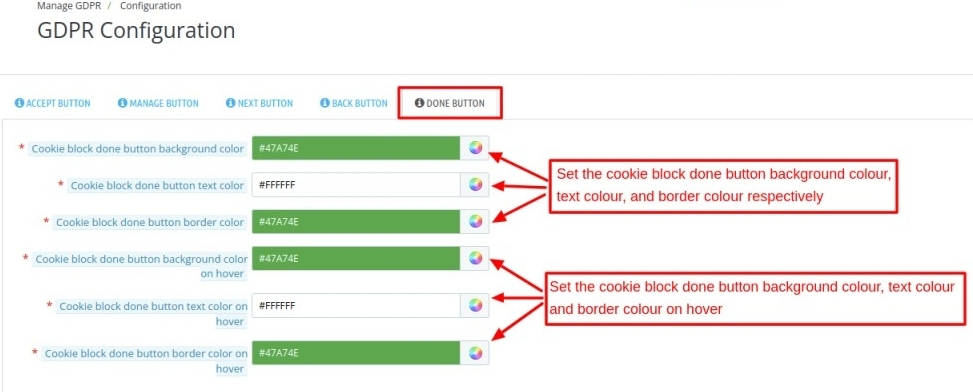
Image and Cookie Block Content

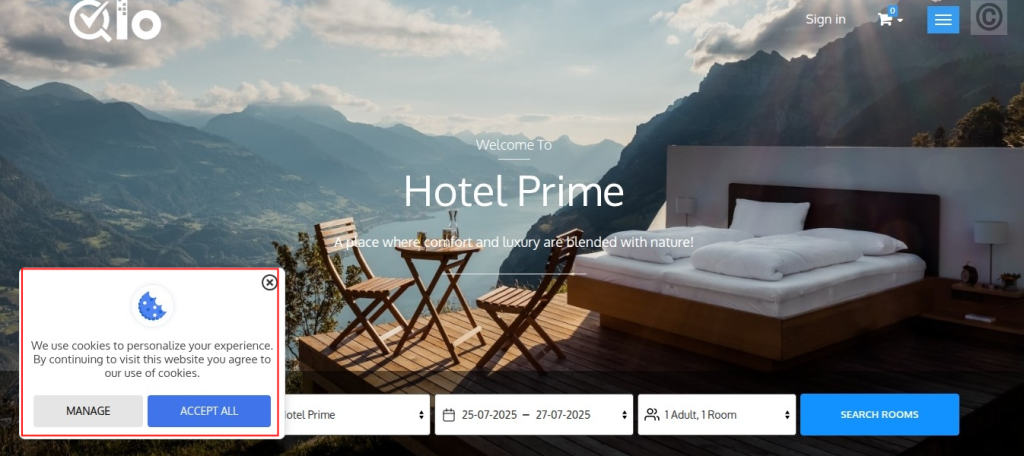
Front End View of a Cookie Block

Manage GDPR Agreement Data
Under “Manage GDPR Agreement Data”, the admin can configure where to show the GDPR agreement checkbox and its content.
Click on Manage GDPR–> Manage GDPR Agreement Data
GDPR Agreement Data Management

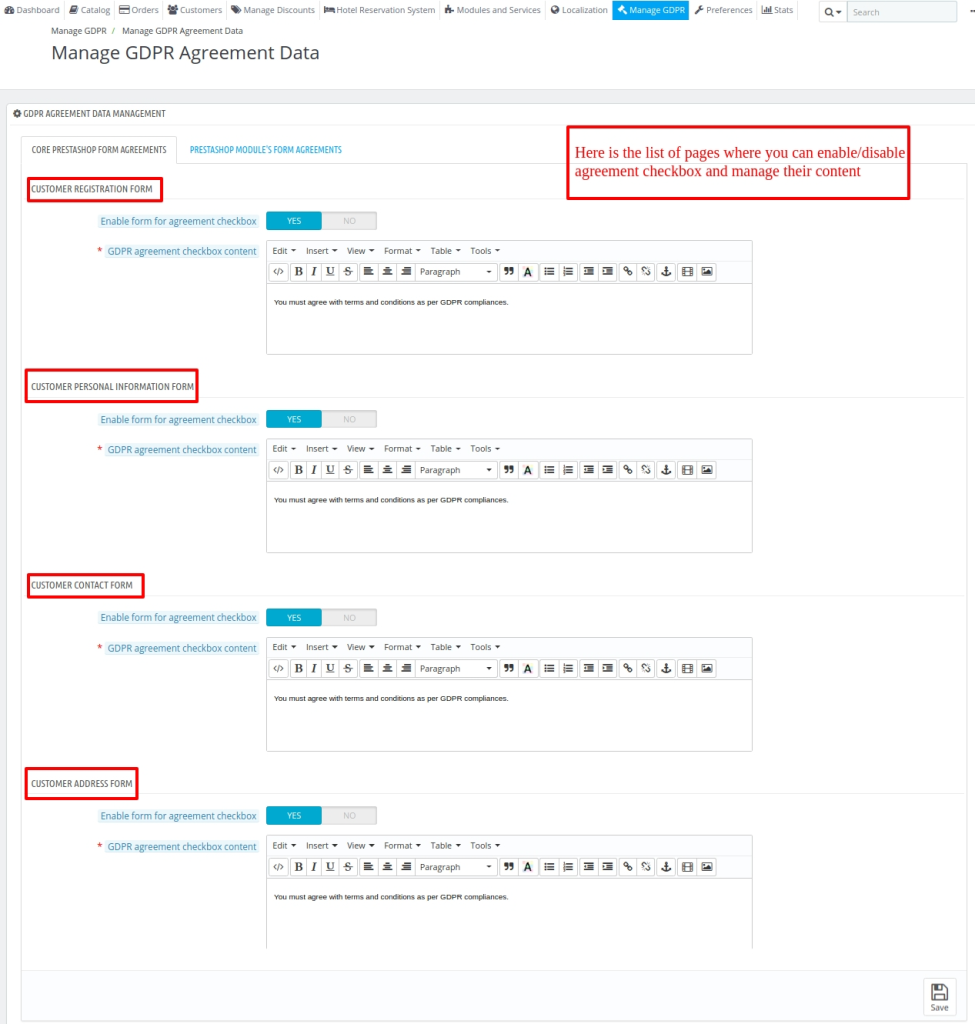
Under “GDPR Agreement Data Management”, admin can configure the display of the GDPR agreement checkbox on:
- Core QloApps Form Agreements
- QloApps Module’s Form Agreements
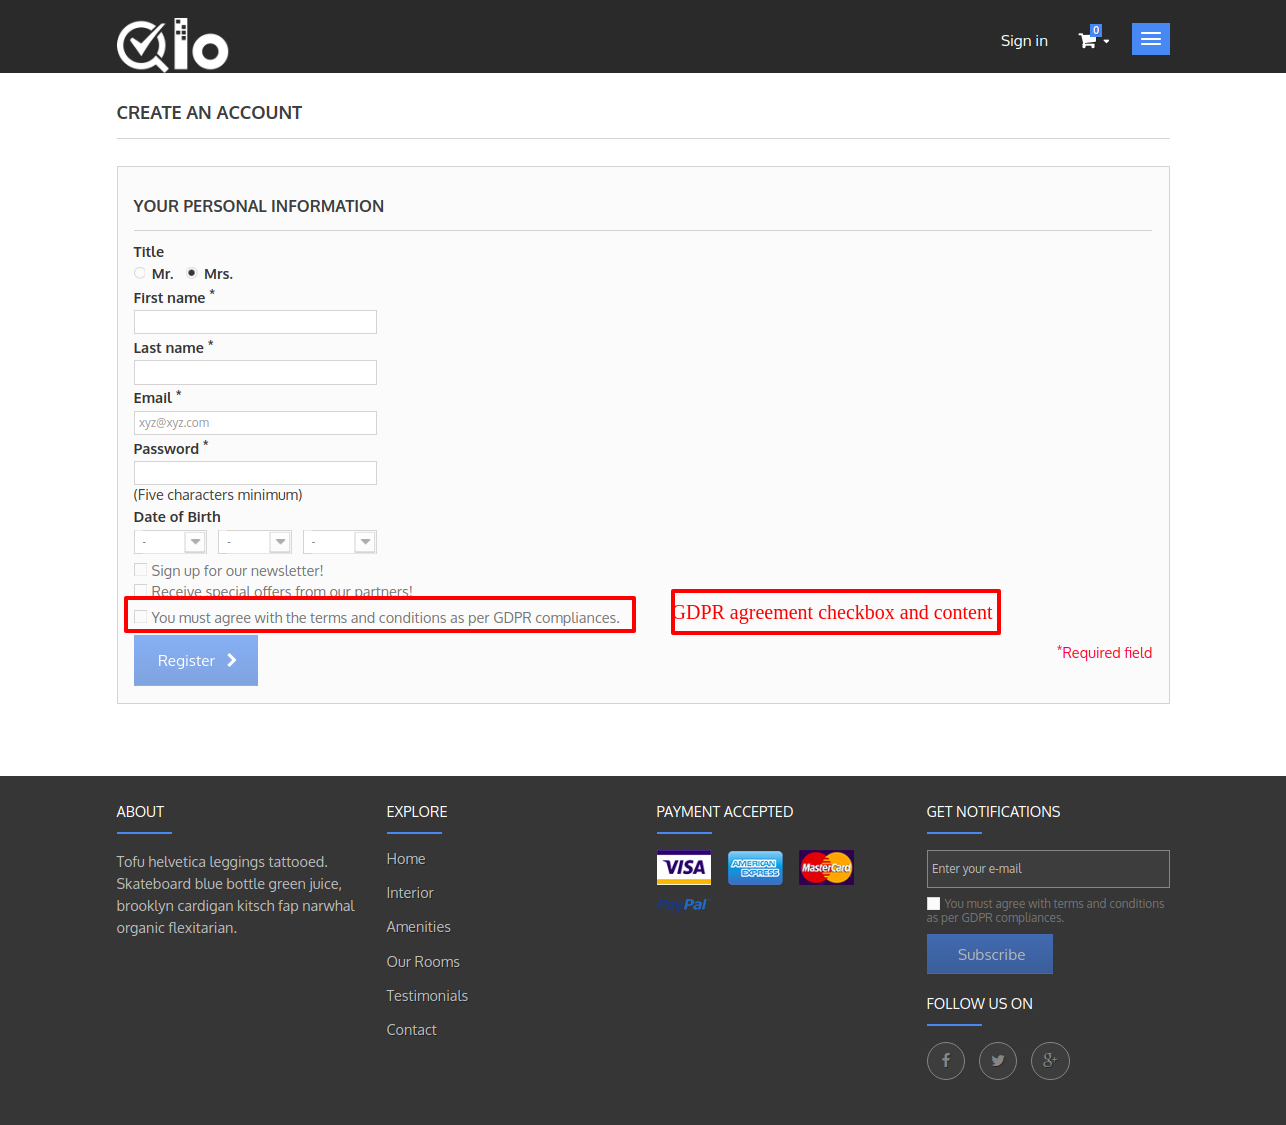
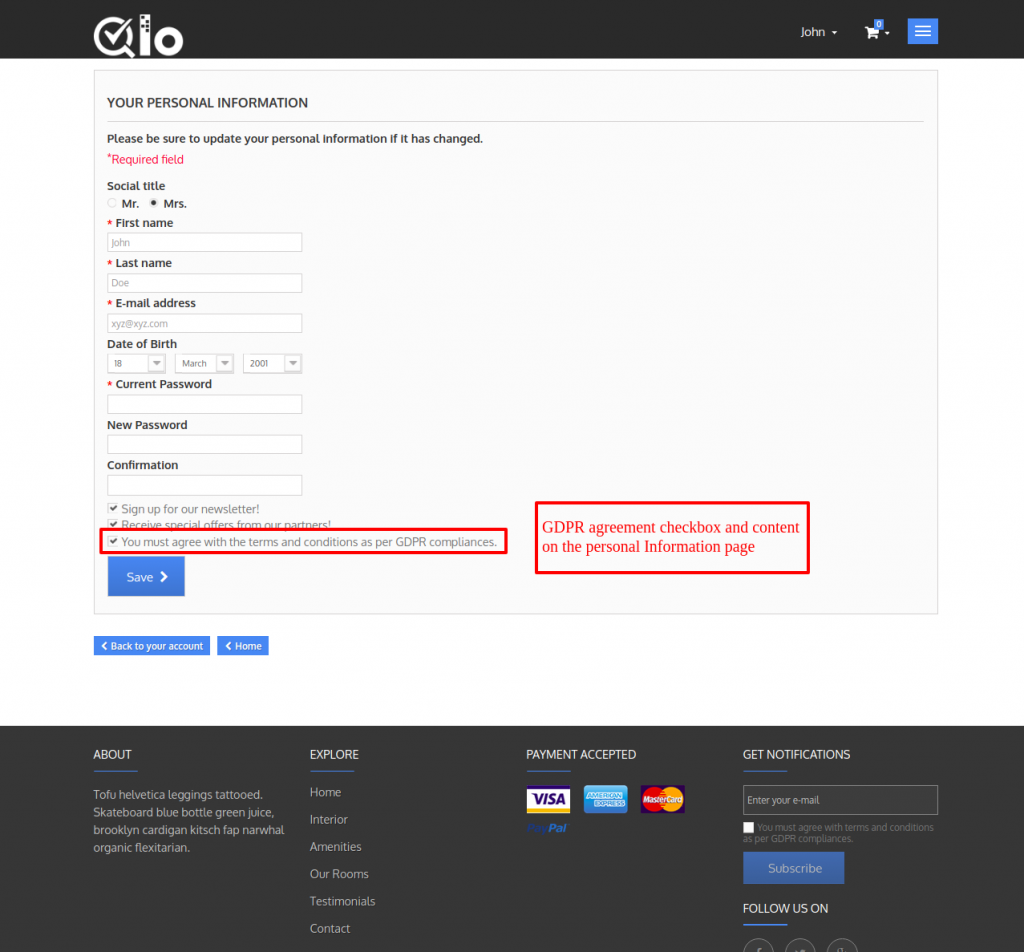
Core QloApps Form Agreements

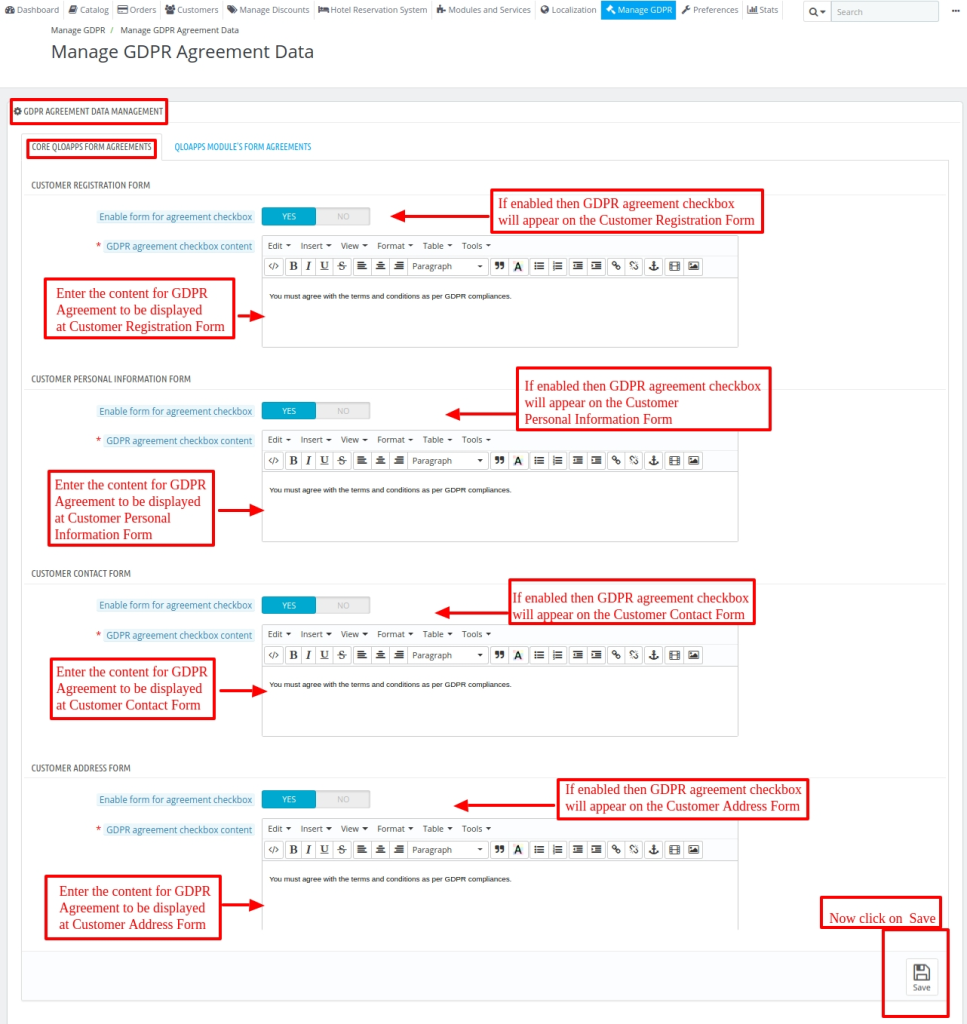
At the Front-end GDPR Agreement Checkbox on Customer Registration Form

GDPR Agreement Checkbox in Customer Personal Information Form

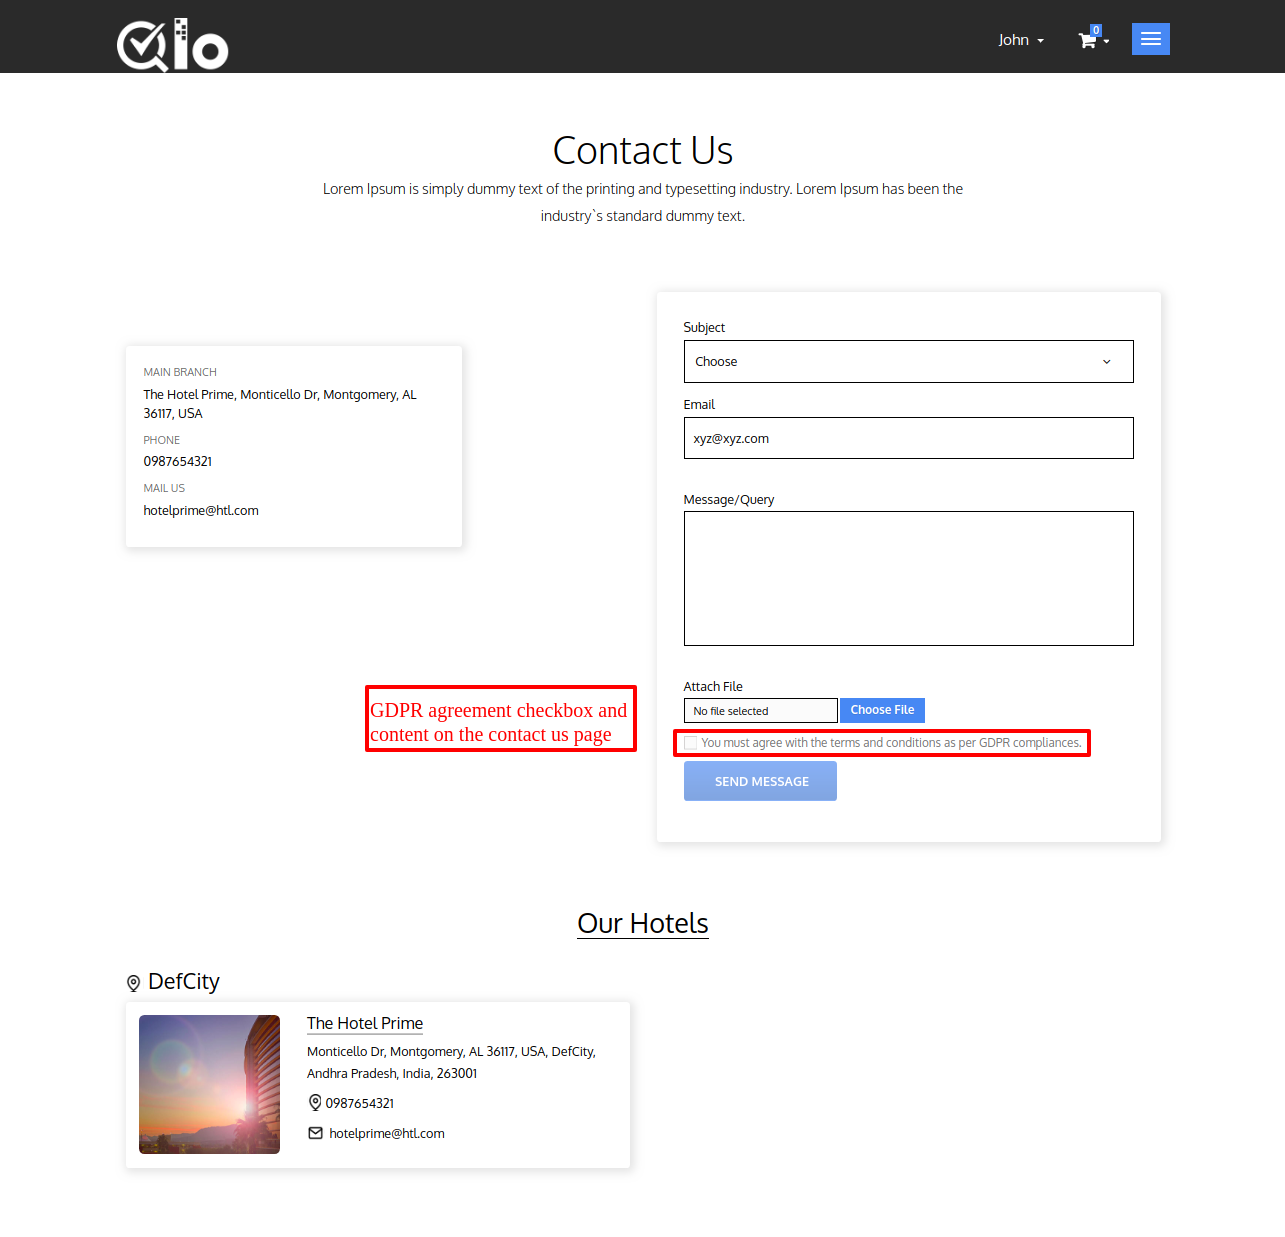
The agreement checkbox and content Contact Form

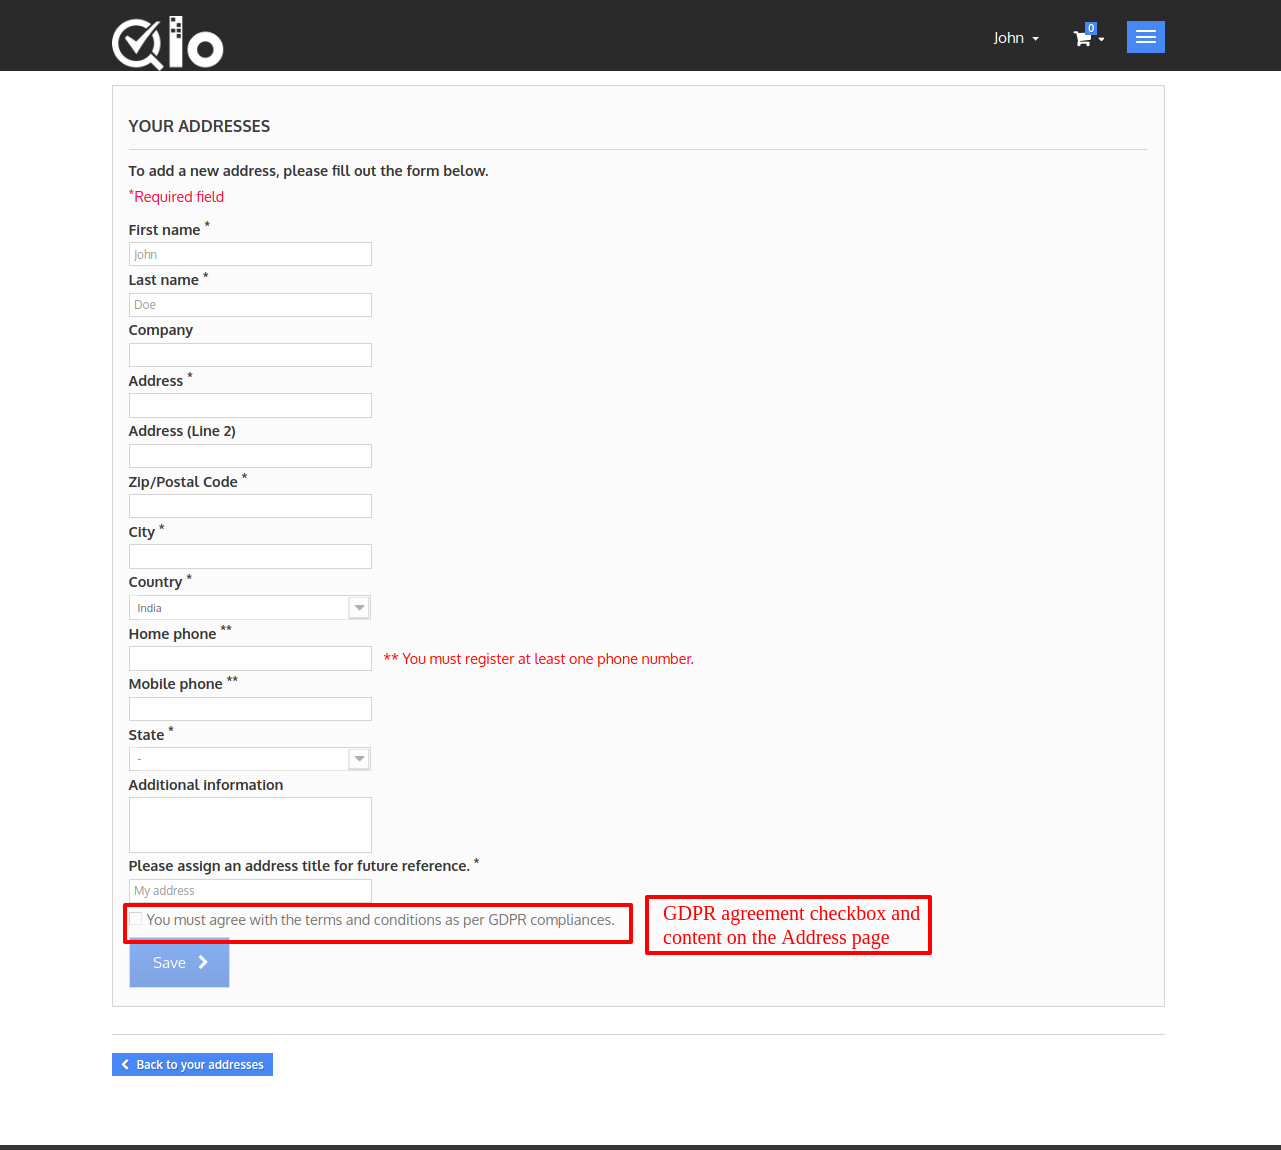
The GDPR Agreement Checkbox in Customer Address Form

QloApps Module’s Form Agreements

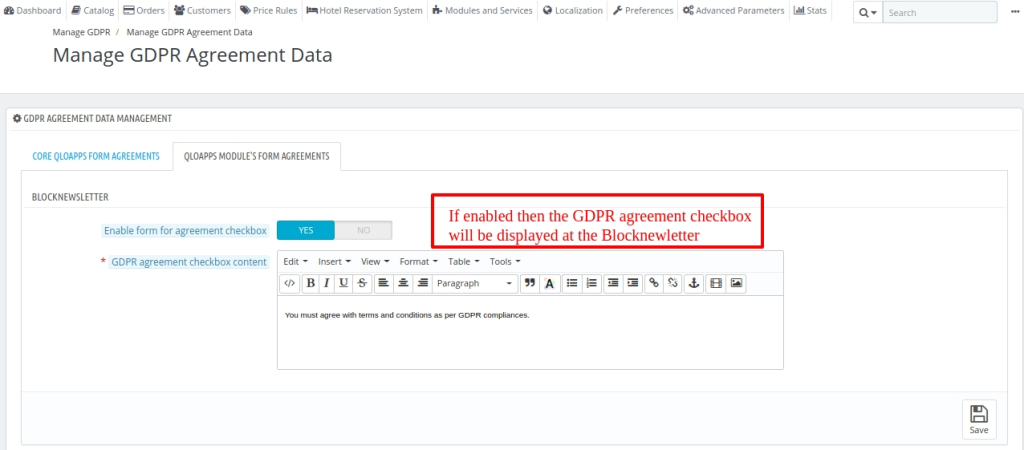
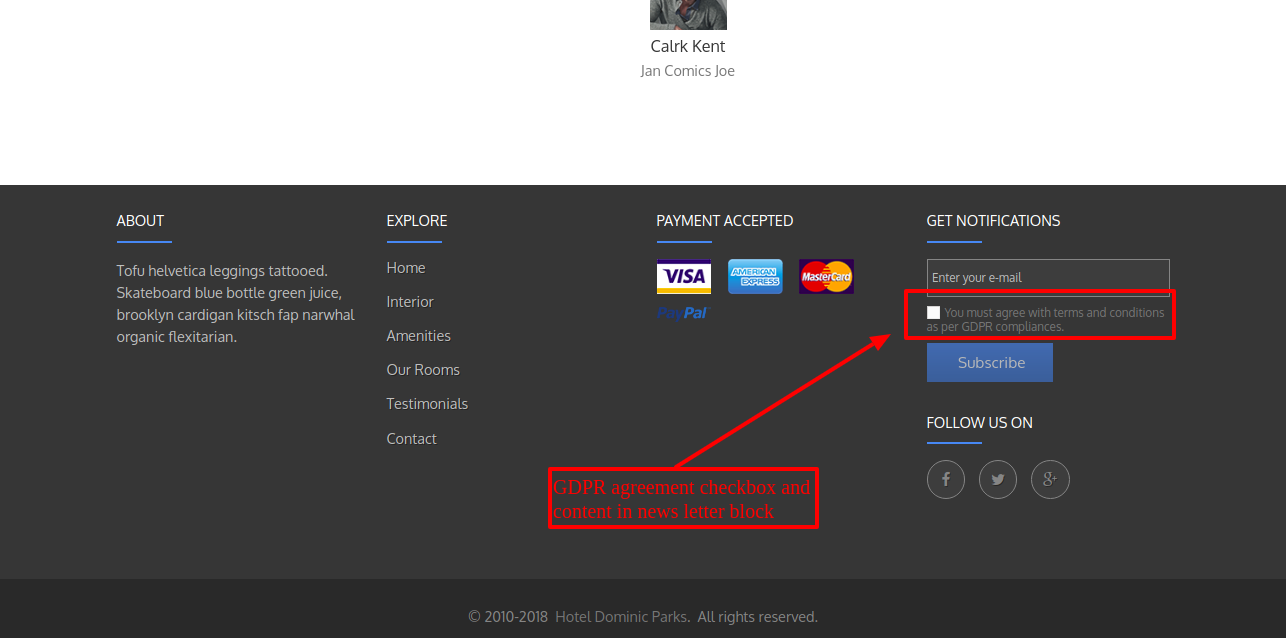
GDPR Agreement Checkbox in modules form

Front End Workflow
Once installing the module, a tab “Manage Personal Data” gets available for the customers under ‘My Account’ at the Front End.
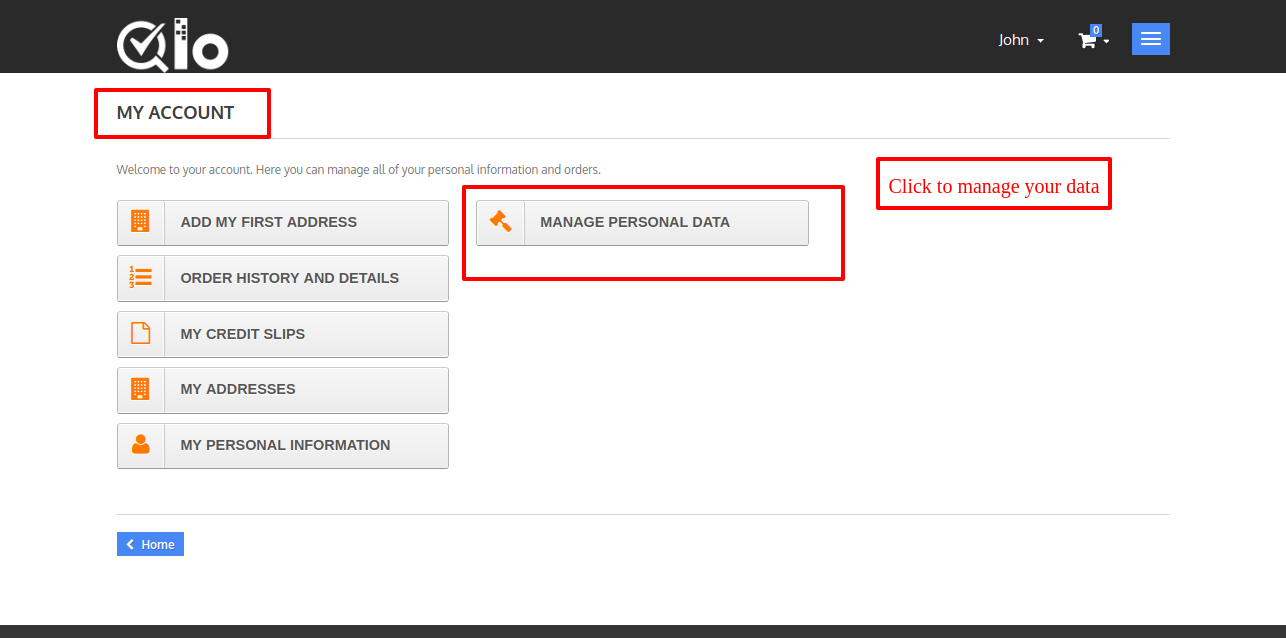
When a customer clicks on the “Manage Personal Data” tab, he can view three sub-tabs.
Personal Data Access, Personal Data Rectification, and Personal Data Erasure.
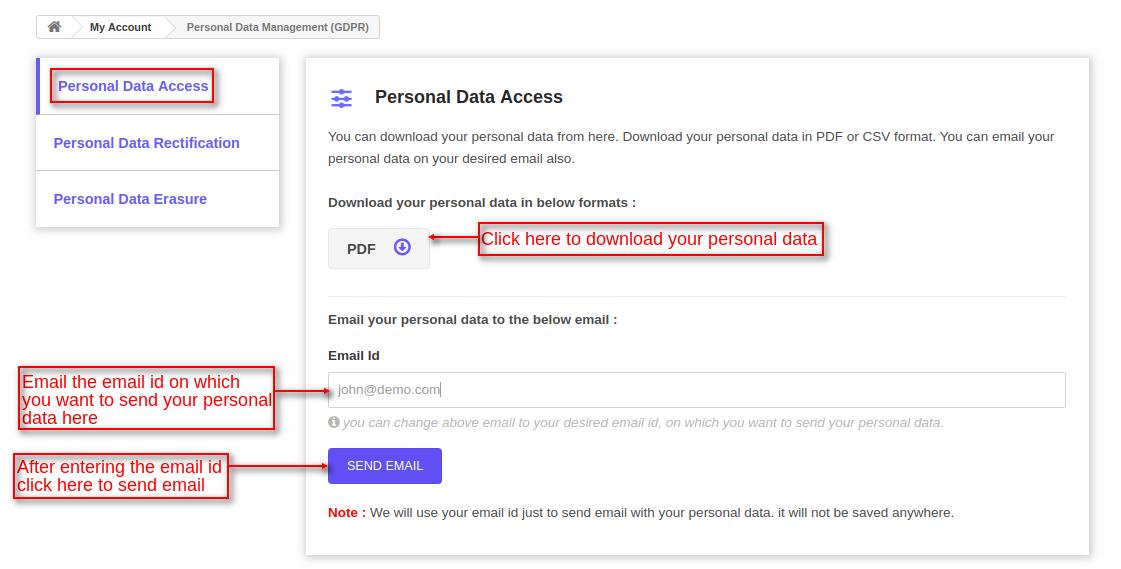
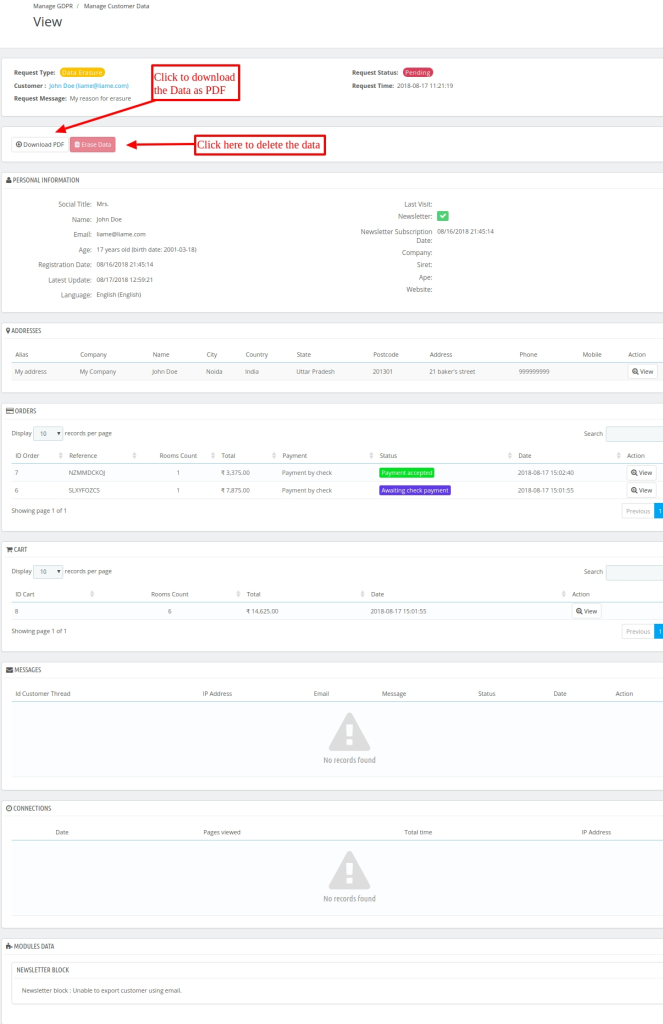
- Personal Data Access – Under this tab, a customer can download his entire data on the website in a PDF format.
- A customer can also email his personal data to his desired email id.

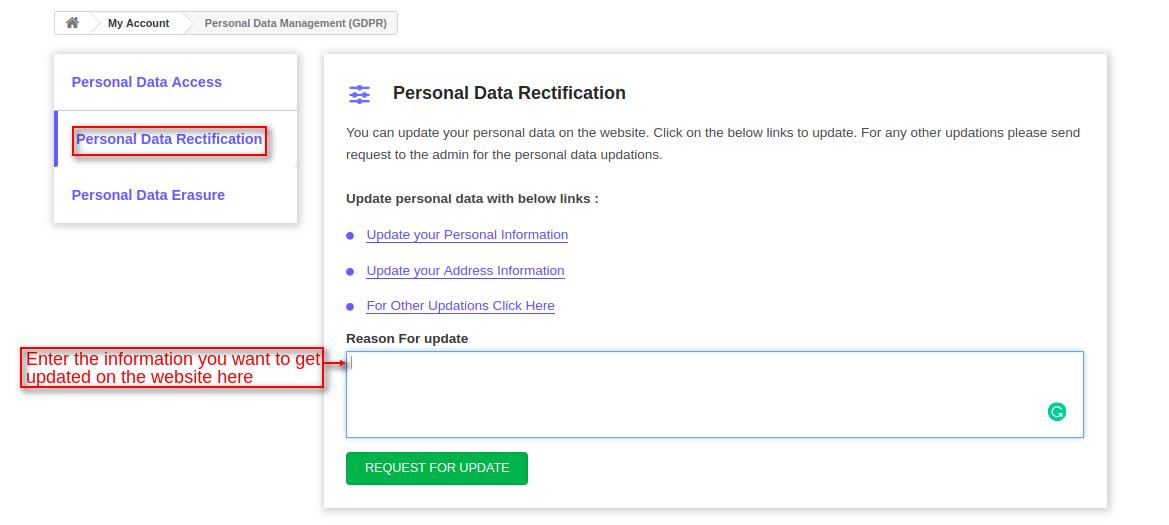
- Personal Data Rectification – Under this tab, a customer can update his personal information, address information.
- Or any other information he wants to get updated on the website.

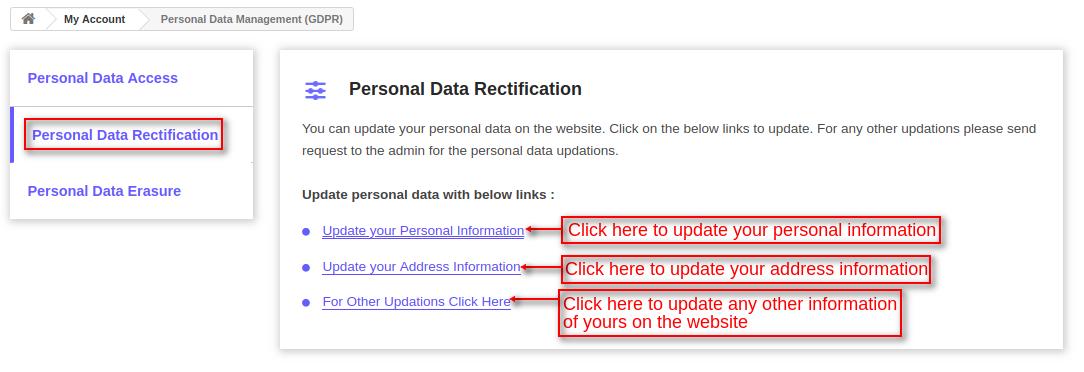
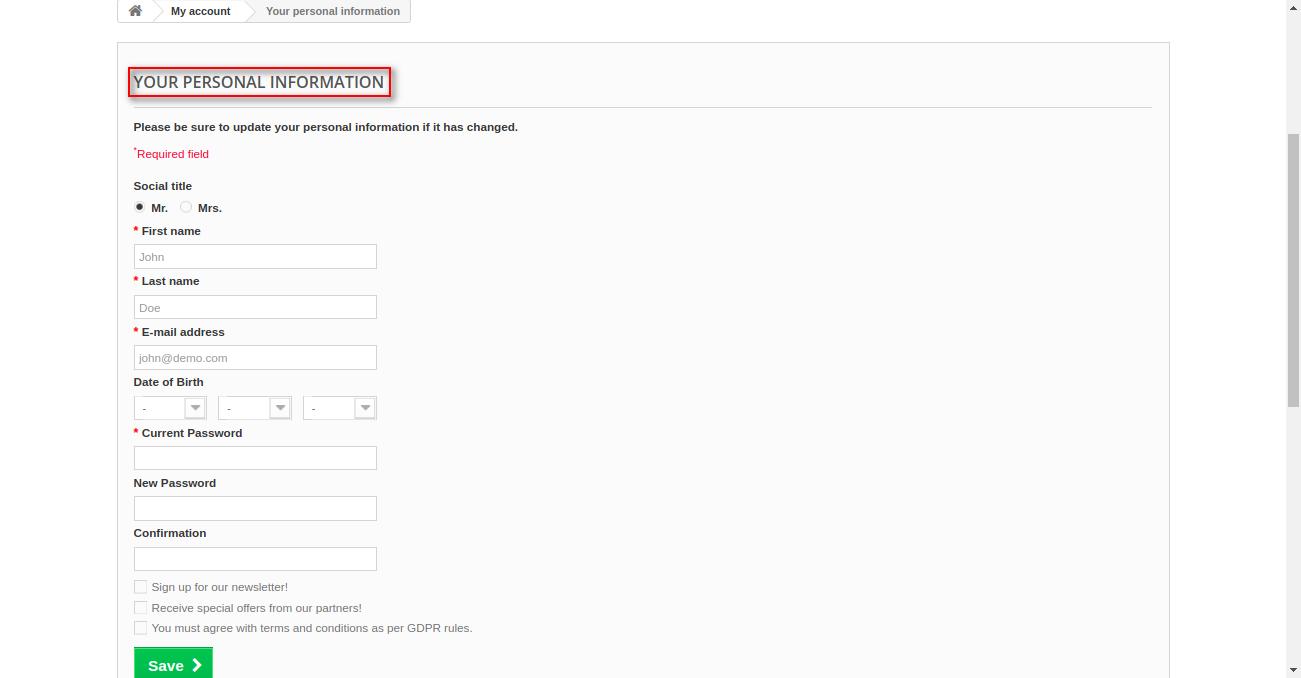
On clicking the ‘Update your Personal Information’ tab, he gets redirected to the Customer Personal Information page where he can update his personal information.

When the customer clicks on the ‘Update Your Address Information’ tab, he gets redirected to the ‘My Addresses’ tab where he can update or delete his address.


When a customer clicks on the ‘For Other Updations Click here’ tab, a block gets available below the tab.
From here he can enter the information he wants to update on the website.

- Personal Data Erasure – Under this tab, a customer can request for data deletion or delete his complete data from the website if “customer data delete approval” has been disabled by admin.


When a customer clicks on the ‘REQUEST FOR DELETE’ button.
Then a pop-up appears on the screen where the customer has to click on the ‘DELETE DATA’ button to erase all his data from the website.

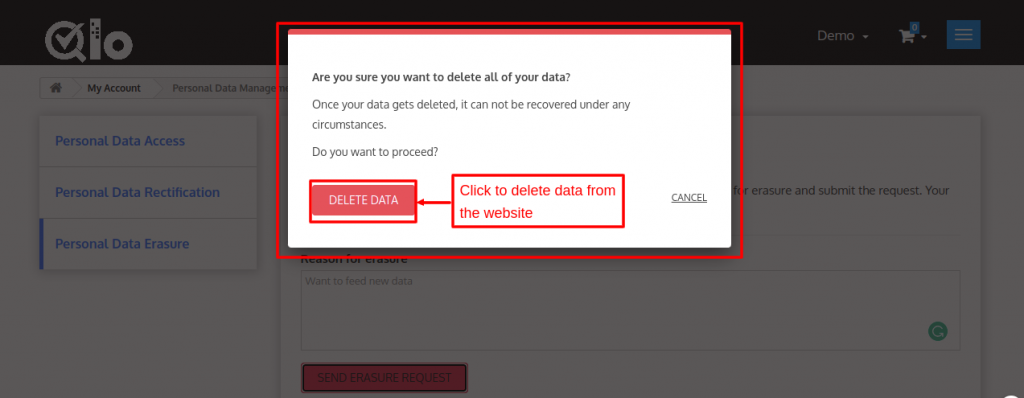
Once a customer clicks on the ‘DELETE DATA’ button, a message will be displayed on the screen as shown below:


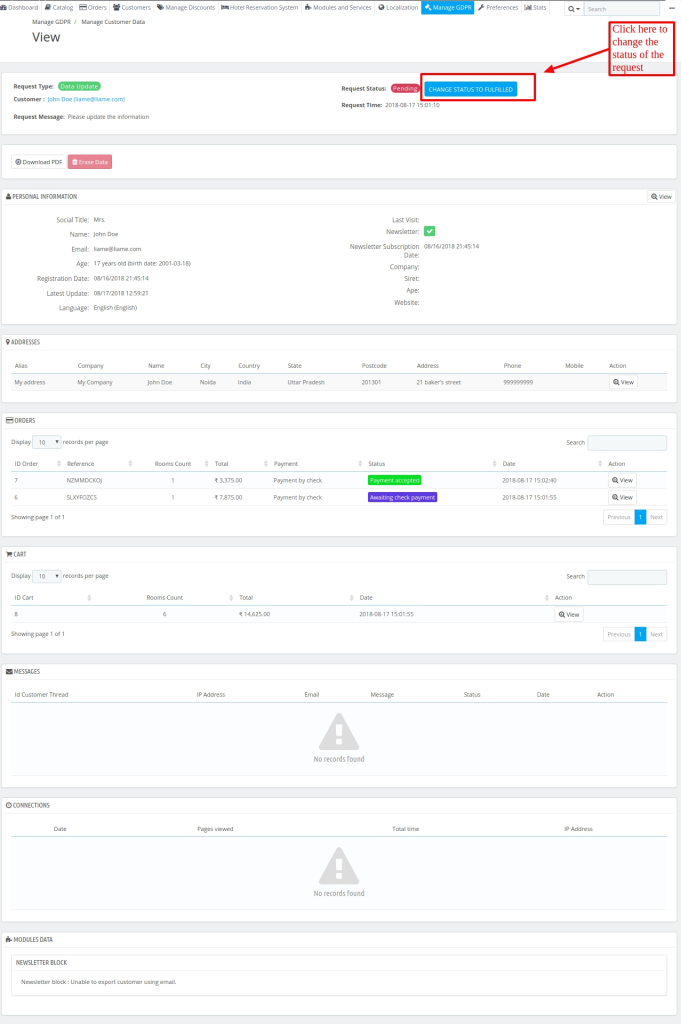
Manage Customer Data

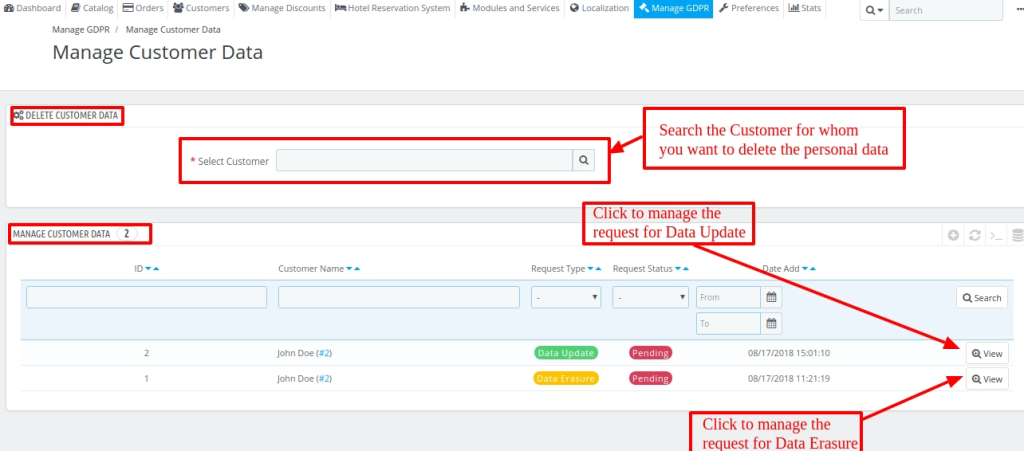
Once a request for data deletion has been submitted by a customer a request for data erasure is sent to admin and he can view it by navigating through Manage GDPR->Manage Customer Data.
- Delete Customer Data – Admin can delete the personal data of a customer from the website by selecting the customer name in the Select Customer field.
- On entering a customer’s name, the system redirects the Admin to the ‘Manage Customer Data’ page from where he can erase the data of the selected customer.

- Manage Customer Data – Under “Manage Customer Data” tab, admin can view the requests placed by the customers for deleting or updating their personal data from the website.
- Admin can view the request and delete/update it by clicking on ‘View’ button.

Manage Cookie Categories
As per General Data Protection Regulations (GDPR), you must inform your customers that your website uses cookies.
Moreover, they also have the choice of disabling some or all cookies.
Hence, to do the same, we have Manage Cookie Categories, Manage Cookies, and Manage Module Cookies.
To set the cookies categories, go to Manage GDPR –> Manage Cookie Categories.
Here, you can view the list of cookie categories already created. Moreover, the admin can also create cookie categories.

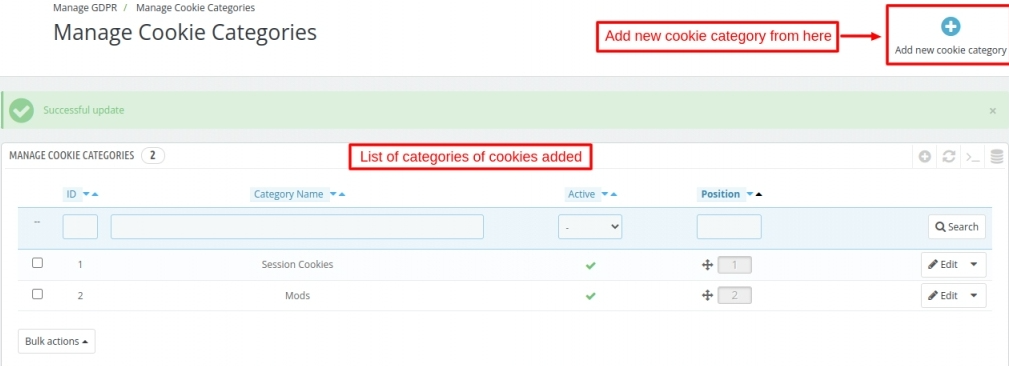
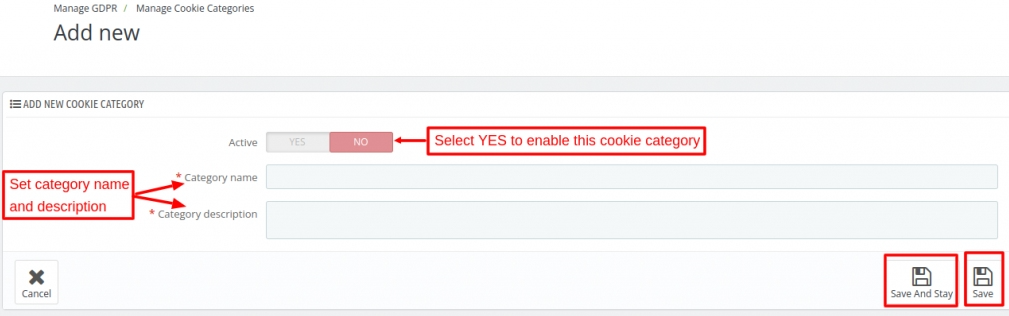
Henceforth, under the manage cookie category, you can add the category name and description.

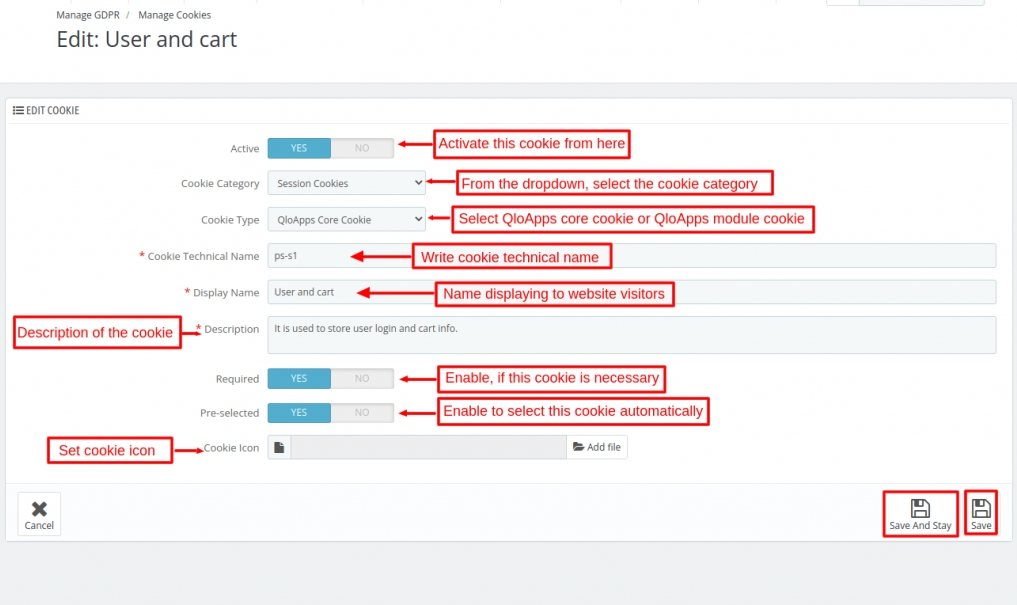
Manage Cookies
Moreover, you can add a new cookie from Manage Cookies.
Go to Manage GDPR –> Manage Cookies, under it you can view the list of cookies under different categories.
Moreover, to add a new cookie, click on ‘Add new cookie’.

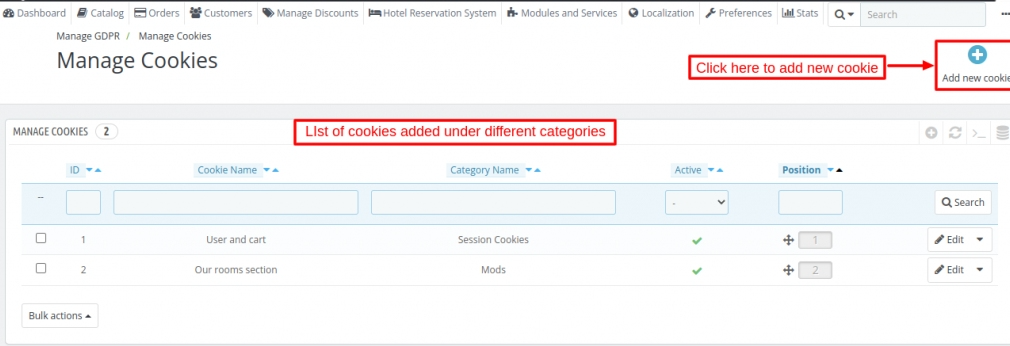
Fill in all the details of the cookies and save them. For reference, look at the below image.

Conclusion
This was all from the QloApps GDPR compliance. I hope I was able to clarify the functioning of the module to you.
If you want to learn about the functionality of QloApps then you can visit this link: QLO Reservation System – Free Open-Source Hotel Booking & Reservation System.
In case of any query, issue, or requirement please feel free to raise it on QloApps Forum.
Moreover, for any spport you can raise a ticket from here.
Current Product Version – 4.0.0
Supported Framework Version- QloApps 1.7.x & 1.6.x