QloApps Multisocial Posts
QloApps Multisocial Posts is an add-on for QloApps.
With QloApps Multisocial Posts you can post your product information on multiple social media platforms instantly or schedule it at a future date.
Undoubtedly, social media is the best platform to connect with your clients. Thus, making it an important part of any business strategy.
However, creating a post for every social media website turns out to be hectic and time-consuming.
With this add-on, you can increase sales by spending a few minutes on social media.
If you want to expand your reach to your clients and target markets then posting your product on social media is a must.
It will increase your business visibility, and you can open your business to a large number of customers.
Hence, the chances of conversions are very high.
Features
- Post to various social media platforms at a time.
- You can select the social media platform where you want to post.
- Allow or restrict the image and description of the product on the post.
- When you select a product for posting, it will automatically fill in all the details of the product.
- You can schedule your post for a future date.
- Calander shows all the successful posts, scheduled posts, and failed posts.
- You can view all the drafts of the posts in the “Draft” section.
- Share at multiple social media platforms at a time.
- Help you to maintain a consistent publishing schedule.
- Saves your time by posting it on multiple social media platforms within a few minutes.
Installation of QloApps Multisocial Posts
The installation of any module is very simple in QloApps.
- Go to the Module and Service tab.
- Click on Add New Module.

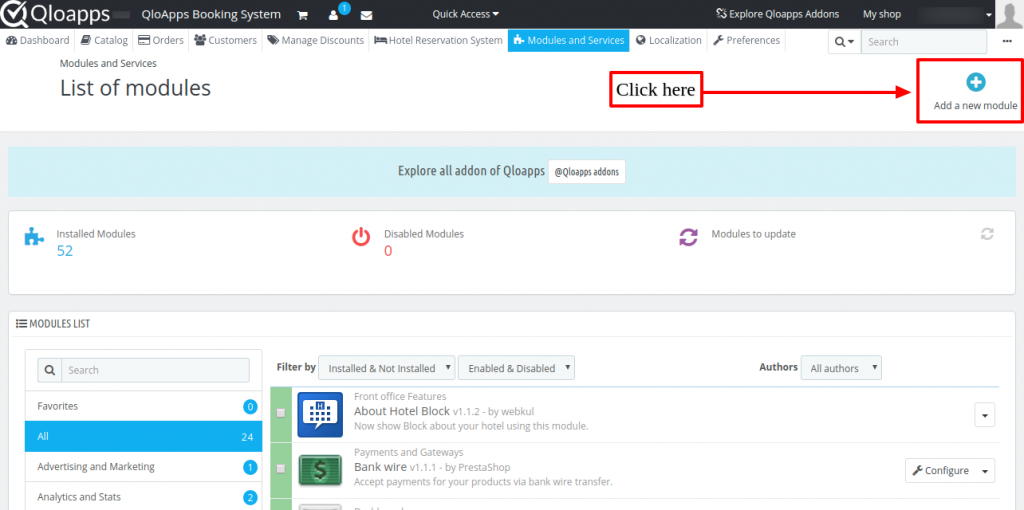
- Now upload the Zip file of the module and install it.

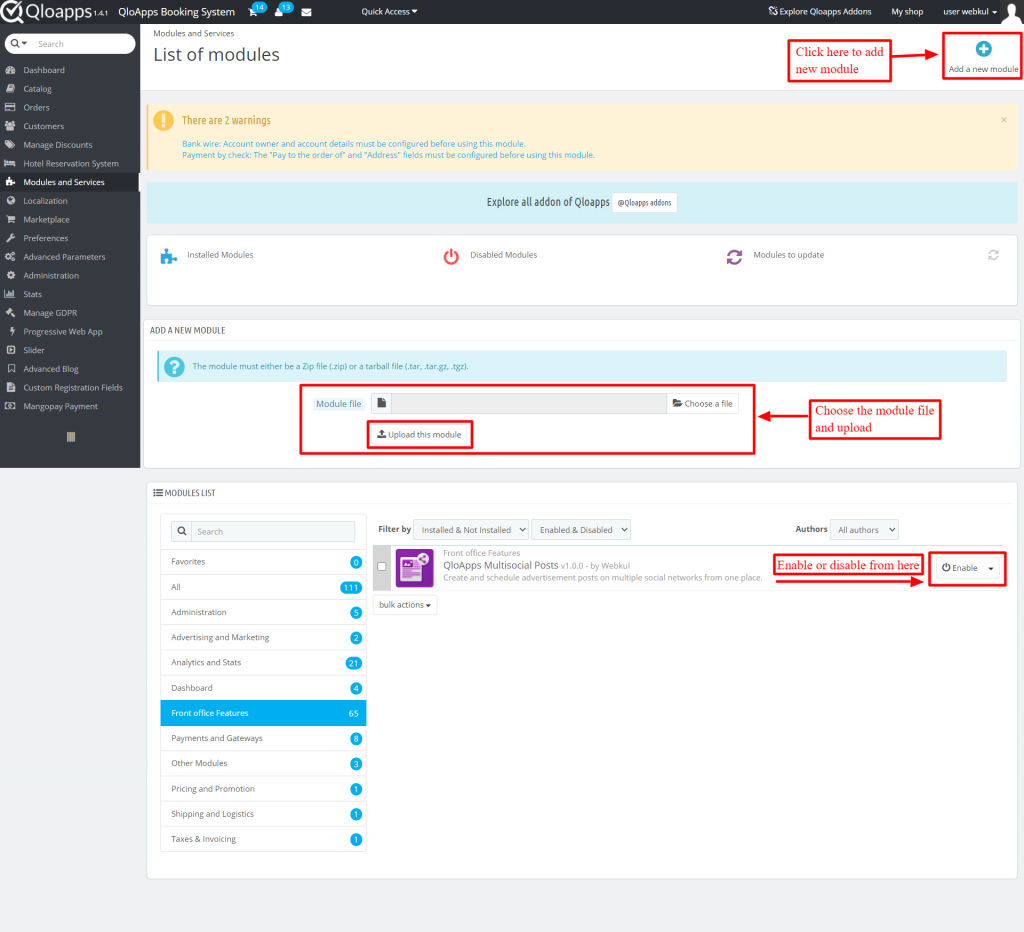
Now you have installed the module. Let’s see how we can configure it.
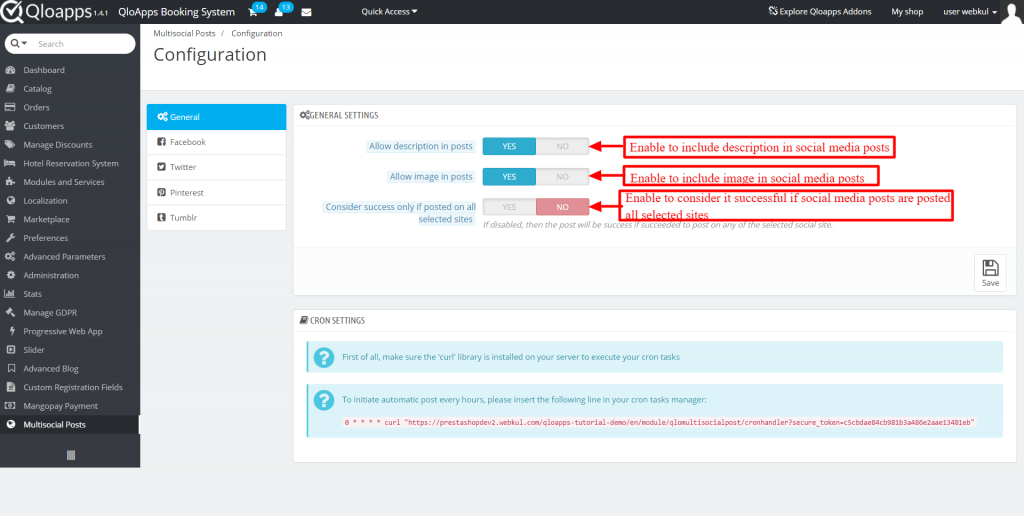
Configuration
After the completion of the installation, a new tab “Multisocial Posts field” is added.

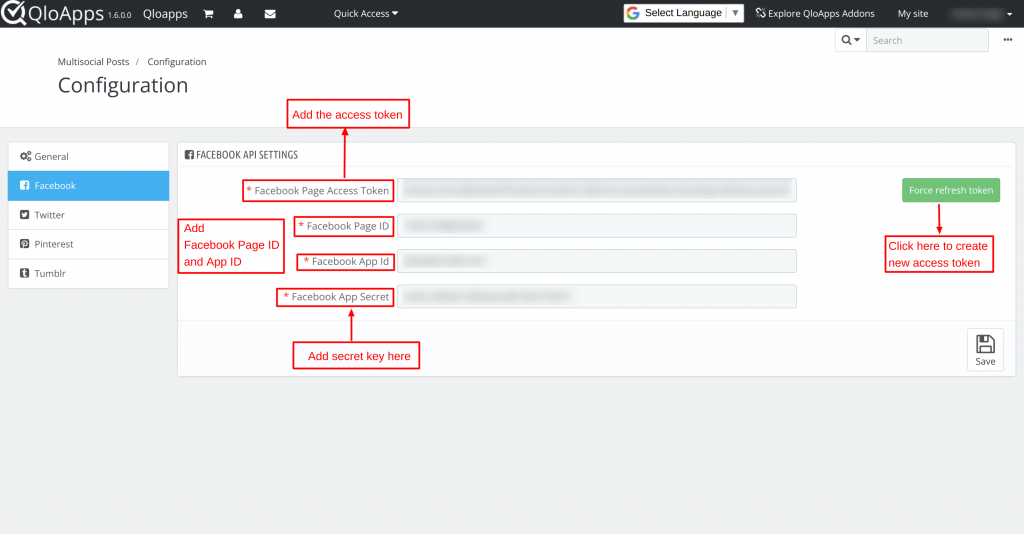
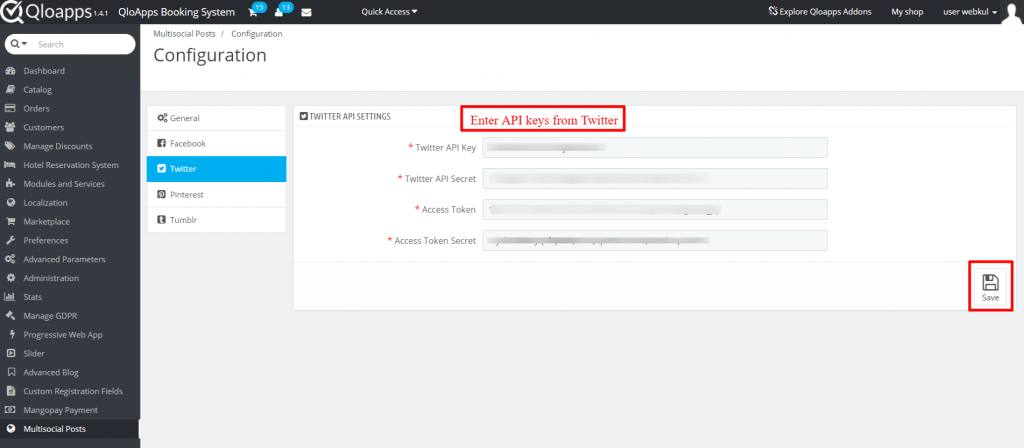
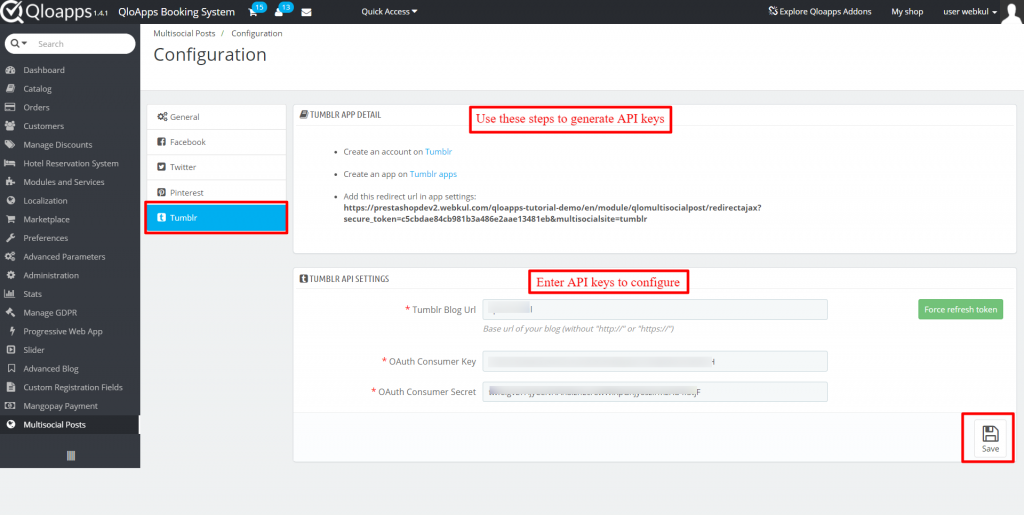
Click on configuration and you will be redirected to the configuration page. It consists of 5 tabs.
These are General, Facebook, Twitter, Pinterest, and Tumblr.
The first tab is “General”. In this, you can include descriptions and images in social media posts.
Another alternative allows you to enable or disable status making it successful only if the post is shared across all social media websites.

The next tabs consist of API details which you have to fill in after getting API keys from their social media websites.


Tumblr

How to get API keys of the following social media platforms
You have to create your Facebook account on the Facebook developer site.
This way, you can add new Apps to your account.
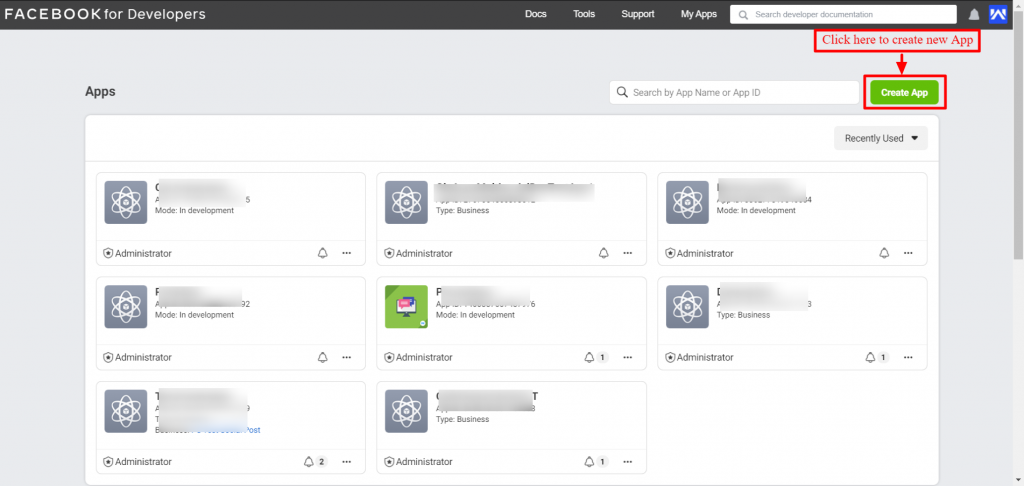
Go to the developer’s account and click on “My App”.
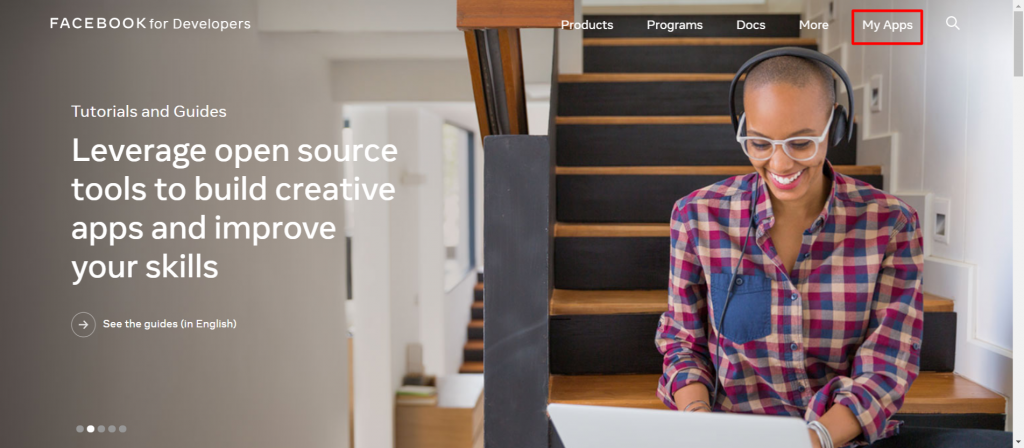
You will be redirected to a new page, in click on “Create App” to create a new App.

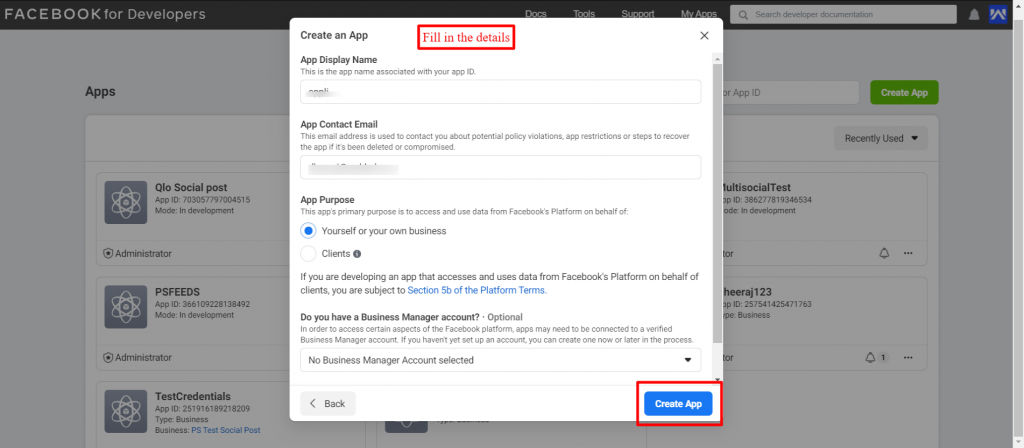
Add details and click on Create App.
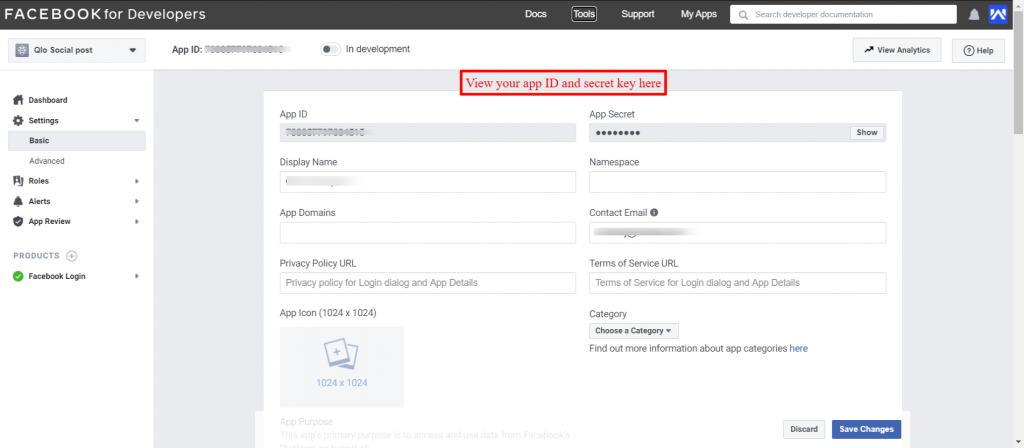
To configure the module, go to the basic setting and you can access it from the App ID and App Secret key.
How to get a Facebook Page Access Token?
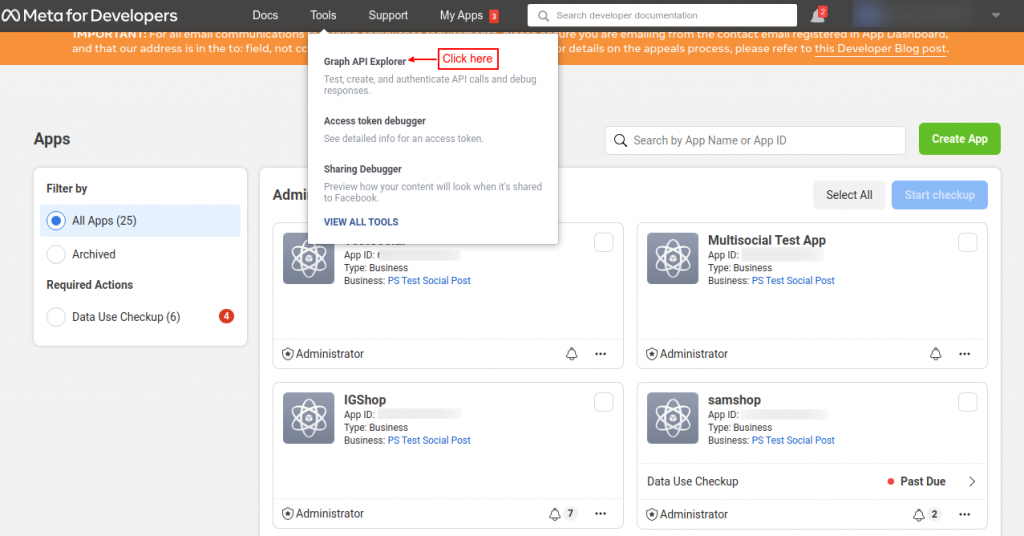
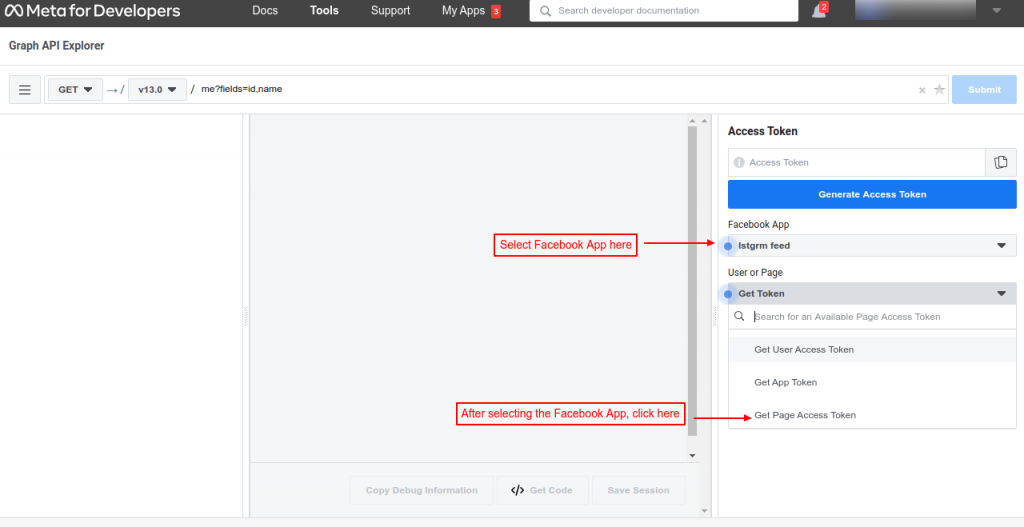
To obtain the Facebook Access Token, the admin first needs to click on Graphic AI Explorer under Tools.

Now, select Facebook App and then click on Get Page Access Token.

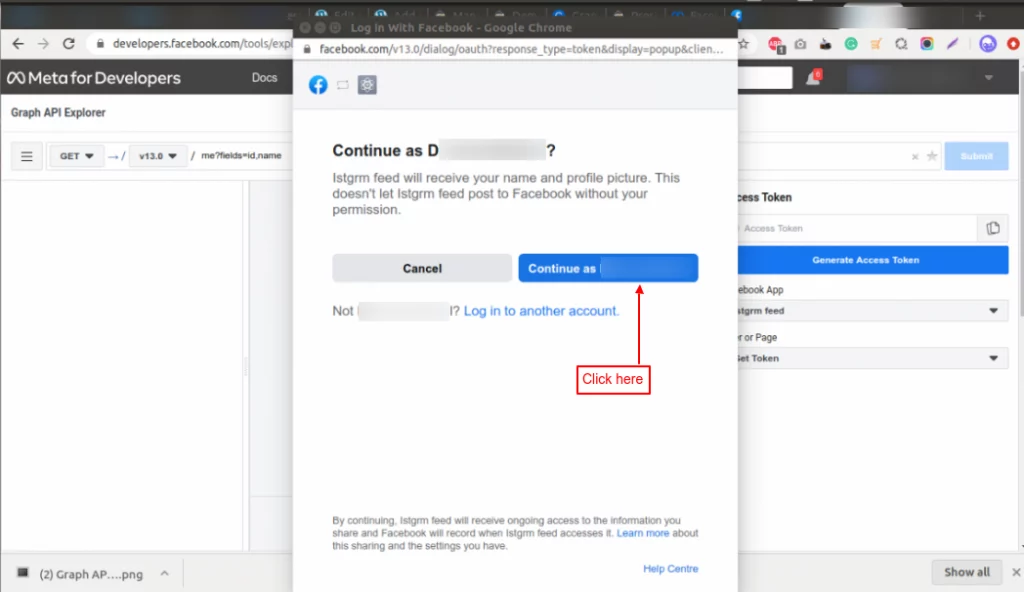
Once you click on Get Page Access Token, A pop-up will appear on the screen showing various details. Click on the Continue Button in that pop-up.

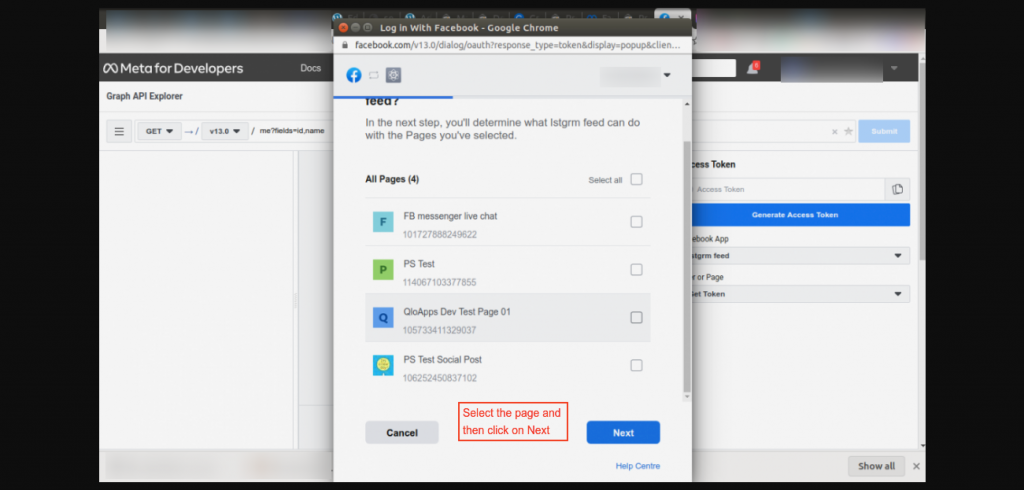
Select the pages, and click on the Next button.

Click on the Done Button to proceed further.

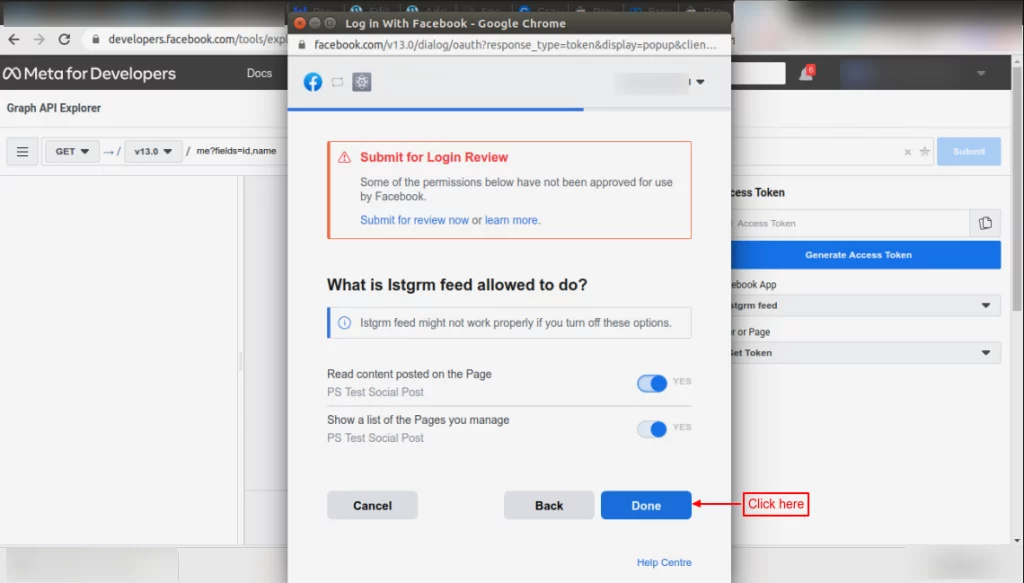

Apply all the permissions mentioned under the Facebook tab in the admin’s back office.

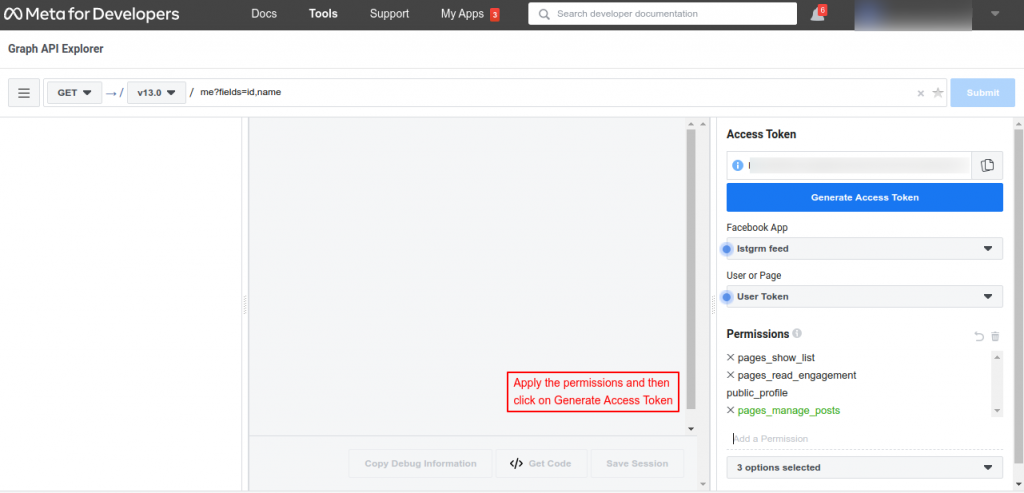
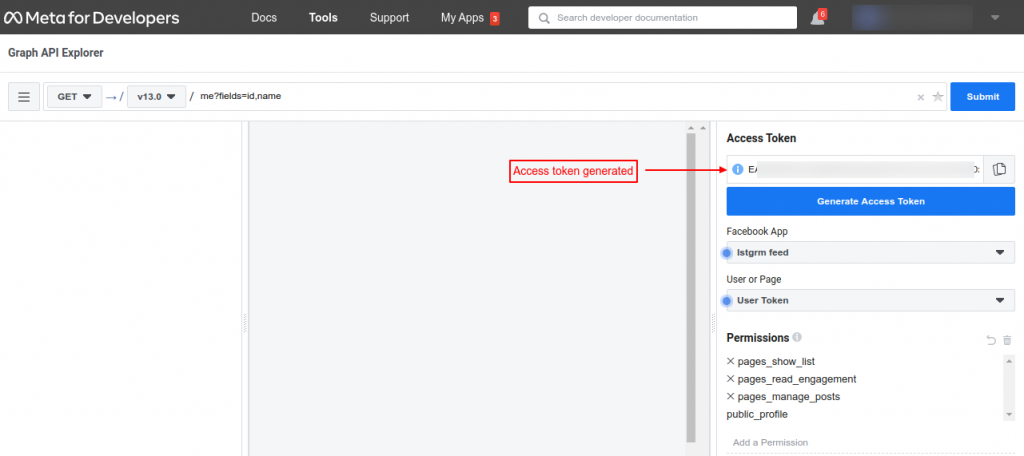
Once you have applied all the permissions, click on the Generate Access Token Button to generate the token.

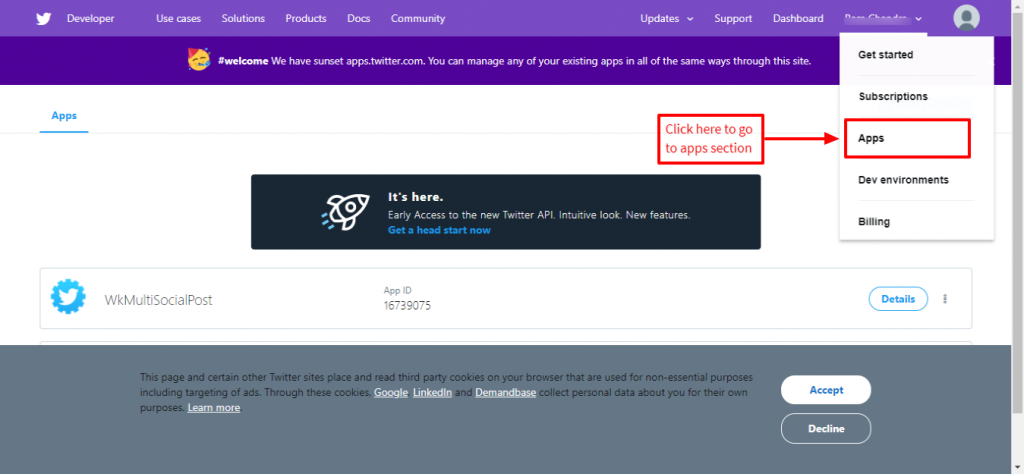
Create a Twitter account on the Twitter developer site. From here you can generate an API key and API secret.
Click on Admin’s account and select “Apps”.

On the redirected page, click on “Create an app”.

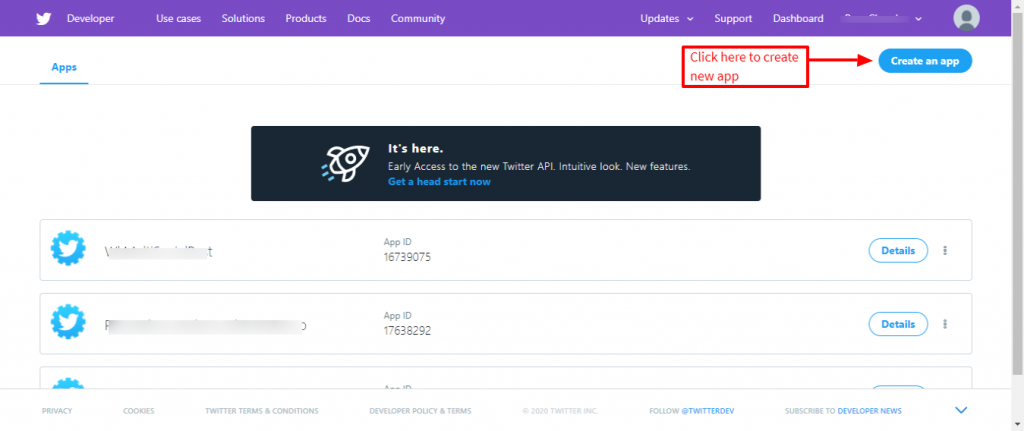
Fill in all the details to create an App.

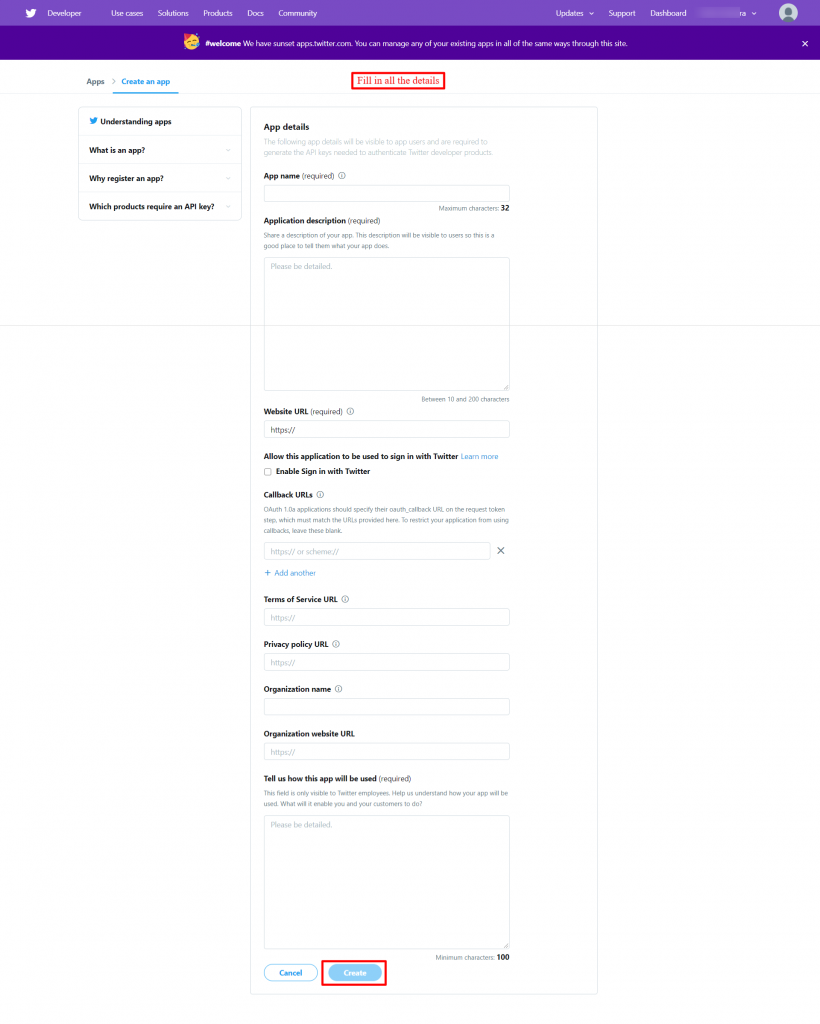
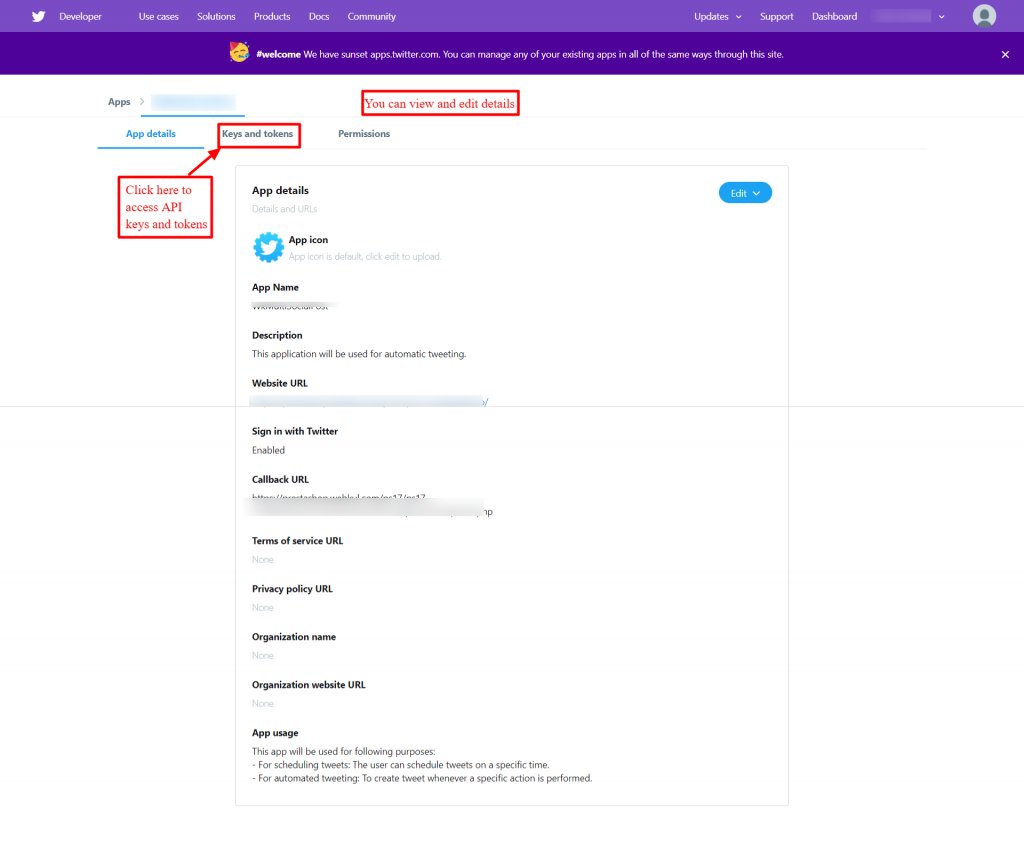
You can view and edit the details of the App by clicking on the created App.
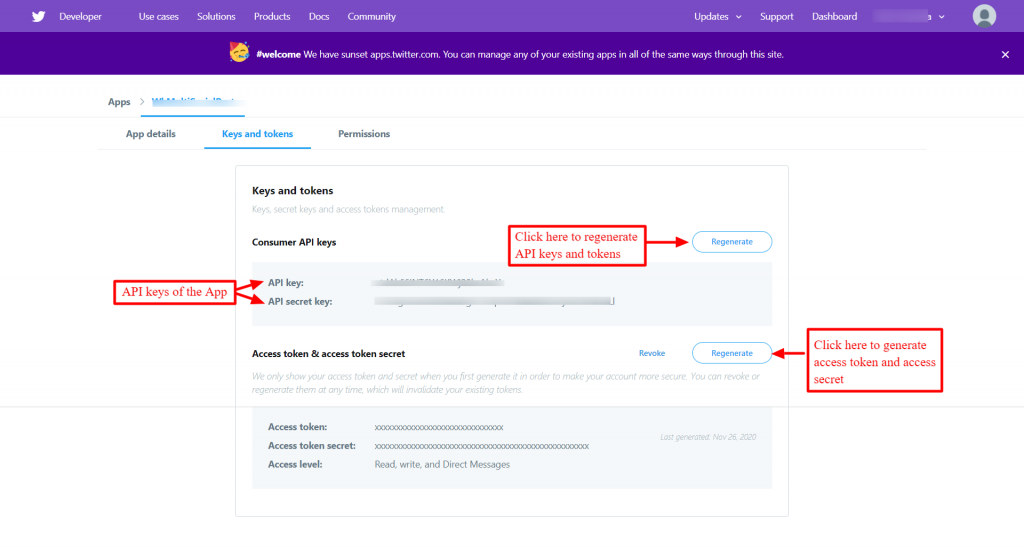
Further, you can click on “Keys and Tokens” to access API keys and tokens.

Click on the generate button available in the access token section to generate an access token.

Tumblr
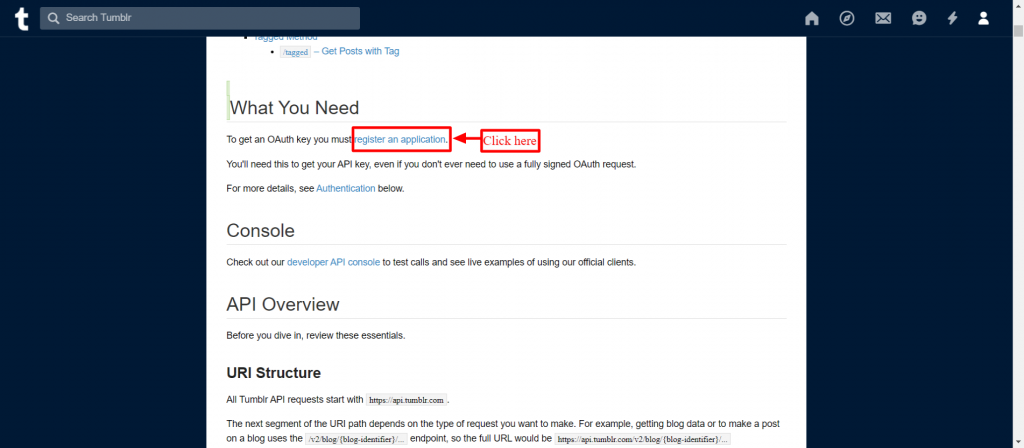
To generate API keys for Tumblr, create an account on Tumblr. For that, go to the Tumblr API web document link.
After that go to the ‘What you need’ section.
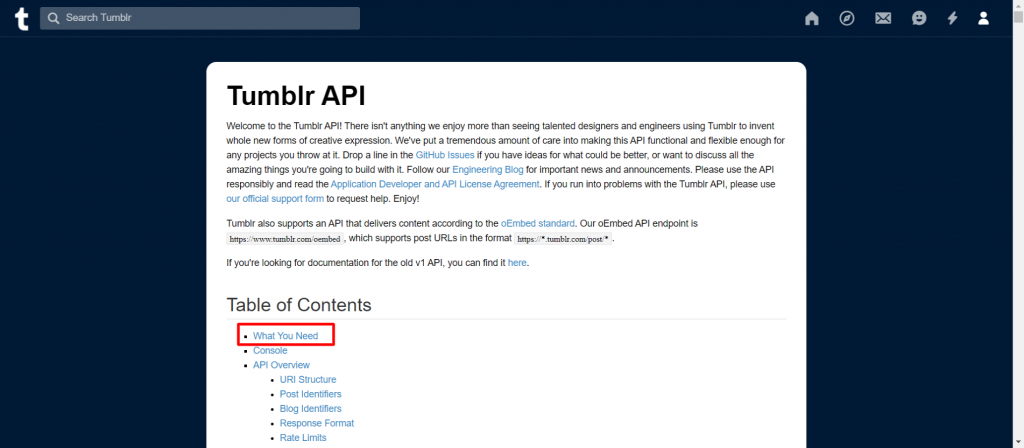
In that, click on register an application to register your App.
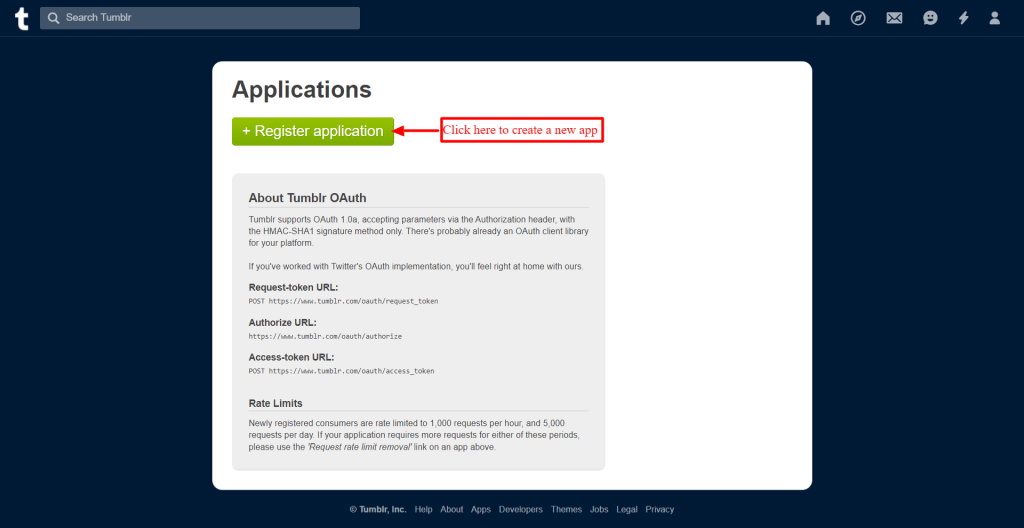
Click on “Register application” to create a new app.

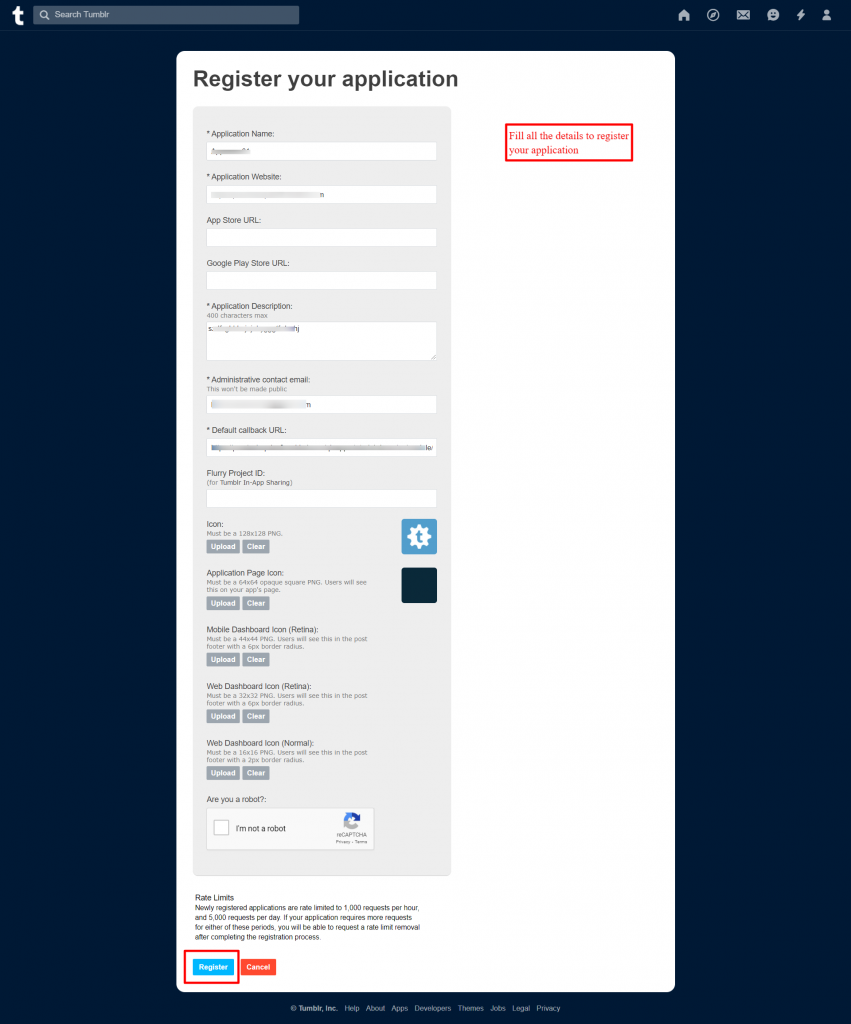
Fill in all the details and get your app registered.

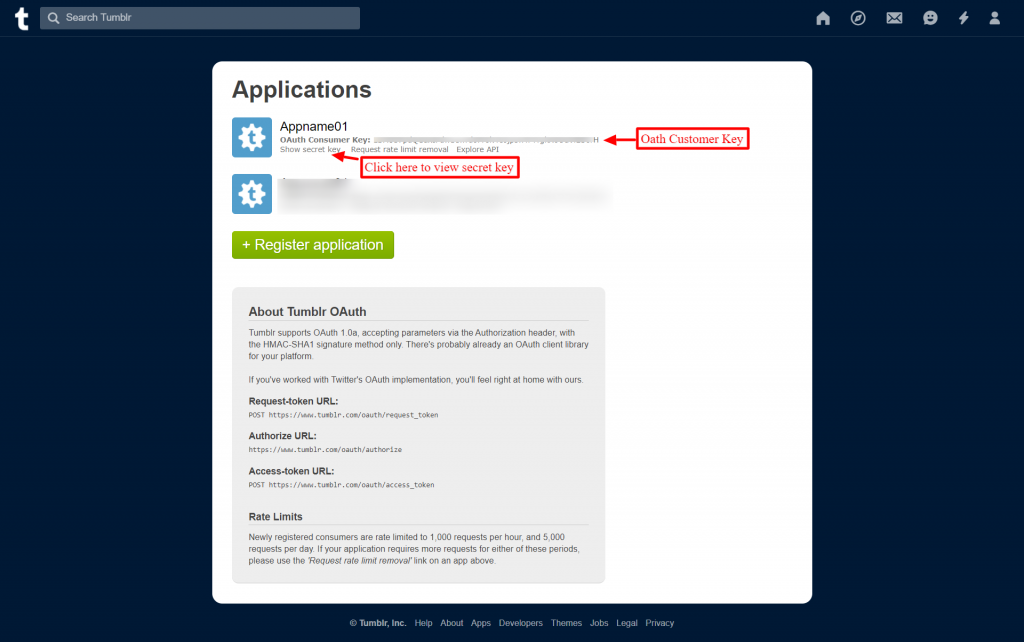
After registering, you may find the API keys below the name of the application.

In your Tumblr account “create a new blog”. Use this blog URL to fill in information about the “Tumblr blog URL” on the configuration page.

Workflow

Calendar
The calendar is useful to show you posts posted in the past, and schedule posts, you can also add a new post from here.

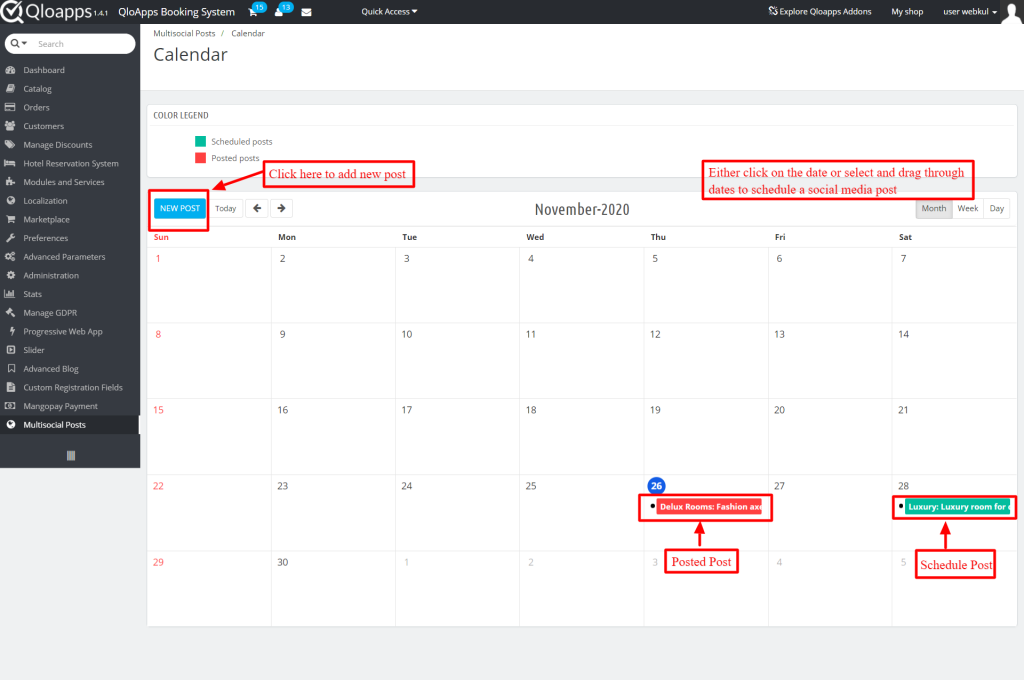
Add a new post Click here to add a new post.
Schedule post On the calendar you can see the dates of the upcoming posts.
Posted post It will display the dates of posts posted in the past.
Add new post
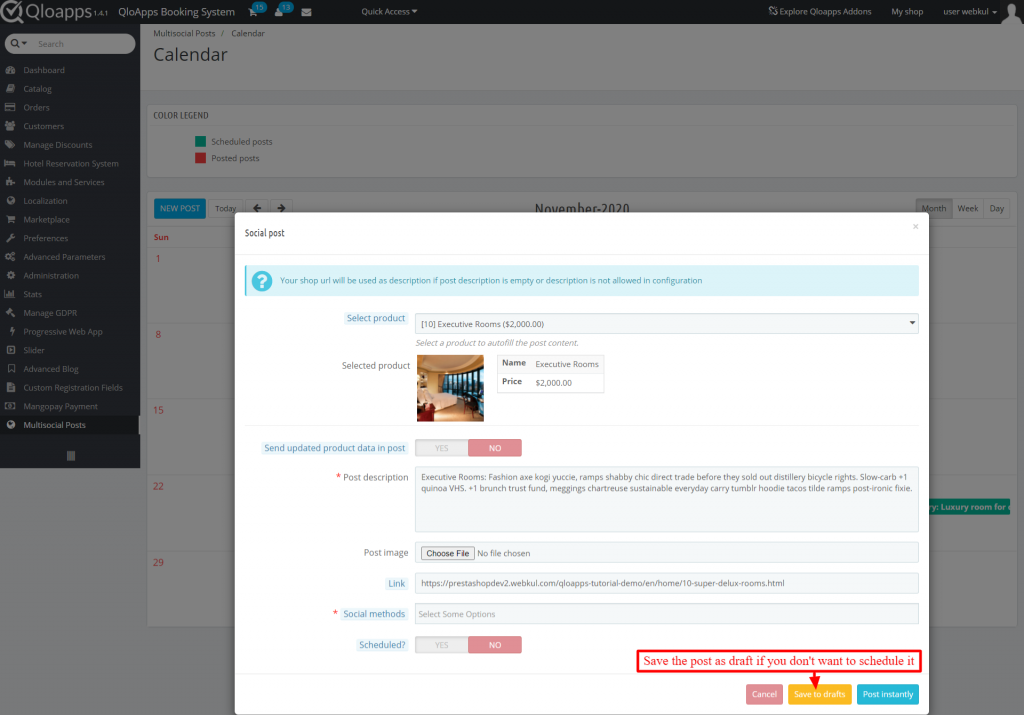
When you click on “New post” a new page appears that shows the following information.
Select Product– You have to select the room type which you want to post.
Send updated product data in the post If you want to schedule your post for a future date then you can enable it. Thus, when the scheduled date arrives, updated data on the product is posted.
Post-description-It includes details of the product. You can change it as per your wish.
Post image- You can choose an image for your post.
Link– You can add a link from here.
Social methods– Select social media where you want to post your product.
Schedule– Enable if you want to schedule a post. If enabled, then select the date and time.

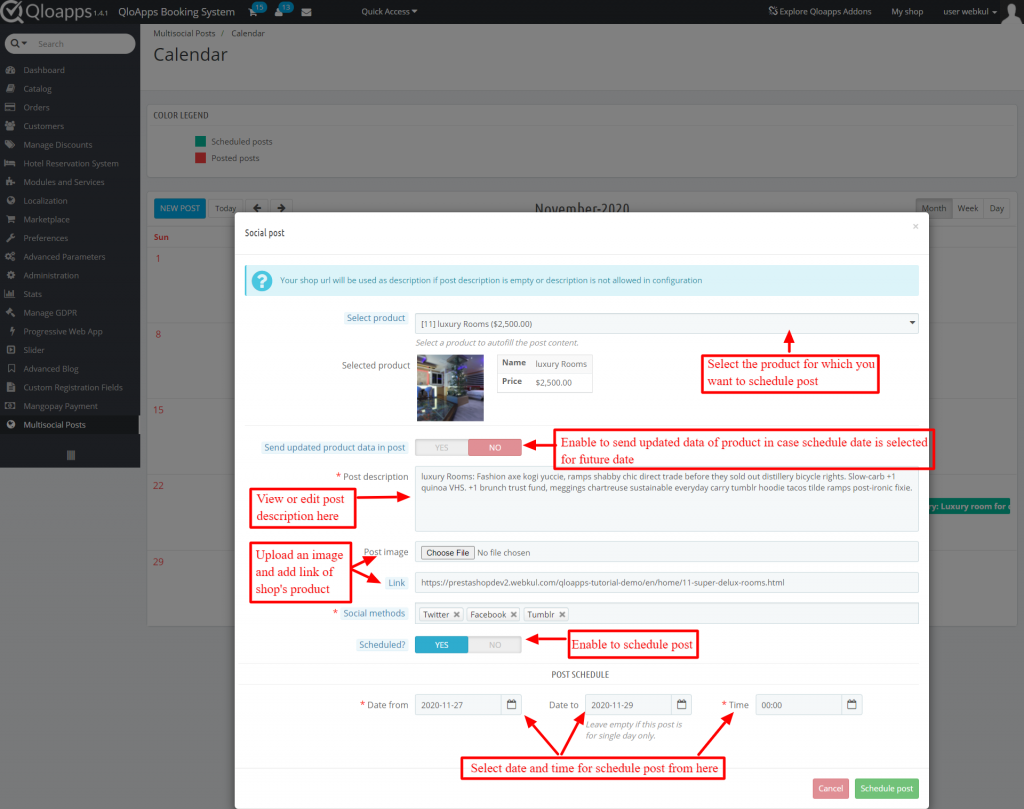
If you don’t want to schedule a post. You can then opt to save it as a draft or immediately post it.

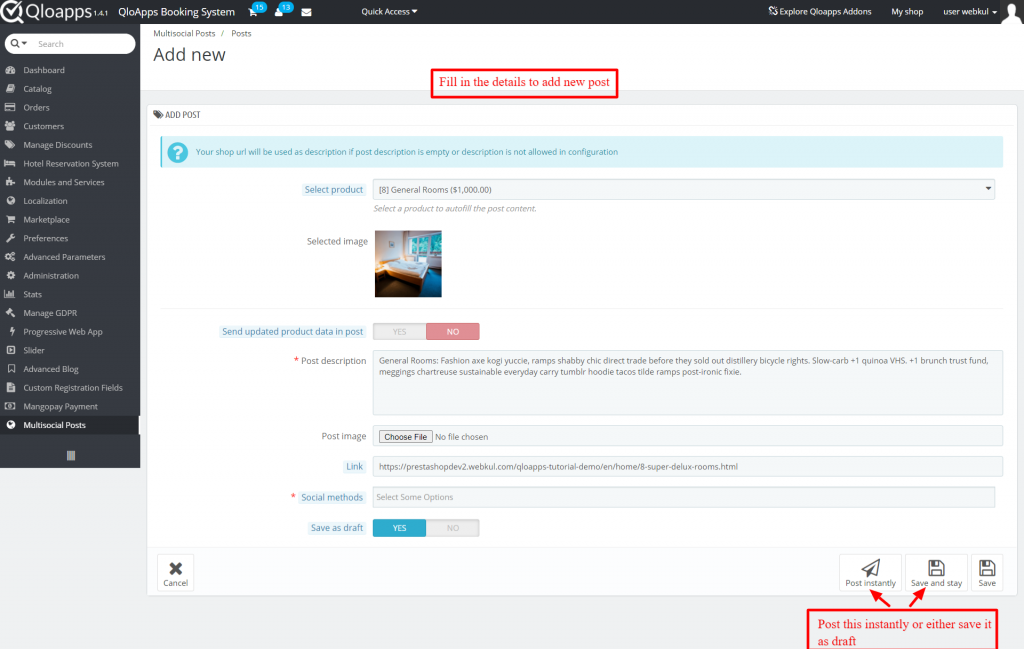
The draft section has all the details of posts saved as drafts. Click on the edit button of any draft you want to post or edit details.
Further, you can also add a post from “Add new post”.


After clicking on “Add new post”, you are redirected to a new page. On this page fill in the details and post it immediately or save it as a draft.

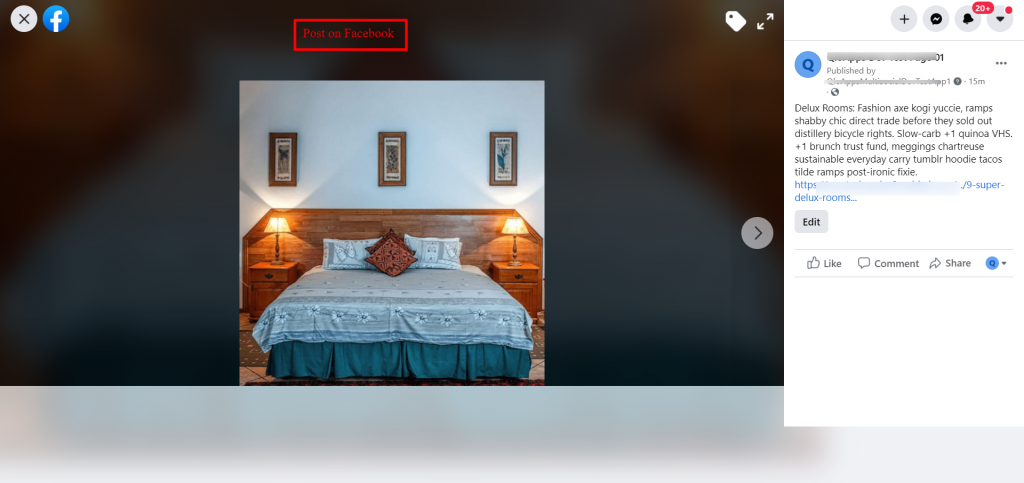
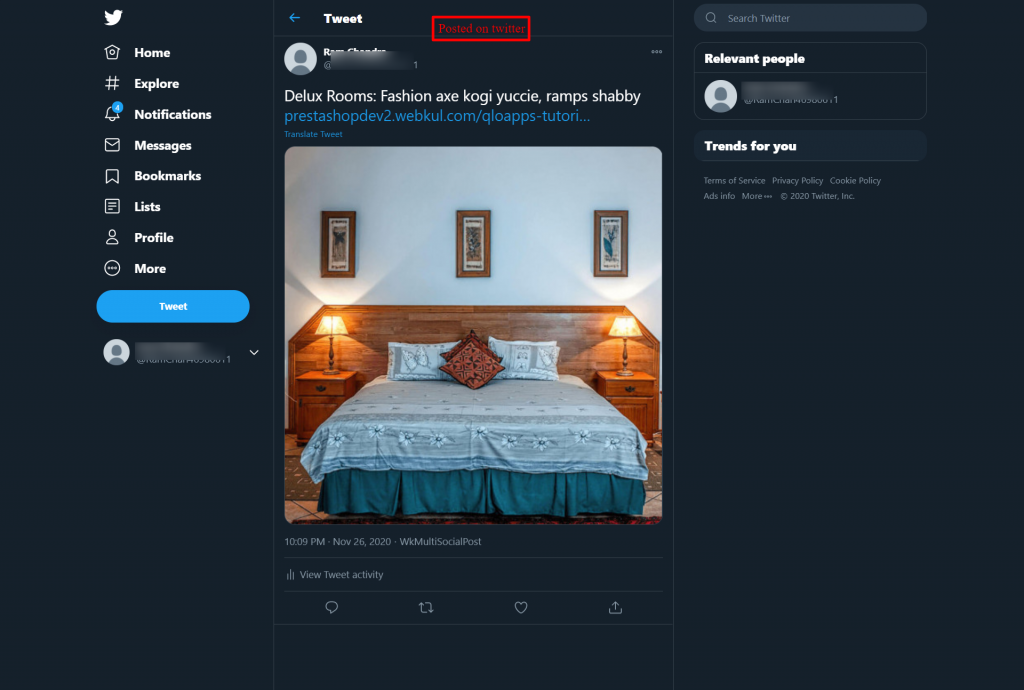
Frontend view of Multisocial Post
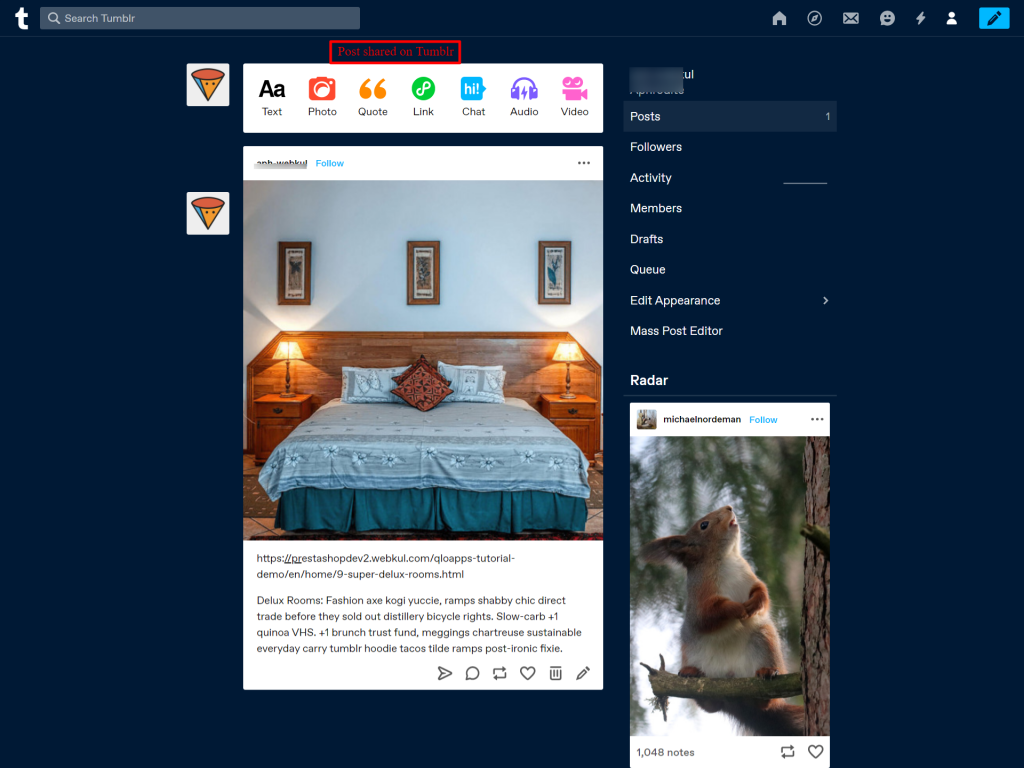
Posts on Social Media Websites
In this way, posts on various social media platforms look like.


Tumblr

Conclusion
This was all from the QloApps Multisocial Posts. I hope I was able to clarify the functioning of the module to you.
If you want to learn about the functionality of QloApps then you can visit this link: QLO Reservation System – Free Open-Source Hotel Booking & Reservation System
In case of any query, issue, or requirement please feel free to raise it on QloApps Forum
Lastly, do not forget to drop your thoughts in the comments.
Current Version 1.0.2
Supported Framework 1. x.x