QloApps Checkout Custom Fields
QloApps checkout custom field module allows you to add custom fields when a guest is booking a room i.e. during the checkout process.
This enhances the guest experience as it helps the hotel to make orders according to the customer
preference thus leading to improved guest interaction.
The admin can add various custom fields and create them using different input types, such as text, checkboxes, and radio buttons.
Admin edit fields from the edit button can create fields only visible to him at the back office
Features of QloApps Checkout Custom Fields
- Create multiple custom fields on the checkout step to collect additional guest information
- Enhances guest experience by collecting special requests or preferences to personalize stays
- User input is shown on the order confirmation page, order confirmation email, order detail page and order invoice.
- The custom field includes an input that can be text fields, dropdowns, checkboxes, date ranges etc.
- Admin can manage custom fields easily from the back office.
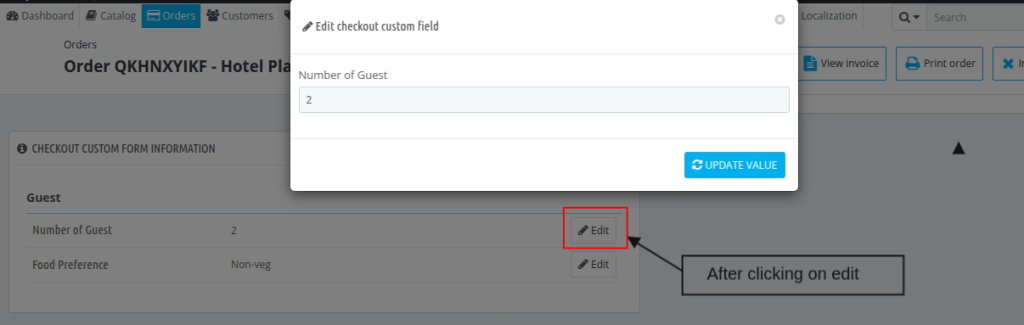
- Edit button on the order detail page to update the field information of the checkout custom for.
- Admin can create fields that are only visible in the back office and not shown to the customers
- Custom checkout fields are also available when the admin creates bookings from the back office.
- Admin can add required fields for having information of visitors like their personal id or any other documents for guest verification
Prerequisites of Installation
Prior to installing the QloApps Custom Registration Fields addon, you must make a few changes in the core files for the proper functioning of the module.
The step is very simple, you have to add the mentioned codes in the following paths.
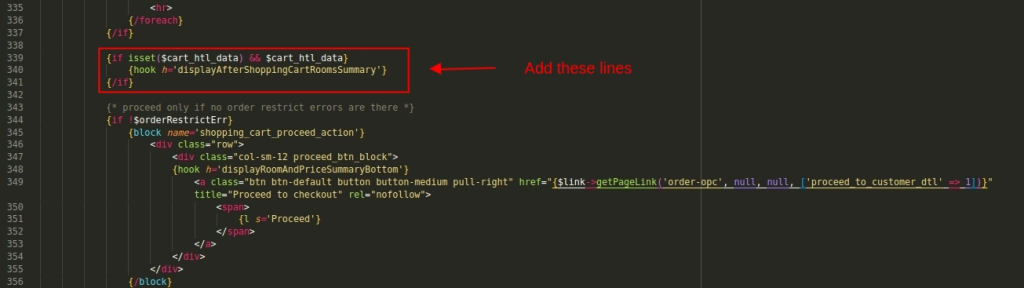
To display the Checkout custom field form on the Room summary page, you have to add a hook in the below tpl file:
Path
`hotelcommerce/themes/hotel-reservation-theme/shopping-cart.tpl`Add below hook code at line number 339 (may vary)
{if isset($cart_htl_data) && $cart_htl_data}
	{hook h='displayAfterShoppingCartRoomsSummary'}
  {/if}
Kindly refer to this screenshot:

How to install QloApps Checkout Custom Fields
The installation of any module is very simple in QloApps.
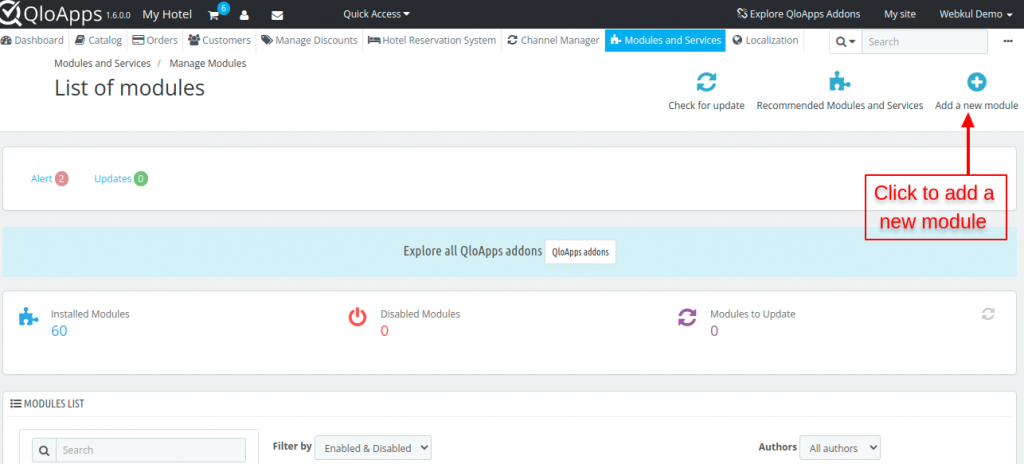
- Go to the Module and Services tab in the back office.
- Click on ‘Add New Module’.

Click on the ‘Choose a file’ and upload the zip file of the module.

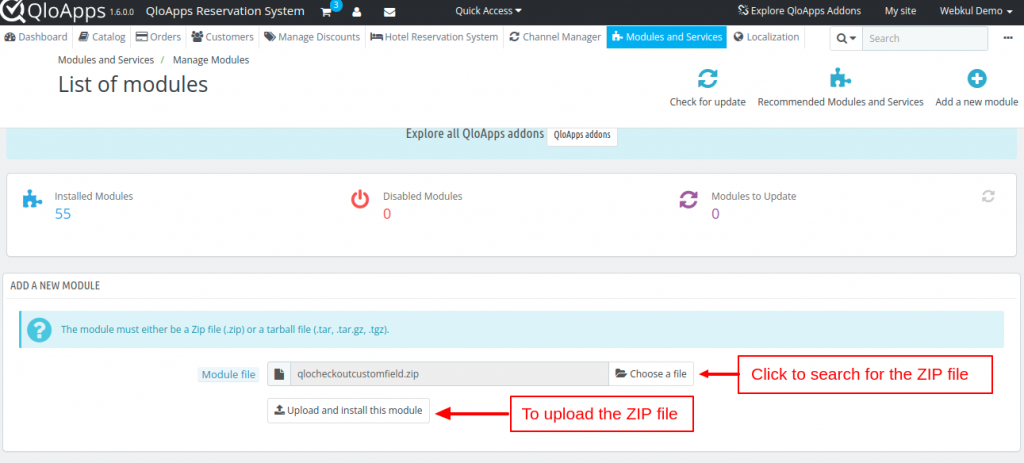
After uploading the ZIP file the module will start installing automatically.

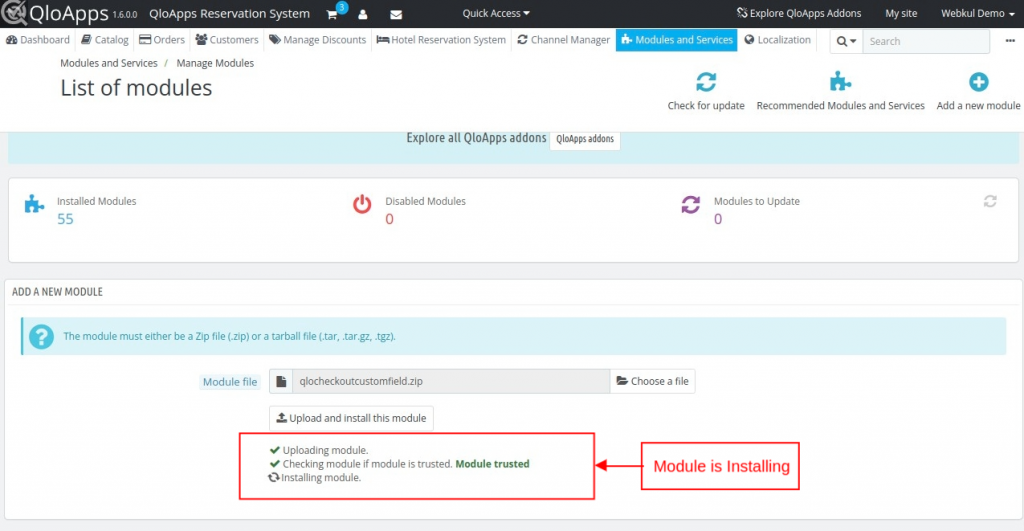
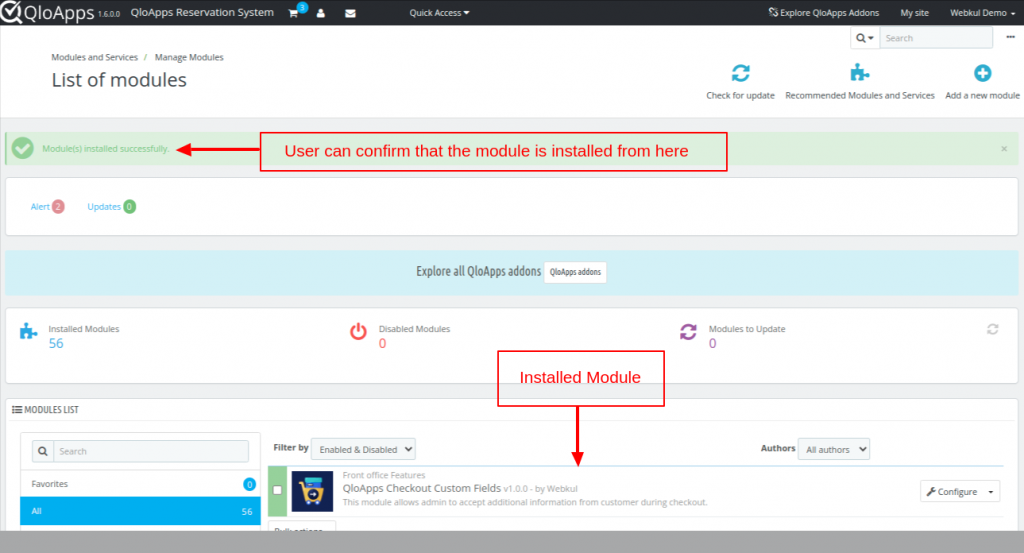
Once the module is installed, the user can see the prompt for successful installation and the module will be listed below.

How to configure QloApps Checkout Custom Fields
After installation, the module adds a new tab “Checkout Custom field” in our tabs section

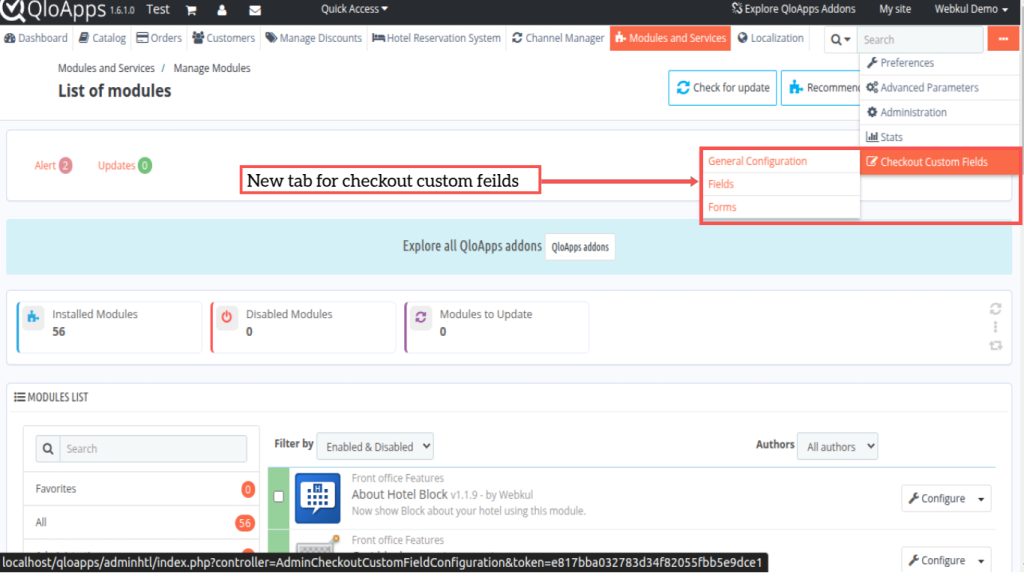
Under checkout custom fields, the user can see the following option:
- General Configuration
- Fields
- Forms
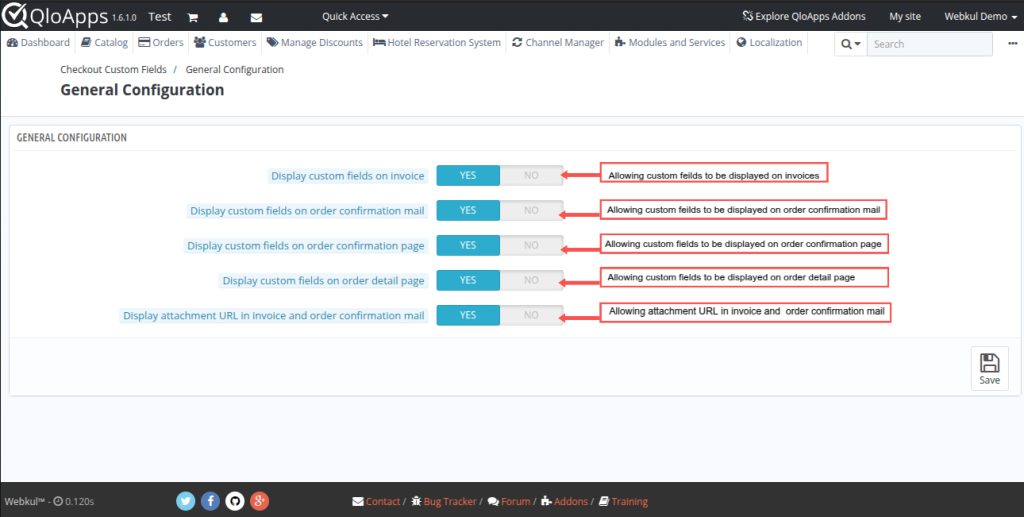
General Configuration
In the general configuration user can enable/disable the following options
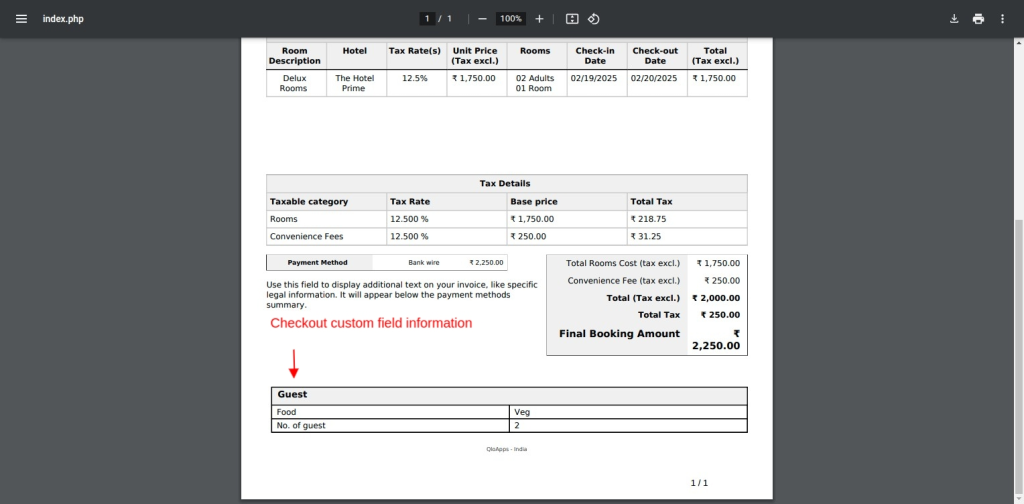
- Display Custom Fields on Invoice :– If enabled it allows the custom field to be displayed on the invoice.
- Display Custom fields on order confirmation mail:- Enable this to display custom fields on order confirmation mail sent to customer, admin, and employees.
- Display Custom fields on order confirmation page:- Enabling this option will allow custom fields to be displayed on the order confirmation page.
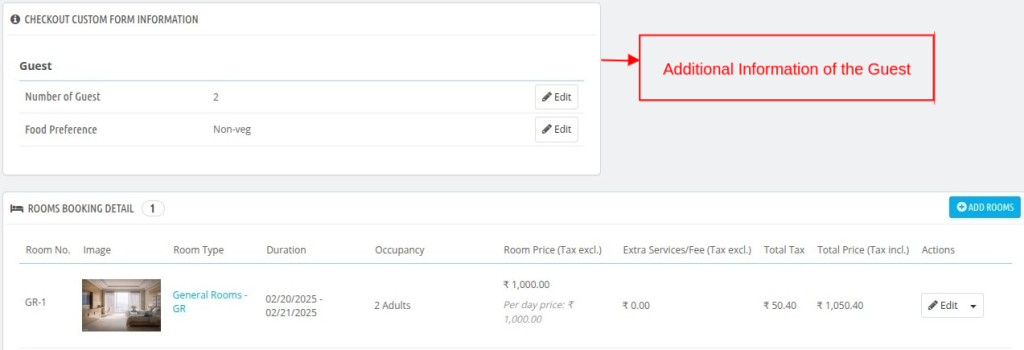
- Display custom fields on the order detail page:- Enabling this will allow custom fields to be displayed on the order detail page.
- Display attachment URL in invoice and order confirmation mail: Enabling this option allows the attachment URL to be displayed on invoice and order confirmation mail.

Workflow of QloApps Checkout Custom Fields
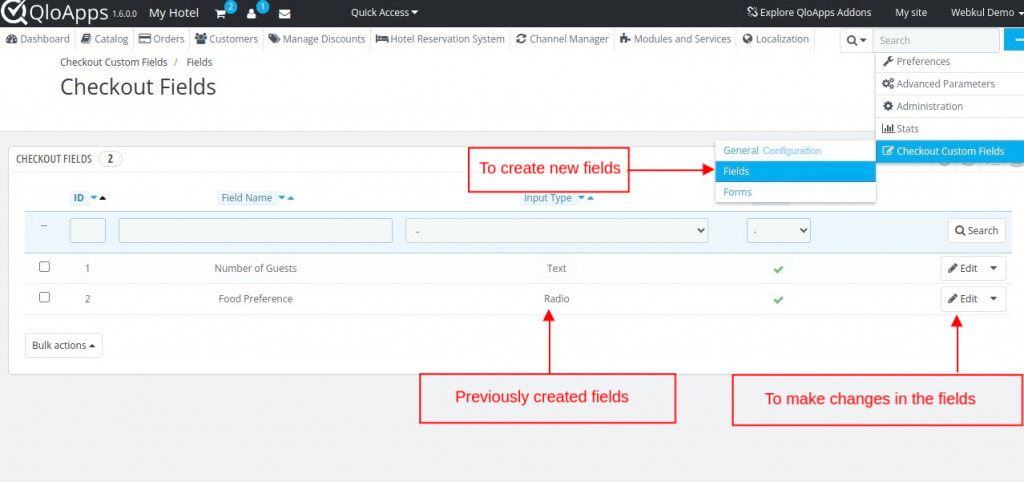
Fields
After configurations, the user can create new fields and edit the other
created fields in the Checkout Custom fields option from the back office.
Checkout Custom Fields > Fields

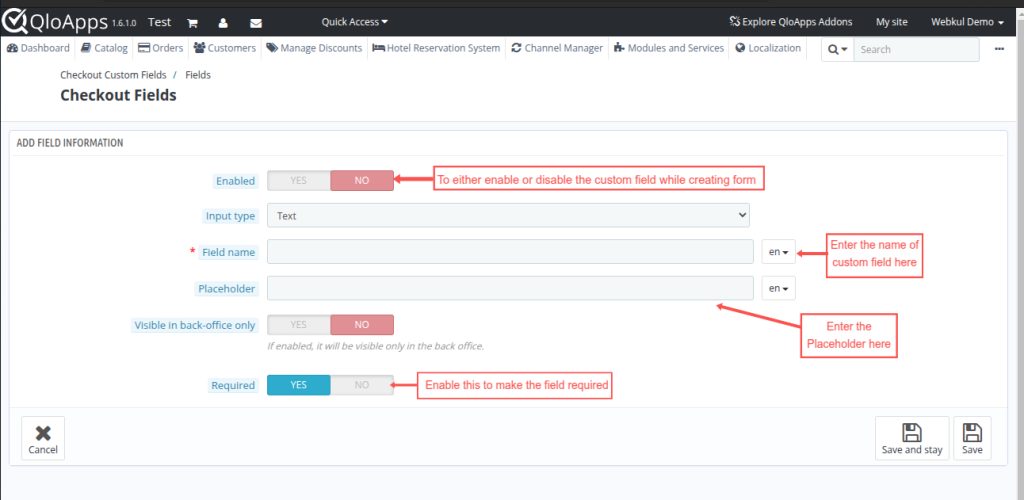
Input Type: The user can select the input type of the custom field such as:
Text

Dropdown

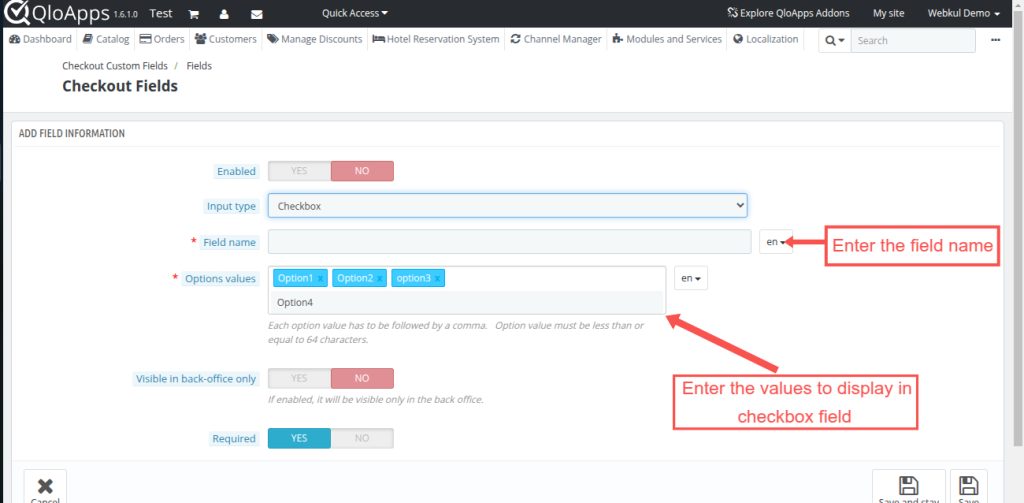
Checkbox

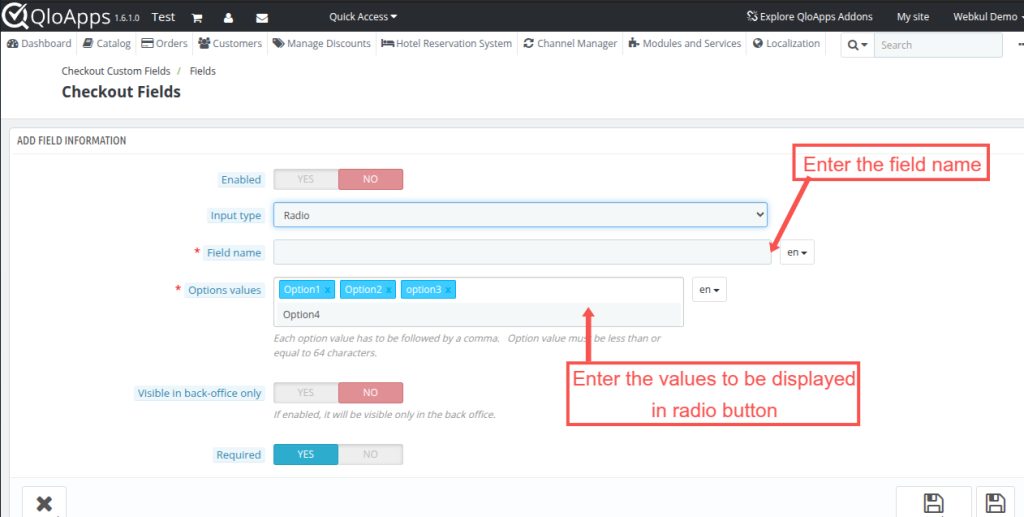
Radio
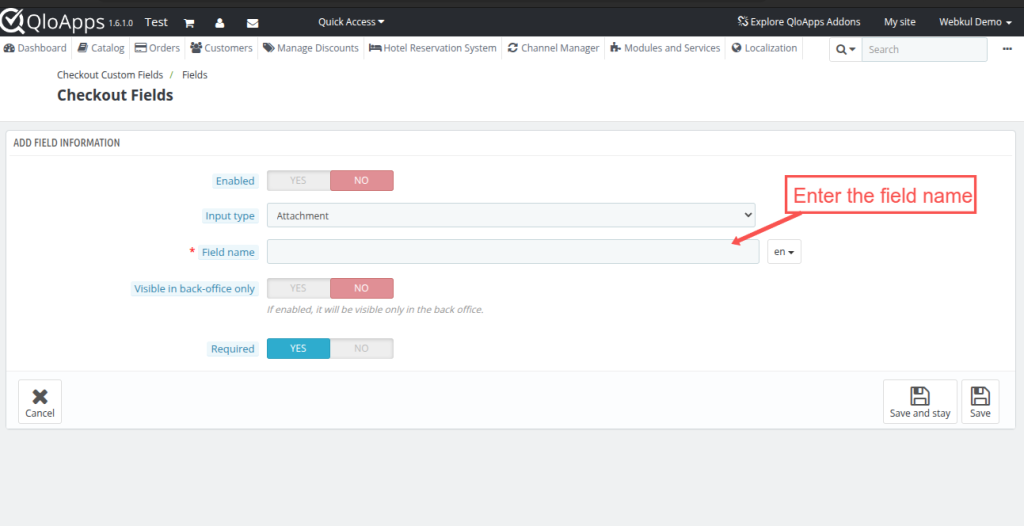
Attachment

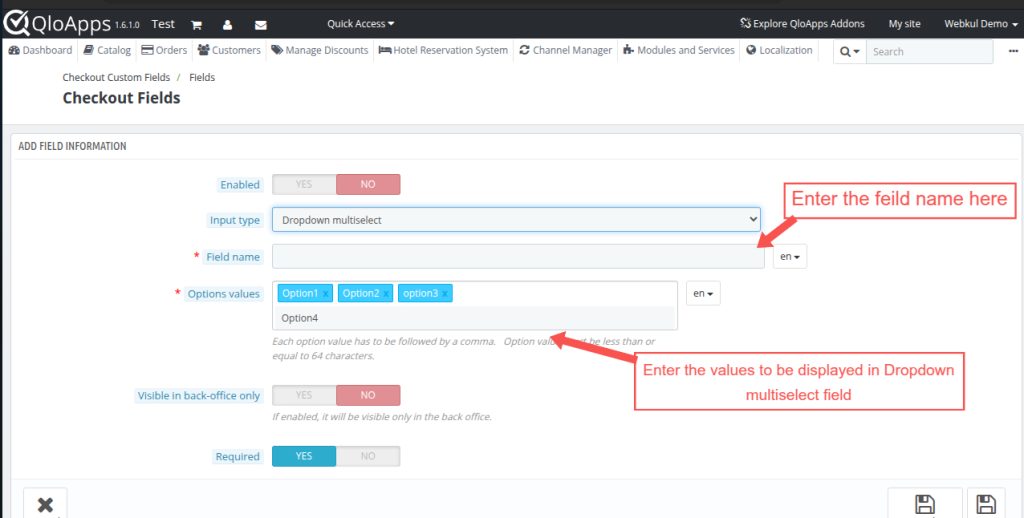
Dropdown Multiselect

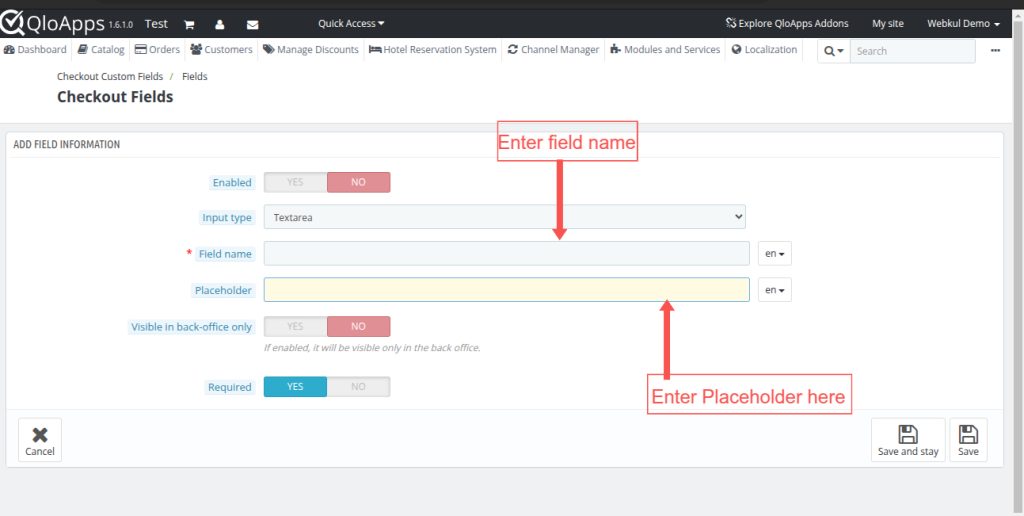
Text Area

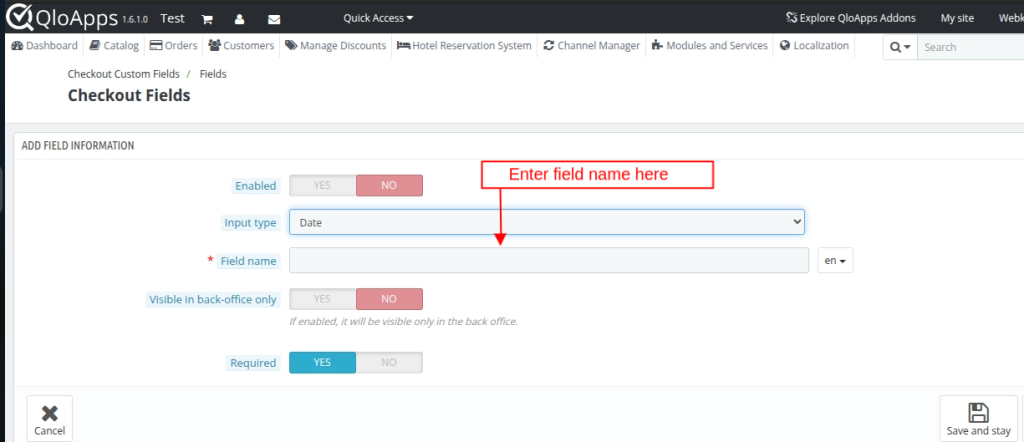
Date

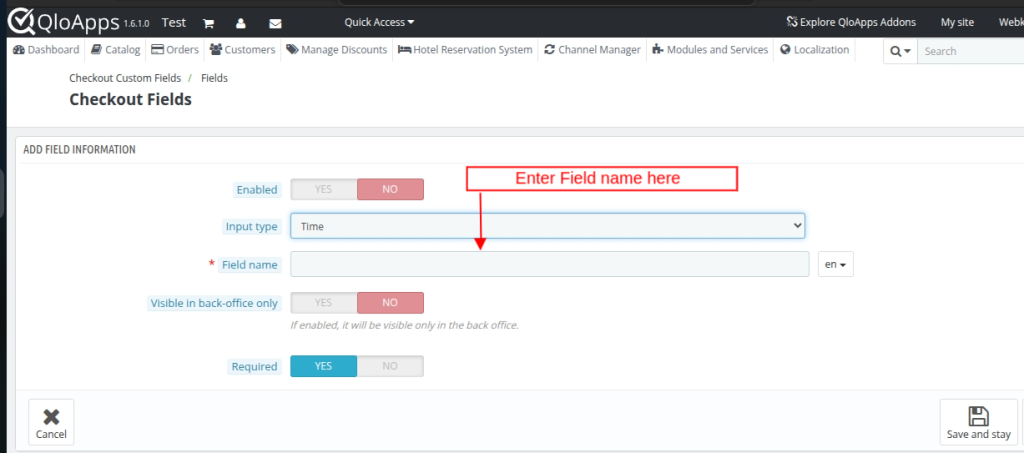
Time

Date and Time

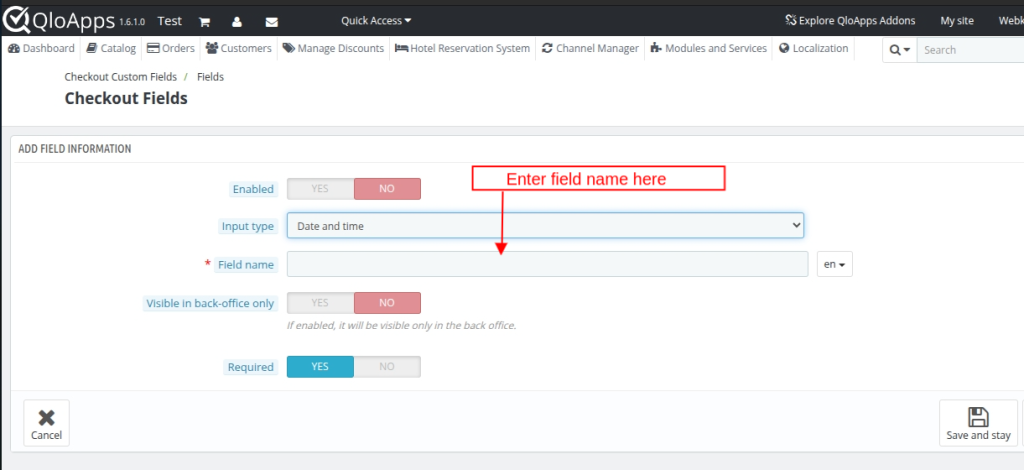
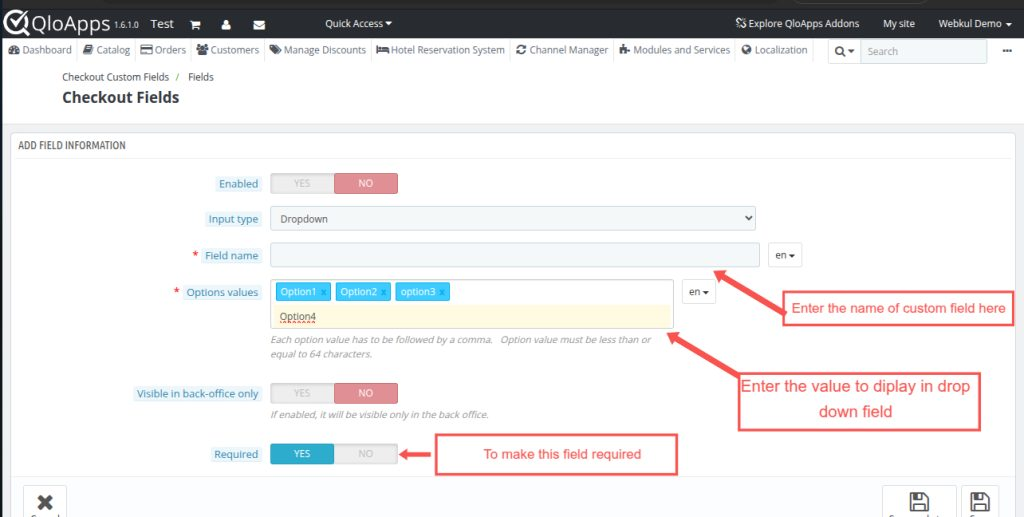
Field Name: Enter the name of the field.
Placeholder: This placeholder will be displayed if we select the input type as text or Textarea
Options Values: These option values will be displayed if we select the input type as dropdown, checkbox, radio, or dropdown multi select.
The user can add multiple values and each value and each value has to be followed by a comma.
Note:- If the input field is selected as a Dropdown, Checkbox, Radio, or Dropdown, the options values fields are added.
Users can add multiple options and each option value has to be followed by a comma.
Visible in Back Office: Enable this to make the field visible on the order detail page from the back office, this will not be visible to customers at the front office.
If the admin wants to make any field that can only be updated or reviewed by him then he can enable this option.
Required: To make a custom field a mandatory field.
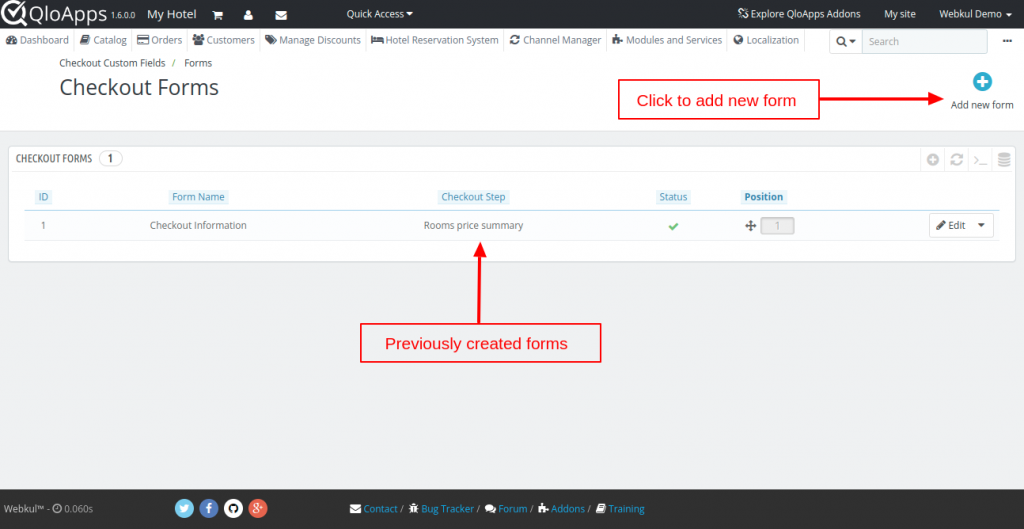
Forms
The customer can add a new form to assign their fields from the back office.
Checkout Custom Fields > Forms

In the add form information block, the user can view and edit the following fields:

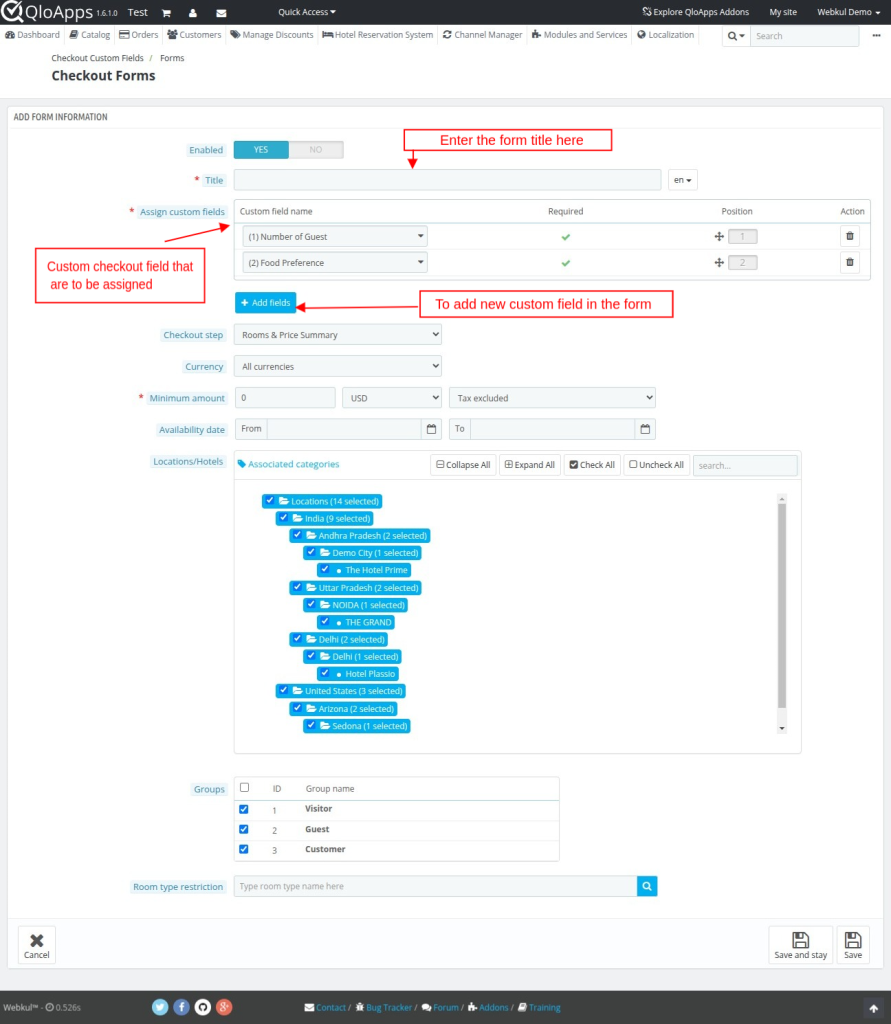
Enabled: Whether to display the form during the checkout step
Title: Users can enter the title of the form.
Assign custom fields: Users can click on add fields option to assign the created custom fields.
Check out step: Can select the step (Room & price summary or guest information) of the checkout page, on which step and section this form will be available.
Currency: Users can select the currencies from the dropdown menu for which this form will be available.
Minimum amount: Users can set the minimum cart amount for which this form will be available, with or without the taxes.
Availability date: The users can select the date range between which this form will be available
Location/Hotels: The user can select the location/hotel in the cart for which this form will be available.
Groups: Users can select the customer group for which this form will be available.
Room type restrictions: Users can select the room type available in the cart for which this form will be available.
Note: If a user marks this field empty then this form will be available to every room type

When you click on edit there will be a pop-up to edit information on custom fields

The custom checkout fields will be displayed in the invoice.

Custom Checkout Fields at the front office
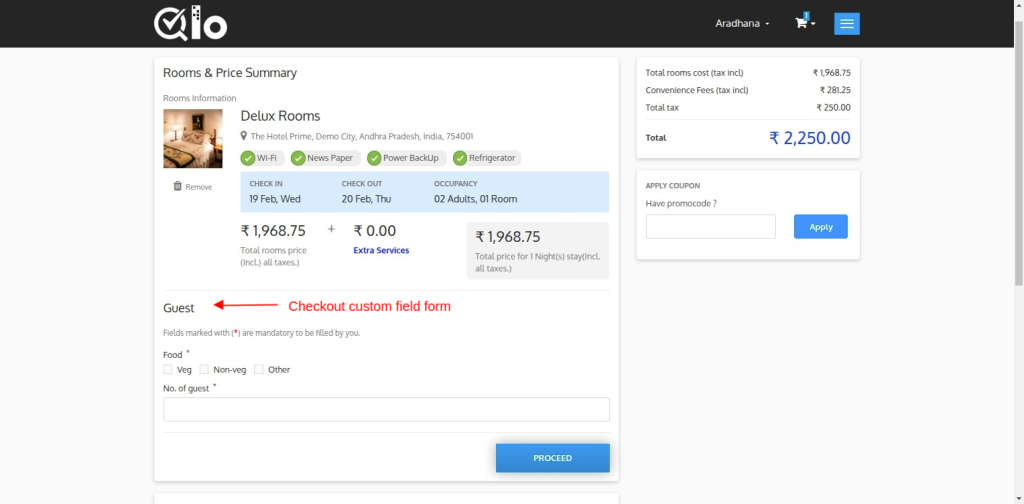
The checkout field will be displayed on the Checkout Page.
Custom form will be displayed in the Guest information section if the checkout step is selected as Guest information

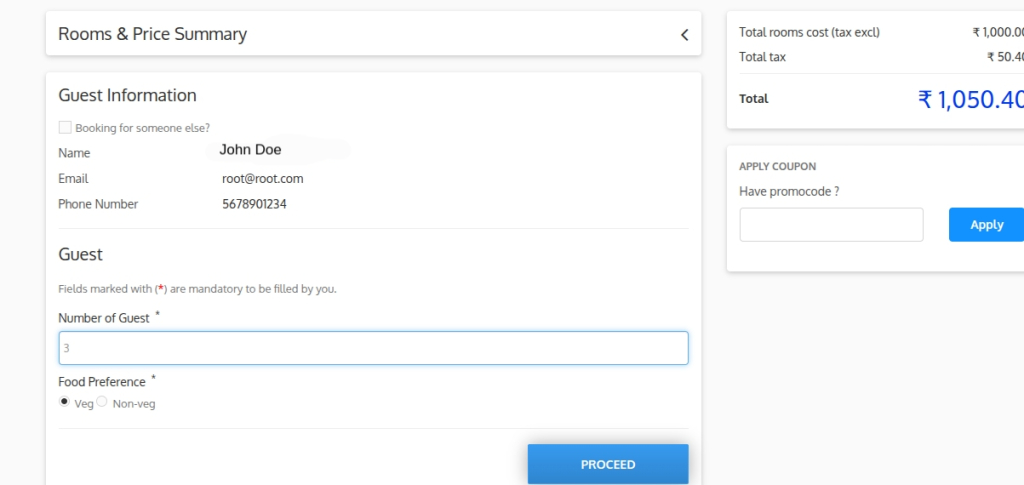
Custom form will be displayed in the room & price summary section if the checkout step is selected as room & price summary
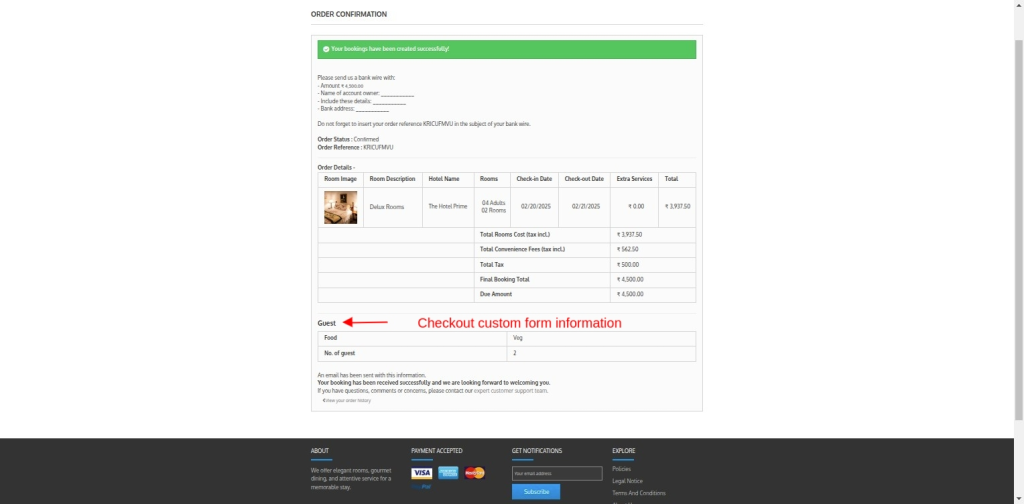
After successful checkout, the user can see custom checkout fields on the Confirmation Page
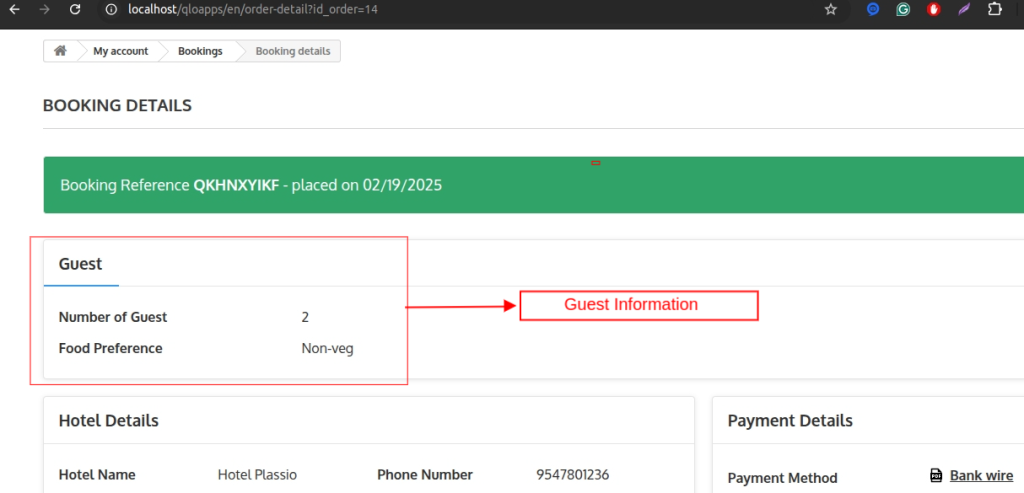
Checkout custom field on the Order history page

Conclusion:
QloApps custom fields allow us to add various sections,
or add personalized fields that enable better data collection and enhanced customer experience.
This allows hotels to collect specific details of customers which improves hotel operations
and gains better insight according to customer needs.
For admins, the addon offers flexible field types, easy back-office management, and the ability to edit custom fields
That is all for the “QloApps Checkout Custom fields module.”
Above all, if you want to learn about the functionality of QloApps then you can visit this link:-
QloApps Reservation System.
In case of any query, issue, or requirement please feel free to raise it on QloApps Forum.
Also, you can raise a ticket to connect with our experts for any assistance.
Current Product Version – 2.0.1
Supported Framework Version – QloApps 1.6.x and 1.7.x