QloApps Progressive Web App is an add-on to enhance your website with two pivotal functionalities.
Firstly, it offers a seamless web application experience, elevating user engagement and accessibility.
Secondly, it integrates push notification capabilities, enabling efficient communication with your audience.
In today’s dynamic landscape, the hotel industry is experiencing a shift towards mobile-centric bookings, emphasizing the importance of adapting to smaller screen sizes.
With a significant portion of bookings originating from mobile devices, hoteliers need to optimize their digital presence accordingly.
A Progressive Web App (PWA) uses modern web capabilities to deliver an app-like experience to users. In progressive web apps, you can access the content that you have already explored in online mode.
PWAs ensure faster loading times even on slower internet connections. This enhanced performance not only improves the overall user experience but also contributes to higher user engagement levels.
Features Of QloApps Progressive Web App
- QloApps Progressive Web App provides a user-friendly experience.
- Slow internet speed will not affect its potential.
- Users can access the visited page in an offline mode, too.
- Increases user engagement, thereby increasing the conversion rate.
- Set the Application name that shows up on mobile phones.
- Enter the application’s short name, which appears on the home screen.
- Enter the Splash Screen Background Colour.
- With PWA, one can upload the App Icon.
- Upload the Push Notification Icon.
- Edit/Delete/Send Push Notifications.
- Attach a Target URL when a user clicks on the Push Notification received.
- Admin can attach a separate Notification icon for each Push Notification.
- Admin can create five types of push notifications.
- Manual Push Notification: Admin can schedule the push notification to send any content with a single click.
- Room type Notification: With this notification can send the details of the room type
- Order Status Notification: This notification will be sent to the user when their order status is updated.
- Welcome Notification: This notification will be sent to the user when they first enter the app.
- Cart Reminder Notification: This notification will remind the user about their abandoned cart.
- Admin can manage the subscribers from the “Manage Subscribers” tab.
- Track the live status of notifications while sending them to customers.
- Admin can view/delete the list of notification history from the “Manage Notification History” tab.
- The maximum character limit for the short name of the app is 12.
- The connectivity status (i.e, offline/online) of the app appears at the end of the screen of the mobile.
- Now, the room type URL is automatically attached to the room type push notification.
Note: For proper working of the module, make sure your server’s PHP version is 5.6+ and PHP extensions gmp, mbstring, curl, and openssl are installed in your system
How to install QloApps Progressive Web App
The installation of any module is very simple in QloApps.
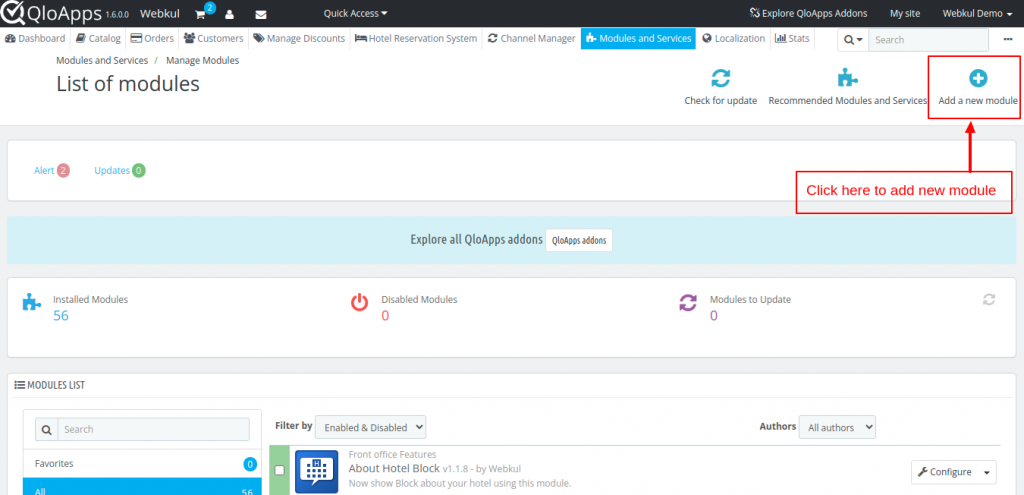
- Go to the Module and Services tab
- Click on Add New Module
Click on Choose a file and upload the zip file of the module.
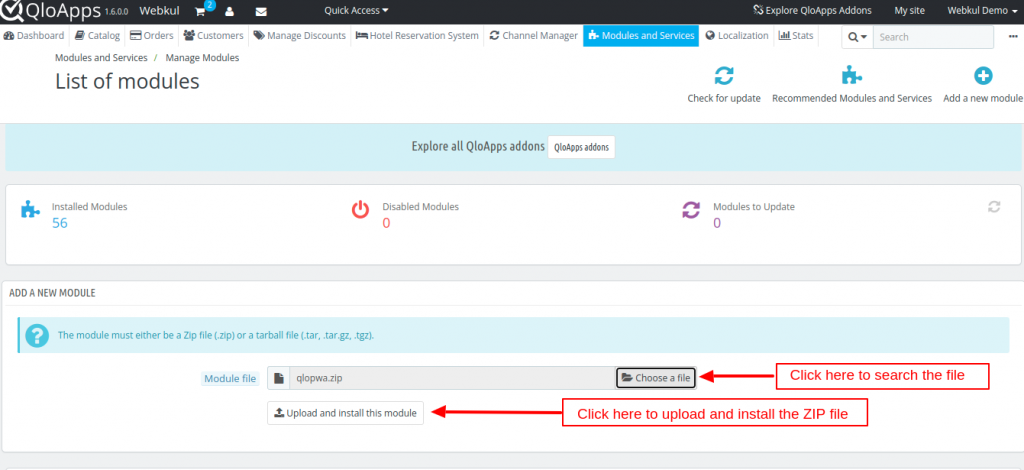
After uploading the ZIP file, the module will start installing automatically.

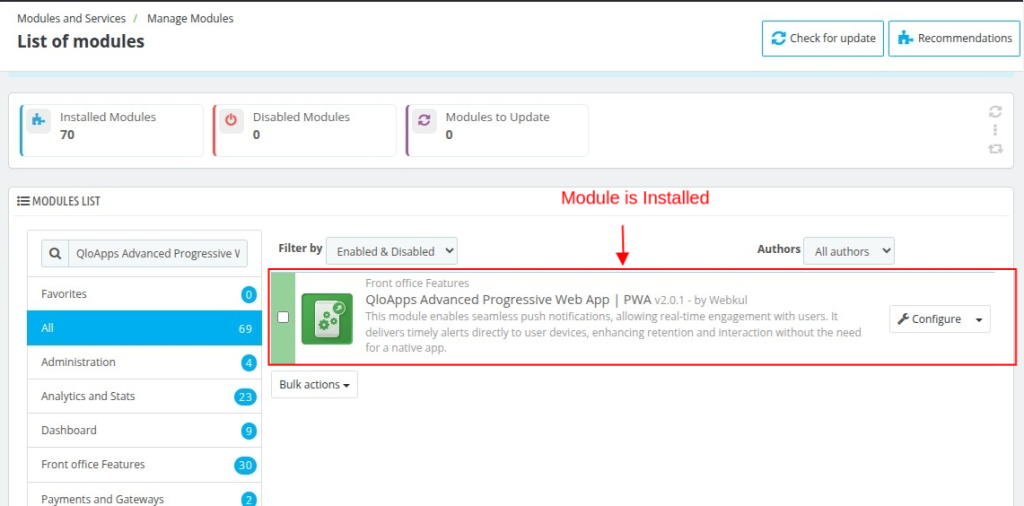
After the module is installed, the modules will be listed below.
How To Obtain Push Notification Credentials
To use this module, you need to have Firebase Project Credentials, which will be used in the Module configuration. Please visit this link and create a new project with your Gmail Account.
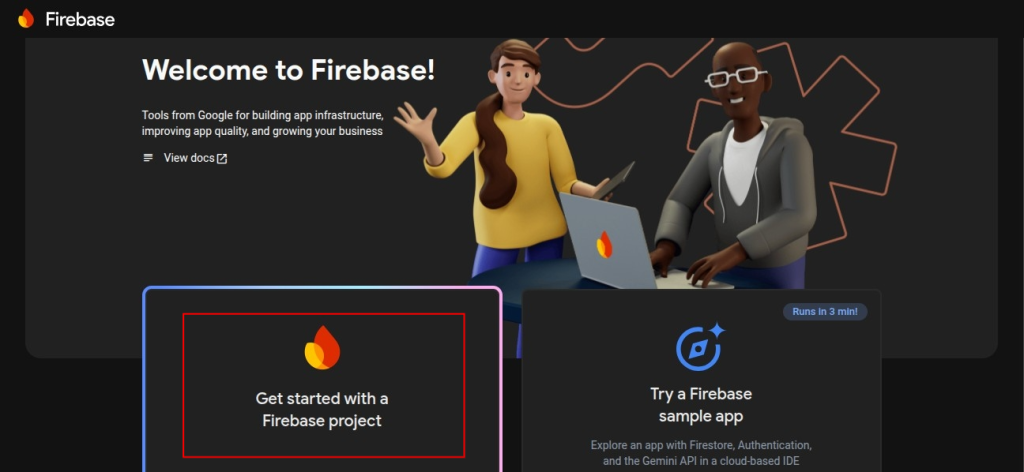
- After opening the Firebase website, please click the Get started with a Firebase project button as shown in the above screenshot.
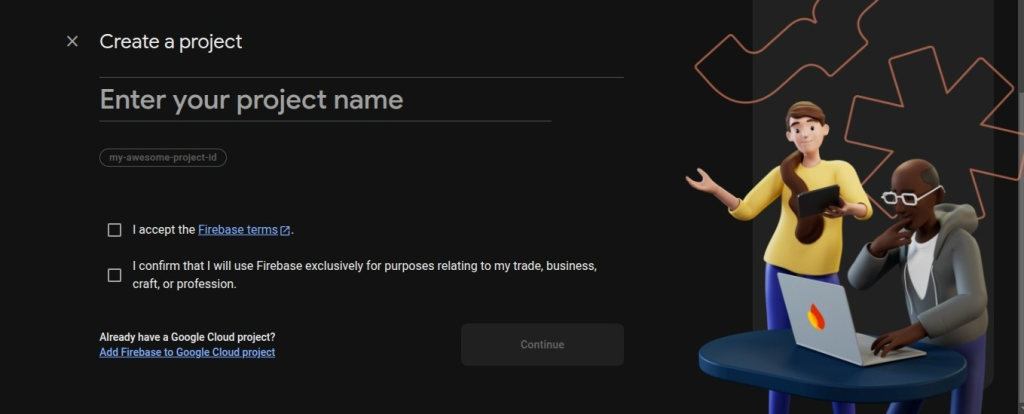
- A new window will appear with the name of Create a project, Here, you have to enter your Project Name and accept the terms and conditions.
- Click the continue button.
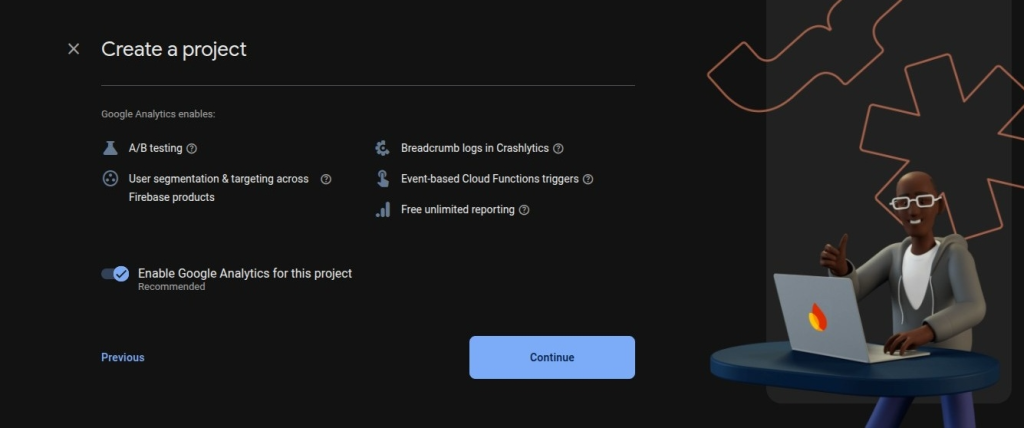
Click the Continue button once again in the window that appears.
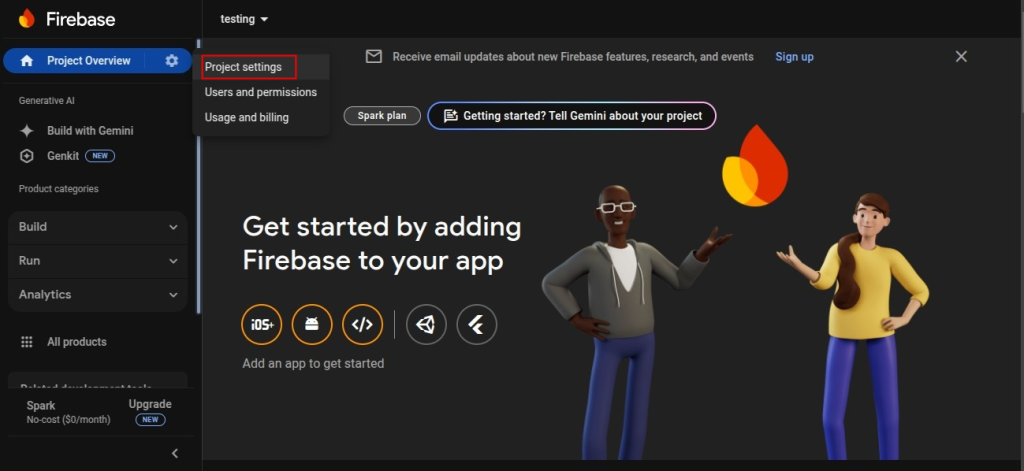
After creating your new project, click the Settings menu icon and select the Project Settings option. A new Settings page will be opened.
After entering the Settings page, click the CLOUD MESSAGING tab. Here, you will find your Project Credentials. Copy and save your credentials as displayed below.

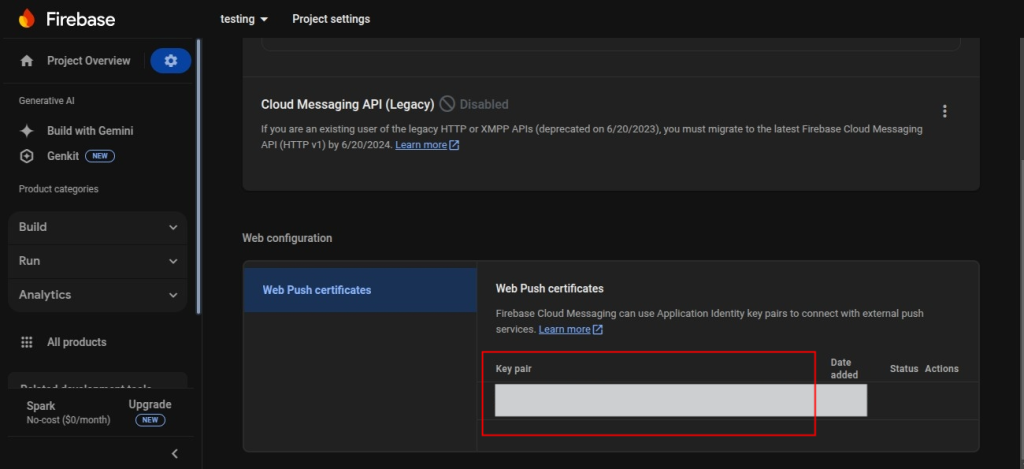
Use these credentials in the Module Configuration to enable the Push Notification service.
How to configure QloApps Progressive Web App
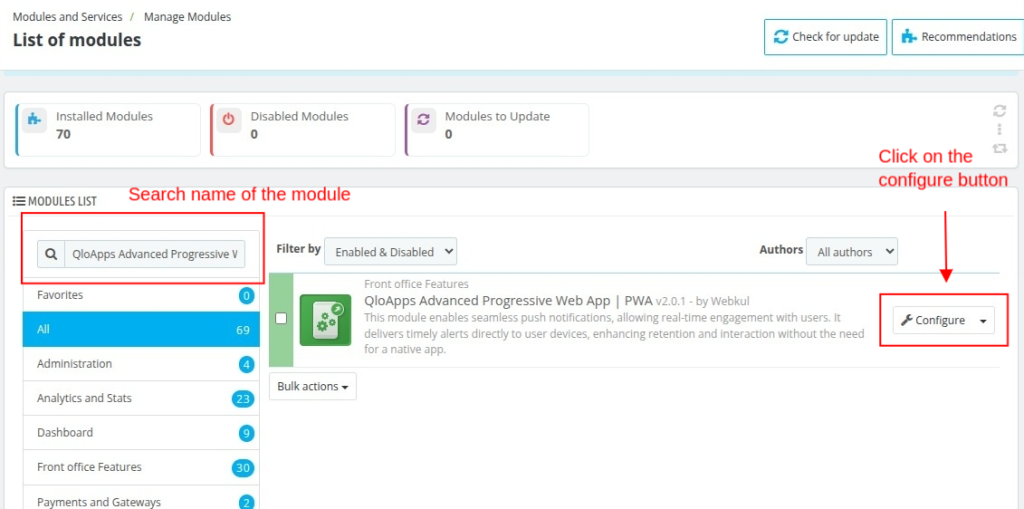
To configure the addon, go to Module and Services > Manage Modules. Here, search for the module name, i.e, QloApps Progressive Web App, and click on the configure button.
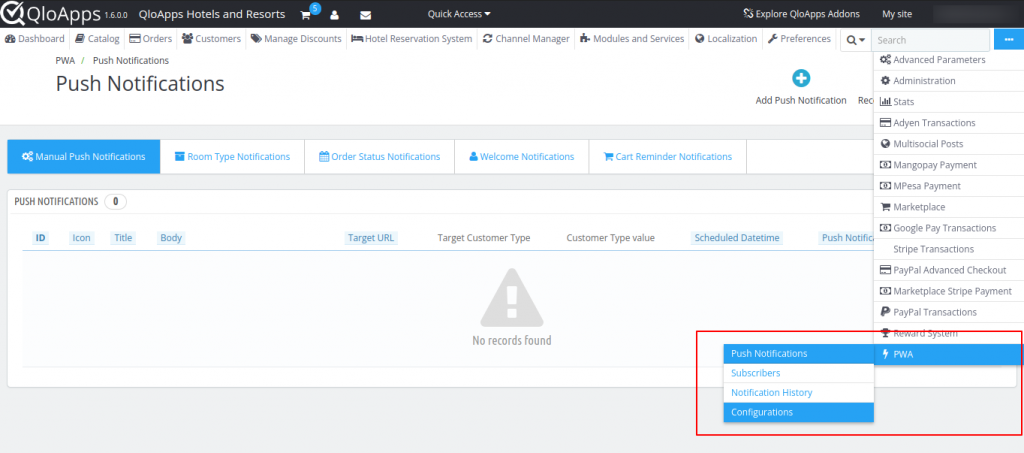
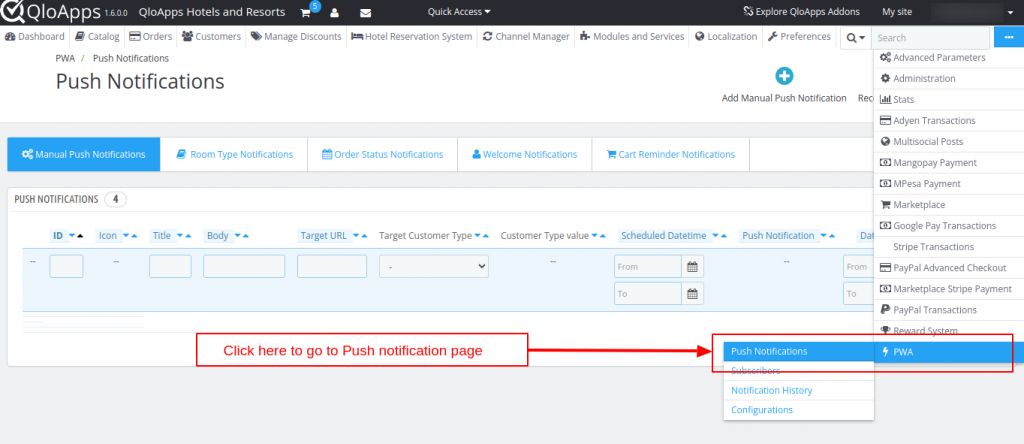
Also, the admin can access the configurations page for the addon, as shown below.
To keep things simple and organized, we have divided the configurations of the QloApps Progressive Web App into sections. So let’s discuss each section one by one.
PROGRESSIVE WEB APP CONFIGURATION
The first section of the configurations page is the App settings. It will allow you to decide the look and feel of your App.
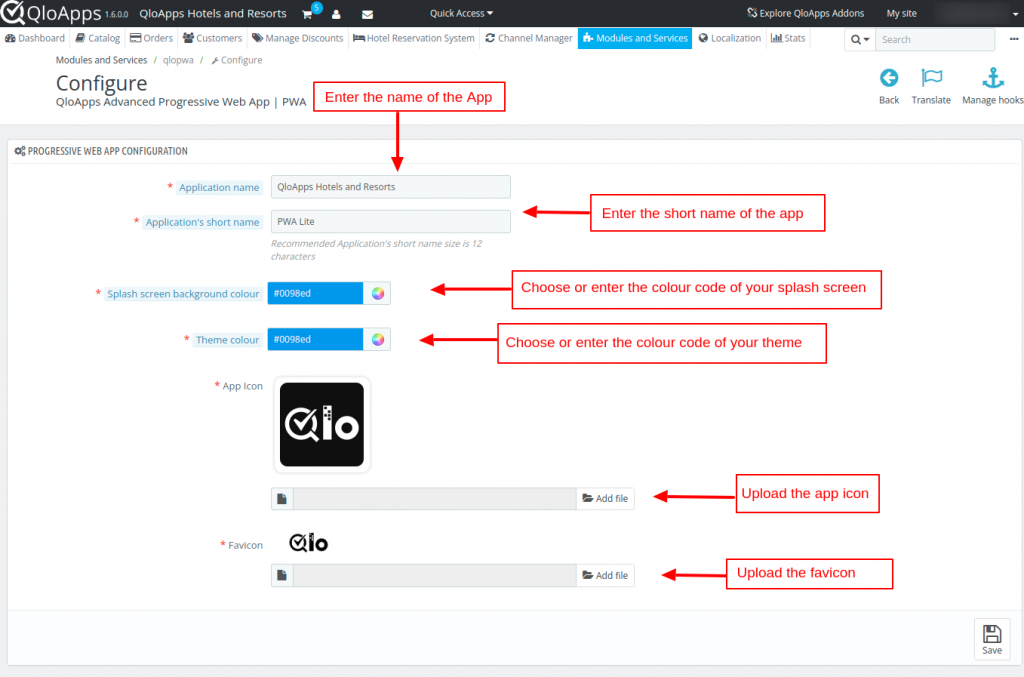
- Application Name: Enter the name of the PWA application
- Application’s short Name: Enter the short name of the PWA application. This short name will be used if there’s insufficient space to display the full name.
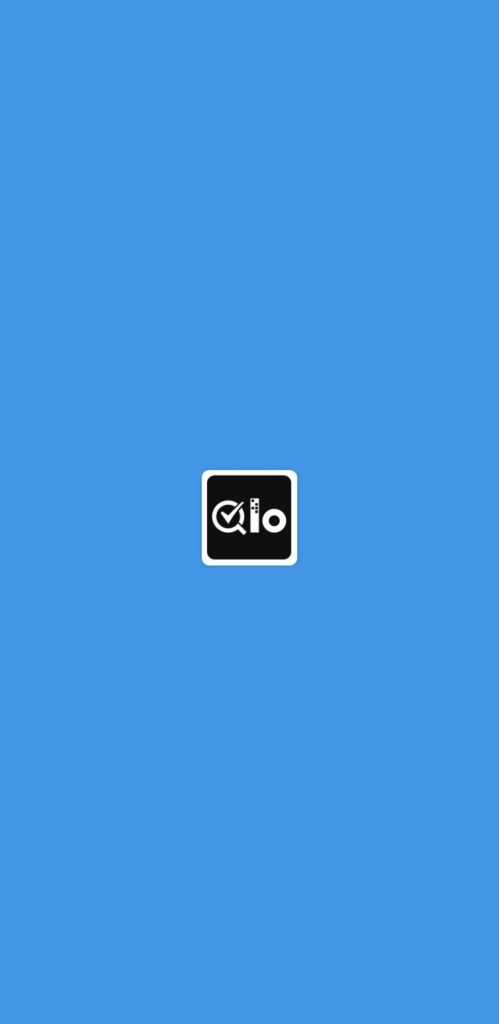
- Splash screen background colour: Here, you can enter or choose the colour code of your splash screen. When you open the app, the first screen that is displayed is the Splash screen. To enhance the user experience, you can choose the colour of the splash screen.
- Theme colour: The theme colour in your PWA app defines the default colour of the operating system and browser UI elements used in the application.
Splash screen of PWA
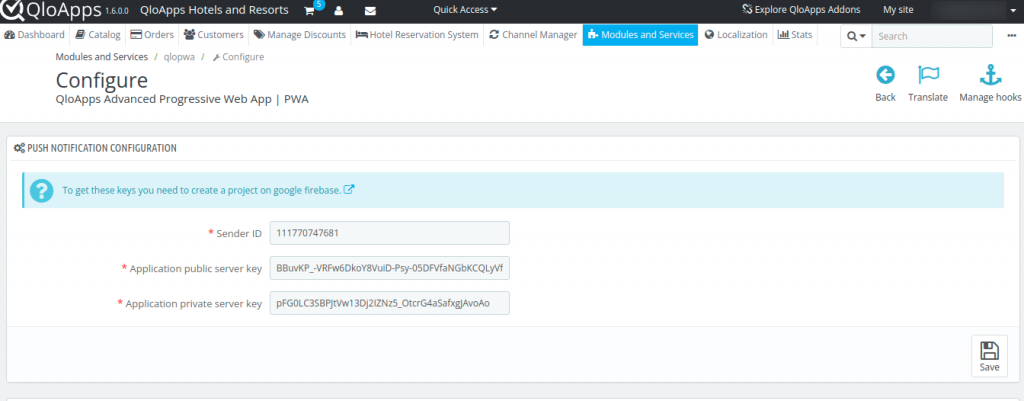
Push Notification Configuration
To set up the push notifications, you need to enter the following keys. To get these keys, you need to create a project on Google Firebase.
General Configuration
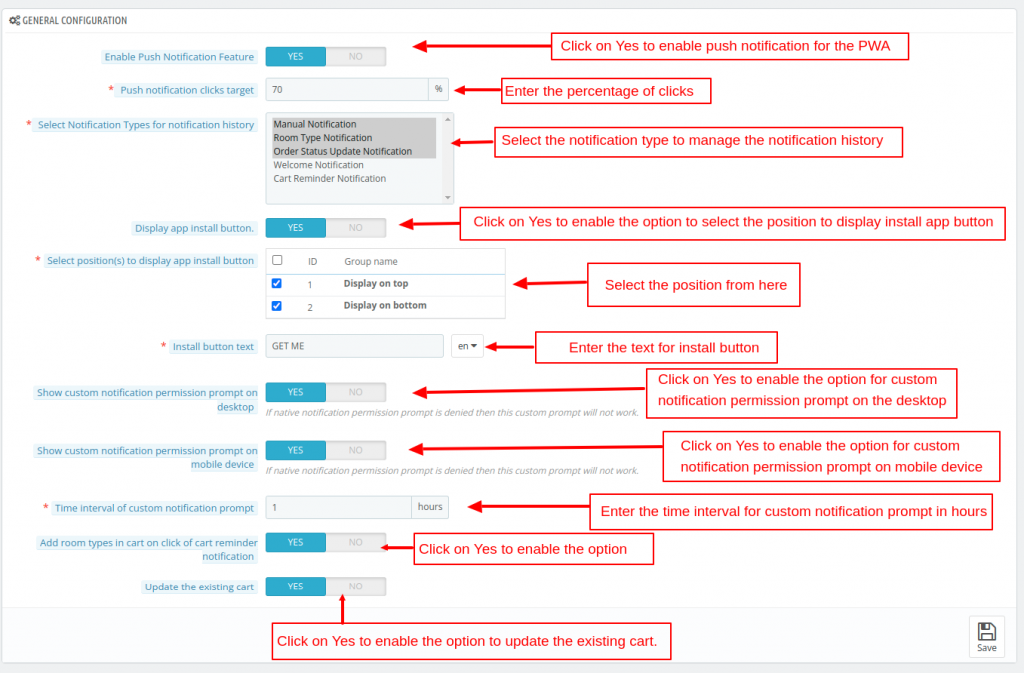
- Enable Push Notification Feature: Click on Yes to enable the push notification for the PWA
- Push notification clicks target: Enter the percentage of clicks out of total subscribers you consider a successful campaign.
- Select Notification Types for notification history: Select the notification types for which you want to manage the notification history.
- Display App install button: Click on Yes to enable the option to display the app install button in the selected position. The available positions are ‘Display on top’, ‘Display on bottom’.
- Install button text: Enter the text for the install button.
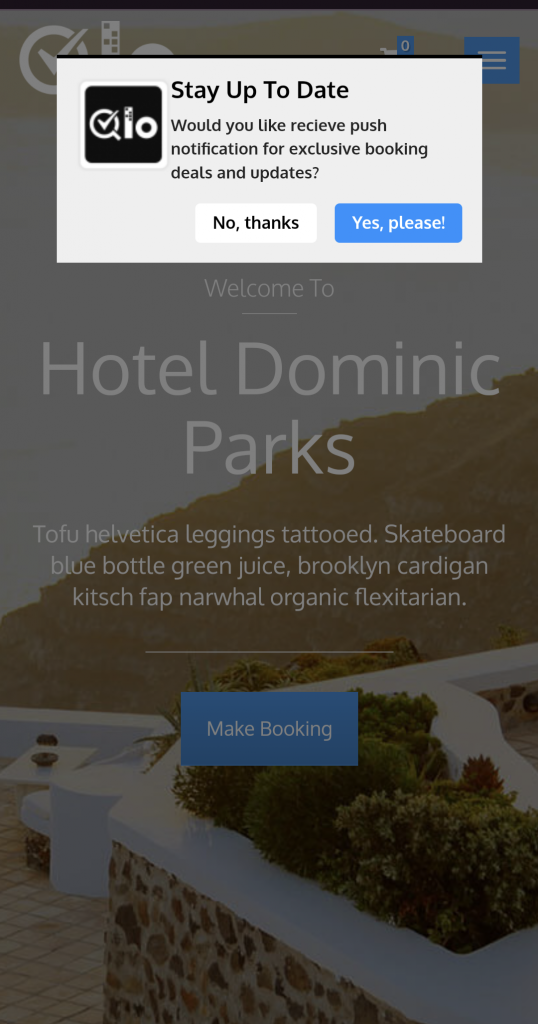
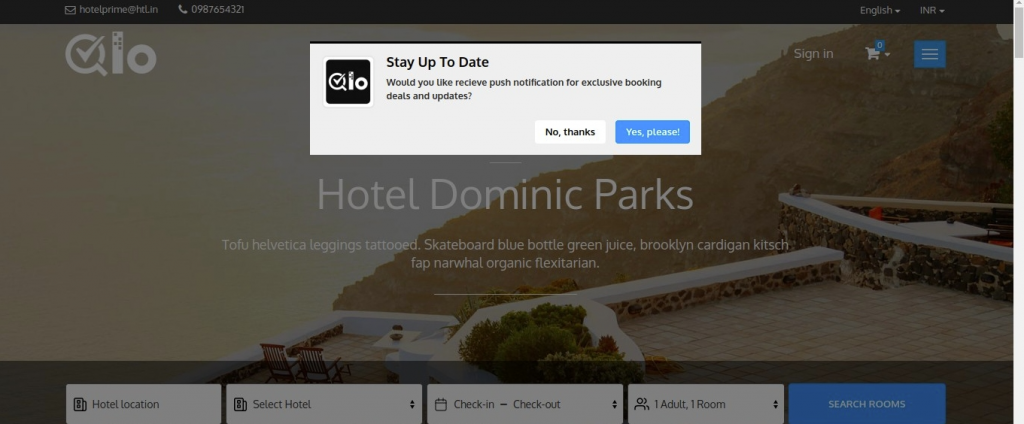
- Show custom notification permission prompt on desktop: Click on Yes to enable the option. If the option is enabled, then the custom notification prompt will appear on the desktop before the native permission prompt.
- Show custom notification permission prompt on mobile device: Click on Yes to enable the option. If the option is enabled, then the custom notification prompt will appear on the mobile device before the native permission prompt.
- Time interval of custom notification prompt: If the push notification option is disabled, then the custom notification prompt will be displayed in the provided time interval.
- Add room types in cart on click of cart reminder notification: Click on Yes to enable the option. If the option is enabled, then whenever the customer clicks on the cart reminder notification, the cart room types will be automatically added to the cart.
Custom Notification Prompt on Mobile Devices
Custom Notification Prompt on Desktop Devices
Cron Jobs
To send the notifications that are scheduled for a particular time such as cart reminder notification, and manual scheduled push notifications.

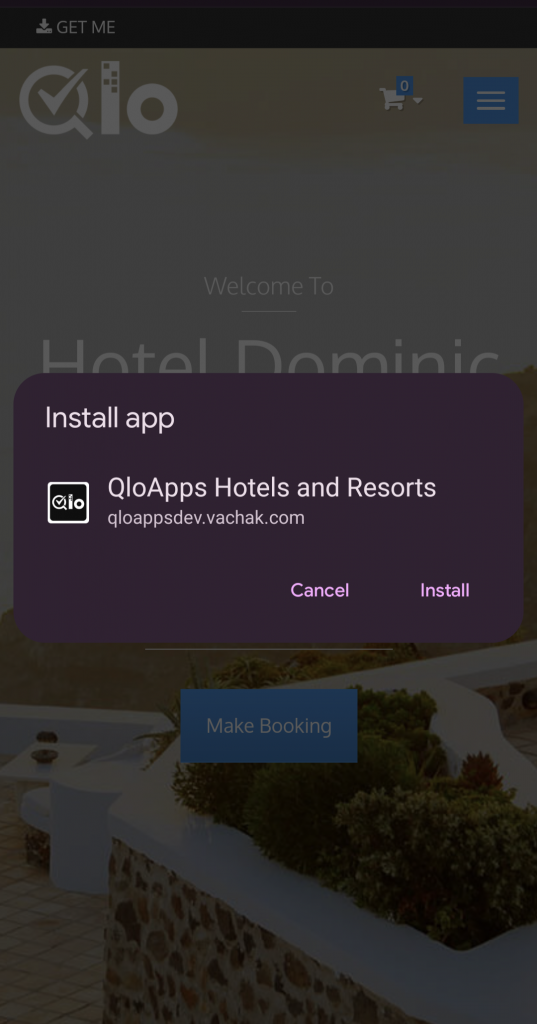
How To Set Up The Progressive Web Application
In your mobile browser, on the hotel’s website, you will find the option for “Install PWA Lite”. Click on Install to proceed with Installation.

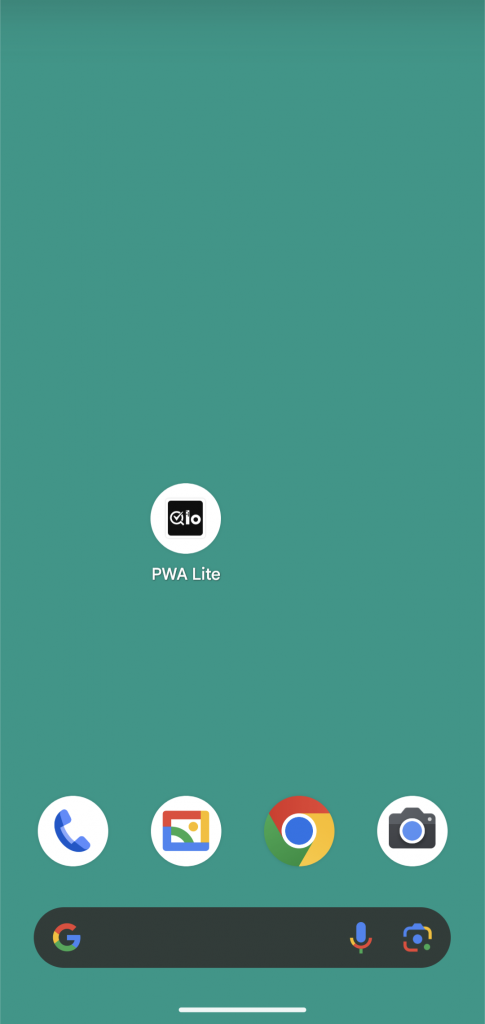
Once the app is installed, user will see the PWA Lite option on the phone’s home screen.
Push Notification
Once, the module is configured, the admin can set the push notification. The QloApps PWA module have 5 types of notifications.
Manual Push Notification
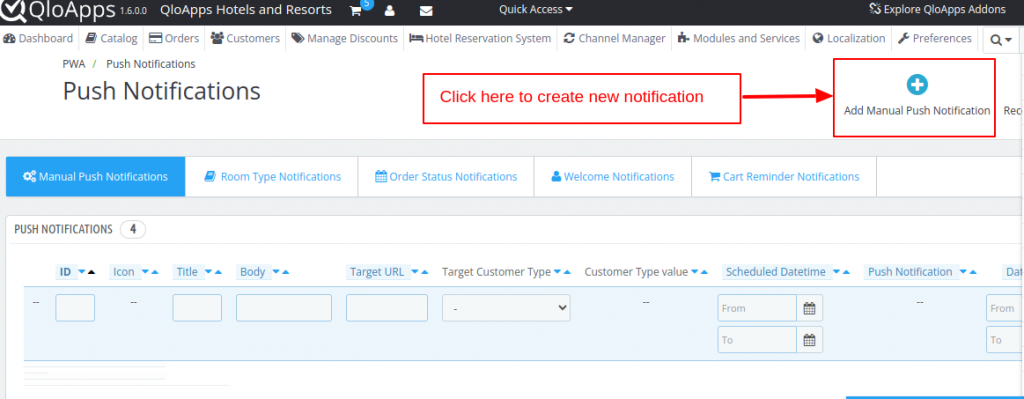
This type of notification allows you to send any content you want to send with a single click or you can also schedule it. Click Add Manual Push Notification to create a new one.
To create a new manual push notification, the admin have to enter the following details:
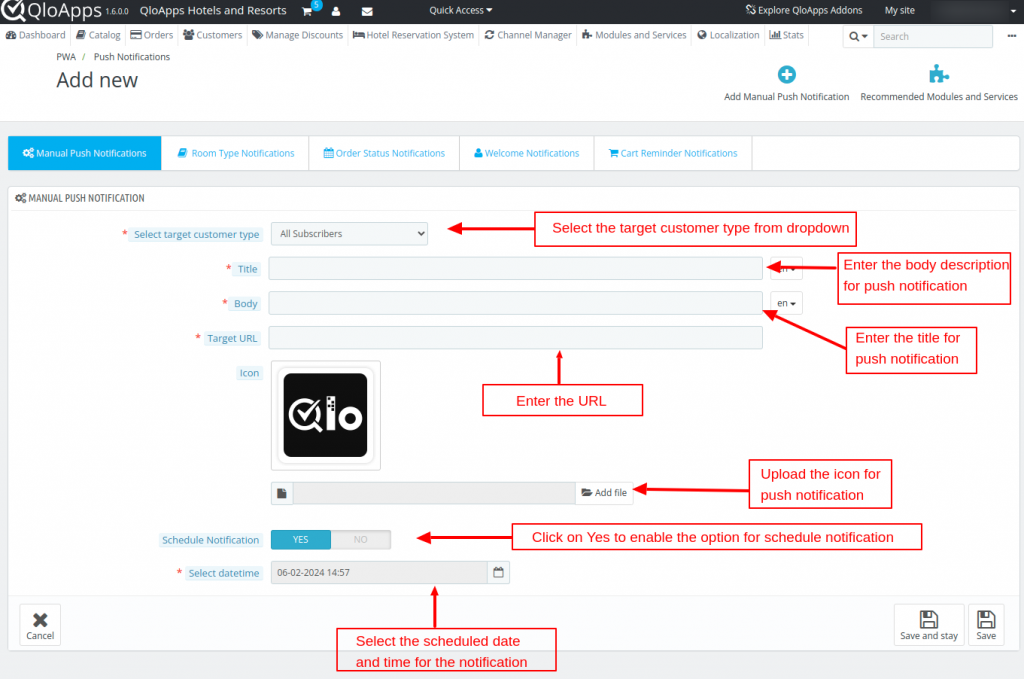
- Select target customer type: Select the targeted customer type (All subscribers, Subscribers customer group, Particular customer).
- If the customer type is selected as Subscriber customer group, then the admin have to select the customer from Visitor, Guest, Customer).
- If the customer type is selected as a particular customer, then the admin has to enter the customer name to send the push notification.
- Title: Enter the title for the push notification.
- Body: Enter the body description for the push notification.
- Target URL: Enter the target URL for push notification. The guests will go to this URL after clicking on the notification.
- Icon: Upload the image for the app icon.
- Schedule Notification: Click on Yes to enable the push notification. If the option is enabled, then the admin will have to select date and time for the notification.
Once the notifications are created, they will be listed as shown in the image below:
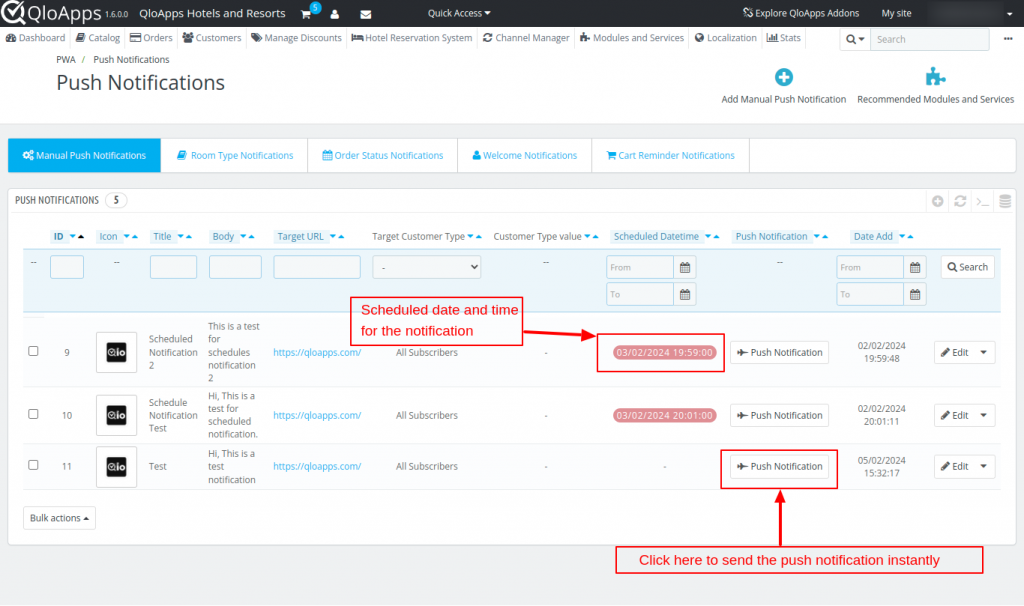
Admin can send the push notification instantly by clicking on the Push Notification button.
Room Type Notification
This type of notification will help the admin to send the details of the room type.
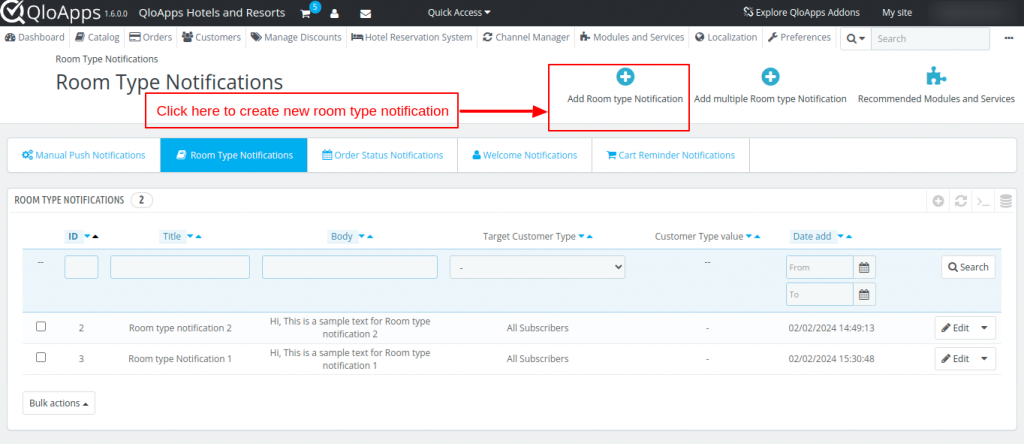
The notification will have the name, price, and image of the room type. From this page, all the created notifications will be listed.
Also, the admin can add new room type notifications and new multiple new room type notifications from this page.
Firstly, the admin will have to create a new room type notification.
Add new room type notification
To create a new Room type Notification, click on Add Room type Notification as shown in the image. The notification created on this page are general and available for every room type.
Here, the admin can create a new Room type Notification by entering the following details.
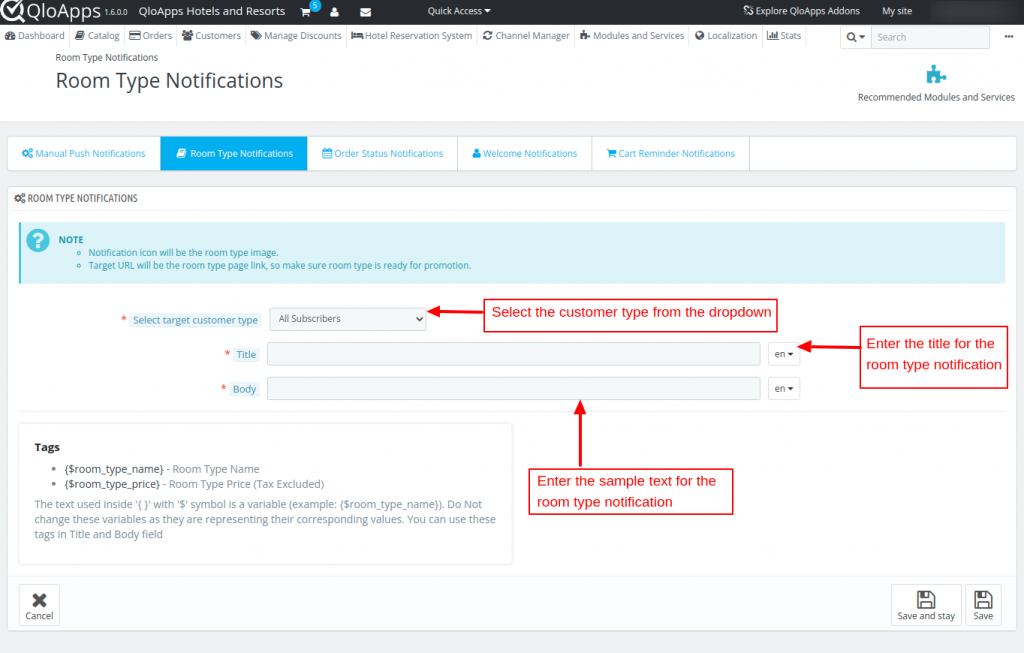
- Select target customer type: Select the target customer type to send the push notification.
- Title: Enter the title for push notification.
- Body: Enter the description for the push notification.
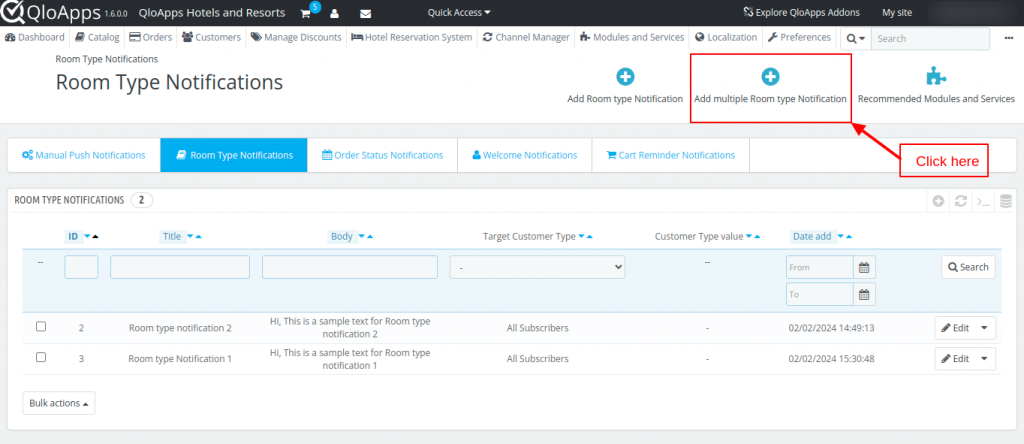
Add multiple room type notifications
With this option, the user can schedule or send notifications instantly for multiple room types.
To schedule or send notifications instantly, click on Add Multiple Room type Notification as shown in the image.
After which a pop-up will appear and the admin will have to enter the following details:
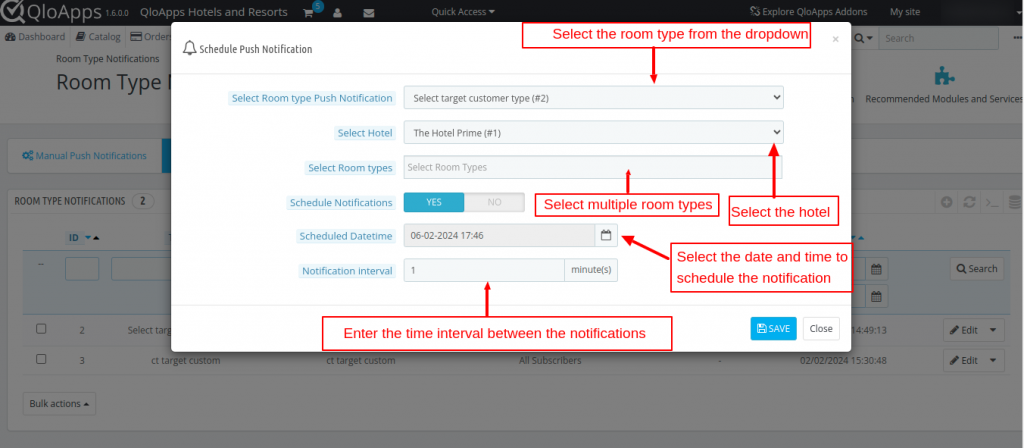
- Select Room type Push Notification: Select the room type from the dropdown for which you want to send the notification.
- Select Hotel: Select the hotels from the drop down.
- Select Room types: You can select multiple room types for the push notification.
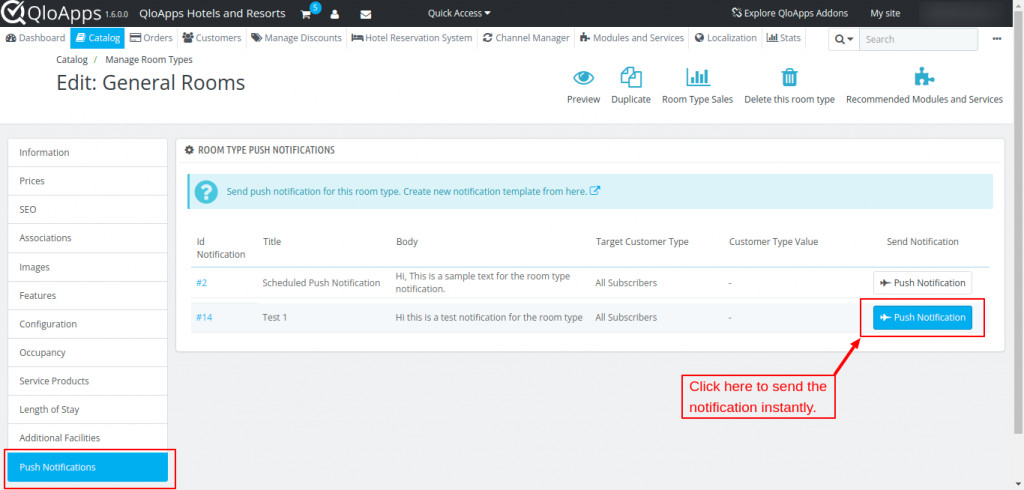
Admin can also send the room type notification for individual room type.
For this, go to Catalog > Manage Room Type > Manage Room types.
Here, select the room type and click on Push Notification Tab. On this page, you will find all the push notifications created for this room type.
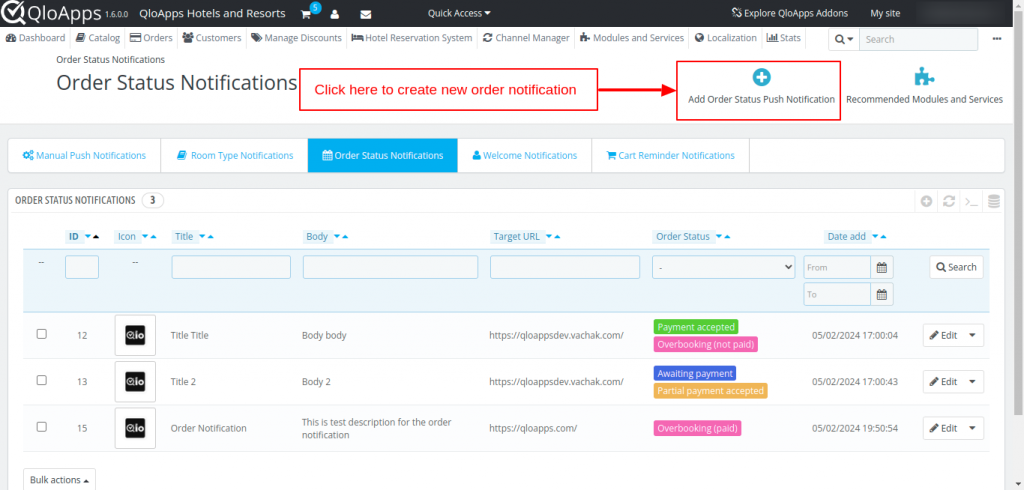
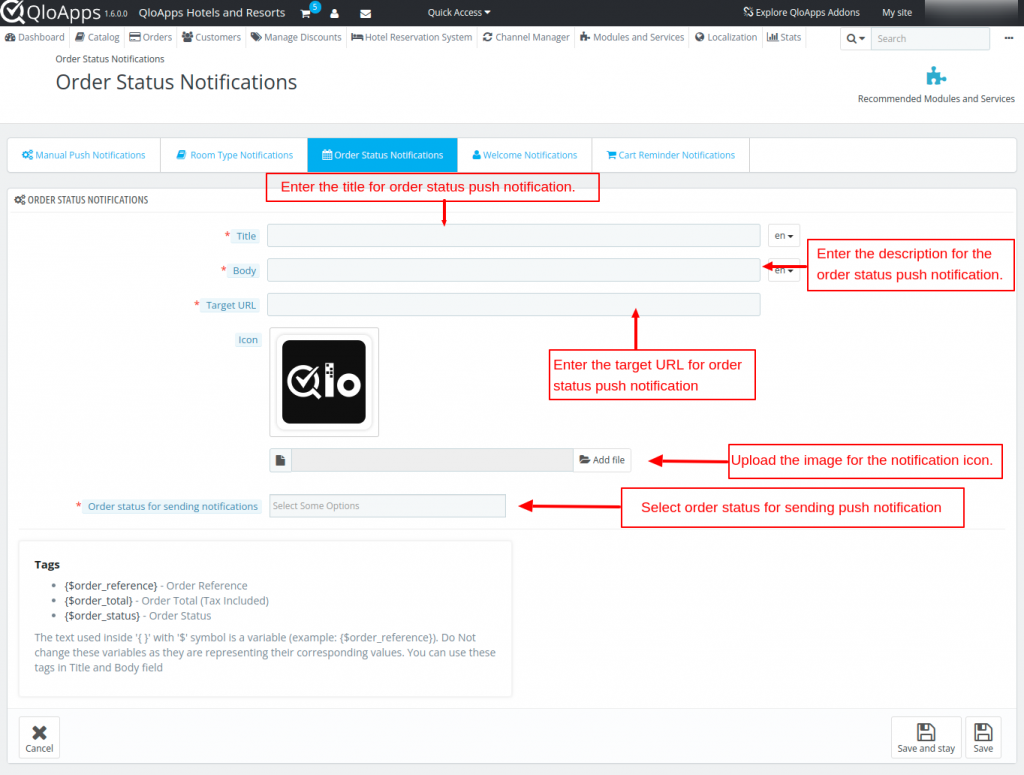
Order Status Notification
In this type of notification, the user will get the notification when their order status gets updated.
On this page the admin can view and edit the order notifications. Admin can create a new order status push notification as shown below:
Here, the admin will have to enter the following details:
- Title: Enter the title for order status push notification.
- Body: Enter the description for the order status push notification.
- Target URL: Enter the target URL for order status push notification. The guests will go to this URL after clicking on the notification.
- Icon: Upload the image for the notification icon.
- Order status for sending notifications: Select order status for sending push notification.
Note: Admin can apply the order status for one 1 type of notification. If you have already applied the order status for type of notification.
Welcome Notification
This notification will be send to the user when they first time visit your website and allow the notification in their browser.
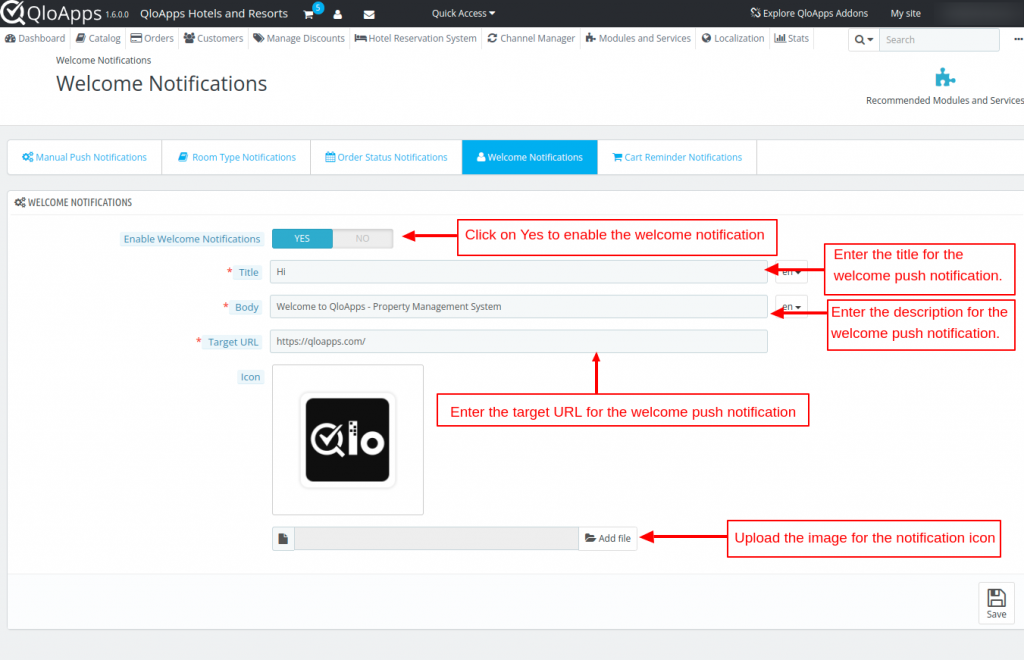
Here the admin will have to enter the following details.
- Enable Welcome Notifications: Click on Yes to enable the welcome push notification.
- Title: Enter the title for the welcome push notification.
- Body: Enter the description for the welcome push notification.
- Target URL: Enter the target URL for the welcome push notification. The guests will go to this URL after clicking on the notification.
- Icon: Upload the image for the notification icon.
CART REMINDER NOTIFICATIONS
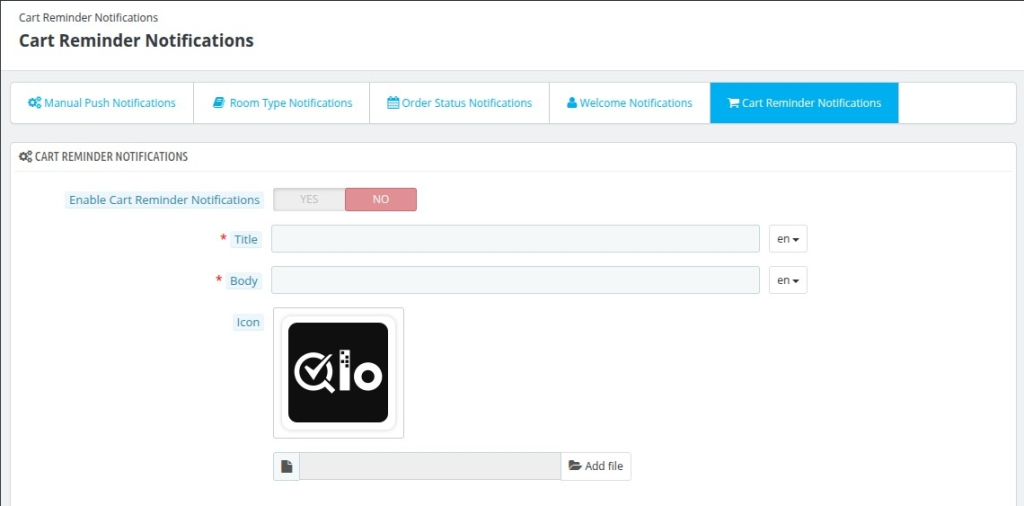
When a user comes to your website add a room to thier cart and abandon the website.
Then this notification will remind him about their cart. To create a cart reminder notification, the admin will have to enter the following details.
- Enable Cart Reminder Notifications: Click on Yes to enable the cart reminder push notification.
- Title: Enter the title for the cart reminder push notification.
- Body: Enter the description for the cart reminder push notification.
- Icon: Upload the image for the notification icon.
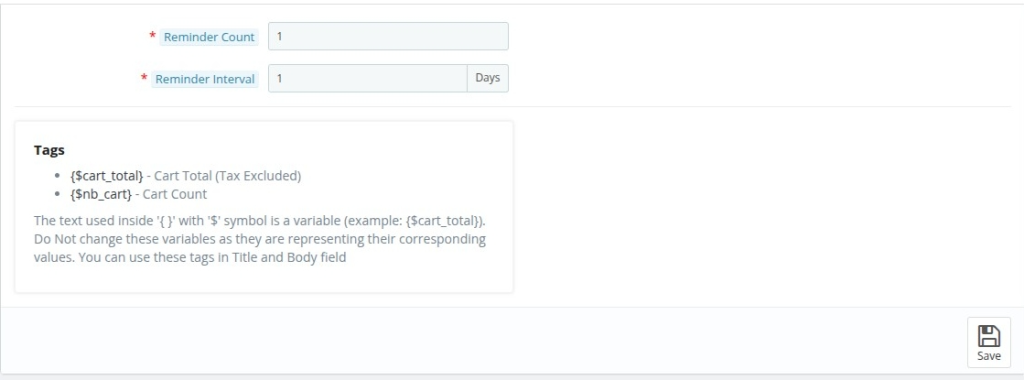
- Reminder Count: Enter the reminder count. This value is the number of times the cart reminder will be sent to the customer.
- Reminder Interval: Enter the reminder interval. This value is the number of days after which cart reminder will be sent to the customer.
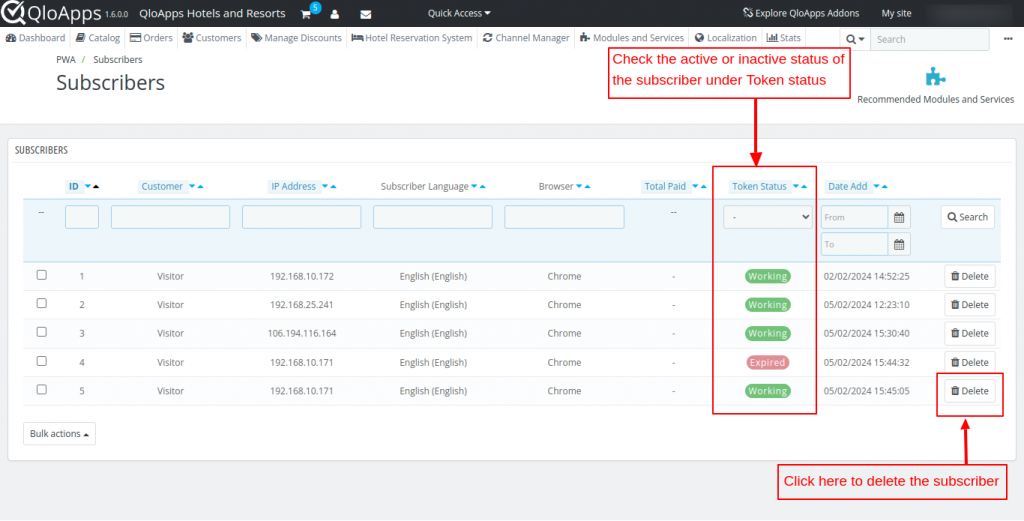
Manage Subscribers
On this page, you will find all your subscribers listed in the table.
A subscriber is a person who has allowed the notification in their browser and app. On this page, you can also delete a subscriber.
Under Token status, the admin can check the active and inactive status of the subscriber.
If the token status is working, the subscriber will receive the notification. Else if the token status is expired, then the subscriber won’t receive the notification.
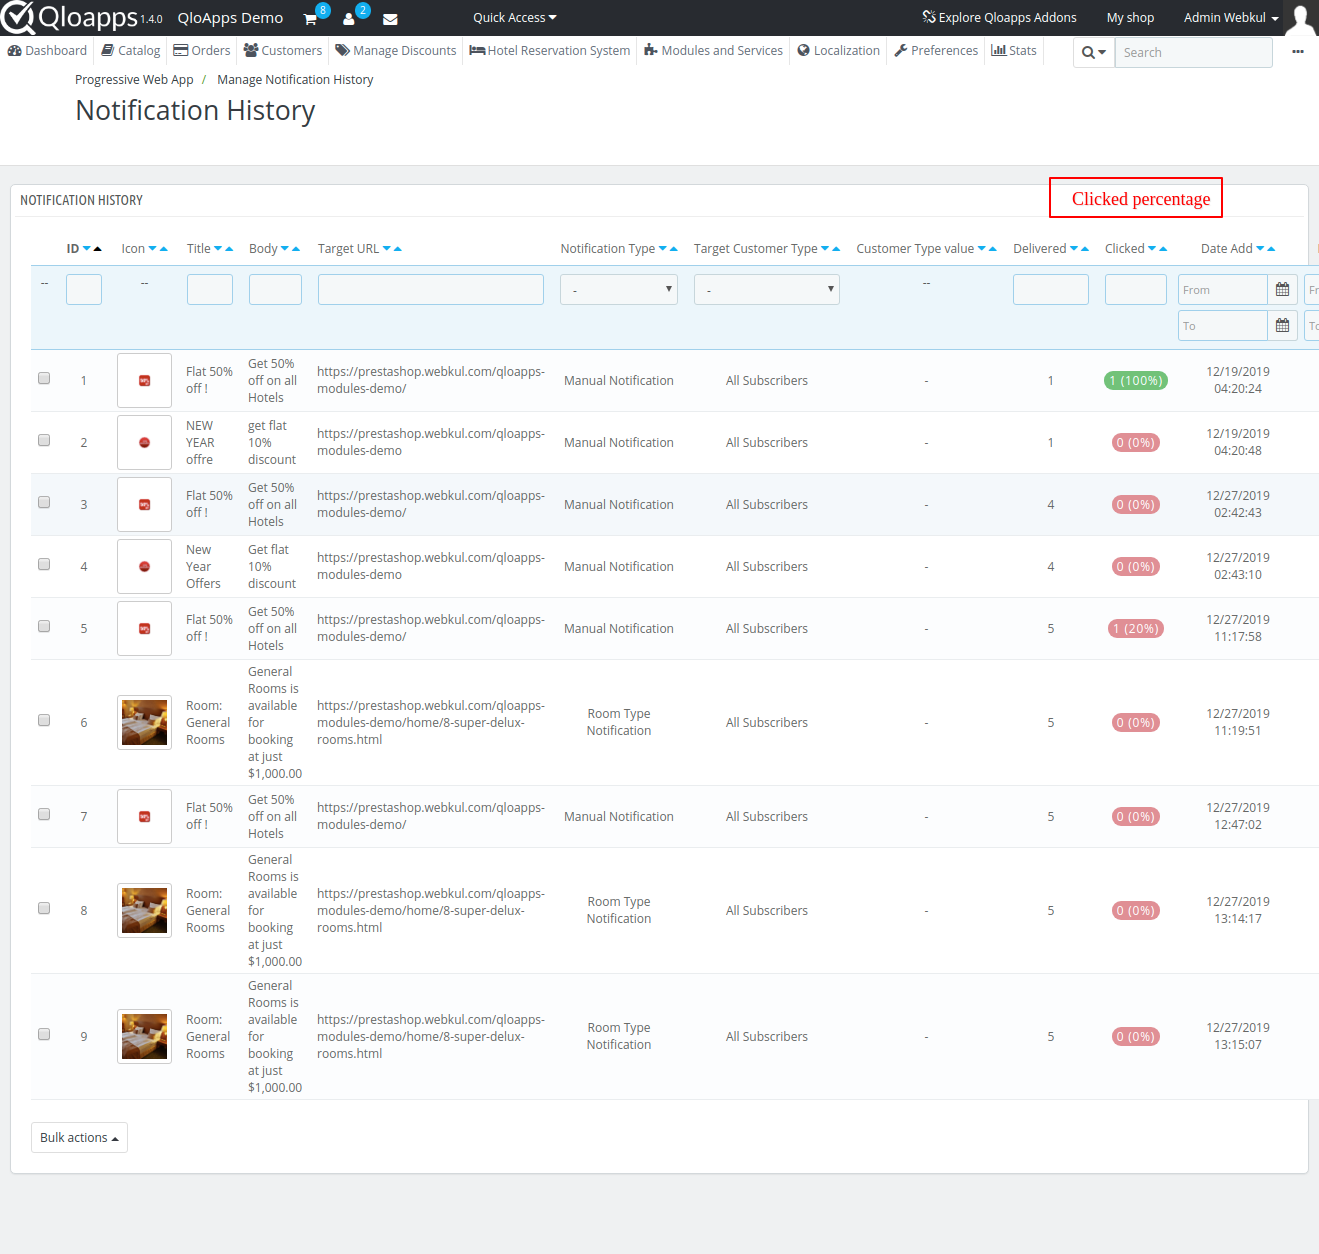
Notification History
This page will contain the history of the notifications that you have sent from your system. Admin can also see the percentage of notifications that were clicked by the users.
Conclusion
This was all about QloApps Progressive Web App. I hope I was able to explain you the module functionality in an easy way.
If you’re a hotelier, try QloApps – hotel management software to manage all your hotel operations.
Refer to QloApp’s free reservation system guide to learn about QloApps.
Share your suggestions with us on QloApps Forums, and if you need any technical assistance, please raise a ticket.
Current Product Version – V 4.0.0
Supported Framework Version – QloApps 1.7.0

Be the first to comment.