QloApps Marketplace On-Desk Booking is an add-on for QloApps Marketplace that empowers your marketplace to take on-desk bookings.
As you know, through the QloApps Marketplace Addon you can convert your hotel booking website into a marketplace of hotels.
where hotelier can list their hotel and you will earn commission on each booking they receive from your marketplace website.
Have you considered how sellers will manage walk-in bookings at their front desk and how the marketplace inventory will auto-update when they take offline reservations?
QloApps Marketplace On Desk Booking Addon is the solution to all such problems.
It helps sellers create offline bookings from their accounts and eliminates inventory mismanagement that could lead to overbooking or underbooking.
This will ease your seller’s offline booking management process. Therefore, enhancing the functionality of your marketplace and improving your relations with your seller.
So let us understand how this module will help sellers take offline bookings seamlessly.
Note:
- You need to install QloApps Marketplace before using this module.
- The Admin Commission in case the seller receives On Desk booking will be zero because these bookings are directly received by the seller rather than from the Marketplace website.
Features Of QloApps Marketplace On-Desk Booking
- The seller can create and manage multiple on-desk bookings with ease.
- Sellers can customize the booking of the offline guests as per their choice.
- Sellers can set the custom price of the room types for their guests.
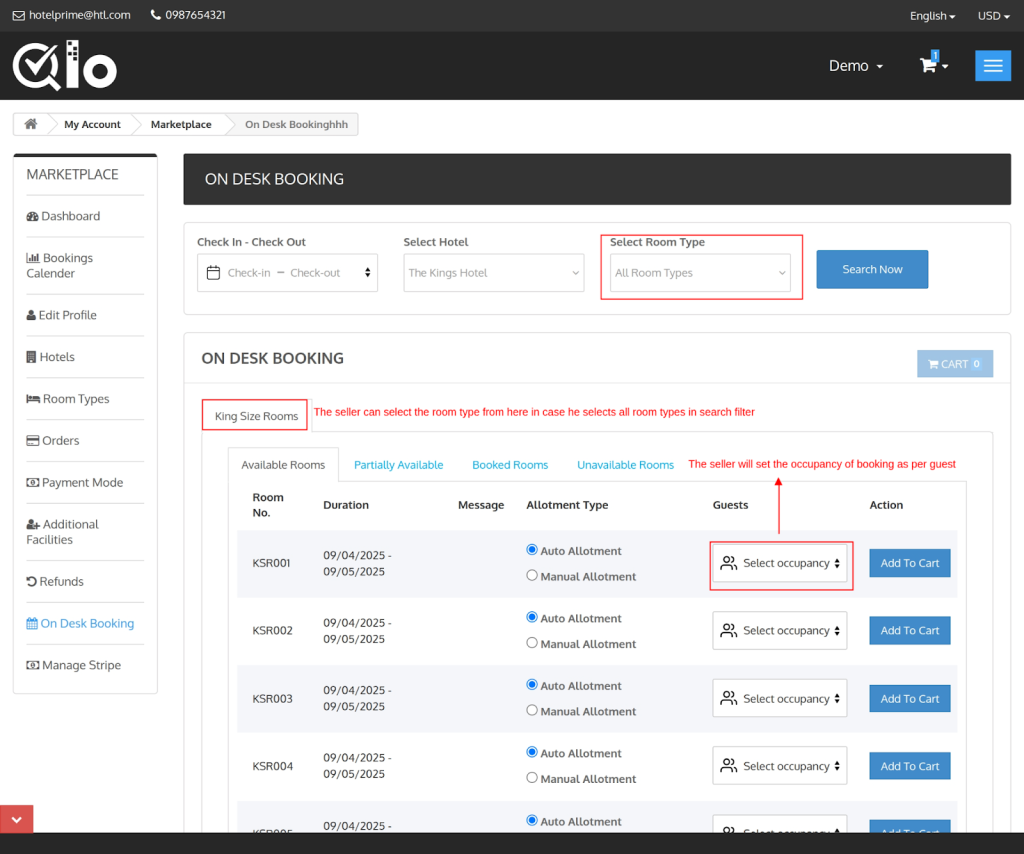
- The On Desk Booking Tab shows available rooms, booked rooms, unavailable rooms, and partially available rooms in a date range.
- The seller can add rooms from multiple room types in a single cart.
- The seller can set the occupancy of the room type while creating the booking.
- The seller can also add the services with the booking for guests.
- The seller can create a new customer or select from existing customers.
- The seller can set the currency and language preferred by the guest while creating the booking.
- The seller can add or edit the customer’s address.
- The seller can select the payment method of the order preferred by the guest.
Installation of QloApps Marketplace On-Desk Booking
The installation of any module is very simple in QloApps.
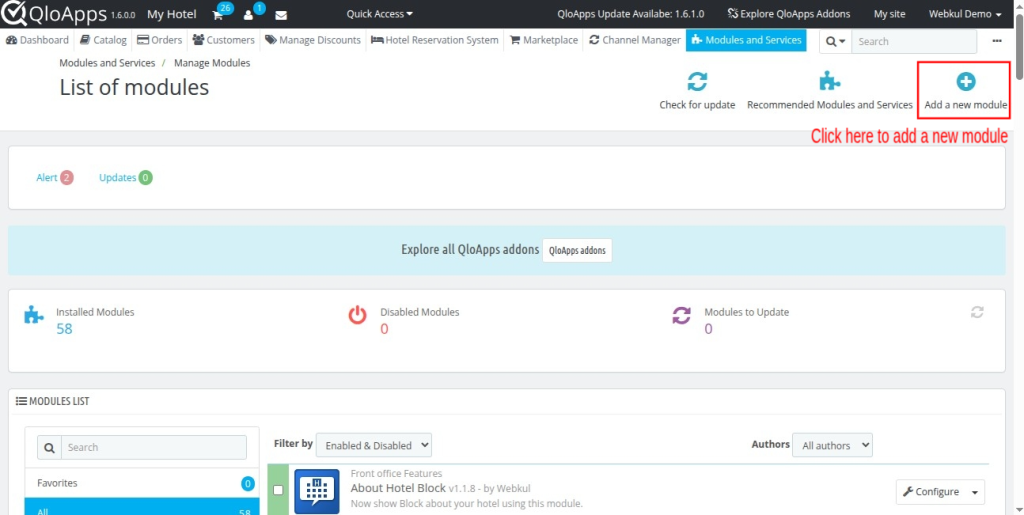
- Go to the Module and Services Menu tab
- Click on Add New Module
- Now upload the Zip file of the Module and click on “Upload and Install this Module”.
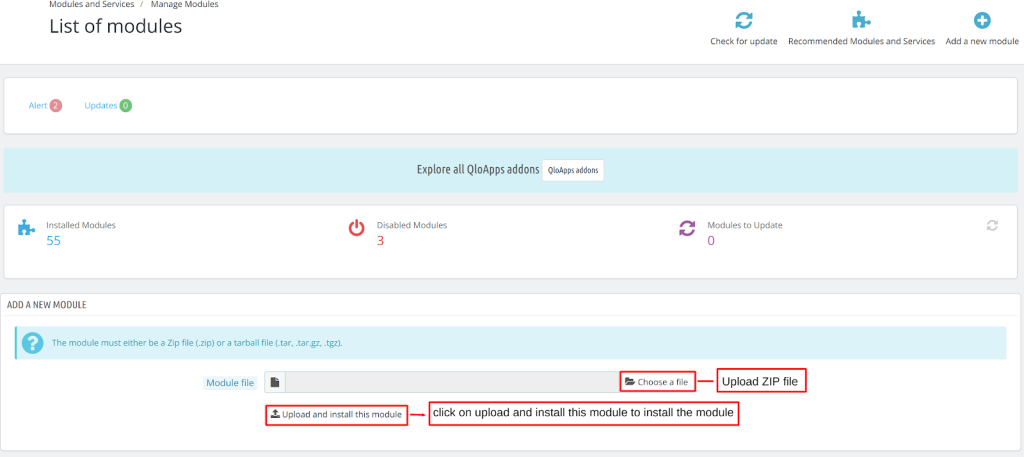
By following these steps the Admin can successfully install the QloApps Marketplace On-Desk Booking module in QloApps.
Once the admin installs the module, the seller will have the On-desk booking tab in his account section.
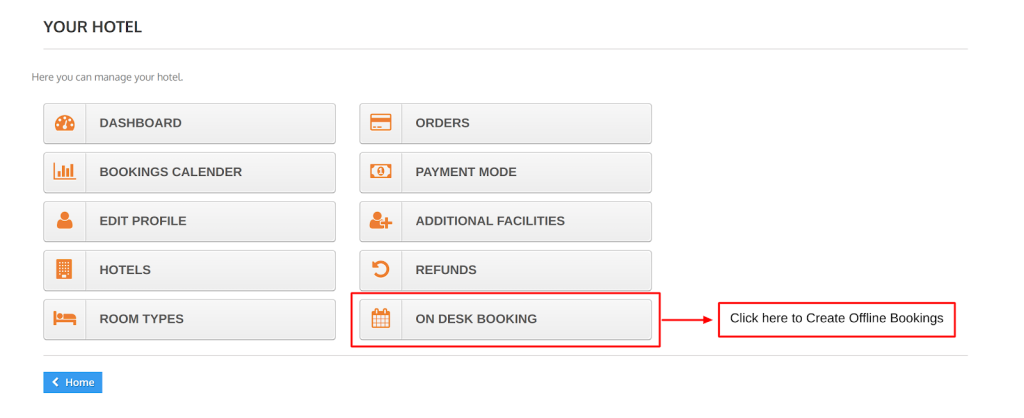
Once sellers click on this button, they will land on the seller’s on-desk booking interface. The on-desk booking tab will be added to the seller interface.
How Will you Create an On-Desk Booking Using This Add-On?
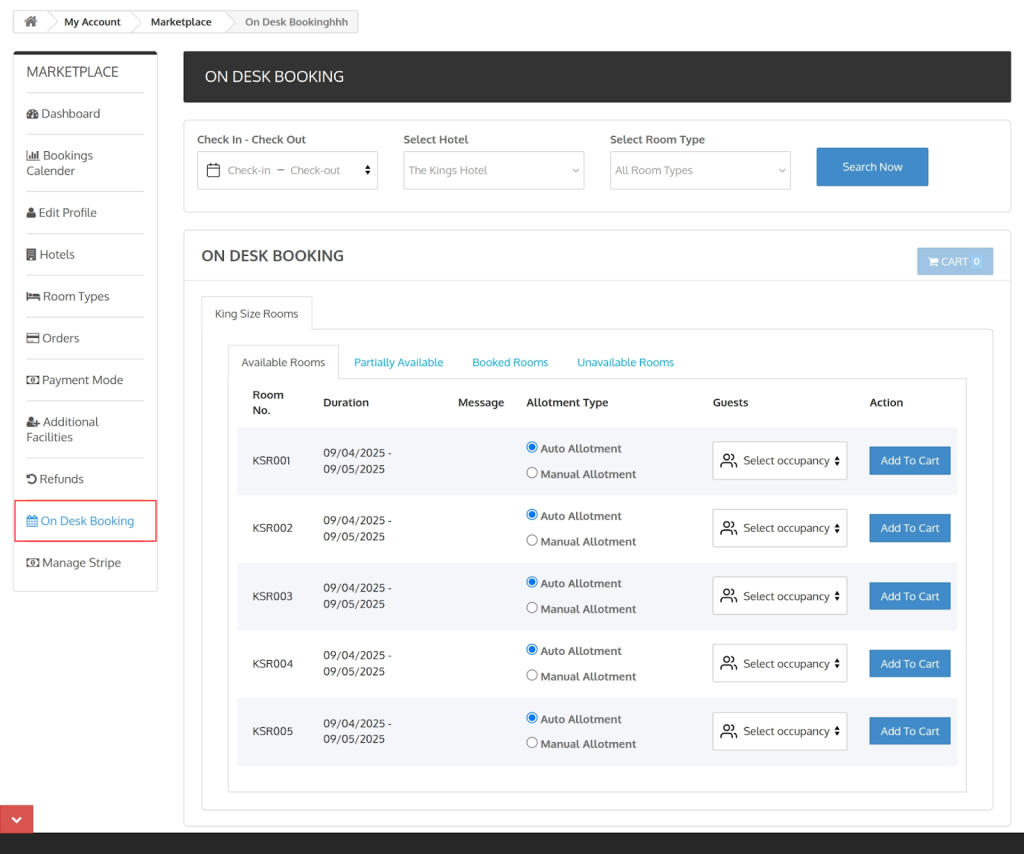
- The seller will search for the room type availability in his hotel as per the check-in and check-out dates of the guest for which he wants to create the offline booking using the search section.
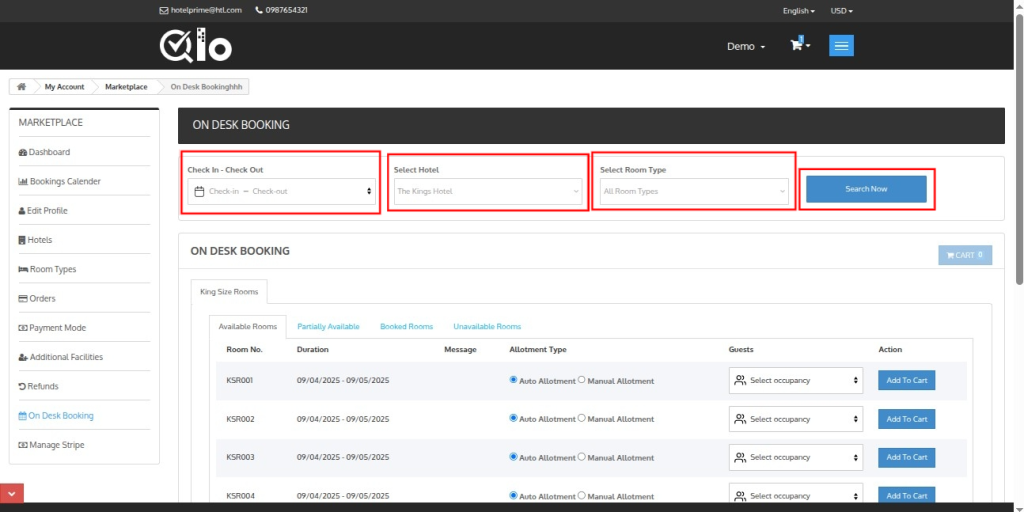
- The seller will define the occupancy and then click on “Add To Cart” to proceed further in the process of creating an offline booking for his on-desk guest.

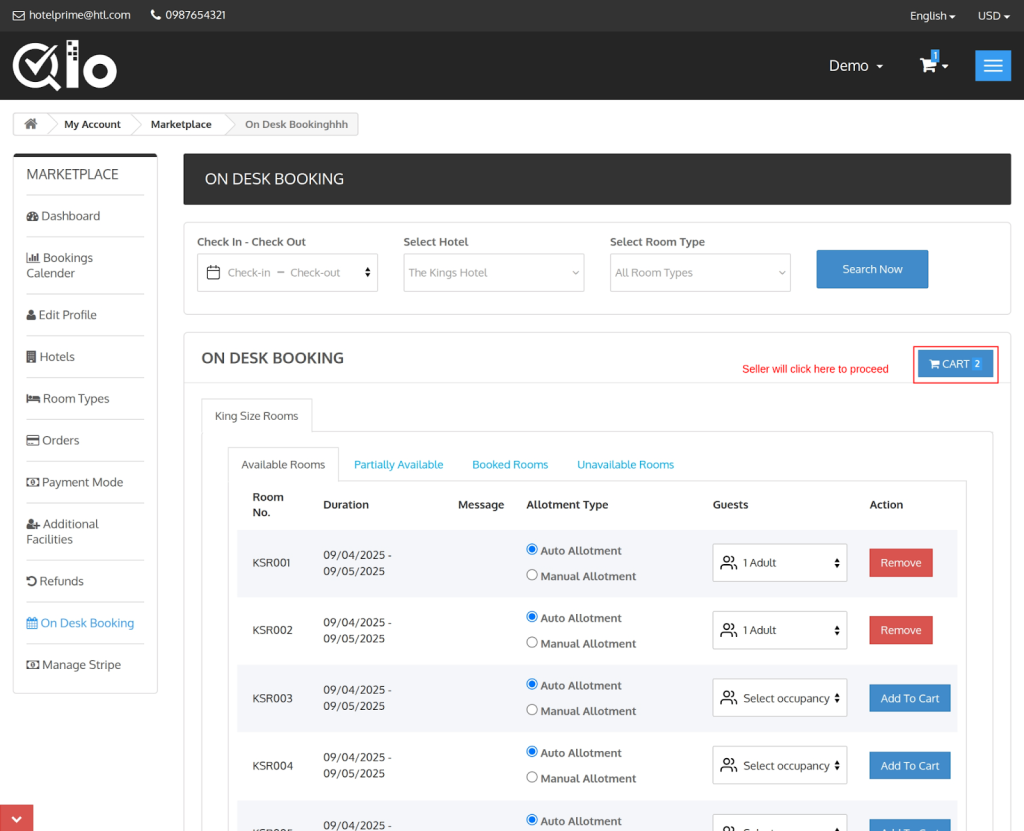
- Once the seller adds all the room types in the cart as per the guest’s need, he will click on the cart button to proceed further.
A Dialog box will appear displaying the details of the order when the seller clicks on the “Cart” Button. After which the seller will Click on “Proceed to Check Out”.
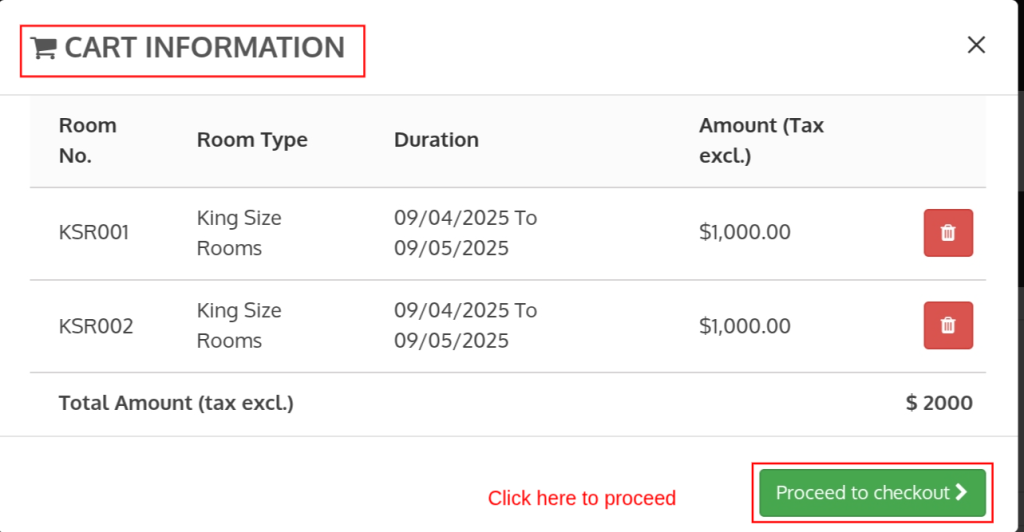
- After the seller clicks on the ” Proceed to Checkout” button, the Cart Details Page will open. On this page, the seller can edit and set the custom price of the room types under the unit price section and occupancy of the room type as per guest count under the Occupancy section.
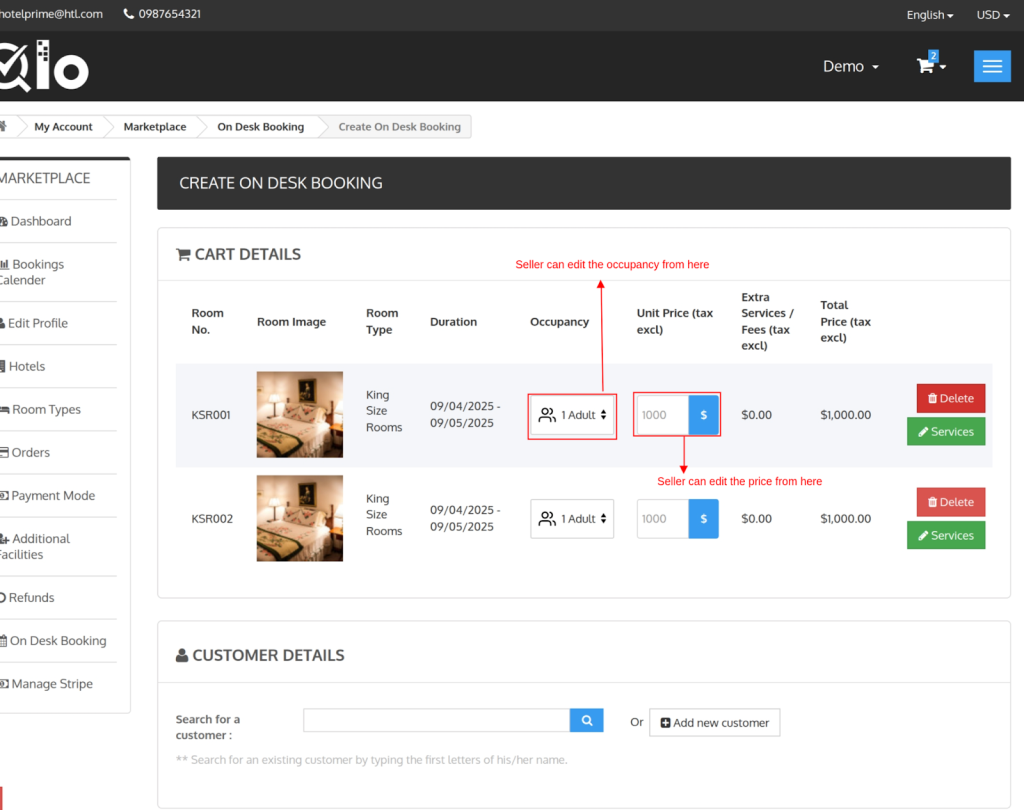
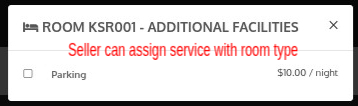
Also, the seller can add services with the room type as per guest requirements from this page directly by clicking on the services button.

Once the seller clicks on this button, a new pop-up will open displaying all available services of the selected room type,
the seller can select the service that his guest wants with his booking through this box.
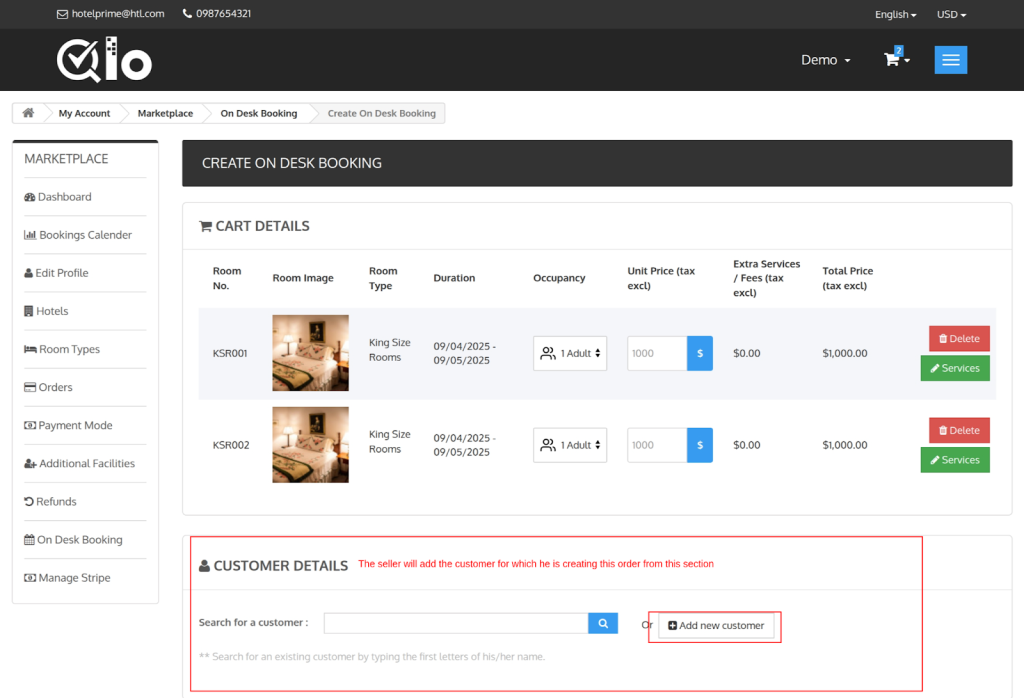
- The seller will now select the customer for whom he is creating the booking. If the guest is an existing customer, then the seller can search for him using the search option, or else in case of the new customer, the seller can add the customer by clicking on ” Add New Customer”.
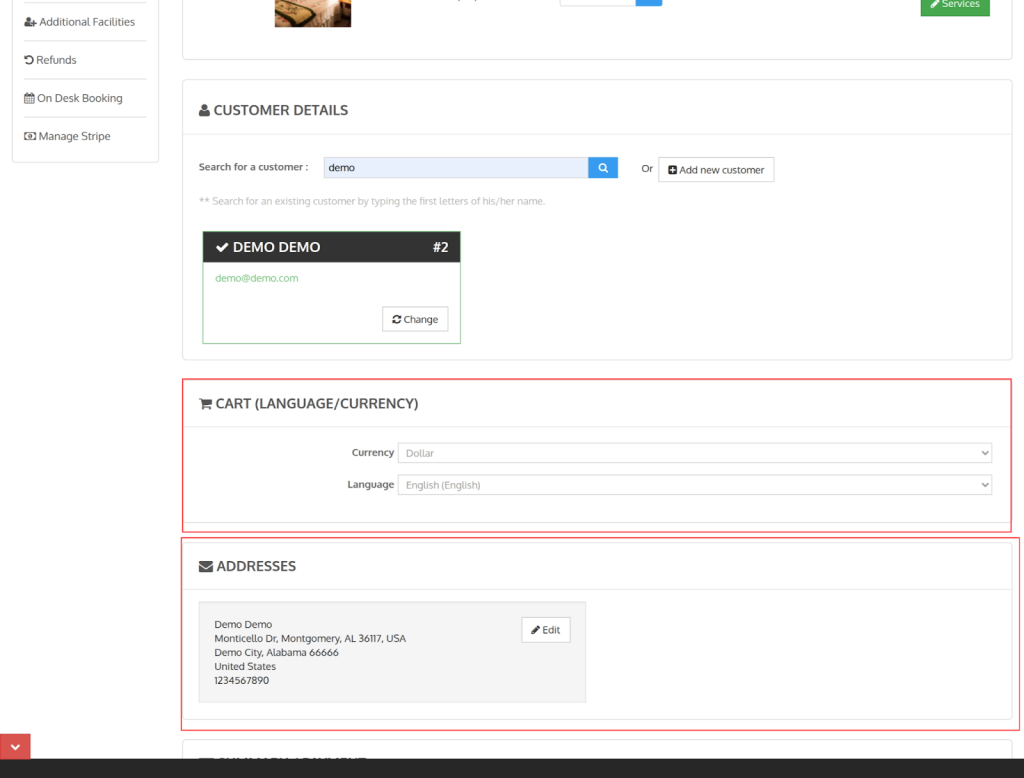
- Once the seller adds the customer details to the order, he will then get the option to edit the cart currency and language as well as the address of the customer.
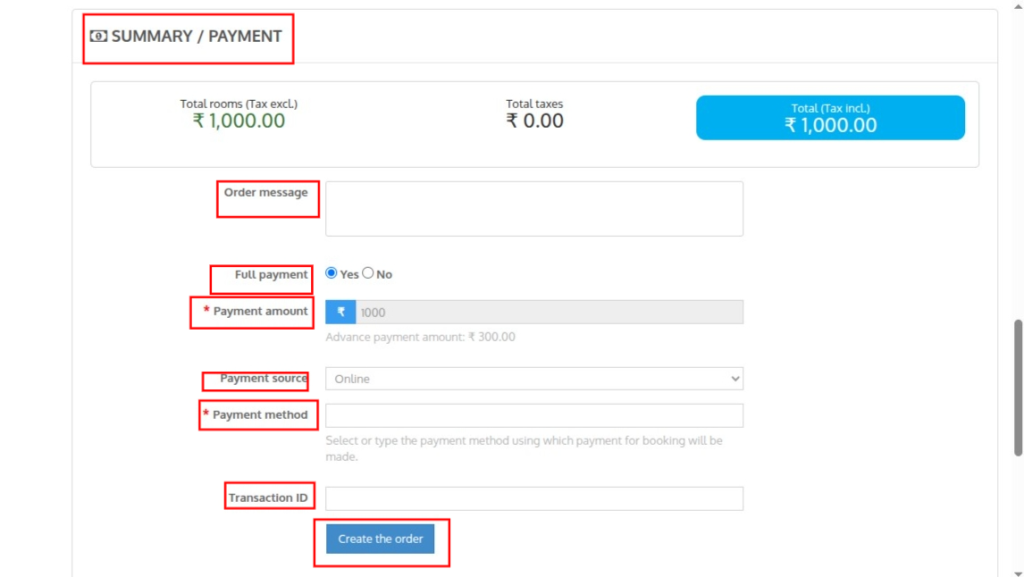
- The seller will select the payment mode and order status of the customer and then he will click on the “Create The Order ” Button to create the order. After successfully creating the order, the order details page opens displaying all the details of the order.
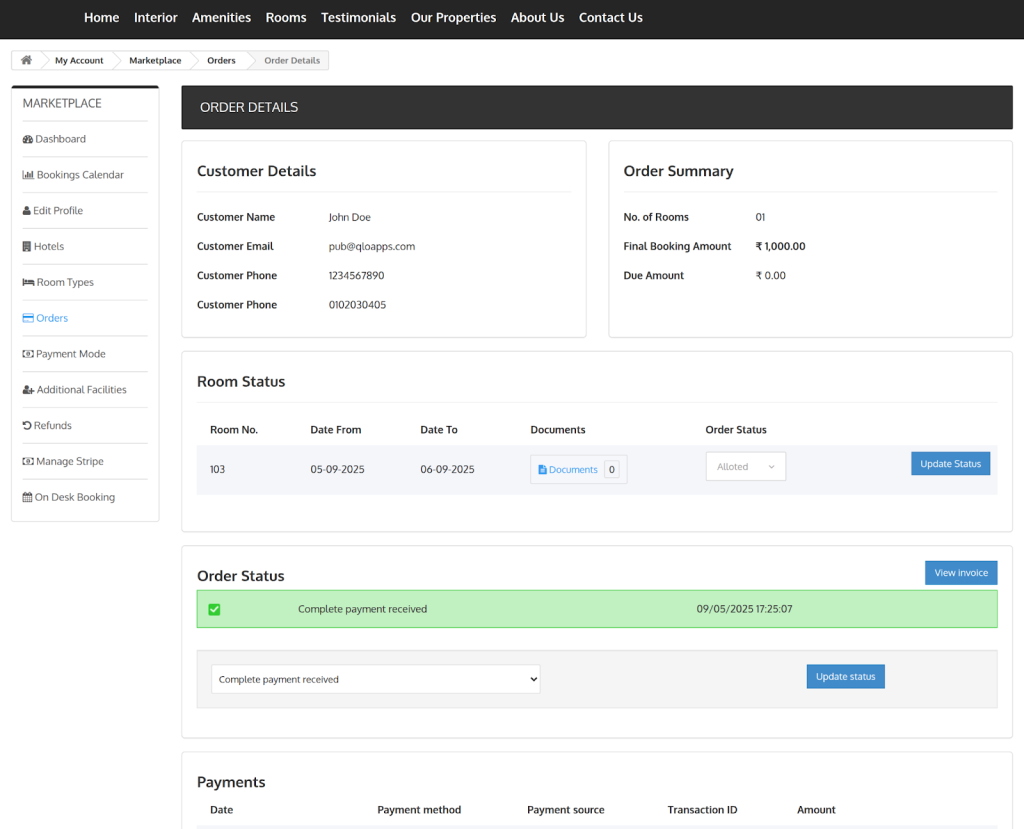
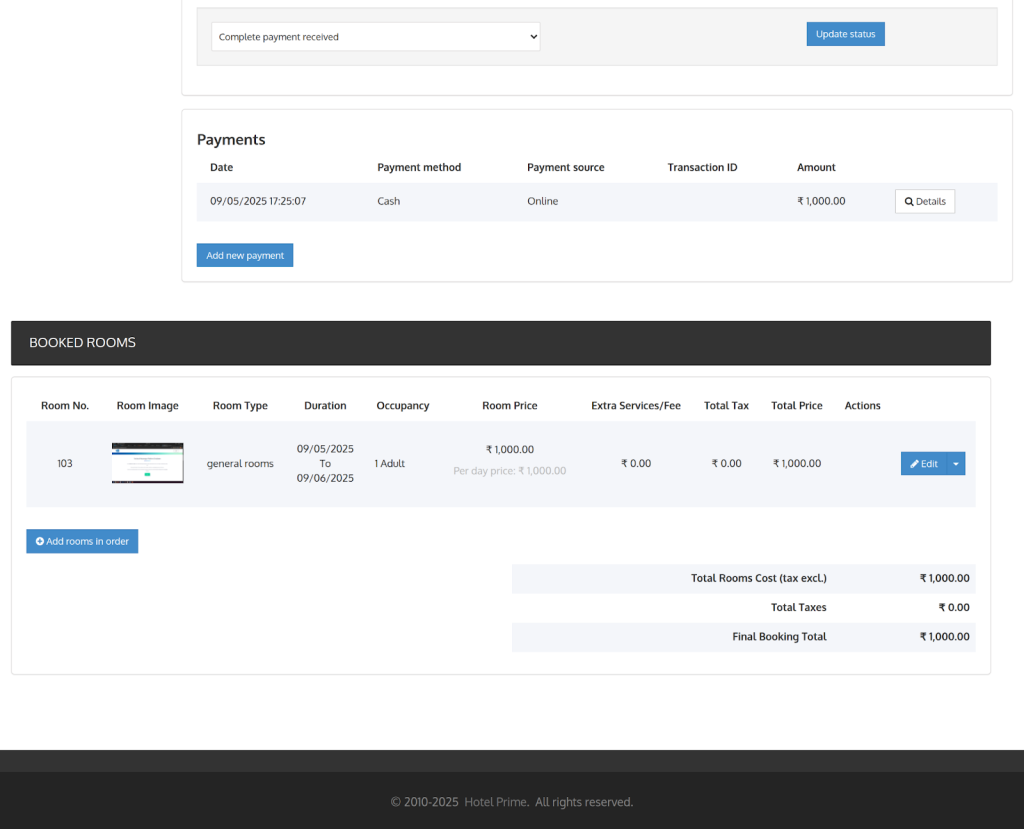
Order Details Page
Order gets created under the orders tab of the Seller Marketplace account. The seller can view and edit the order from the order details page.
Conclusion
This was all from the QloApps Marketplace On-Desk Booking. I hope I was able to clarify the functioning of the module to you.
If you want to learn about the functionality of the QloApps Marketplace Module then you can visit this link: QloApps Marketplace Module.
In case of any query, issue, or requirement please feel free to raise it on QloApps Forum
Current Product Version – 4.0.0
Supported Framework Version- QloApps 1.7.x

Be the first to comment.