
Despegar Channel Manager setup with QloApps can be completed easily using the following steps.
In this guide, we’ll explore the complete process of setting up Despegar with QloApps Channel Manager to help you connect and manage your hotel listings efficiently.
To add the Despegar to the QloApps Channel Manager, follow the steps given below.
Despegar Integration with QloApps
Follow the steps below to connect your Despegar property with QloApps Channel Manager.
Step 1: Verify the Despegar Account
The client must be registered with Despegar and have a hotel/property associated with their account.
Step 2: Open My Connections
Log in to the Despegar Extranet and navigate to the property’s General Settings. Then, select My Connections.
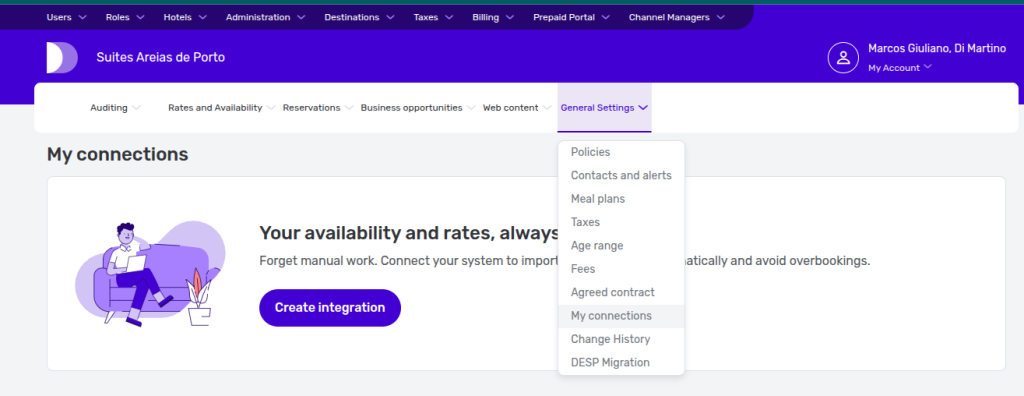
The connection screen will appear. It will show all existing connections for the property.
Step 3: Create an Integration
Next, click Create Integration to start the channel manager integration
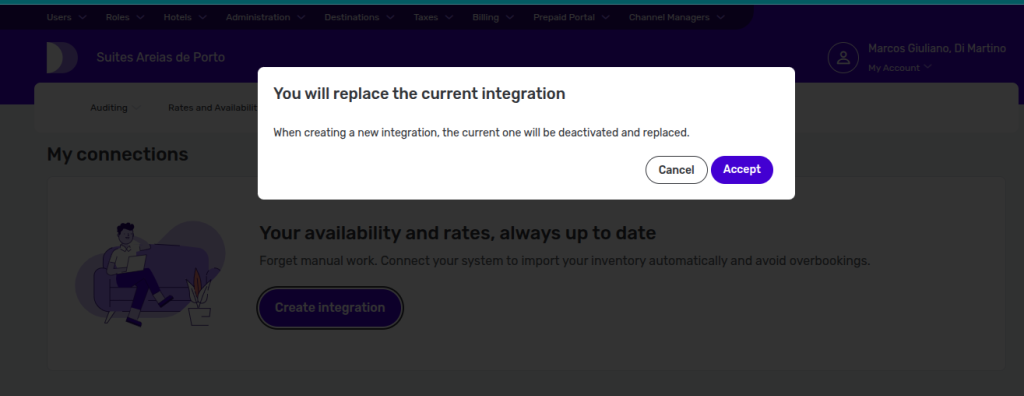
Step 4: Accept the Confirmation
A confirmation modal will appear. Review the information and click Accept to proceed.
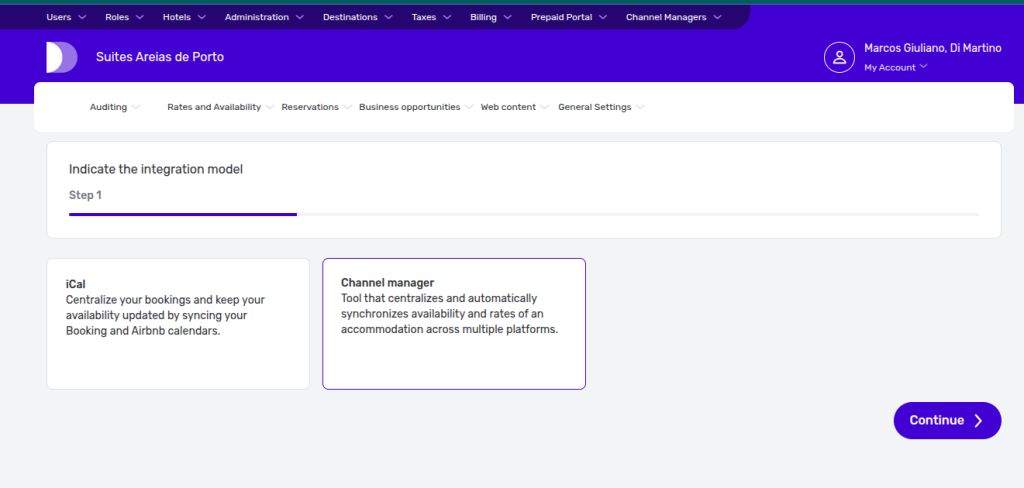
Step 5: Select Channel Manager
From the available integration options, select Channel Manager.
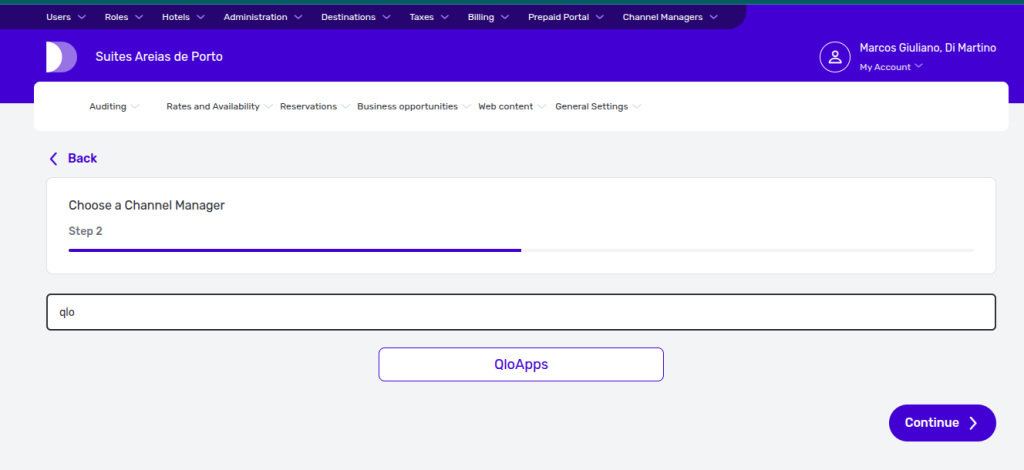
Step 6: Select QloApps
Search for QloApps using the search box or locate it by scrolling through the available channel manager options. Select QloApps to continue.
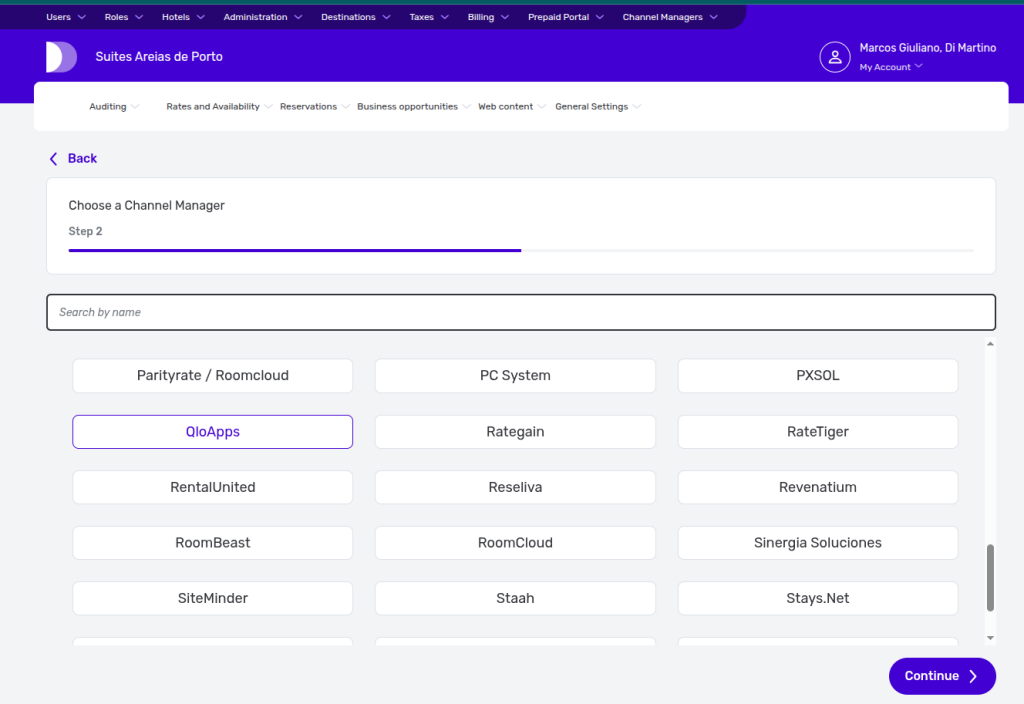
Step 7: Enter the Required Information
Complete the required details for the integration as requested by Despegar.
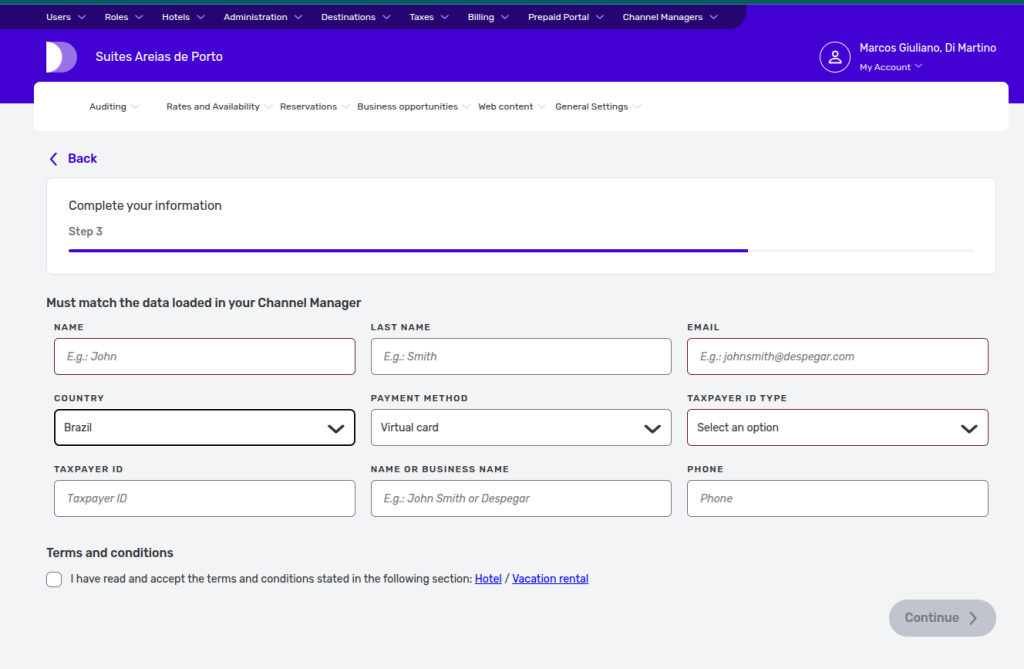
Step 8: Generate the Activation Code
Once you submit the required information, Despegar will generate an activation code.
This code is required to complete the integration process.
Note: Make sure to copy and securely save the activation code.
Once the above steps are done Go to the QloApps Channel manager to add the Despegar OTA.
Add the Despegar Channel in QloApps Channel Manager
Users can add Despegar to the QloApps Channel Manager by following the given steps.
Step 1: Open the Channel Manager
From the Main Menu:
- Log in to QloApps Channel Manager.
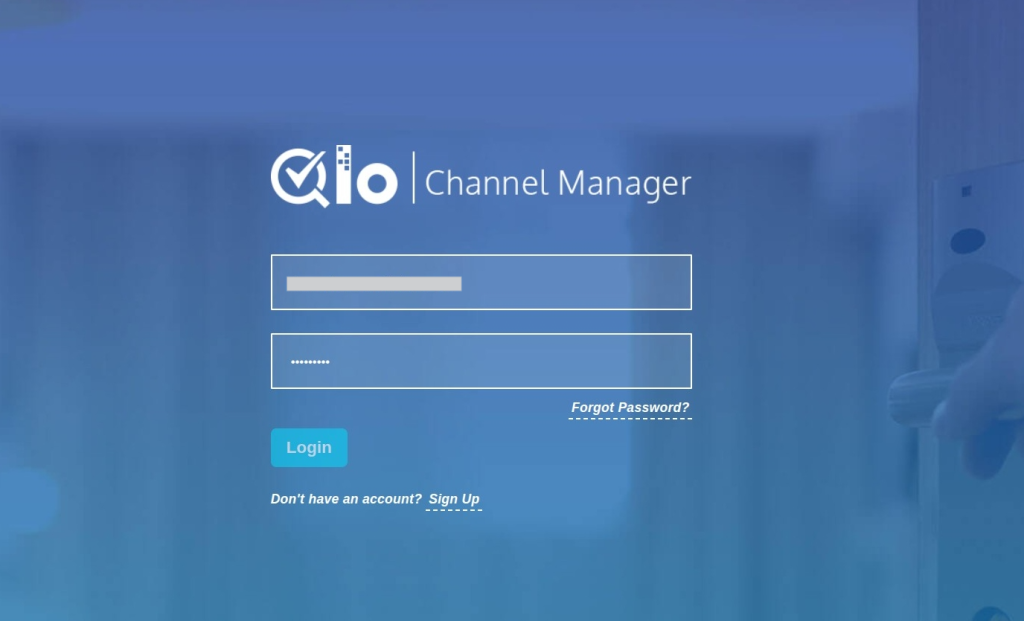
- Go to Channels Tab
- Click on Add Channel
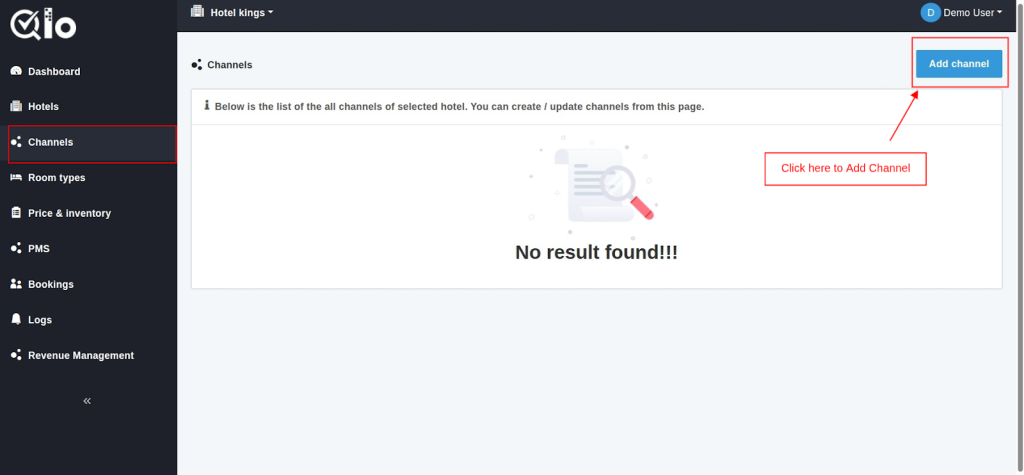
- Here in the Select Channel from drop-down, click on Despegar.
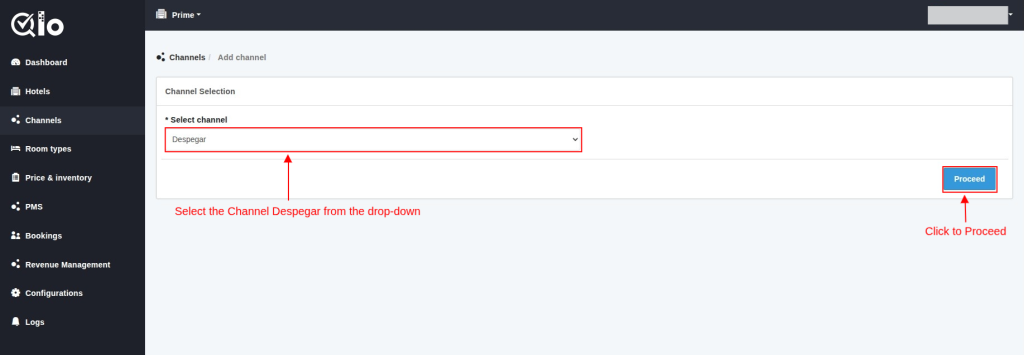
- Click Proceed.
Step 2: Enter Despegar Property Details
After selecting Despegar, enter your property details to connect the channel.
Fill in the following details:
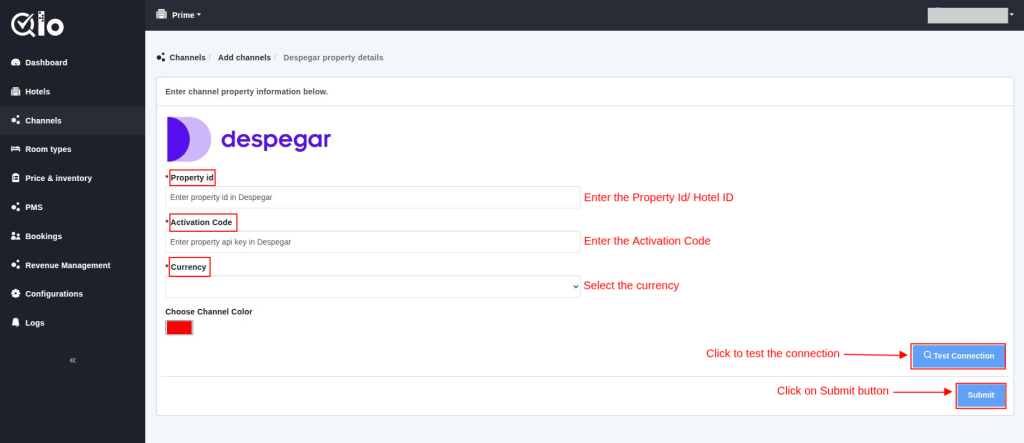
- Property ID: Enter the Property ID/Hotel ID associated with the property on Despegar.
- Activation Code: Enter the Activation Code provided by Despegar during the integration setup.
- Currency: Select the currency configured for the property on Despegar.
- Channel Color: Select a color to easily identify the Despegar channel in the QloApps Channel Manager.
Step 3: Test the Connection
After entering the details, click Test Connection. QloApps will check the connection with your Despegar property.
Step 4: Submit the Channel
Once the connection test is successful, click Submit to establish the channel and proceed with room and rate mapping.
Note: Make sure that the Property ID and Activation Code are entered correctly before testing the connection.
Room and Rate Mapping
Room and rate mapping establishes a connection between the room types and rate plans configured in QloApps Channel Manager and those available on the Despegar OTA.
Map the following:
- QloApps Room Type with the corresponding Despegar Room Type.
- QloApps Room Rate with the corresponding Despegar Room Rate.
For reference, see the image below:
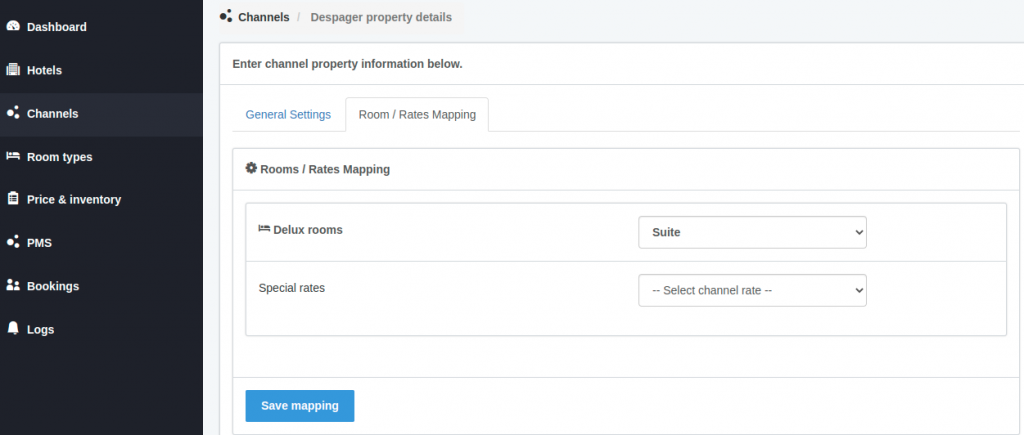
After completing the mapping, click Save Mapping.
Once the channel has been added successfully and the mapping is completed, the Despegar will appear on the Channel List page.
From the Actions column, users can:
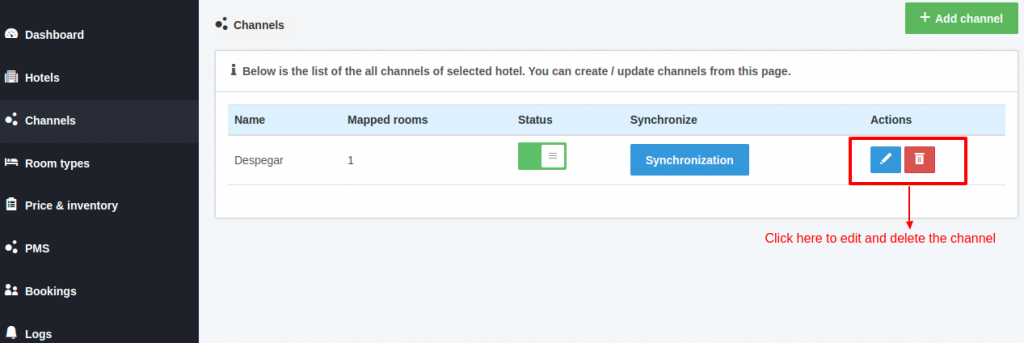
- Edit the channel.
- Delete the channel.
Note: The channel can only be deleted when its status is Disabled.
Synchronize Despegar Channel
Users can synchronize the Despegar channel by clicking the Synchronization button.
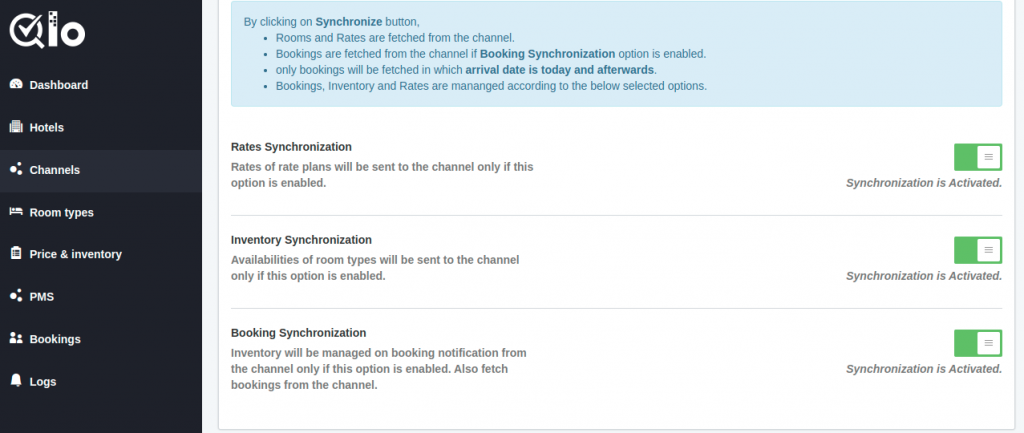
Synchronization keeps inventory, rates, and bookings updated between QloApps Channel Manager and Despegar.
By clicking Synchronize, the following processes can be performed:
- Rooms and rates are fetched from the channel.
- Bookings are fetched from the channel if Booking Synchronization is enabled.
- Only bookings with an arrival date of today or later are fetched.
- QloApps manages bookings, inventory, and rates based on your selected synchronization options.
Rate Synchronization
When Rate Synchronization is enabled, the rates configured for the rate plans in QloApps are sent to the Despegar.
Inventory Synchronization
When you enable Inventory Synchronization, QloApps sends room availability to Despegar.
Booking Synchronization
When Booking Synchronization is enabled, bookings are fetched from Despegar and inventory is updated based on booking notifications received from the channel.
Once you synchronized the channel successfully then you can proceed further for Price And Inventory In the QloApps Channel Manager.
Conclusion
This was all from the process of setting up Despegar for the QloApps Channel Manager. I hope I was able to clarify it for you.
If you want to learn more about QloApps Channel Manager.
If you want to learn about the functionality of QloApps, then you can visit this link: QLO Reservation System – Free Open-Source Hotel Booking & Reservation System
In case of any query, issue, or requirement, please feel free to raise it on QloApps Forum

Be the first to comment.