QloApps Stripe Payment Gateway is an addon for QloApps which will allow you to accept online payments through Stripe Payment Gateway.
The stripe payment gateway module allows you to accept credit cards directly on your site through your Stripe account.
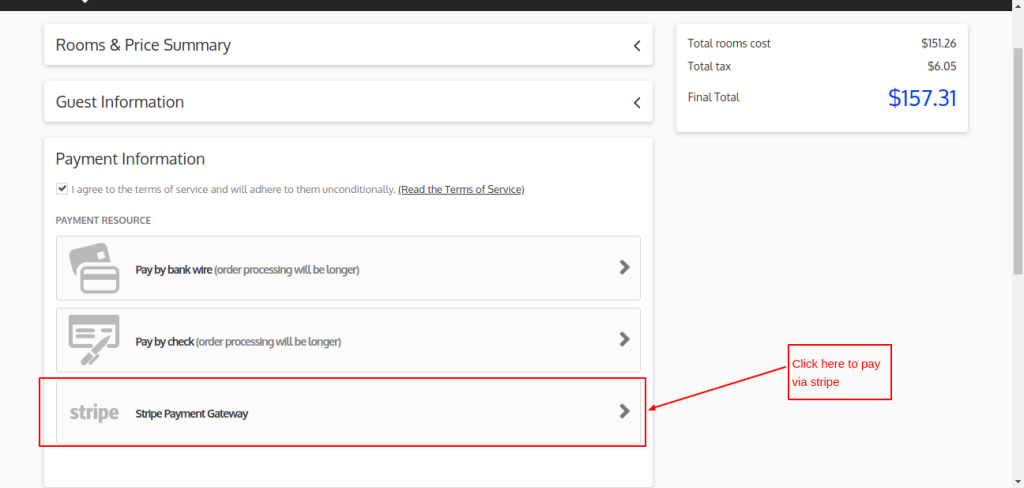
An easy payment process is a must for every website. For this functionality, we use payment gateways.
Secure Payment gateways like Stripe are very good for customer experience. Furthermore, they also make your life easy as a hotelier.
Note:
* Before purchasing this module, please visit STRIPE to ensure that this payment gateway is available in your country.
* The QloApps Stripe Payment Gateway module is compatible with PSD2 SCA (Strong Customer Authentication).
Unlock Seamless Transactions: Key Features of QloApps Stripe Payment Gateway
- Stripe Payment Gateway supports Mastercard, Visa, American Express, JCB, and Discover.
- Easy to manage as control never leaves the merchant site while making payment which normally happens with other payment gateways.
- It provides the feature of a one-click payment option.
- Easy to configure by admin through the back end.
- Alternate payment methods are available on the front end as per their cart currency.
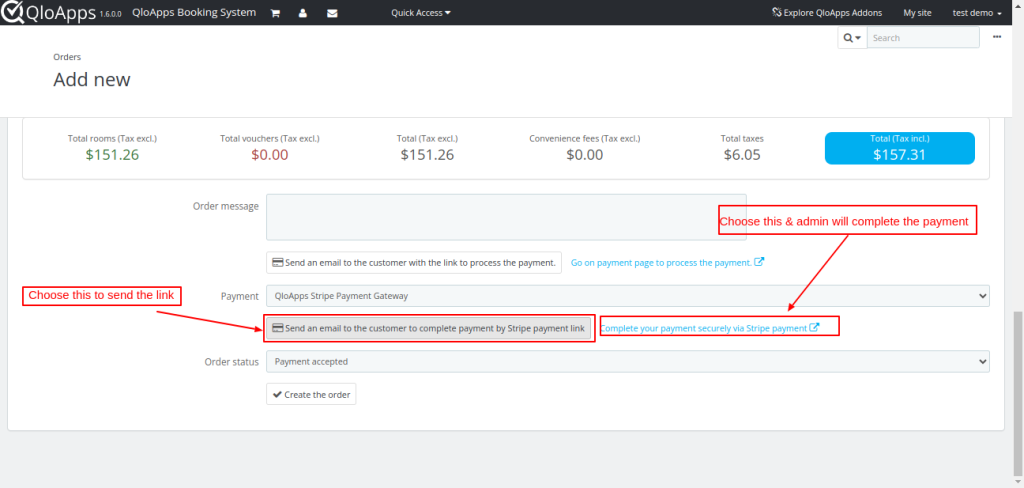
- Admin can make the payment on the backend via stripe payment gateway or can send the stripe payment gateway payment link to the customer
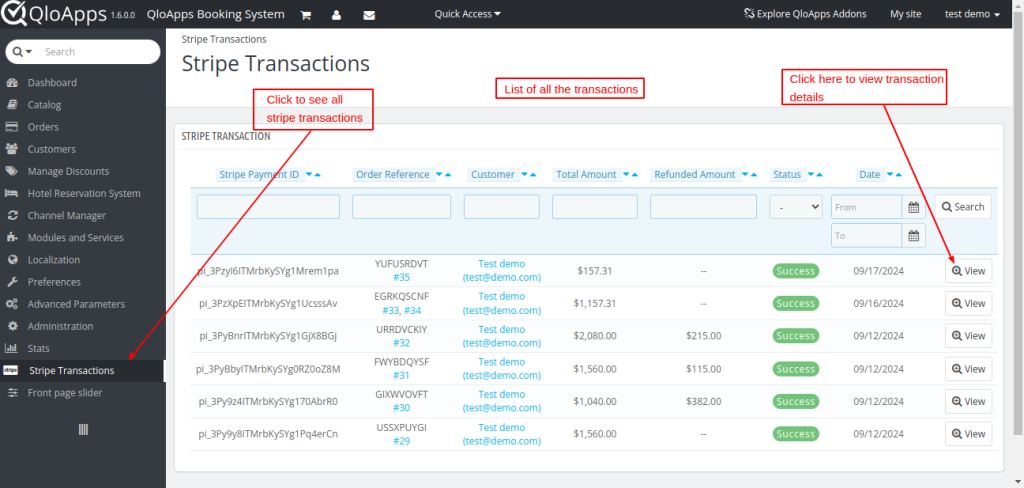
- Admin can view all transactions through the Stripe payment gateway tab.
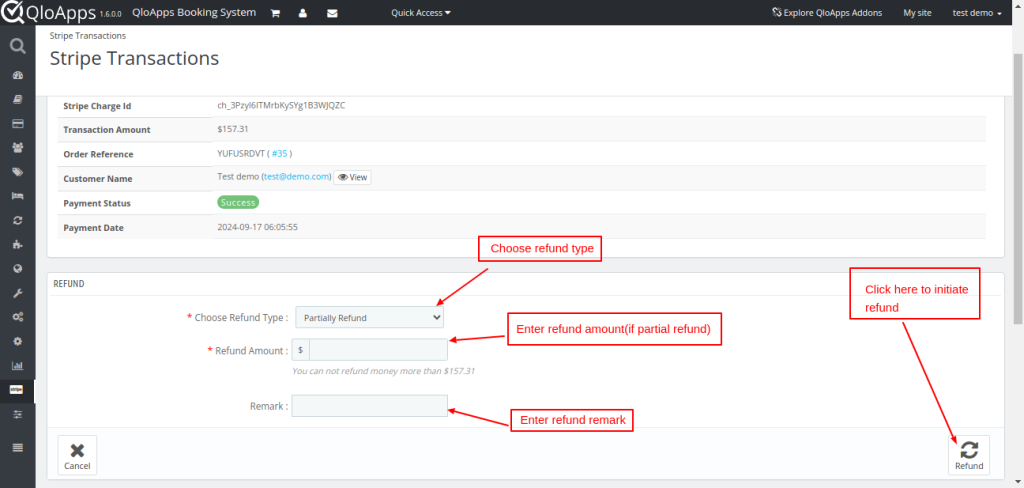
- Admin can also refund the full or partial amount to the buyer as per the requirement.
- While refunding the partial amount, the admin can specify the amount less than or equal to the amount paid by the buyer.
How to install QloApps Stripe payment gateway: A complete tutorial
The installation of any module is very simple in QloApps.
- Go to the Module and Services tab
- Click on Add New Module
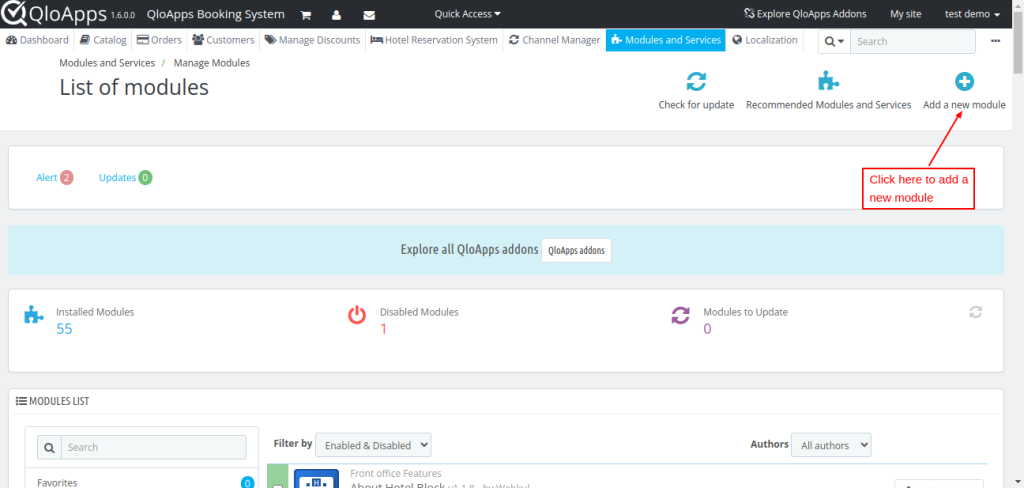
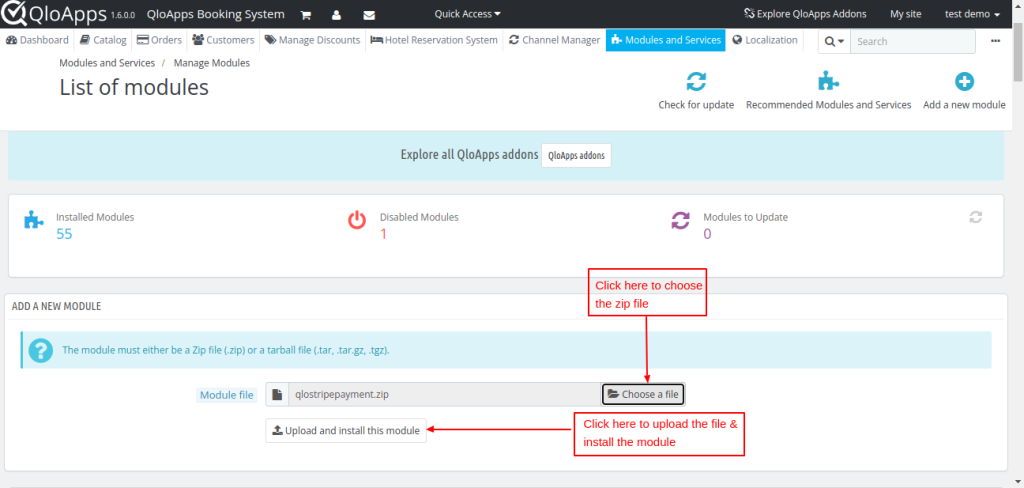
- Now upload the Zip file of the Module and click on Install
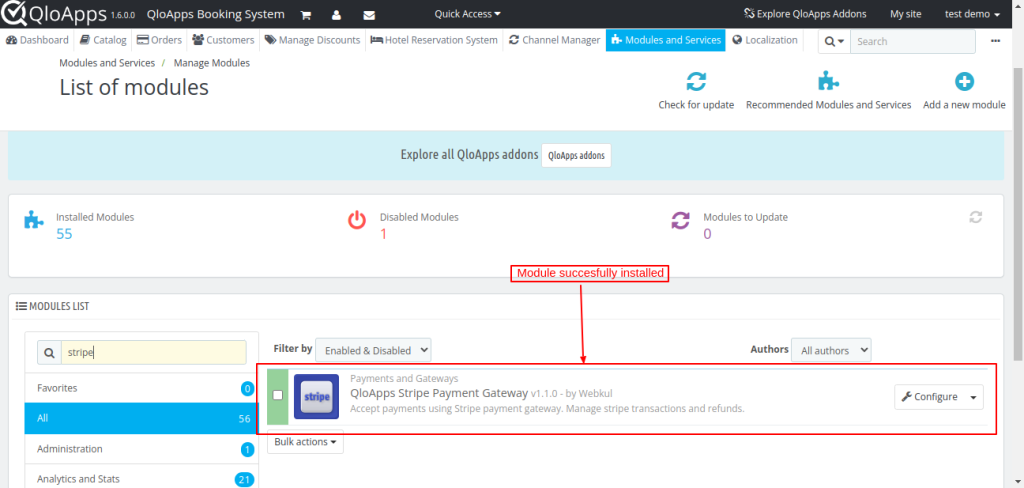
- Once the installation is finished, it will confirm that it was successful, followed by a display of the installed module below.
Ultimate Guide to Configuring QloApps Stripe payment gateway
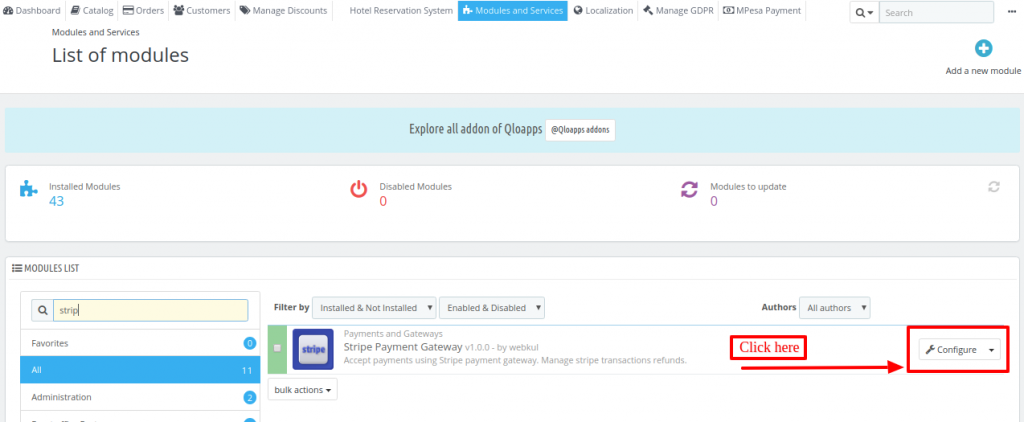
Once installed, you can configure the QloApps Square Payment Gateway by following these steps:
Click on the “Configure” button to access the configuration page.
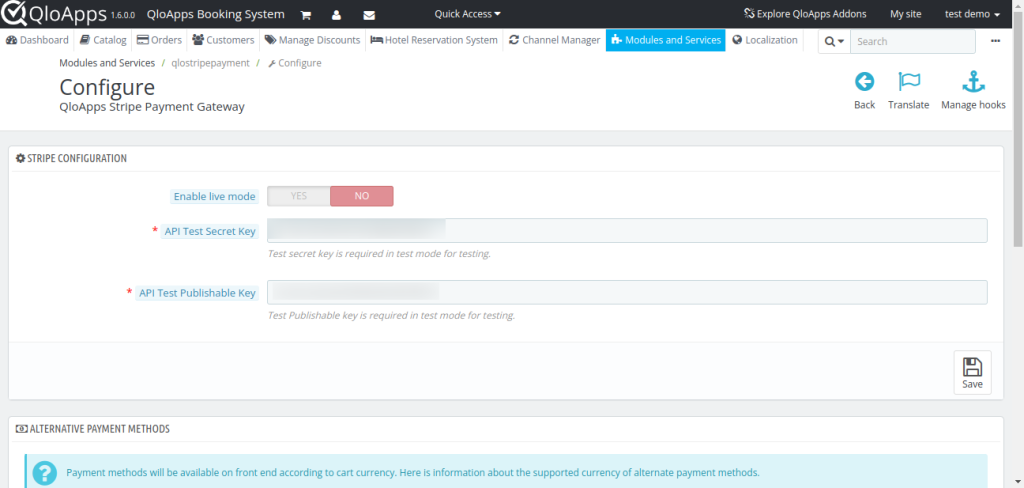
Environment:
Switches between production and sandbox modes for testing and production purposes. Production mode is for actual transactions, while sandbox mode is for testing and development.
API Secret key:
Enter your Stripe API secret key, obtained from your Stripe account, to enable transactions.
API publishable key:
An API publishable key will be provided for authenticating and securing transactions.
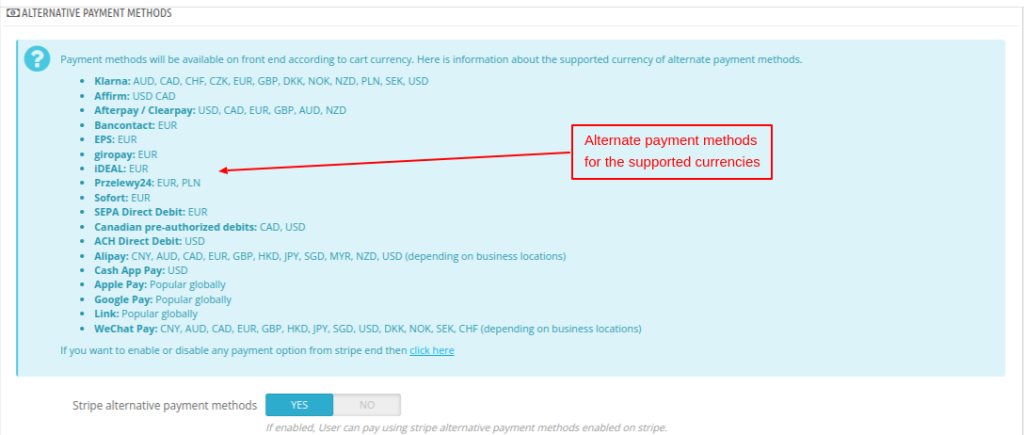
Alternative Payment Methods:
Below the Stripe configuration, you will see a list of all the additional payment methods that you can enable from your Stripe account.
Note: Alternative payment methods that are enabled in the Stripe dashboard settings will be available, depending on the cart’s currency.
How to Easily Obtain Your API keys For QloApps Stripe Integration
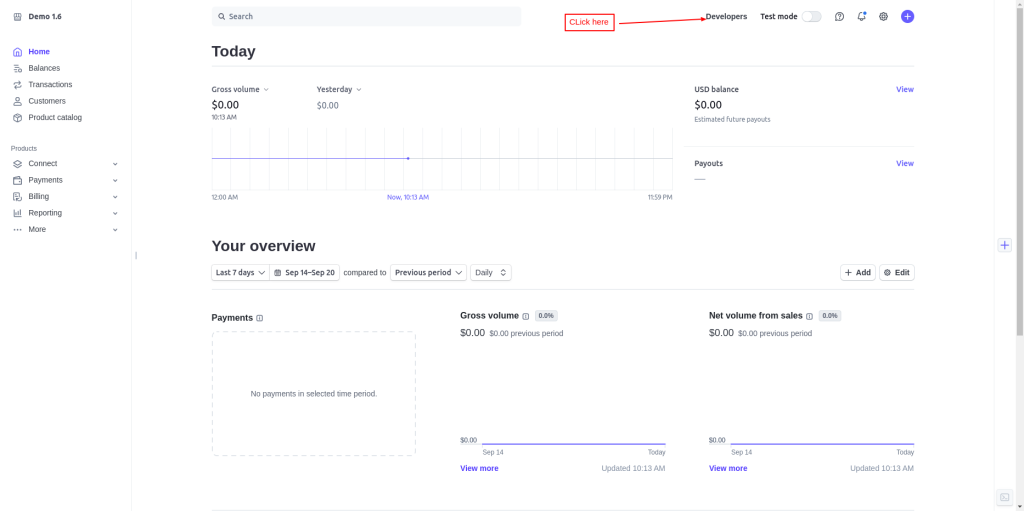
Admin needs to have their account on Stripe Payment Gateway.
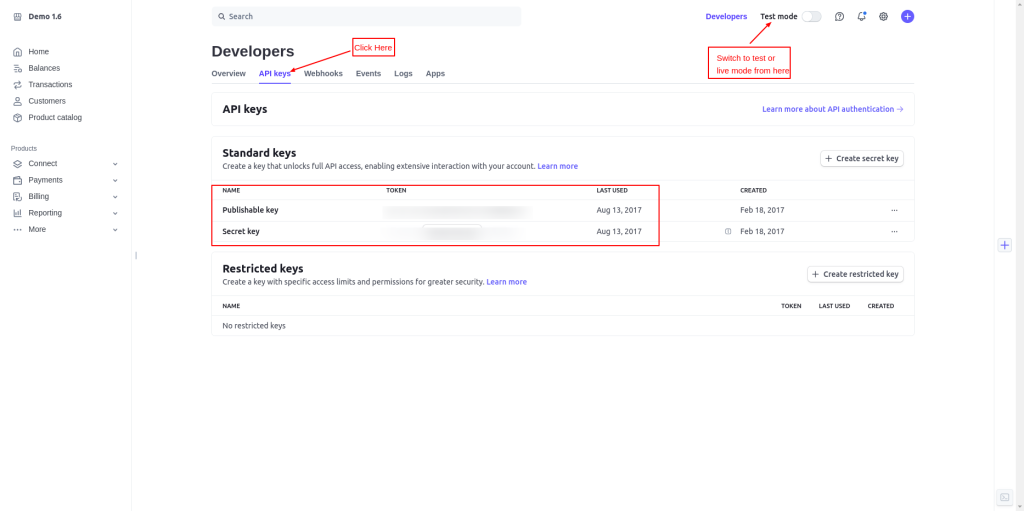
After logging in to your account, click on the developer’s option
Now, click on the API keys tab to get the API key for both Test & Live modes.
Admin can switch to Test or Live mode.
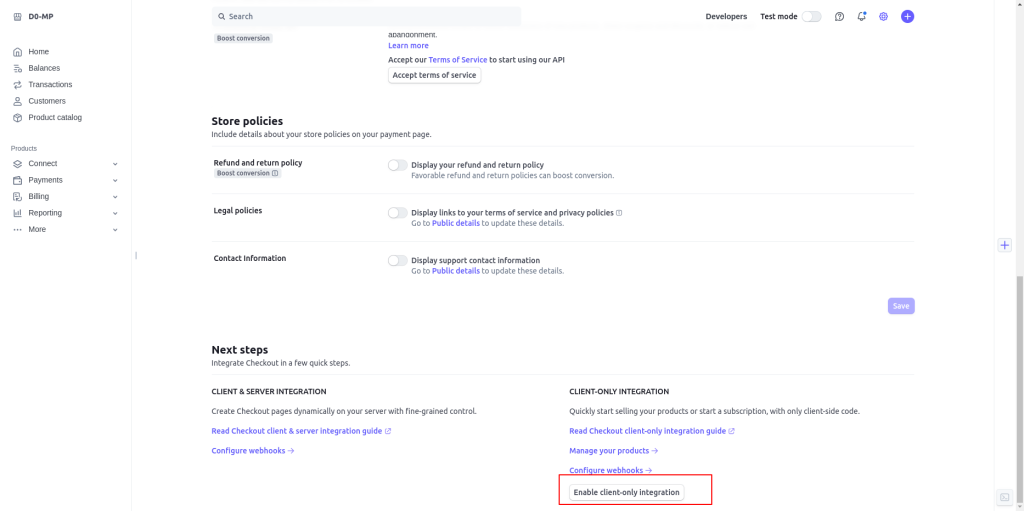
For new SCA(Strong Customer Authentication), the admin has to enable Checkout Client Integration as shown below:
As per the requirement, the admin can fill the API keys in the module configuration.
Navigating The Frontend Workflow In QloApps Stripe Payment Gateway
On the front end, the user will find the option to pay with Stripe Gateway at the checkout page.
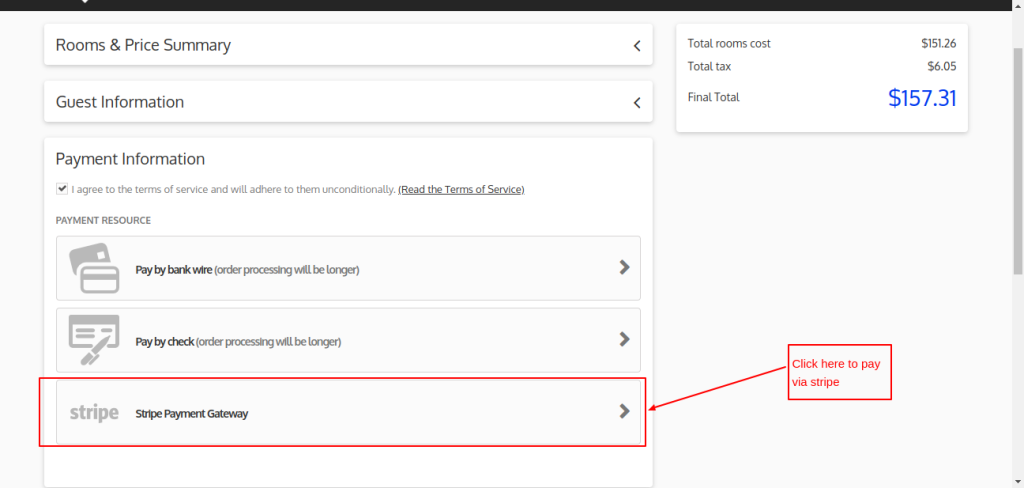
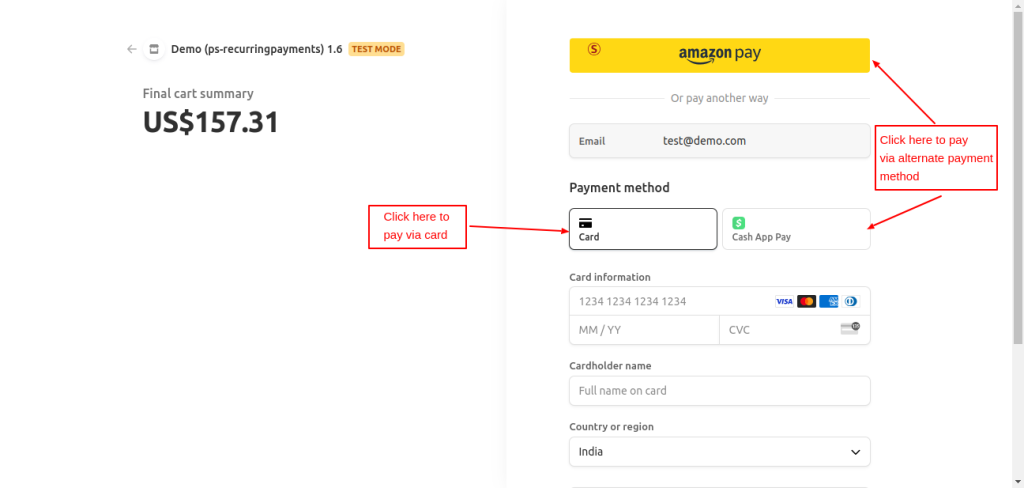
Once the user clicks on Stripe he will be redirected to the payment page where he can complete his payment from card or any alternate payment method supported by his cart currency.
Customers can also pay via the Stripe payment gateway from the backend. There are two options:
- The admin can send a payment link to the customer’s email.
- Admin can process the payment on the customer’s behalf from their stripe payment gateway.
After the payment is completed, the admin can send a confirmation message to the customer.
Refunds Made Simple: How To Use The QloApps Stripe Payment Gateway
Using the Stripe Payment Gateway, you can easily manage the refund process of your customers. Here’s how:
All Stripe transactions will be listed under the ‘Stripe Transactions’ tab. By clicking on this tab, you will see a list of all transactions processed through Stripe.
Now click on the View Detail button. On this page, you will have the details of the transaction.
- Choose the refund type: full refund or partial refund(enter the amount for partial refund)
- Enter a remark for the refund.
- Click on the “Refund” button to initiate the refund process.
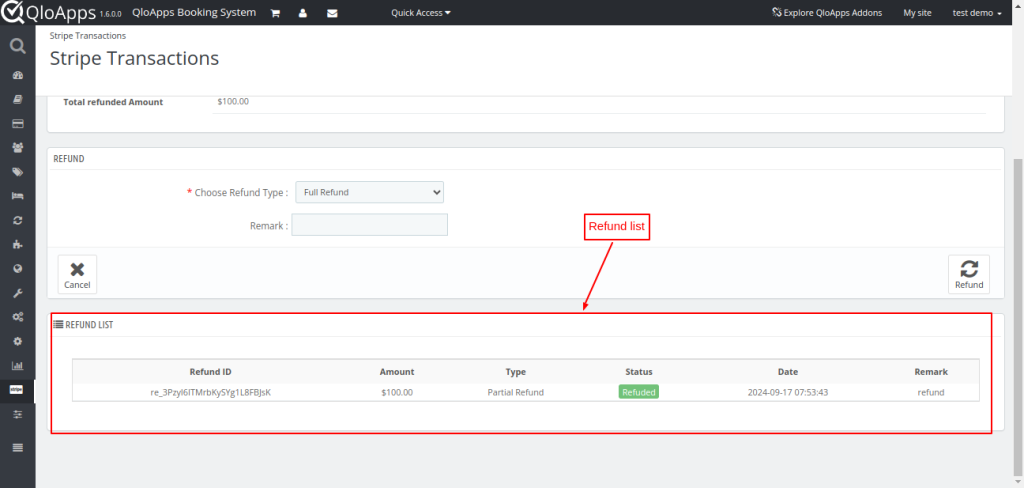
- Once you’ve processed the refund, a record for that refund will be created on the “Stripe Transactions” page.
Wrapping Up
This was all from the QloApps Stripe Payment Gateway. I hope I was able to clarify the functioning of the module to you.
Reach Out: We’re Ready to Assist
If you want to learn about the functionality of QloApps then you can visit this link: QLO Reservation System – Free Open-Source Hotel Booking & Reservation System
In case of any query, issue, or requirement please feel free to raise it on QloApps Forum
Current Product Version – 4.0.0
Supported Framework Version- QloApps 1.7.x

Be the first to comment.