QloApps Social Wall Feed is an add-on for QloApps which will allow you to show your Facebook wall feeds on your hotel booking website.
Facebook is the largest social media platform. In the first quarter of 2019, Facebook reported 2.4 billion monthly active users (MAU)
This makes it very important to include your brand’s wall on your hotel booking website. It will increase the engagement on your website.
Just think about it. A user comes on your website and sees your wall. This will increase his dwell time which is very important in terms of modern-day SEO.
Then he sees the images of your hotel, your guests comments, and likes. This will motivate him to make a booking.
And that is why we have a made this add-on for you.
So let us check how we can install and use QloApps Social Wall Feed on your QloApps hotel booking website.
QloApps Social Wall Feed’s Features
- The Facebook wall post will be displayed on the front page.
- Admin can select the position where he wants to display the Facebook Wall Feed at Front End.
- Admin can select the CMS pages where he wants to display Facebook Wall Feed at Front End.
- The Admin can hide the cover photo from the header of Wallfeed.
- Admin can set the height and width of the wall.
- Admin can choose to display the custom button on the page or not.
Installation of QloApps Social Wall Feed module
The installation of any module is very simple in QloApps.
- Go to Module and Services tab
- Click on Add New Module
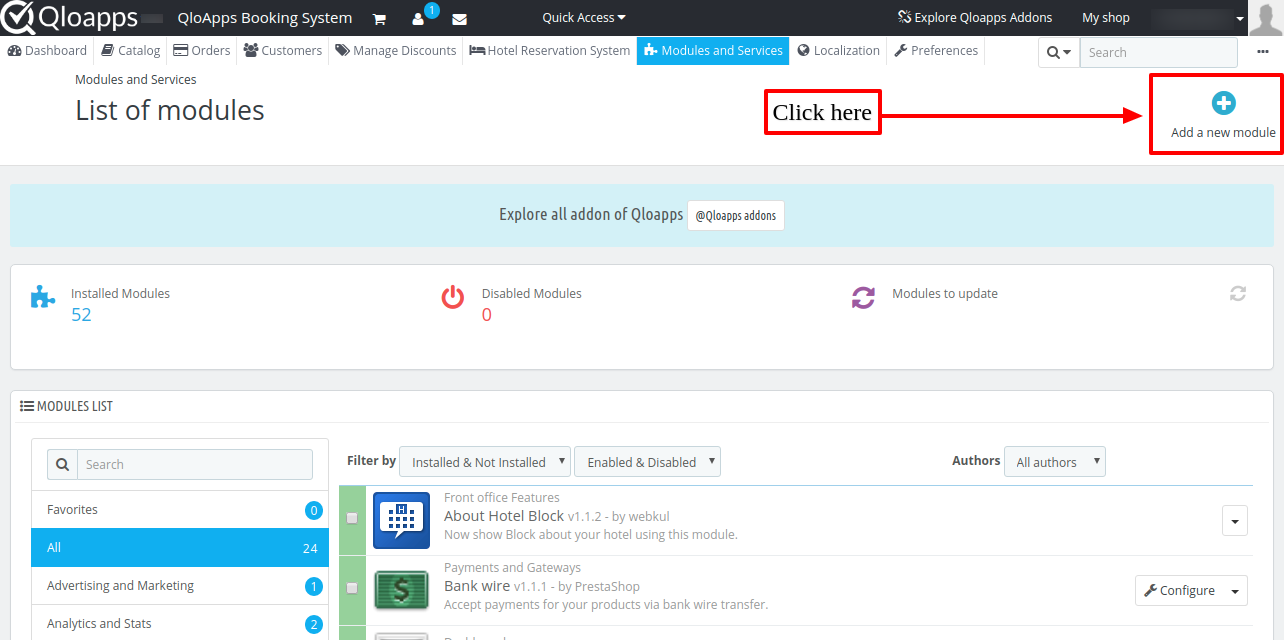
- Now upload the Zip file of Module and click on Install

Now you have installed the module. So let us check the Module Configuration
Module Configuration
After successful installation let us configure the module. Please go to the Hotel Reservation System →Settings to find the configurations.
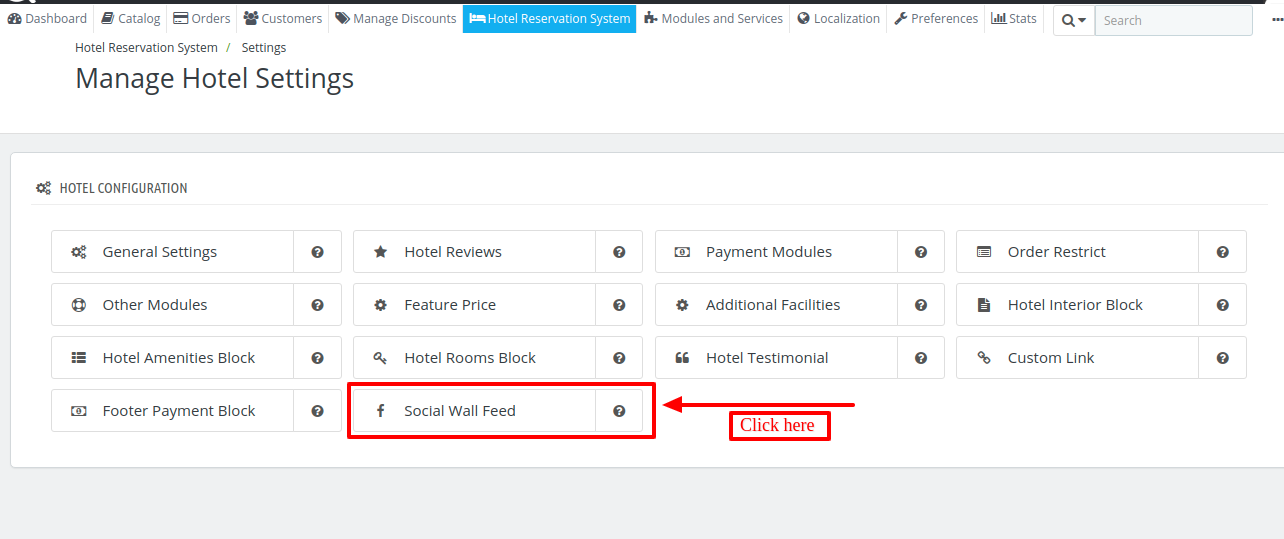
Click this button to go to configure page.

Effects of each field on Front
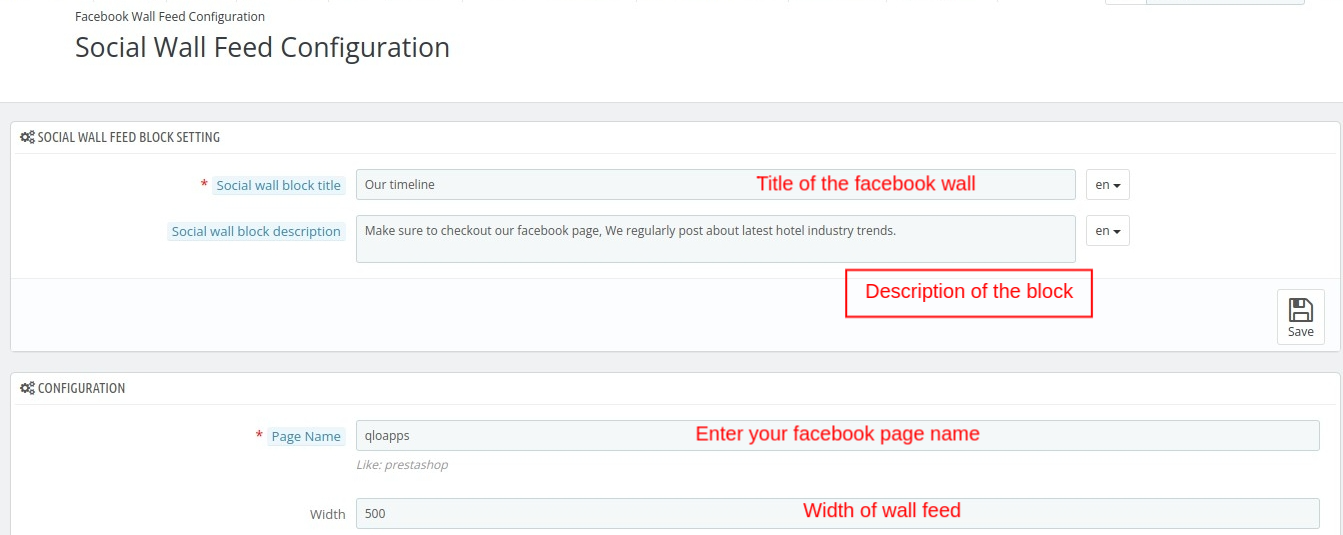
Page Name: Enter the Facebook whose wall feed you want to show
Width: Decide the width of Wall Feed Box
Height: Decide the width of Wall Feed Box
Display on: Enter where you want to show the Wall Feed Box. There are three option home page, left column, and right column

On the Room Listing page

Display on CMS Pages: Select the CMS pages on which you want to show the Wall Feed.
To display the Facebook Wall Feed on your CMS page you will have to add the following custom hook.
Add Custom Hook
tpl
{hook h="displayCMSPage" page=$cms}

in file '/themes/default-bootstrap/cms.tpl' where {$cms->content}
displayed in the first if condition.
Final code will be
html
<div class="rte{if $content_only} content_only{/if}">
{$cms->content}
{hook h="displayCMSPage" page=$cms}
</div>
Once the hook is added then wall feed will start showing up on the CMS page

Language: Select the language of your wall feed
Tabs: Which facebook tabs you will like to display
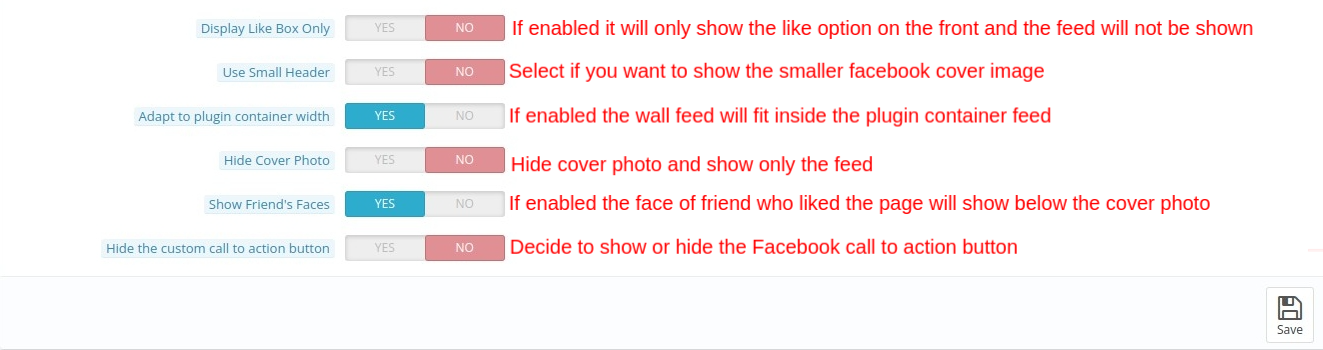
Display Like Box Only: When you enable this option then it will only show the page like option and hide the wall feed

Use Small Header: This field will allow you to decrease the size of the facebook header shown in the feed box

Adapt to plugin container width: The feed box will fit inside the plugin-container width.
Hide Cover Photo: You can hide the cover photo and show only feeds

Show Friend’s Faces: If enabled then the picture of friends who have like the page will be visible below the cover photo
Hide the custom call to action button: If you have any call to action button on your page then you can show or hide it
Conclusion
This was all from the QloApps Social Wall Feed. I hope I was able to clarify the functioning of the module to you.
If you want to learn about the functionality of QloApps then you can visit this link: QLO Reservation System – Free Open-Source Hotel Booking & Reservation System
In case of any query, issue or requirement please feel free to raise it on QloApps Forum
Lastly, do not forget to drop your thoughts in the comments.
Current Product Version – 4.0.0
Supported Framework Version- QloApps 1.7.x

Be the first to comment.