QloApps OxPay Payment module allows users to make safe and secure online transactions via the OxPay Payment gateway.
Numerous payment options, including credit cards, debit cards, net banking, and others are easily accessible to customers.
It will support and empower your business by providing speedy transactions. This will help to scale up the business.
Features of QloApps OxPay Payment
- QloApps Oxpay payment allows users to pay via their debit cards and credit cards.
- Payment through net banking can be easily done with the OxPay payment gateway.
- The admin can set the mode of the module in Test mode and Live Mode as per their requirements.
- The admin can easily see the list of all the transactions separately done through Oxpay at the admin end.
- As per the requirement, the admin can easily enable and disable the module.
How to install the OxPay module?
To install the OxPay module follow the given steps.
Step1. Go To Modules and Services.
Step 2: Click on “Add a new module” to add a module.
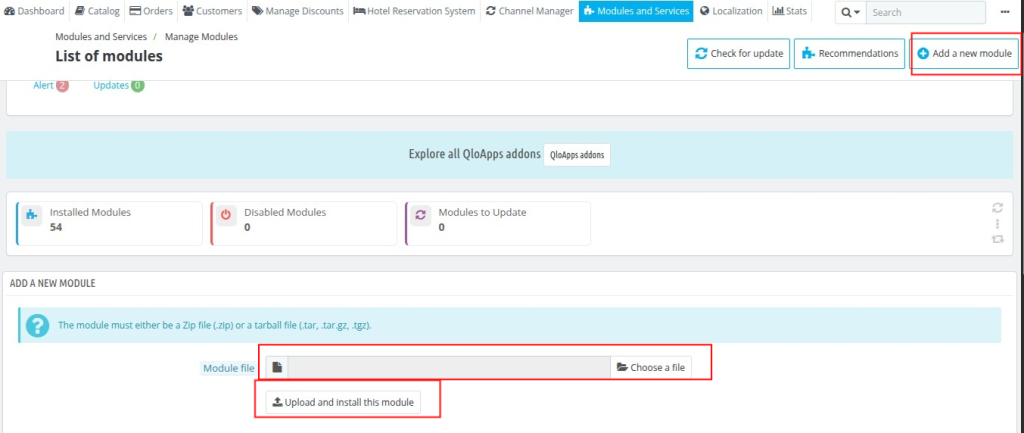
Step 2: Click on choose a file to upload the module.
Now upload the Zip file of the module for installation.
Step 3. Once the module file is uploaded then install the module. In the module list search for the “OxPay” module then click on install for installation.
After this user can configure the module.
Module Configuration
After successfully installing the module, the module configuration page will appear. To configure the OxPay module enter the following details.
Here configuration process is the same for Test mode and Live mode.
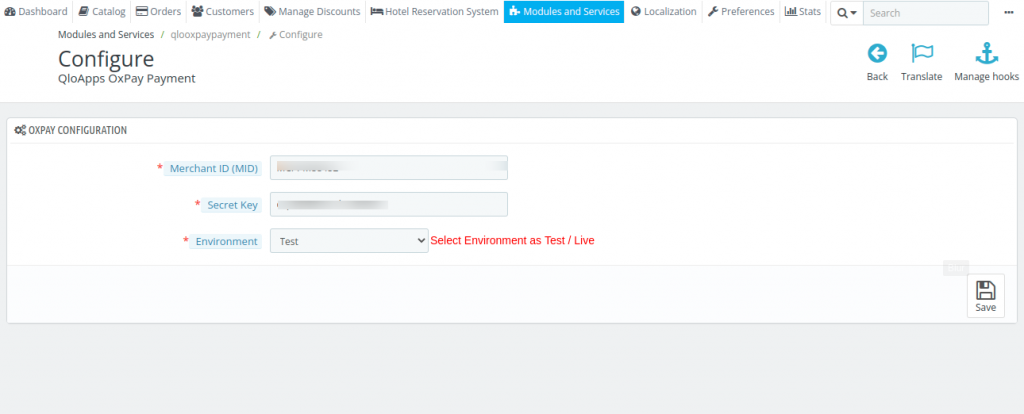
Merchant ID: Enter the Merchant ID or MID provided by the OxPay.
Secret Key: Enter the secret key provided by OxPay.
Environment: From the drop-down select environment as Test or Live.
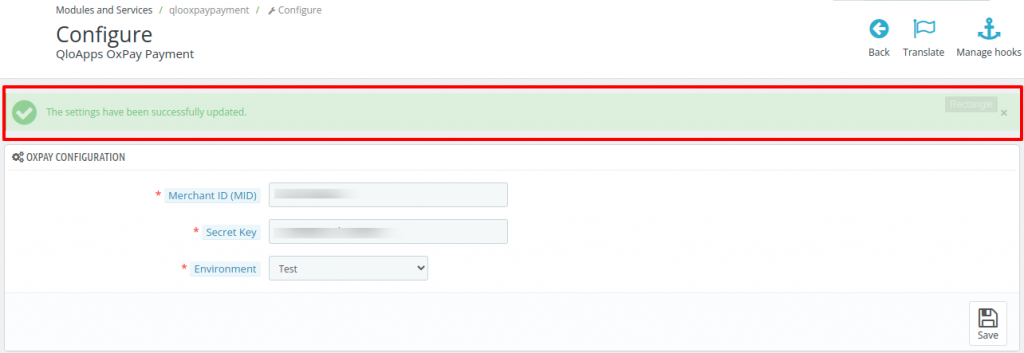
After that, click on the Save button to successfully save the configuration settings.
How to get Merchant ID and Secret Key
To get the Merchant ID and Secret key, go to the OxPay website. After that, click on try OxPay now.
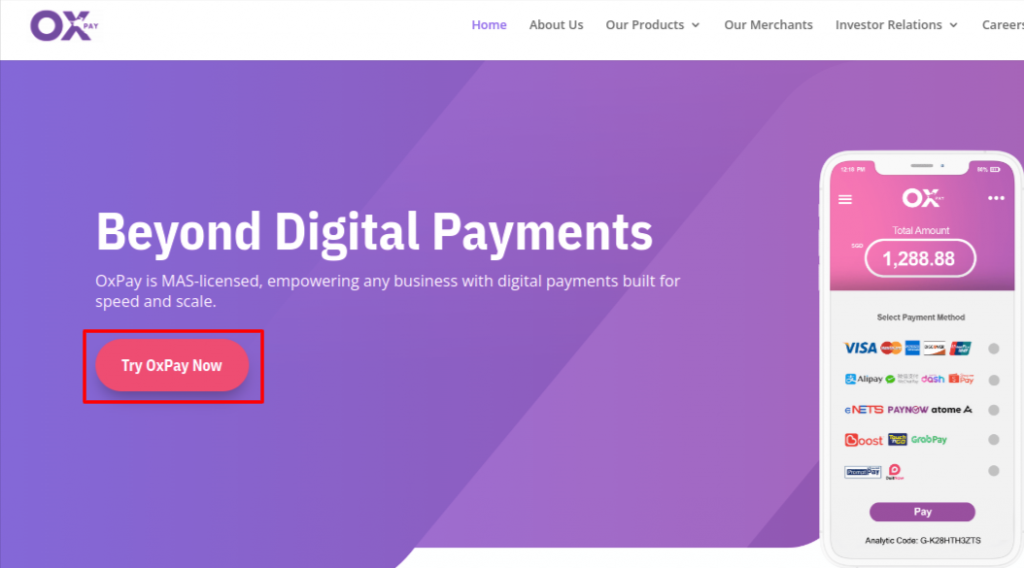
As a result, the contact OxPay page will appear.
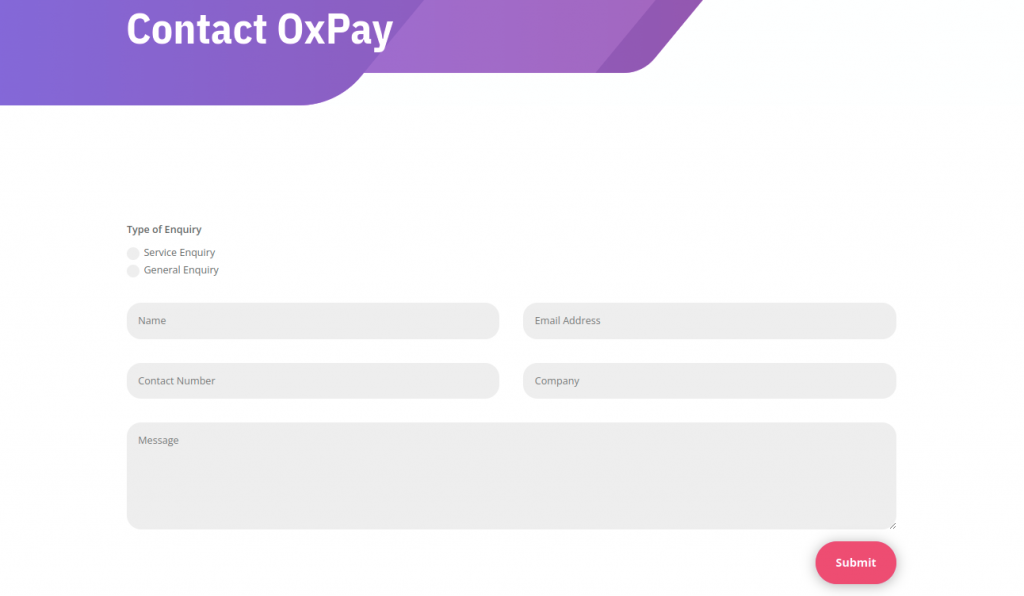
After filling out the form, click on the submit button. After that connect with the OxPay team to get the API Doc and login credentials ( Test and Live).
OxPay Module Working: Front End.
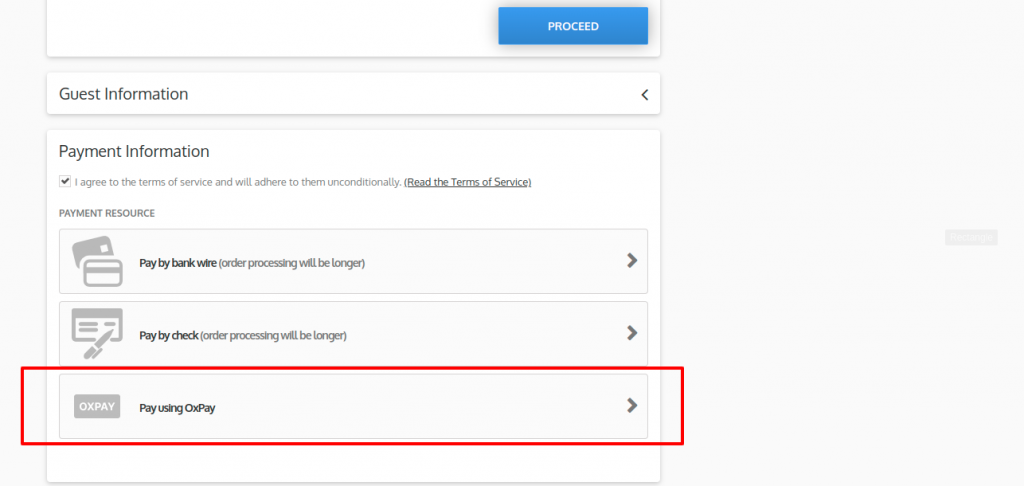
When you have added the room to the cart and proceeded with the payment, then on the “Room and Price summary” page click on “Proceed”.
After that, in “Payment Information” agree with the terms and conditions.
Now select the payment method as “OxPay“
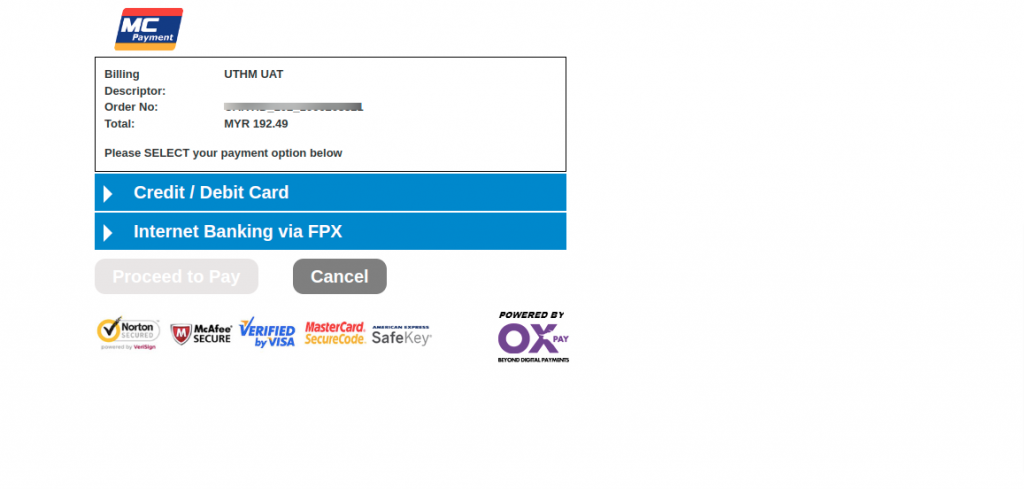
After selecting “Pay using OxPay“the following window will open. Now select your payment method.
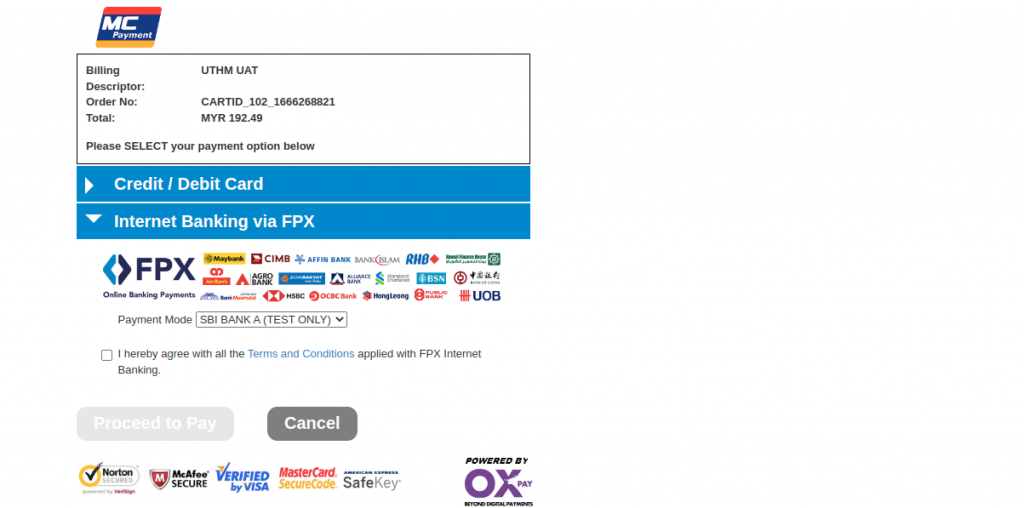
Here we have selected “Internet Banking via FPX” and the payment mode for the same. You can select your payment mode as per your choice. Now, click on “Proceed to pay“.
Transaction Details: Back End
On the backend side, the admin can view the transactions made through OxPay. Click on the account icon as shown in the below image and select “OxPay Transactions.”
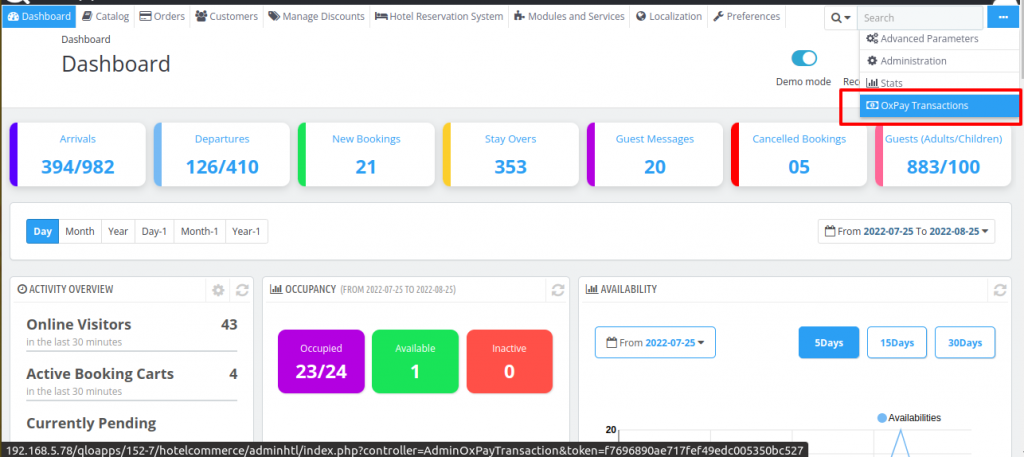
Therefore, all the transactions by OxPay will be seen.
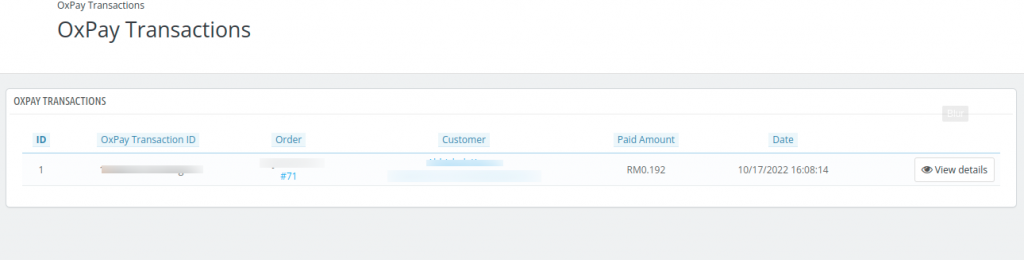
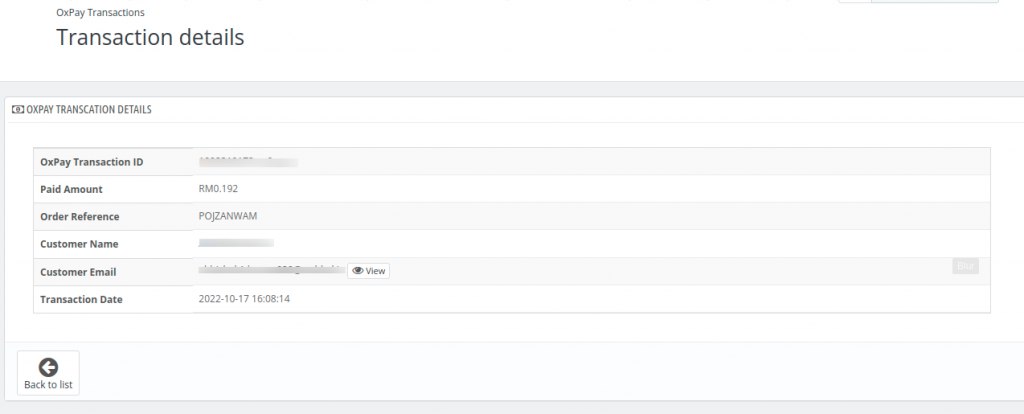
After that, click on View Details to check the transaction details.
Conclusion
This was all from the QloApps OxPay Payment. I hope I was able to clarify the functioning of the module for you.
If you want to learn about the functionality of QloApps then you can visit this link: QloApps Reservation System – Free Open-Source Hotel Booking & Reservation System.
In case of any query, issue, or requirement please feel free to raise it on QloApps Forum.
Current module version: 4.0.0
Supported QloApps framework: 1.7.x

Be the first to comment.