The QloApps Marketplace MangoPay Payment Gateway is designed to simplify and automate payments across a multi-vendor hotel marketplace.
When guests book a room, the system automatically deducts the admin commission and instantly settles the remaining amount with partner hotels.
With simple setup and a transactions panel, the MangoPay Gateway lets admins control marketplace payments while providing sellers fast, automated settlements.
NOTE: Before purchasing this module, please ensure that MangoPay is available and supports your country and currency. This helps avoid setup or payment restrictions.
Features of the QloApps Marketplace MangoPay Payment Gateway Module
- Admin can accept payments through MangoPay by enabling it as a checkout payment option.
- Admin can allow sellers to receive payments directly through MangoPay, with deduction of the admin commission.
- Admin can monitor all payment activity through the dedicated Transactions tab for complete visibility.
- Admin can enable or disable MangoPay based on marketplace requirements.
- Provides a secure and reliable payment solution with support for multiple currencies and global regions.
- Automates financial operations for marketplace platforms, reducing manual payout work and increasing accuracy.
Install the QloApps Marketplace MangoPay Payment Gateway Module in QloApps
Note: Ensure that the QloApps Marketplace module is installed and active before installing this add-on.
You can install the QloApps Marketplace MangoPay Payment Gateway module in just a few steps:
- Go to the Modules & Services tab in your QloApps back office.
- Click on Add New Module.
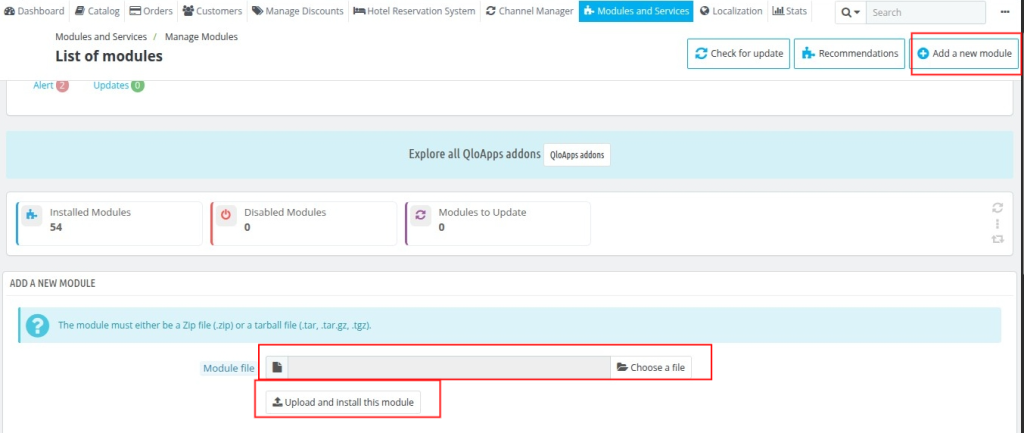
- Under Module Installation, upload the module ZIP file.
- Click Upload and Install this module to complete the installation.
Once these steps are completed, the module will be successfully installed and ready for configuration.
Configure the QloApps Marketplace MangoPay Payment Gateway
After installation, the module will appear in your Manage Modules list.
To configure it:
- Log in to your QloApps Admin Panel and navigate to Modules & Services.
- Use the search bar to locate the module in the list.
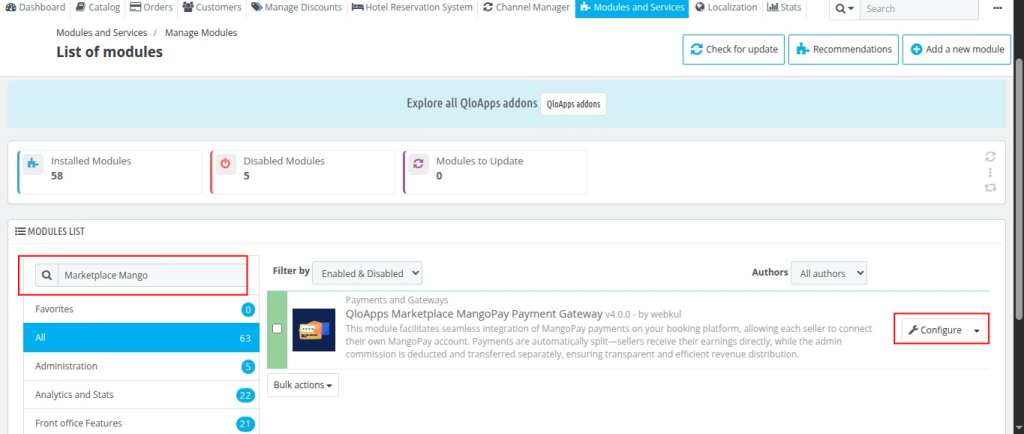
- Click Configure and begin the setup.
Once you click Configure, you will see the following settings:
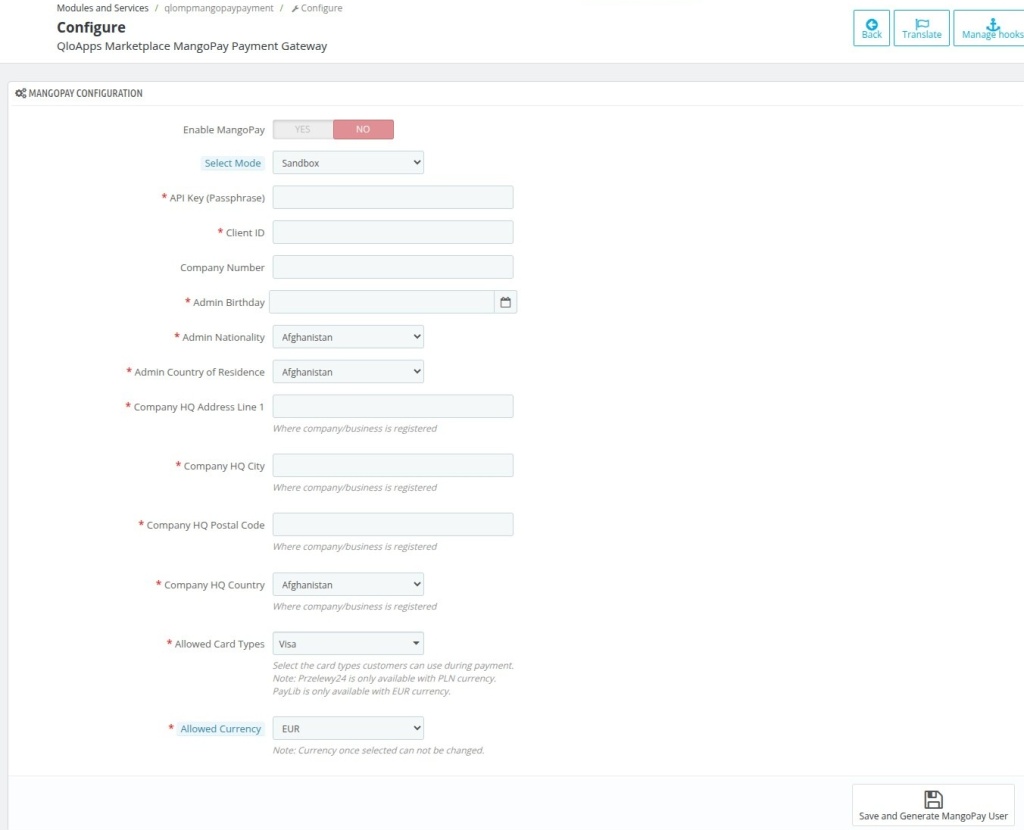
- Enable MangoPay – Turn MangoPay payments on or off for your marketplace.
- Select Mode – Choose Sandbox for testing or Live mode for real payments.
- API Key (Passphrase) – The secure key used to connect your MangoPay account to QloApps.
- Client ID – The unique identifier of your MangoPay account required for authentication.
- Company Number – The official registration number of your company.
- Admin Birthday – The date of birth of the marketplace admin required for verification.
- Admin Nationality – The admin’s nationality for identity validation.
- Admin Country of Residence – The country where the admin currently lives.
- Company HQ Address Line 1 – The primary address where your company is legally registered.
- Company HQ City – The city where your company is officially registered.
- Company HQ Postal Code – The postal/ZIP code of your company’s registered address.
- Company HQ Country – The country where your company is legally registered.
- Allowed Card Types – Choose which card type guests can use for payments.
- Allowed Currency – Select the currency guests can use to pay through MangoPay.
Note: Przelewy24 is only available with PLN currency. PayLib is only available with EUR currency.
How Admin Gets MangoPay API Key and Client ID
- Create a MangoPay business account by signing up and registering your business details.
- Log in to MangoPay using your credentials.
- Go to the “Developer” and click “API Accounts”.
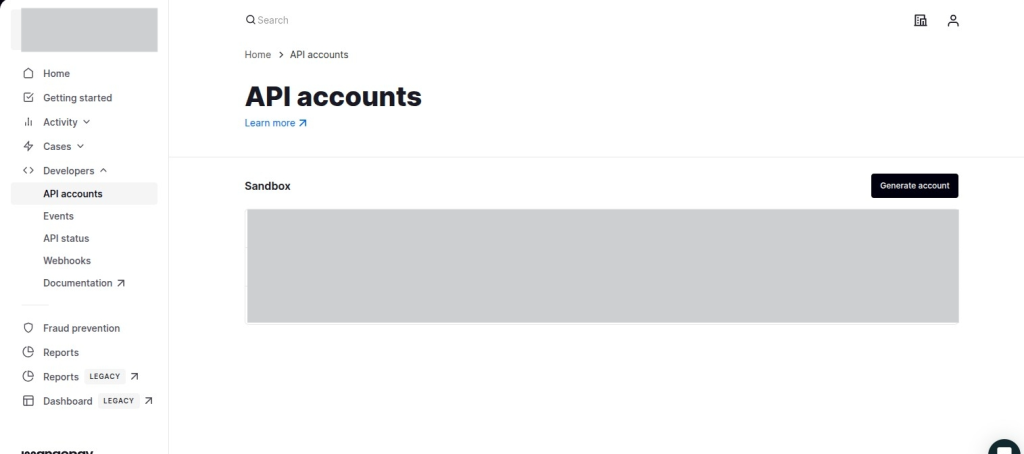
- Then Click on Generate Account.
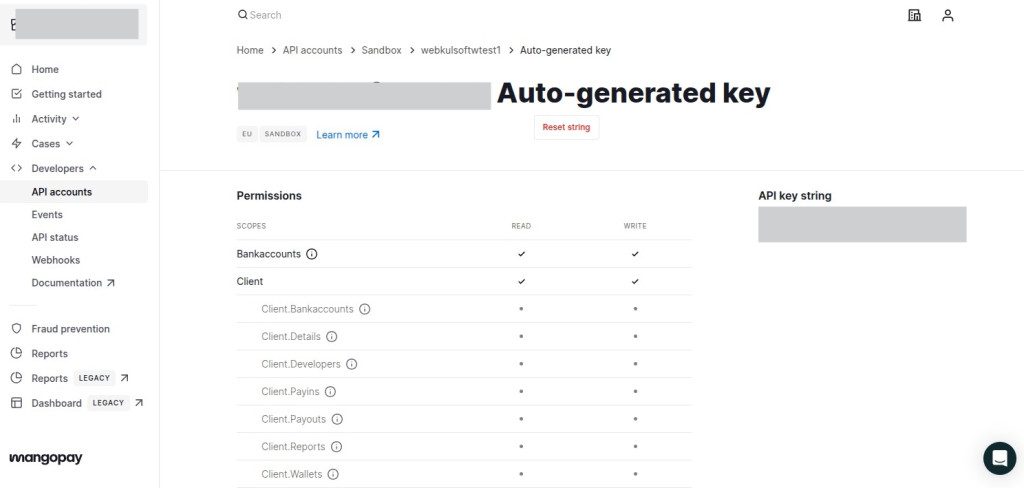
- Paste the API Key and Client ID into the MangoPay configuration fields in QloApps.
How Admin Can View QloApps Marketplace MangoPay Transactions
- Log in to the QloApps back office using admin credentials.
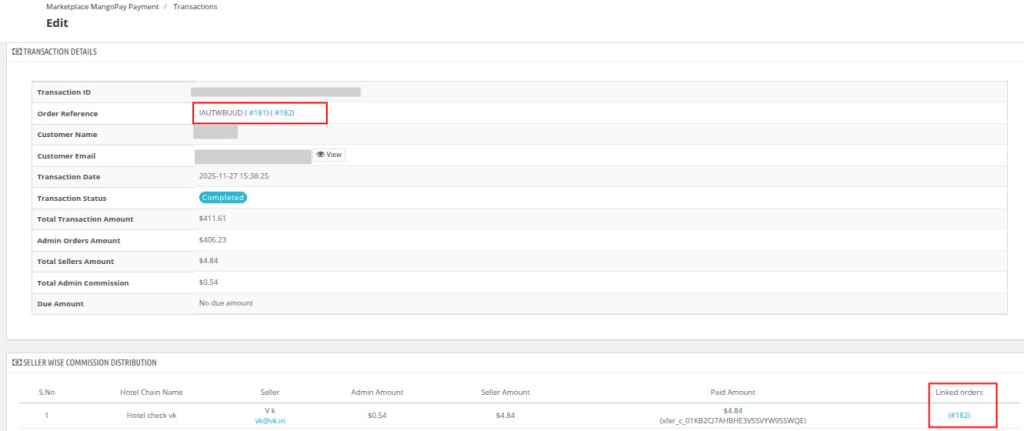
- Go to MP MangoPay and click on the Transactions tab to access all MP MangoPay payment records.

Note: Admin can view detailed MangoPay transaction information, including seller payouts, admin commission, and linked orders, by clicking View in the Transactions tab.
Seller Marketplace MangoPay Manage
Once the admin enables the QloApps Marketplace MangoPay Payment Gateway module, sellers can connect their MangoPay accounts to receive payouts.
A new tab, Manage MangoPay, will appear in the seller dashboard where the seller must fill in the required business and personal details.
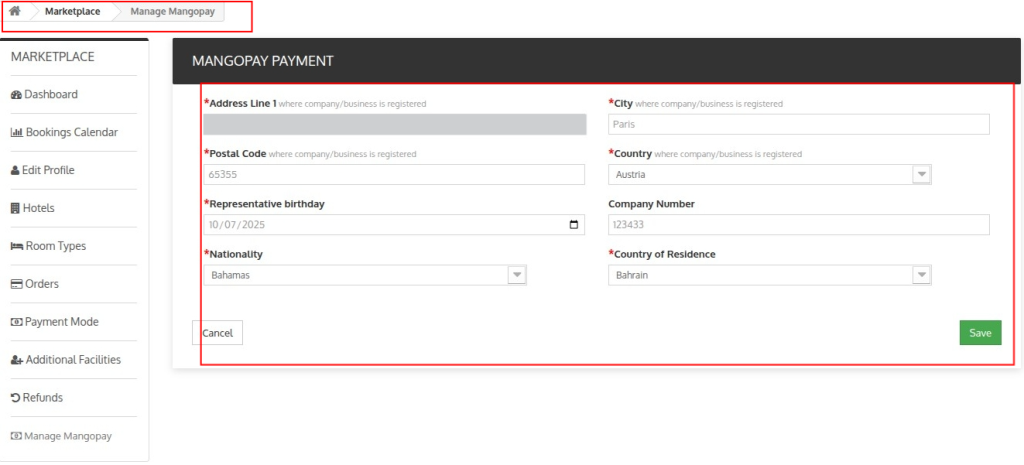
After submission, the system creates the seller as a MangoPay user with a wallet in the admin’s account, enabling secure and automated payouts for bookings.
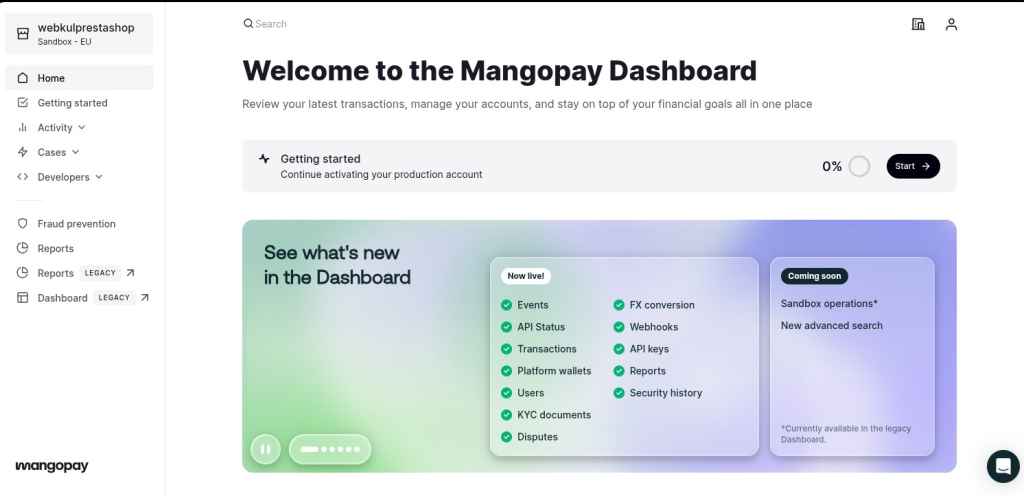
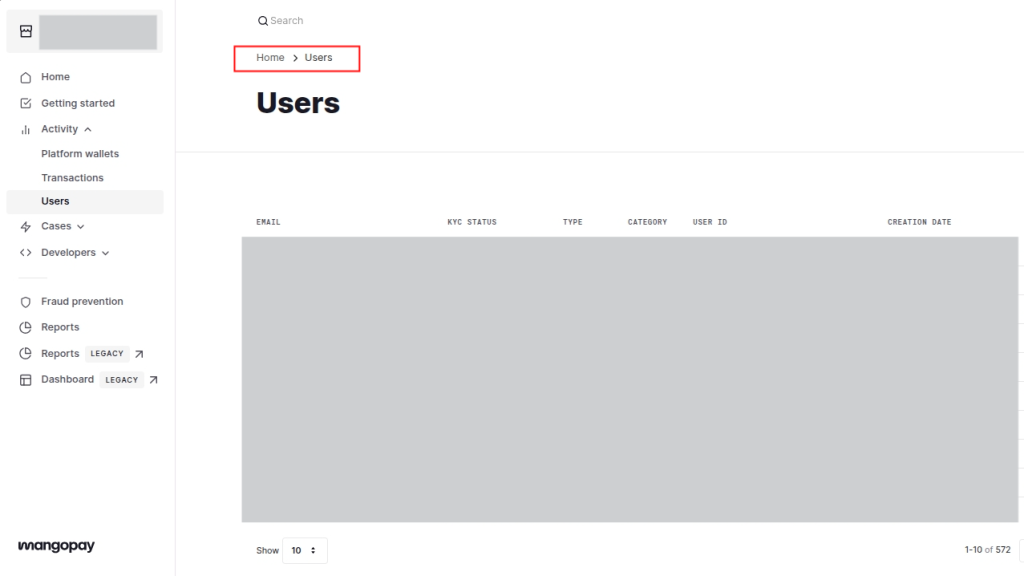
How the admin will see lists of all Mangopay users
To view all MangoPay users, the admin must log in to the MangoPay Dashboard at hub.mangopay.com and click on the “Users” section to see the complete list of registered marketplace users.
How can guests pay via MangoPay
When a guest proceeds to checkout, they can choose MangoPay as their payment option.
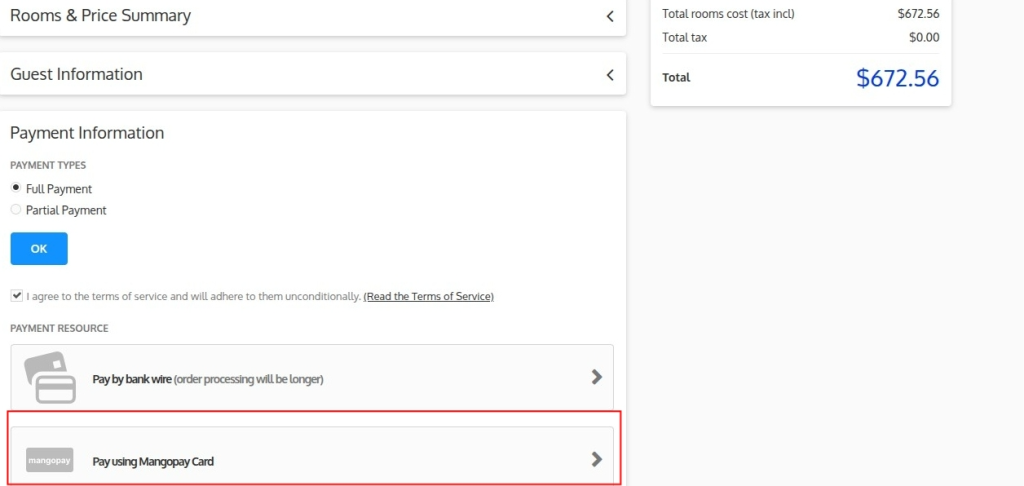
Once selected, the system redirects them to the MangoPay payment page, where they complete the transaction using supported cards.
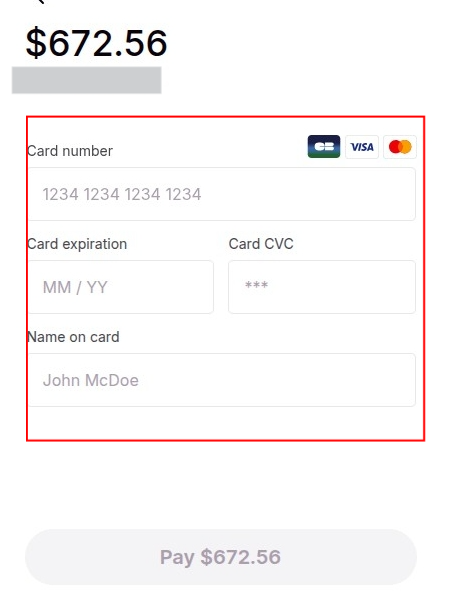
After a successful payment, QloApps automatically splits the booking amount between the admin and the seller based on the configured commission rules.
Conclusion
The QloApps Marketplace MangoPay Payment Gateway provides a secure, streamlined, and fully automated payment solution for multi-vendor hotel marketplaces.
With easy setup, transparent reporting, and reliable processing, the module helps admins and hotels manage payments efficiently and ensure a smooth guest booking experience in QloApps Marketplace.
Current Version: 4.0.0 & 1.0.0
Supported Framework Version 1.7.x & 1.6.x

Be the first to comment.