With the QloApps Marketplace Braintree Payment Gateway Module, the marketplace admin can significantly simplify the process of managing commissions and seller booking amounts.
This module allows guests to pay via Braintree, automatically splitting the booking amount in real-time, transferring the shares to both admin and seller accounts, saving time and ensuring accuracy.
Explore how the admin can configure the QloApps Marketplace Braintree Payment Gateway to streamline seller payouts and enhance the marketplace experience.
NOTE: Before purchasing this module, you need to visit “Braintree” to confirm the availability of the Braintree payment gateway in your country.
Key Features of The QloApps Marketplace Braintree Payment Gateway:
- Multiple Payment Options: Accept payments via credit cards, PayPal, and Google Pay.
- Card Support: Supports major cards, including Amex, Mastercard, Visa, JCB, and Discover.
- Security and Reliability: Robust security measures ensure protected and reliable transactions.
How to Install the QloApps Marketplace Braintree Payment Gateway:
NOTE: Kindly install the QloApps Marketplace module before installing this module.
- Go to the “Modules and Services” tab.
- Click on “Add New Module”.
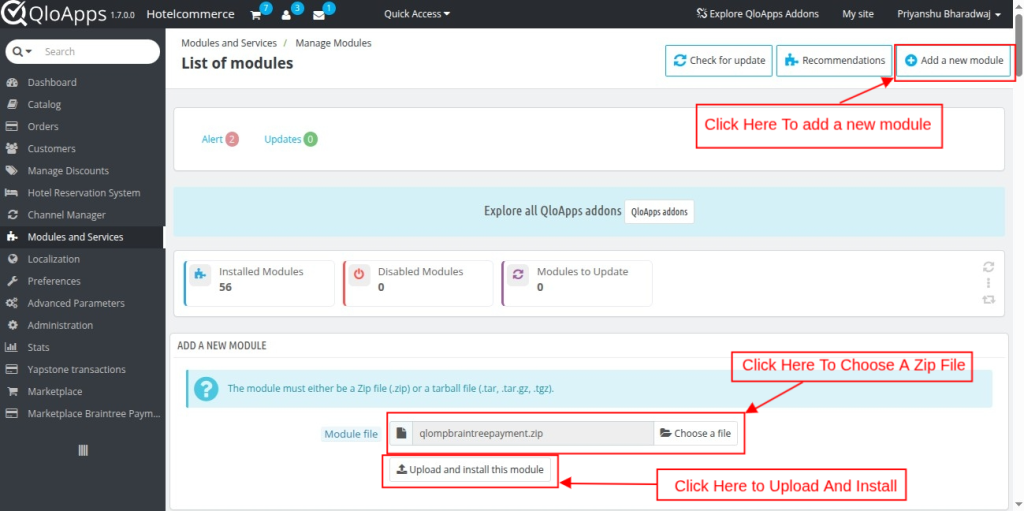
Click on ‘Choose a zip file‘ and upload the zip file of the module.
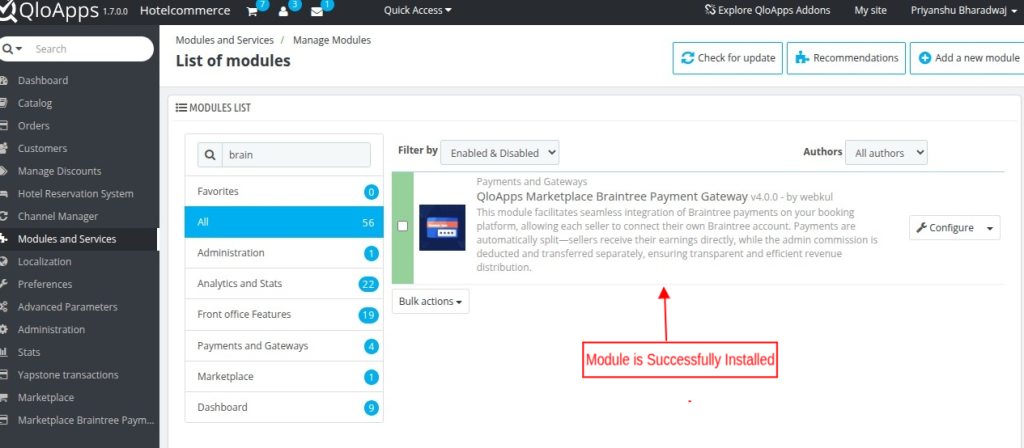
By following these steps, the Admin can install the module successfully
Configuration Process:
Clicking on the configure button will redirect you to the configuration page.
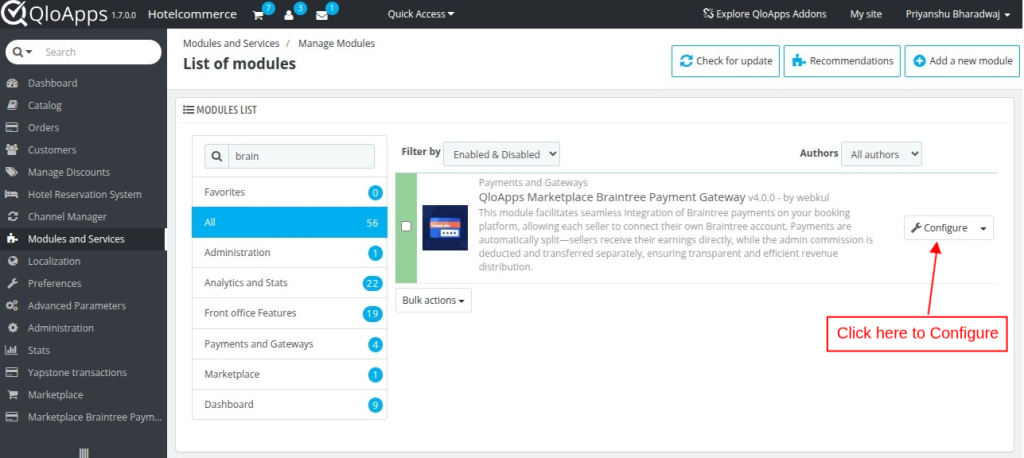
Configuration Page:
- Braintree Configuration:
The configuration section lets the admin set up and manage Braintree payment gateway settings.
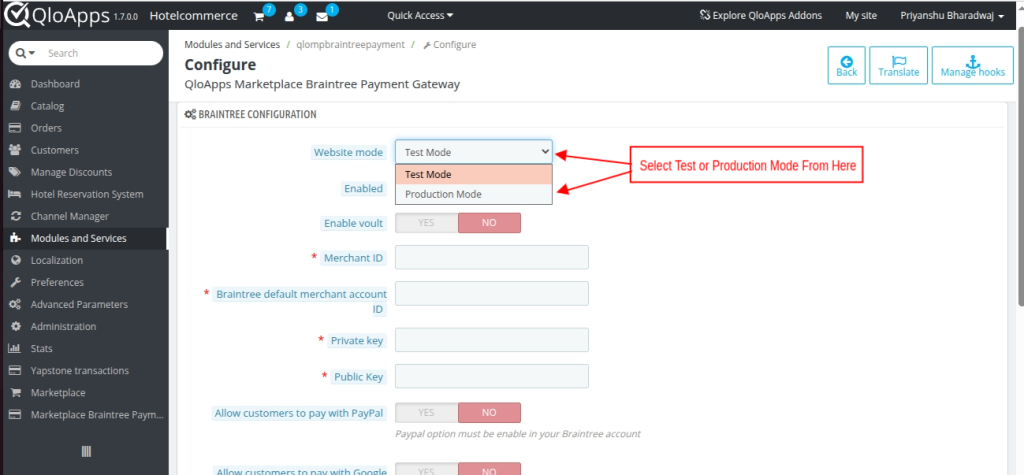
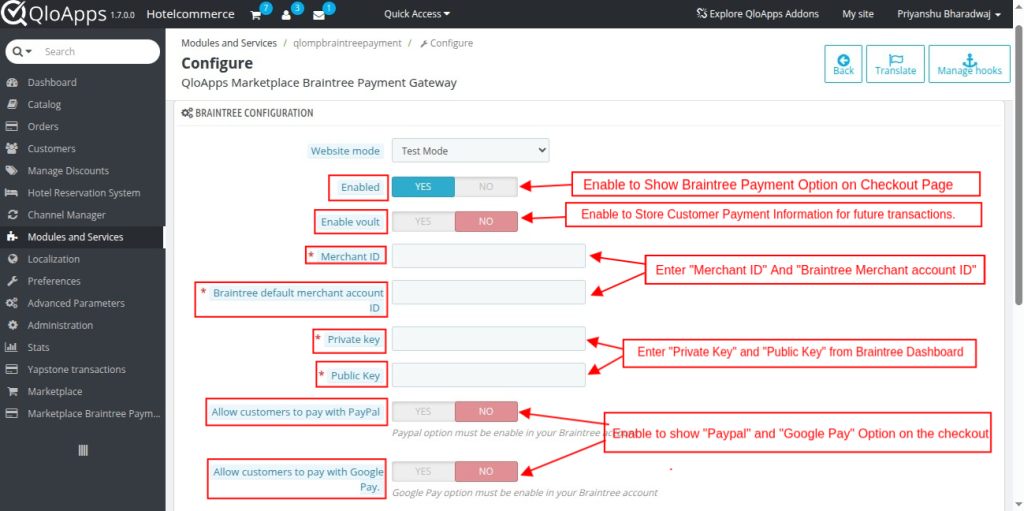
- Website Mode: Switches between Test Mode (for testing payments) and Production Mode (for real transactions).
- Enable: Enable or disable the Braintree payment gateway for customers. When enabled, the Braintree payment option will be visible and available for customers during the checkout process.
- Enable Vault: Enable or disable the Braintree Vault feature, which securely stores customer payment information for future transactions.
- Merchant ID: Enter your Braintree Merchant ID, which you can obtain from your Braintree account, to enable transactions.
- Braintree Default Merchant Account ID: Obtain your Braintree default merchant account ID from your Braintree account.
- Private Key: The unique key provided by Braintree for authenticating and securing transactions.
- Public Key: The unique key provided by Braintree for encrypting and decrypting data.
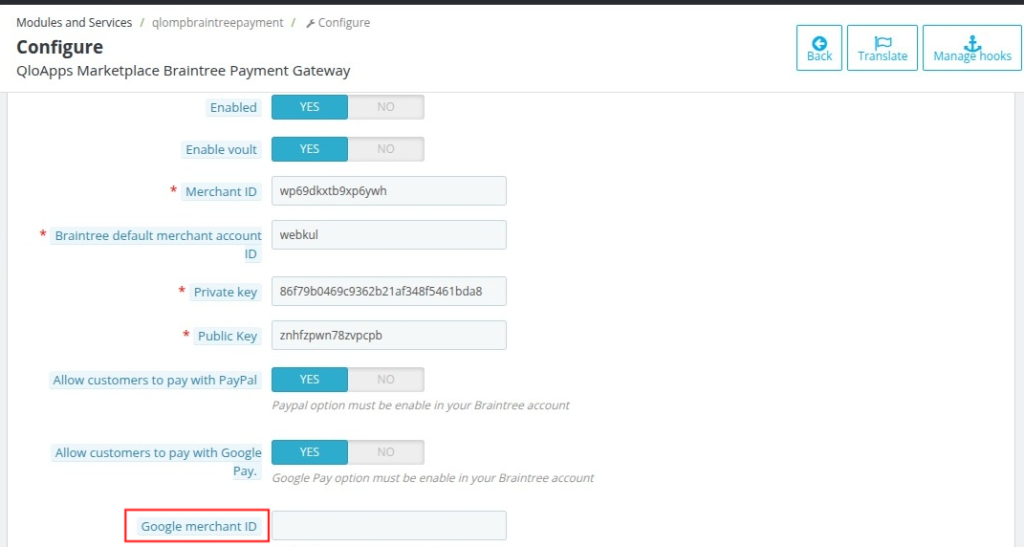
Google Merchant ID: The Google Merchant ID is obtained from the Google Merchant Center.
- Braintree Webhook Configuration:
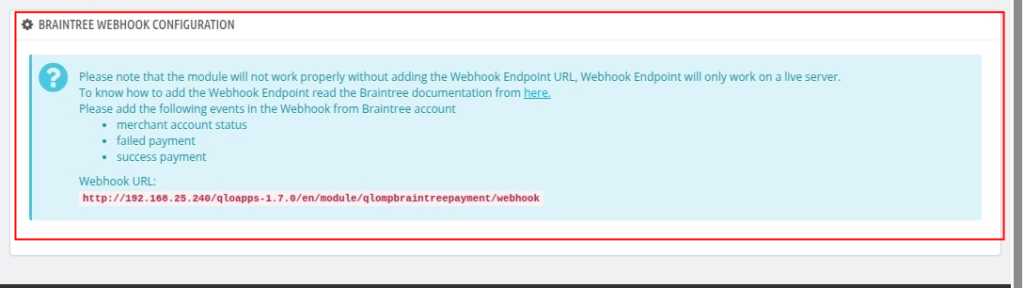
Webhooks enable real-time updates from Braintree on transactions, subscriptions, and events, helping QloApps Marketplace automatically manage actions like status changes and chargebacks.
NOTE: It only supports the currency you choose when setting up your Braintree account, so payments are processed in that currency for smooth transactions and accurate tracking.
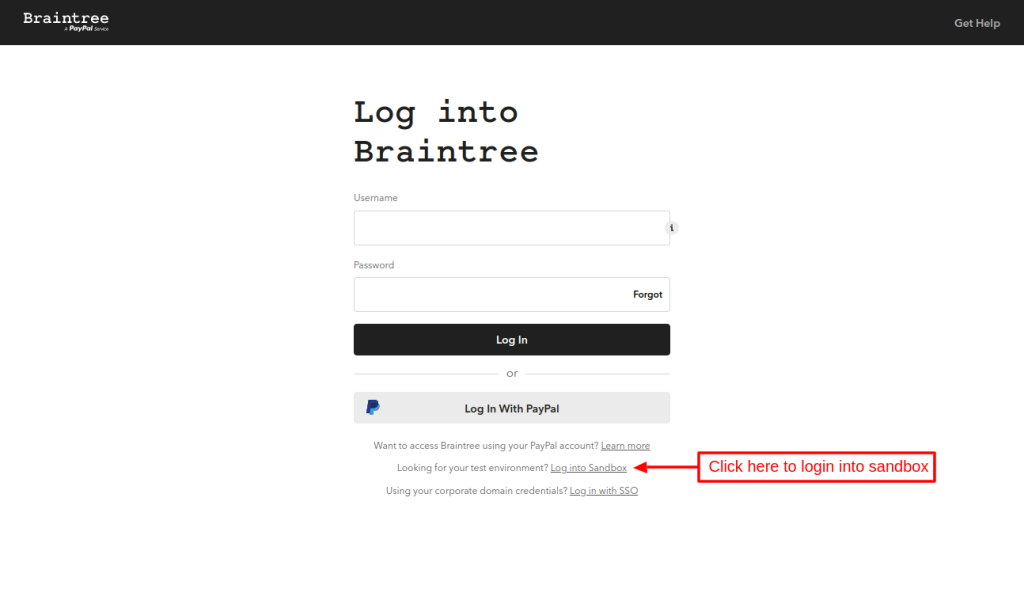
How to get API keys:
To get the API keys, the admin needs to have an account at Braintree Gateway.
The admin needs test keys for testing purposes. The admin also needs production keys for the live site.
For the test environment, log in to Sandbox.
After logging in, go to my user under Account. Here, the admin will find the API keys.
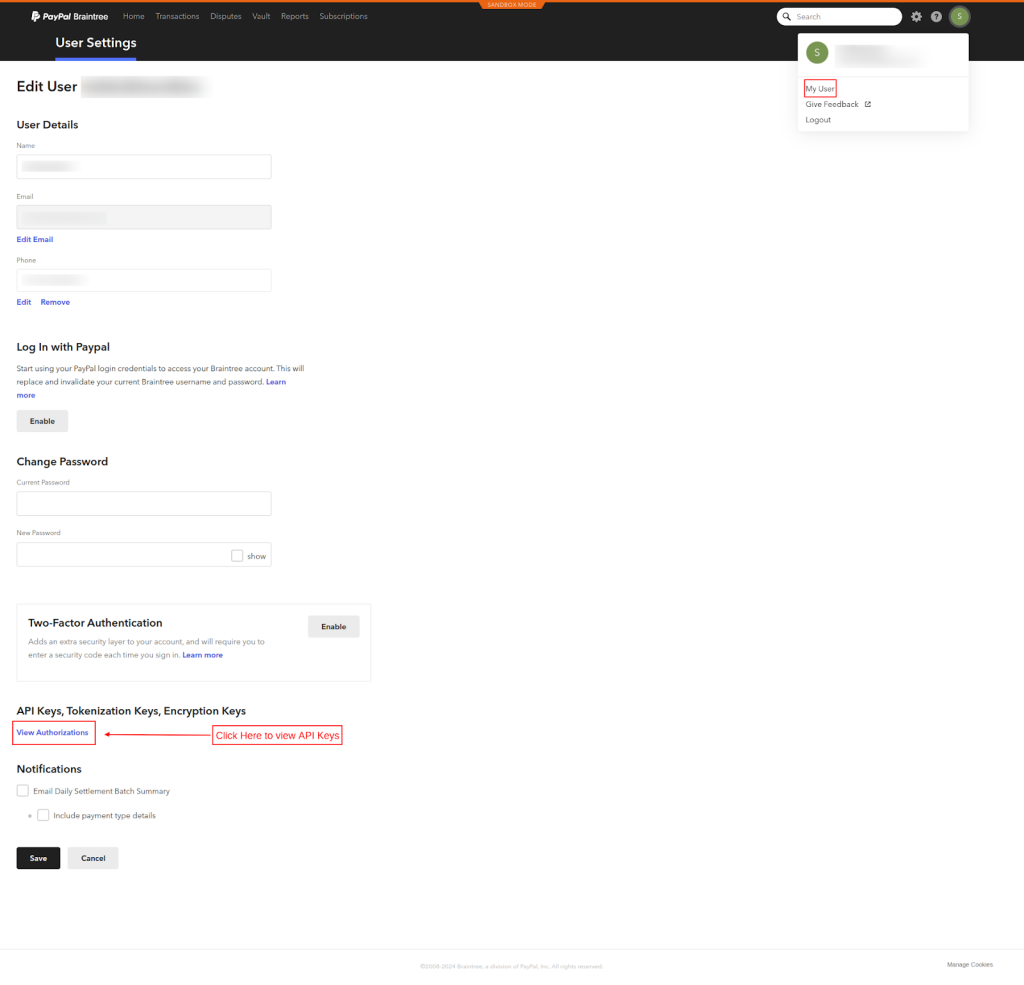
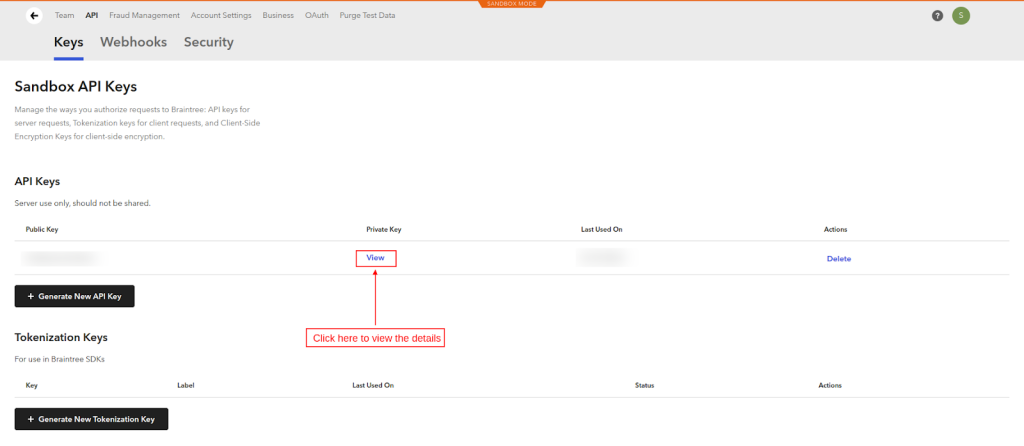
Now, click on the View API Keys button.
All the details for the Merchant ID, Private Key, and Public Key will be available here.
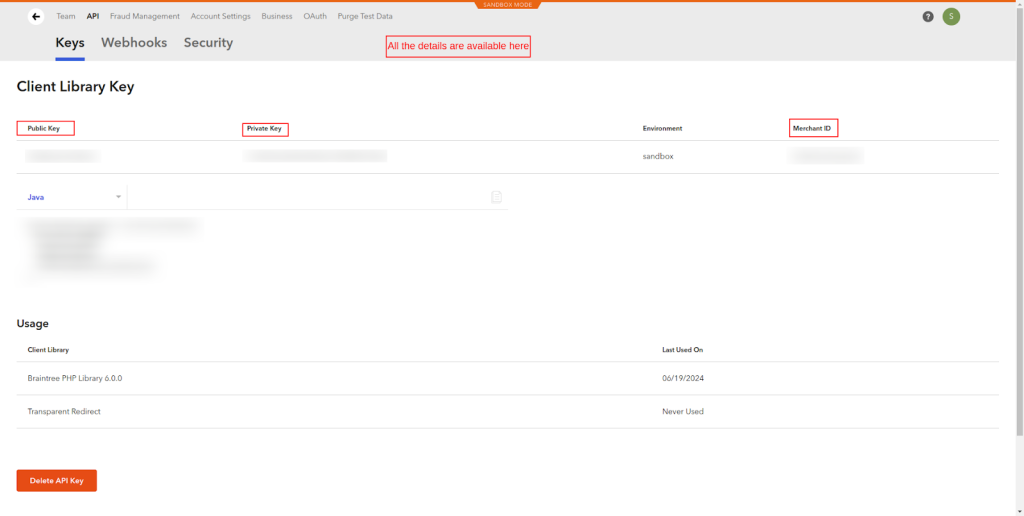
Copy and paste the Merchant ID, Private Key, and Public Key from the Braintree Account to the payment gateway configuration page.
Test Credit Card Numbers For Test Mode:
When testing your payment gateway in the test mode, you may need to use specific test credit card numbers to trigger different responses from the gateway.
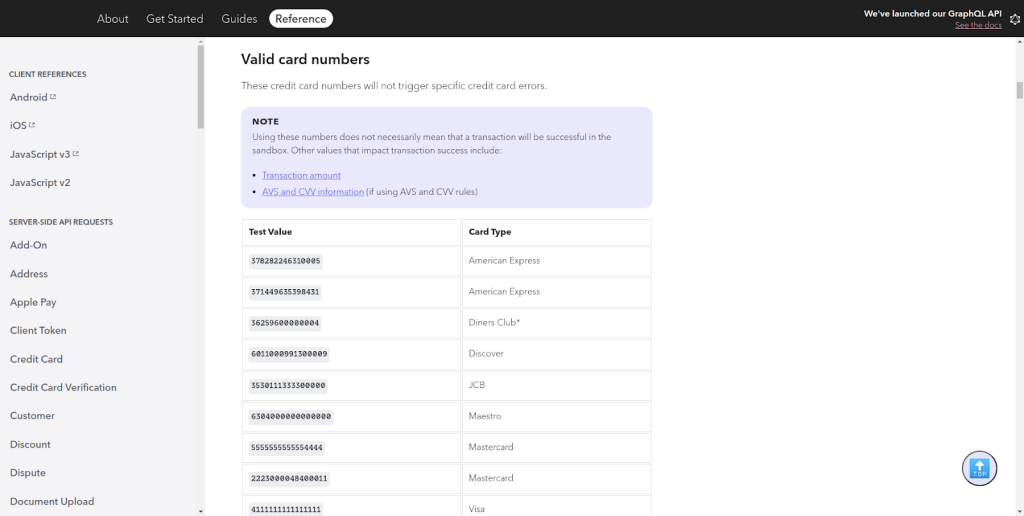
You can access the test credit card numbers from the documentation directly by clicking the link below:
https://developer.paypal.com/braintree/docs/reference/general/testing/ruby
NOTE: This will provide the specific test credit card numbers and details you need to test your payment gateway in the sandbox environment.
Front-End Workflow:
When you configure the module correctly, consumers can pay using Braintree on the checkout page.
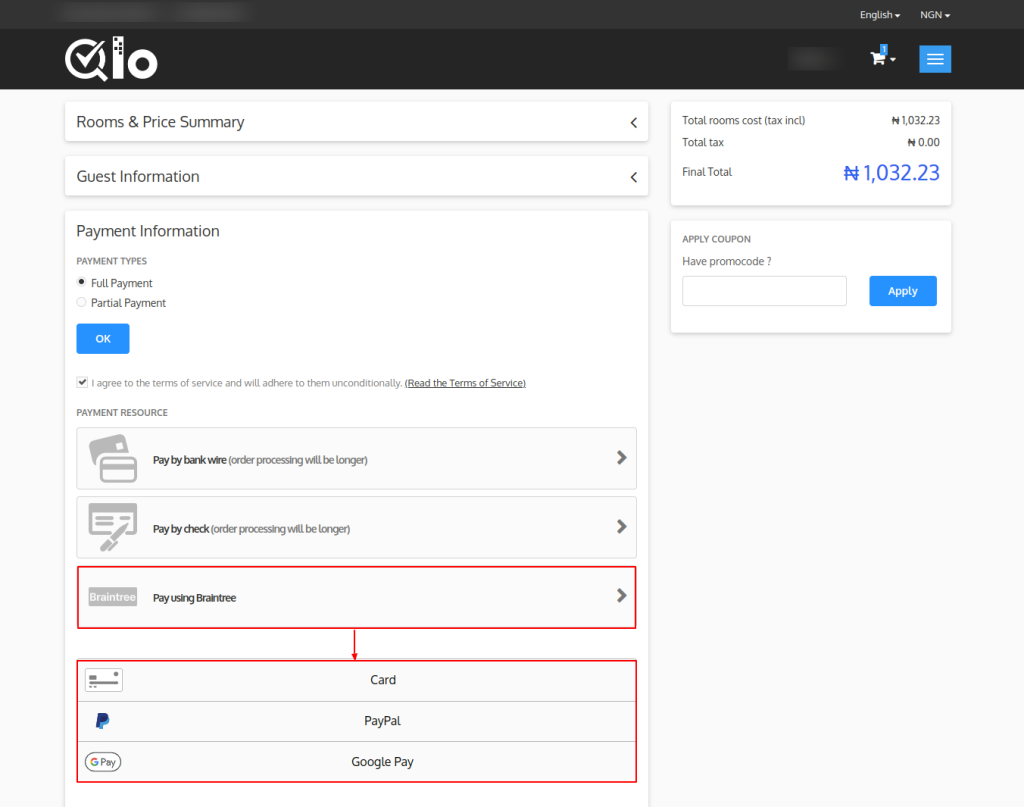
Once click on “Pay Using Braintree”, you will get 3 options:
- Card
- PayPal
- Google Pay
Card Payment
On selecting the card option, a customer needs to enter the card and expiry date to proceed with the payment. After specifying the card details, click on the validate payment button.

Once the card details are validated, the customer can confirm the Payment to continue to complete the booking process.
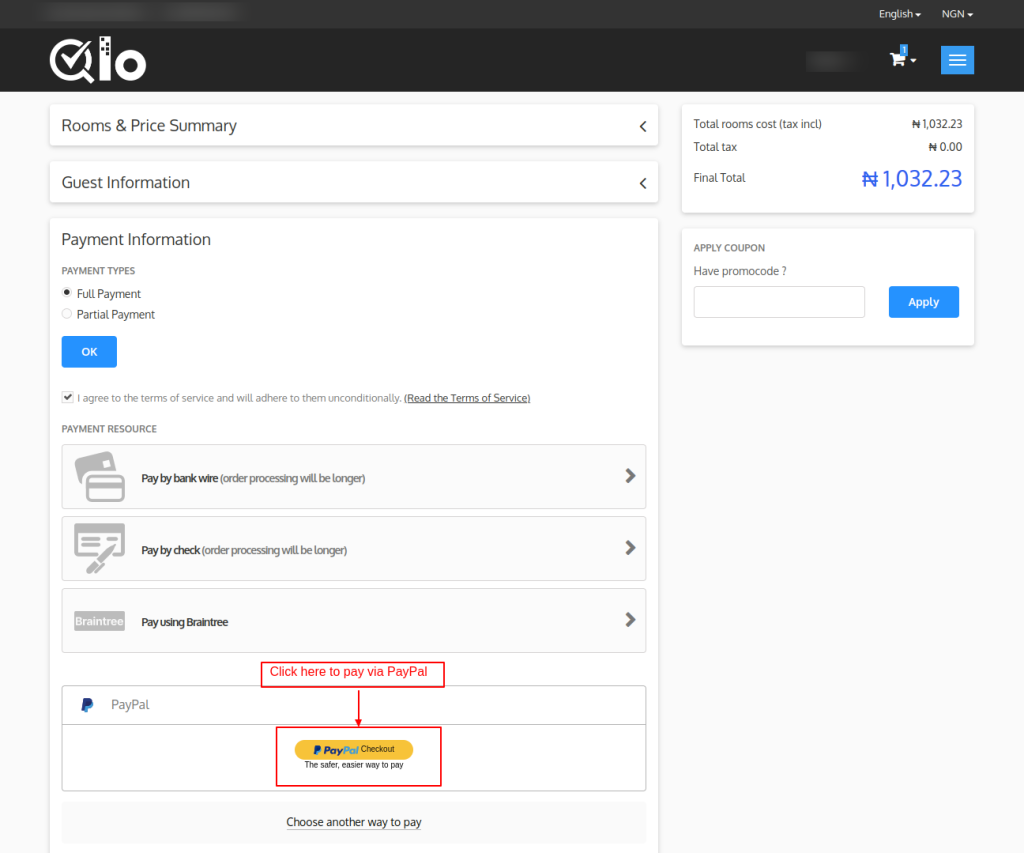
Pay Via PayPal:
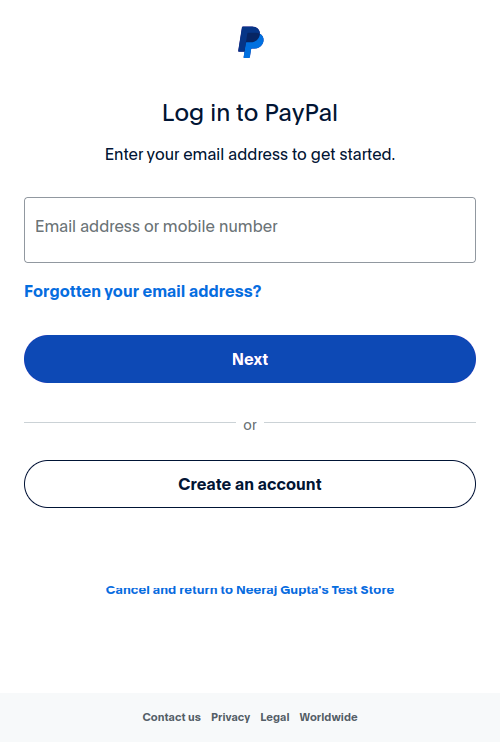
To begin the PayPal payment process, select the PayPal checkout option. The customer is redirected to the PayPal login page upon pressing the button.
The customer can proceed to pay for the order by entering their login details here.
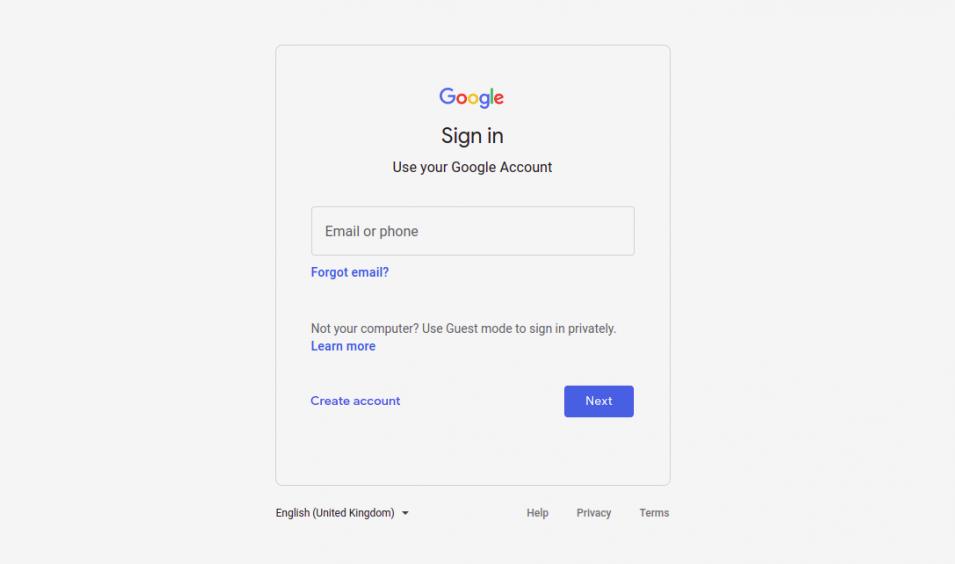
Pay Via Google Pay
Select the GPay option to start using Google Pay to make a payment.
Marketplace Braintree Payment Transaction:
After installation, the module adds a new tab, “Marketplace Braintree Payment Transactions“.
Here, you can see the list of all the bookings done through the Braintree payment gateway.
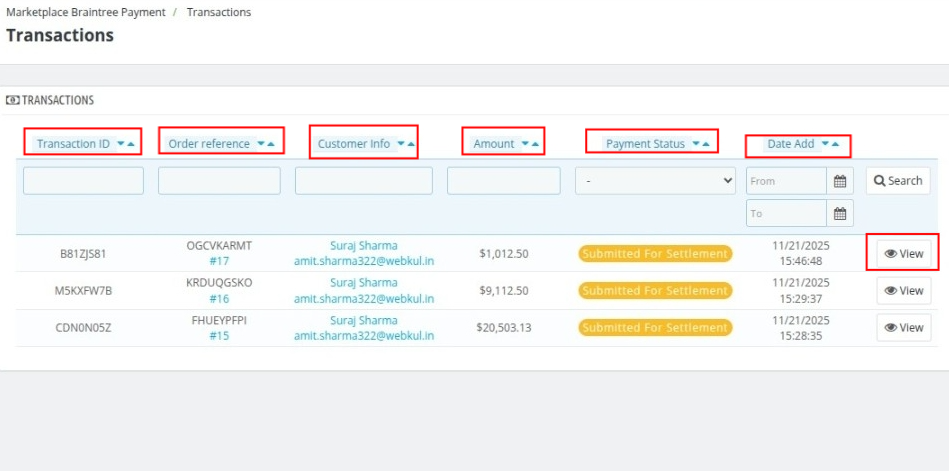
Click on the View button to see the complete transaction details.
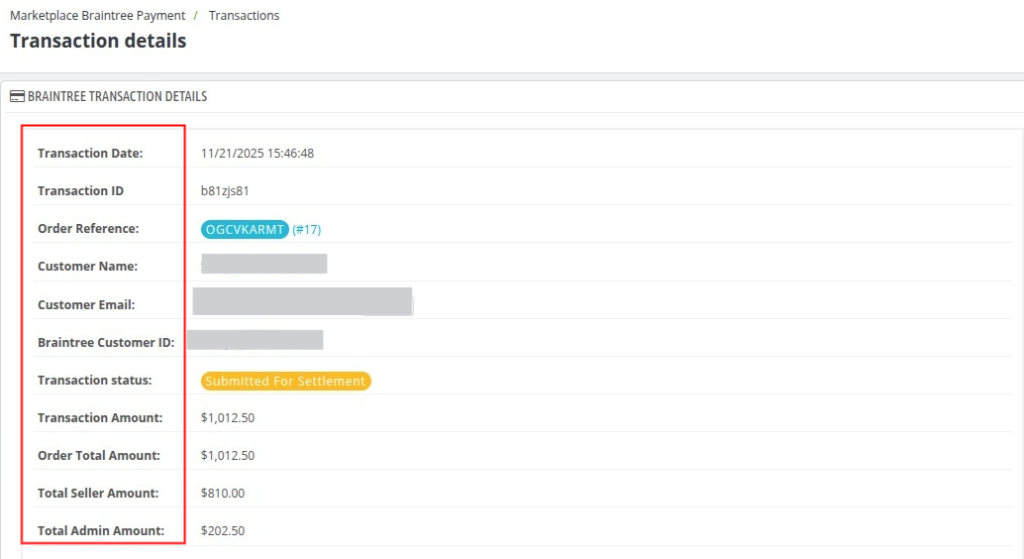
Seller-Wise Commission Distribution:
This table provides a breakdown of earnings for the seller involved in the transaction.

Conclusion:
That was all about the “QloApps Marketplace BrainTree Payment Gateway”.
Above all, if you want to learn about the functionality of QloApps, then you can visit this link: All In One Property Management System.
In case of any query, issue, or requirement, please feel free to raise it on the QloApps Forum.
I hope this blog helped you understand the working and configuration of the QloApps Marketplace Braintree Payment Gateway Module.
Current Product Version – 4.0.0 & 1.0.0
Supported Framework Version – QloApps 1.7.x & 1.6.x

Be the first to comment.