QloApps Maintenance Mode is a useful add-on that helps you temporarily put your hotel booking website under maintenance while making updates or changes.
With the help of QloApps Maintenance Mode, you will be able to put your website on maintenance and customize the page content to be shown to the visitor.
As search engines regularly crawl your website, displaying an under-construction page during updates helps protect your SEO rankings.
Features of QloApps Maintenance Mode
- Add a customizable maintenance page to your store and let the customers know that your store is currently under maintenance.
- Configure the text to be displayed on the maintenance page.
- Display the newsletter subscription form on the maintenance page.
- Add Admin login on maintenance page to allow admin to access front office while still being in maintenance mode.
- Multiple page layouts for maintenance mode to choose from.
- Option to add a customized background image on the maintenance page.
- A countdown timer displays the exact date and time after which the website goes live.
- Multiple countdown timer layouts for the maintenance page.
- Admin can also add social icons on the maintenance page.
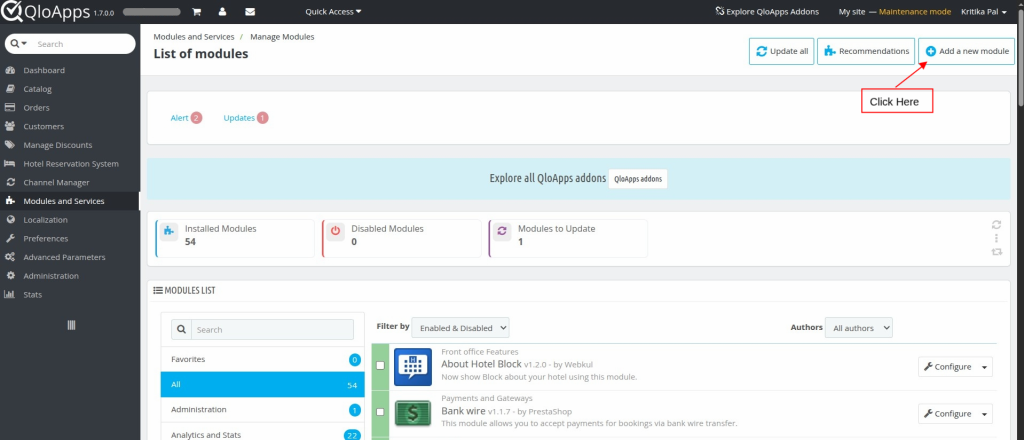
Installation Of QloApps Maintenance Mode
The installation of any module is very simple in QloApps.
- Go to the Module and Services tab
- Click on Add New Module
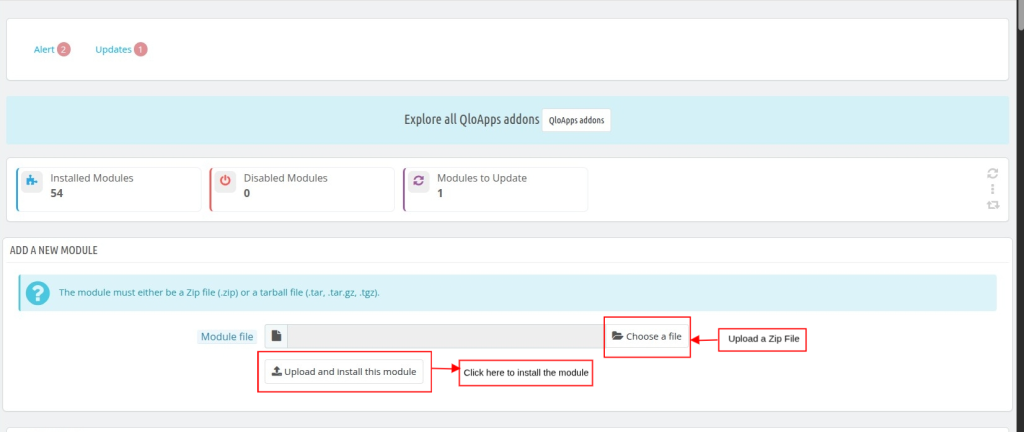
- Now upload the Zip file of the Module and click on Install
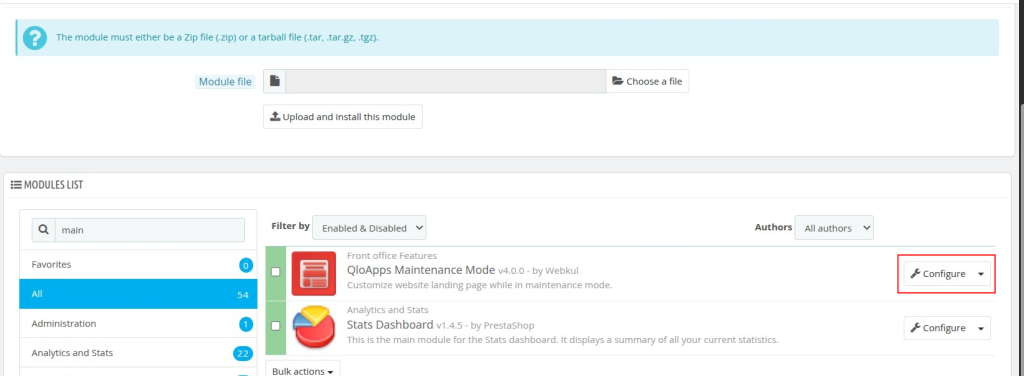
Once the module is installed, you can configure it from the Modules and Services section.
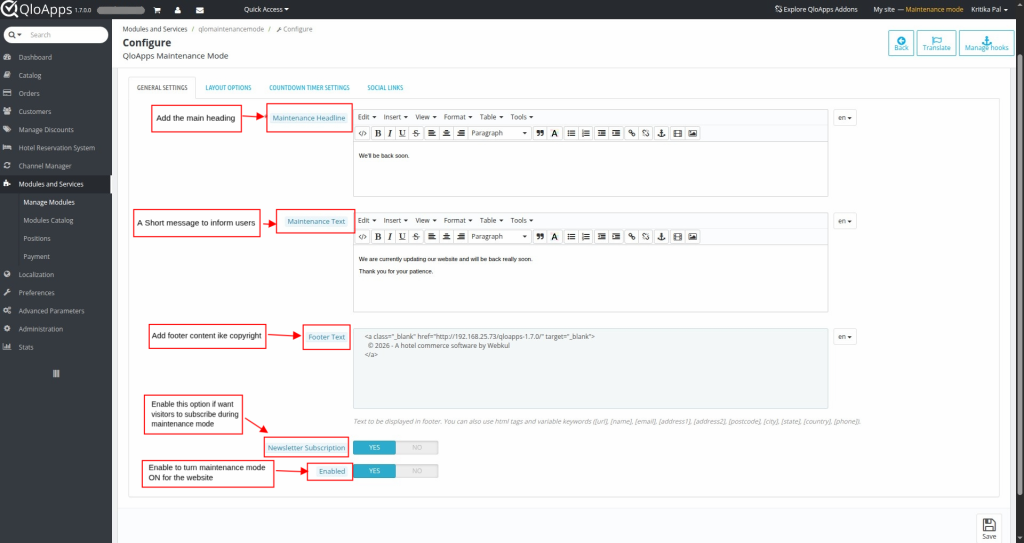
Configuration of QloApps Maintenance Mode
The configuration is in the Module and Services Tab.
Now the configurations are divided into four tabs. Let’s explore them one by one.
General Settings
Here you can have the controls to manage the content displayed on the website when the website is in maintenance mode.
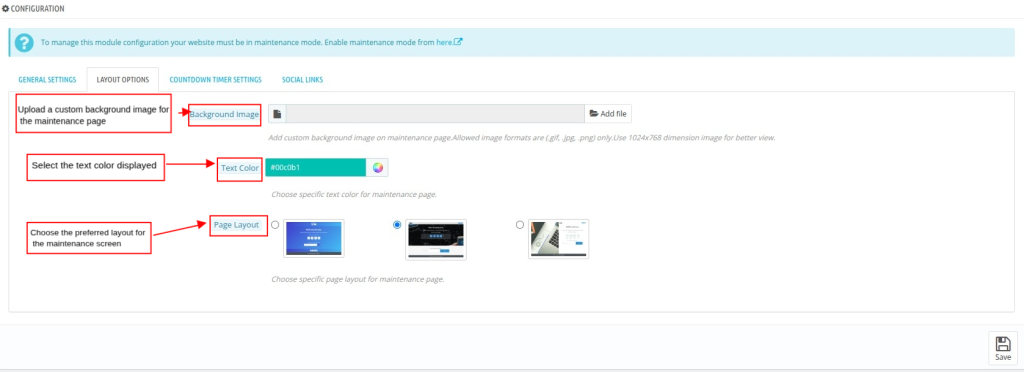
Layout Options
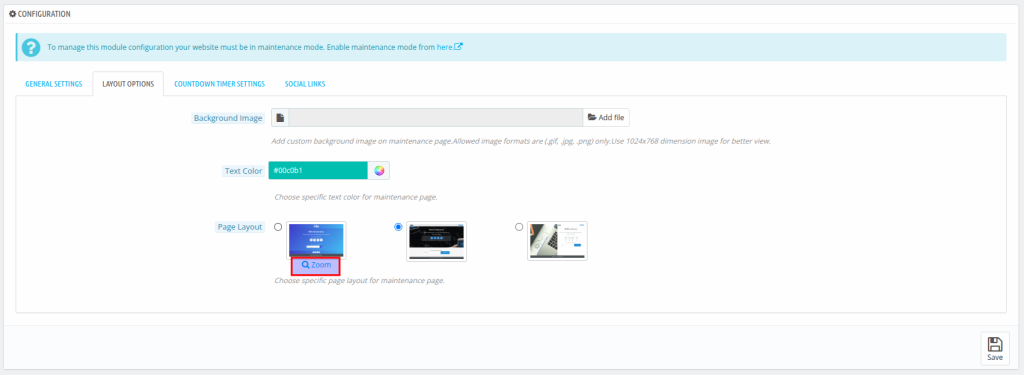
Under “Layout”, the admin can select a layout for the maintenance page. Admin can also upload a custom background image to be displayed on the maintenance page.
By clicking on the “zoom” button, the admin can view the page layout more clearly as shown below:
Countdown Timer
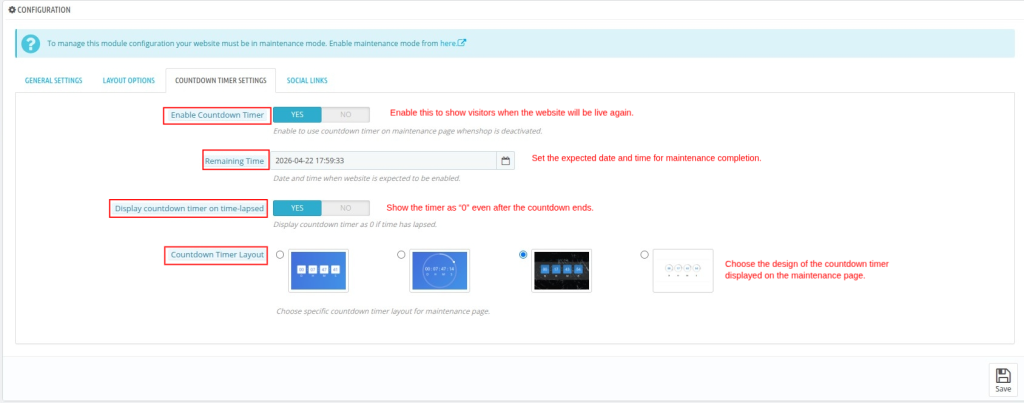
Under “Countdown Timer”, admin can:
- Enable/disable the display of the countdown timer on the maintenance page.
- Set the time after which the website gets activated.
- Enable/disable the display of the countdown timer as ‘0’ even if the time lapses
- Select the layout of the countdown timer.
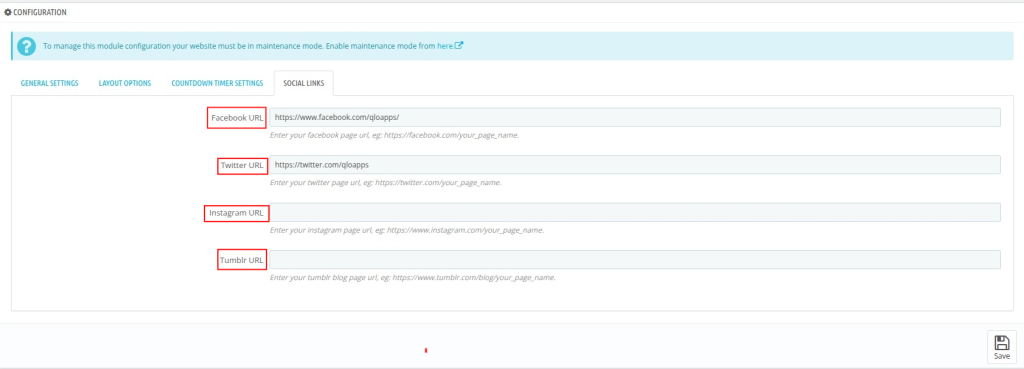
Social Links
Under ‘Social’ tab, admin has to enter the URL of its social pages.
Enable Maintenance Mode and allow Admin login
To enable the maintenance mode, go to the “Preferences Tab” and click on the “Maintenance” option in the drop-down.
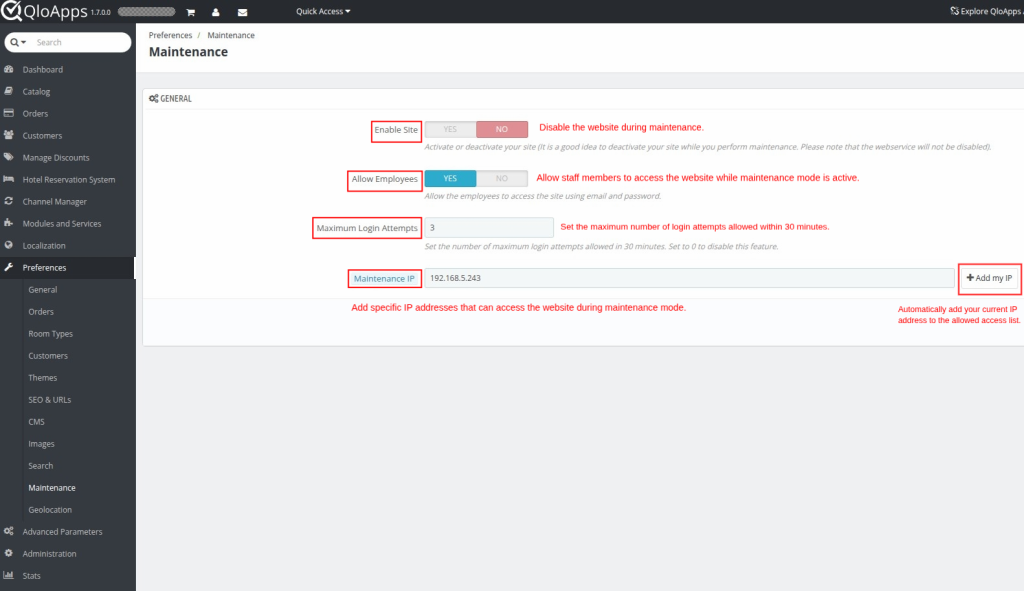
Once the “Maintenance tab” that appears, use toggle for “Enable Site” to enable maintenance mode.
To allow admin login on Maintenance page use toggle “Allow Employees” to display login option for employees while website is under Maintenance.
Frontend View
When you enable maintenance mode on your website with “Allow Employees” enabled, accessing front office will appear like this.
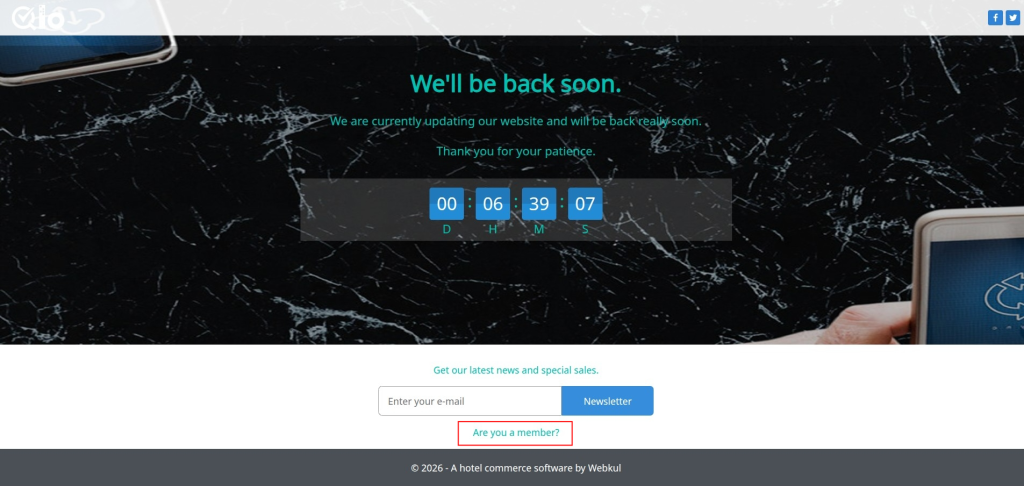
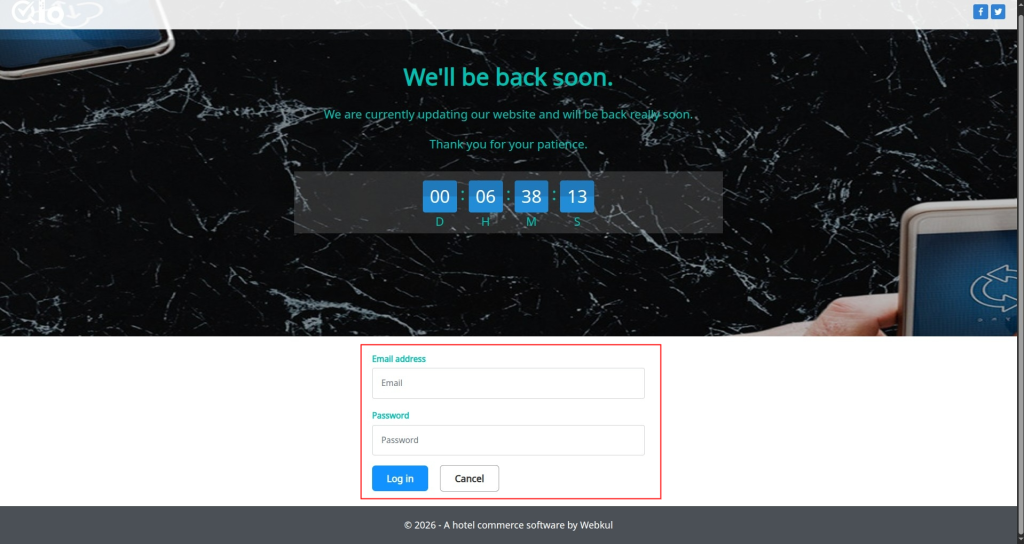
Once you click on the “Are you a member?” the following form will appear asking for employee credentials.
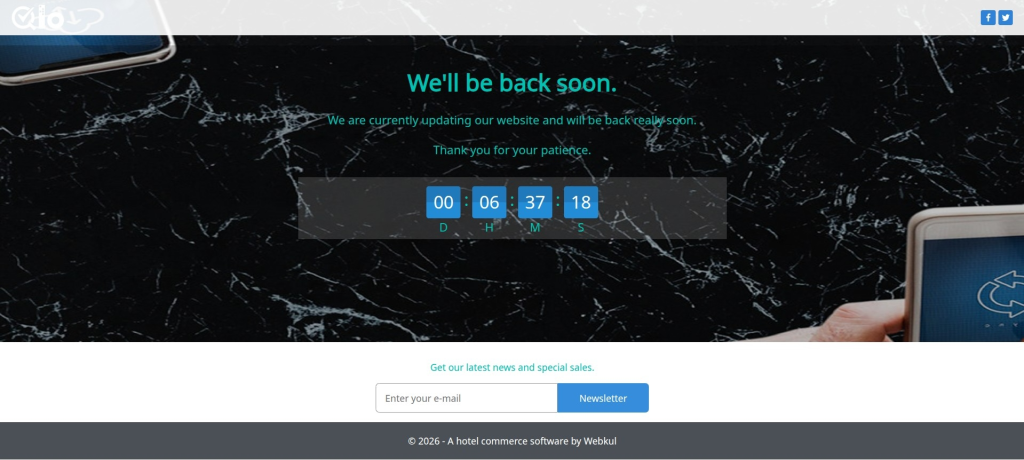
Here is the front-end view of the Maintenance Page with “Allow Employees” disabled.
Conclusion
So this was all from QloApps Maintenance Mode. I hope I was able to clarify the add-on in the best possible way.
This is how the QloApps Maintenance Mode add-on helps you manage hotel website updates without affecting user experience or SEO performance.
If you want to learn about the functionality of QloApps then you can visit this link: QloApps Reservation System – Free Open-Source Hotel Booking & Reservation System
In case of any query, issue, or requirement please feel free to raise it on QloApps Forum

Be the first to comment.