QloApps Hotel Virtual Tour is a useful tool that will allow travelers to interact with your property virtually.
Virtual Reality has the potential to take the hospitality industry to the paramount of success. It is proven to increase the online bookings and hotel revenue.
Hotel Virtual Tour will help the traveler to check out your hotel without actually visiting it.
Evidently, this results in generating trust and attracts the traveler to book your hotel rooms.
Virtual tours are also very useful in decreasing your website’s bounce rate. And ,this not a rocket science, just a simple login to process.
If your website has virtual touring functionality, then the user will spend more time on exploring the hotel.
This will result in people spending more time on your website. Hence, lesser bounce rate.
The benefits of virtual reality in hotel industry is never ending.
So we have made this addon for QloApps websites so that the admin can enjoy the endless benefits of virtual reality and take his part in the future of hotel technology .
So let us check the features of this addon and discuss how this tool works.
Features of QloApps Hotel Virtual Tour
- Show virtual tours on your website
- Create separate tours for all your hotels
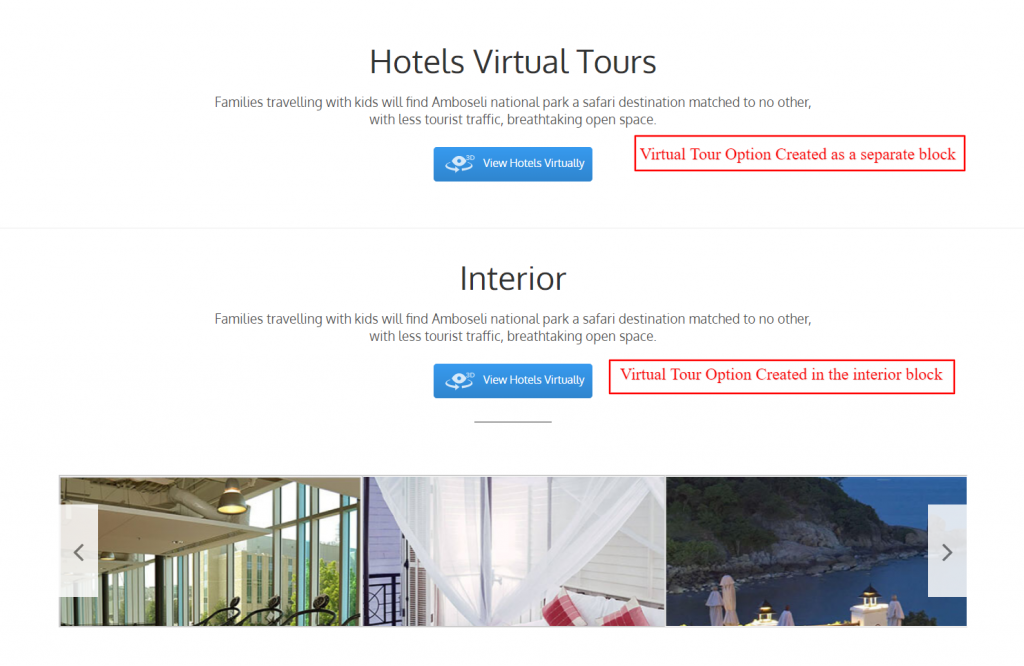
- A separate page with all hotel virtual tours created
- Create a separate Virtual Tour block on the home page
- Create a Virtual Tour button in the interior block of the home page
- Virtual Tour links in the Navigation Menu and Footer
- Virtual Tour directly from the room type page so that the visitor can tour the room directly
- Option to view virtual tour in the room type details
- Upload panorama images to create an interactive experience
- Add hotspots on the image to jump to a different scene
- List all the areas of your hotel so that user can directly jump to that area
- User can zoom in and out as per their preference
- User can view the virtual tour in full screen
- Thumbnail Slider to preview the other images available in the tour
- Select default images for a tour where a user lands when he checks the hotel virtually
- Select default images for a room where a user lands when he checks the room virtually
Prerequisite Of Installation
For QloApps version 1.5.0 or less you need to add some hooks to the code.
Before you install the QloApps Hotel Virtual Tour addon you must make few changes in the core for the proper functioning of the module.
The step is very simple, you just have to locate the following paths and replace the mention codes.
Path 1
Go to hotelcommerce/themes/hotel-reservation-theme/ folder and open file product.tpl
Now add the following hook code below line number 123
{hook h="displayRoomTypeImageExtraContent"}
Path 2
Go to hotelcommerce/modules/wkabouthotelblock/views/templates/hook/ folder and open the file hotelInteriorBlock.tpl
Now add the following hook code below line number 27
{hook h="displayInteriorExtraContent"}
Installation Of QloApps Hotel Virtual Tour
The installation of any module is very simple in QloApps.
- Go to the Module and Services tab
- Click on Add New Module
- Now upload the Zip file of the Module and click on Install

Now You Have Installed The Module. So Let Us Check The Module Configuration.
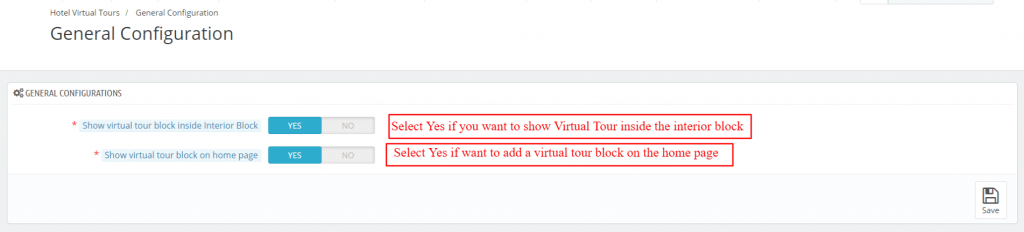
Configuration Of QloApps Hotel Virtual Tour
The configuration of this addon is very simple. You just have to decide if you want to show the Virtual Tour option separately as a block, or as button in the interior block or both.
Frontend
Working of QloApps Hotel Virtual Tour
The best thing about QloApps Hotel Virtual Tour is its user friendly working.
To create a hotel virtual tour is very simple. You just have to select a hotel and start adding images for different areas of the hotel and link them to each other with hotspots.
Let us know check this out in details.
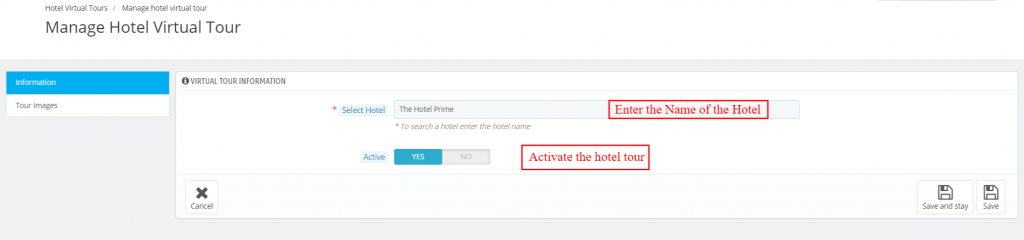
Go to Hotel Virtual Tab –> Manage Hotel Virtual Tour. Now click on Add New Tour to create a tour.

Now the following steps to create a tour.
Select the hotel you want to create its virtual tour
The create Tour interface is divided into two tabs. In the first Information tab you will have to select the hotel for which you want to create the tour.
Start Adding Images for the different parts of your Hotel
Once you have selected the hotel now you have to upload images for the different parts of the hotel.
For this, you will have click on the Add New Button Image
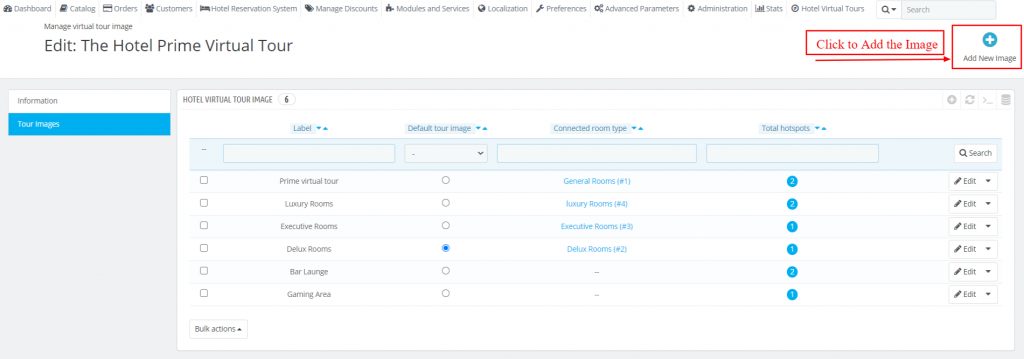
Now fill the details and upload the image.
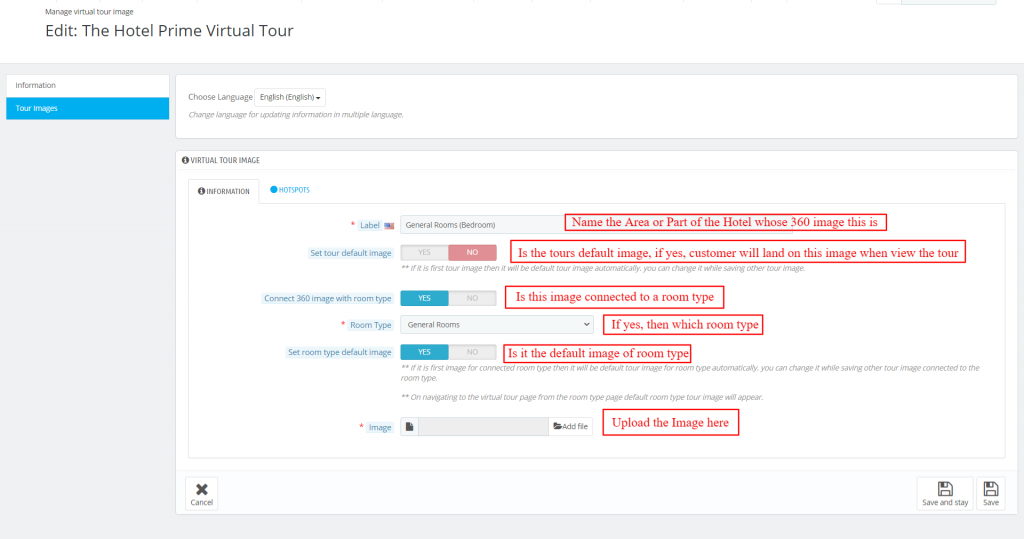
Once you have uploaded the panorama images then click on Save and Stay and move to create Hotspots.
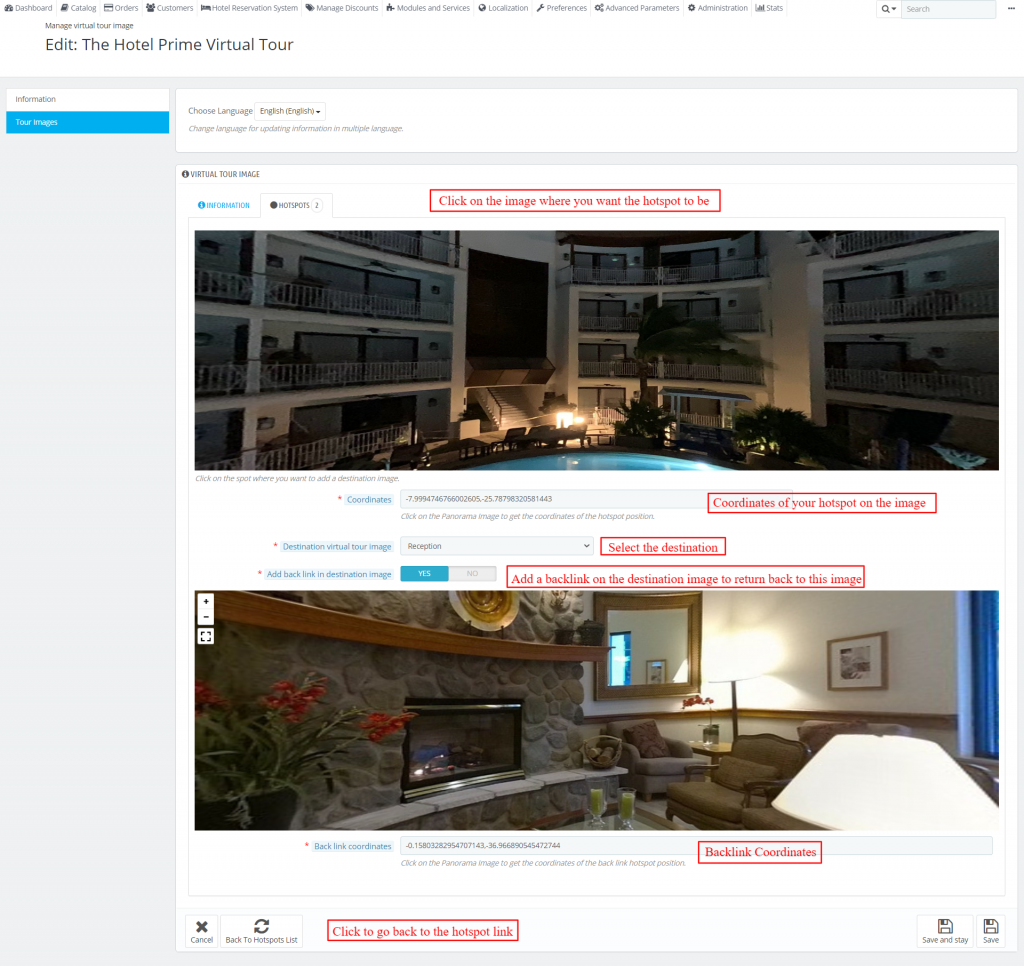
Hotspots are used to connect two images. For an example, when the user in touring the hotel and he is outside the hotel.
Then you can create a hotspot on the front gate and link it with the hotel reception image.
So when the user click on that hotspot then he will land on the hotel reception.
This will create a simulation that the user was standing out of the hotel and on a click he enters the hotel.
So to create a hotspot just click on Add New.
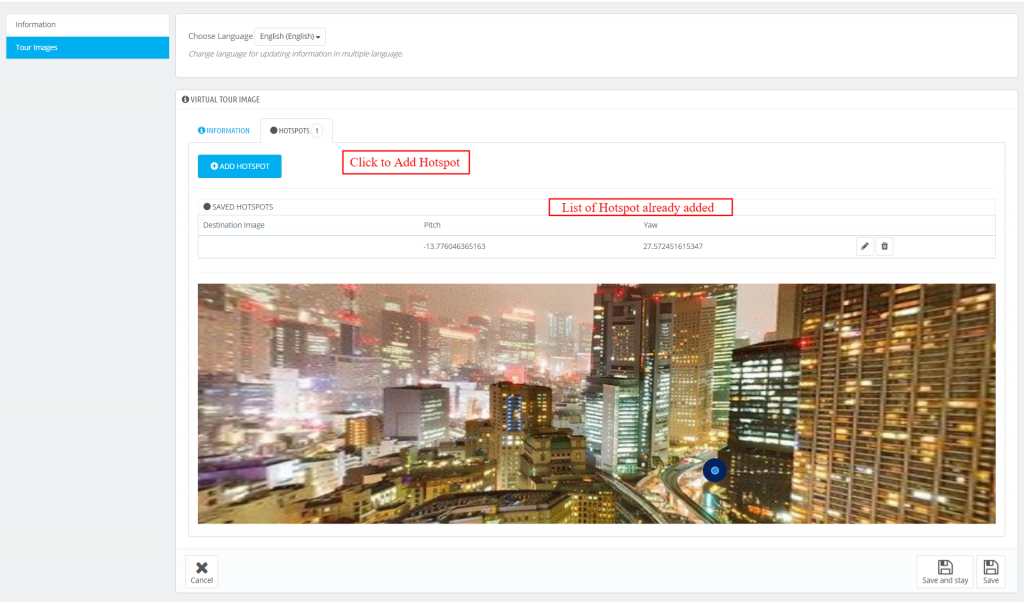
Now select a position on the image and select the destination where you want to send the user on the click of this hotspot.
Frontend View
Once you have created all the images for the hotel tour visitors of the website can view the virtual tour.
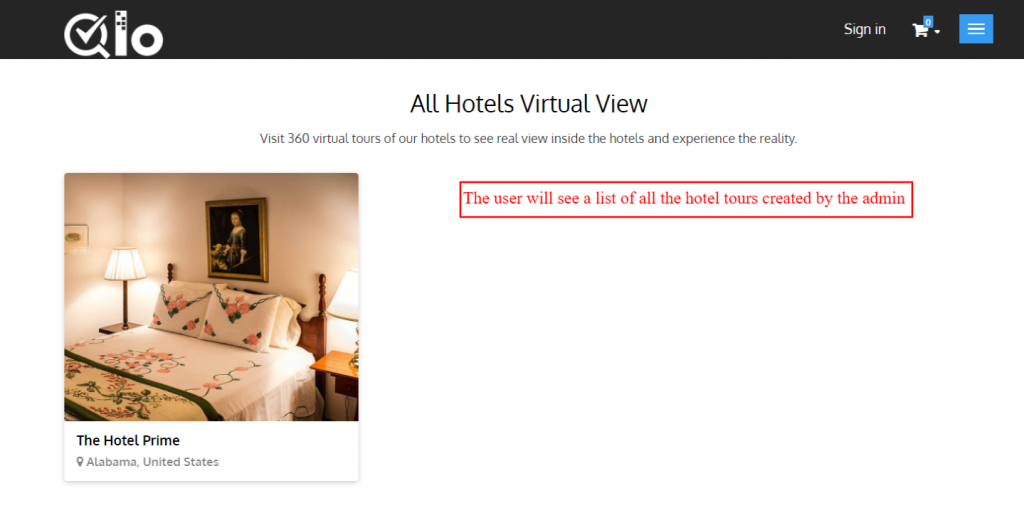
Now click on a tour to start it. And the tour interface will appear as shown in the following image.
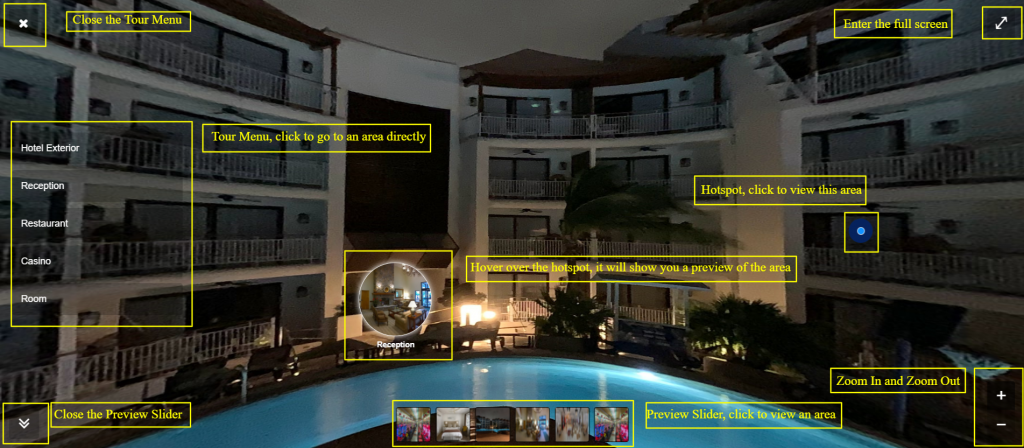
Here is a preview of the Hotel Virtual Tour.
Conclusion
So this was all from QloApps Hotel Virtual Tour. I hope I was able to clarify the add-on in the best possible way.
If you want to learn about the functionality of QloApps then you can visit this link: QLO Reservation System – Free Open-Source Hotel Booking & Reservation System
In case of any query, issue, or requirement, please feel free to raise it on QloApps Forum
Current Product Version – 4.0.0
Supported Framework Version- QloApps 1.7.x

Be the first to comment.