QloApps Google Translate is an add-on that helps you to translate the content of the website into various languages.
Hence, you do not have to translate your content one by one for every field.
This module will translate the whole content at once for you with the help of Google Translator.
You only have to select the type and language of the translation and with a click, you can easily translate the front end in your desired language.
To expand your business language plays a crucial role. Customers will prefer to view the website in their native language.
Therefore, it not only builds customer confidence and revenue for your brand.
Consequently, also improve your chances of getting a higher rank in search engine result pages.
Hence, to remove the language barrier this module is the perfect solution for you.
Features of QloApps Google Translate
- Easily translate the contents of the page.
- Use Google Translate to translate the website into any of the desired languages.
- Admin can translate Front office translations and Back office translations
- He or She can also translate Error messages translations.
- Admin can translate Field name translations.
- Admin can translate all the Installed modules.
- He or She can translate PDF and Email templates.
- Apart from the type of translation, select a theme and language to modify translations.
Installation of QloApps Google Translate
The installation of any module is very simple in QloApps.
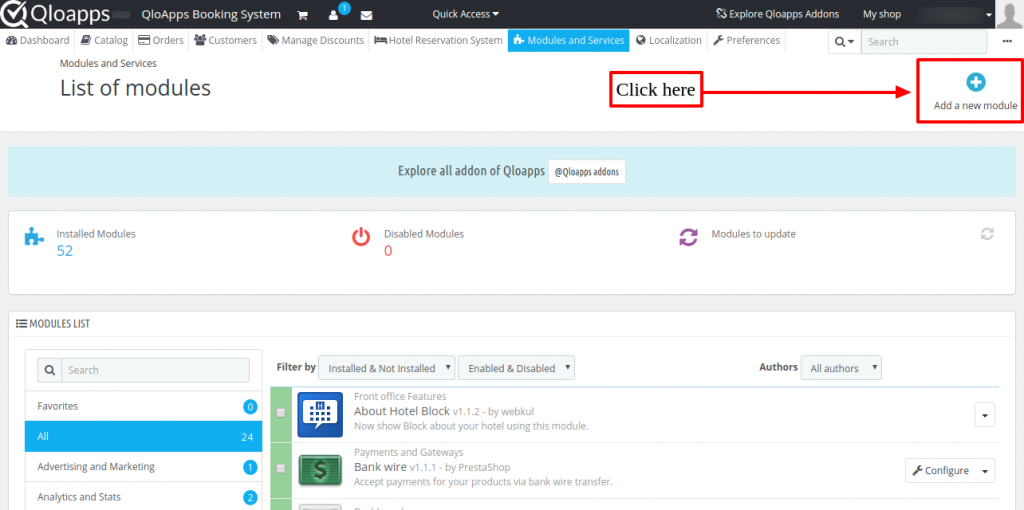
- Go to the “Module and Services” tab.
- Click on “Add New Module”.
Now upload the Zip file of the module and click on install.
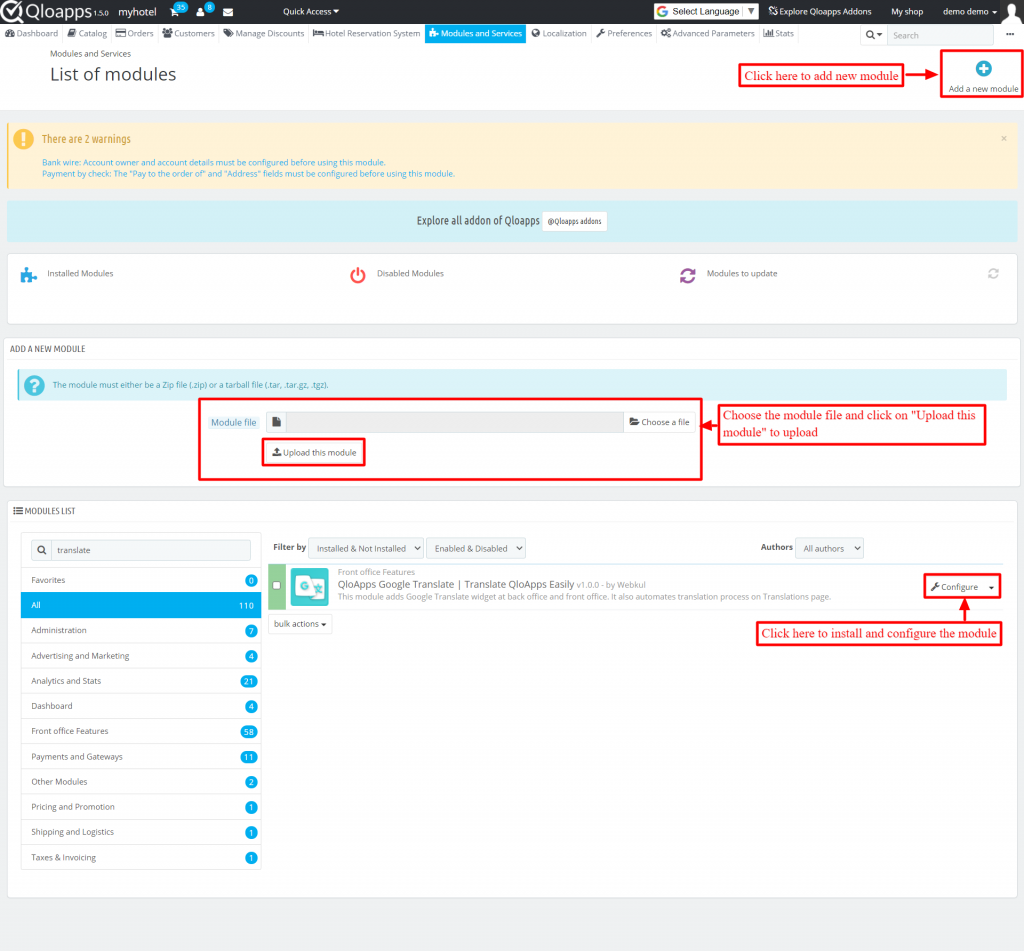
Now You Have Installed The Module. So Let Us Check The Module Configuration.
Configuration of QloApps Google Translate
The image shown below will open for configuring the module.
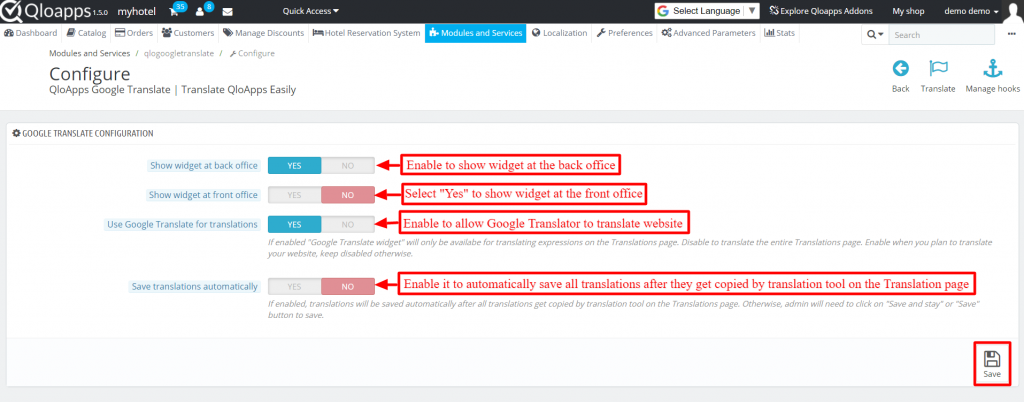
Under the Google translate configuration, enable or disable the following options:
- Show widget at the back office: Enable the option to show widgets at the back office.
- Show widget at the front office: Enable it to show the widget at the front office of the website.
- Use Google Translator for translations: Select “Yes” to allow the “Google Translate widget” to translate your website.
- Save translations automatically: Enable to automatically save translations. So, in the future, you do not require to again repeat the process of translating the website for the same language.
Modify Translations
Afterward, go to the “Localization” tab and then click on “Translations” in the drop-down.
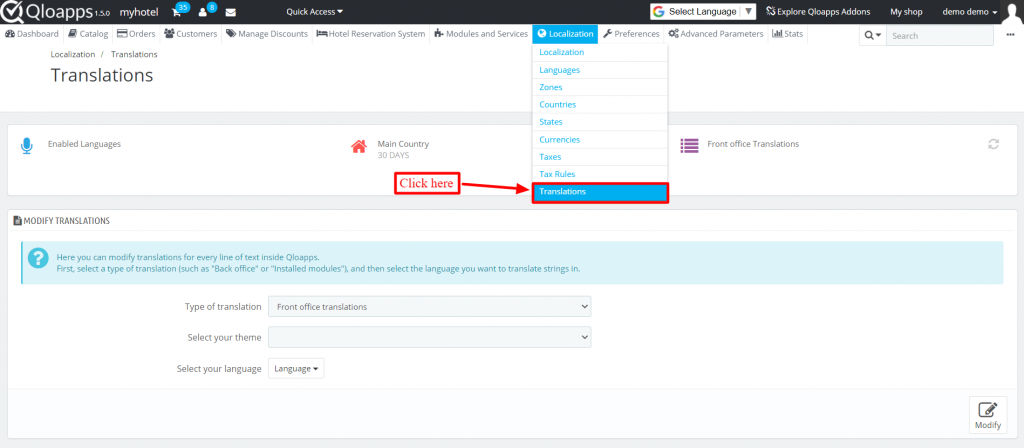
Here you can see the option to modify translations.
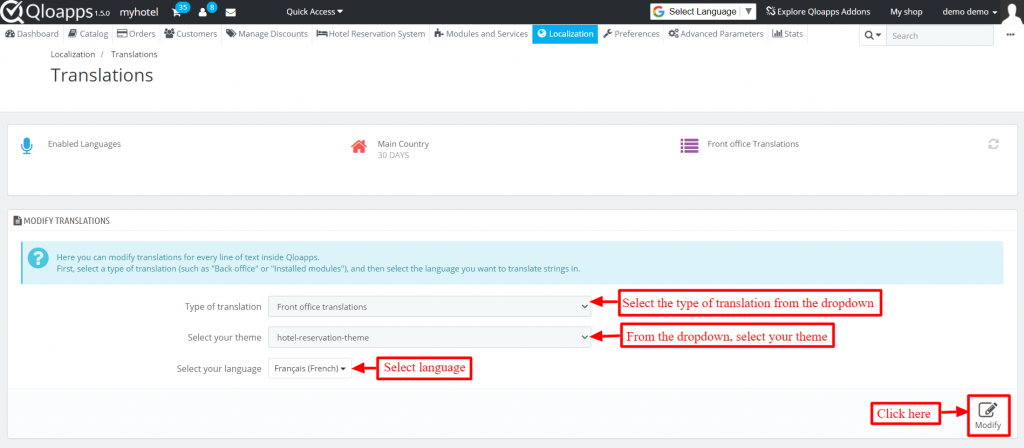
There are three fields:
- Type of translation: Select the type of translation from the dropdown whose fields you want to translate.
- Select your theme: From the dropdown, select your theme.
- Select your language: Select the language in which you want to translate the fields of your website.
In the Type of translation, there are seven options for you to select.
- Front Office translations: It translates the fields of the front office of your website. It is visible to your customers.
- Back Office translations: It translates the fields at the back office of your website. It is visible to you and your hotel staff.
- Error message translations: To show your error messages in your words.
- Fields Names translations: Select it to translate the field names at both the front and back end.
- Installed Module translations: To translate the fields in the modules you have installed. Only installed modules will be available in this field.
- PDF translations: You may use this field to translate the fields in PDFs generated on your website, such as invoices.
- E-mail template translations. It is used to translate the e-mail templates that are sent from your website.
Editing Translations
After selecting the field you will land on the new page. In this, I have selected “Installed Module Translation” in the “Type of Translation”.
Hence, you will view this image after selecting the same.
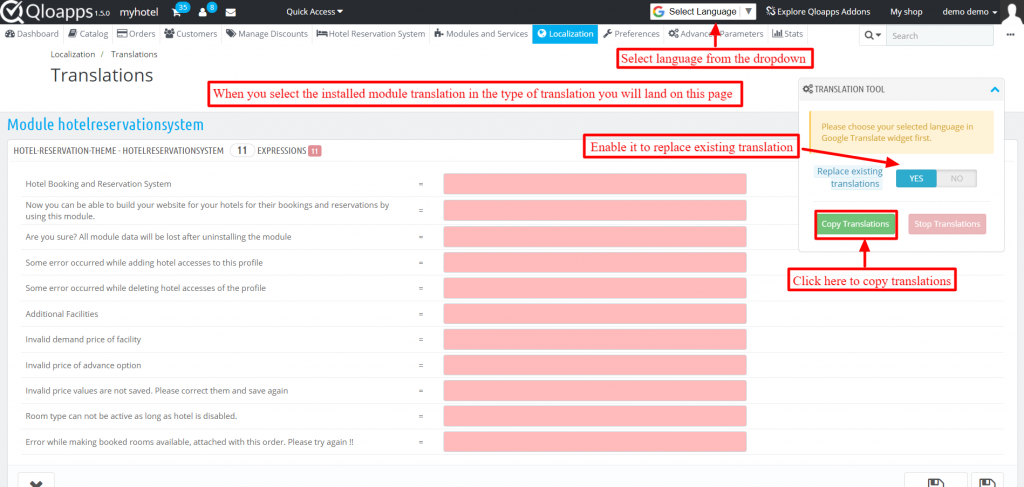
Here you have to select the language from the widget on the top in which you want to translate the website.
Moreover, on the right-hand side, you can see the “Translation Tool” box. In this, select “Yes” to replace existing translations.
Afterward, click on “Copy Translations” to view the website in the language you desired.
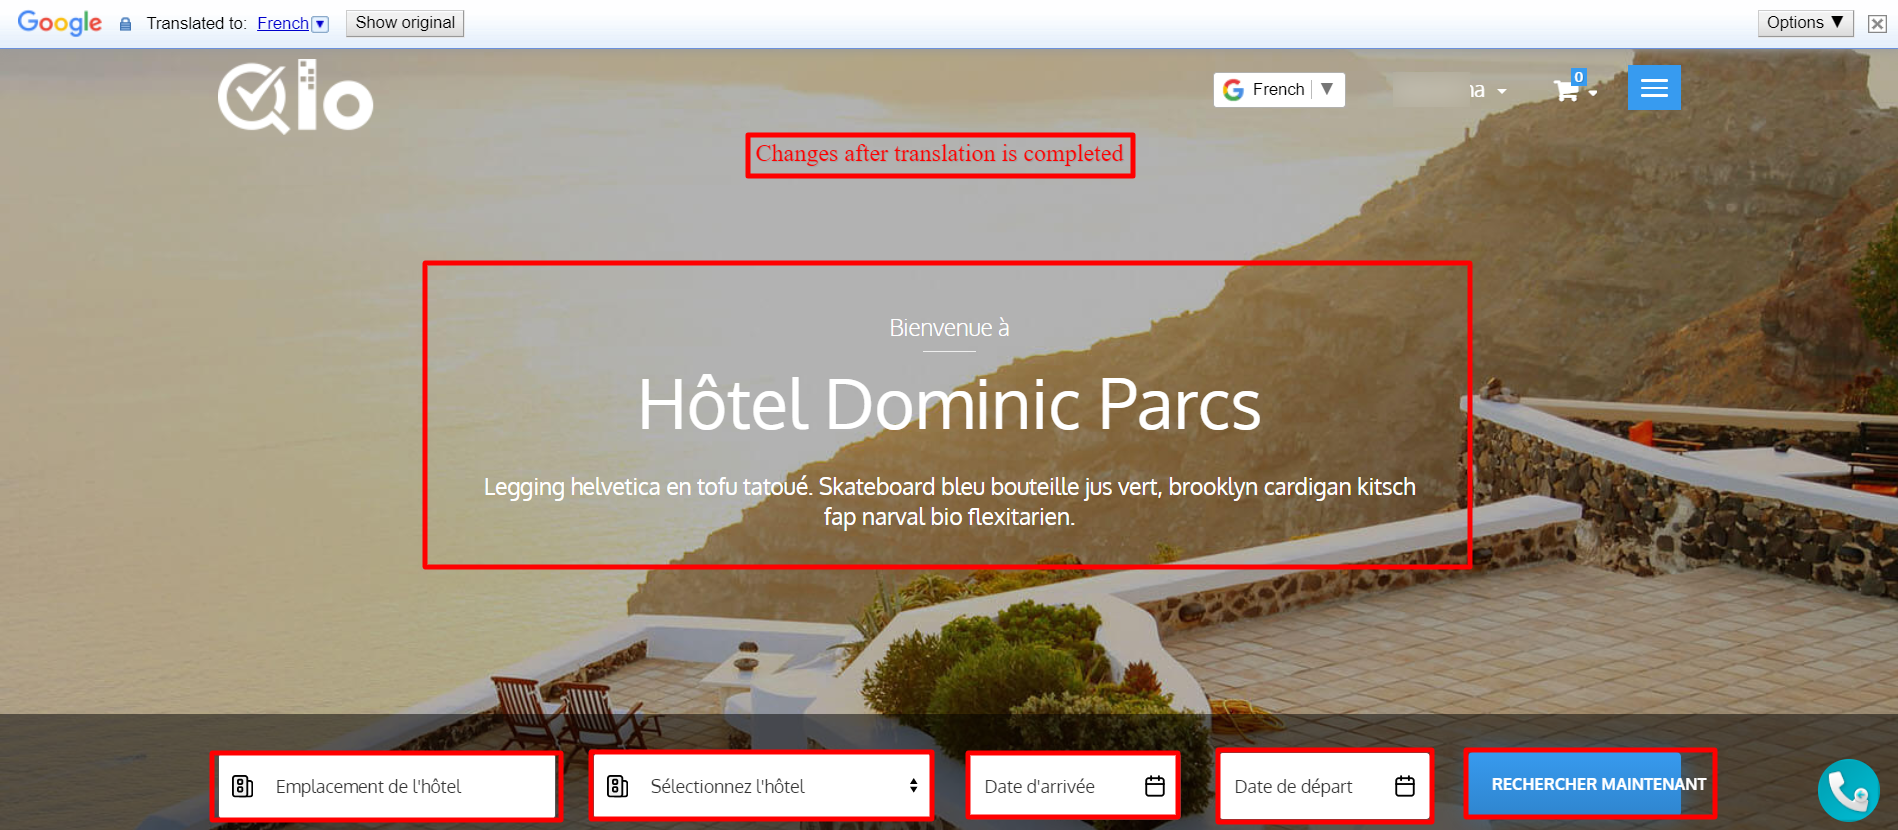
Frontend
This is the homepage of the website after translating it.
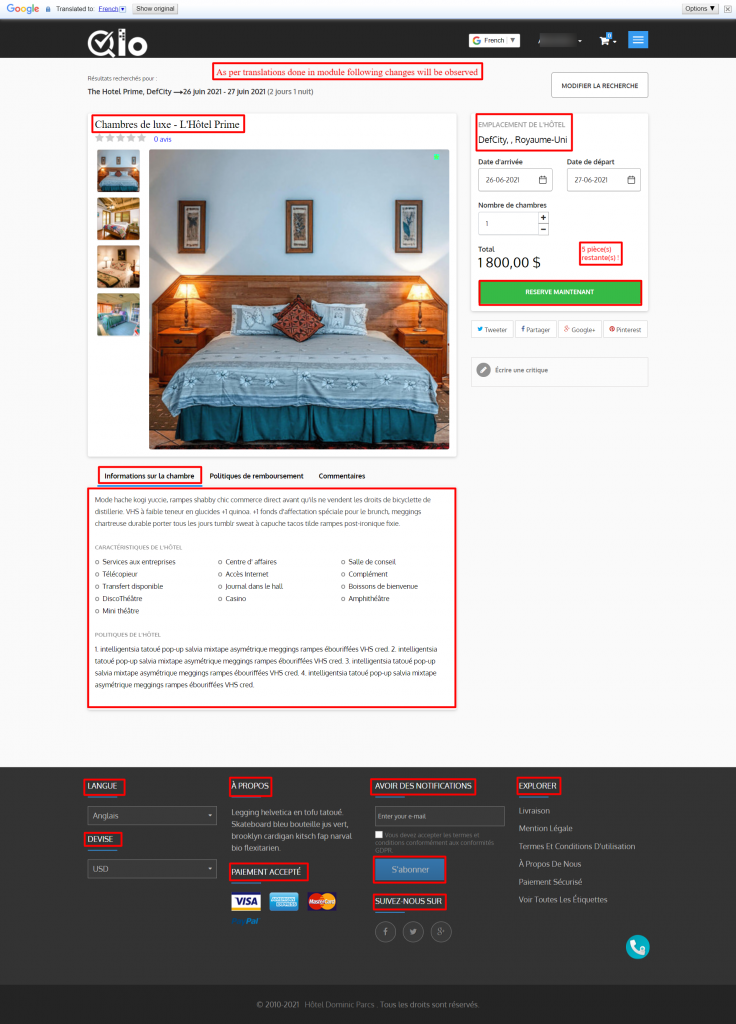
Moreover, take a look at the room type page after translating it.
E-mail template
This module allows the translation of email templates as well. Admin will not have to waste precious time going through each email and then translating it.
This module will translate every template automatically. Here is the order confirmation email translated into Spanish.

Conclusion
This was all from the QloApps Google Translate | Translate QloApps Easily. I hope I was able to clarify the functioning of this module.
If you want to learn about the functionality of QloApps then you can visit this link: QLO Reservation System – Free Open-Source Hotel Booking & Reservation System
In case of any query, issue, or requirement please feel free to raise it on QloApps Forum
Current Product Version – 1.0.4
Supported Framework Version- QloApps 1.6.x and 1.7.x

Be the first to comment.