QloApps Google Pay payment gateway is an add-on that integrates Google Pay payment gateway to your hotel booking website.
Google Pay is a digital wallet platform and online payment system developed by Google to enable in-app, online, and in-person contactless transactions on mobile devices.
Thus, allowing users to make payments using their Android phones, tablets, or watches.
We integrate Google Pay with QloApps to make the checkout process simple and fast.
The payment gateway is secure as it is backed by the security of Google.
Features of QloApps Google Pay payment gateway
- The payment gateway provides 24*7 support.
- The module will work in live and test mode.
- It supports Amex, Mastercard, Visa, JCB, and Discover cards.
- The transactions are faster and smoother.
- It is reliable and secure.
- It adds a complementary payment method to your website.
Installation
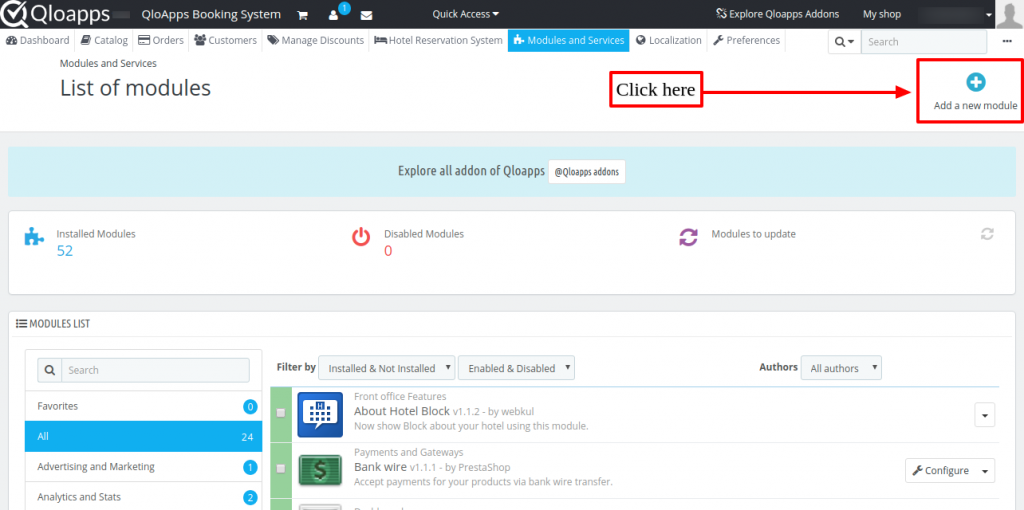
The installation of any module is very simple in QloApps.
- Go to the “Module and Services” tab.
- Click on “Add New Module”.
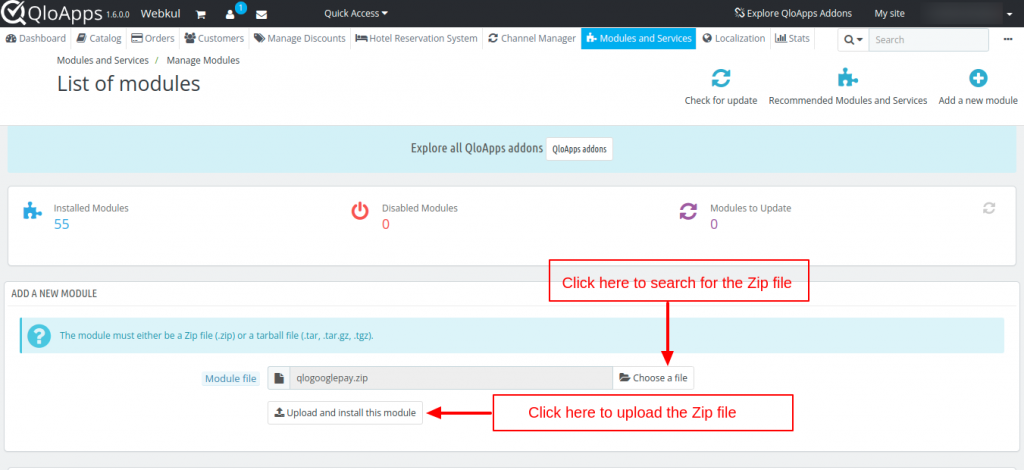
Click on Choose a file and upload the zip file of the module.
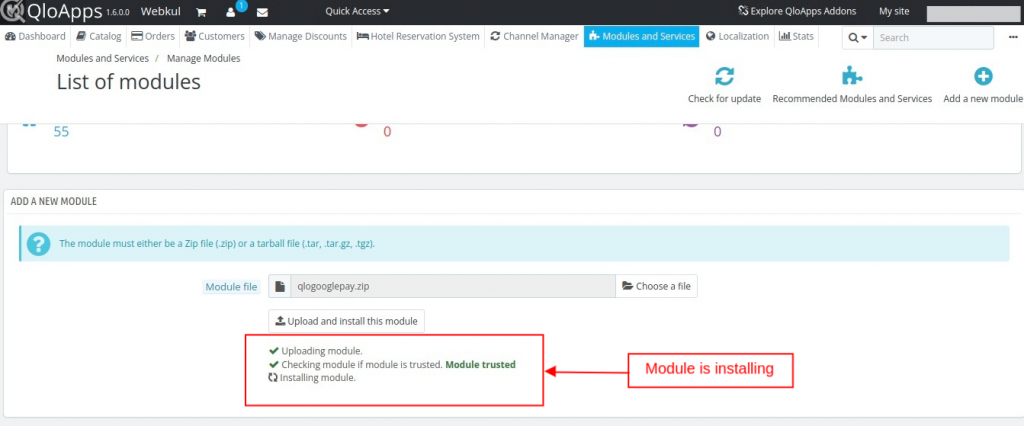
After uploading the ZIP file the module will start installing automatically.
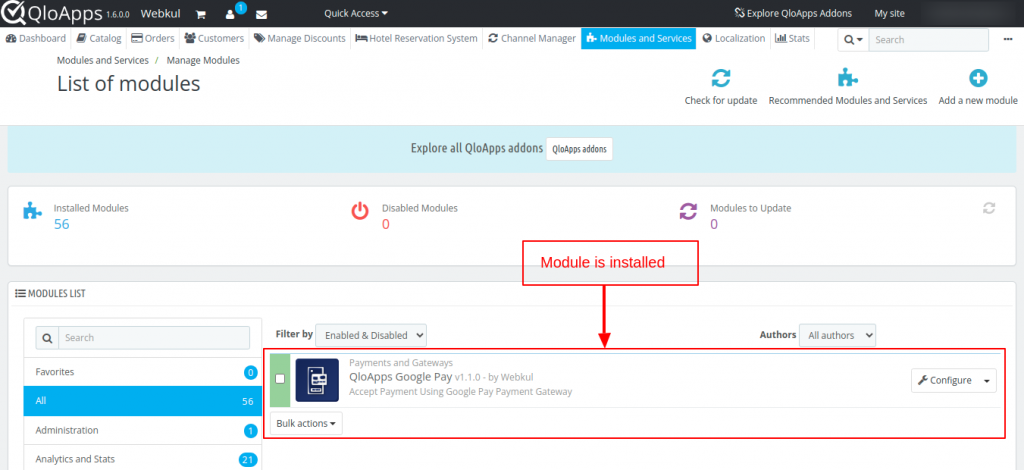
After the module is installed, the user can see the prompt for successful installation and the installed modules will be listed below.
Now you have installed the module. So let’s check how to configure it.
Note: To use Google Pay payment gateway, you need to have a stripe account for the public and the secret key.
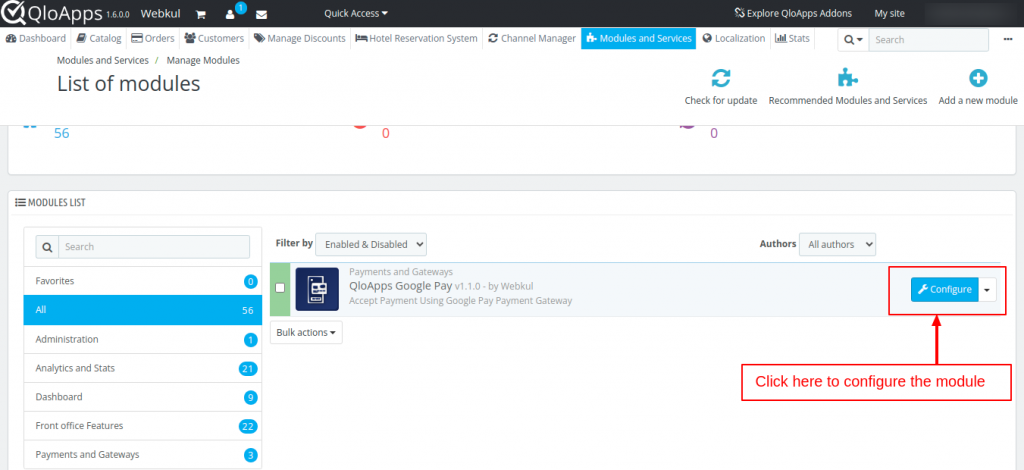
Configuration of the Google Pay payment gateway
After clicking on the configure button, you will be redirected to the configuration page.
Here, you need to enter the following details:
- Google Pay merchant name: Enter the merchant name which is provided by the Google Pay
- Google Pay merchant ID: Enter the merchant ID which is provided by the Google Pay
- Stripe Gateway Public key: Enter the public key which is provided by the Stripe Payment Gateway
- Stripe Gateway Secret key: Enter the secret key which is provided by the Stripe Payment Gateway
- Payment Mode: Select the environment mode for the payment from the drop-down.
- Card allowed for payment: Choose the card type which you want to allow for payment.
- Allowed card authentication type: Choose the card authentication type which you want to allow the payment for.

How to get the Google API keys?
To get the API keys, request for production access here: Google Pay Merchant Key
Create an account.
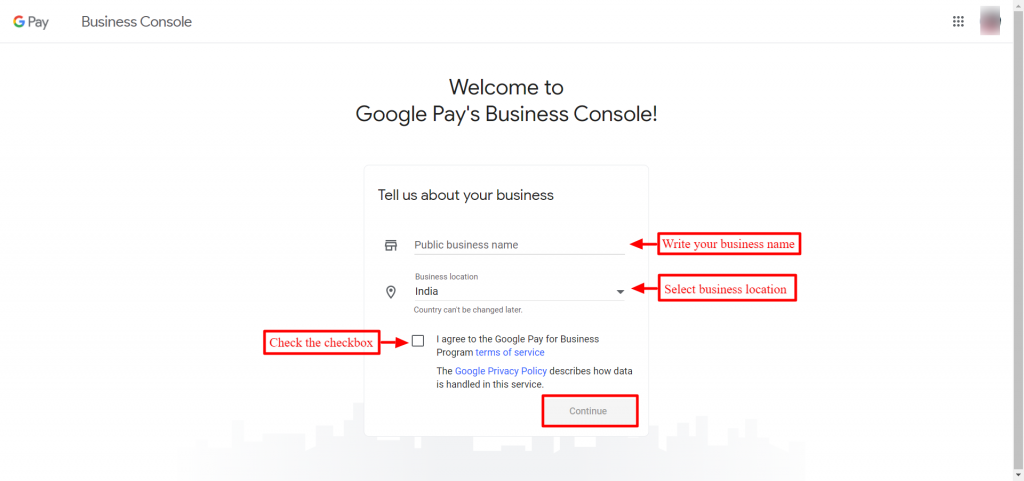
Afterwards, go to ‘Business Profile’ and set up your payment profile after filling in all details.
How to get the Stripe API keys?
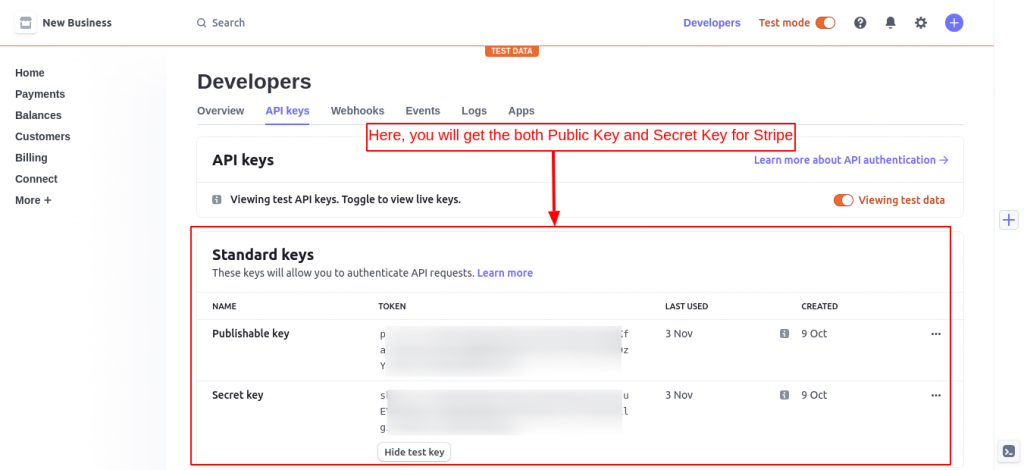
To get the Public key and Secret key from the stripe, you need to go to the Stripe Website and login with your Stripe account.

You will land ton the Stripe home page. Now enable the test mode and click on Developers tab.
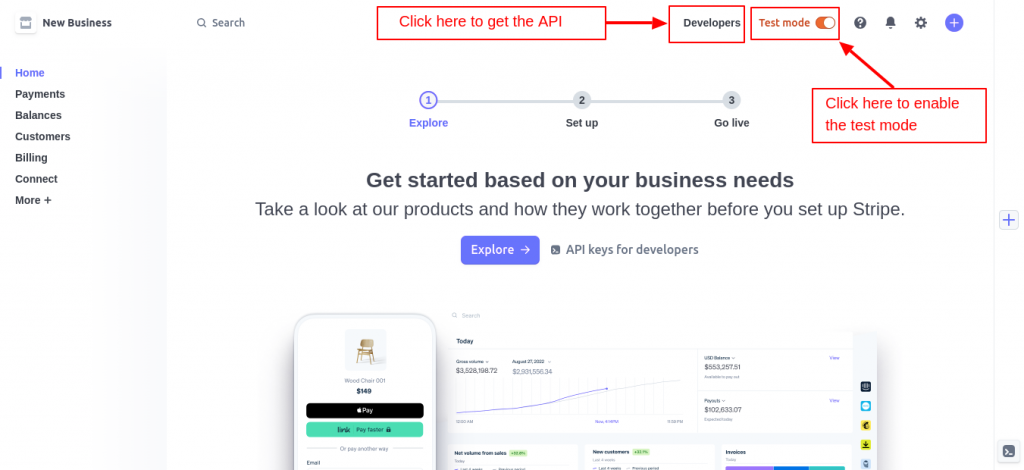
Here you need to click on API Keys tab.
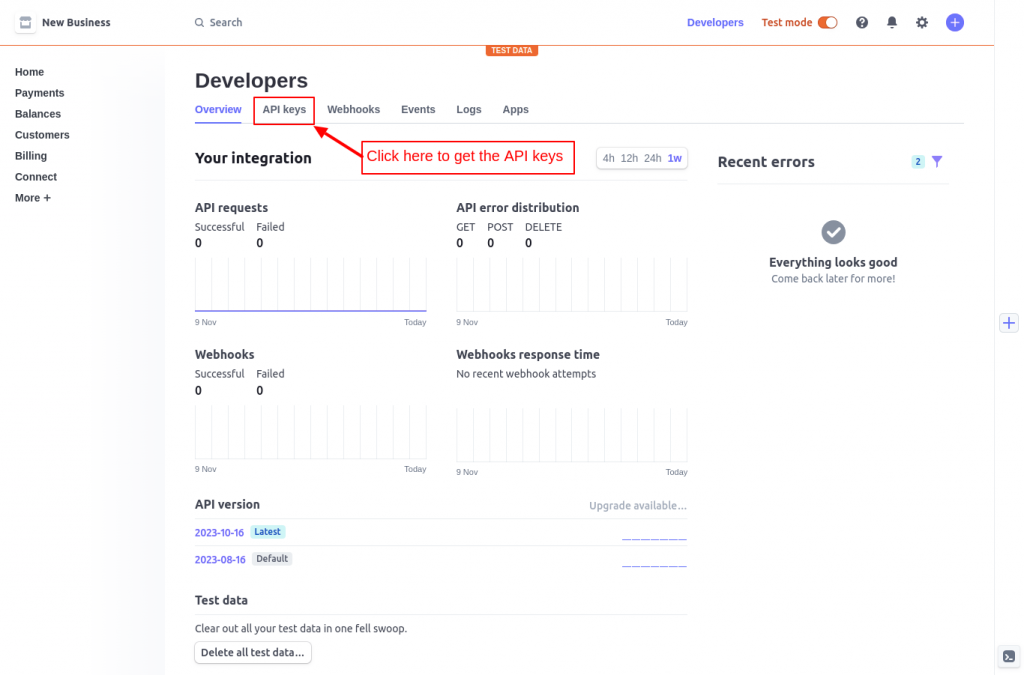
On this API Keys tab, below you will find the stripe public keys and secret key.
Worfkflow of the QloApps Google Pay payment gateway
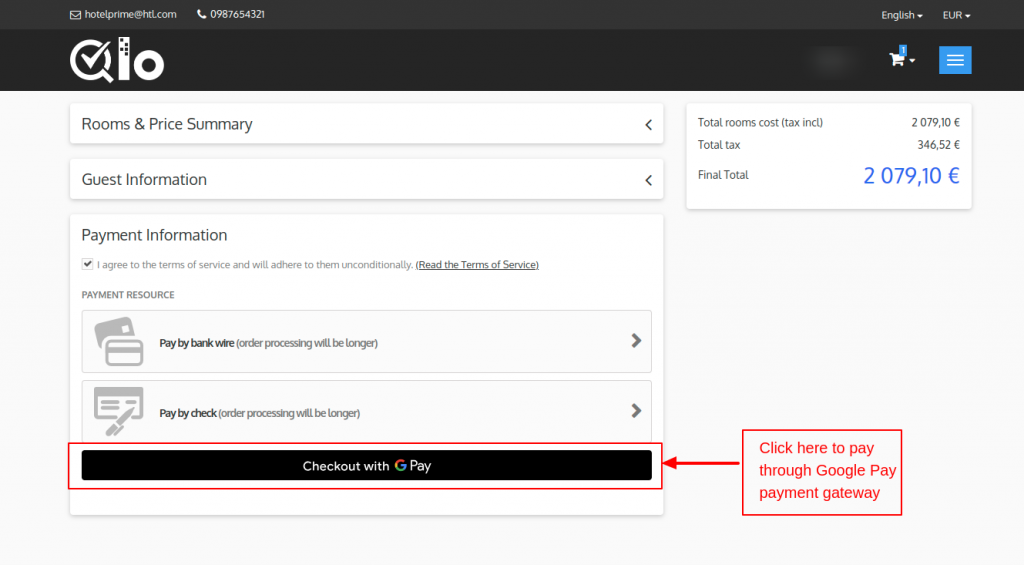
Checkout Page
At the checkout page, you can see the Google Pay payment option is available. Click on it to pay from the Google Pay payment gateway.
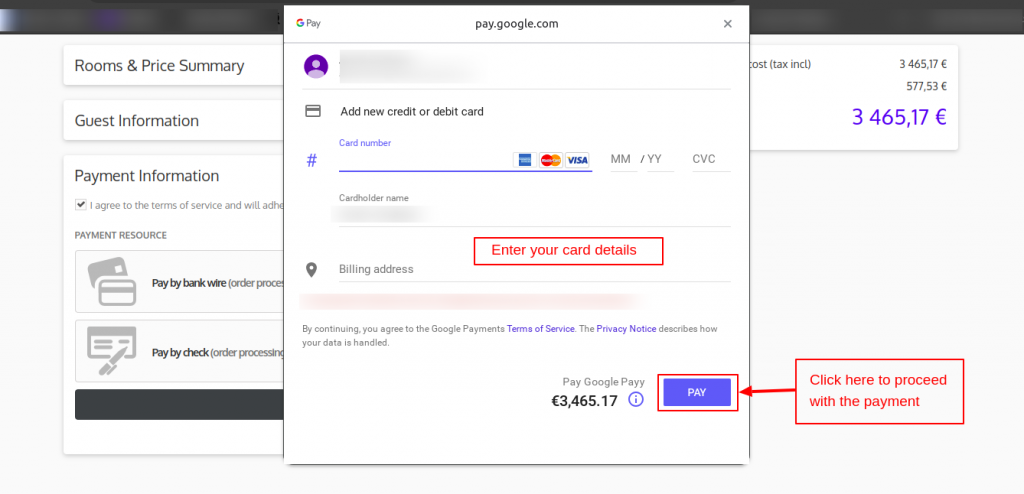
Afterwards, a pop up appears where a customer has to fill card number, cardholder name and billing address and click on ‘Pay’ to make the payment.
Back office features of Google Pay
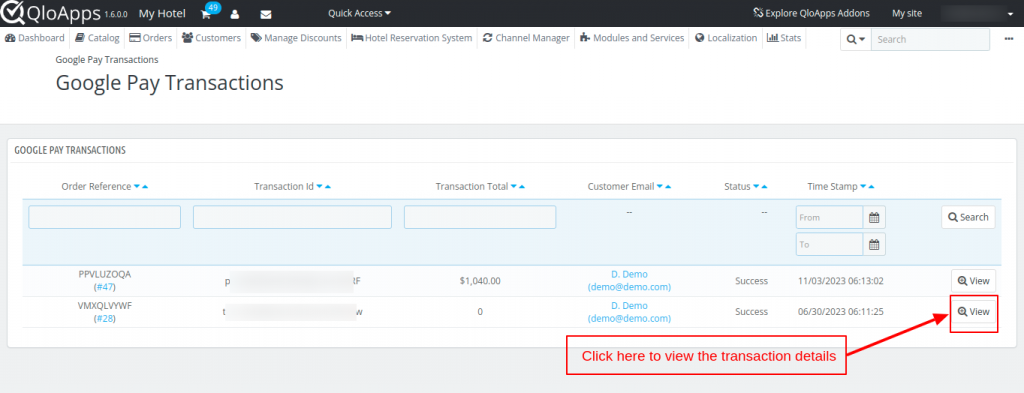
In the back office, a separate tab is added where the admin can view all the Google Pay Transactions.
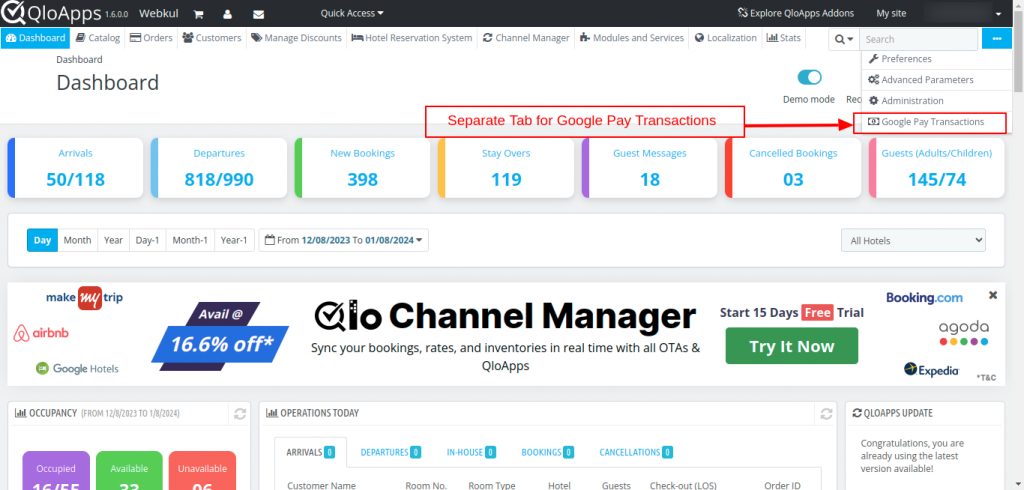
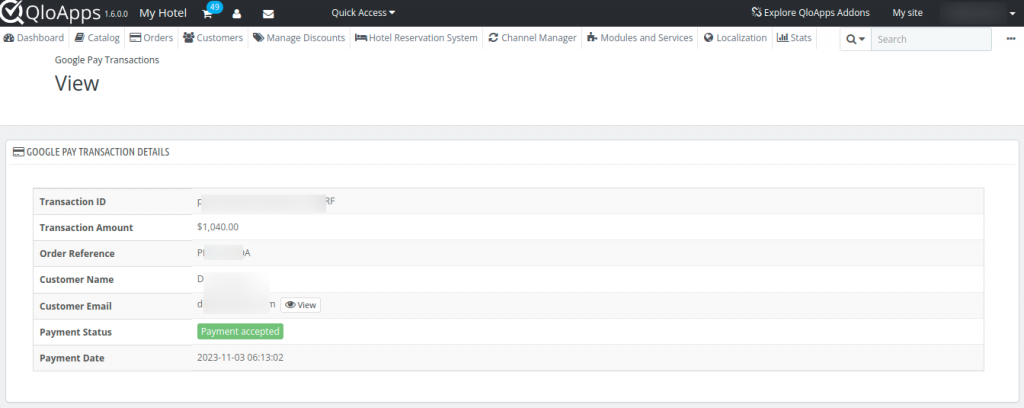
Here, the admin can see the list of Google Pay transactions. Admin can click on view to see the transaction details.
On this page, the all the details regarding the transaction will be displayed.
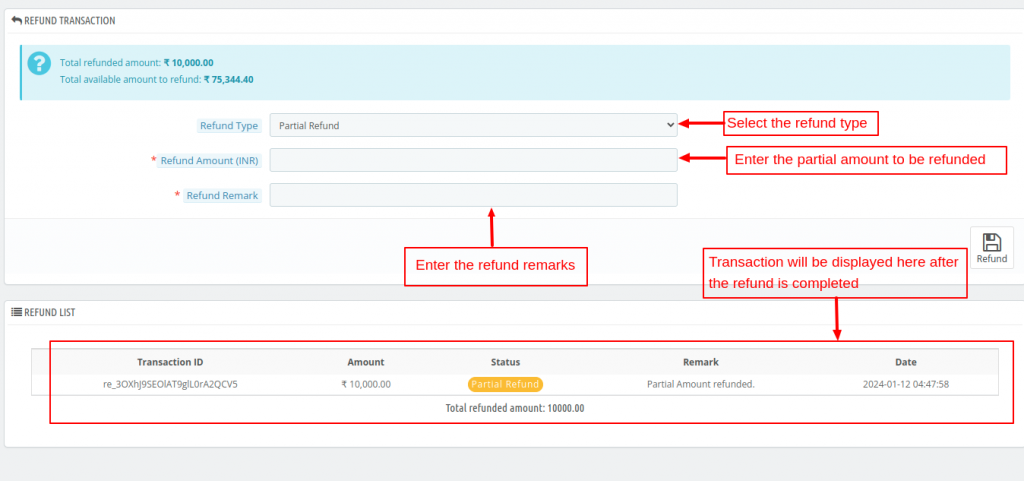
Also, on this page admin have the ability to refund the amount. They can select the refund type as either partial or full refund and enter the refund remarks.
If admin have selected the partial refund, they have to enter the partial amount.
Once the refund process is completed, the refund details will be visible in the below list.
Conclusion
This was all from the QloApps Google Pay Payment Gateway. I hope I was able to clarify the functioning of the module to you.
If you want to learn about the functionality of QloApps then you can visit this link: Qlo Reservation System – Free Open-Source Hotel Booking & Reservation System.
In case of any query, issue or requirement please feel free to raise it on QloApps Forum.
Current Product Version – V1.1.0
Supported Framework Version – QloApps 1.6.x

The module is live now. You can buy the module from the store after clicking on Buy Now button on the top and get the zip file.
In case of any other issue, you can raise a ticket at: https://webkul.uvdesk.com/en/customer/create-ticket/.