QloApps Entry/Exit Popup is an add-on that allows you to give information or promotion offers to website visitors through pop-ups.
Hence, we can say that the pop-up is used to create awareness or to market your room type.
The great thing about using pop-ups is that you can change the customize it as per your business requirements.
You can easily change the look and feel of the pop-up by customizing its text, design, and visibility.
Since the pop-up automatically shows on the website page, it automatically attracts people’s attention.
Features of QloApps Entry/Exit Popup
- The admin can create multiple templates for creating the popup.
- The admin can set the duration of the popup by selecting its start and end date.
- Select the pages on which the popup should display.
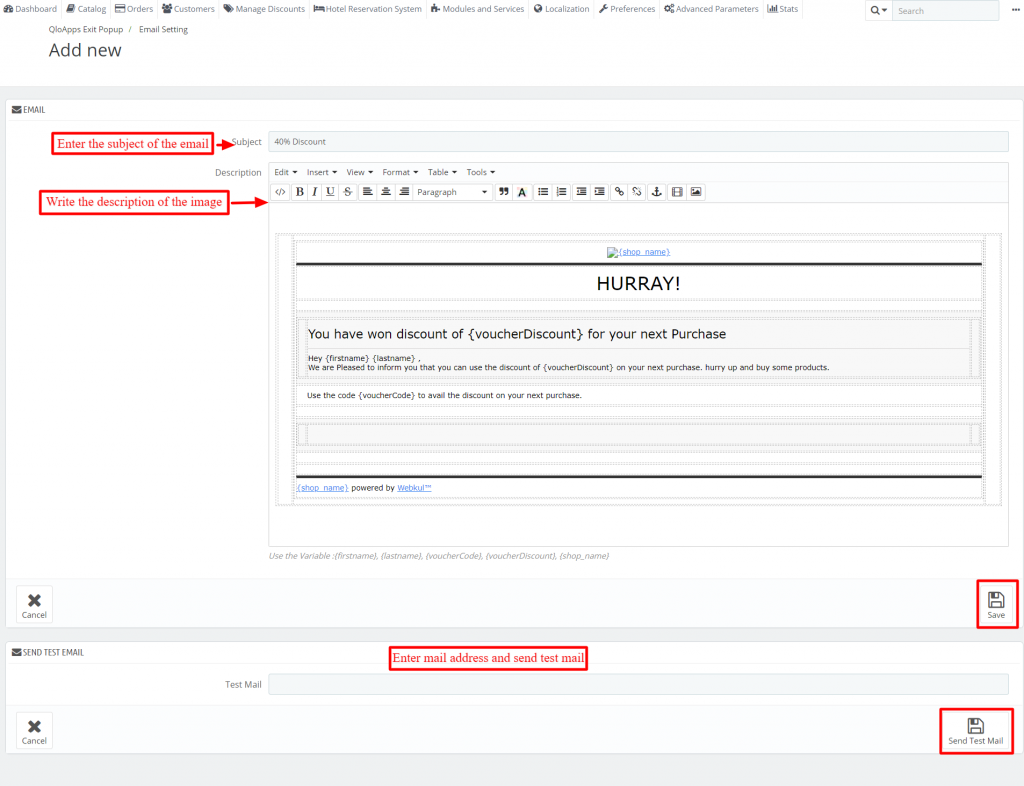
- Admin can send emails to customers. He can also send a test email before actually sending it to customers.
- Customize the text, design, and visibility of the popup.
- Select the group (Visitor, Customer, Guest) who can see the popup.
- Set the timer, after which a popup appears on the website.
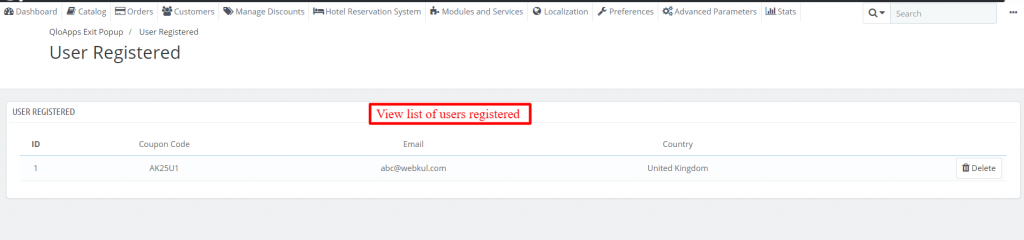
- View the list of users registered.
Installation of QloApps Entry/Exit Popup
The installation of any module is very simple in QloApps.
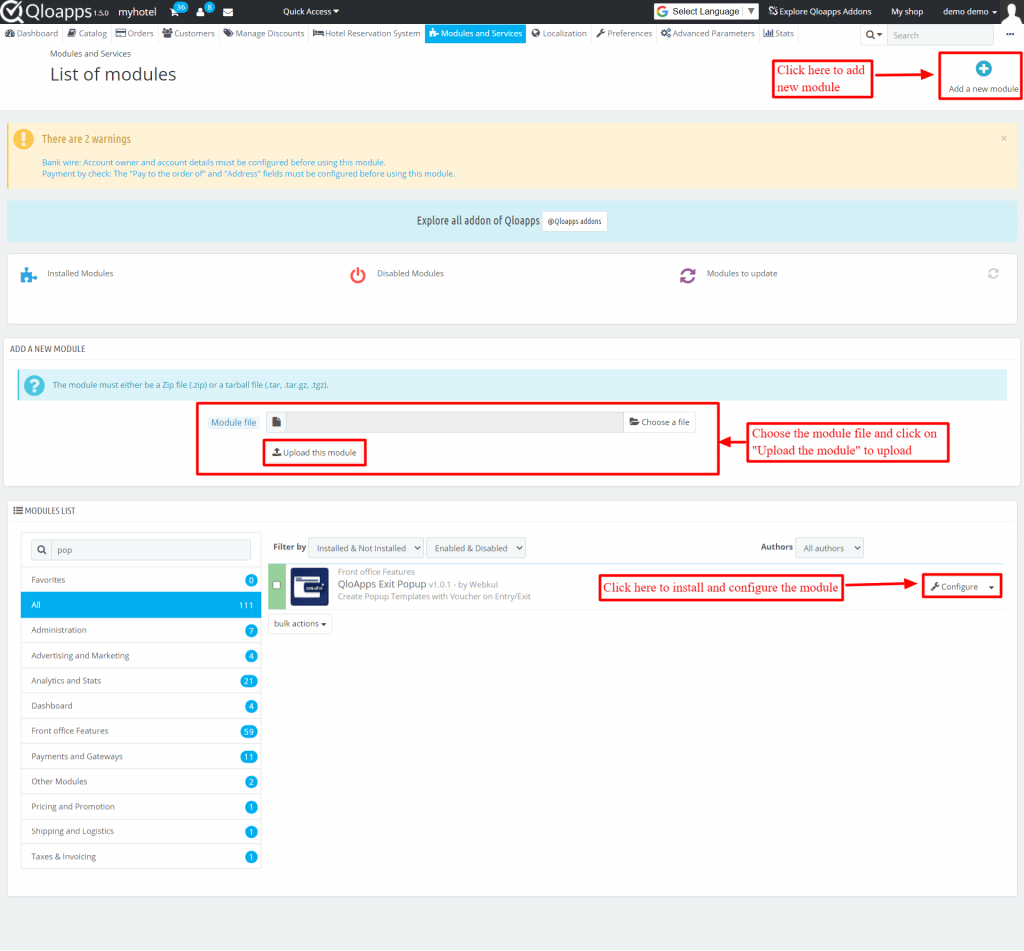
- Go to the “Module and Services” tab.
- Click on “Add New Module”.

Now upload the Zip file of the module and click on install.
Now You Have Installed The Module. So Let Us Check The Module Configuration.
Configuration of QloApps Entry/Exit Popup
The image shown below will open for configuring the module.

Using the QloApps Entry/Exit Popup, enable or disable the following options.
- Display “Don’t Show Again” Button: Enable to Display “Don’t Show Again” Button.
- Send mail to customer: Enable to send mail to customers.
- Select Terms and Conditions Page: Select the page from the dropdown.
Popup List
From this, customize the popup look.
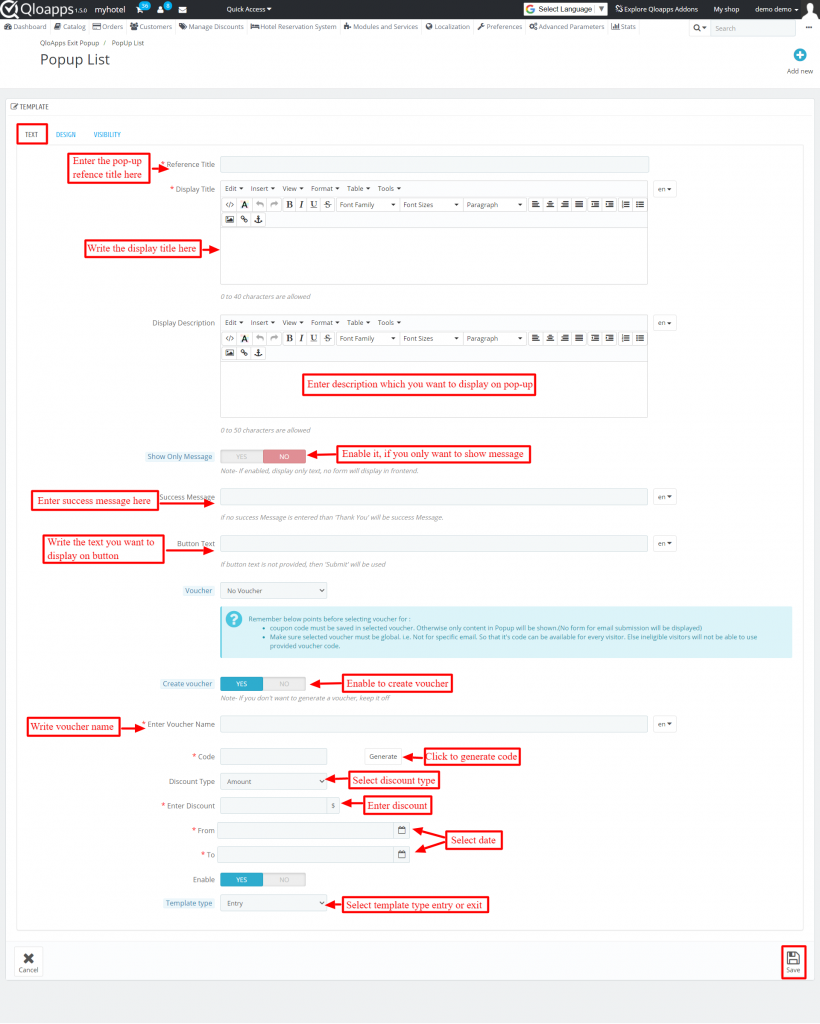
Text
- Reference Title: Enter the reference title of the popup.
- Display Title: Write the display title here.
- Display Description: Write the description which you want to display on the popup.
- Show only message: Enable it, if you only want to show a message.
- Success Message: Enter the success message.
- Button Text: Write the text you want to display on a button.
- Voucher: The created voucher will be displayed here.
- Create Voucher: Enable to create a voucher.
- Enter Voucher Name: Write voucher name here.
- Code: Click on “Generate” to generate code.
- Discount Type: Select discount type from the dropdown.
- Enter Discount: Enter discount amount or percentage.
- From or To: Select the date range in which you want to display the voucher.
- Enable: Select “Yes” to enable.
- Template Type: Select template type as entry or exit.
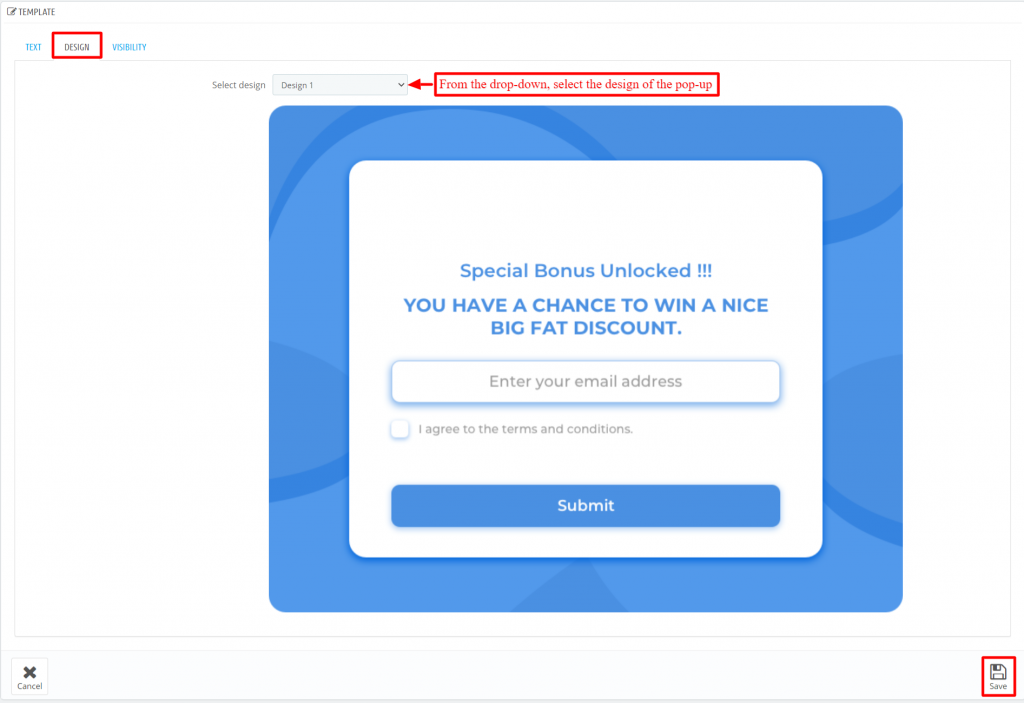
Design
Select Design: Select the design or customize it.
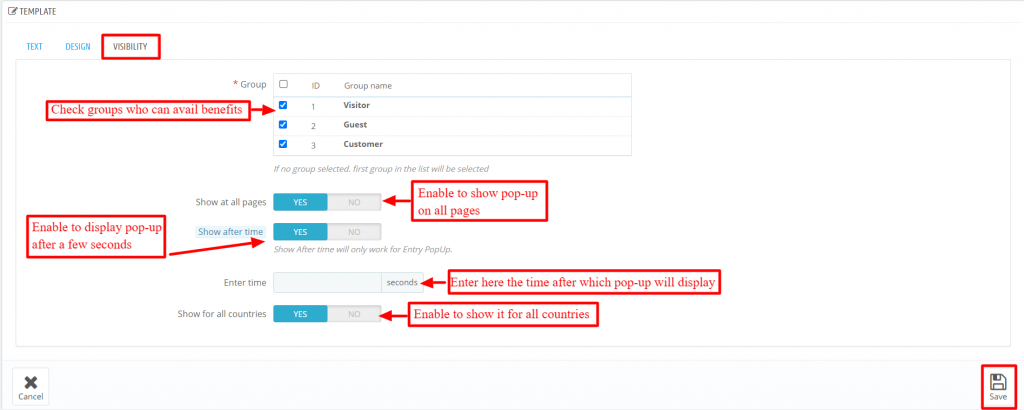
Visibility
- Group: Select the group that can see the popup.
- Show at all pages: Enable it to display on all the pages.
- Show after some time: Enable to show the popup after some time.
- Enter time: Enter the time after which the popup will display.
- Show for all countries: Enable it to show it in all countries.
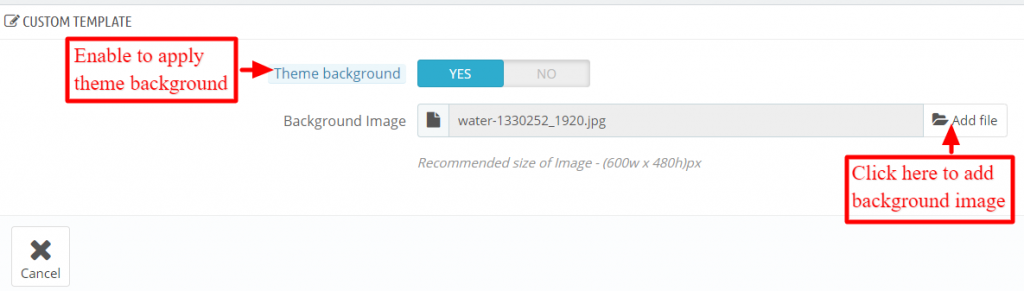
Custom Template
Select the background image of the theme.
Email Setting
Customize the email and send it to customers. Moreover, you can also send test emails to confirm the mail setup.
User Registered
View the list of users registered.
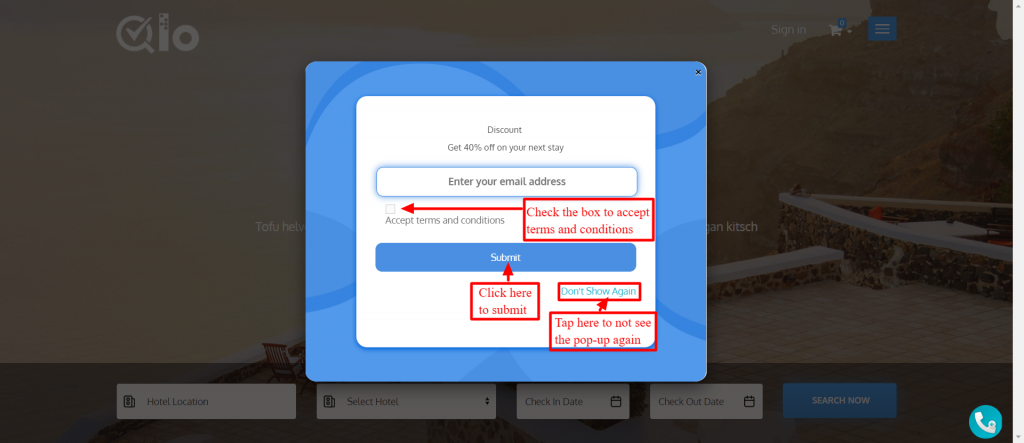
Frontend
The popup is displayed on the website. Enter the details and click on the submit.
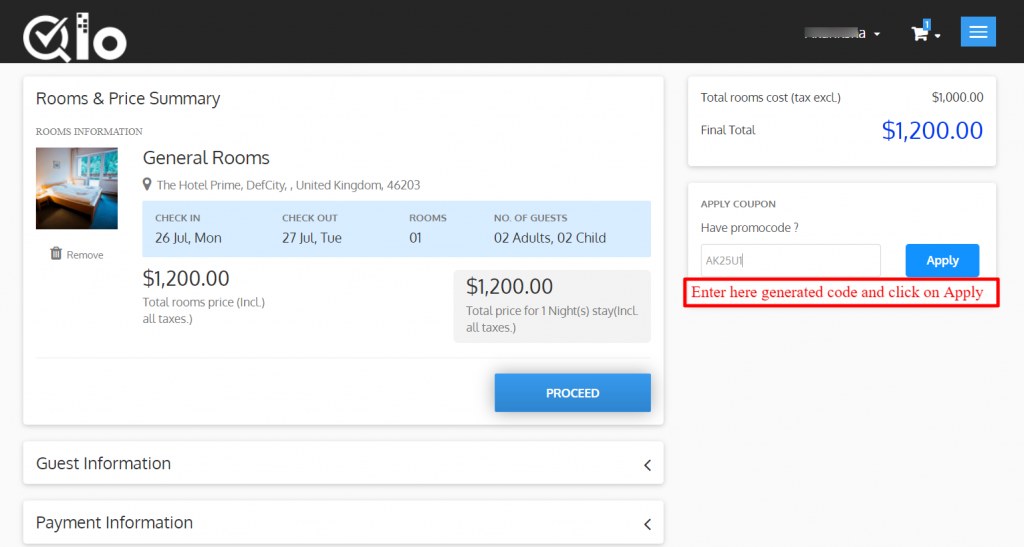
Afterward, copy the code and sign in to use it at the time of reserving a room.

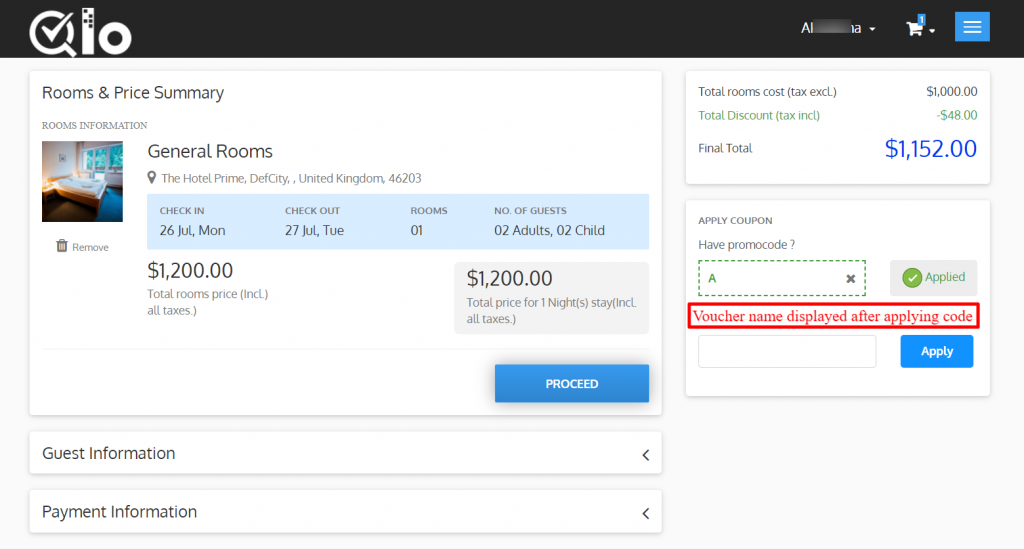
This is the check-out page. Enter the code and click on “Apply” to get a discount.
The name of the voucher will display after applying the coupon code.
Conclusion
This was all from the QloApps Entry/Exit Popup. I hope I was able to clarify the functioning of this module.
If you want to learn about the functionality of QloApps then you can visit this link: QLO Reservation System – Free Open-Source Hotel Booking & Reservation System
In case of any query, issue, or requirement please feel free to raise it on QloApps Forum
Current Product Version – 1.0.3
Supported Framework Version- QloApps 1.6.x and 1.7.x

Be the first to comment.