QloApps Custom Registration Field is an add-on which will help you to gather tailored information from your customer.
You can add fields in the Customer Registration Form and gather all the information as per your needs.
Further, you can make any field mandatory to be filled during registration.
Its benefit is that you can use these data to understand your customer’s behaviour and provide personalized experiences to them.
Features
- The Admin can create and edit new custom fields from the backend.
- The Admin can add fields such as textbox, text area, radio button, checkbox, file type and backend drop-down.
- He can active or inactive the fields from the backend.
- Admin can set the field optional or mandatory for the customer.
- It allows the admin to add new fields and easily validate them without changing the codes.
- Custom registration fields help to gain more information through custom fields about customers.
Prerequisites Of Installation
Before you install QloApps Custom Registration Fields addon you must make a few changes in the core for the proper functioning of the module.
The step is very simple, you just have to replace the mention codes in the following paths.
Path;
Just follow these simple steps:
First : Open Controllers -> front -> identityController.php
Step 2 : Go to Line number 76 (line number may differ) press Enter and paste below code just above the code: if (!count(\$this->errors))
Hook::exec('actionBeforeUpdateCustomField')
step 3 : Save and upload the file.
Installation of QloApps Custom Registration Field Addon
The installation of any module is very simple in QloApps.
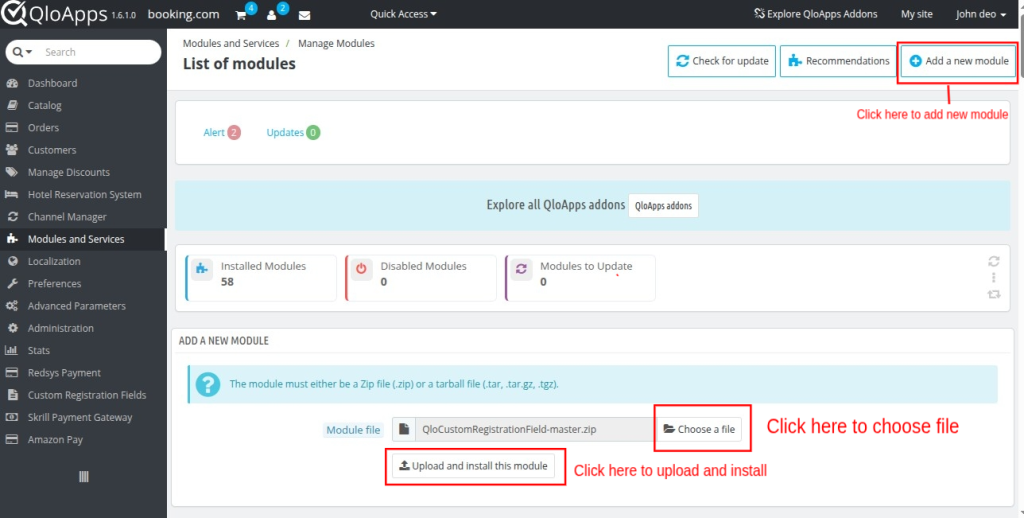
- Go to Module and Services tab
- Click on Add New Module
- Now upload the Zip file of Module and click on Install.
After installation, it will start showing up.
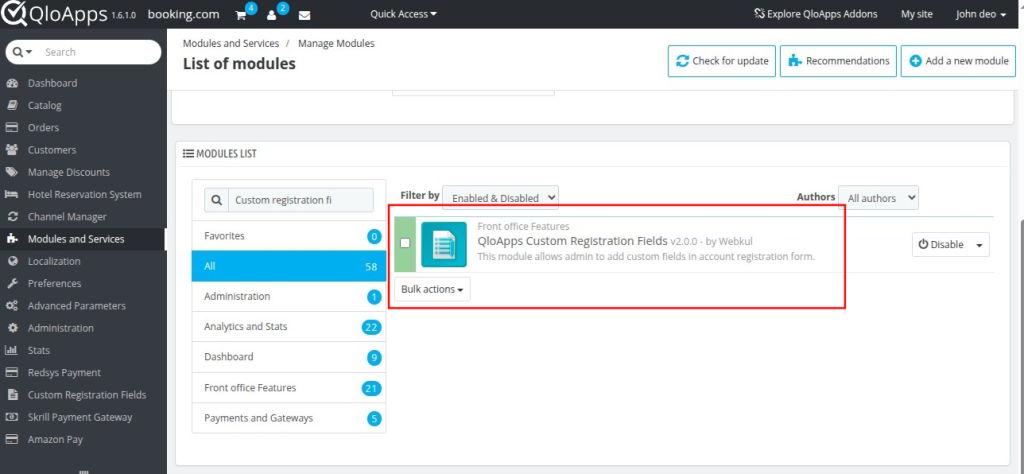
Now you have installed the module. So, let’s check the module configuration.
Module Configuration
After the completion of the installation, a new tab “registration custom field” is added.
Finally after “Custom Registration Field”, we can configure the module.
You can see the list of all the fields already added, you can edit them. Further, you can add new fields from here.
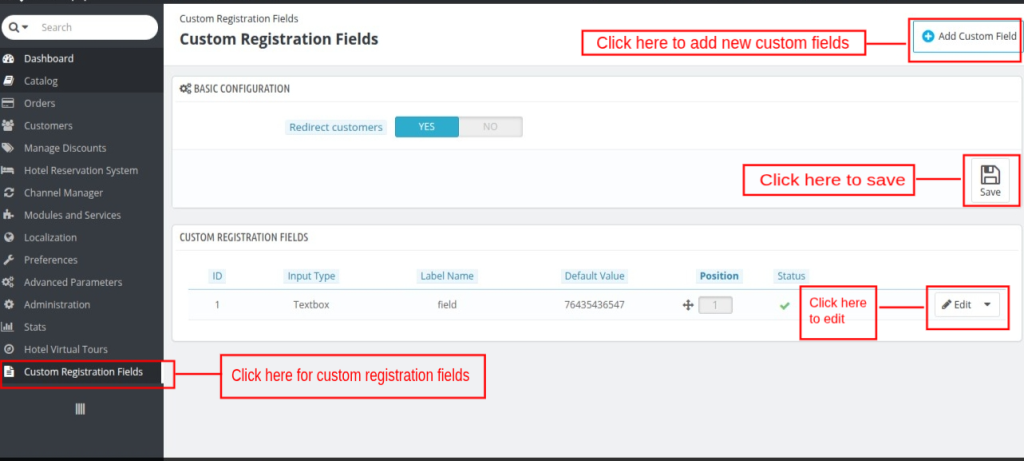
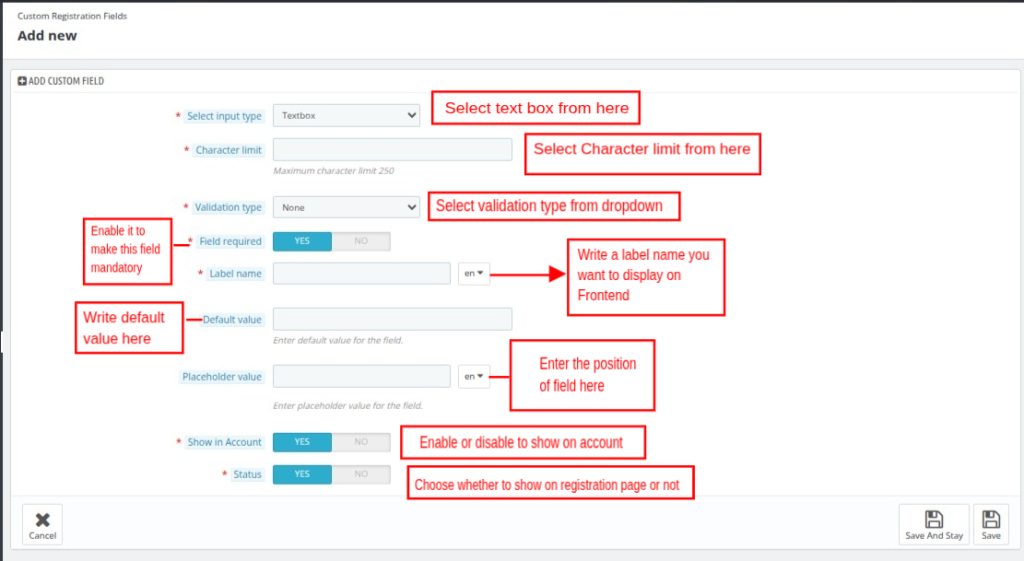
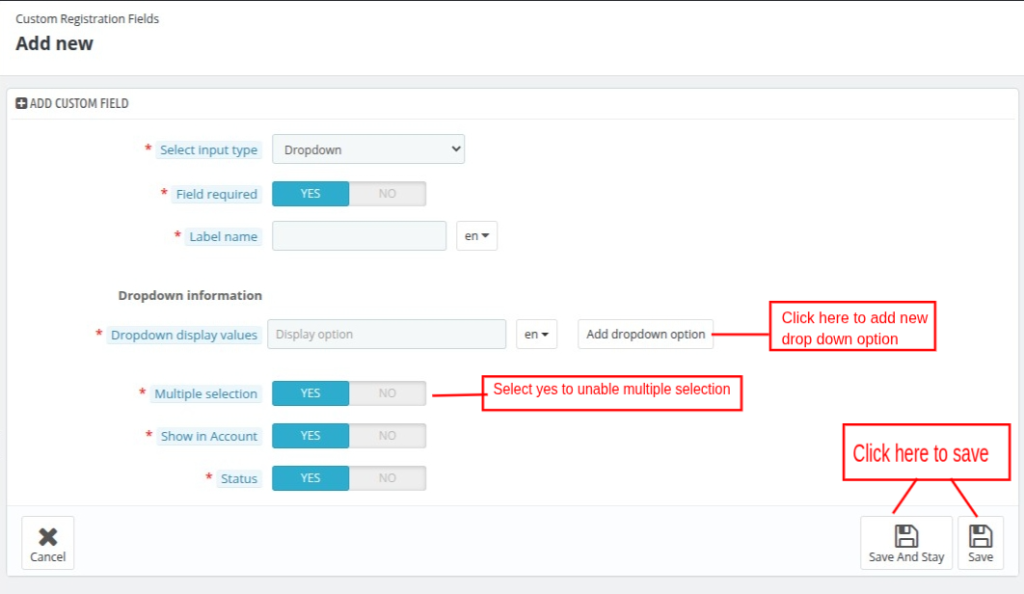
When you click on “Add custom field”, it will look like the image below. Let us check all the options in it.
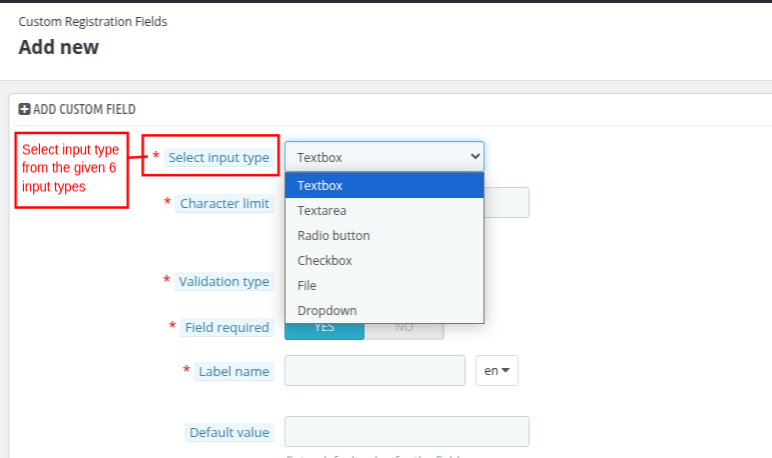
Select Input type: You have to select the custom field type from the dropdown.
Adding textbox as the custom registration field
You can add textbox in the custom field and fill in all the details as specified in the image below.
Frontend view of after adding textbox in the backend.

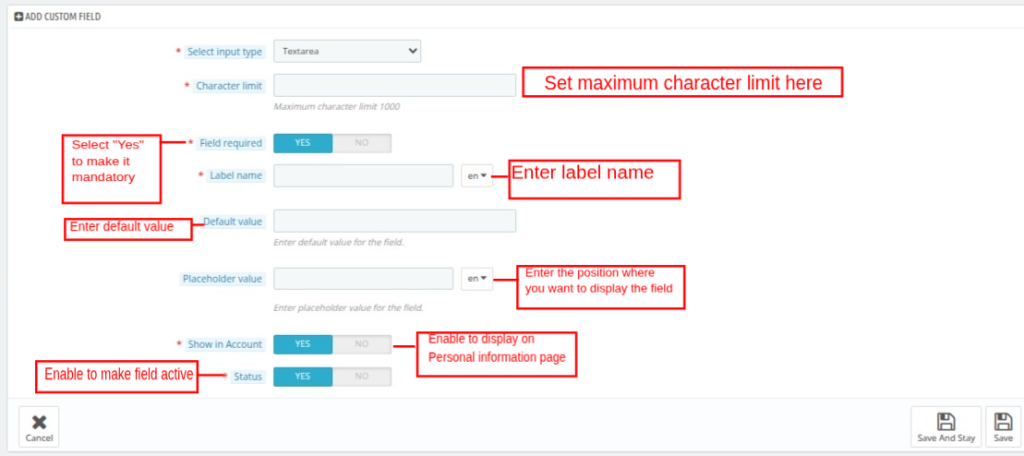
Adding textarea as the custom registration field
See the image below and add textarea field and its details from the backend.
Frontend view after adding textarea in the backend.
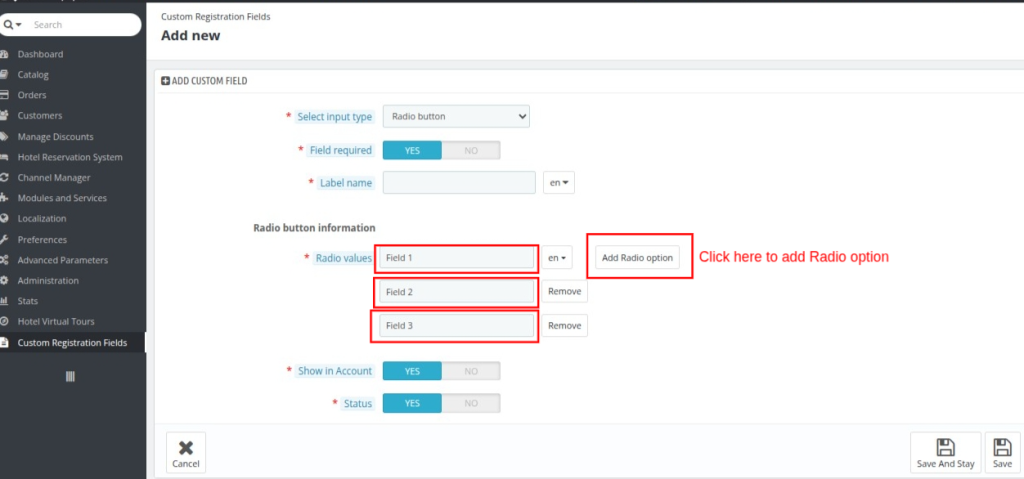
Adding radio button as the custom registration field
Admin can add as many as radio button as per the need from the backend. It allows visitors to choose only one option at a time.
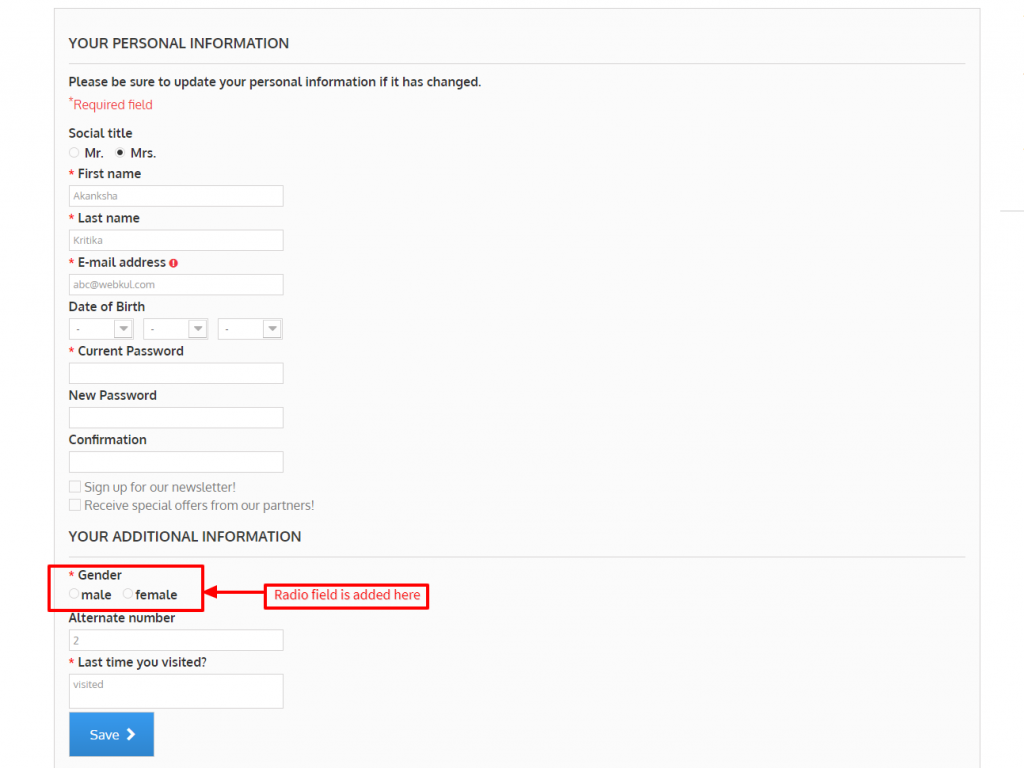
This is the frontend view after adding radiobutton at the backend.
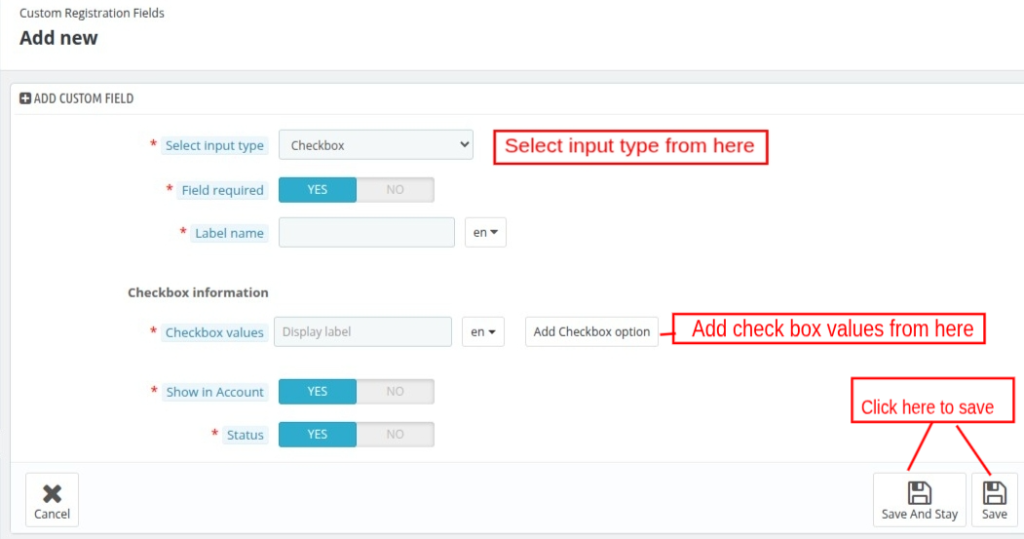
Adding checkbox as the custom registration field
Similarly, admin can add checkbox from the backend. The customer checks the boxes to select options.
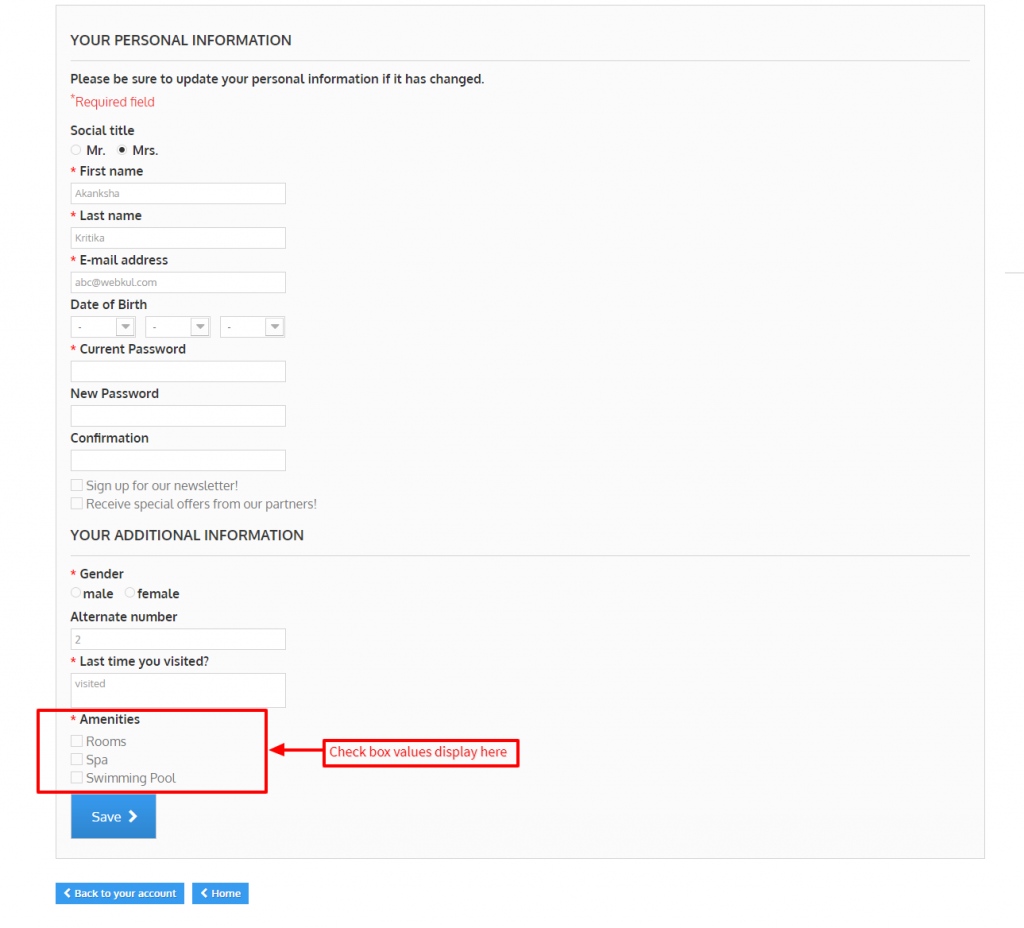
This is the frontend view of the checkbox.
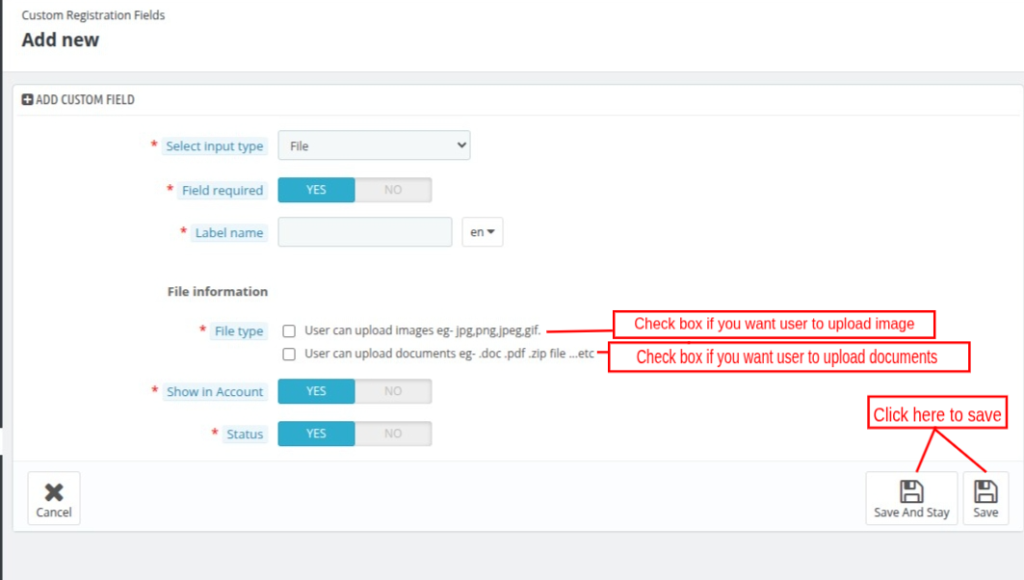
Adding file type as a custom registration field.
If an admin wants to have an image, documents, etc of guests, then he can use file type as a custom field.
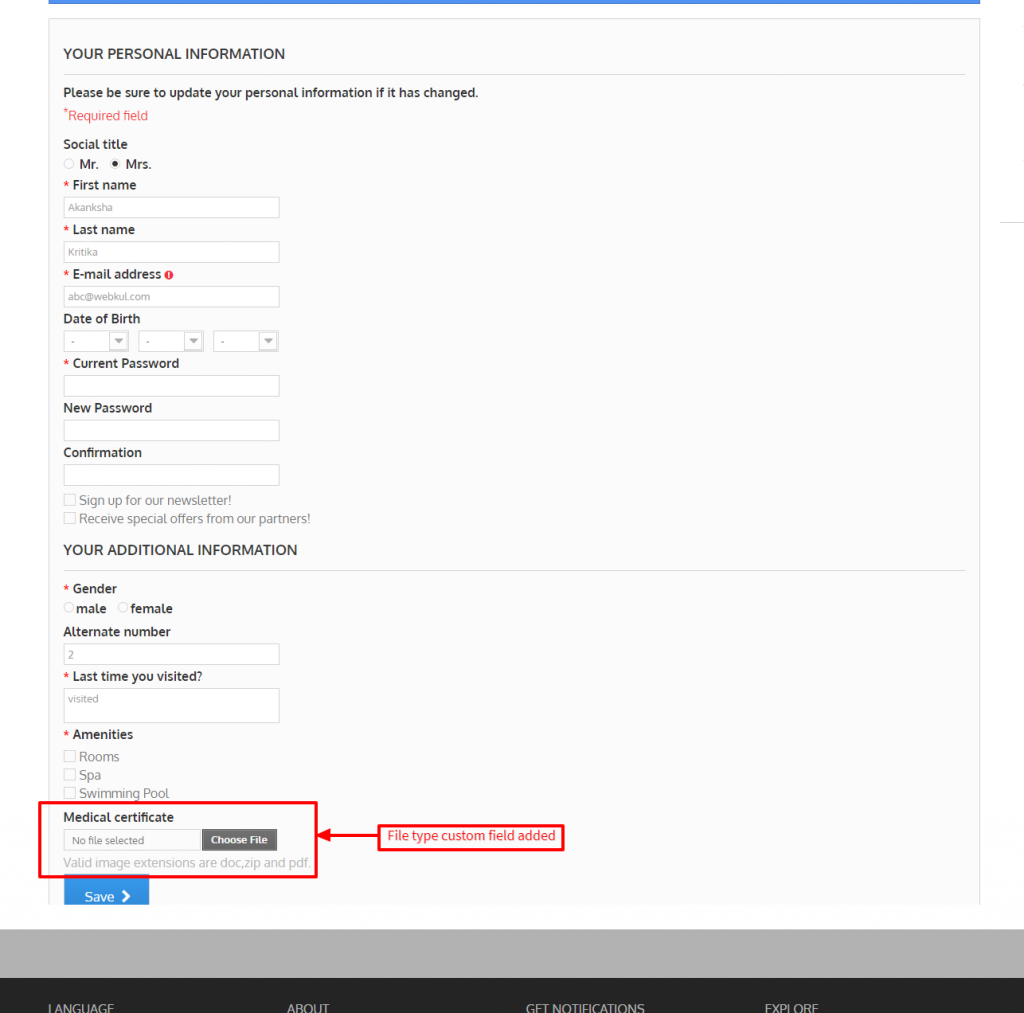
Frontend view after adding a file type in the backend.
Adding dropdown as the custom registration field
Similarly, admin can add dropdown in the backend.
Frontend view after adding dropdown as the custom registration field
QloApps
Hence, in this way you can add various types of custom fields on the registration page.
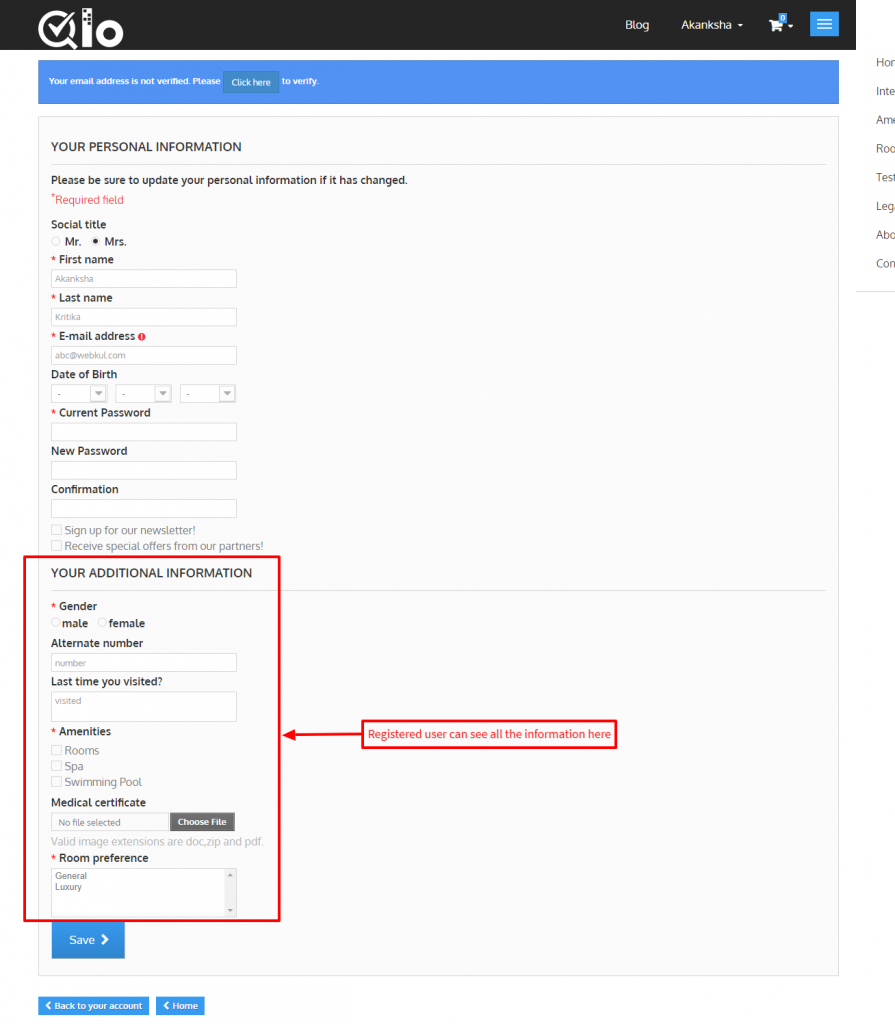
When the user is registering they can view the additional information on the under “my information tab” on the account page.

Further, already registered customer can also view and add additional information under “my information tab” on the account page.
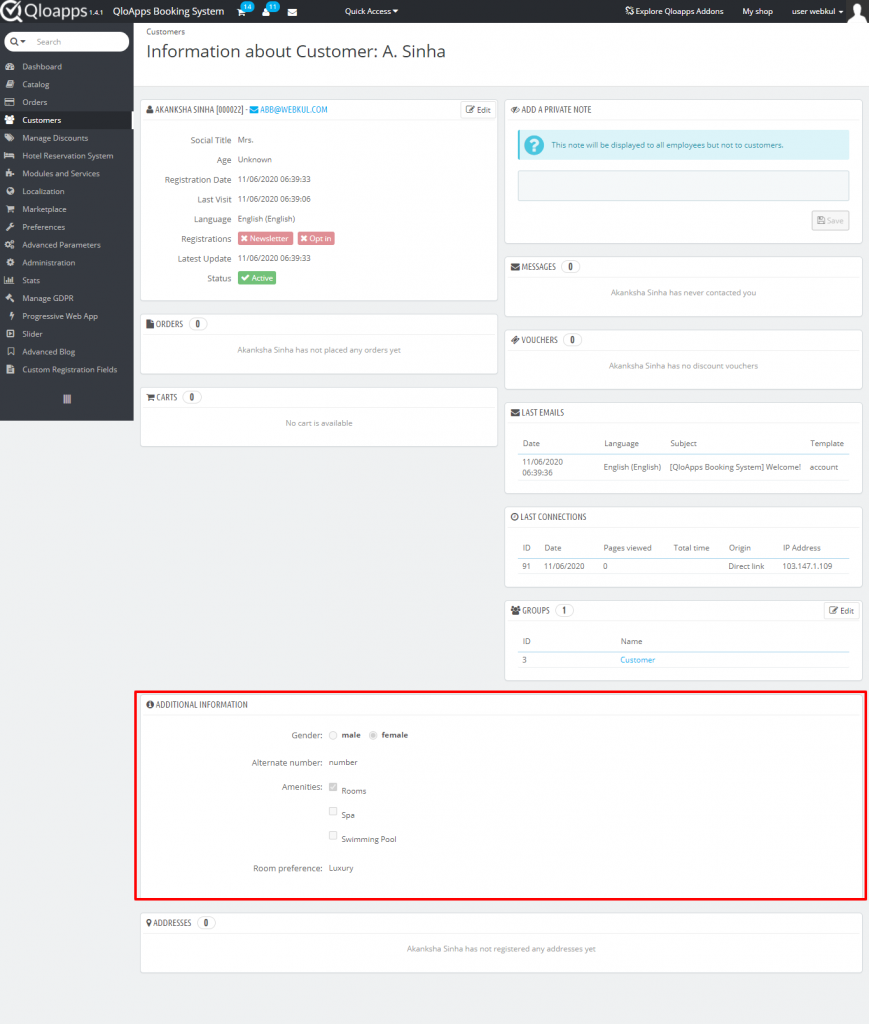
From the backend, admin can view the additional information of the customer under the “customers” tab.
Conclusion
This was all from the QloApps Custom Registration Field. I hope it helps you out in understanding the flow and functionalities of this module.
If you want to learn about the functionality of QloApps then you can visit this link: QLO Reservation System – Free Open-Source Hotel Booking & Reservation System
In case of any query, issue or requirement please feel free to raise it on QloApps Forum
Current product version: v2.0.1
Supported framework version: 1.7.x & 1.6.x

Be the first to comment.