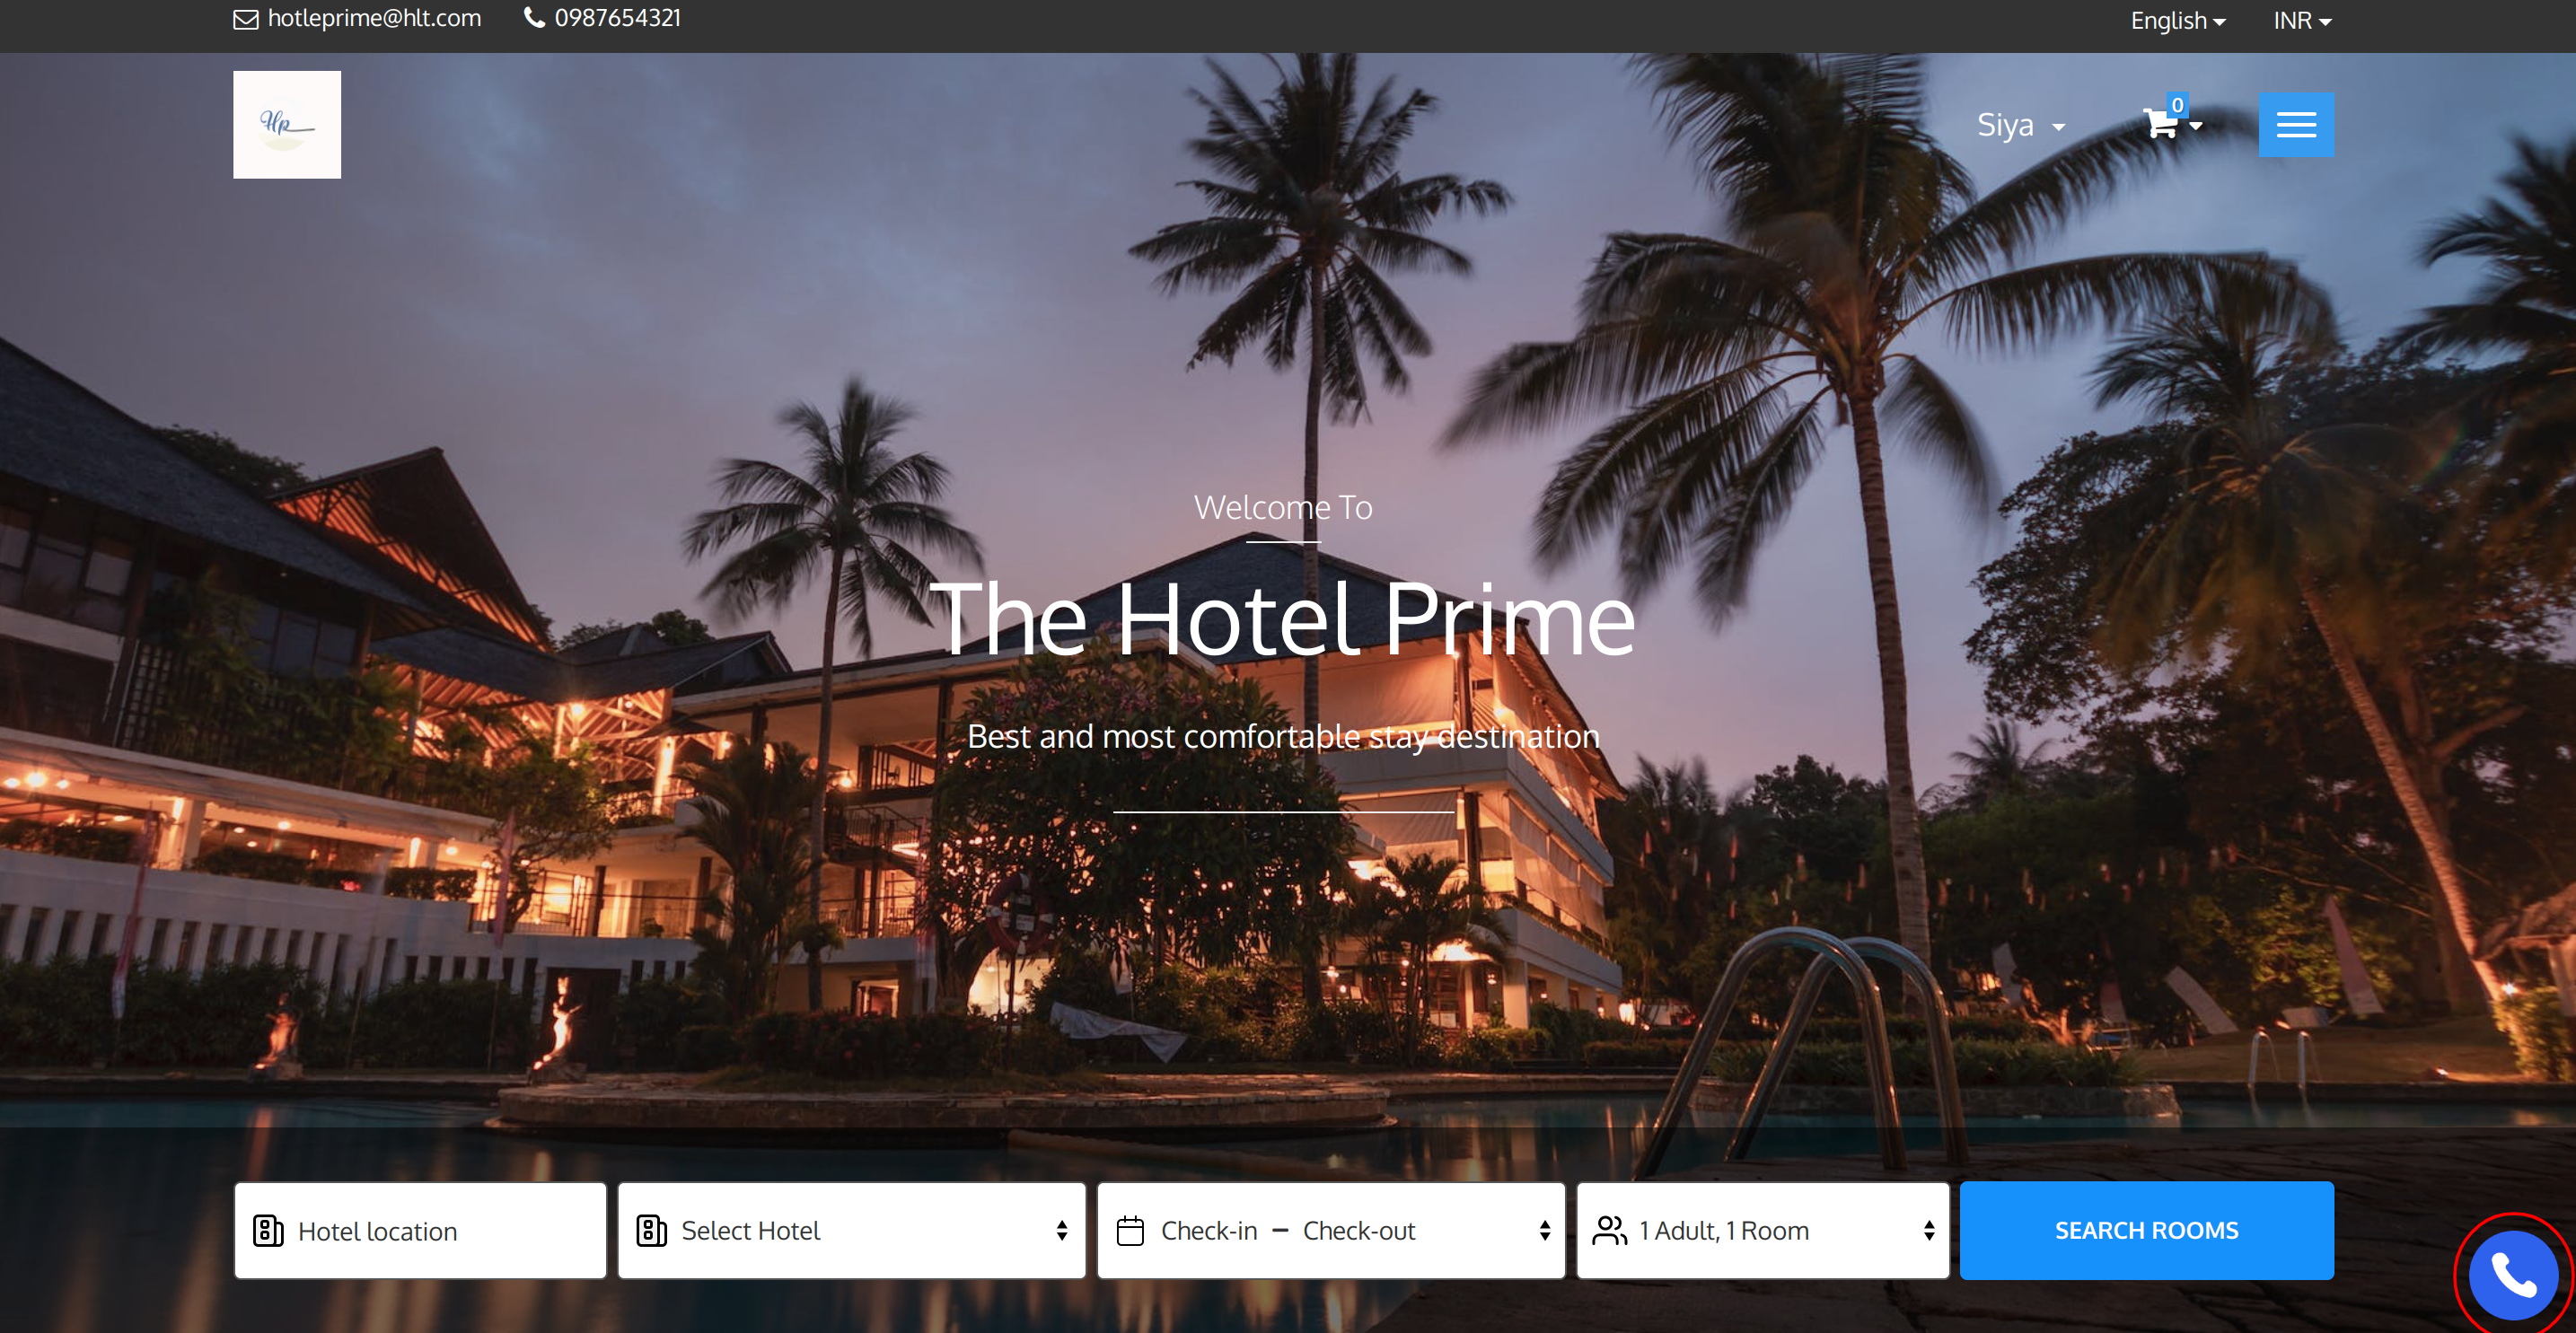
One of the best ways to make your clients feel heard and prioritized is to offer them ways to connect with you for their queries at any time.
And this is what QloApps Callback Request add-on will help you do for your guests.
With the QloApps Callback request addon, you can add a callback request form on your hotel booking website through which your clients can raise a request for you to connect with them over a call.
Therefore, It will provide your client with a quick and easy way to get in touch with you.
Providing your guests with a direct way to communicate with you will help you ease their customer journey and booking experience.
Thus, It will ultimately lead to increased bookings and a satisfied customer base.
So, Let me explain how you can configure this addon to manage your guest’s queries and collect their callback requests.
Features of QloApps Callback Request
- Admin can add a callback request icon on the home page of his booking website.
- The admin can edit the position, icon close image color and icon image of the callback request icon.
- The Admin can enable/ disable the option to get notified when a customer clicks on the callback request icon and add the mail ID on which he wants to receive the notification emails.
- Admin can configure the fields that guests should fill up in the callback request form by selecting the fields that he wants to add in the form (name, date, time, message) and fields that should be mandatory to fill when the guest submits the form.
- Admin can configure the form of QloApps Callback Request including:
- Form title and its position, font size, font weight, font color and background color.
- Callback form border weight and its radius and color.
- Form fields text position, border radius and color.
- Close Button icon color and size.
- Submit button text, font size, font weight, button type, color and background color.
- Admin can view the list of all callback requests he has received from the callback requests section.
- Admin can manage and update the status of each callback request he has received.
Installation of QloApps Callback Request
It is quite simple to install this module in QloApps. To install this module, you have to follow the following steps:
- Go to Module and Services.
- Click on Add New Module.
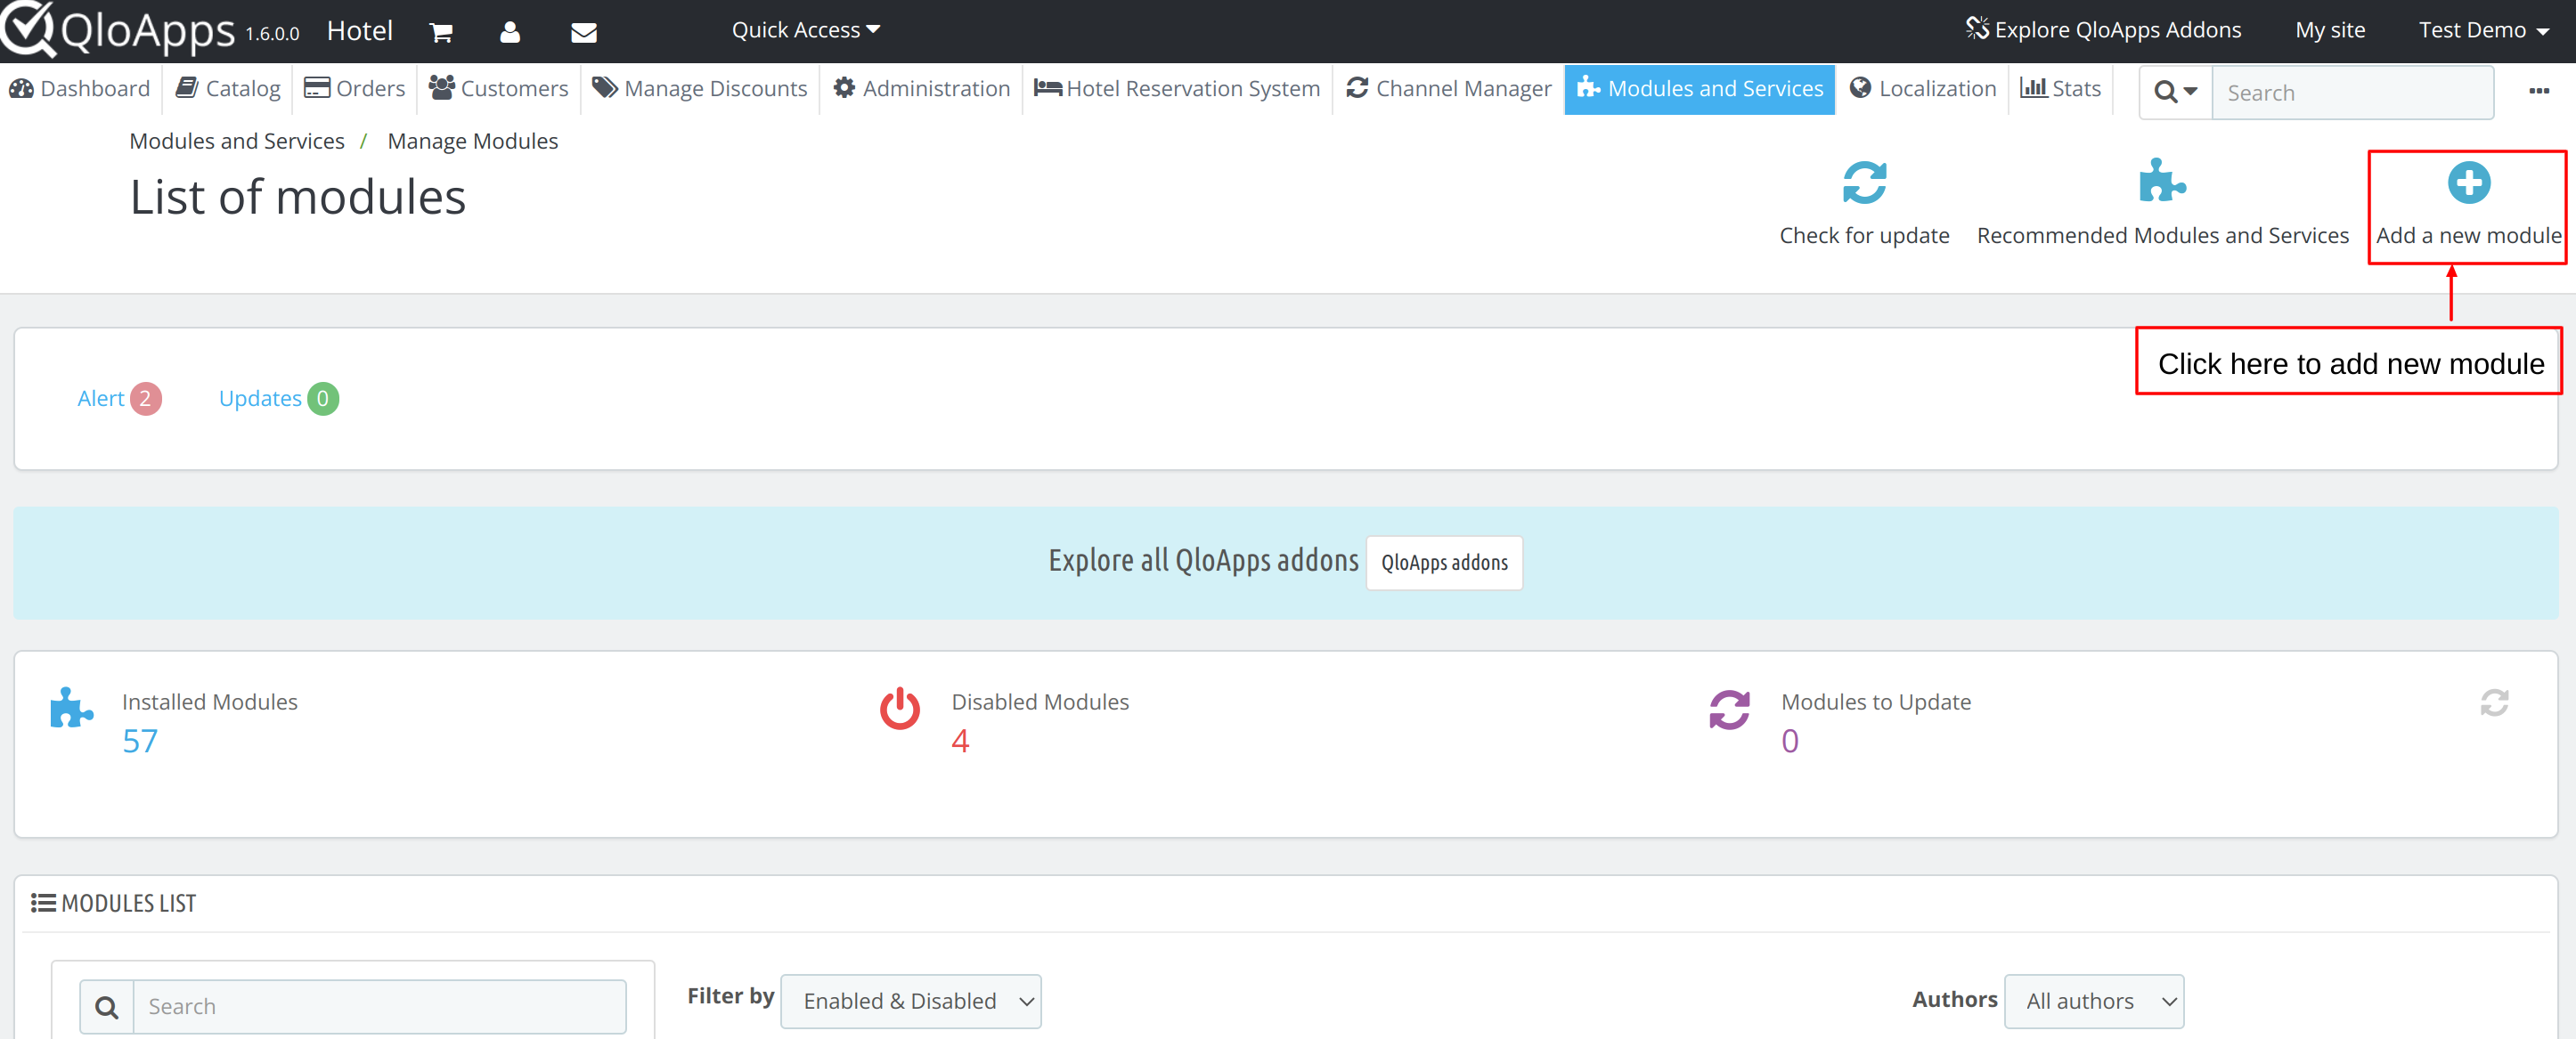
- Now upload the zip file of the Module and click on “Upload and Install this module” to install the module.
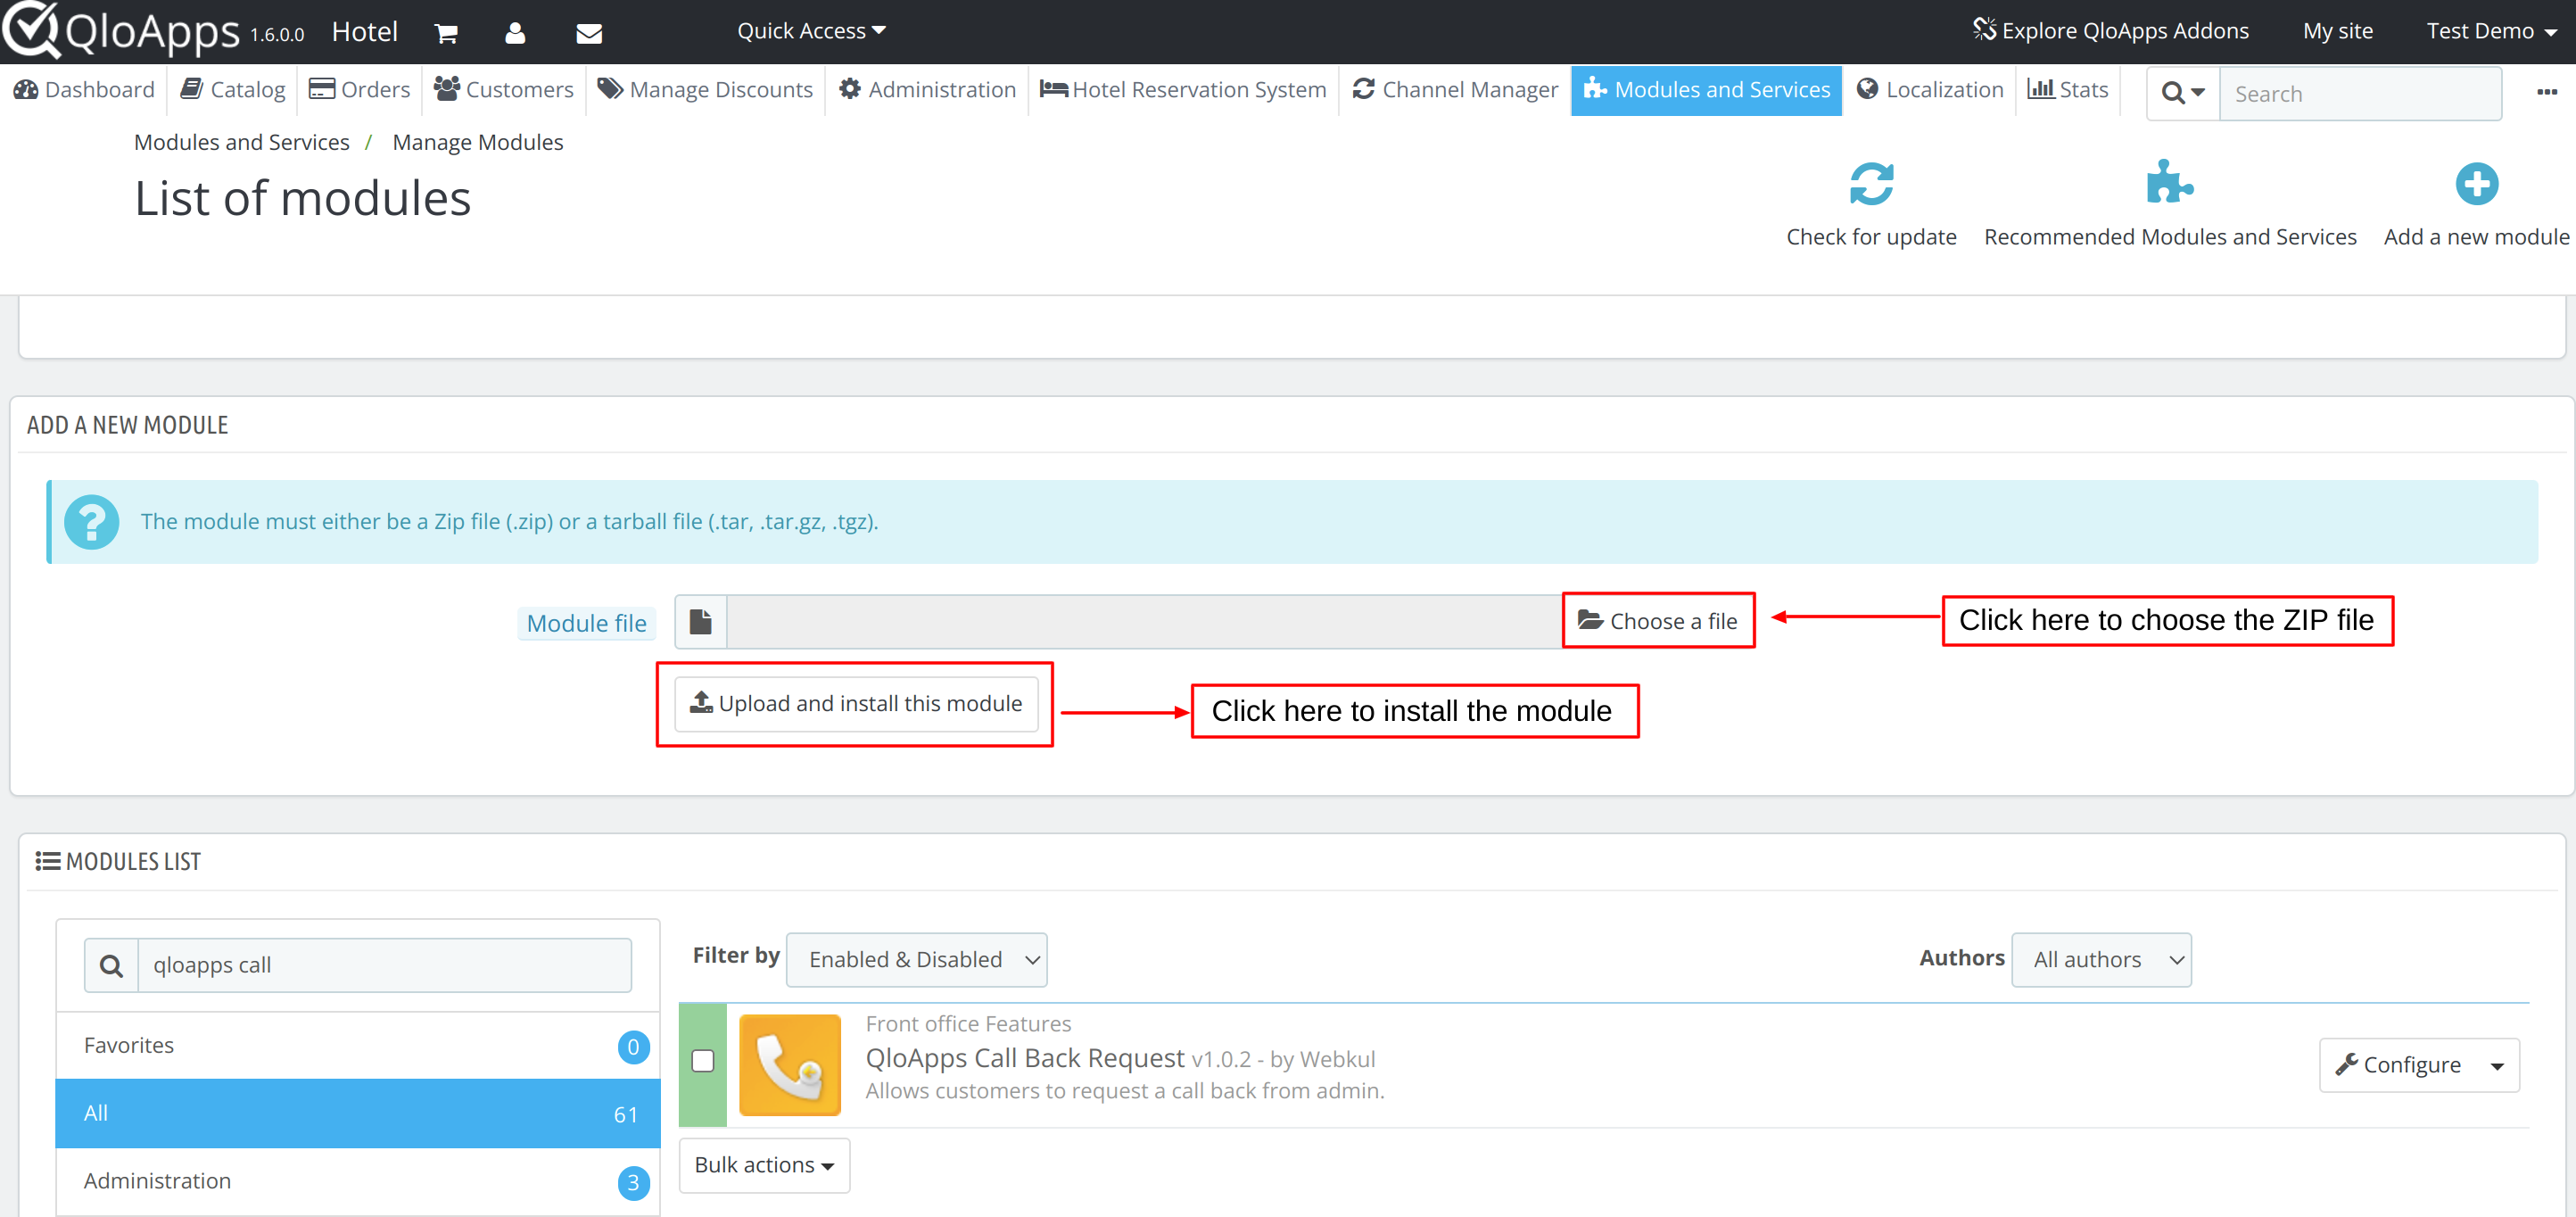
This is how you can install the module in QloApps.
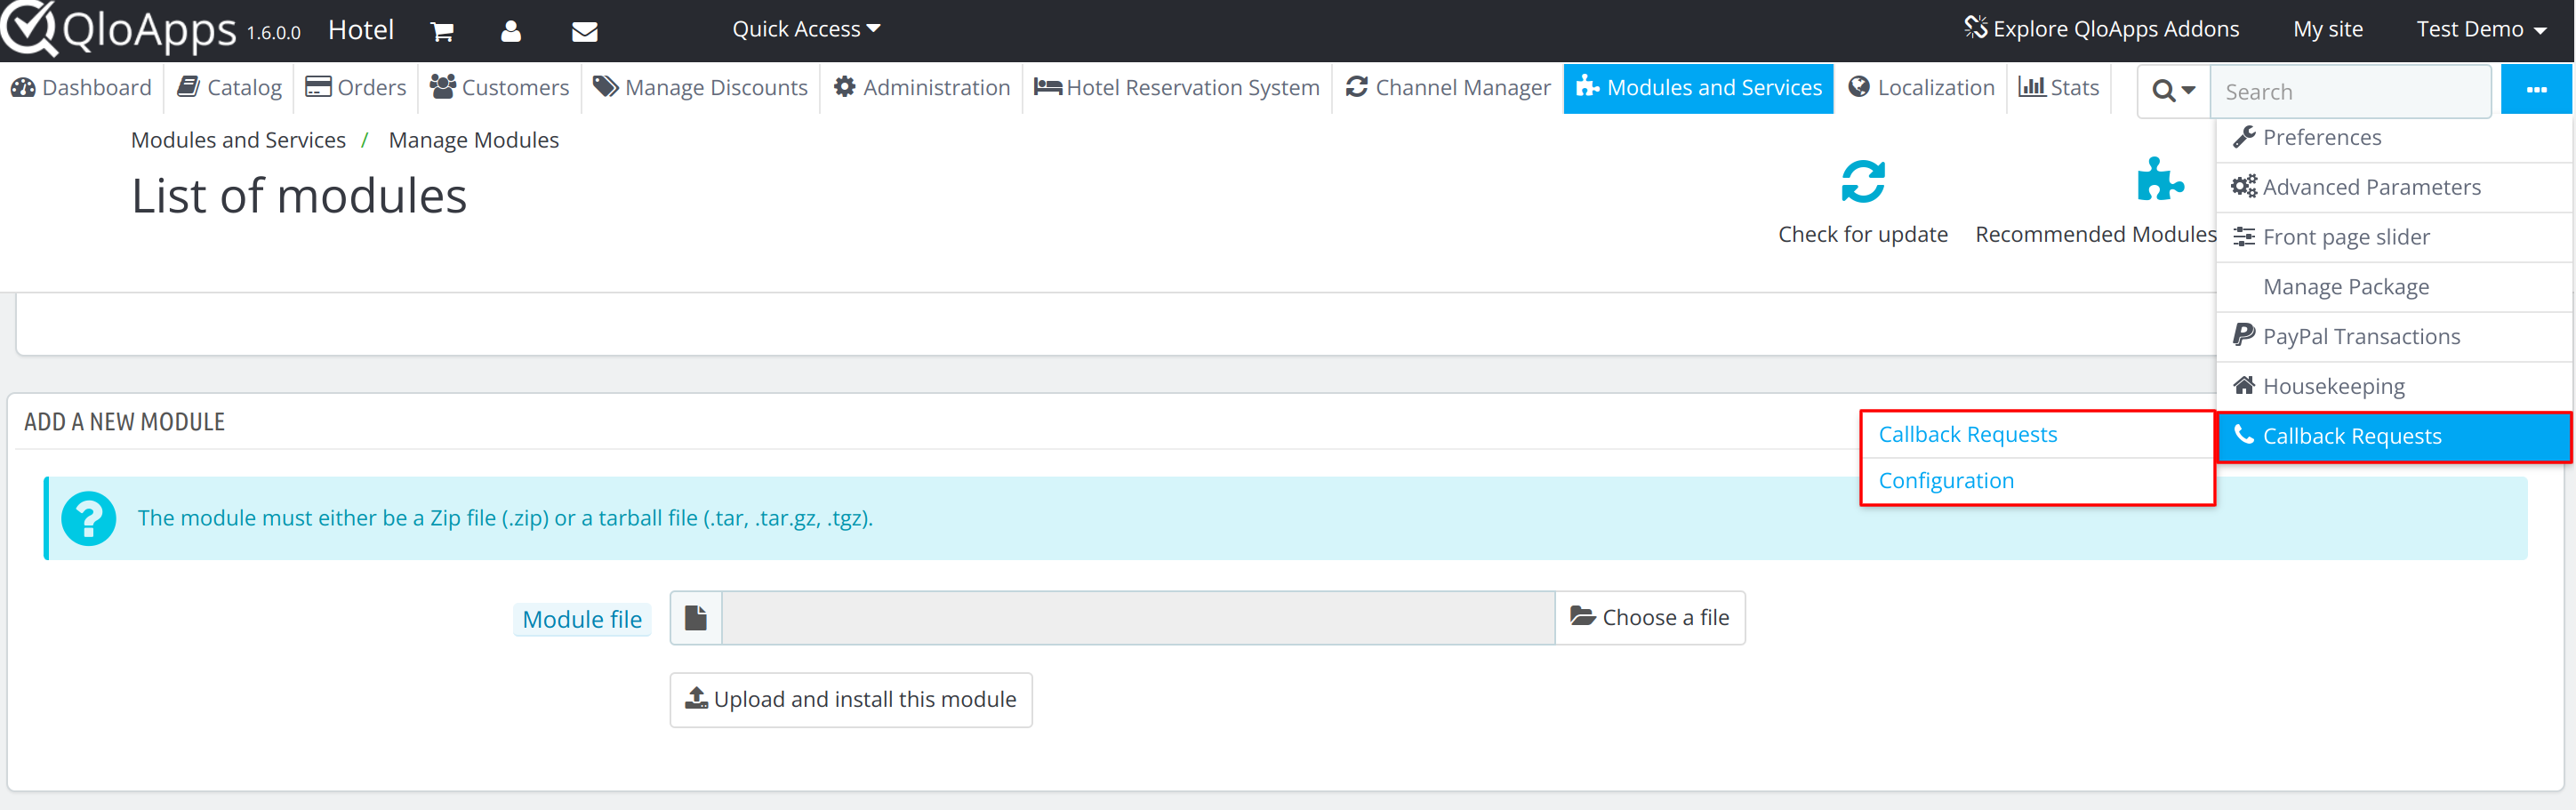
So, After the installation, a new menu of QloApps Callback Requests will be added to the menu bar through which you can configure and manage your callback requests.
Let me explain to you how you can configure this module.
Configuration of QloApps Callback Request
To configure this module, click on the “callback requests” menu in the menu bar and select the “configuration” option from the drop-down.
Once you click on configuration, the configuration page will open.
Three sections through which you can configure this module are:
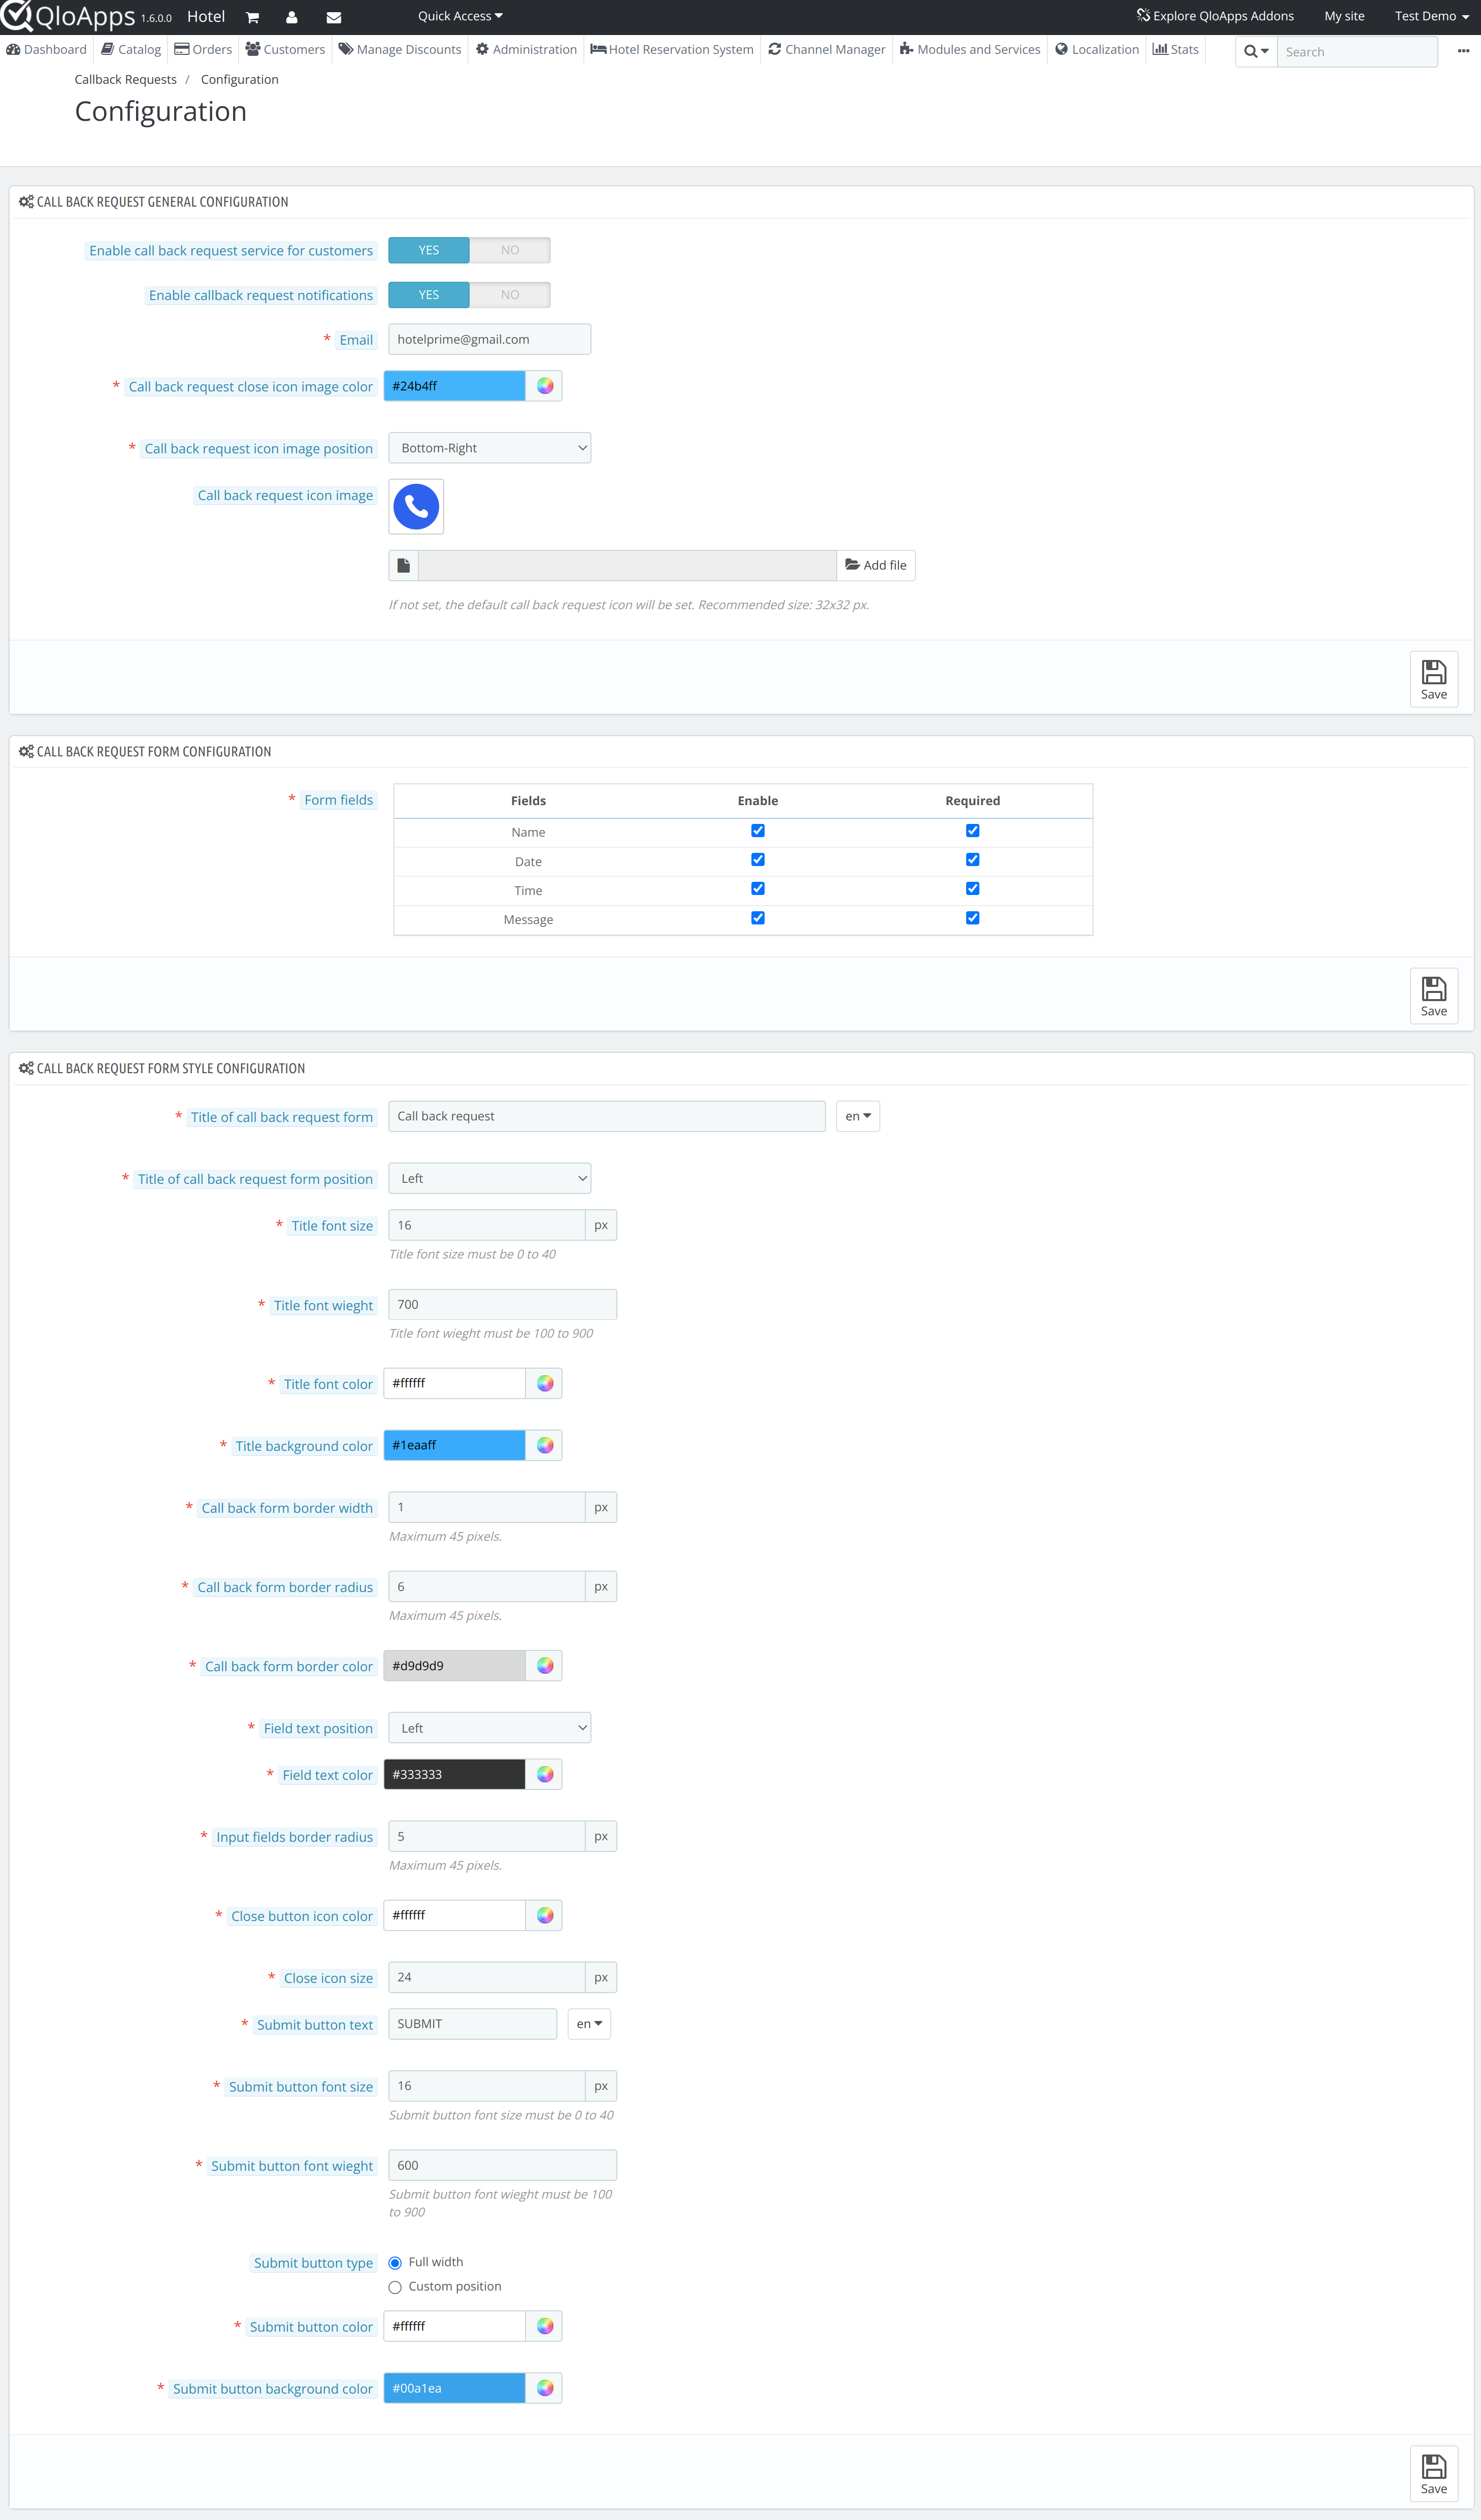
Callback Request General Configuration
In this section, the admin can edit and set the following general configurations of the CallBack Request module:
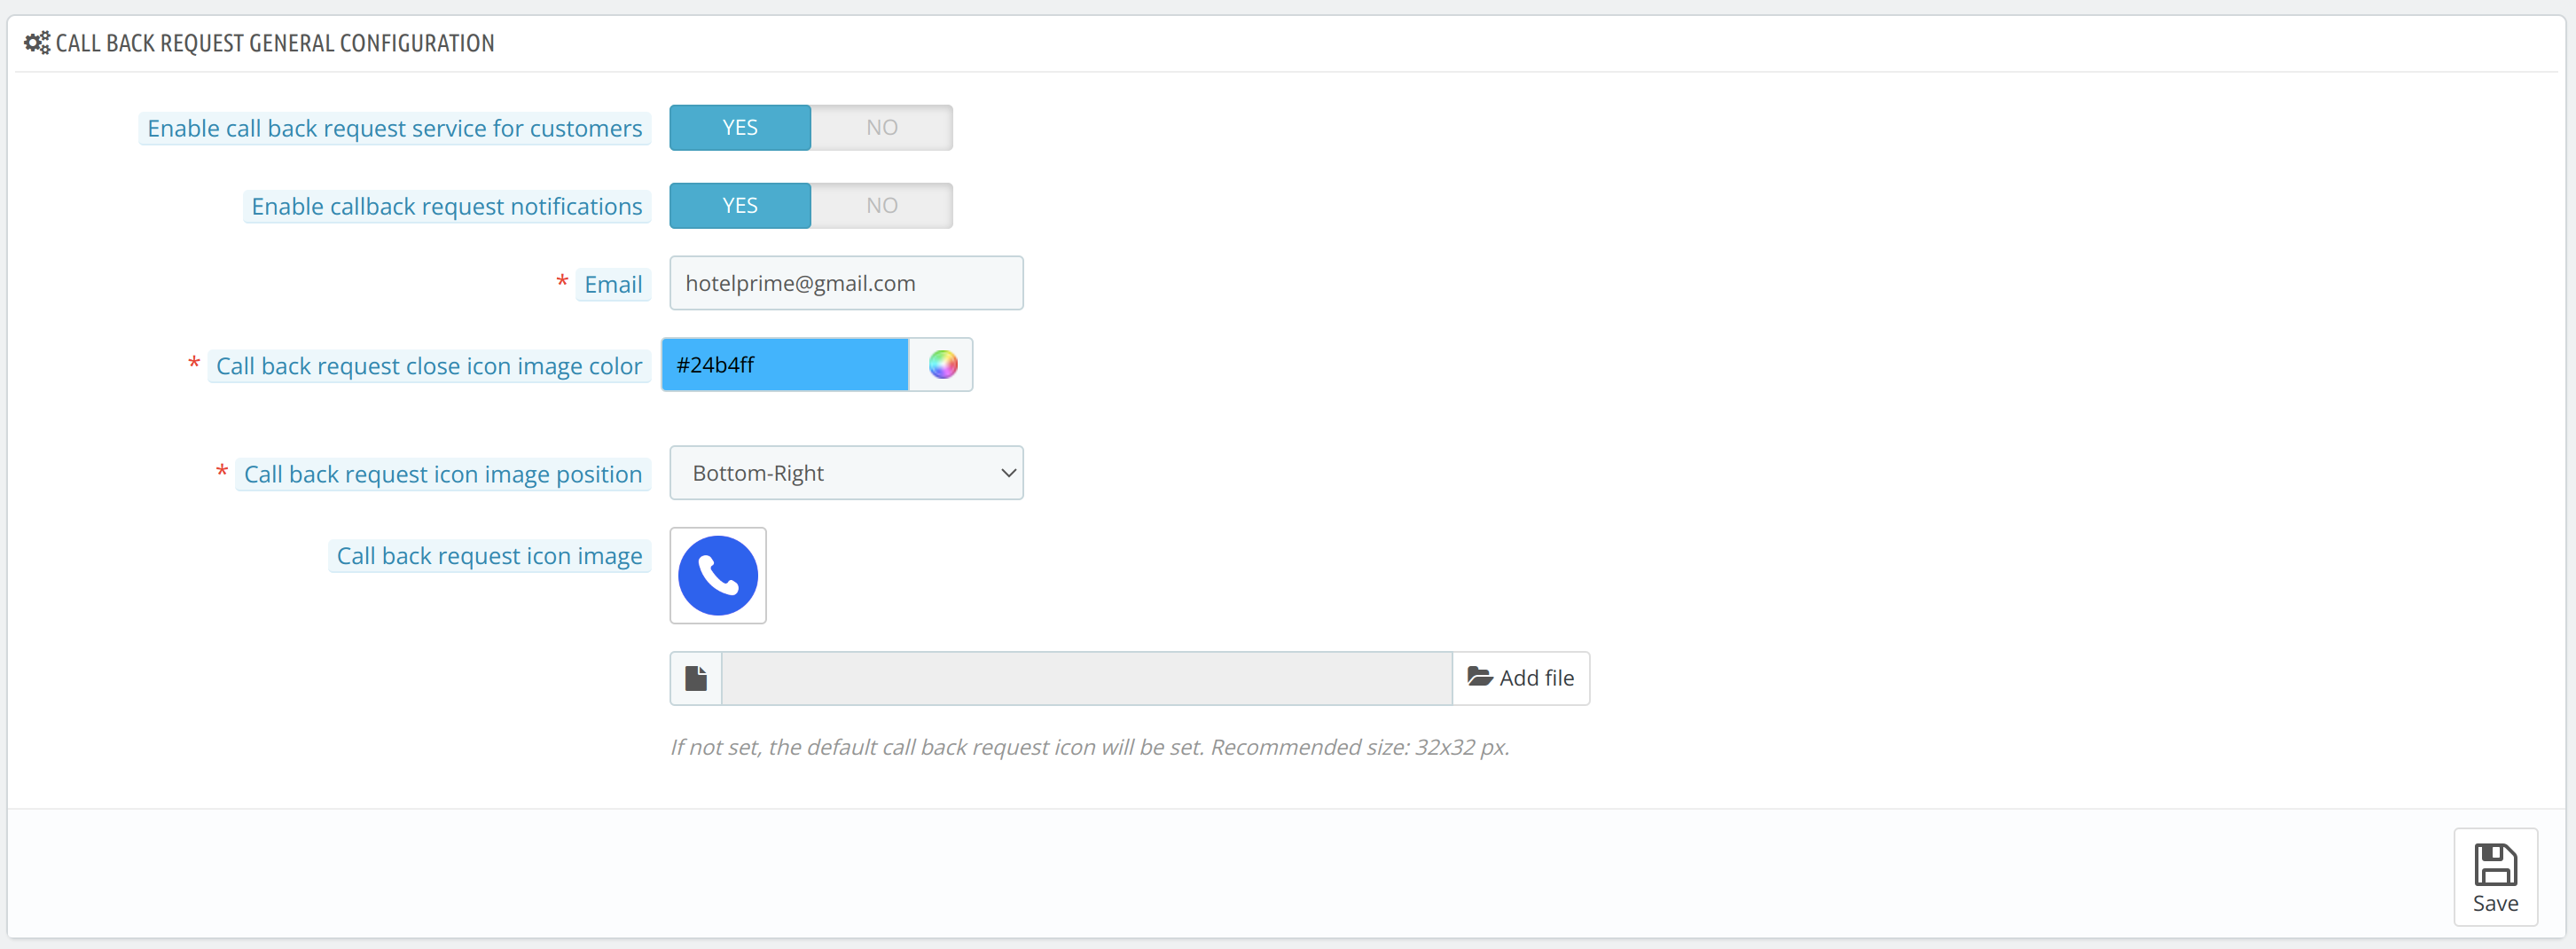
- Enable CallBack Request services for customers: The admin can enable/ disable the service of callback requests for his customer through this option.
- Enable CallBack Request Notifications: The admin can enable this option if he wants to receive notifications about the callback requests he will receive from his guests.
- Email: The admin will enter the email ID in which he wants to receive notification mail about the callback requests created by his guests.
- Callback Request Close Icon Image Color: The admin can configure the color of the callback request close icon using this option.
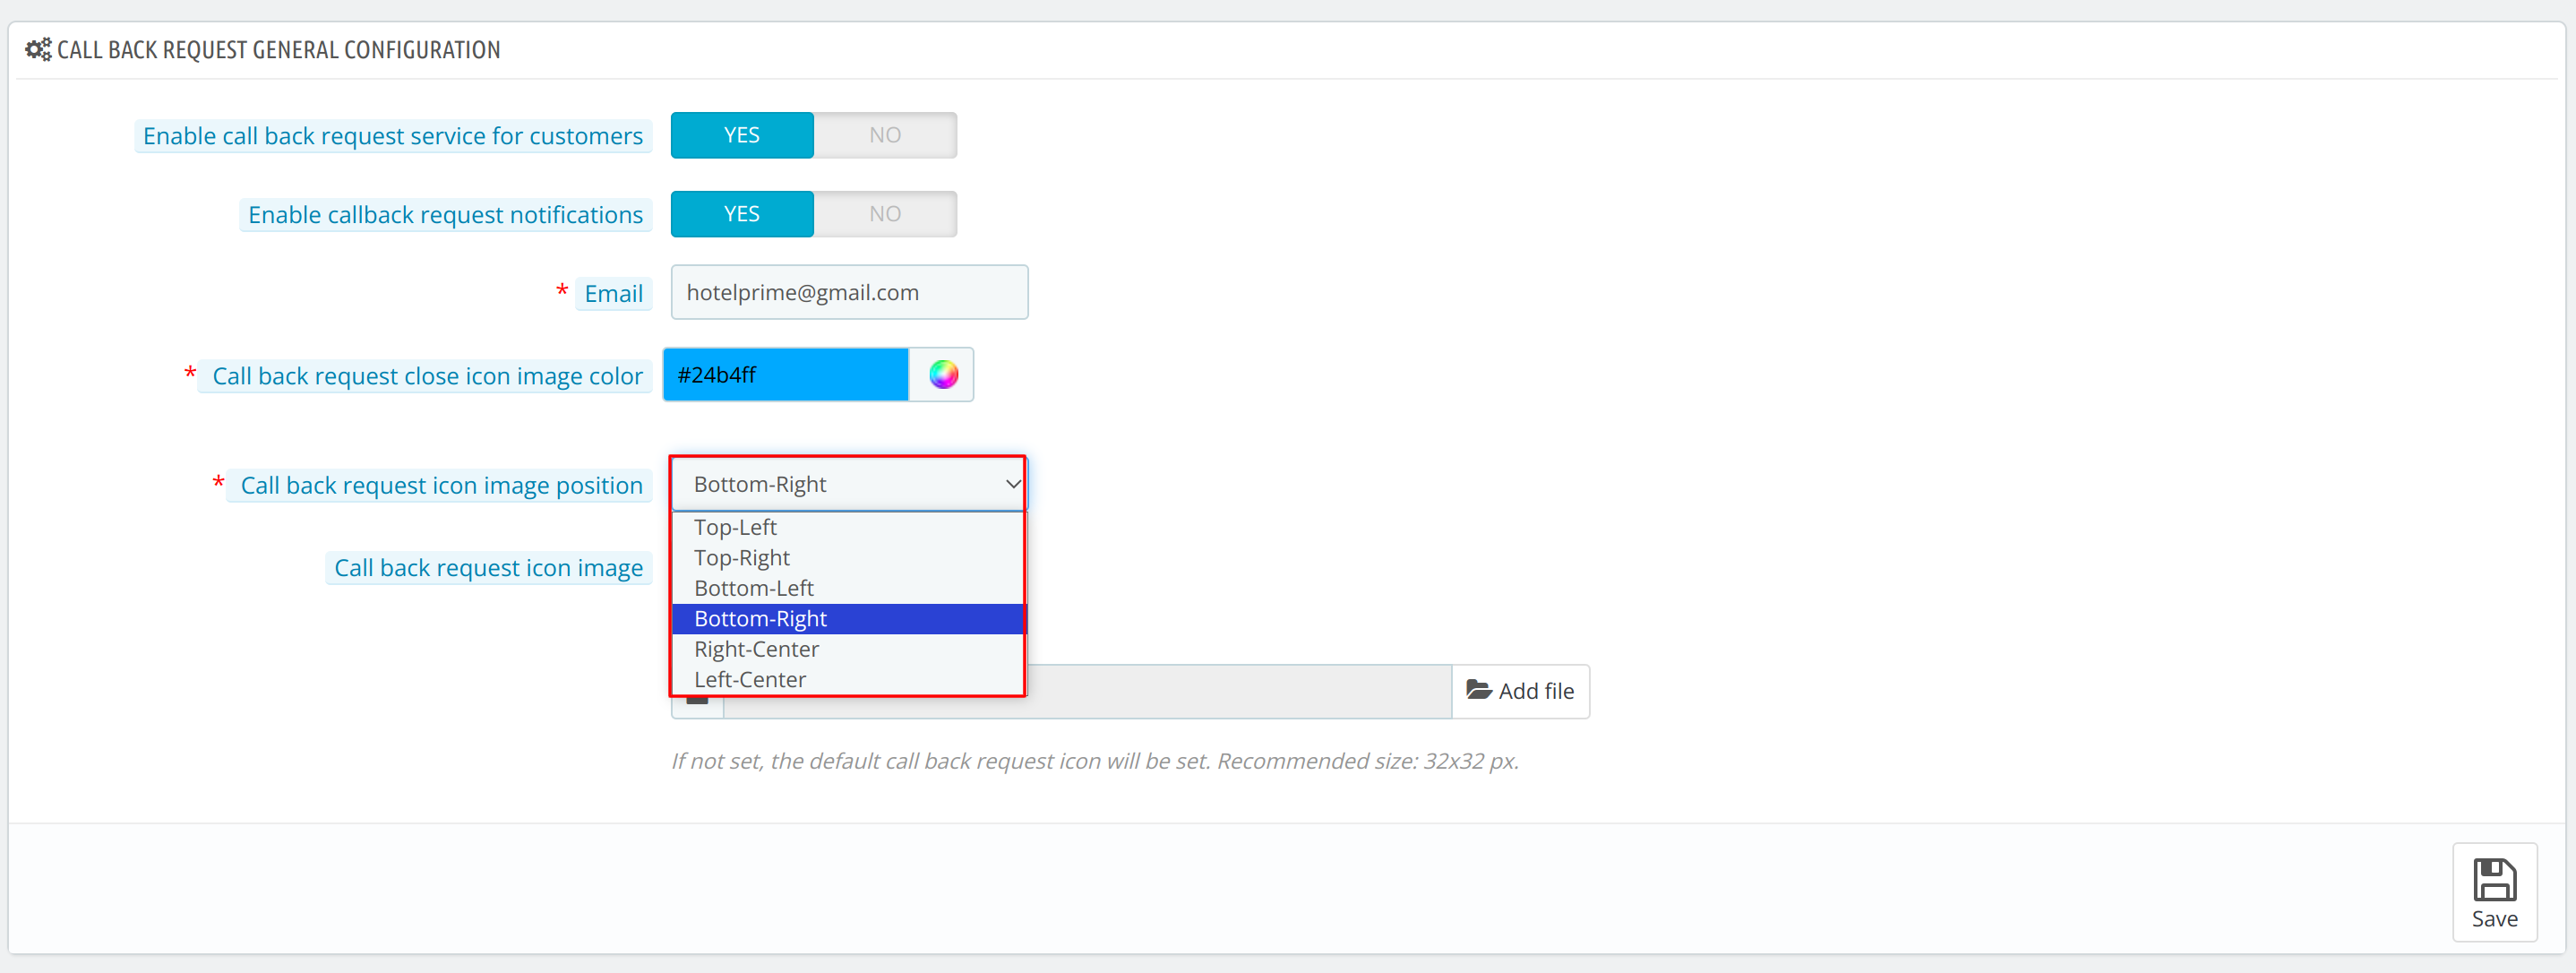
- Callback Request Icon Image Position: Admin can choose any of the six available positions where he wants to display the callback request icon image to his guest on the home page of the website.
- Callback Request Icon Image: The admin can upload and edit the icon image through this option.

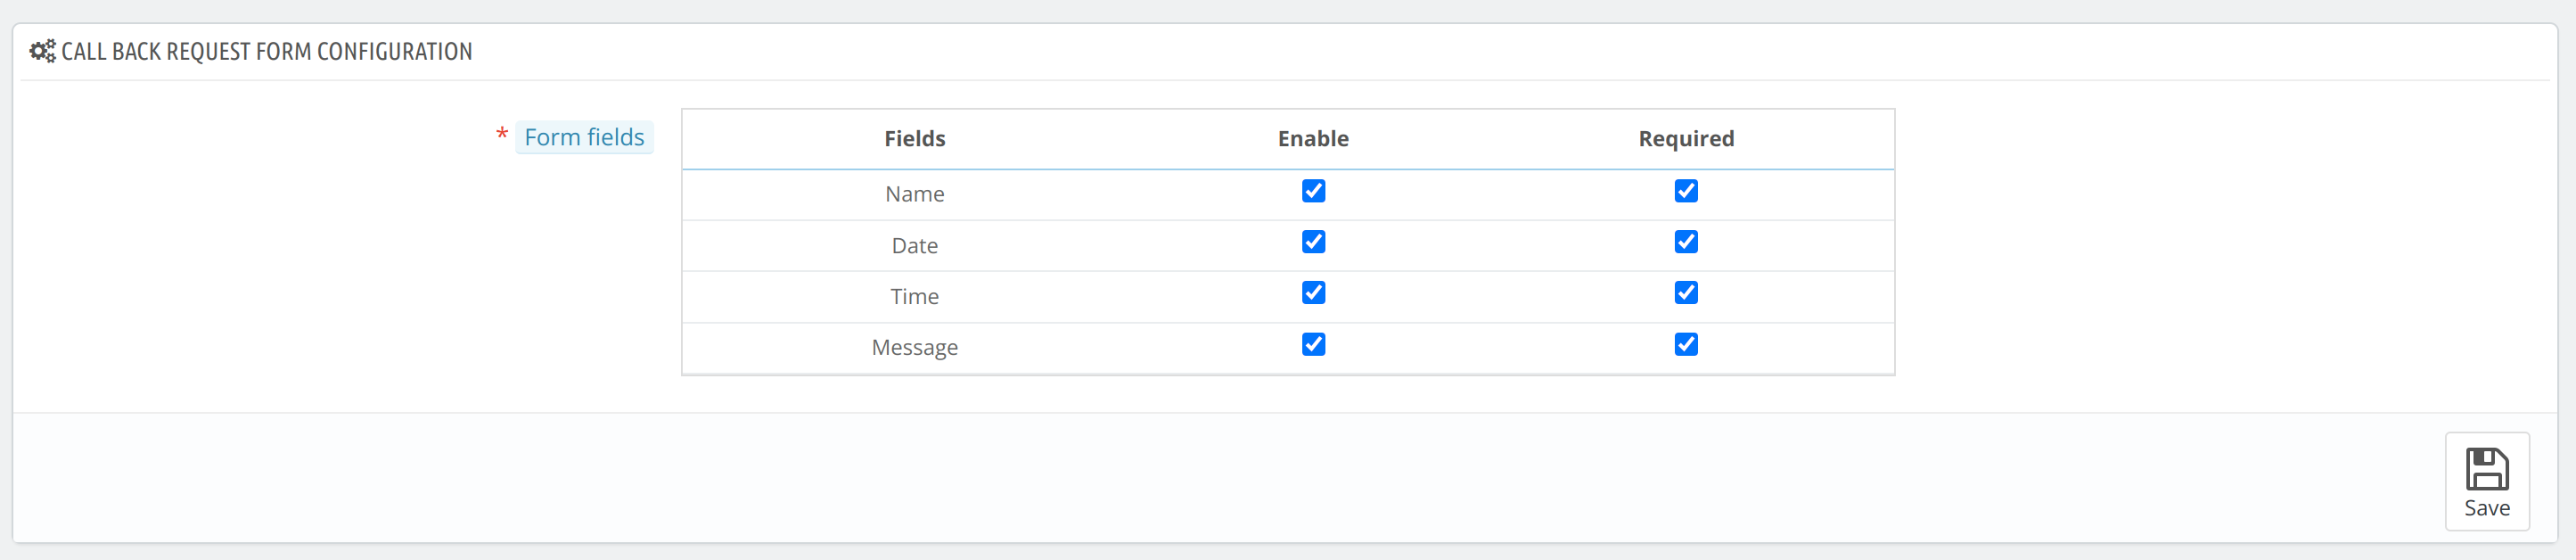
Callback request form configuration
In this section, the admin can select the fields that he wants to include in the callback request form and the fields that he wants to make mandatory for his guests.
The admin can add the following fields in his form by checking the box of that particular field:
- Name: Field in which the guest will enter his name
- Date: Field in which the guest will enter the date at which he wants to receive the call from the admin.
- Time: Field in which the guest will enter the time at which he wants to receive the call from the admin.
- Message: field in which guests can write a message for the admin.
The admin can also make any of the fields mandatory to be filled in while submitting the form for the guest by checking the required column box for the particular field.
Callback Request Form Style Configuration
In this section, the admin can configure the callback request form displayed to guests on the homepage of the website.
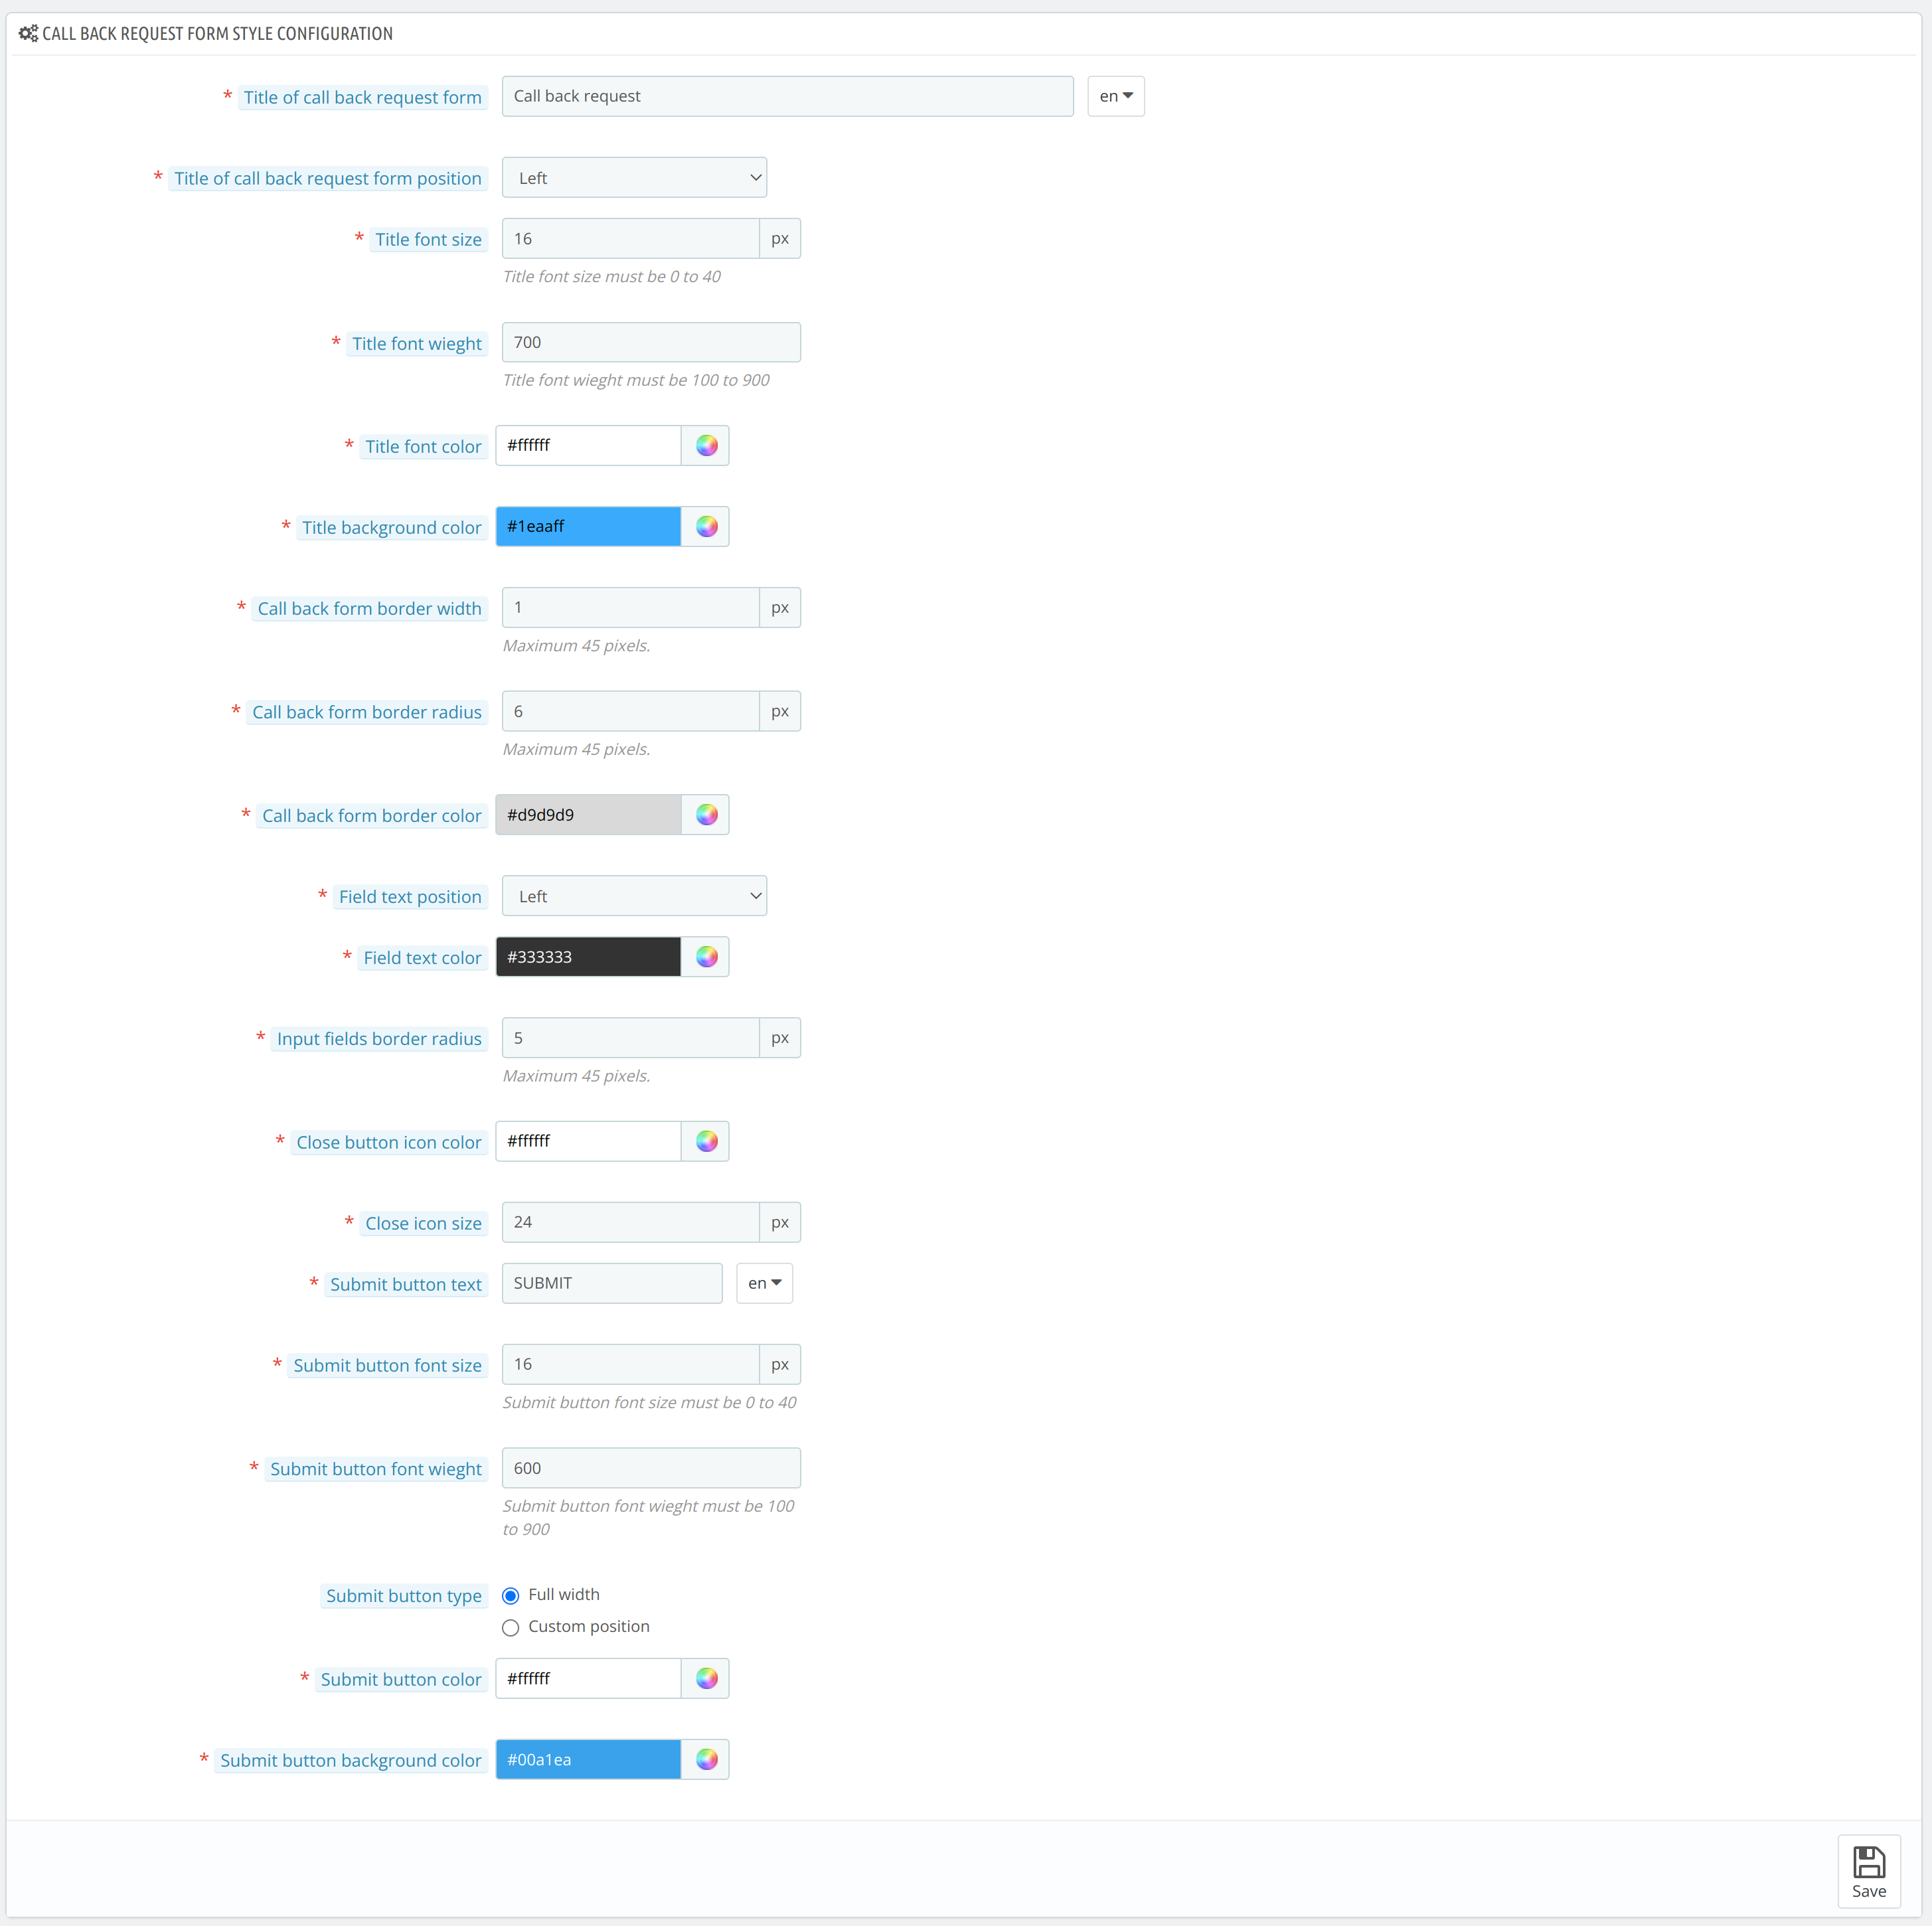
The admin can configure the form title, border, field text, close button, and submit button through the following options:
Title of Callback Request Form Configuration
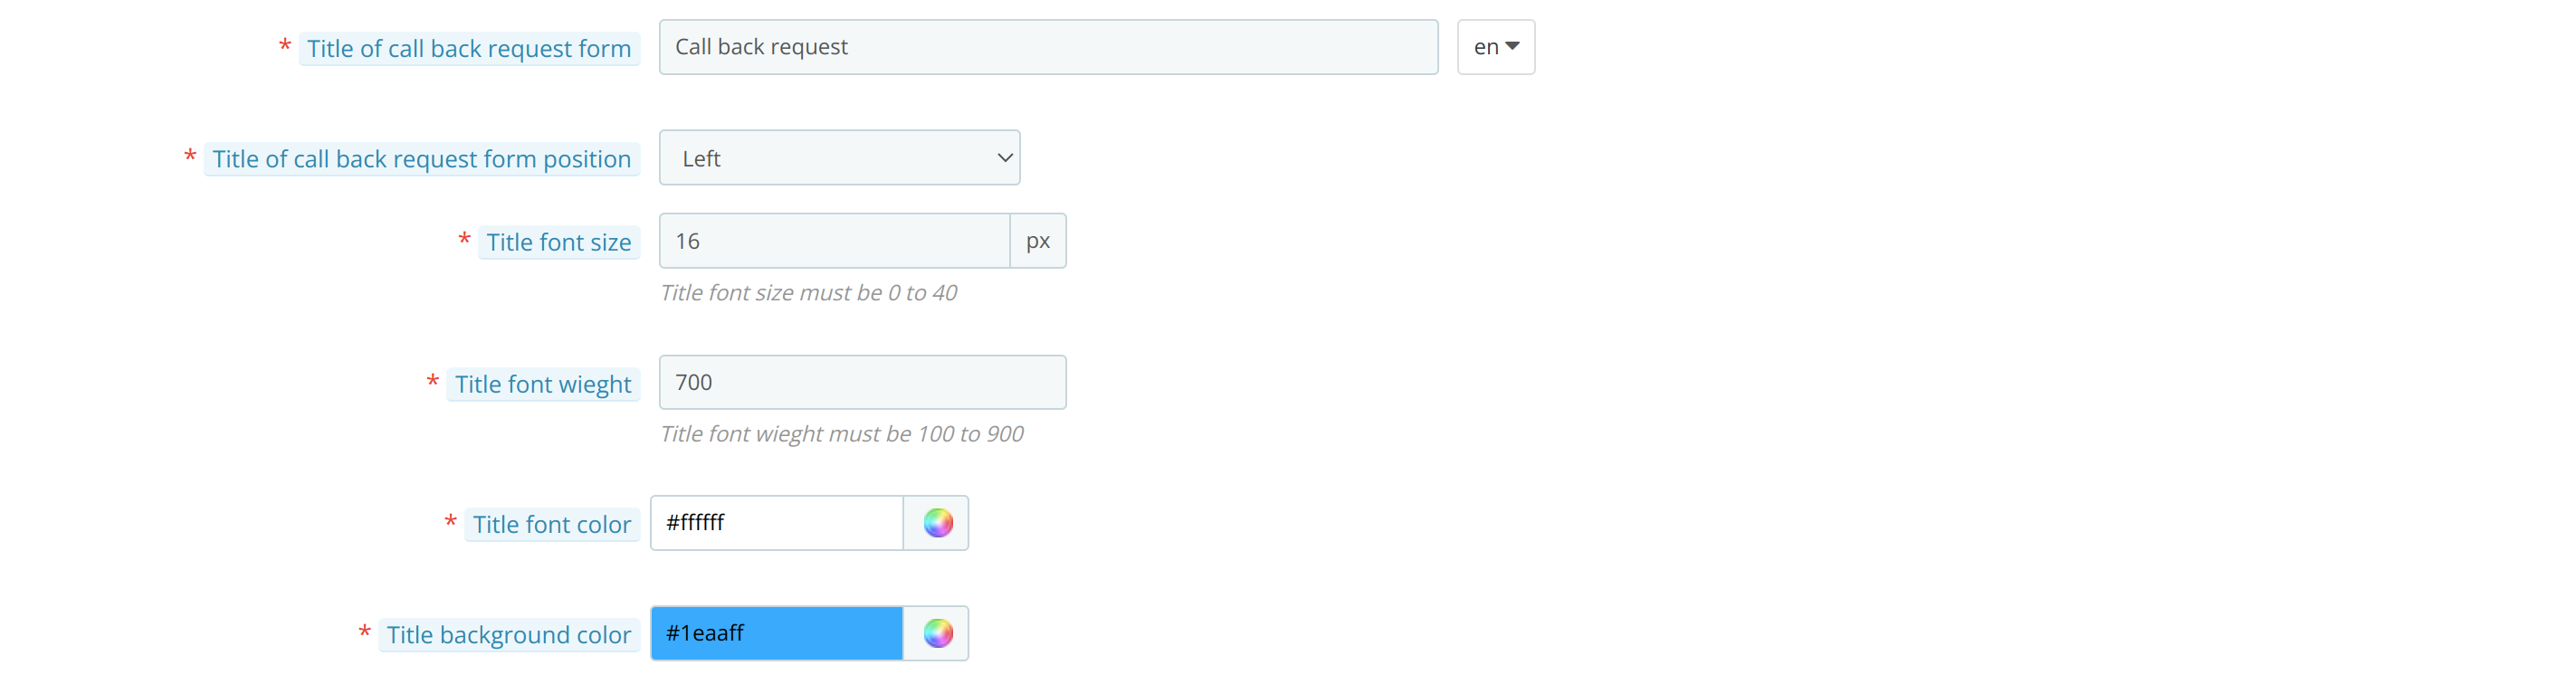
- Title of callback request form: The admin can set the title of the callback request form from this option.
- Title of callback request form Position: The admin can choose whether he wants to display the title of the form in the center or on the left side of the form.
- Title Font Size: The admin can set the font size of the title.
- Title Font Weight: The admin can set the font weight of the title.
- Title Font Color: The admin can set the font color of the title.
- Title Background Color: The admin can set the background color of the title.
Border of Callback Request Form Configuration

- Callback form border Width: The admin can set the border width of the form.
- Callback form border Radius: The admin can set the border radius of the form.
- Callback form border Color: The admin can set the border color of the form.
Field text of Callback Request Form Configuration

- Field Text Position: The admin can configure whether he wants to place the fields of the form at the left, right, or center of the form.
- Field Text Color: The admin can set the field text color.
- Input Field Border Radius: The admin can set the border radius of the field input box of the form.
Close Button of Callback Request Form Configuration

- Close Button Icon Color: Admin can set the color of the close button.
- Close Icon Size: The admin can edit the size of the close icon.
Submit Button of Callback Request Form Configuration
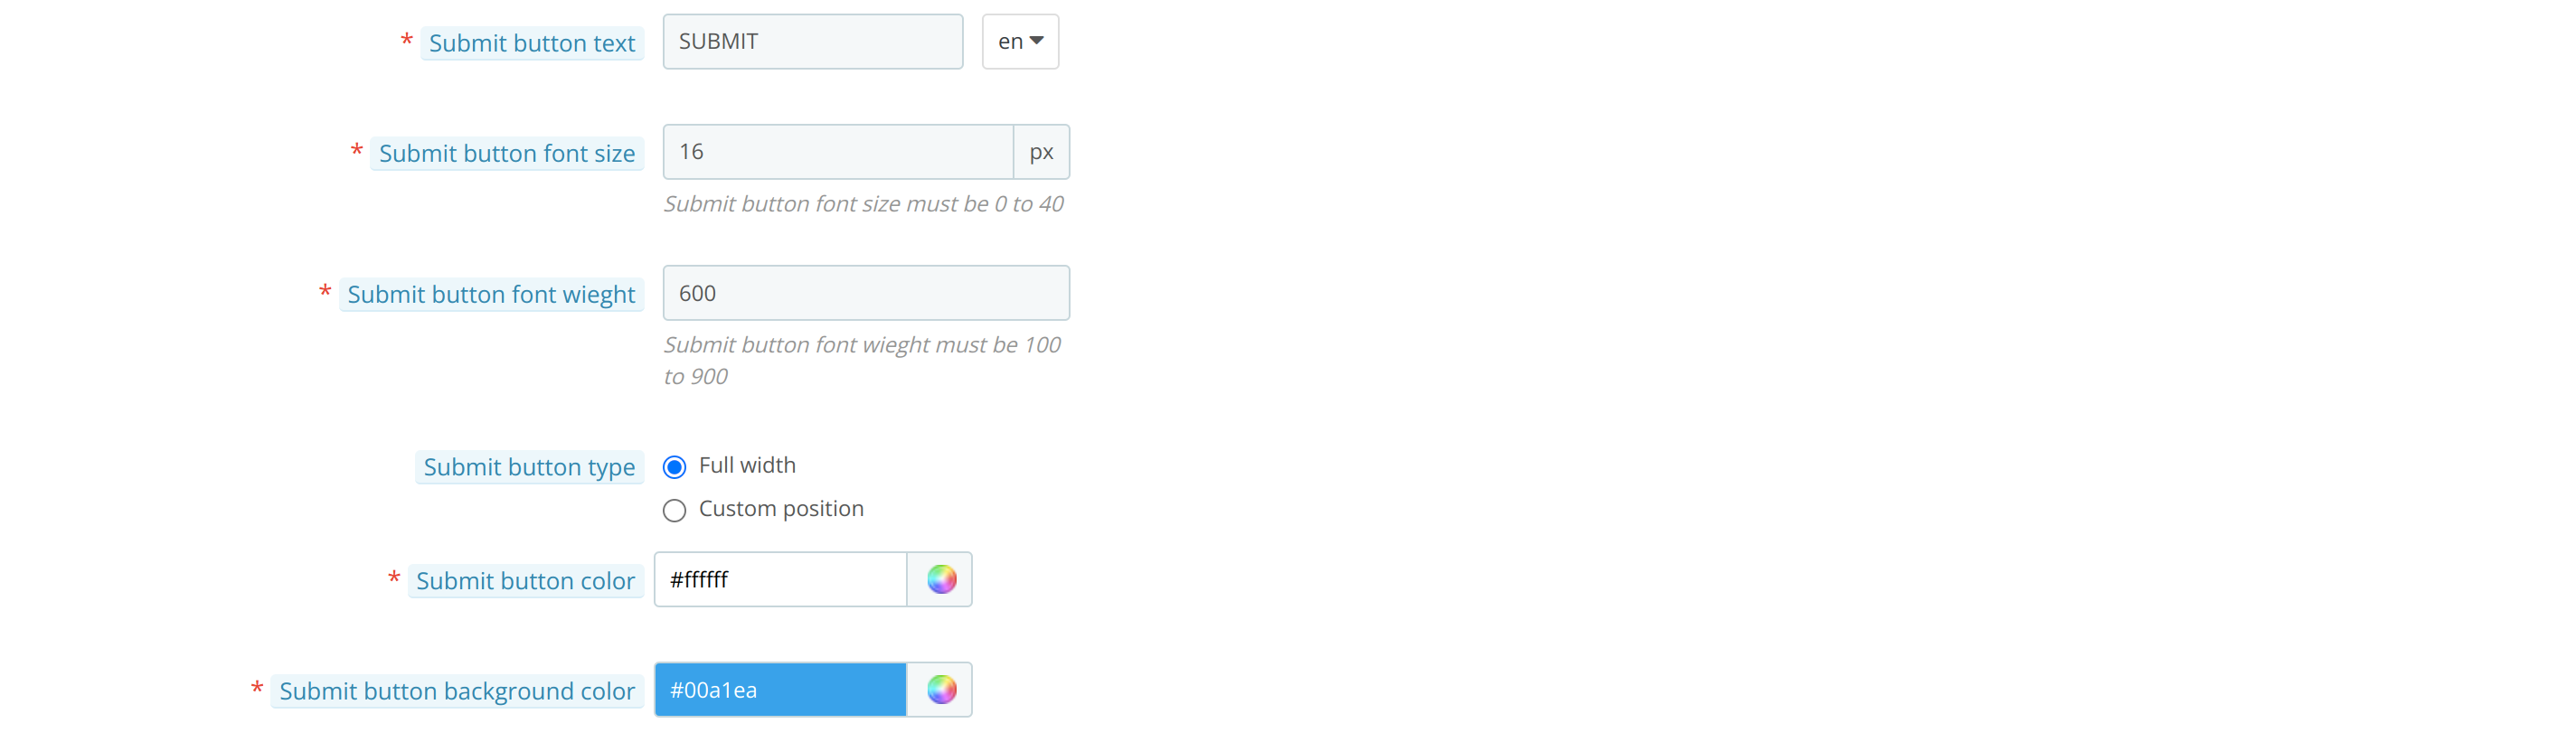
- Submit Button Text: The admin can edit the text of the submit button from this option.
- Submit Button Font Size: The admin can change the font size of the text of the submit button.
- Submit Button Font Weight: The admin can change the font weight of the text of the submit button.
- Submit Button Type: The admin can choose whether he wants to show the submit button in full width or he wants to show the button at a custom position in the form( left, right center).
- Submit Button Color: The admin can change the color of the submit button.
- Submit Button Background Color: The admin can change the background color of the submit button.
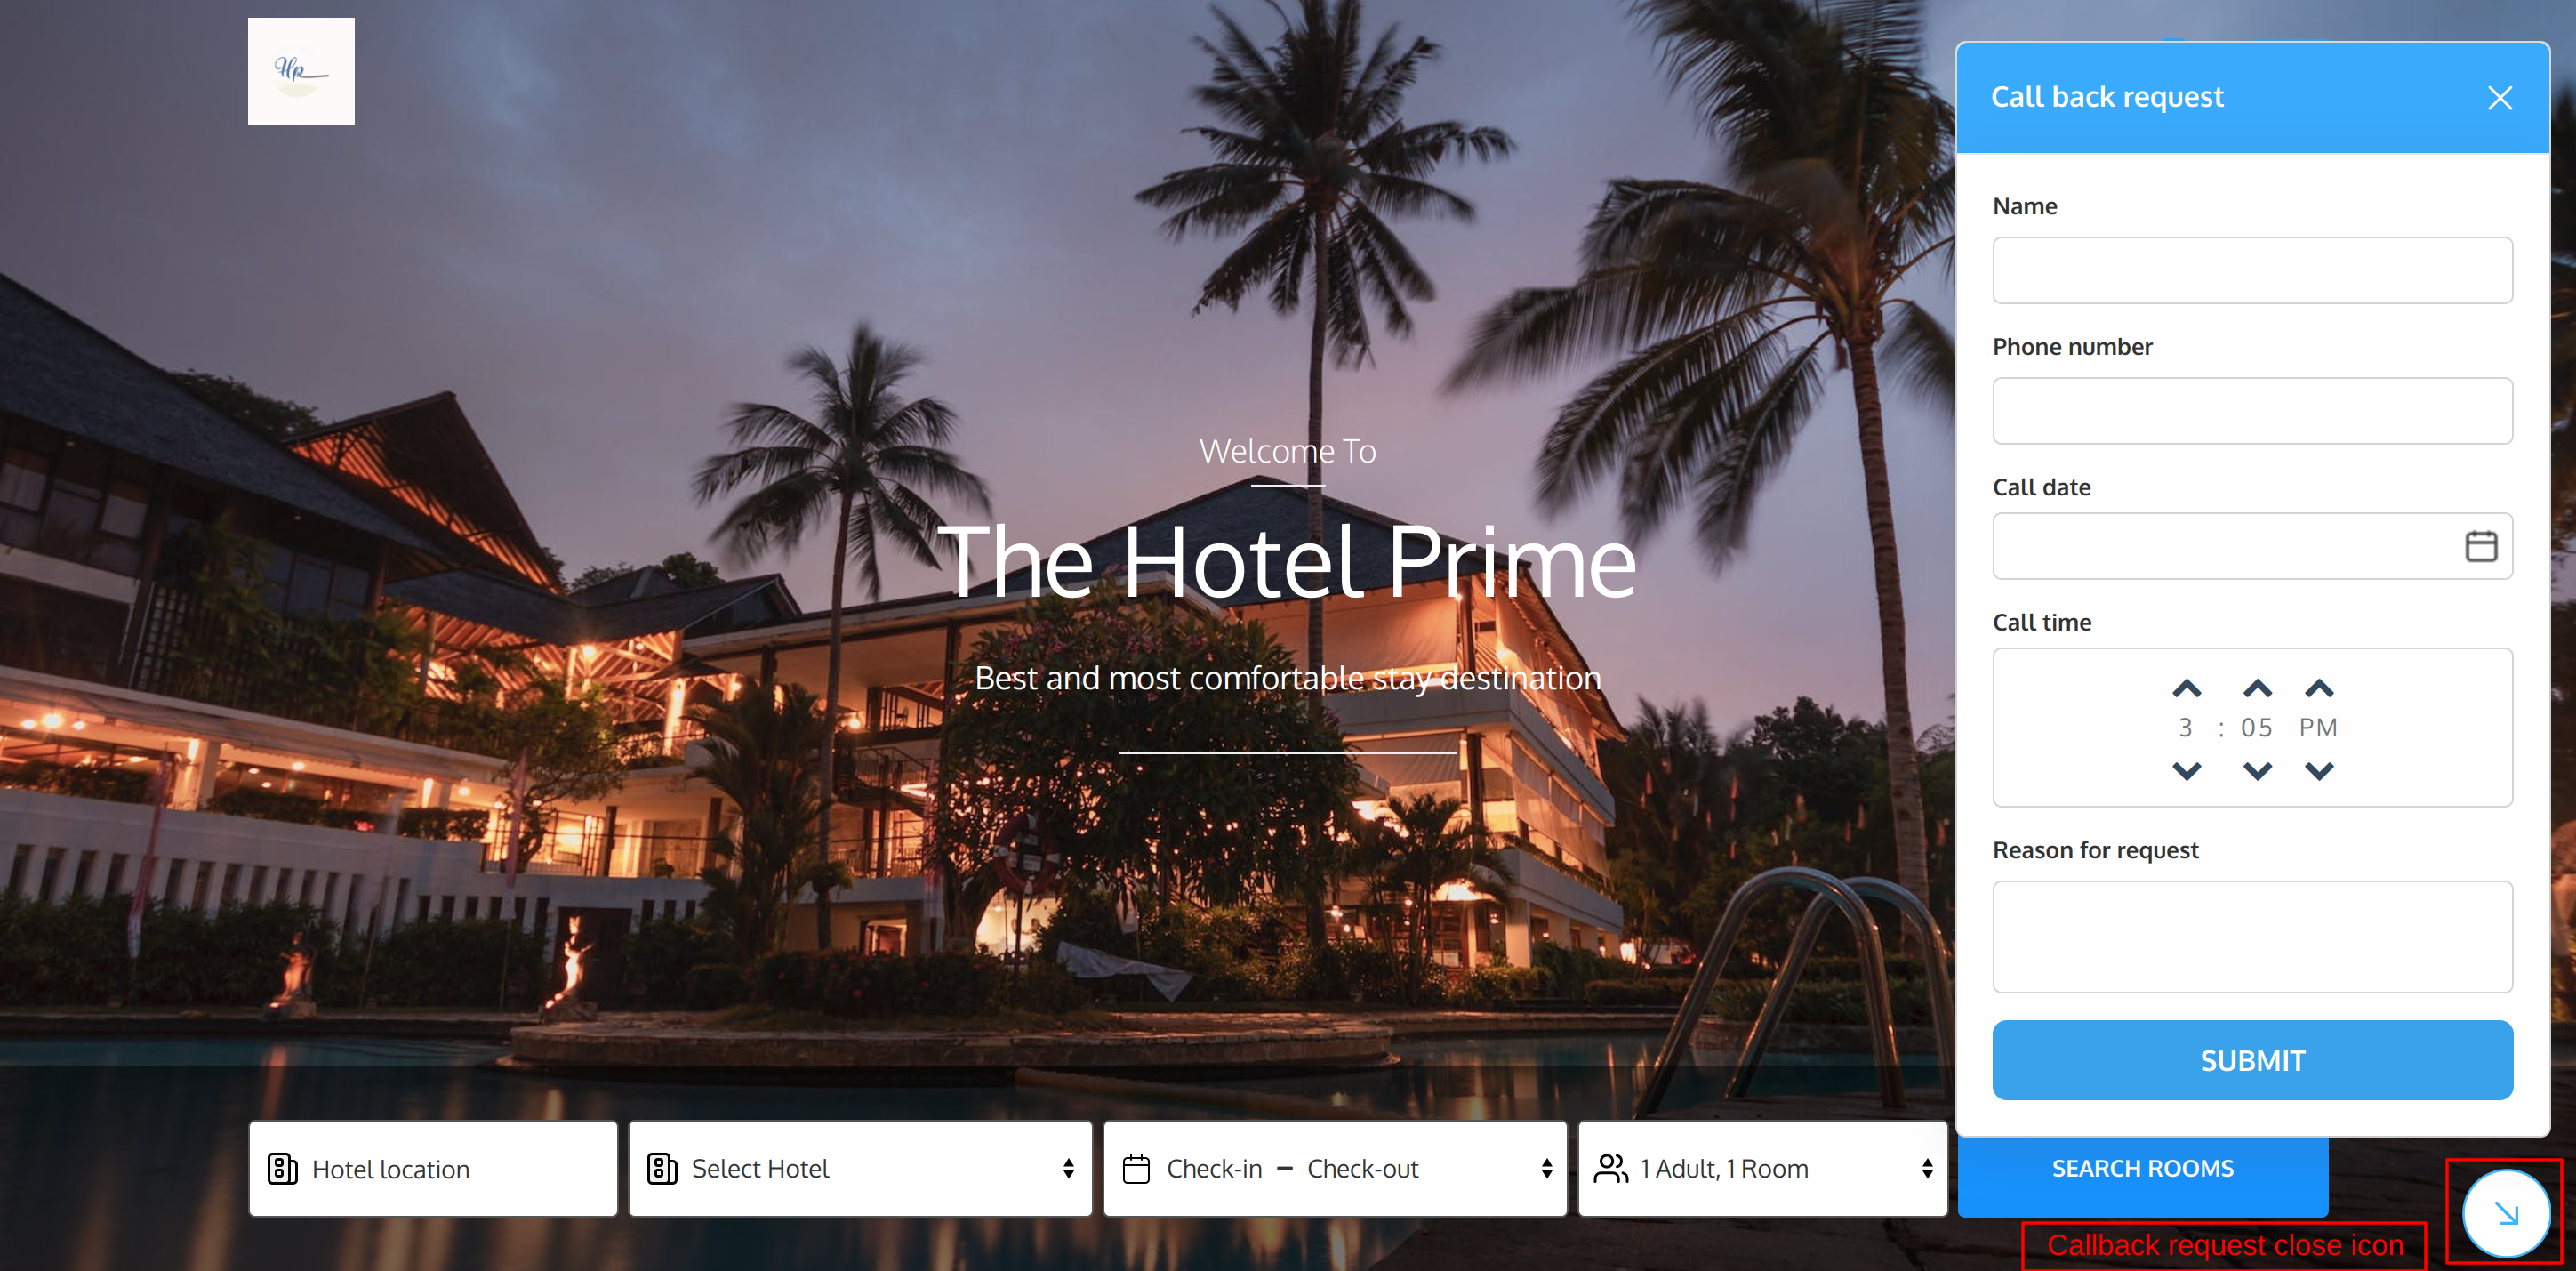
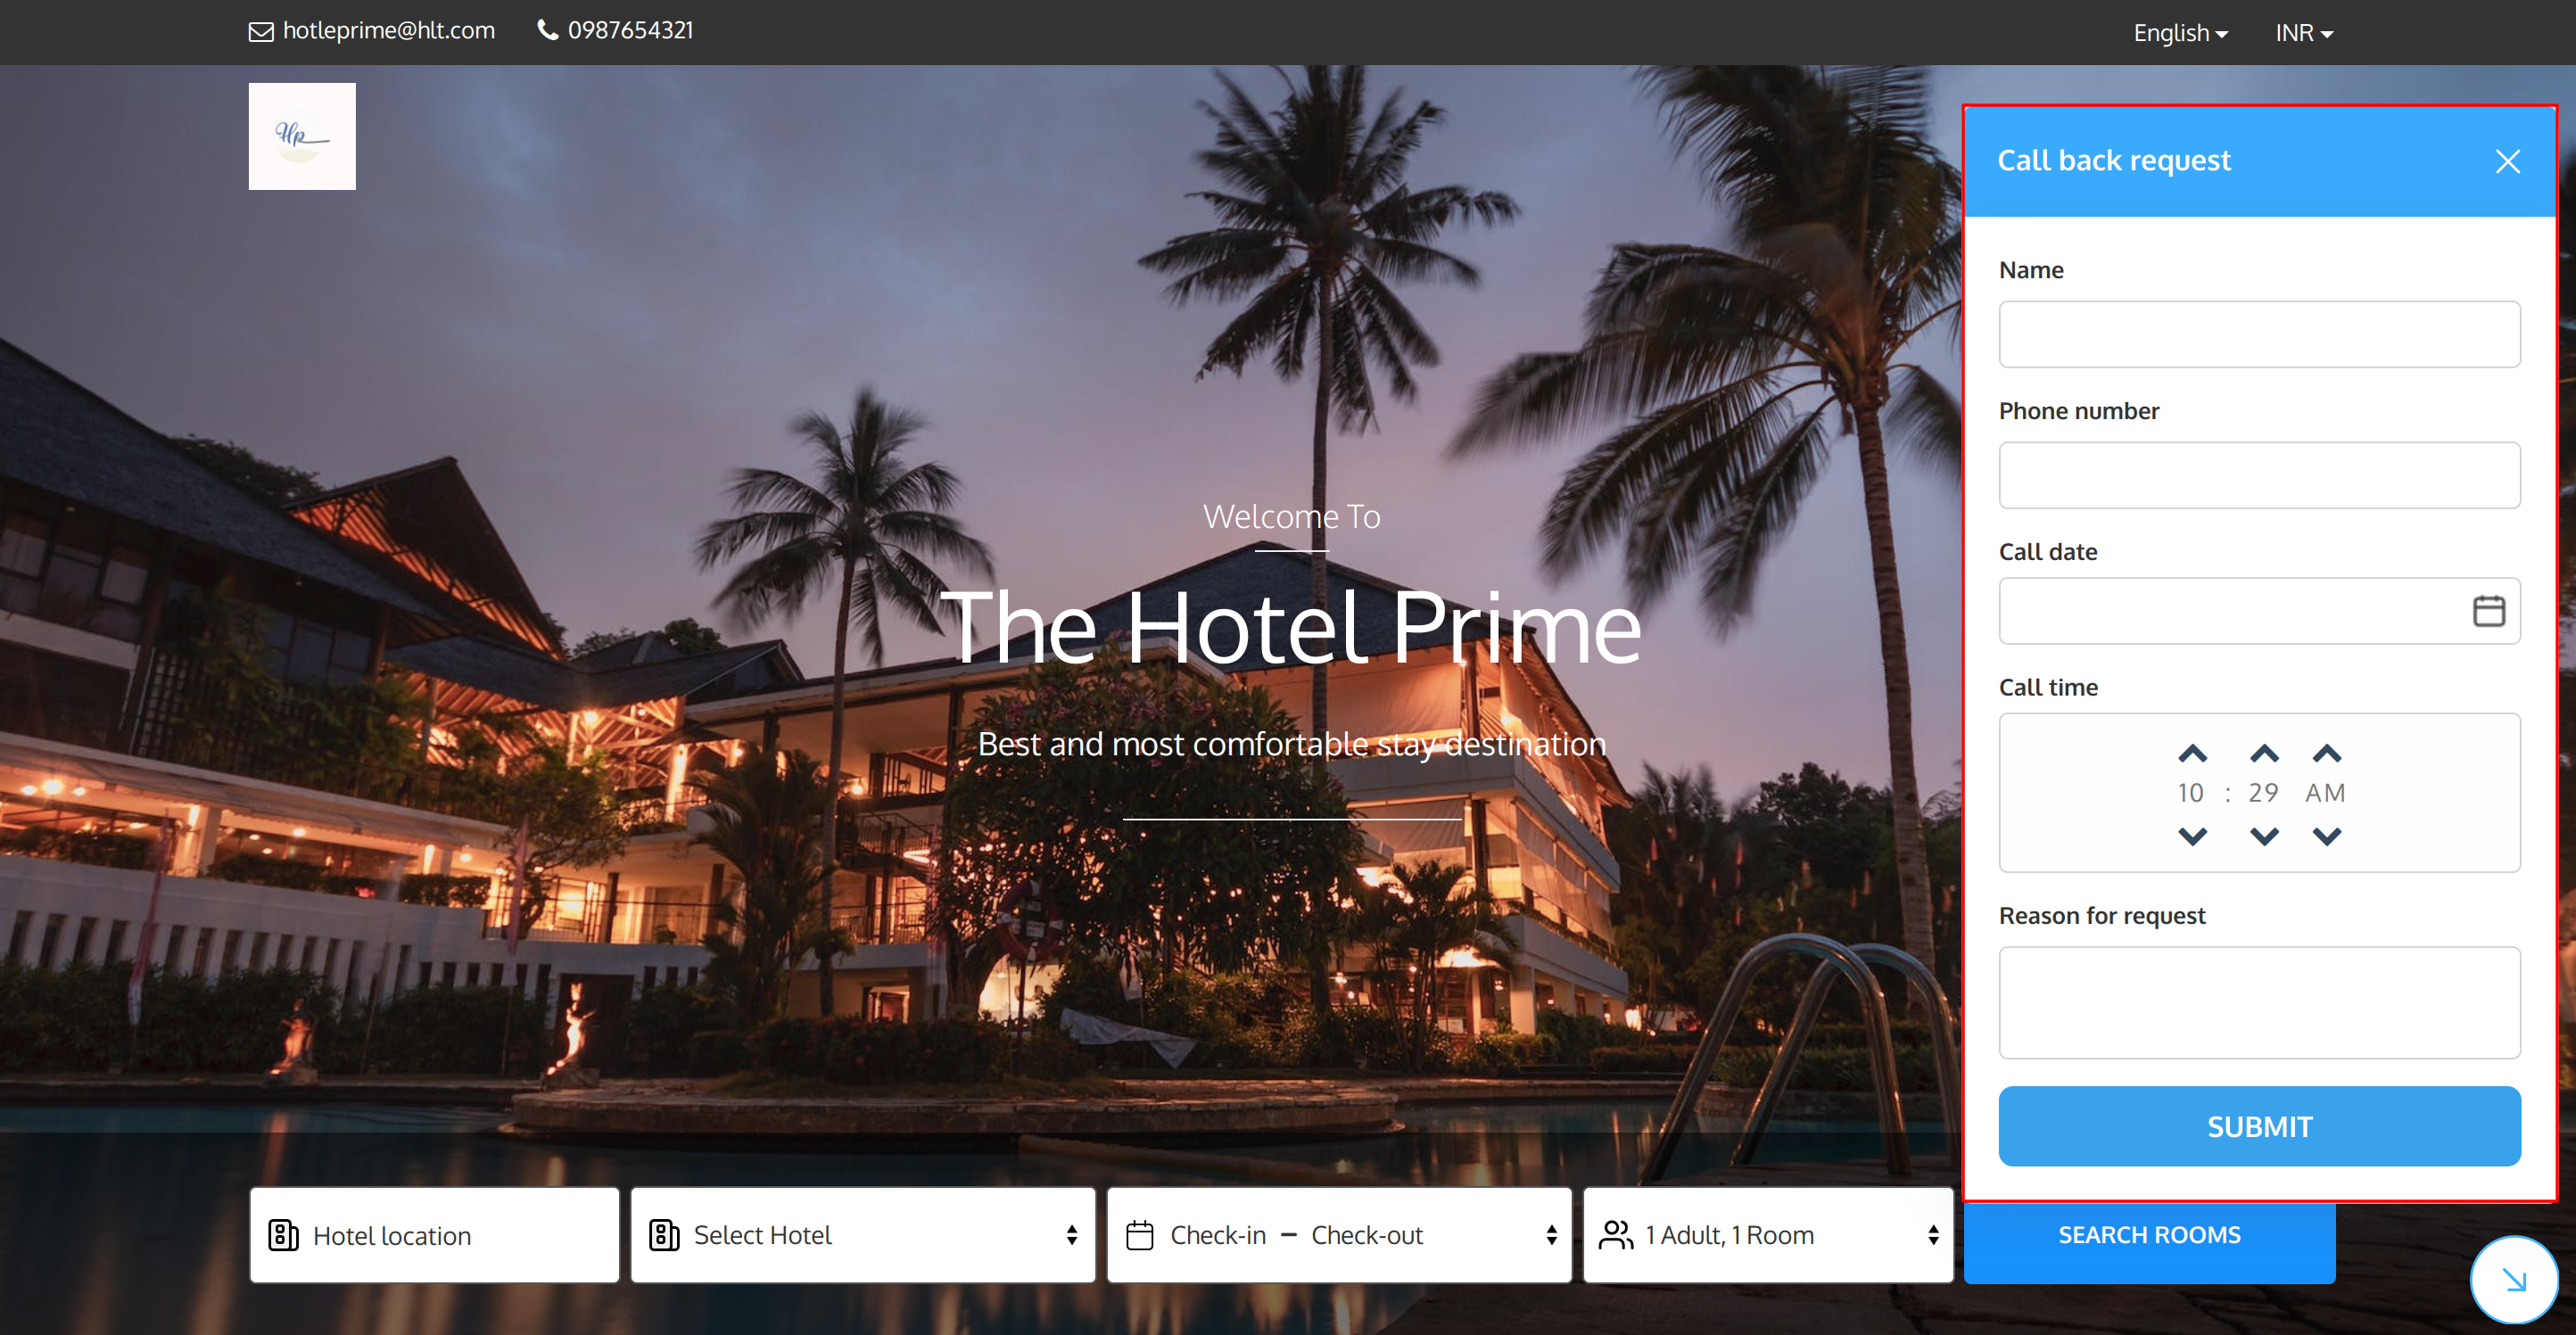
How Guest Can Submit the Callback Request Form?
To submit the callback request, the guest will click on the callback request icon on the home page of the website.
Next, he will fill up all the details in the various fields of the callback form and will click on “submit” button to submit the form.
Callback Request Management
All the requests submitted by the guests are displayed to the admin on the callback request page.
To view the list of all received callback requests, click on callback request menu and select the callback requests option from the drop-down.
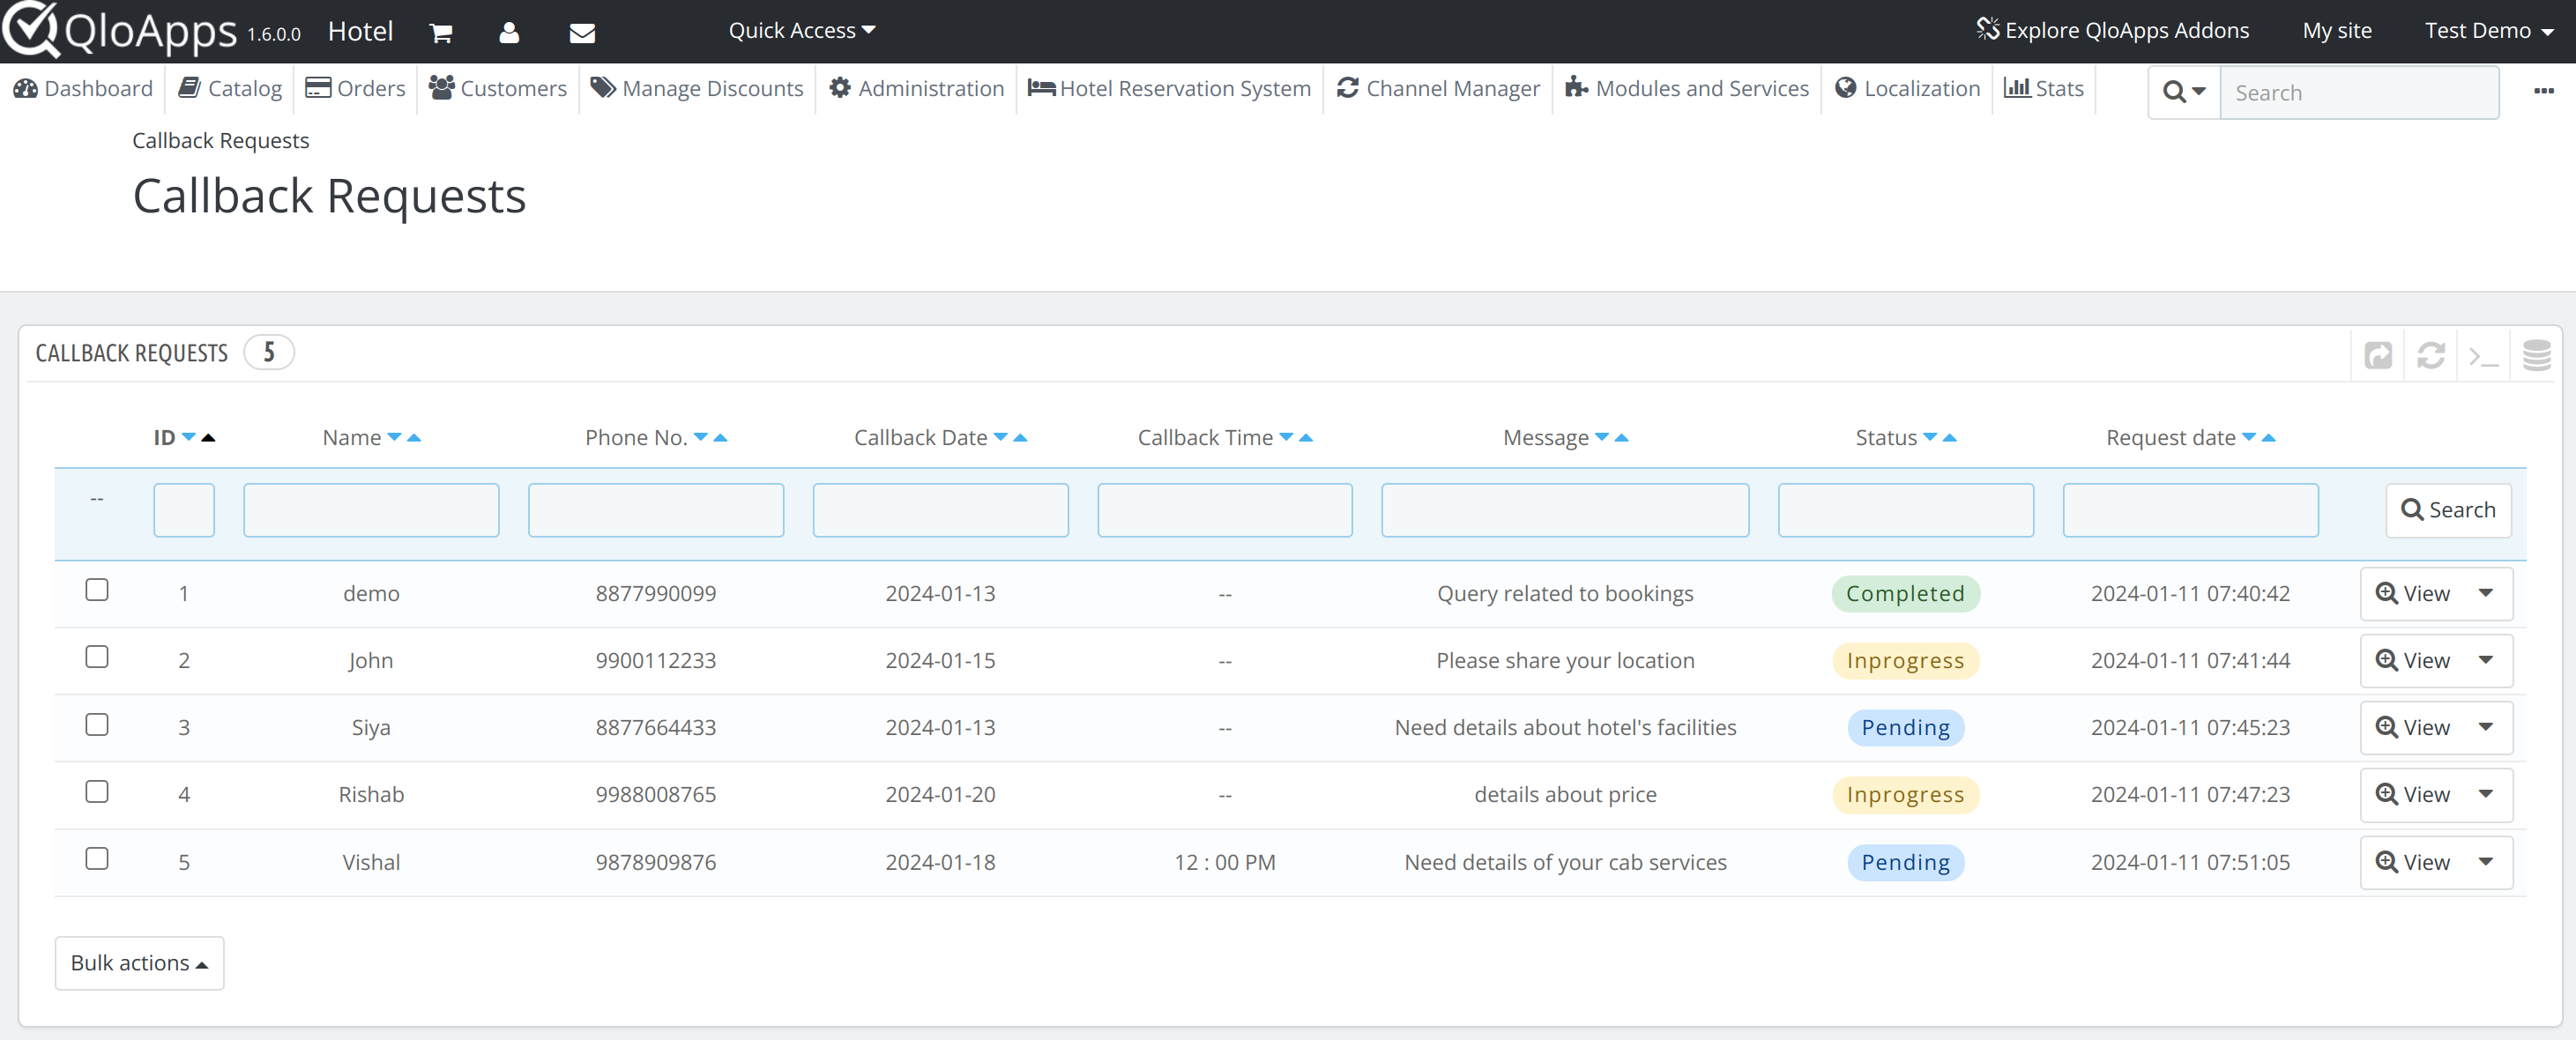
The admin will click on the view option to view all the details of the callback request and to manage the callback requests that he has received.
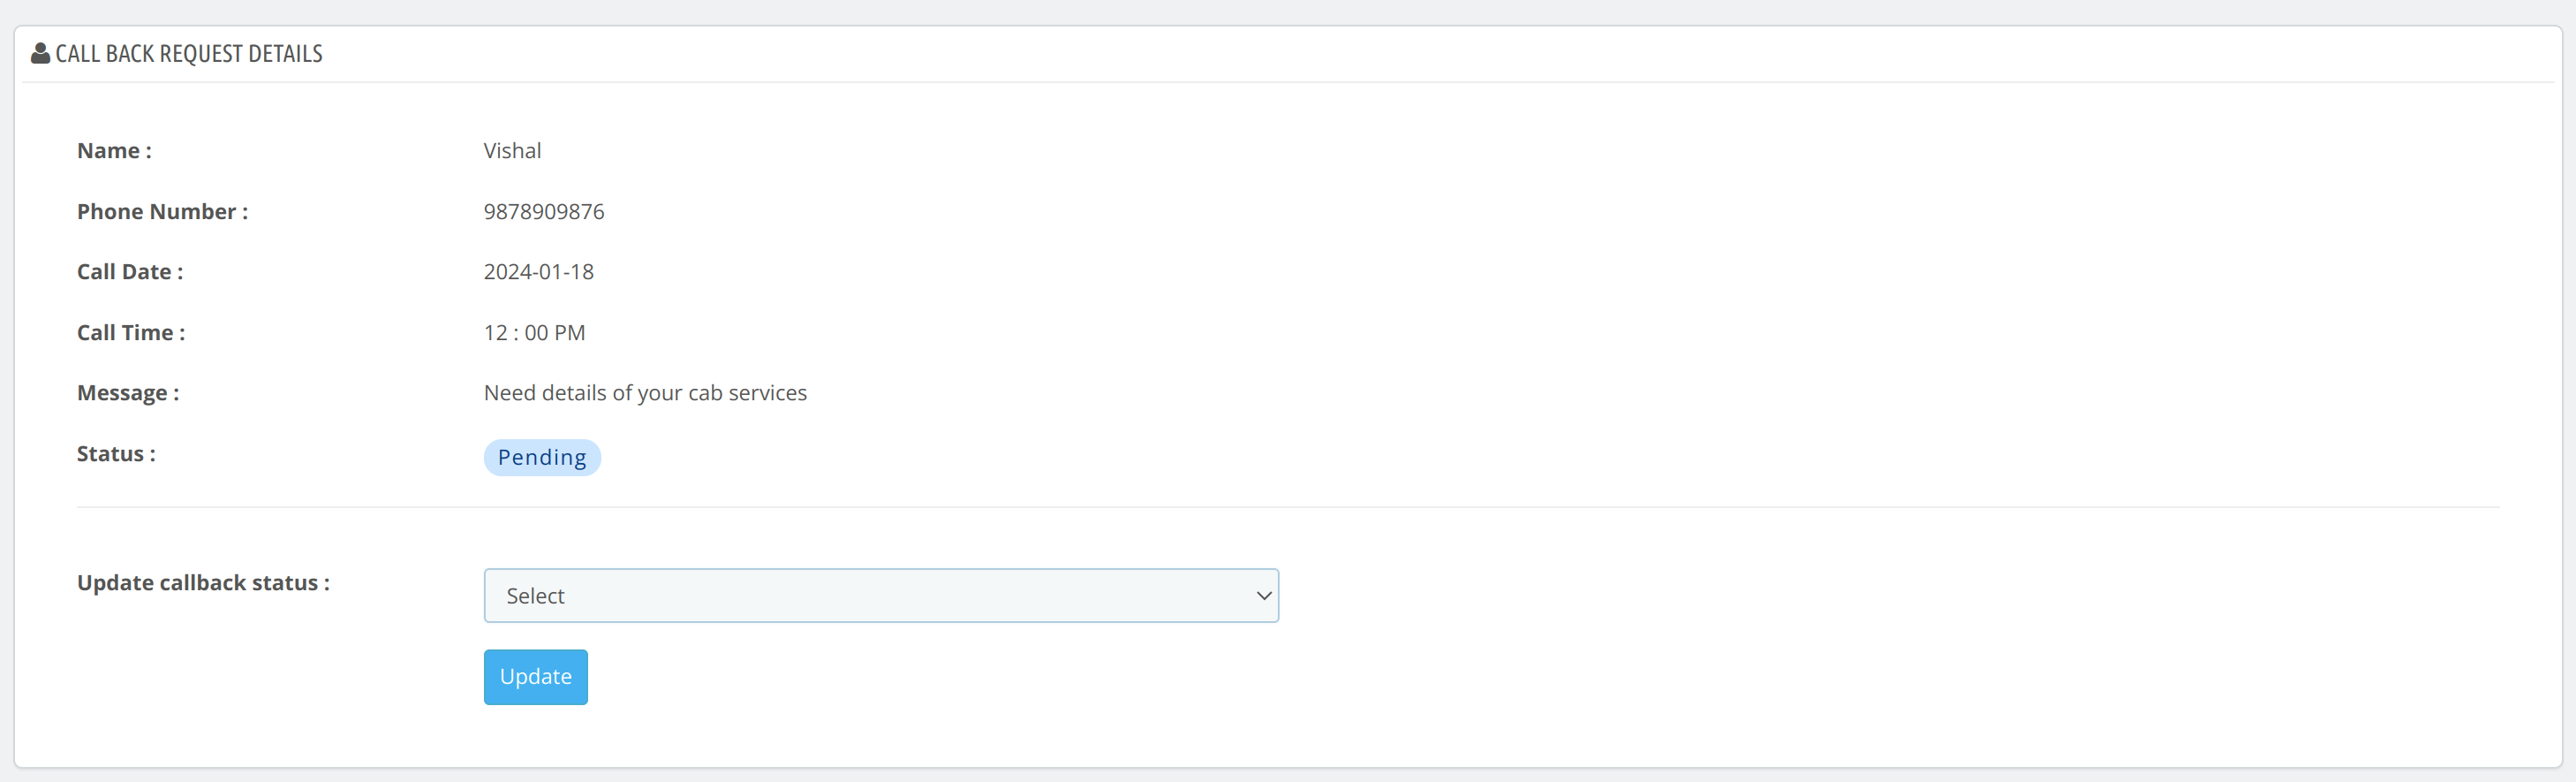
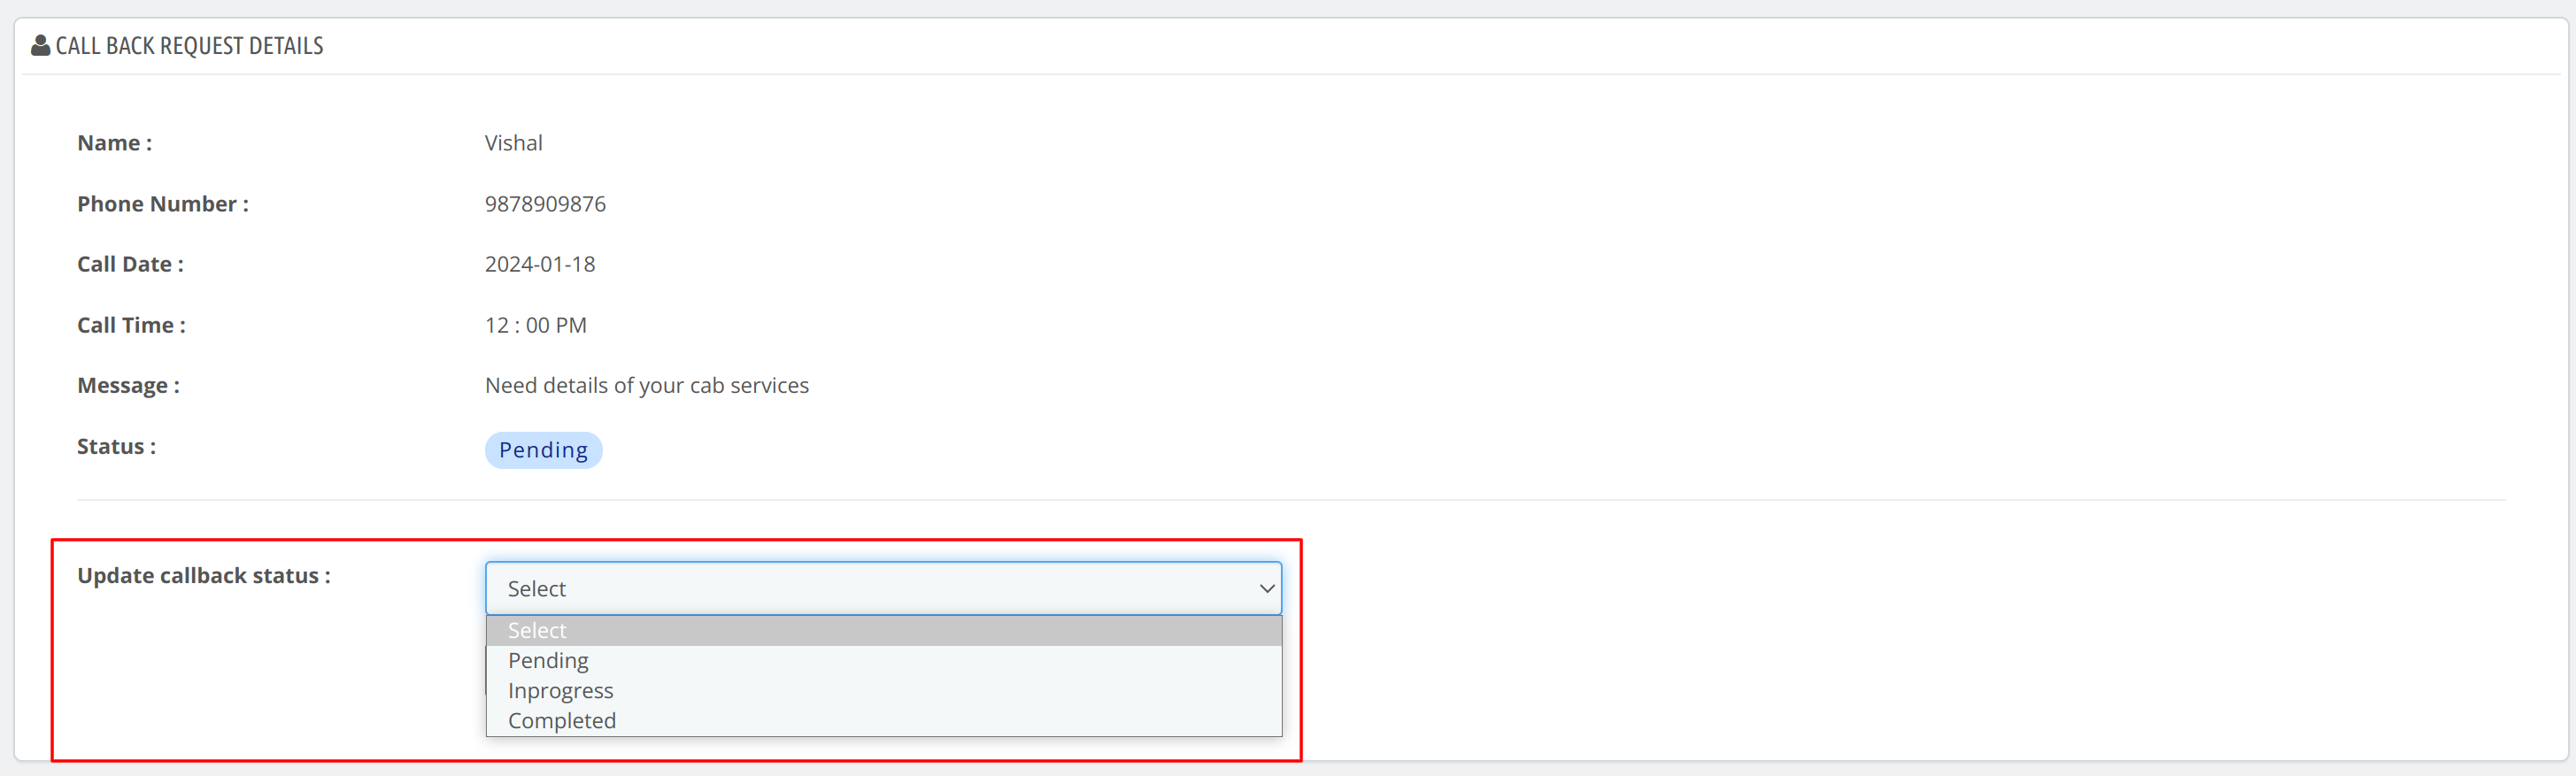
As per the current progress of the callback request, the admin can manage the status of the requests from the update callback status option.
Conclusion
This was all from the QloApps Callback Request. I hope it helps you understand the flow and functionality of the module.
Hence, if you want your guests to send you a callback request, install this module.
If you want to learn about the functionality of QloApps then you can visit this link: QLO Reservation System – Free Open-Source Hotel Booking & Reservation System
In case of any query, issue, or requirement please feel free to raise it on QloApps Forum
Lastly, do not forget to drop your thoughts in the comments.
Current product version: v 1.1.1
Supported framework version: 1.7.x & 1.6.x

Be the first to comment.