
QloApps Booking Request lets a hotelier review a booking before the guest pays for it. Guests send a request at checkout, and hotel staff approve, change or reject it from the Back Office under Orders › Booking Requests. The module covers the Request Booking checkout step, the request list and detail pages, the approval window, the guest’s My account pages and the email notifications.
NOTE: The module requires QloApps 1.7.0 or later. It replaces the checkout template
order-opc.tplthrough thedisplayOverrideTemplatehook, so it can conflict with another module that overrides the same template. You can get the module from the QloApps Booking Request store page.
Features of QloApps Booking Request
- Replace the payment step at checkout with a Request Booking step whenever you turn the module on
- List every request under Orders › Booking Requests with Pending, Approved, Rejected, Expired and Completed status badges
- Approve or reject a request from the list or from the Request status window, with a remark the guest can read
- Add, edit or delete rooms and extra services on a request while it is open
- Email the guest a checkout link that stays valid for a number of days you set
- Convert a request into a booking from the Back Office with Admin Checkout
- Show requests under My account, with Edit Booking for guests you let change them
- Let guests look up a request by reference and email address without signing in
- Email the super admin, the hotel and its employees about each new request, and email the guest on every status change
How to Install QloApps Booking Request
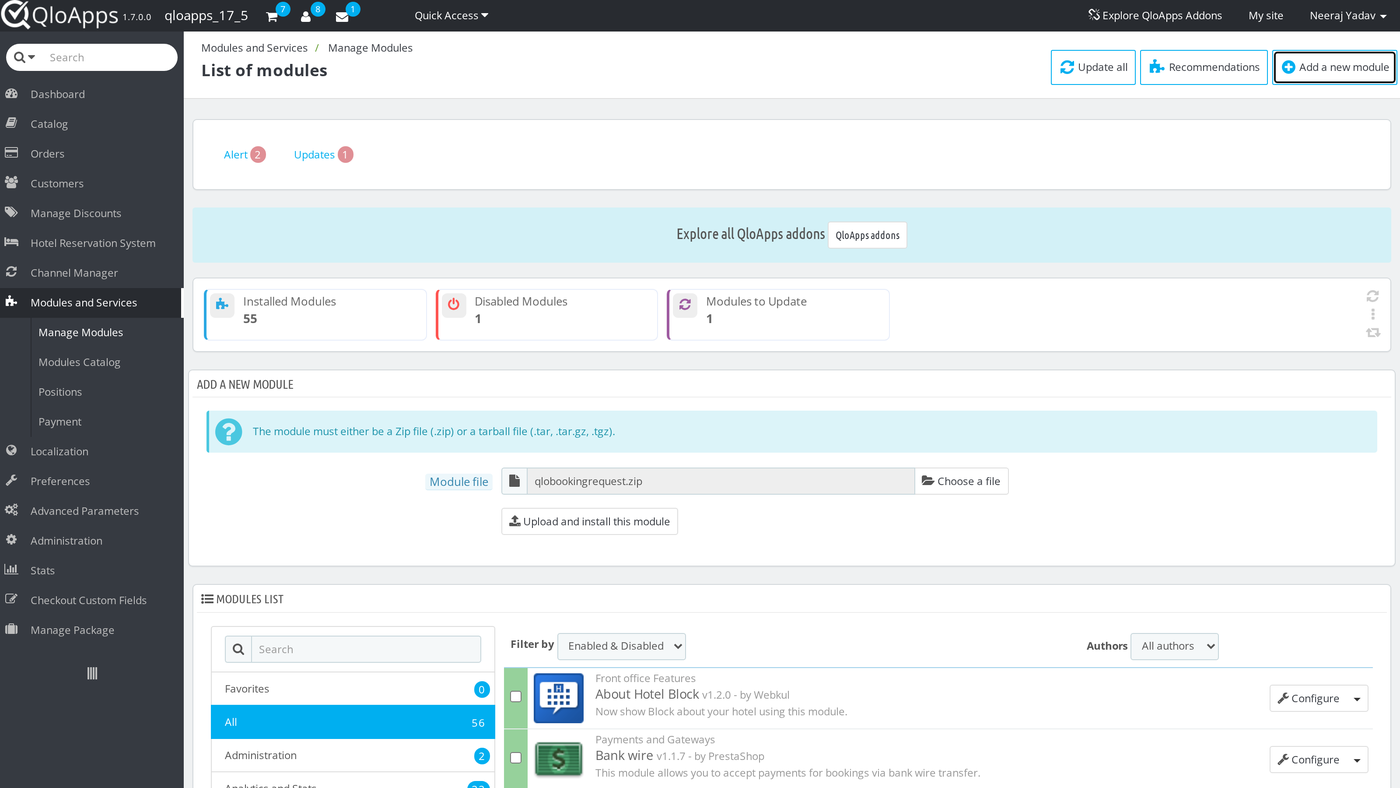
- In the Back Office go to Modules and Services › Manage Modules and click Add a new module.
- Under Module file, click Choose a file, select the module ZIP, then click Upload and install this module.
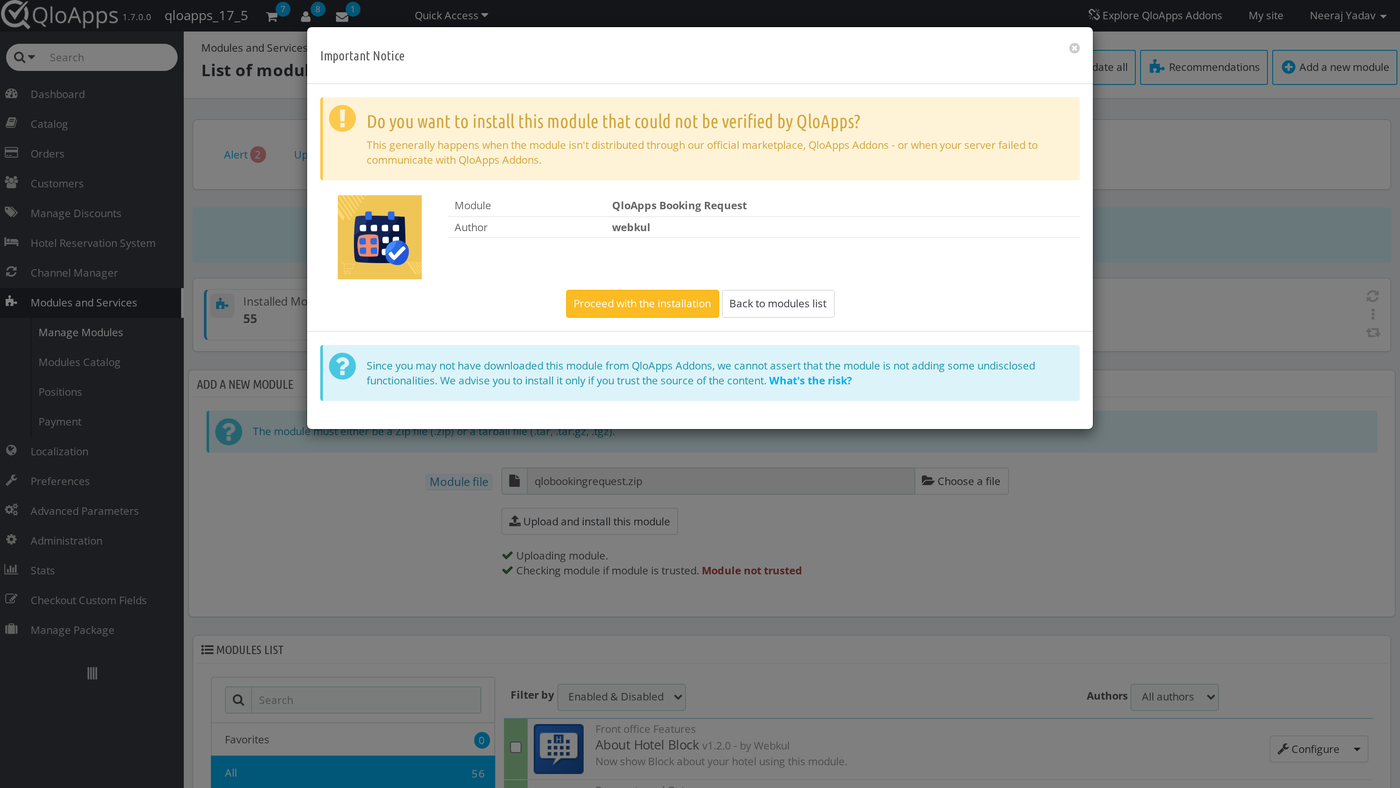
- QloApps asks “Do you want to install this module that could not be verified by QloApps?” This appears for any module that does not come from QloApps Addons. Check that the module name reads QloApps Booking Request and the author reads webkul, then click Proceed with the installation.
- QloApps shows “Module(s) installed successfully.” and lists QloApps Booking Request v4.0.0 under Other Modules.
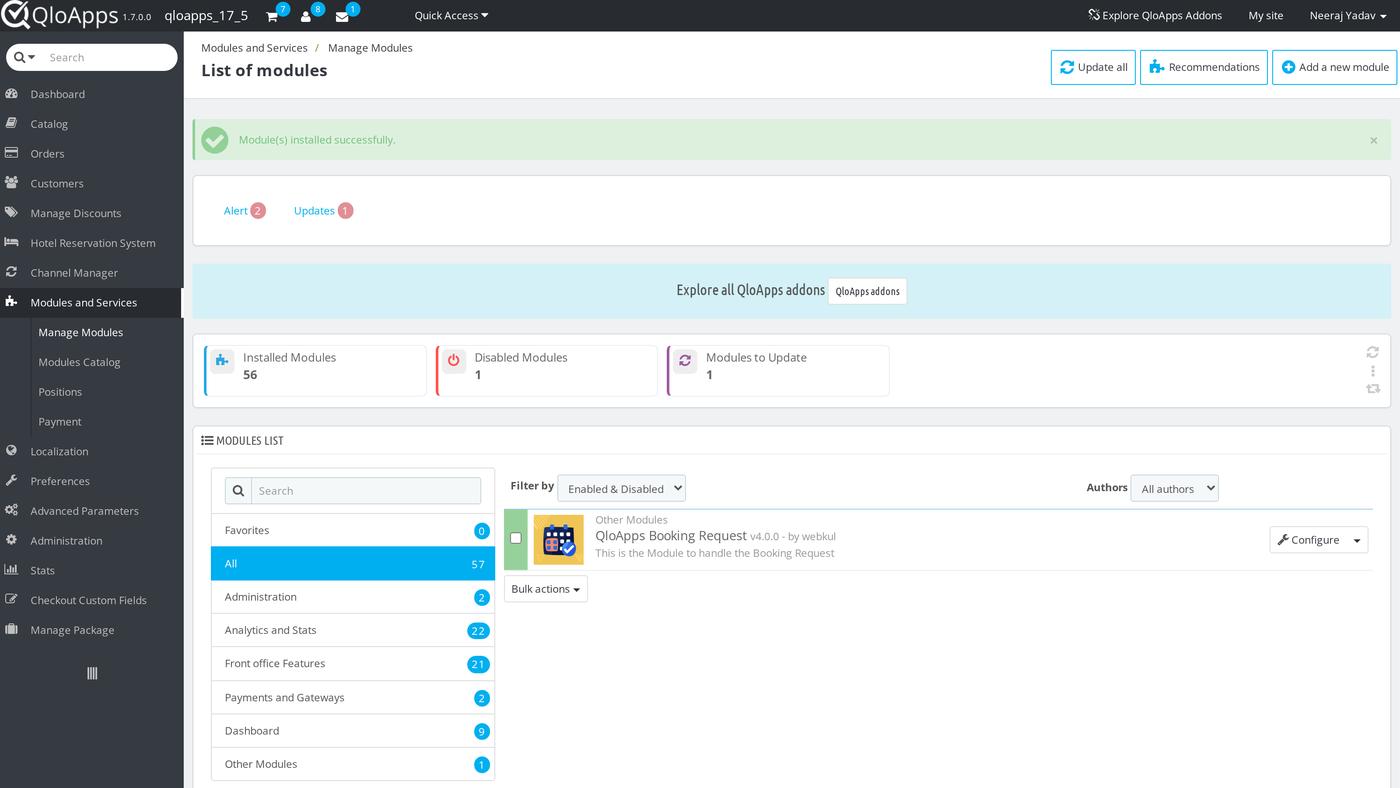
The install adds the Orders › Booking Requests menu entry, a hidden configuration page, and five sample requests, one for each status.
Configuration of QloApps Booking Request
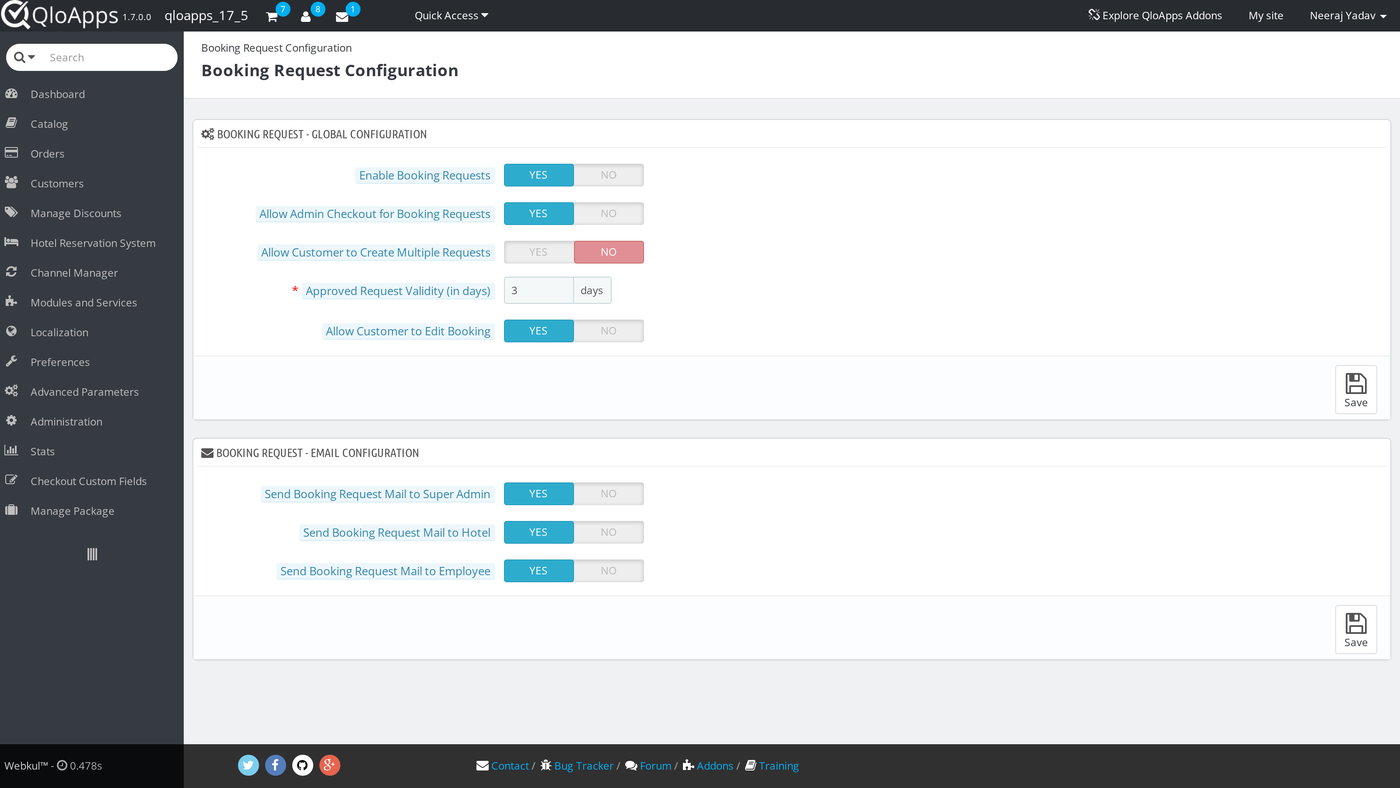
In Modules and Services › Manage Modules, find QloApps Booking Request and click Configure. This opens the Booking Request Configuration page, which has two panels. Each panel has its own Save button, and saving one panel does not change the other.
General Configuration
The Booking Request – Global Configuration panel has five settings:
- Enable Booking Requests: turns the module on. When it is Yes, the Request Booking step replaces the payment step at checkout. When it is No, checkout works as normal. Default: Yes.
- Allow Admin Checkout for Booking Requests: shows the Admin Checkout button on a request, so staff can convert it into a booking from the Back Office. Default: Yes.
- Allow Customer to Create Multiple Requests: lets one guest hold more than one request at a time. When it is No, a guest with a pending request cannot send a second one. Default: No.
- Approved Request Validity (in days): the number of days a guest has to finish checkout after approval. When the time runs out, the request expires. You must fill in this field. Default: 3 days.
- Allow Customer to Edit Booking: lets guests change a pending request with Edit Booking, and change an approved request from the Complete Booking checkout. Any change to an approved request sends it back to Pending for approval again. Default: Yes.
Email Configuration
The Booking Request – Email Configuration panel decides who receives a mail about a new request:
- Send Booking Request Mail to Super Admin: default Yes.
- Send Booking Request Mail to Hotel: default Yes.
- Send Booking Request Mail to Employee: default Yes.
These switches control the staff emails only. The guest always receives an email when the module records a request, and again each time the status changes.
Click Save in each panel after you change it. QloApps shows “Global configuration updated successfully.” or “Email configuration updated successfully.”
Sending a Booking Request From Checkout
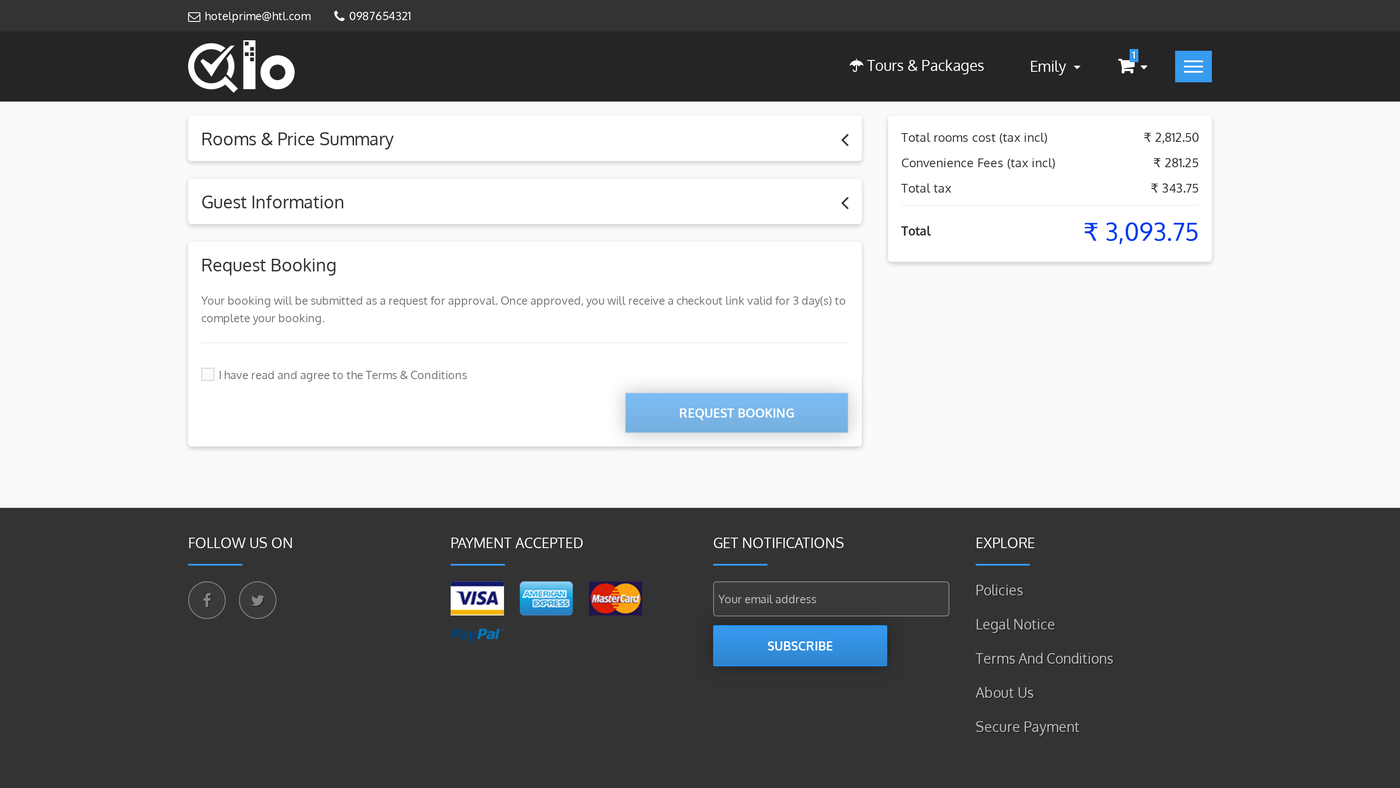
With Enable Booking Requests on, a guest adds a room, opens checkout and goes through Rooms & Price Summary and Guest Information. The last step is Request Booking, where the payment step used to be.
The step tells the guest that the booking goes in as a request, and that after approval they receive a checkout link valid for the number of days you set. The guest ticks I have read and agree to the Terms & Conditions, then clicks Request Booking.
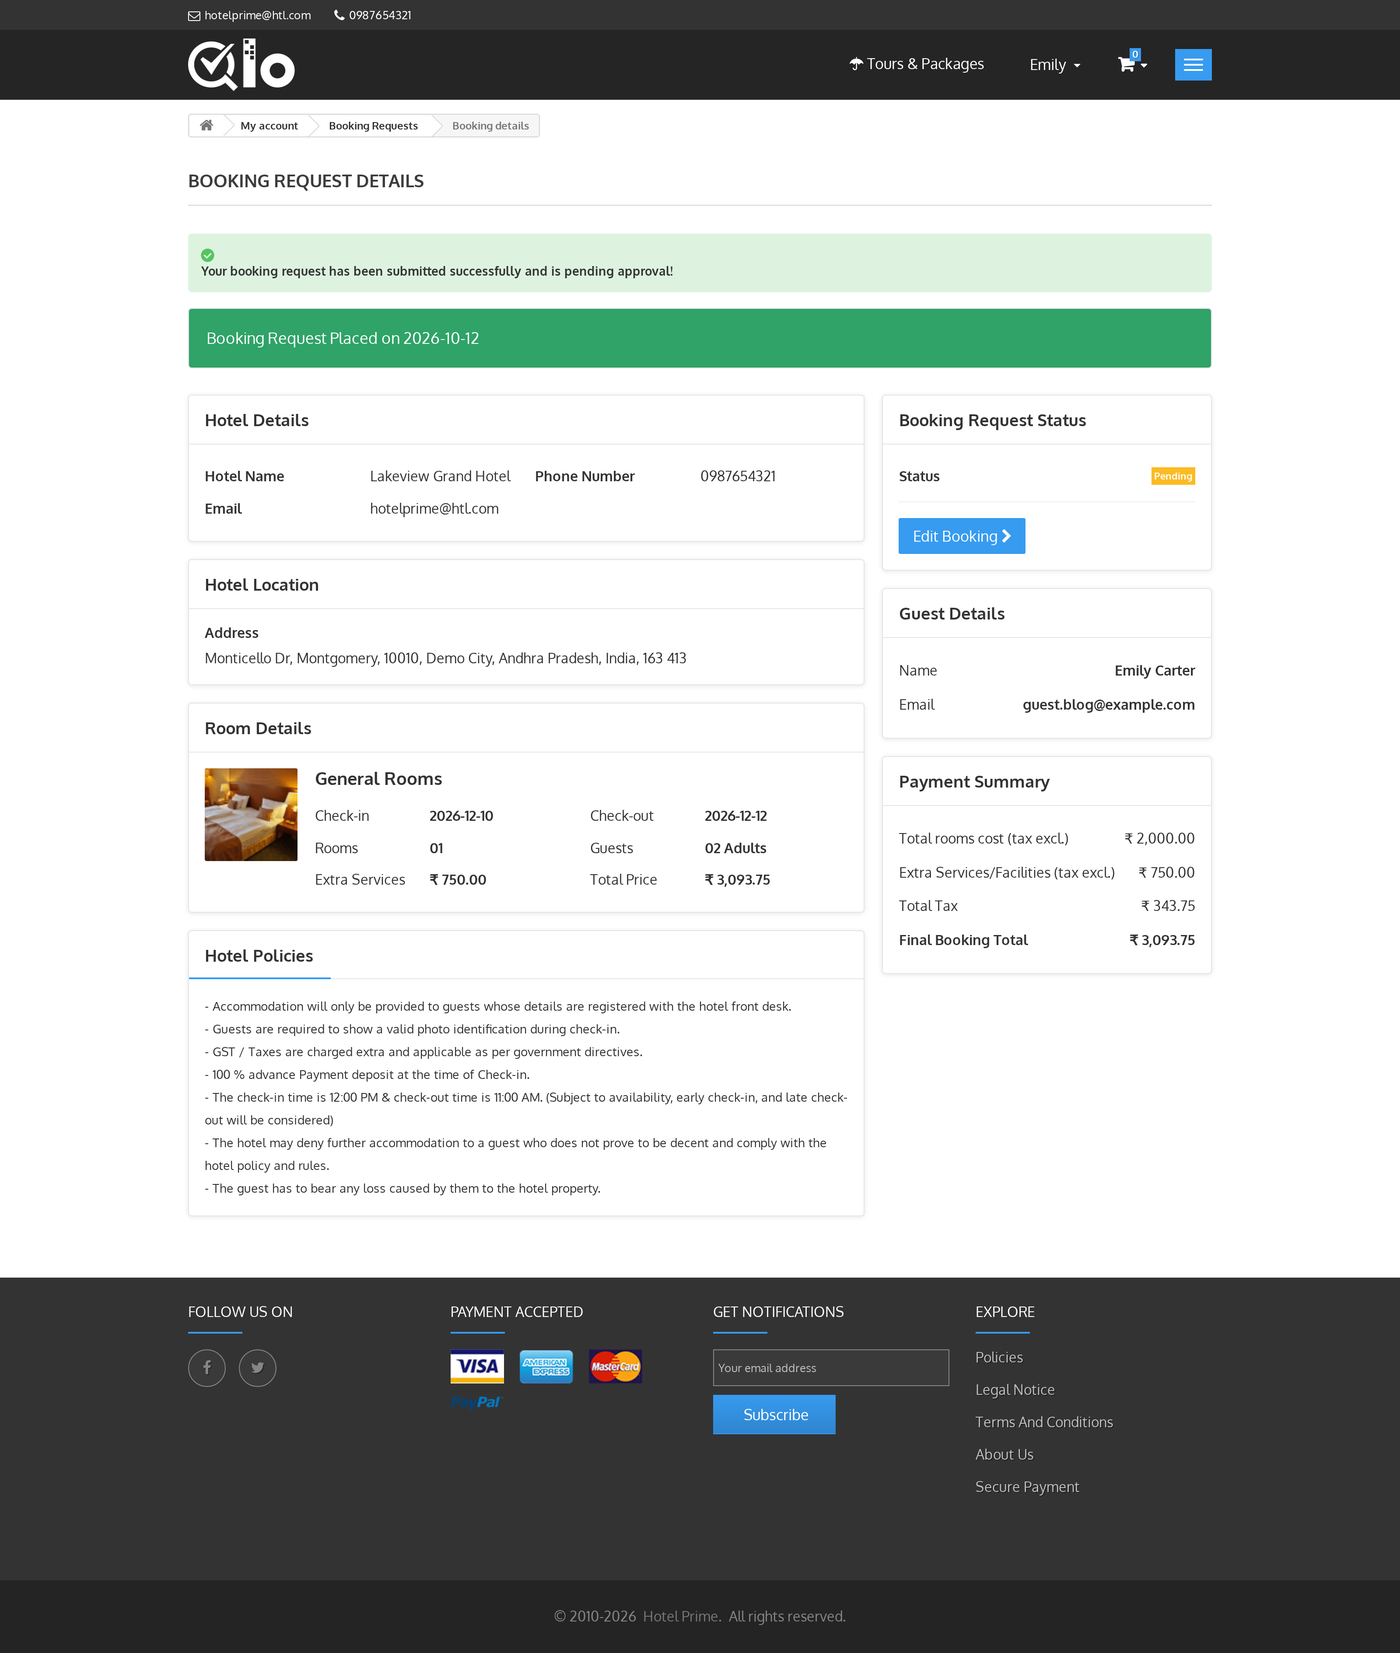
QloApps opens the Booking Request Details page with the message “Your booking request has been submitted successfully and is pending approval!” The page shows the hotel, the room, the dates, the guests and the payment summary, and the status is Pending. While the request is pending, the guest can use Edit Booking if you allowed it.
If a guest already has a pending request and Allow Customer to Create Multiple Requests is No, checkout shows “You already have a pending booking request. Creating multiple requests is not allowed.”
Reviewing Booking Requests
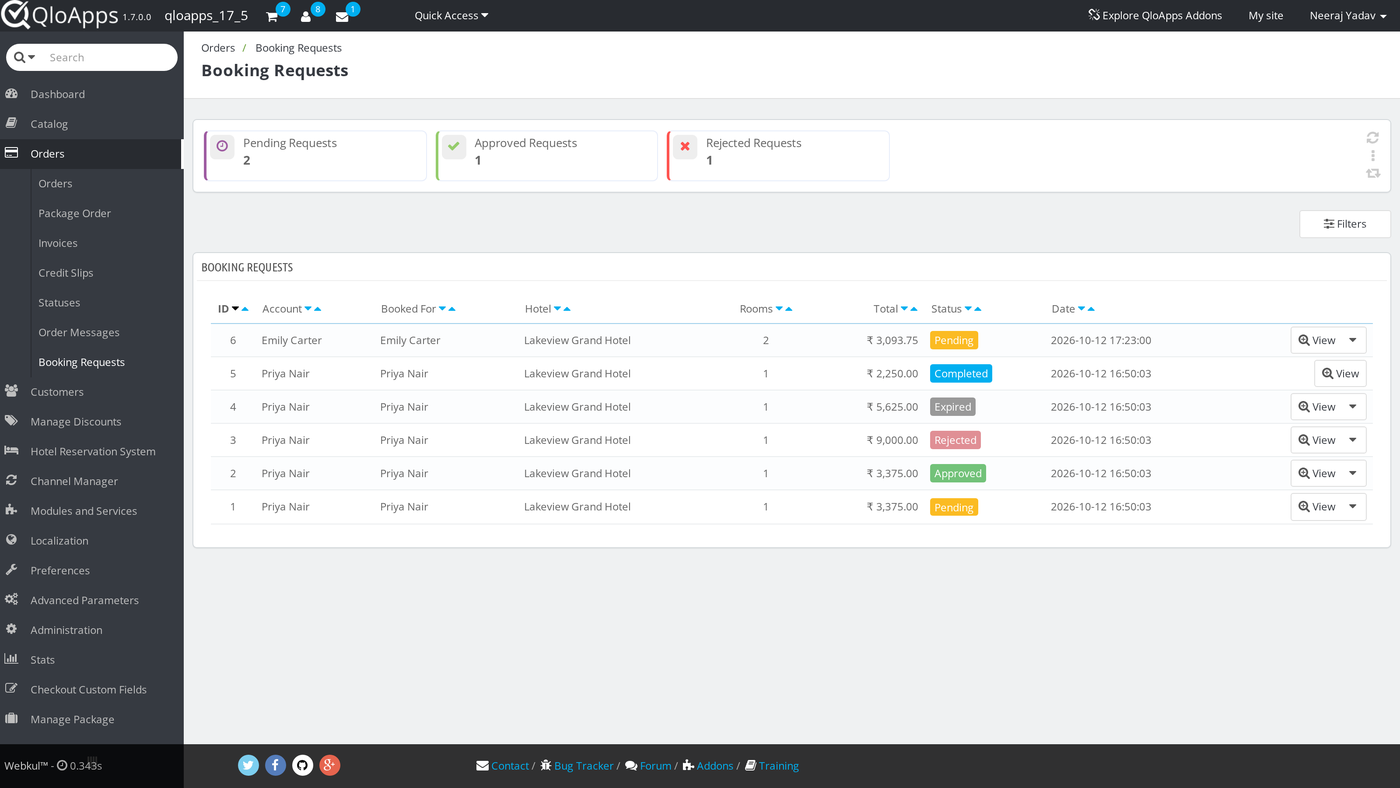
Go to Orders › Booking Requests. The three counters at the top show the pending, approved and rejected requests. The list shows each request’s ID, Account, Booked For, Hotel, Rooms, Total, Status and Date. Use Filters to narrow the list, for example by Status.
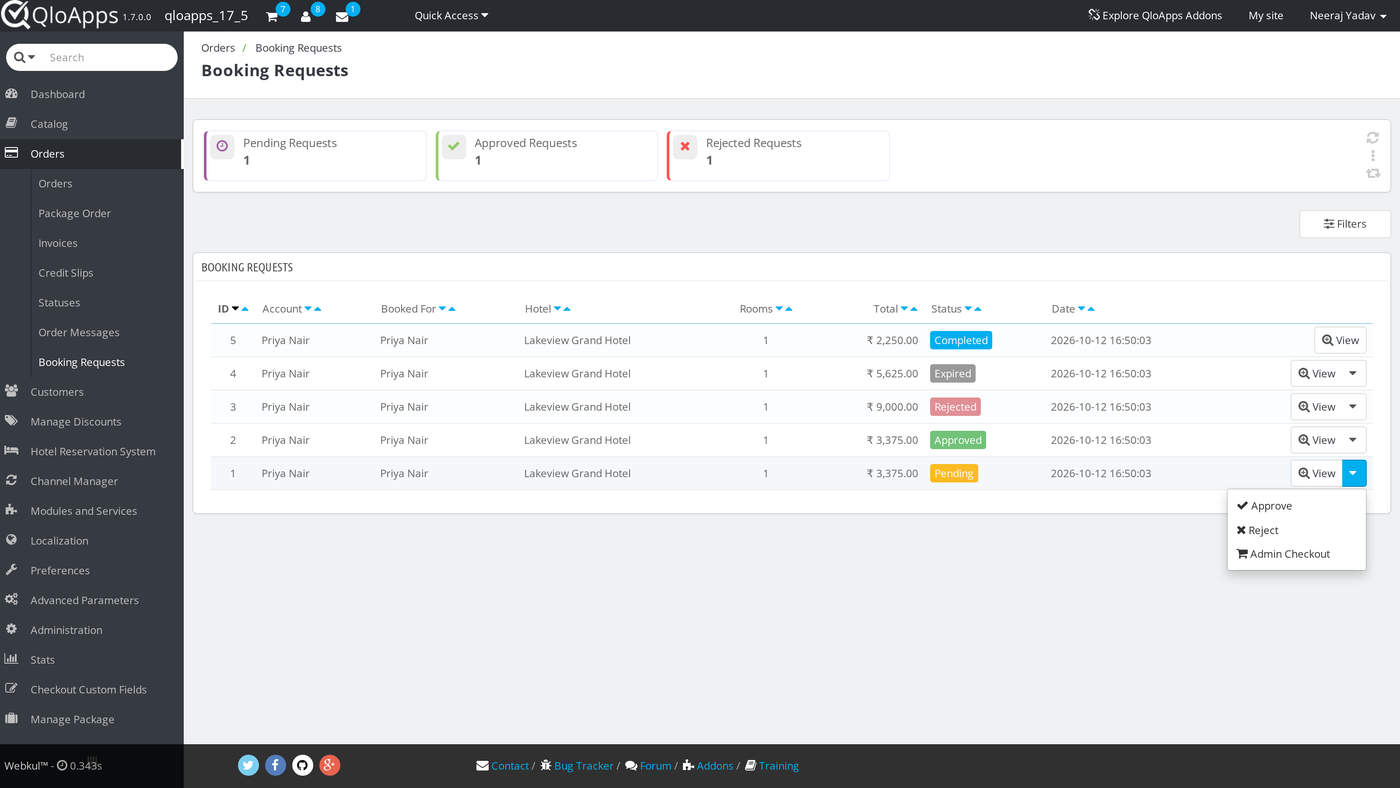
Click the arrow next to View to open the row actions. Approve and Reject change the status without opening the request, and Admin Checkout converts the request into a booking.
An employee who is not a super admin only sees requests for the hotels in their profile.
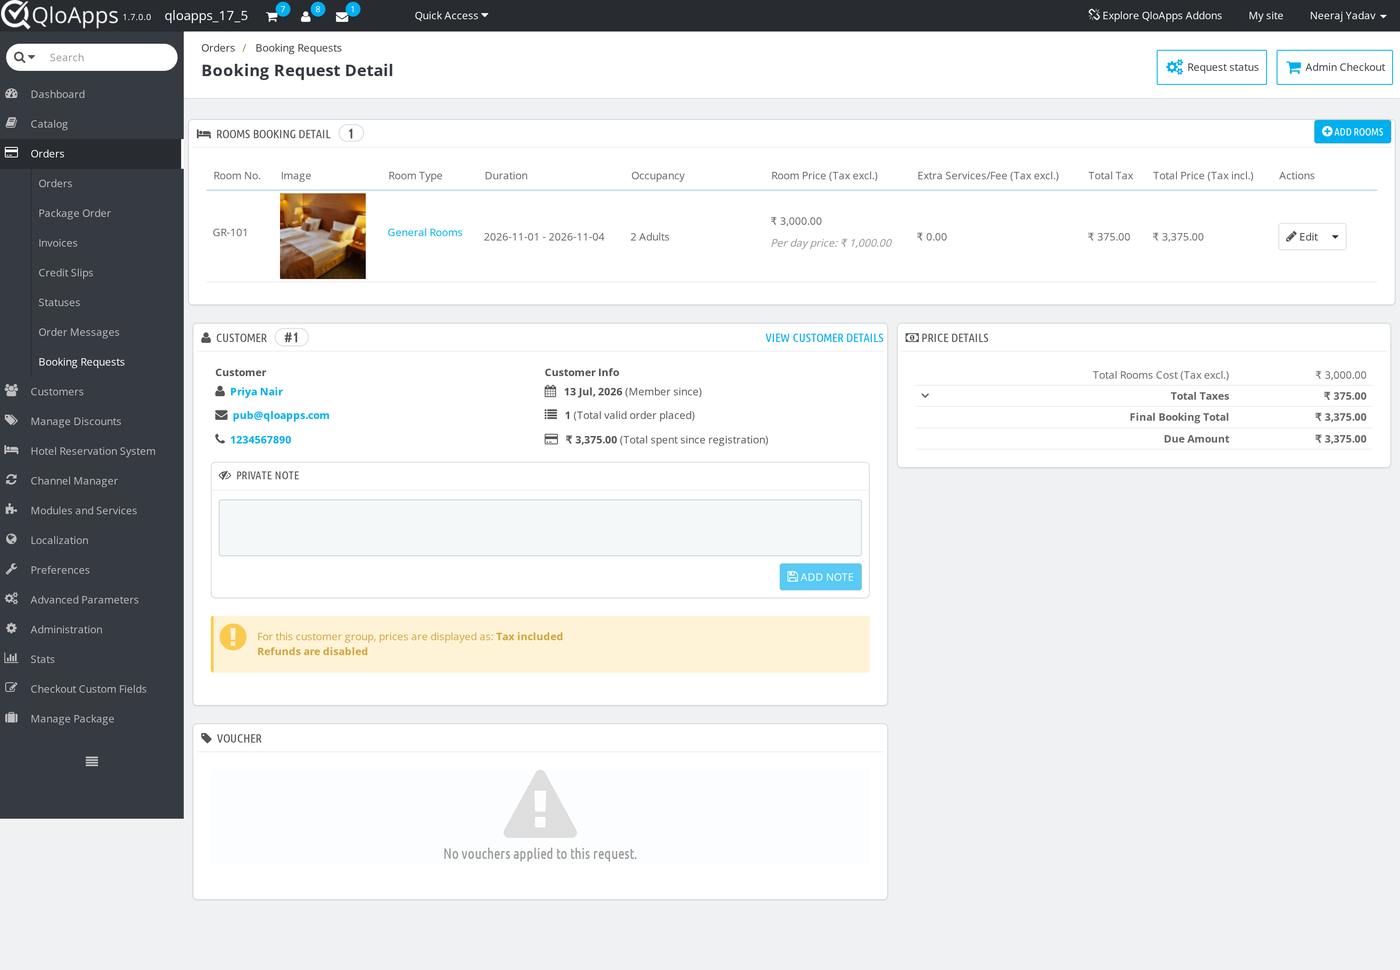
Click View to open Booking Request Detail. The page shows the rooms with their dates and occupancy, the guest, any private note, the vouchers and the price breakdown. While a request is open, use Add Rooms to add a room, and the Edit menu on a room row to change or remove it.
Approving or Rejecting a Request
- Open the request with View.
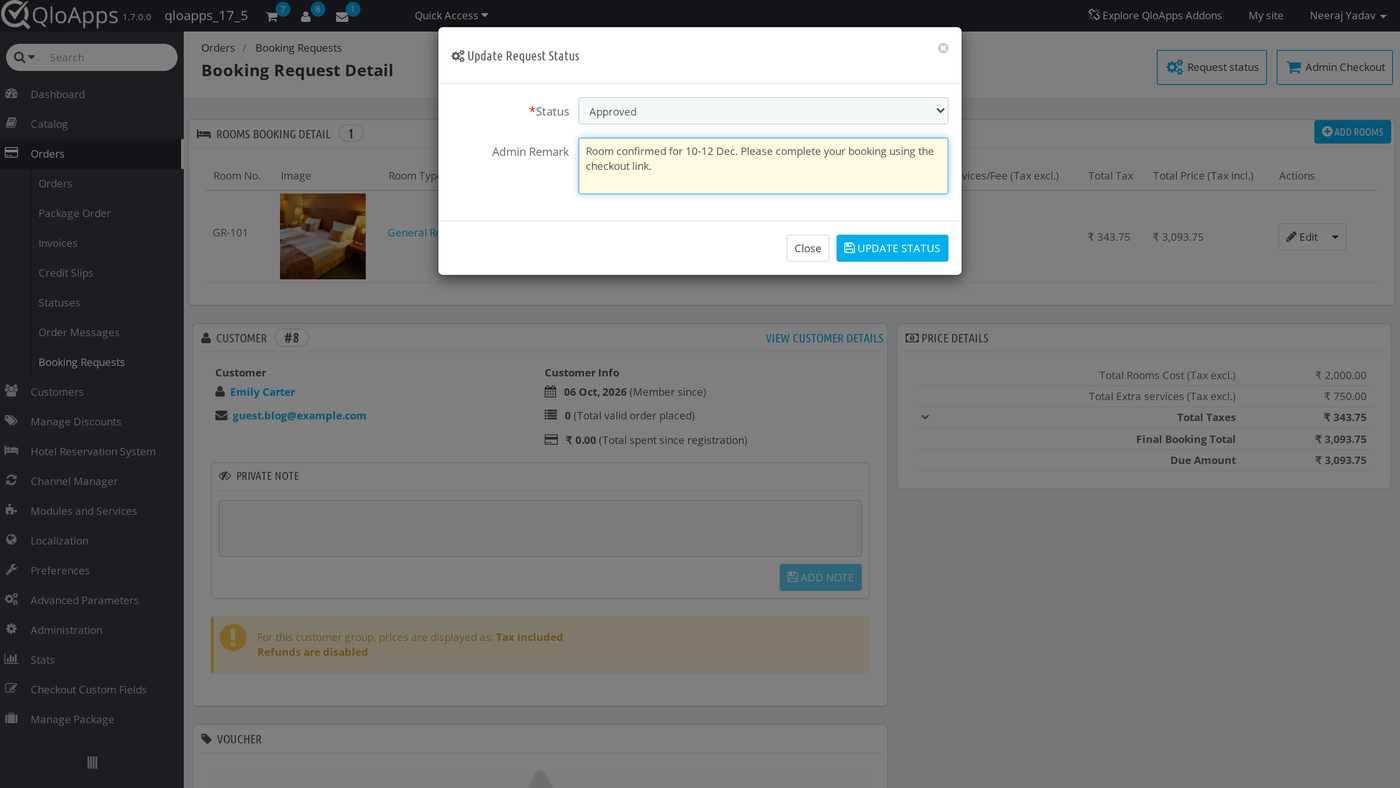
- Click Request status in the toolbar. The Update Request Status window opens.
- Pick Approved or Rejected in Status. Type a note in Admin Remark if you want the guest to see one. The remark is optional.
- Click Update Status.
QloApps hides the Request status button once a request is Completed or Expired, because you cannot change those statuses.
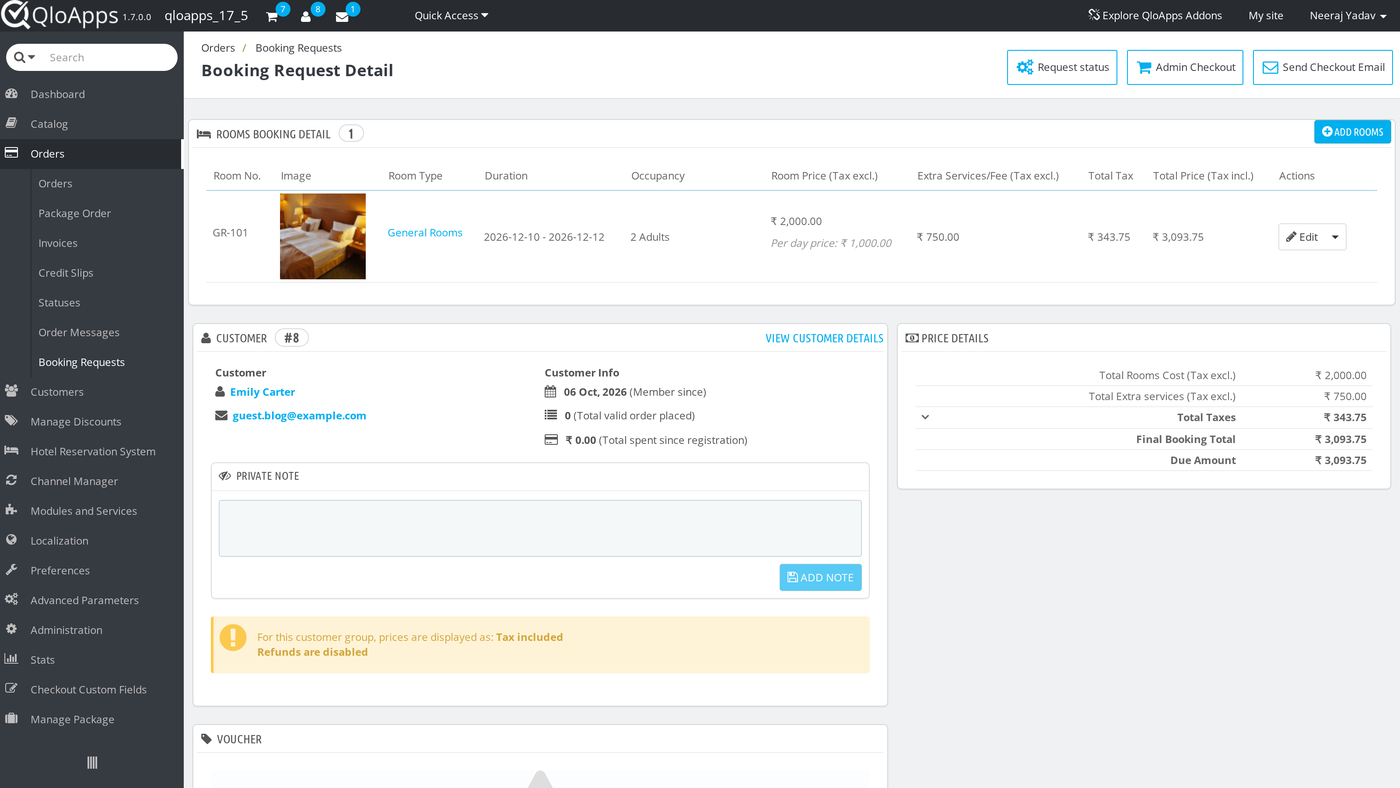
After you approve a request, QloApps emails the guest a link to complete the booking, together with the date by which they must finish. The toolbar now also shows Send Checkout Email, which sends that email again, and Admin Checkout when Allow Admin Checkout for Booking Requests is Yes.
When you reject a request, the guest receives an email with the new status and your remark.
Completing a Booking as a Guest
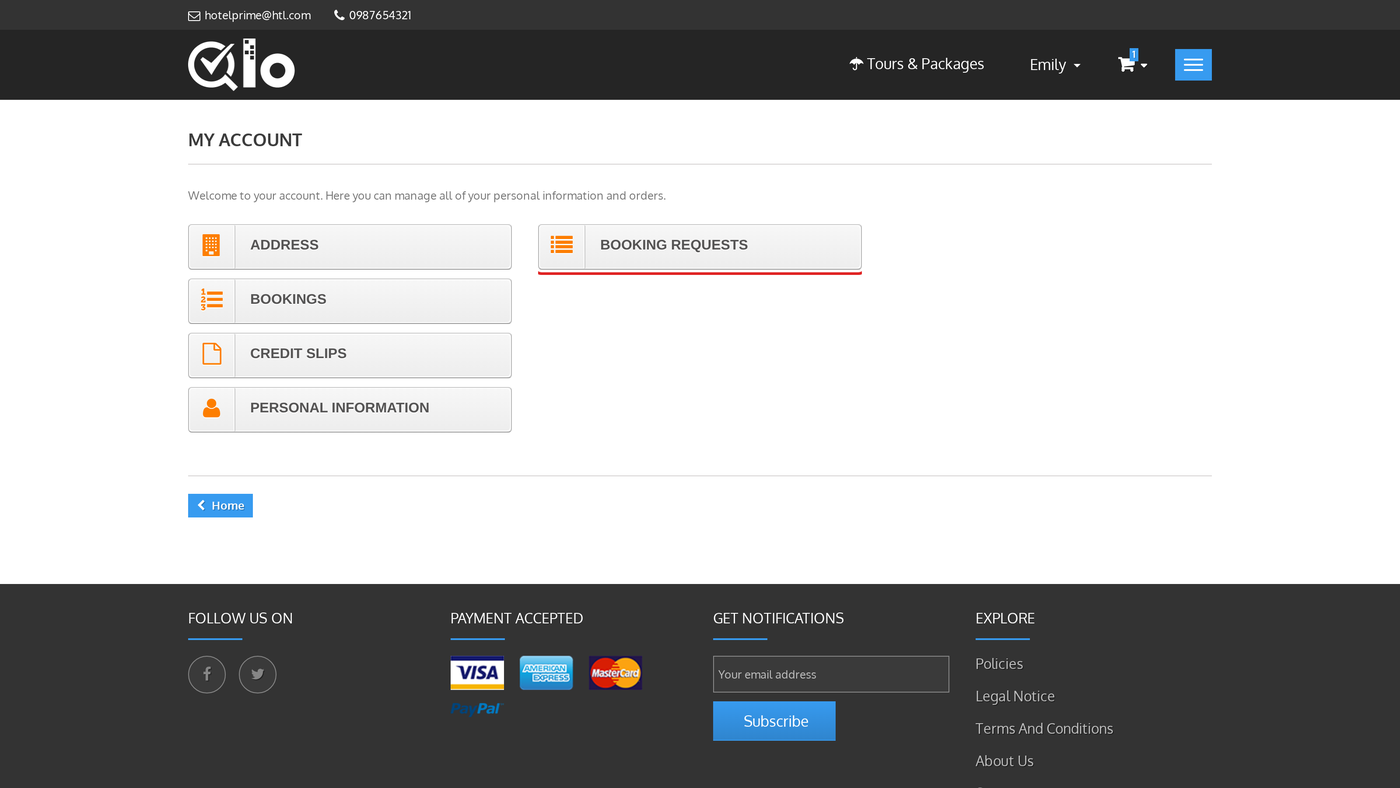
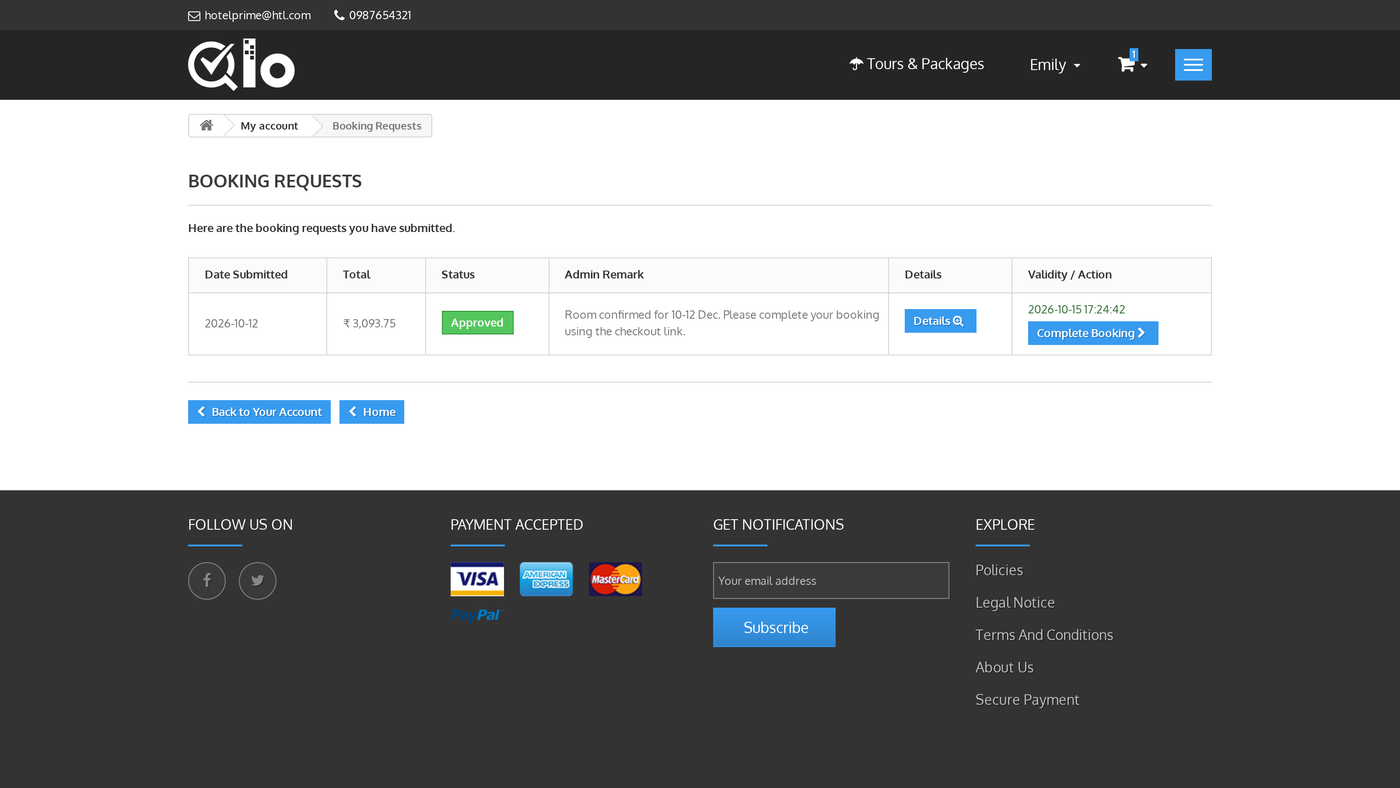
Guests find their requests in My account, under Booking Requests.
The Booking Requests page lists each request with its Date Submitted, Total, Status and Admin Remark. Details opens the request. For an approved request, Validity / Action shows the last day to finish, and Complete Booking takes the guest to checkout. If the guest does not finish before that date, the request becomes Expired. When the guest completes checkout, the request becomes Completed.
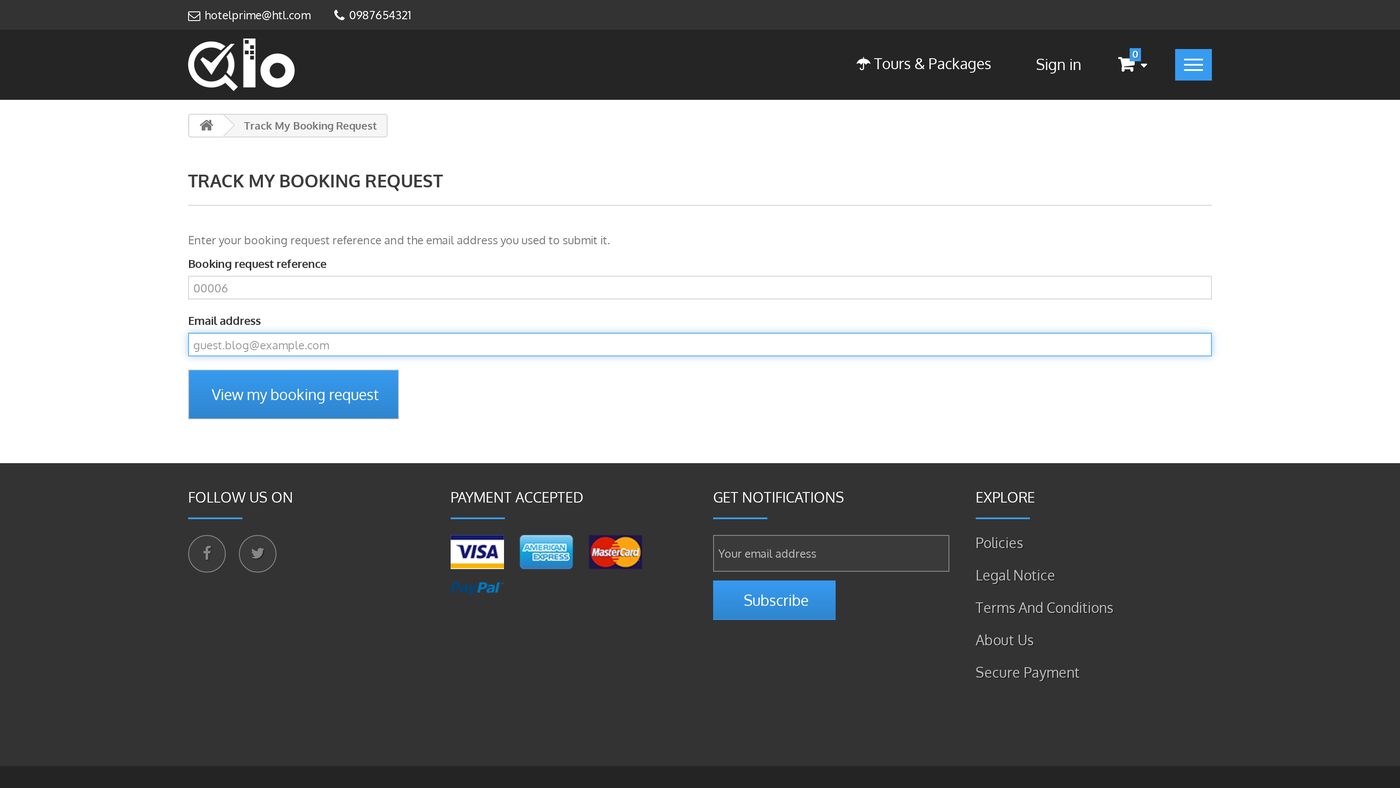
A guest who has not signed in can open the Track My Booking Request page. They enter the Booking request reference, which is the request ID padded to five digits such as 00006, and the Email address they used. QloApps then signs them in to the request and opens its details page.
Booking Requests on the Customer Page
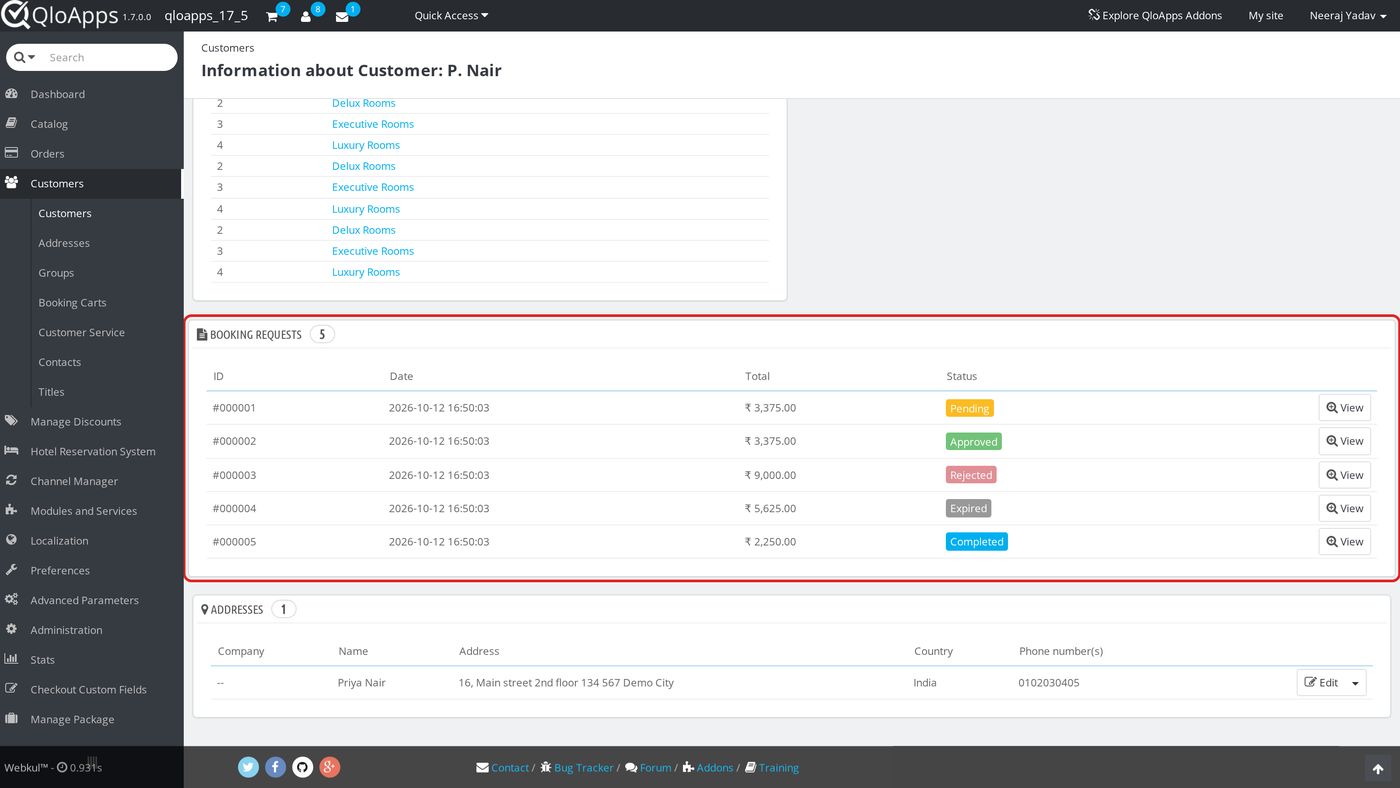
Open Customers › Customers and click View on a guest. A Booking Requests panel lists every request from that guest, with its ID, date, total and status, and a View button that opens the request.
Conclusion
QloApps Booking Request holds each booking as a request until your staff approve it. This guide covered the install, the two configuration panels, the Request Booking step at checkout, the Back Office list and detail pages, approving and rejecting requests, and the pages guests use to track and complete their bookings. Finally, we hope this guide has helped you configure and use QloApps Booking Request with confidence.
Additionally, to learn more about the functionality of QloApps, you can visit this link: All-in-One Property Management System. For technical assistance, raise a ticket at QloApps Support. In case of any query, issue, or requirement, please feel free to raise it on the QloApps Forum.
Current Module Version: 4.0.0
Supported QloApps Versions: 1.7.x

Be the first to comment.