QloApps Backup Manager is an add-on that allows you to take a backup of your file system and database. The user can create the backup automatically with help of cron.
With this add-on, the backup can be taken quickly whenever you are updating your website or system.
It will be helpful to get back to the old version if in case you’re doing any migrations, any changes in the website, and many others.
Features
- The admin can create multiple backups of the database and file system.
- The backup of the database and file system can be created separately.
- The admin can easily delete the old backup from the system.
- The user can set the cron to create the automatic backup by setting cron.
- The admin can change the path of the backup file while creating the backup.
- The admin can set the limit for the maximum number of backups stored.
- The old backups can be deleted automatically after the configured days.
Installation of QloApps Backup Manager
If you want to install the QloApps Backup Manager then follow the given steps. It is very easy and simple.

- Go to the “Modules and Service” tab.
- Click on “Add new module“

Here you will upload the zip file of the module and proceed with the installation.
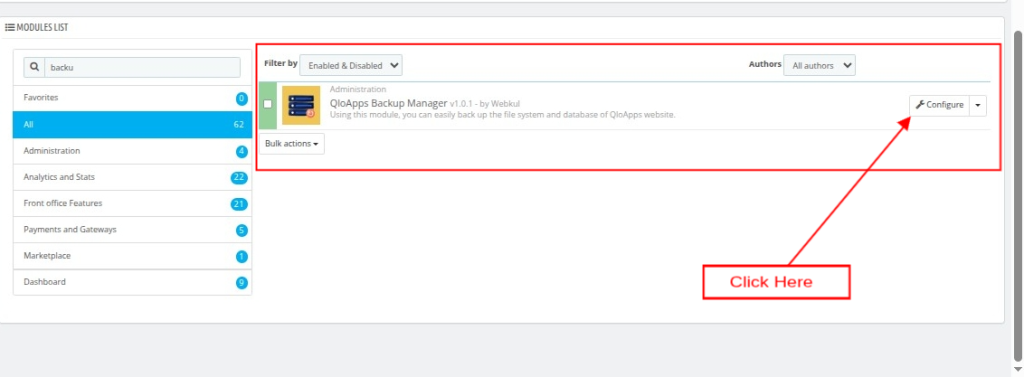
Once the module is installed successfully, then click on “Configure” to configure the addon
Configuration
When you click on the configure then the configuration page will appear of the addon. Here you can do the configuration on the following points:
- Backup Database: Enable or disable the “Backup database” if you want to create the database backup.
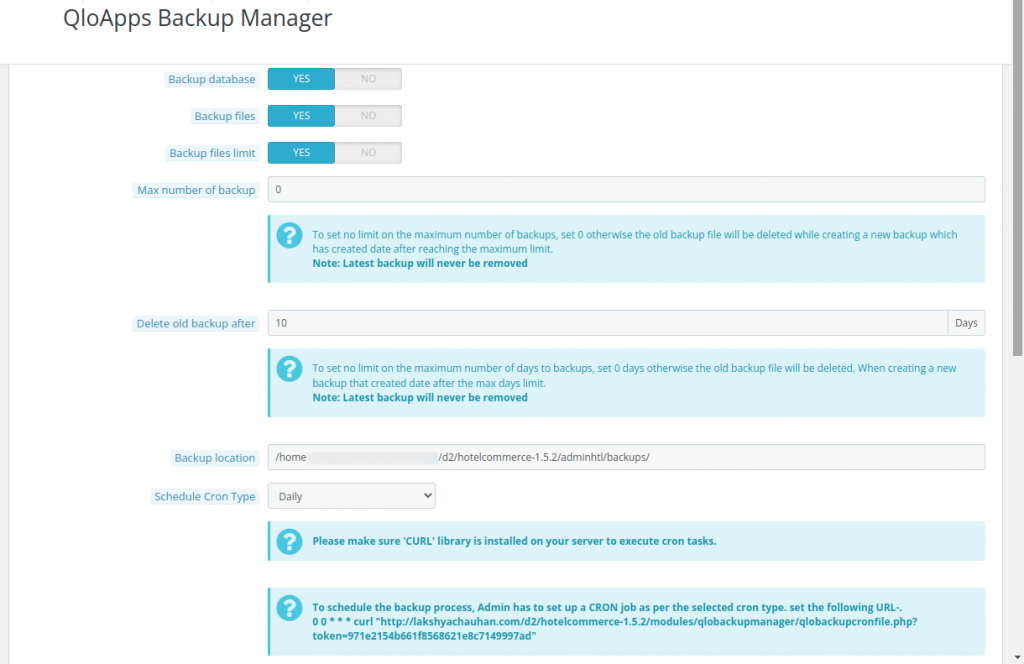
- Backup Files: Enable or disable the option if you want to create a backup of files.
- Backup File Limit: The user can set the limit on the maximum number of backup files to get stored.
- Delete Old Backup After: To set how many days the old backup file will be removed.
- Backup Location: It is the location where the backup will be stored. Set the location where you want the backup.
- Schedule Cron Type: You can set the cron to create an automatic backup. The user can set the corn on a daily, weekly, and monthly basis.
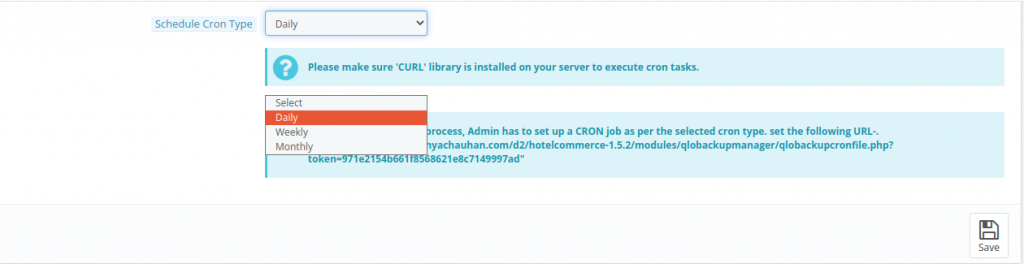
Now click on the save button to save the configuration.
Now, in ‘CREATE BACKUP‘ panel, click on Create a new backup as given in the image below.

Once the backup is created, the list of all available backups will be seen below the panel.
List of Available Backups
The list of available backups will have the backup details. The details are the types of the backup file, the size of the file, and the creation date.
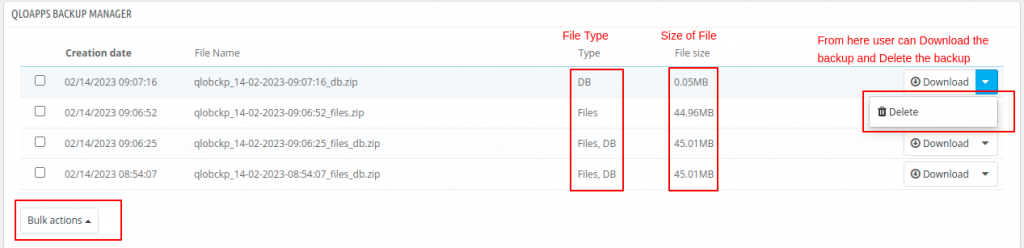
From here the user can download the backup in the local system. Moreover, they can individually delete the backup file.
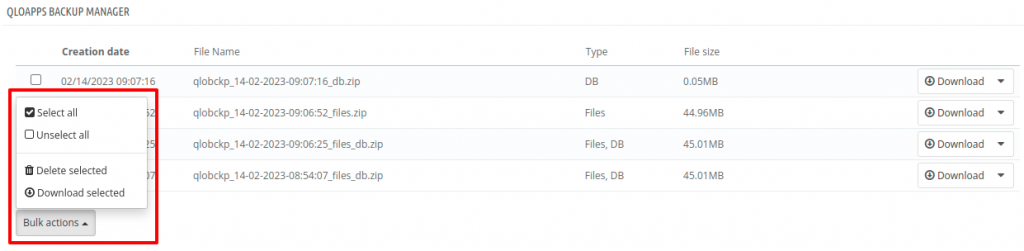
From the bulk actions, the user can select and unselect multiple files. Therefore, they can download or delete the backup files.
So, that’s all for the QloApps Backup Manager addon.
Please share your review
That’s all for “QloApps Backup Manager”.
Above all, if you want to learn about the functionality of QloApps then you can visit this link: QloApps Reservation System.
In case of any query, issue, or requirement, please feel free to raise it on QloApps Forum.
Moreover, you can raise a ticket to connect with our experts for any assistance
Current Product Version – 1.0.1
Supported Framework Version – QloApps 1.7.x & 1.6.x

Be the first to comment.