QloApps Authorize.net Payment Gateway Addon is one of the efficient payment gateway add-ons of QloApps that can simplify the process of payments for your guests.
Your guests can easily book rooms online using this payment gateway from your QloApps Hotel Website.
Every hotelier aims to ease the online payment method for their guests as it increases their booking rates and revenue and builds a sense of trust among the guests.
Integrate the Authorize.net payment gateway and collect payments through different payment modes like Visa, American Express, JCB, Mastercard, Discover, and Diners Club cards.
This efficient add-on allows you to easily process your guests’ refund requests so that you can improve their booking experience.
QloApps Authorize.net Payment Gateway
- Integrate the secure and reliable Authorize.net payment option for your guests on your website
- Allow your guests to complete their booking payment online using the Authorize.net payment option
- This payment gateway will support cards including Visa, Mastercard, Discover, American Express, Japan Credit Bureau, and Diner’s Club.
- Admin can configure and use this addon in two environments: Live and Sandbox
- View and manage all the transactions processed using the QloApps Authorize.net Payment gateway addon from the transactions tab in the back office.
- Enable your guests to request refunds on payments made using the Authorize.net payment gateway
- Easily process your guests’ refund requests using this payment gateway add-on.
- Refund the complete amount or partial amount of your guest’s bookings.
Remarks:
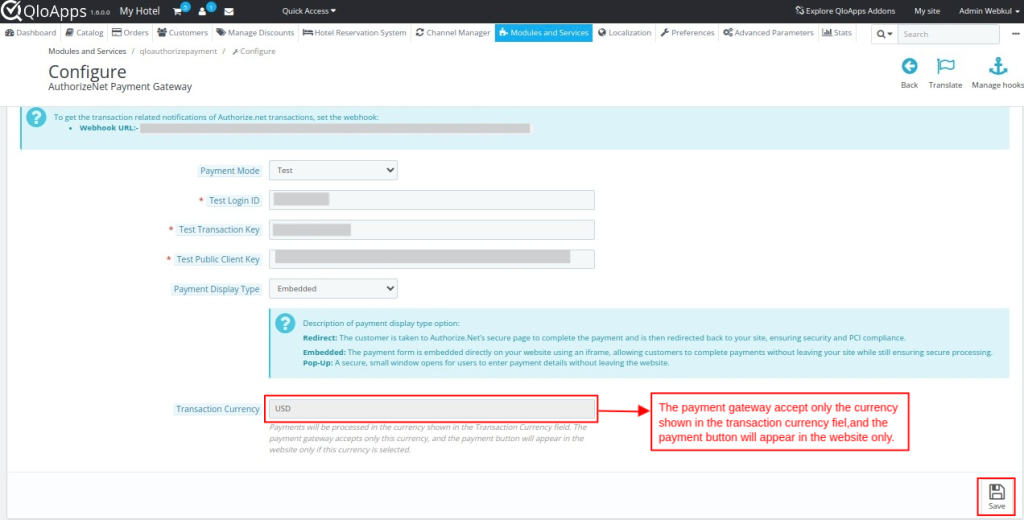
- Authorize.net supports the following currencies: United States Dollar, Canadian Dollar, Pound Sterling, Euro, Swiss Franc, Danish Krone, Norwegian Krone, Polish Zloty, and Swedish Krona.
- To use this payment gateway, your business should be established in the United States, Canada, or Australia.
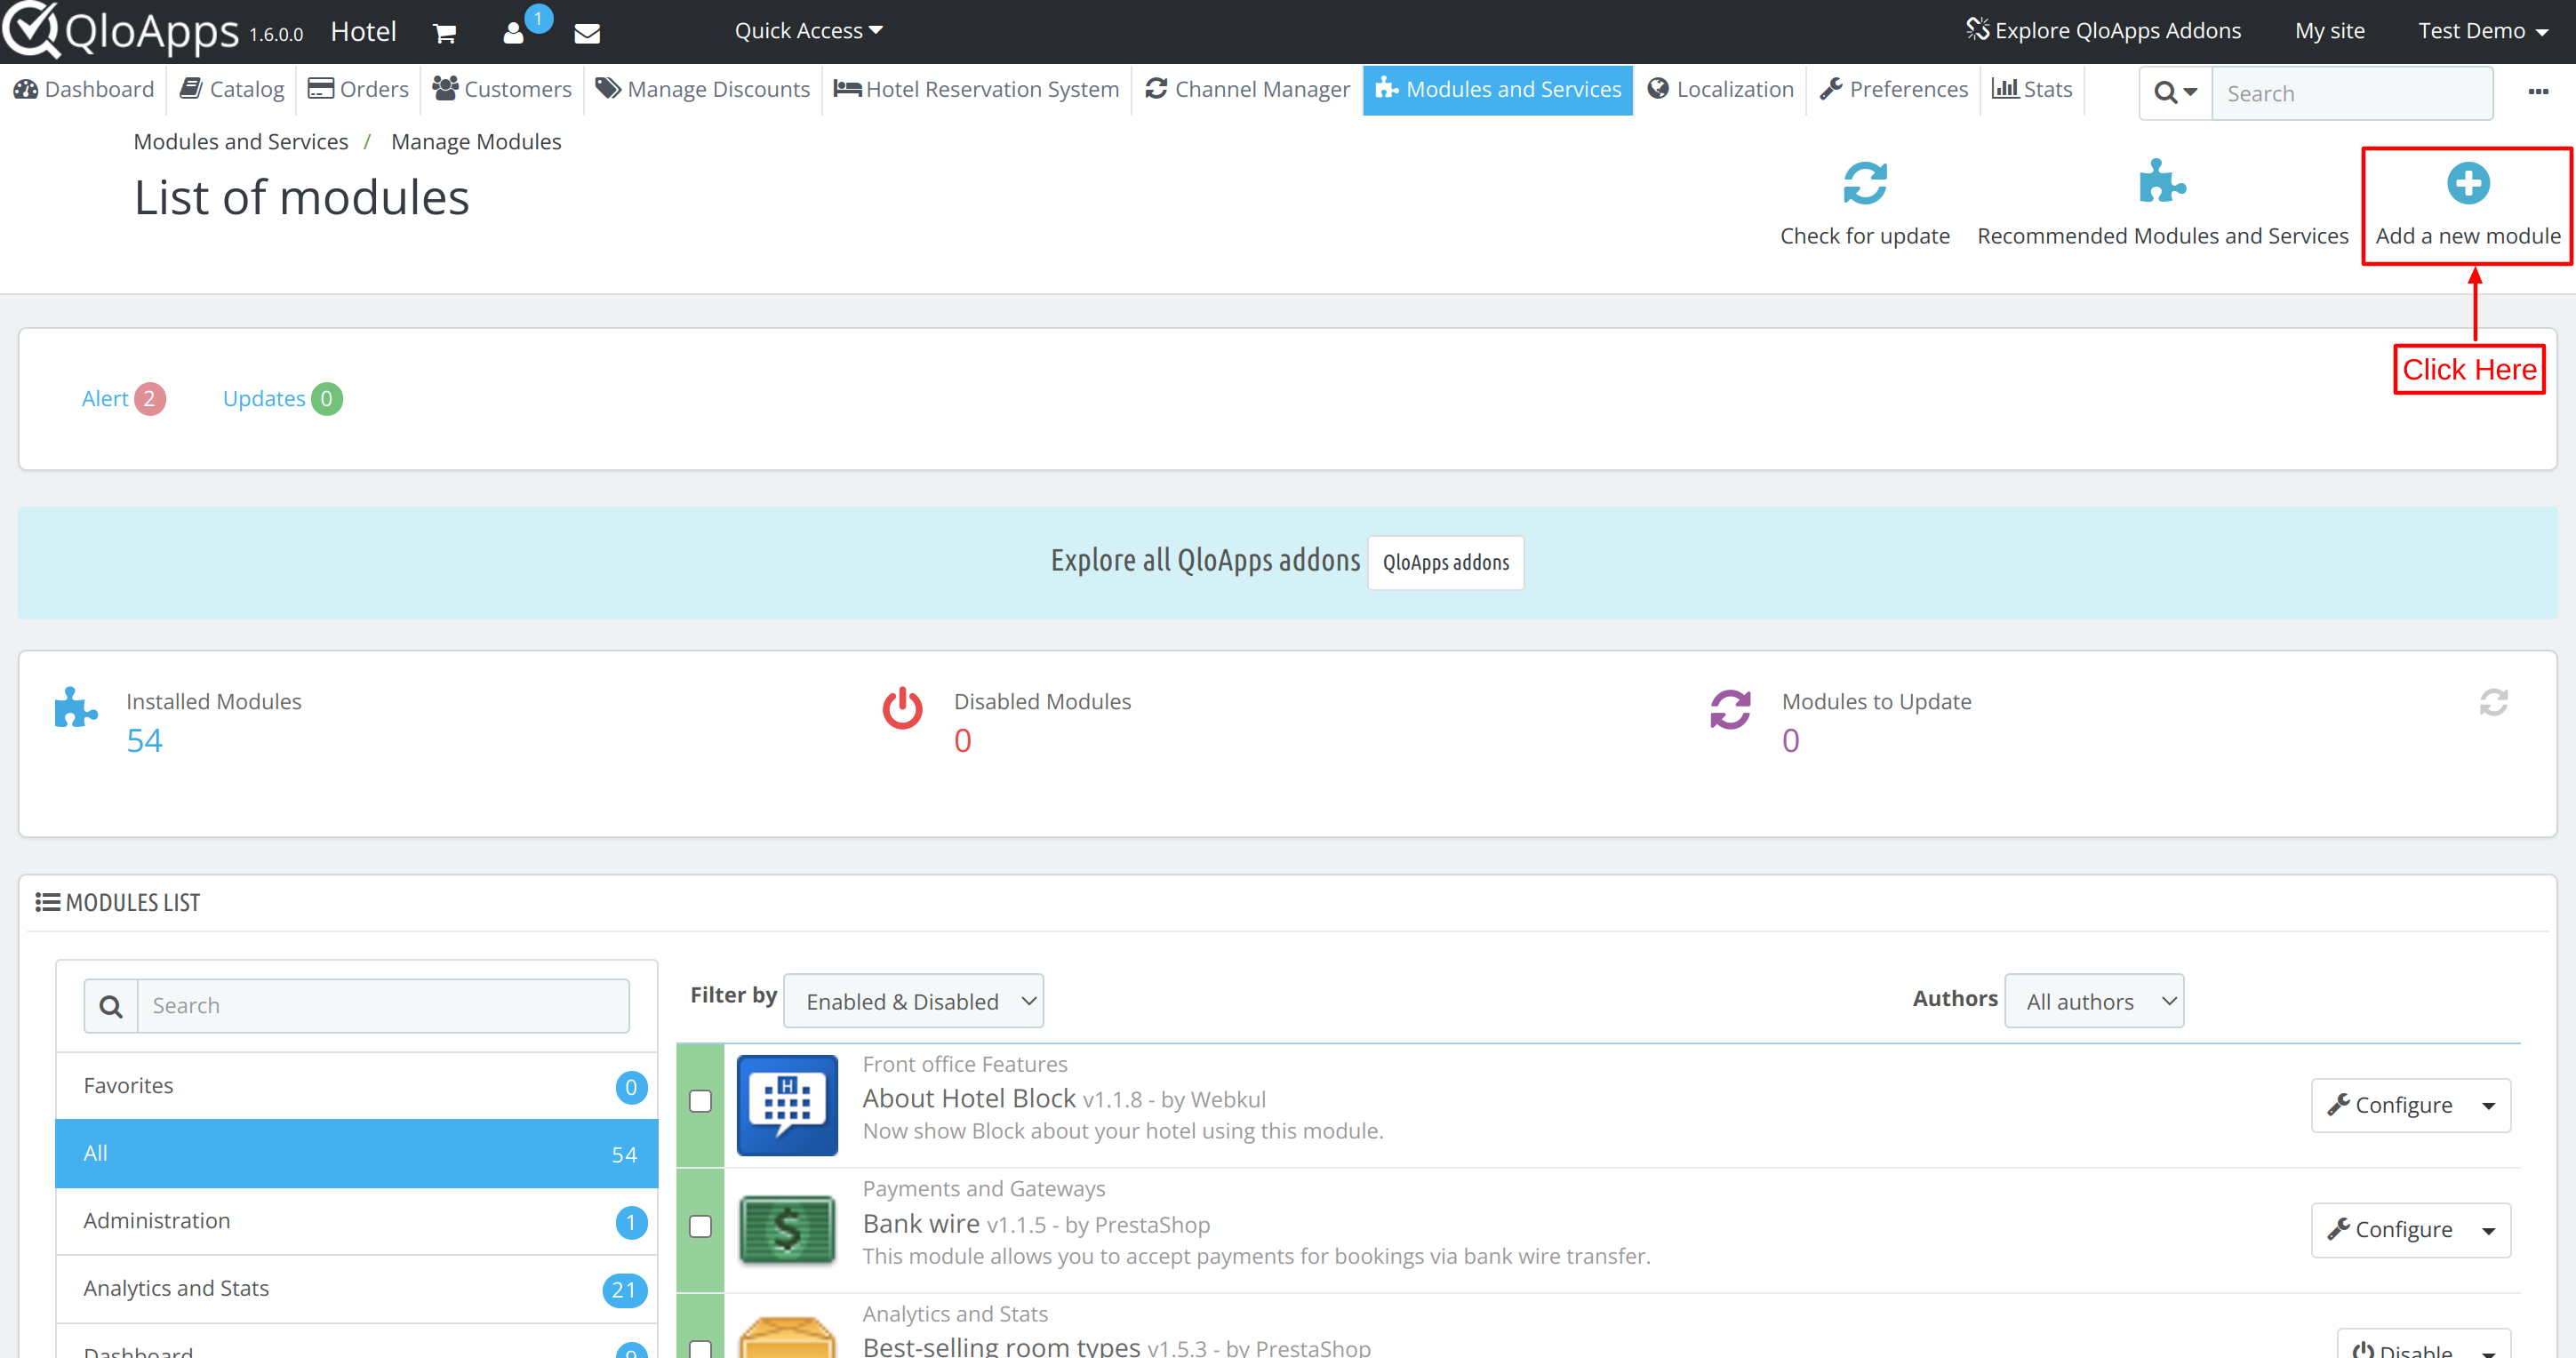
Installation Process of QloApps Authorize.net Payment Gateway
The installation process of QloApps modules is very easy. To install the QloApps Authorize.net Payment Gateway in your QloApps system:
- Firstly, go to the Modules and Services tab present in the menu at the Back Office.
- Click on Add a new module.
- Upload the ZIP file.
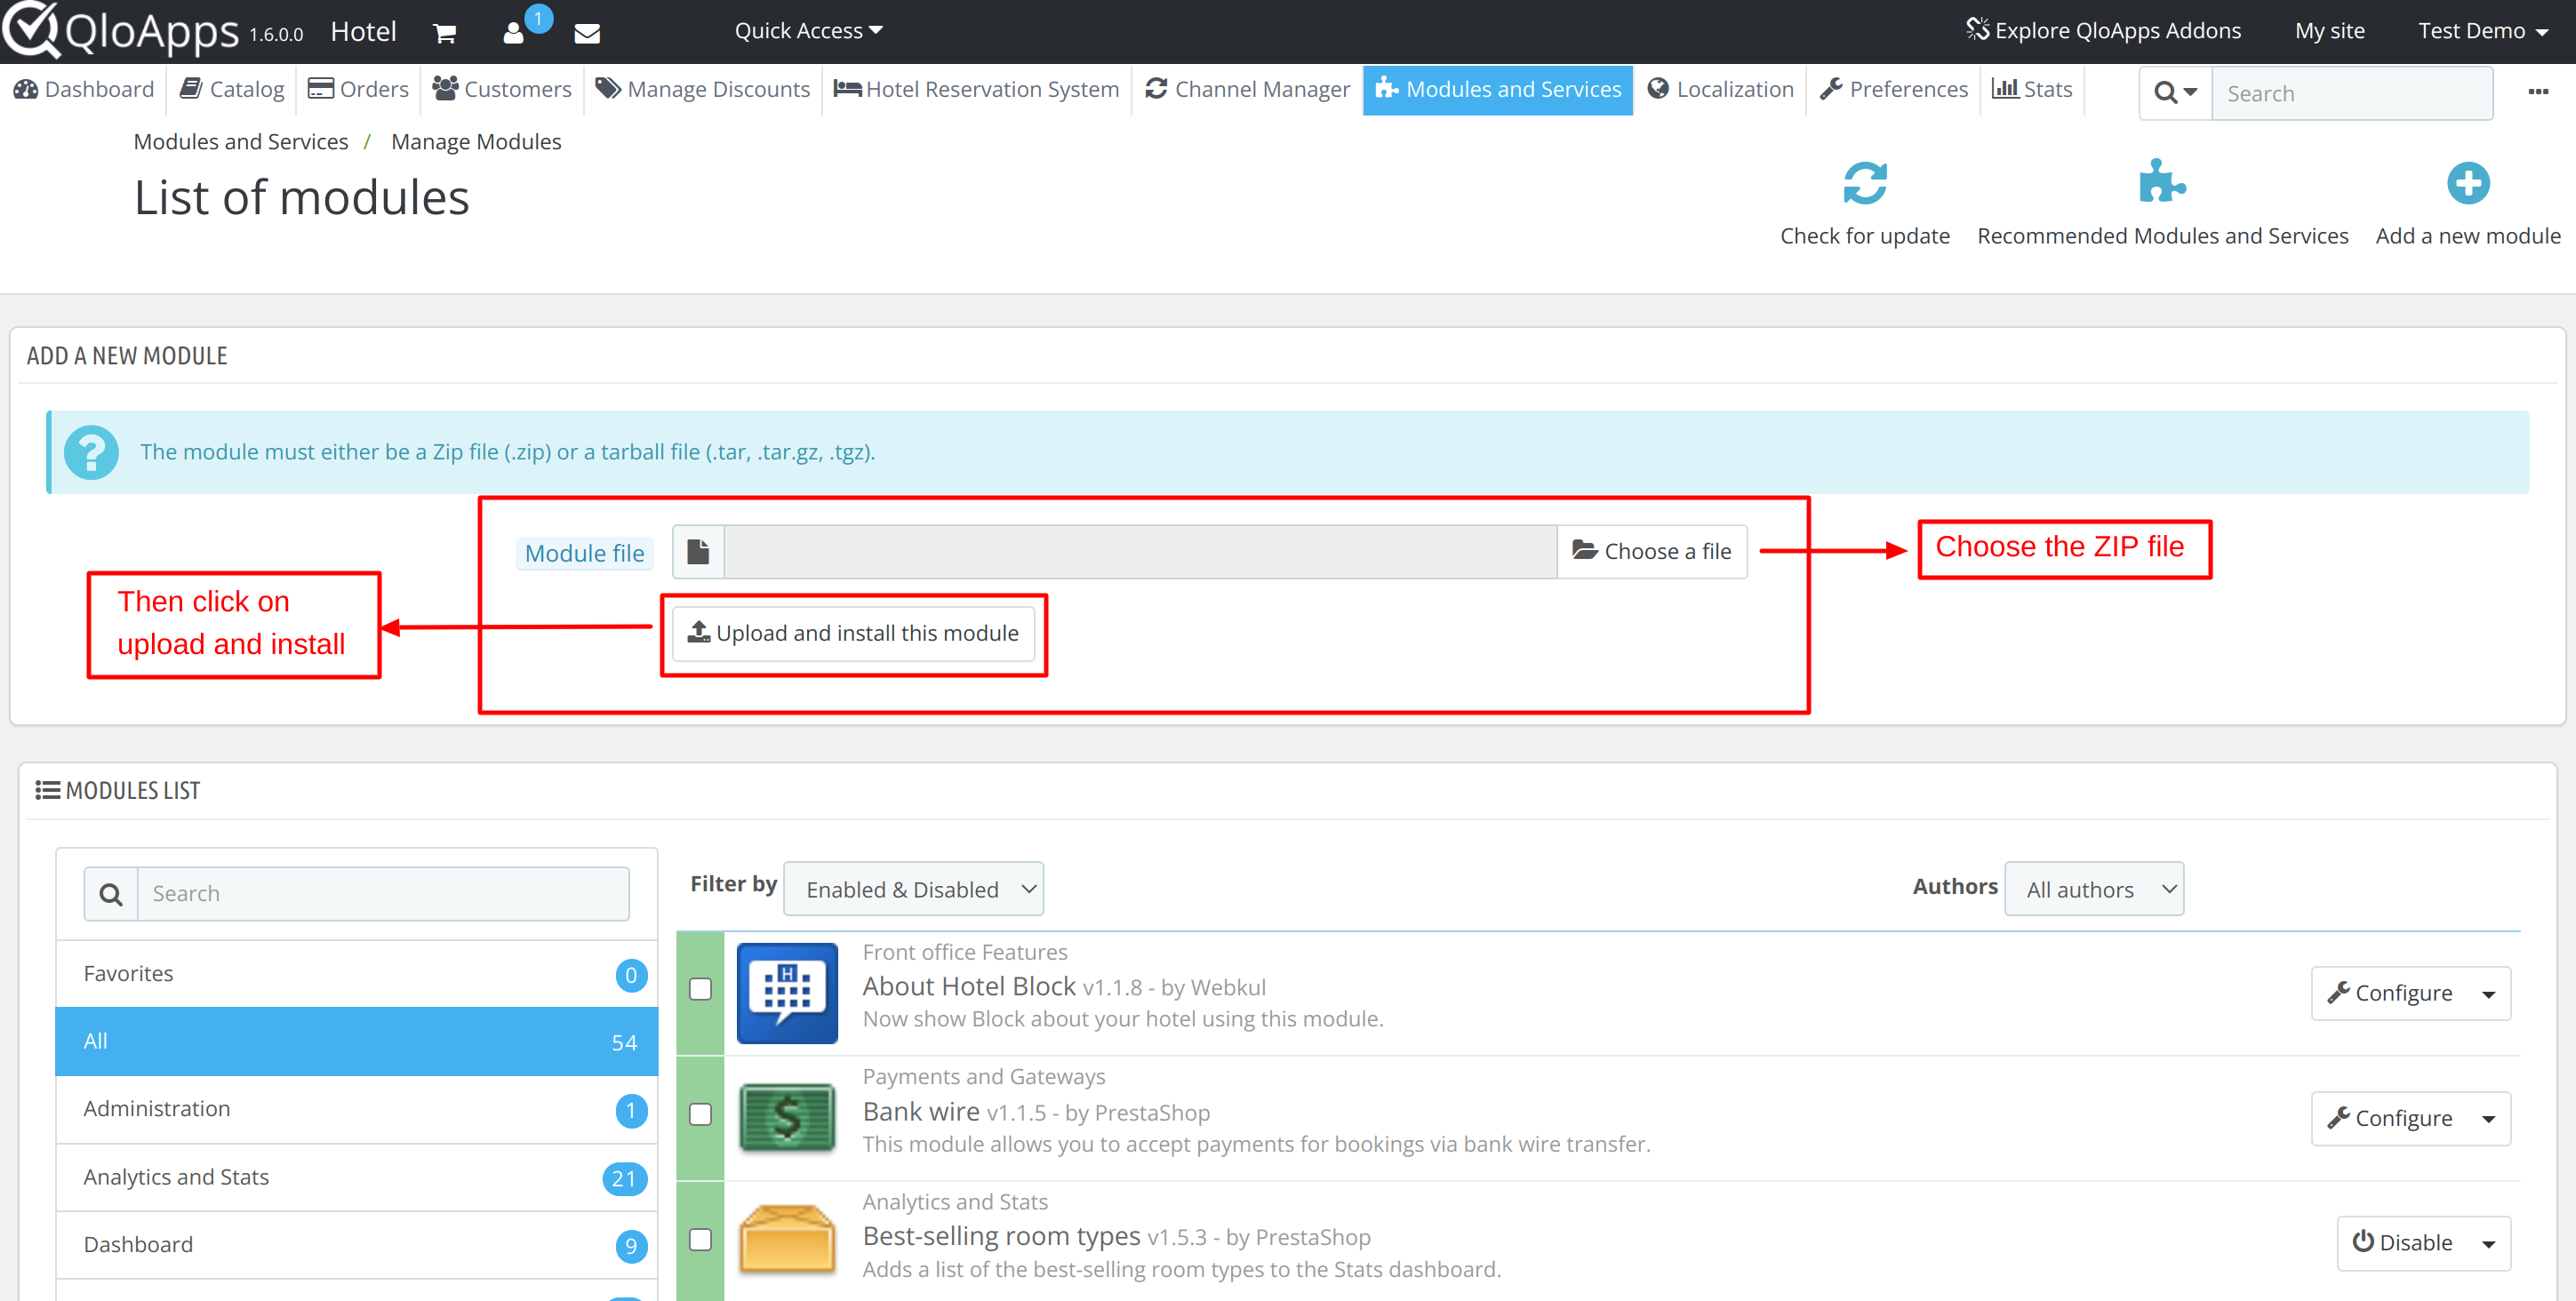
Once you click on upload and install, your module will be installed in the system. You will be able to configure your module at any point in time.
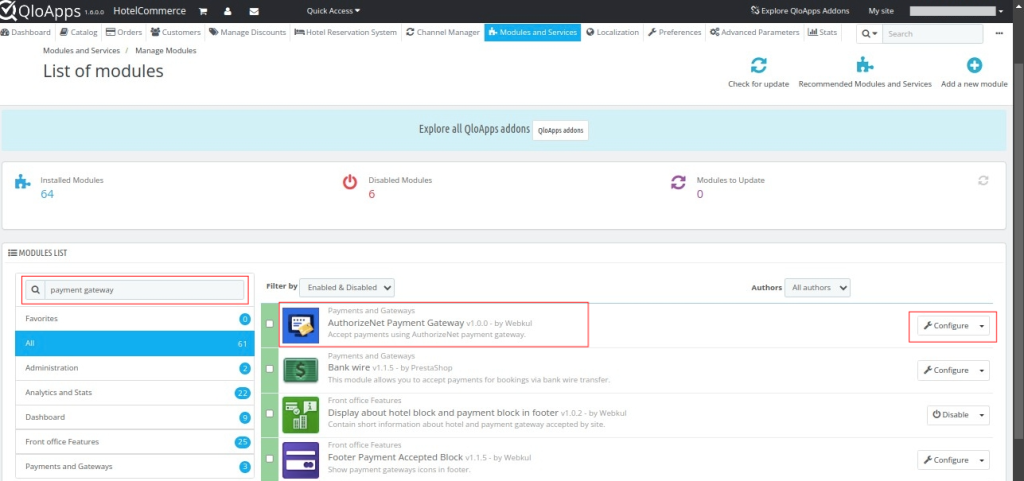
Configuration of QloApps Authorize.net Payment
After successfully installing the module, the admin has to configure the module. To configure the module, you have to set the following options:
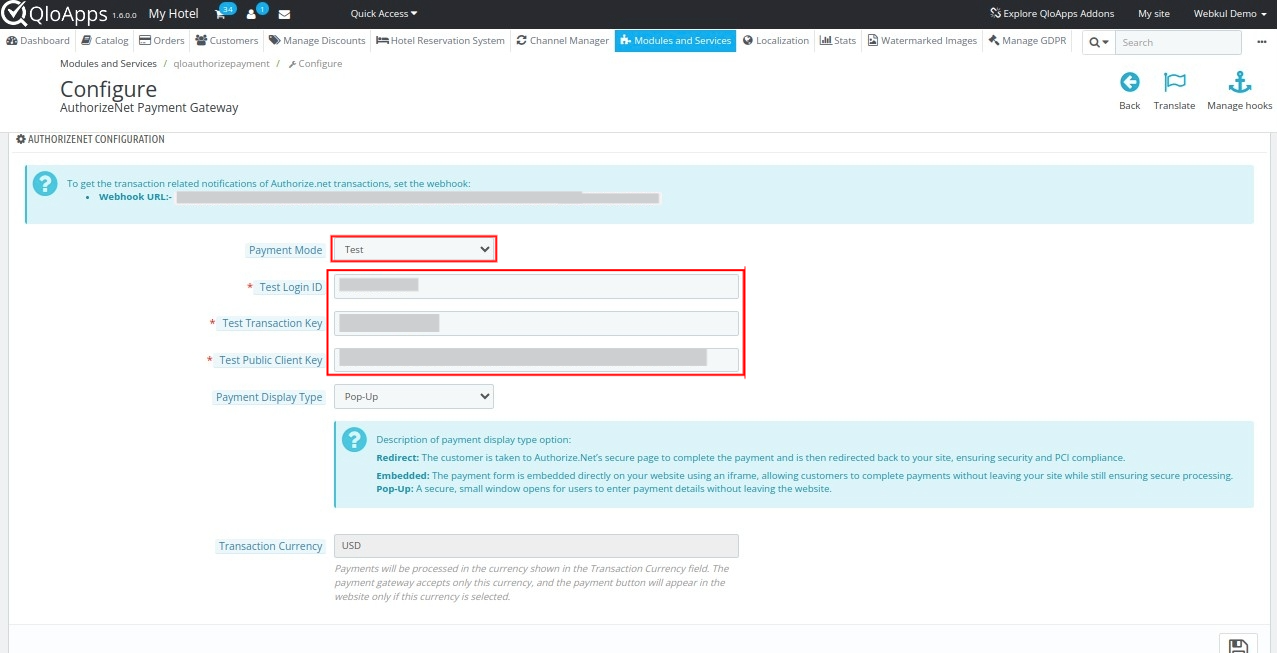
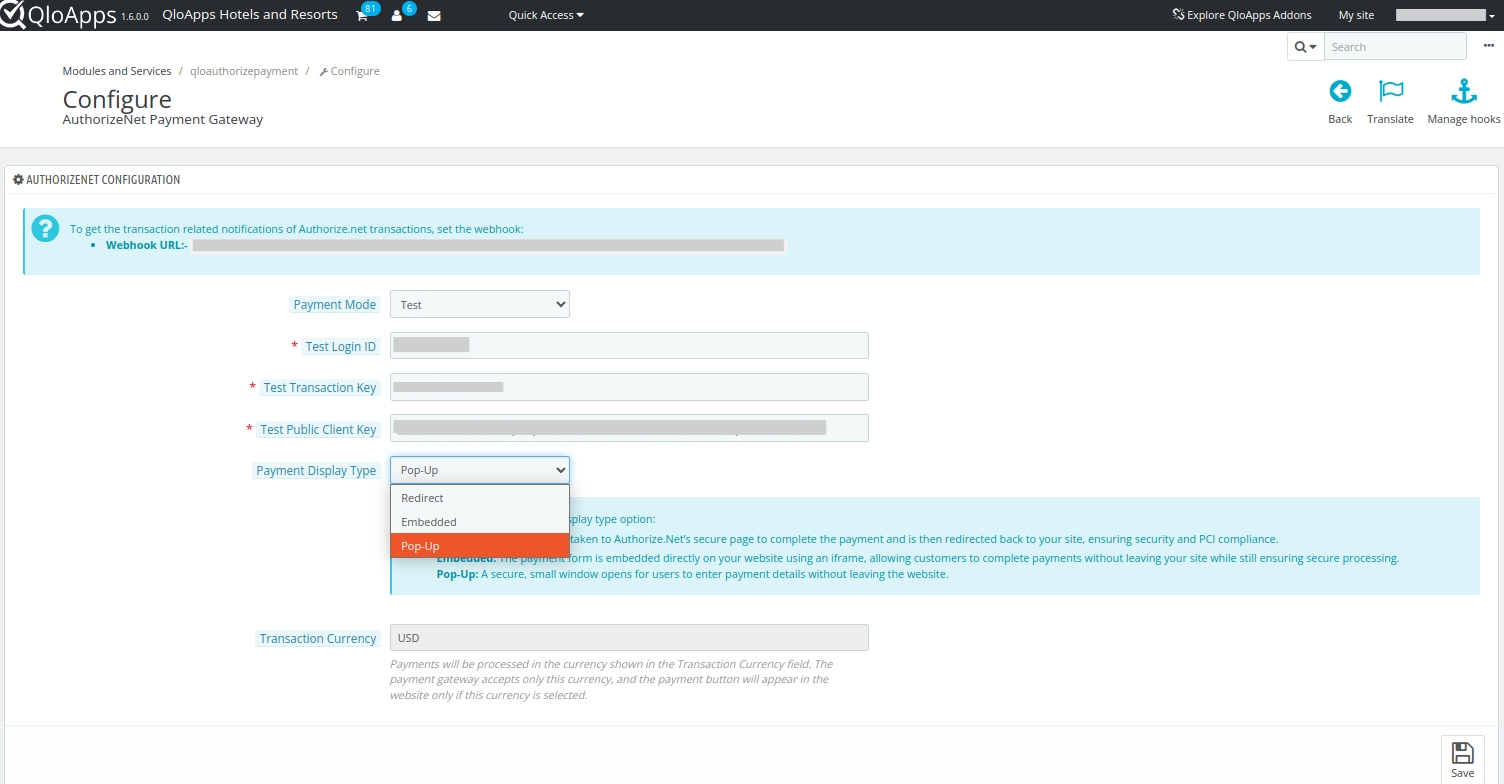
- Payment Mode: There are two payment modes available in QloApps:
- Live: If you are using it for real and live transactions, select Live Mode.
- Test: If you are testing your addon and its functionalities, select Test Mode.
As per your selected payment mode, you have to add the below-mentioned details:
- If you have selected test mode, then add the following details:
– Test Login ID
– Test Transaction Key
– Test Public Client Key
- If you have selected live mode, then add the following details:
– Live Login ID
– Live Transaction Key
– Live Public Client Key
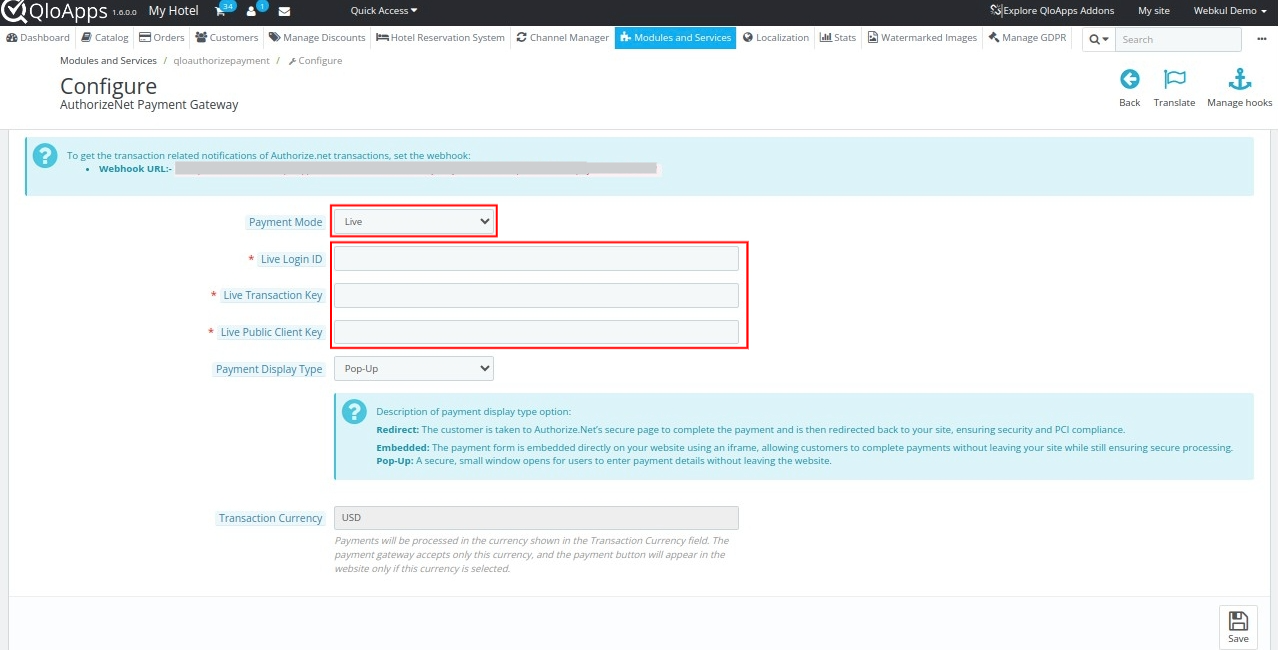
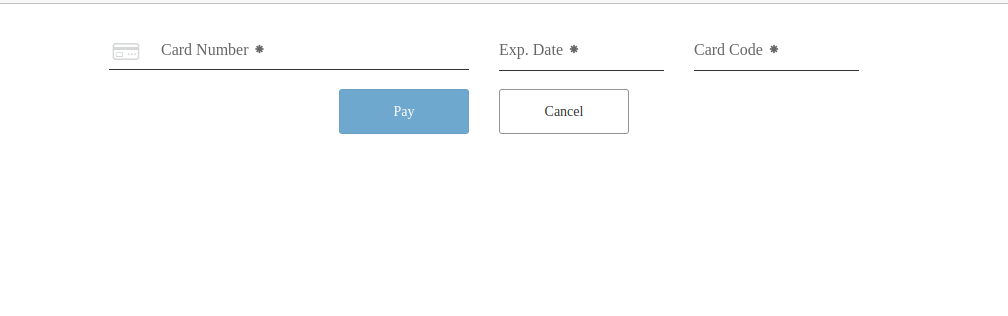
2. Payment Display Type: There are three ways in which you can display the payment option to your guests on the website:
- Redirect: This will redirect your guests to the page of the Authoize.net payment gateway.
- Embedded: This will embed the Authorize.net payment gateway option on your QloApps website so that your guests can pay for their booking from the website only.
- Pop-Up: A secure, small window allows users to enter payment details without leaving the website.
Steps to Obtain the Login ID, Transaction Key, Public Client Key, and Webhook URL
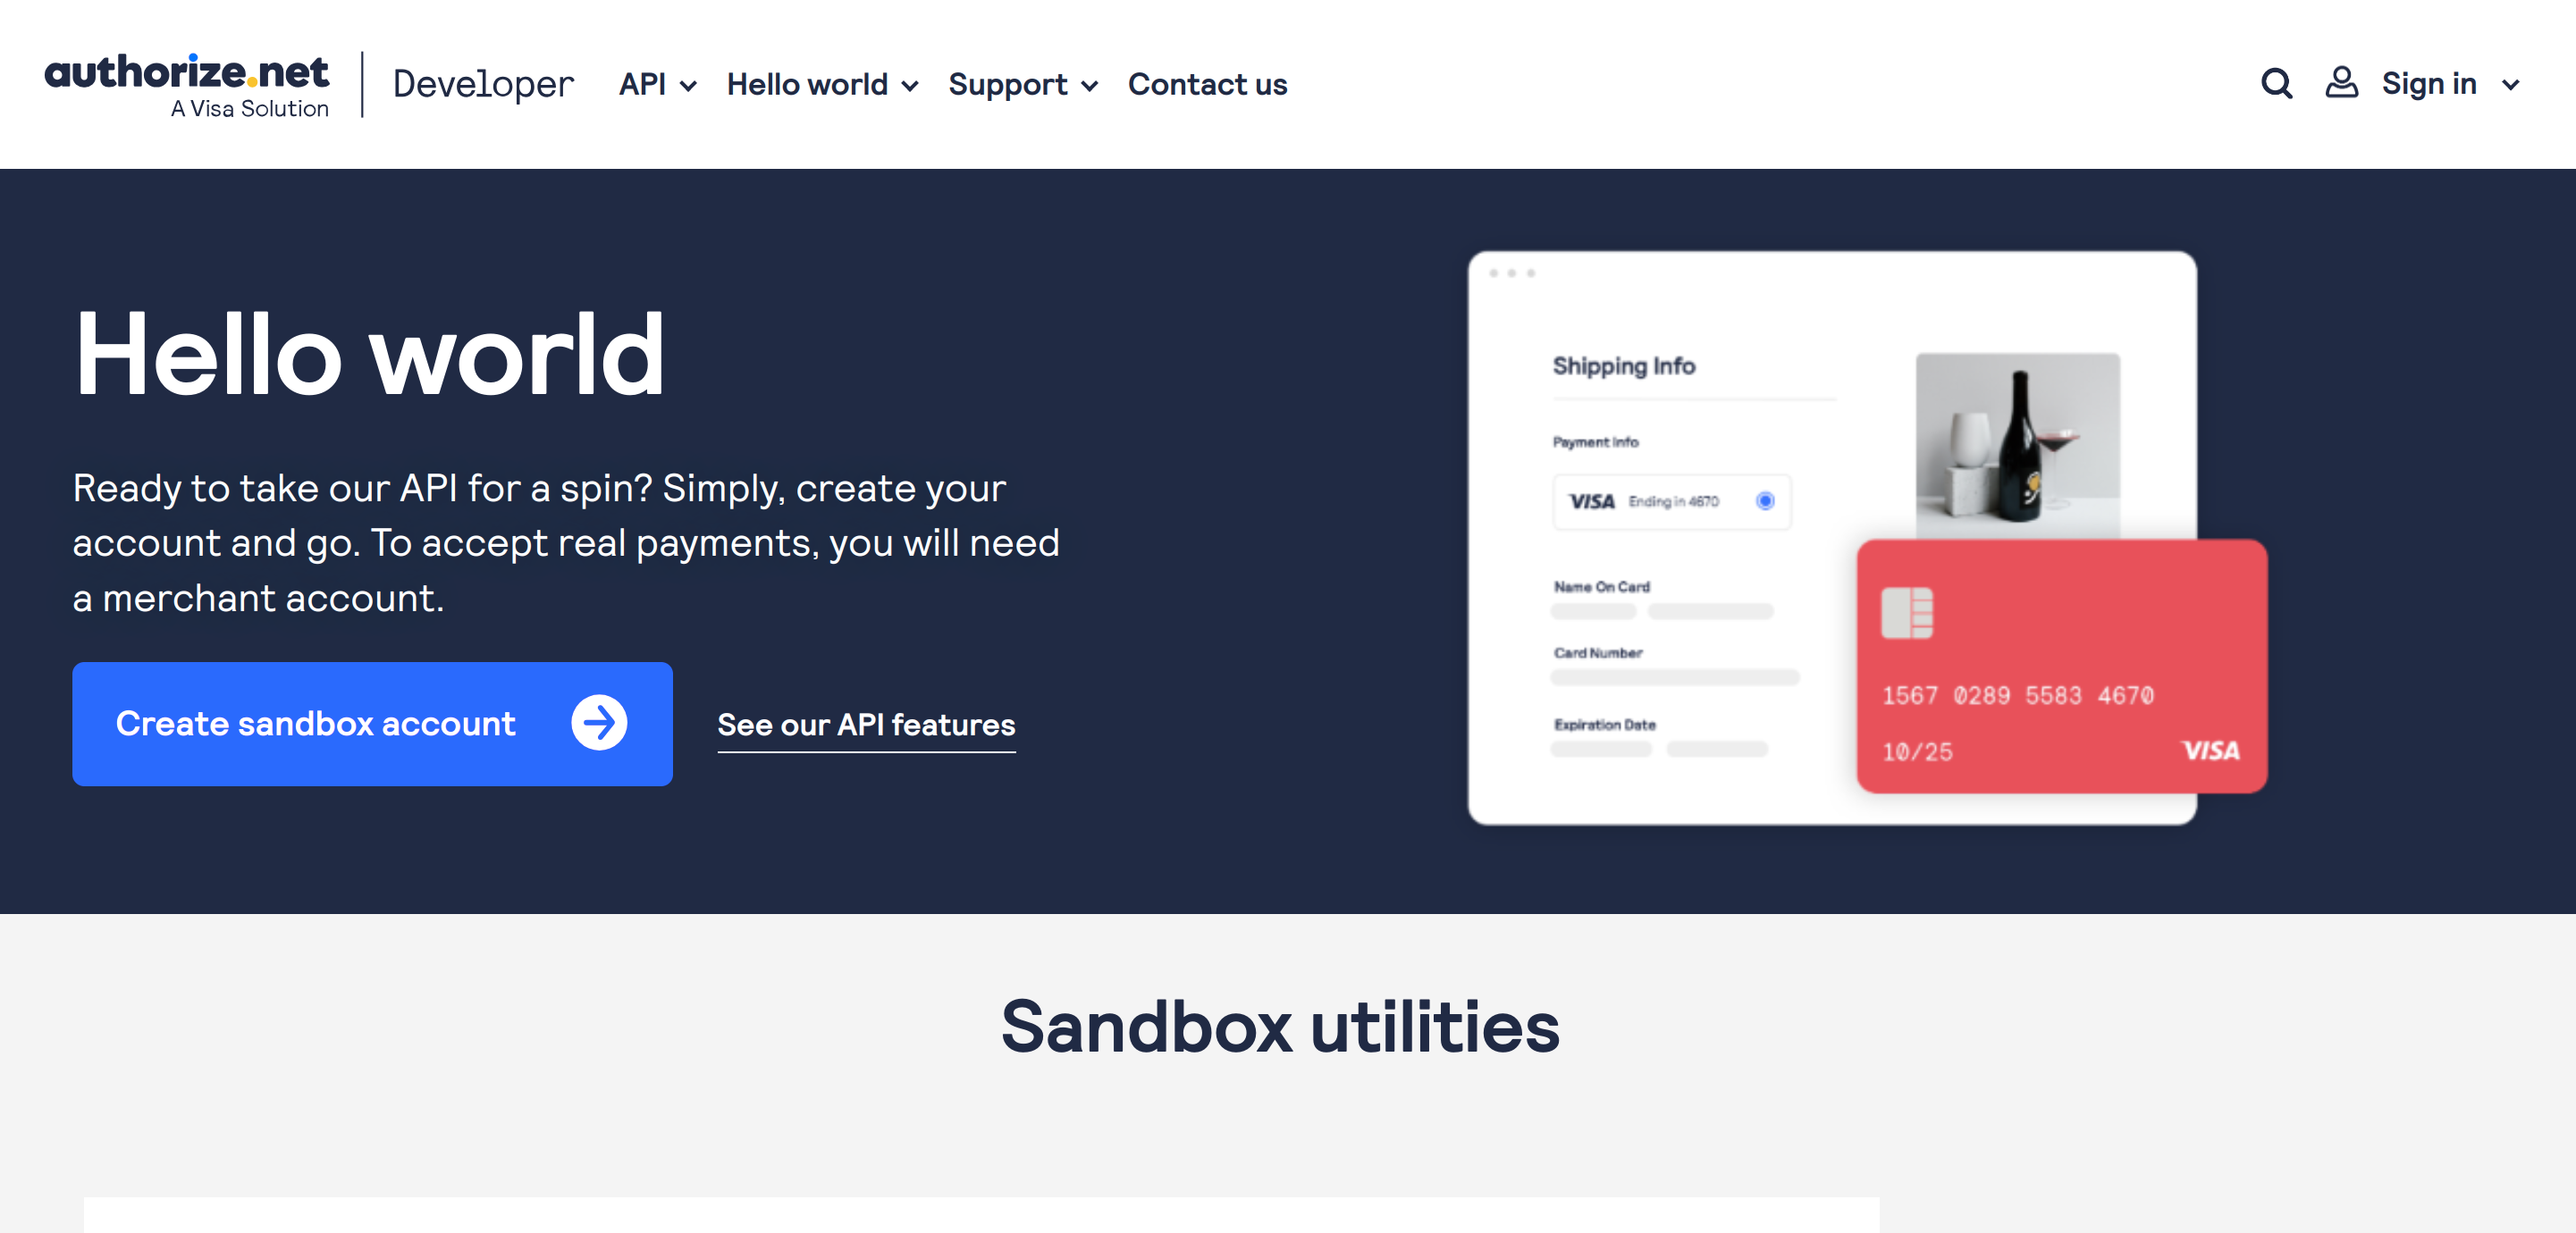
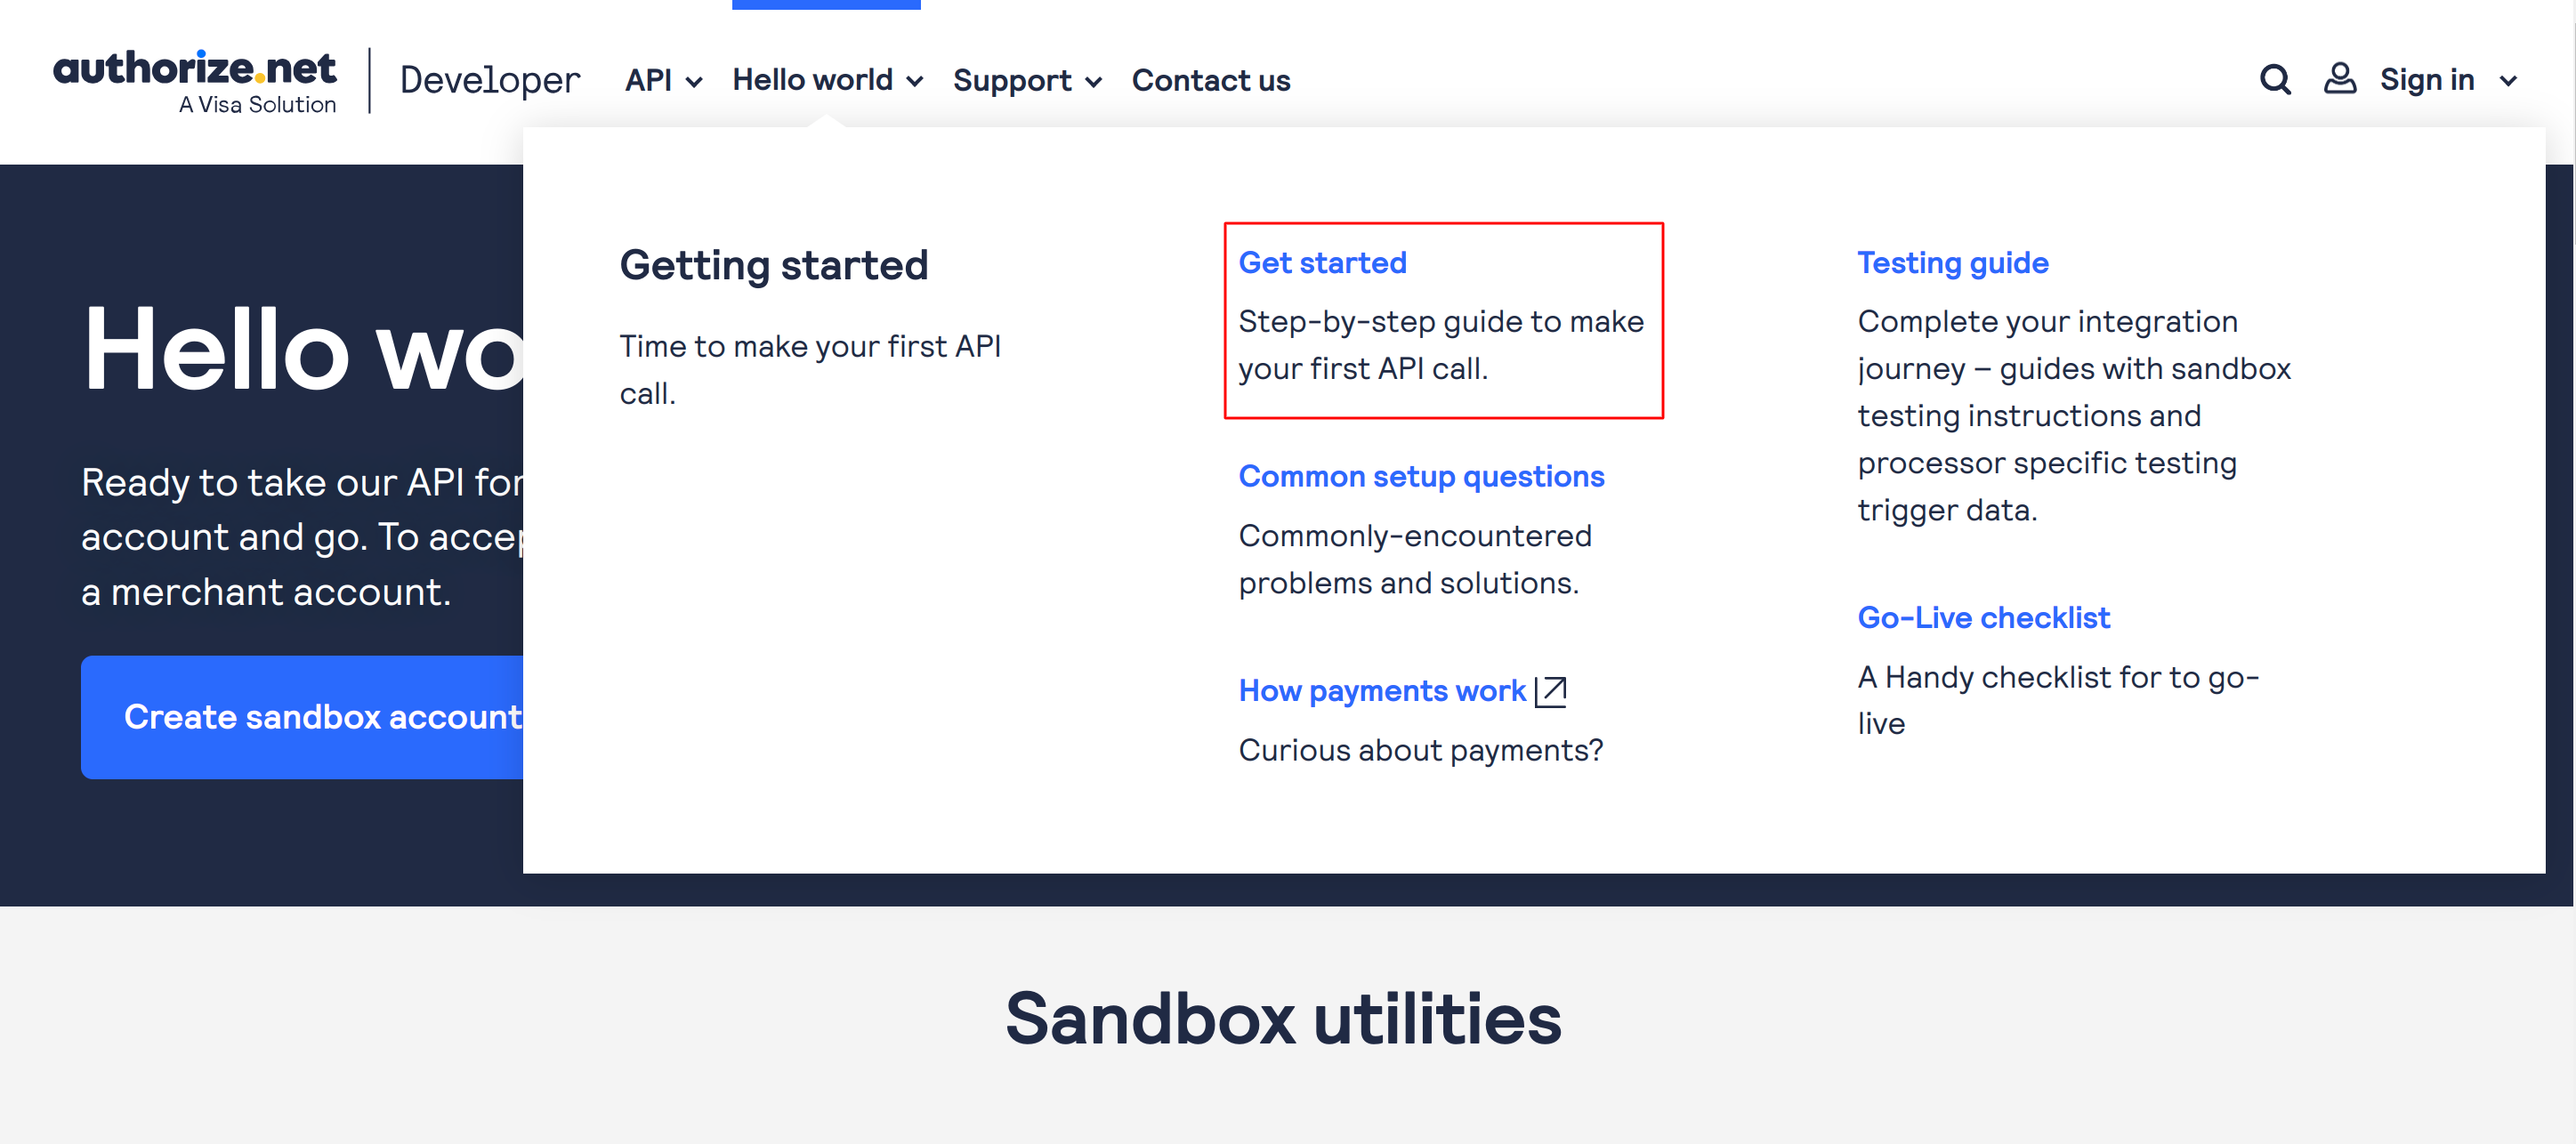
- To obtain the credentials, you need to create a sandbox account using the link: https://developer.authorize.net/hello_world.html
- Click on “Get Started” under the Hello World tab.
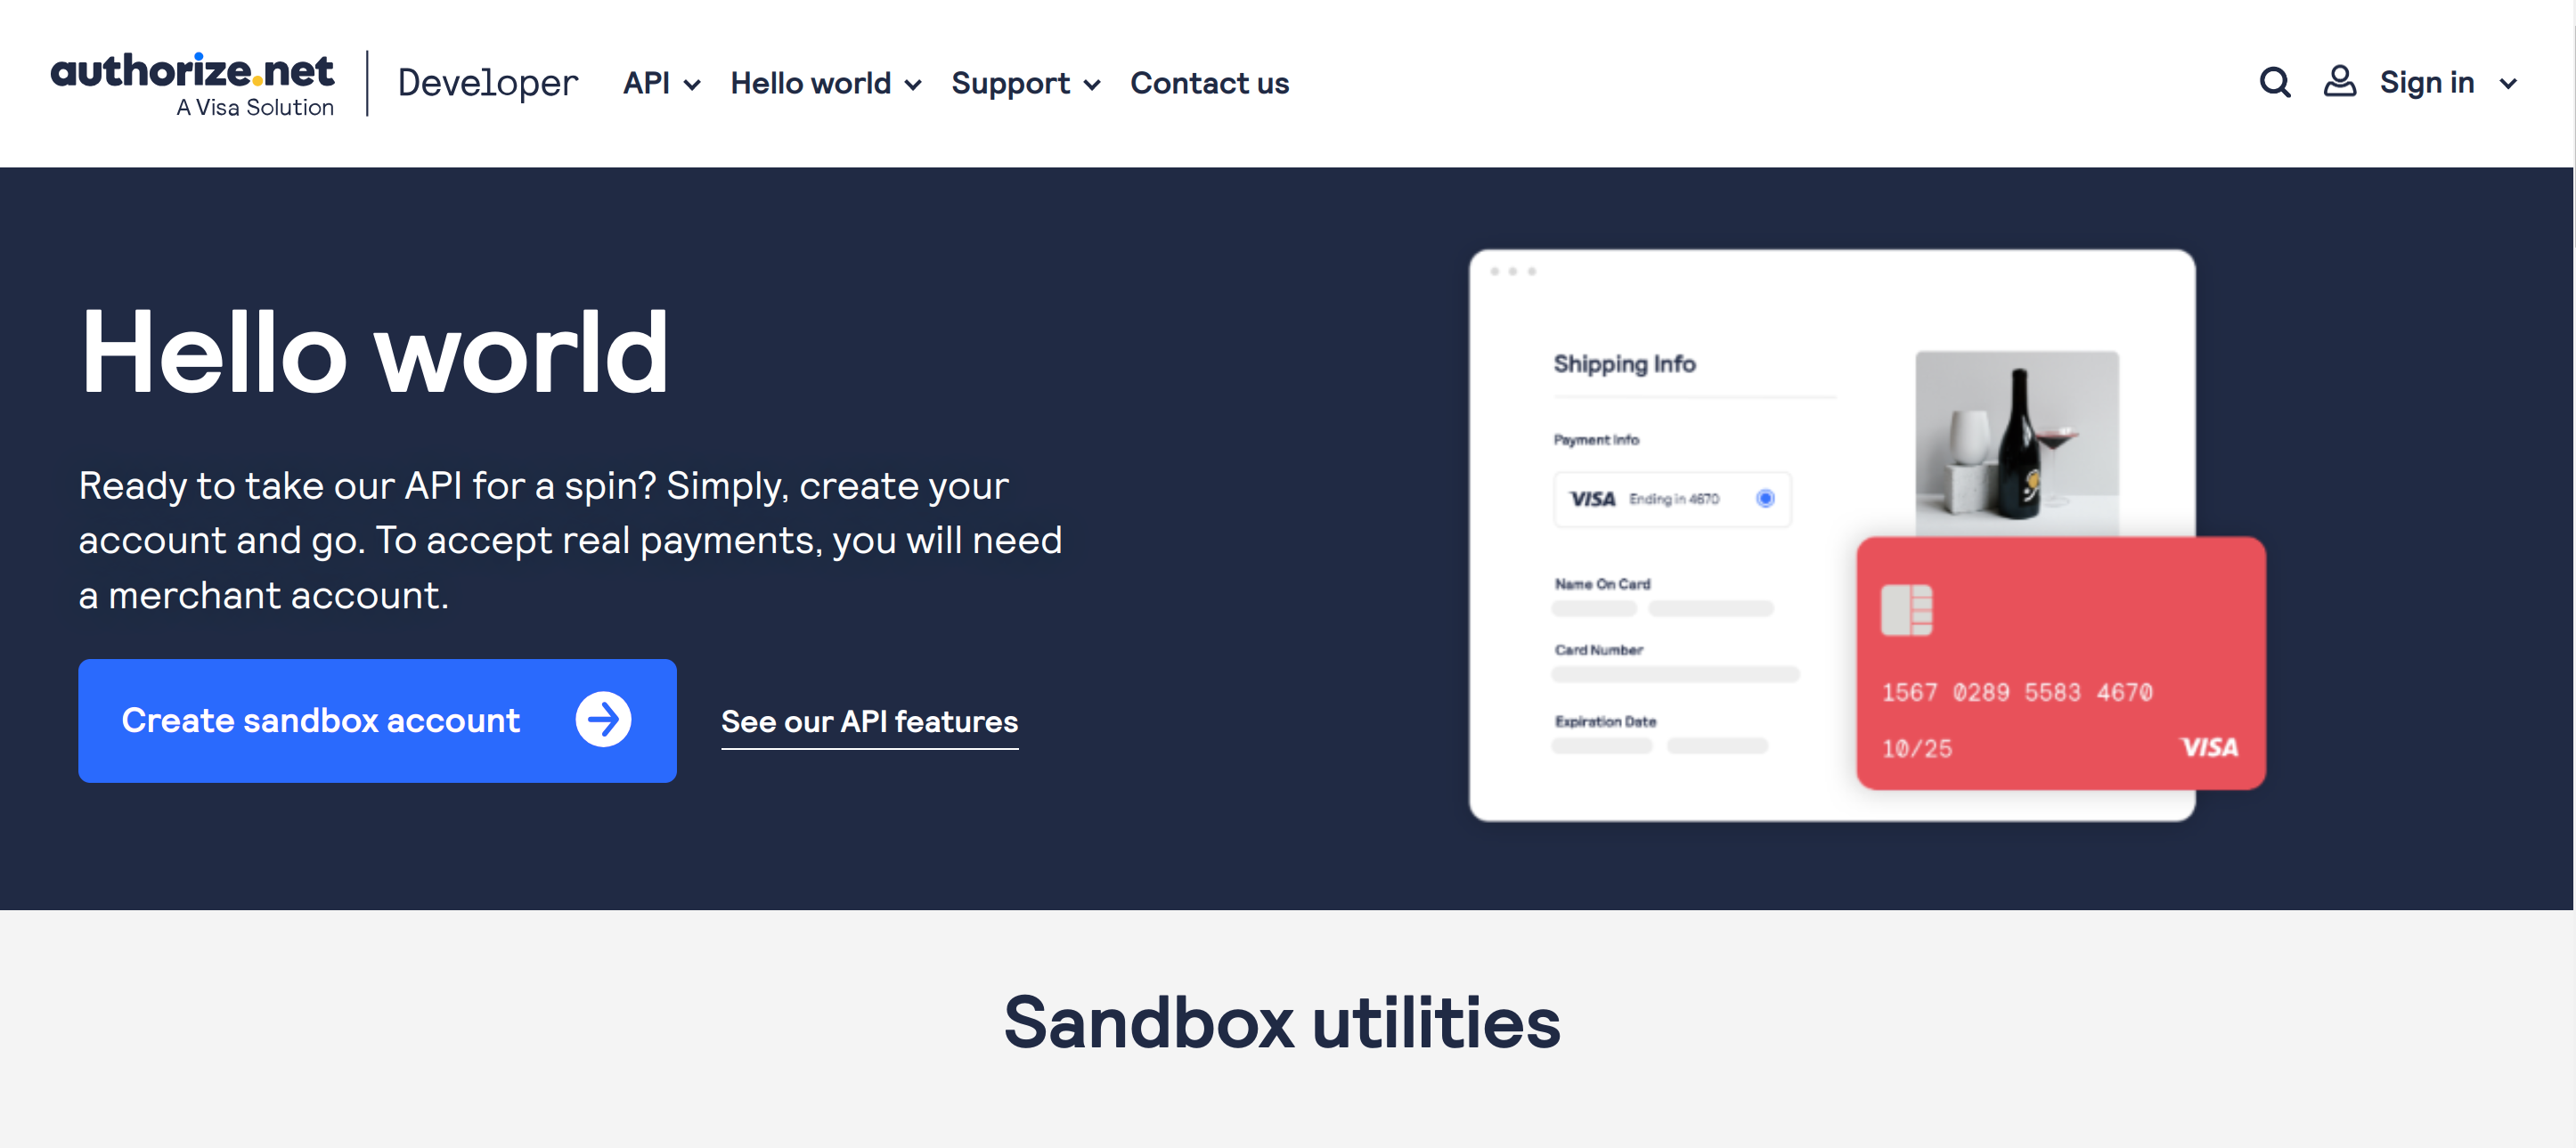
- Now click on the Create Sandbox Account button.
- Next, you have to fill out the form to create your sandbox account.
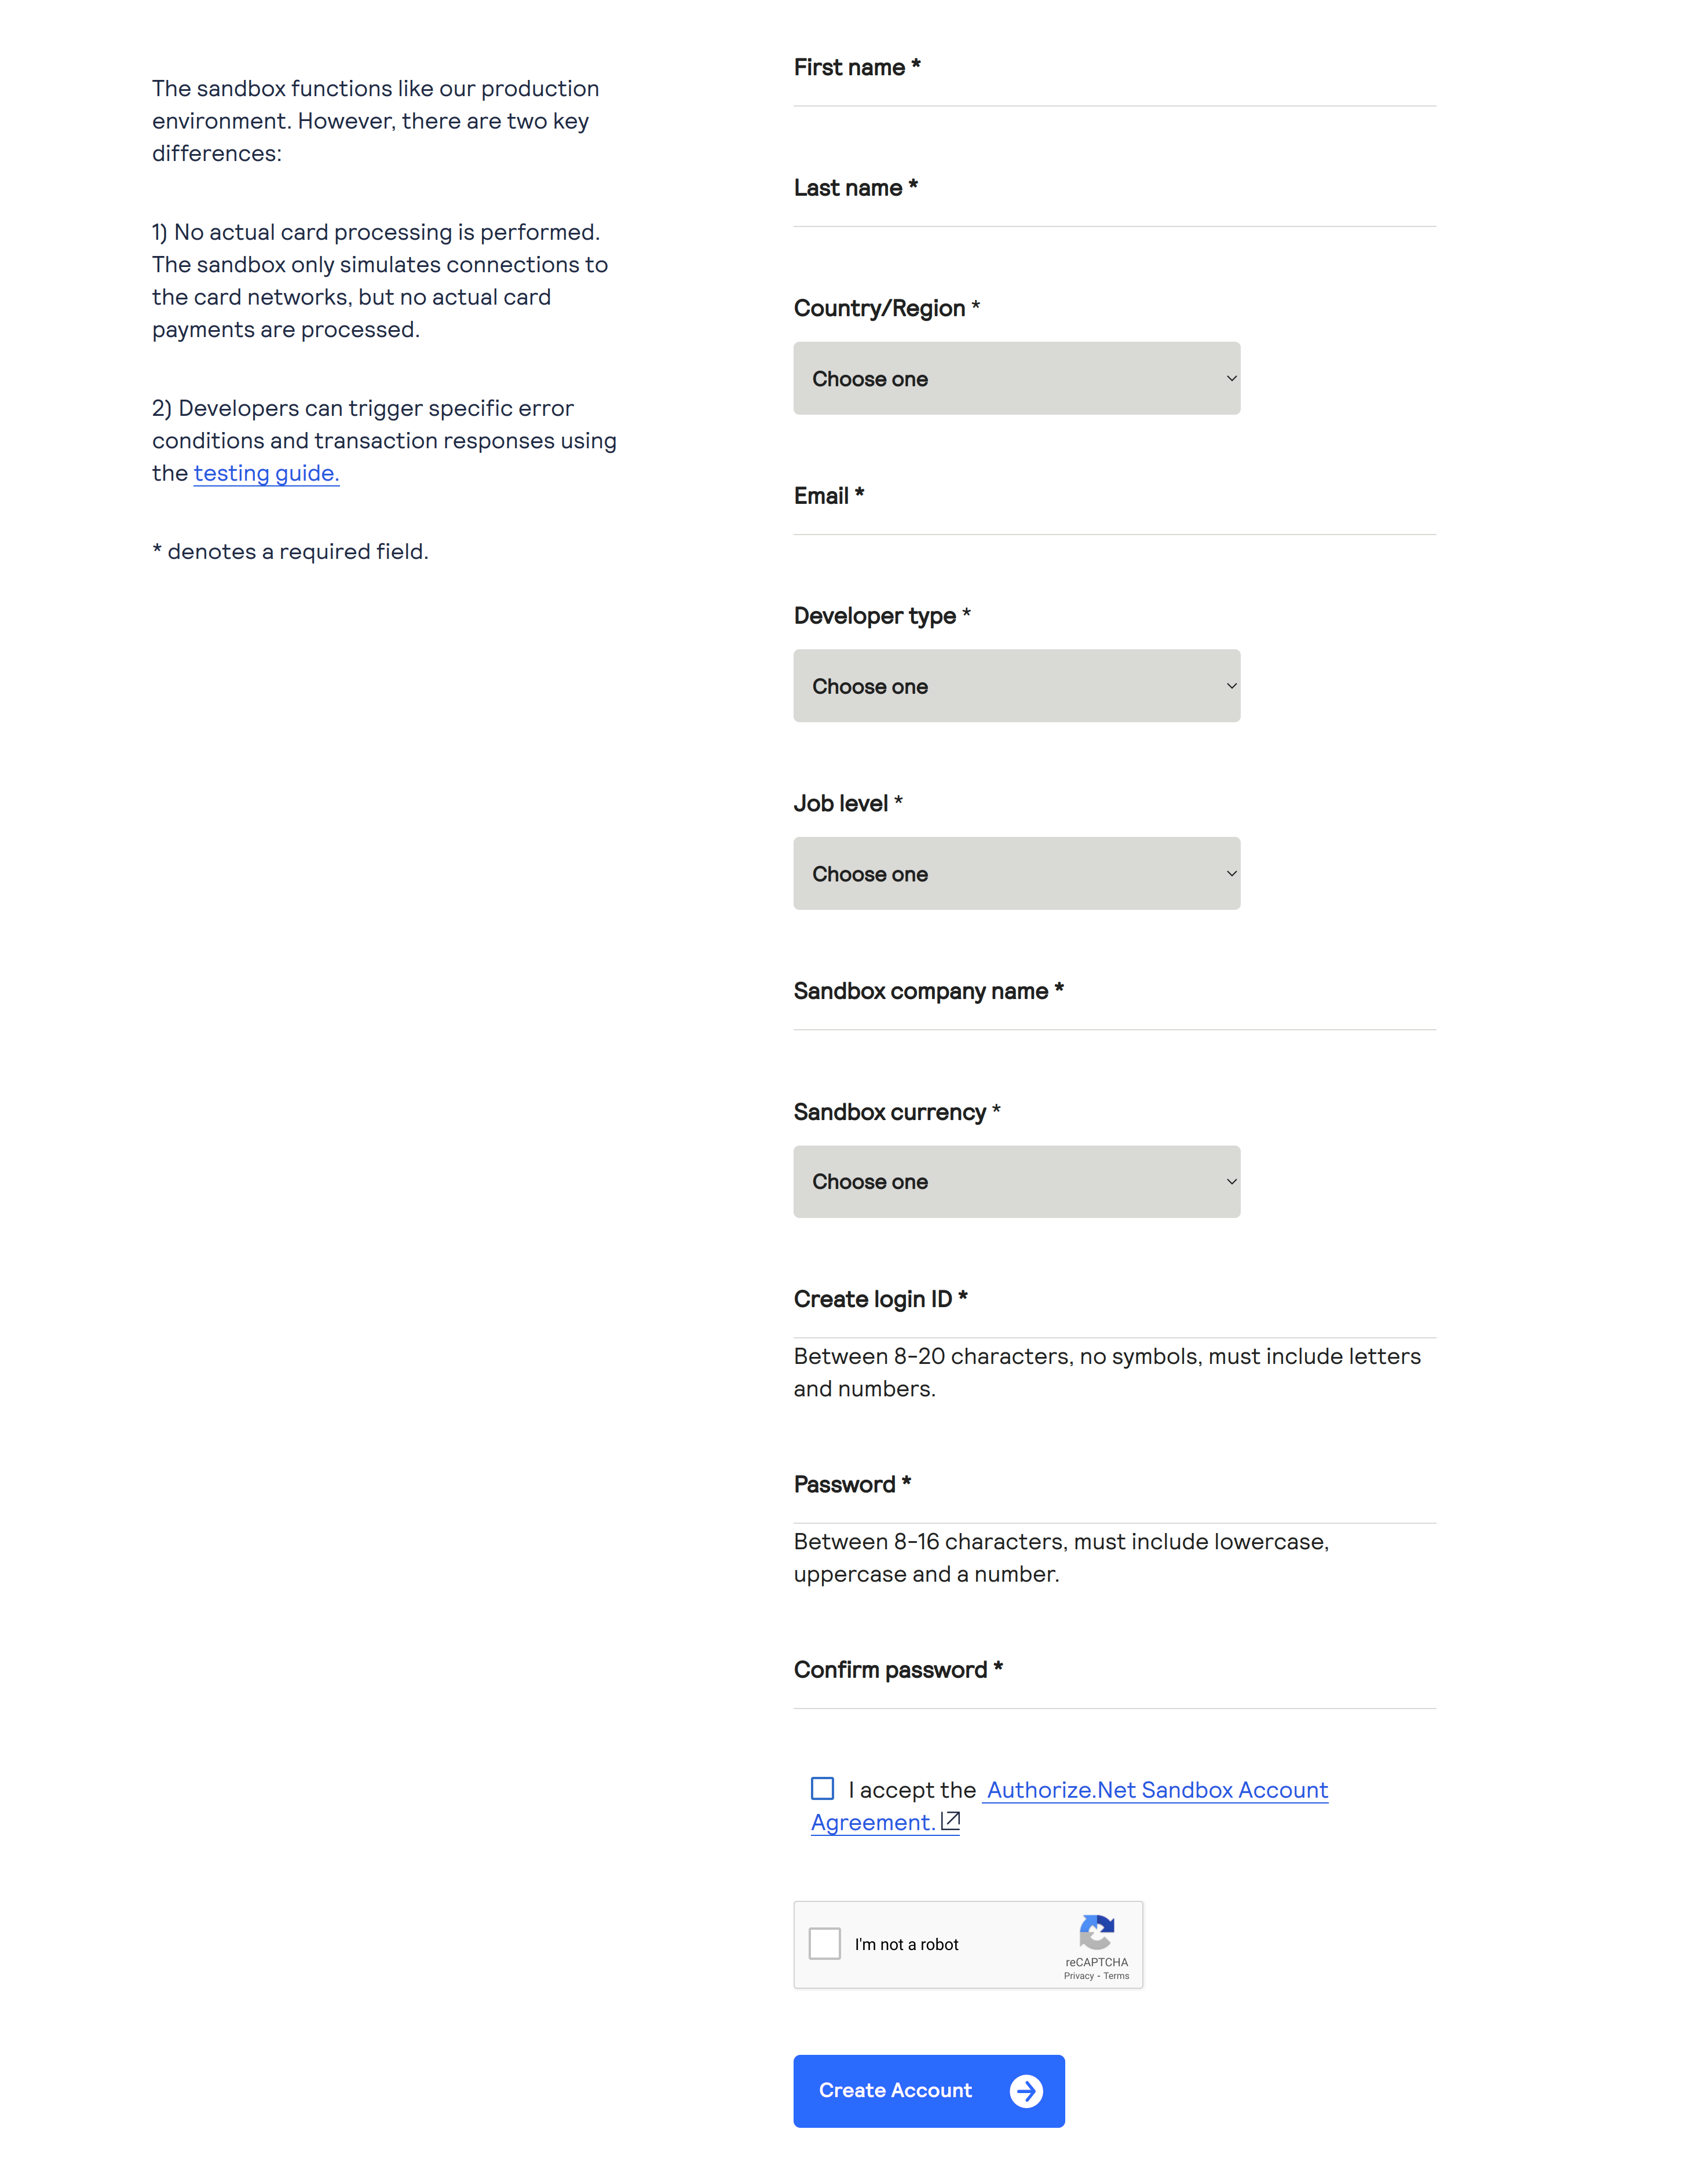
- Once you have created the account, use the username and password to log in to your sandbox account.
Note: Link to sign in to your sandbox account: https://sandbox.authorize.net/
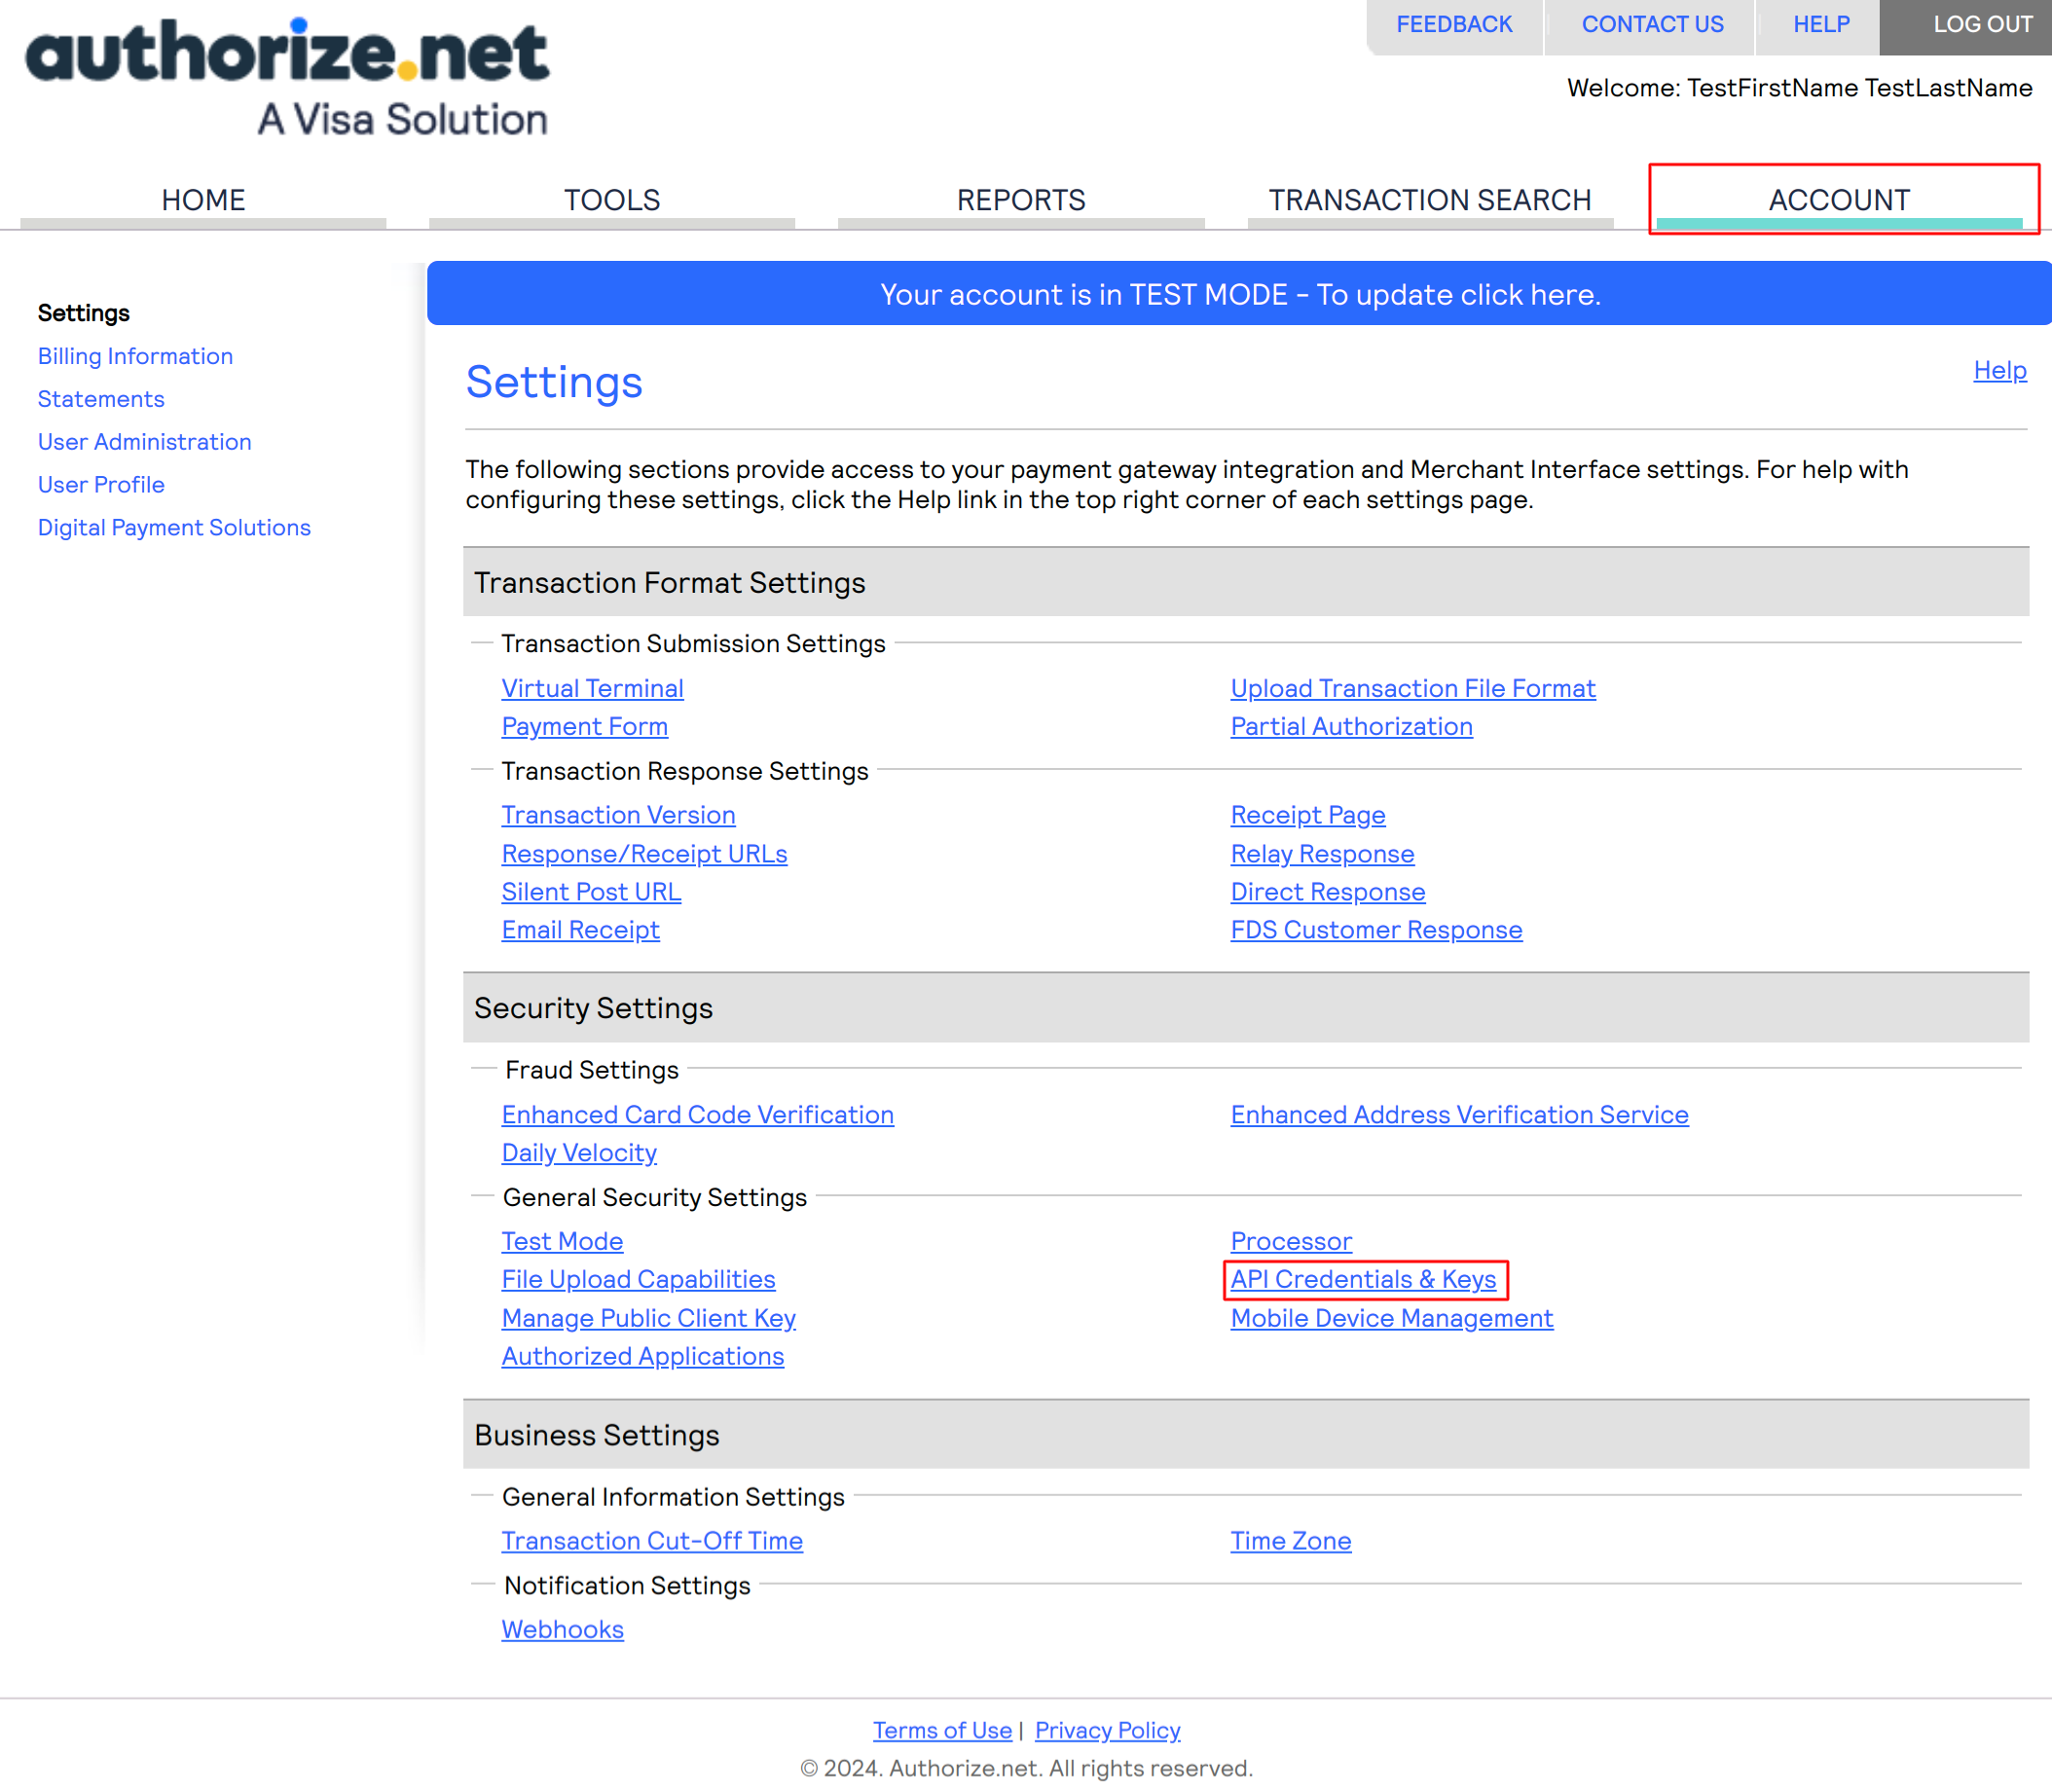
- Now, To obtain the keys, click on API Credentials & Keys under the Account tab.
- Now, Obtain the API login key and Generate a new Transaction Key.
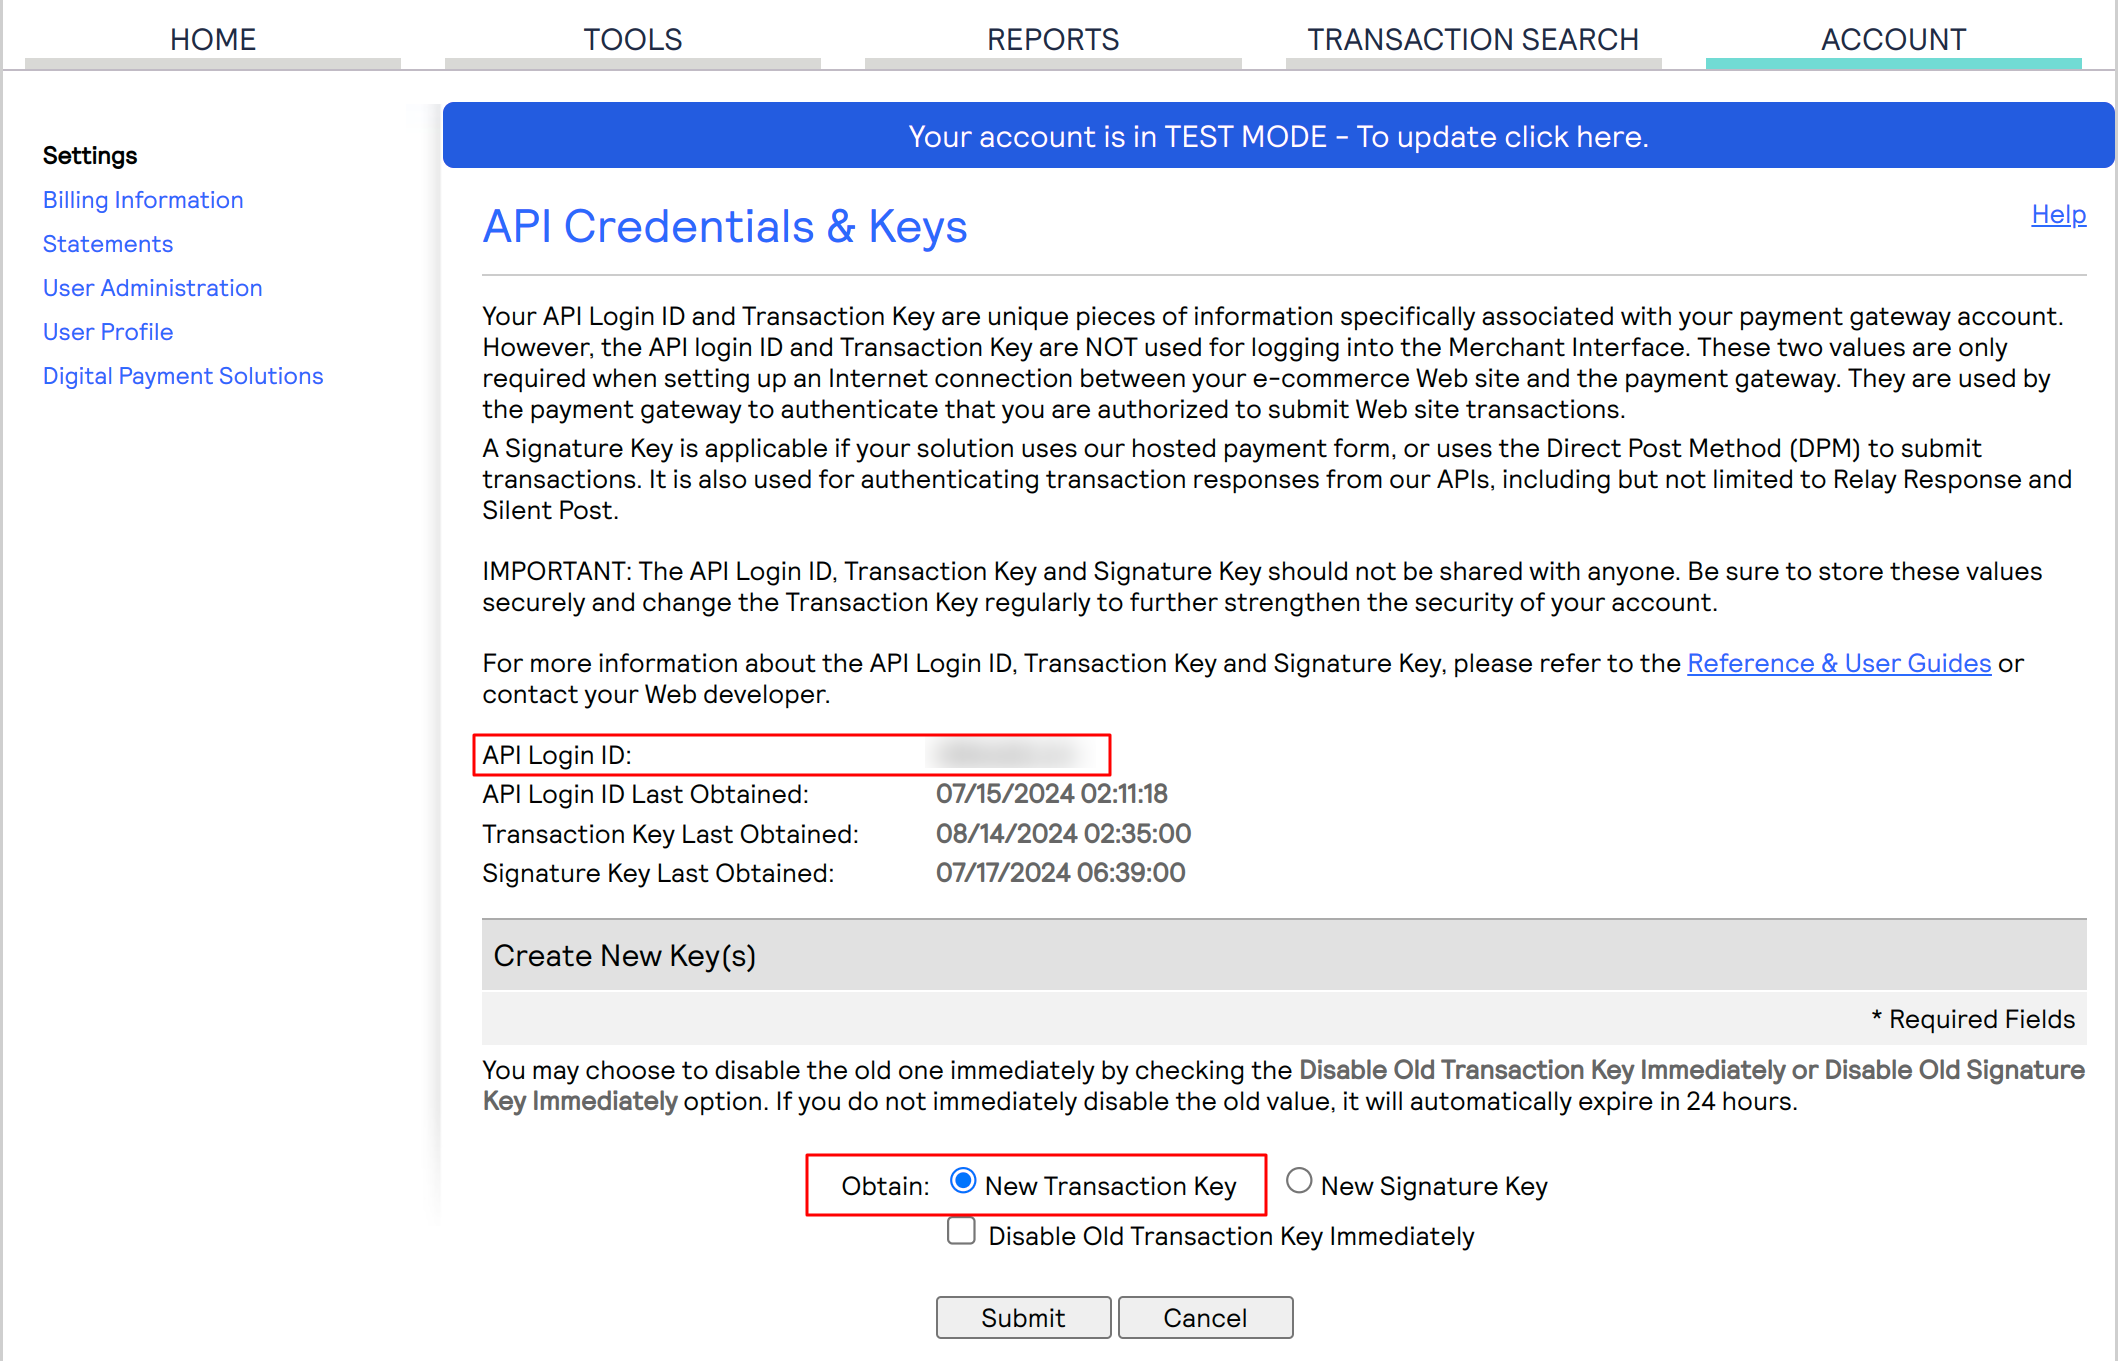
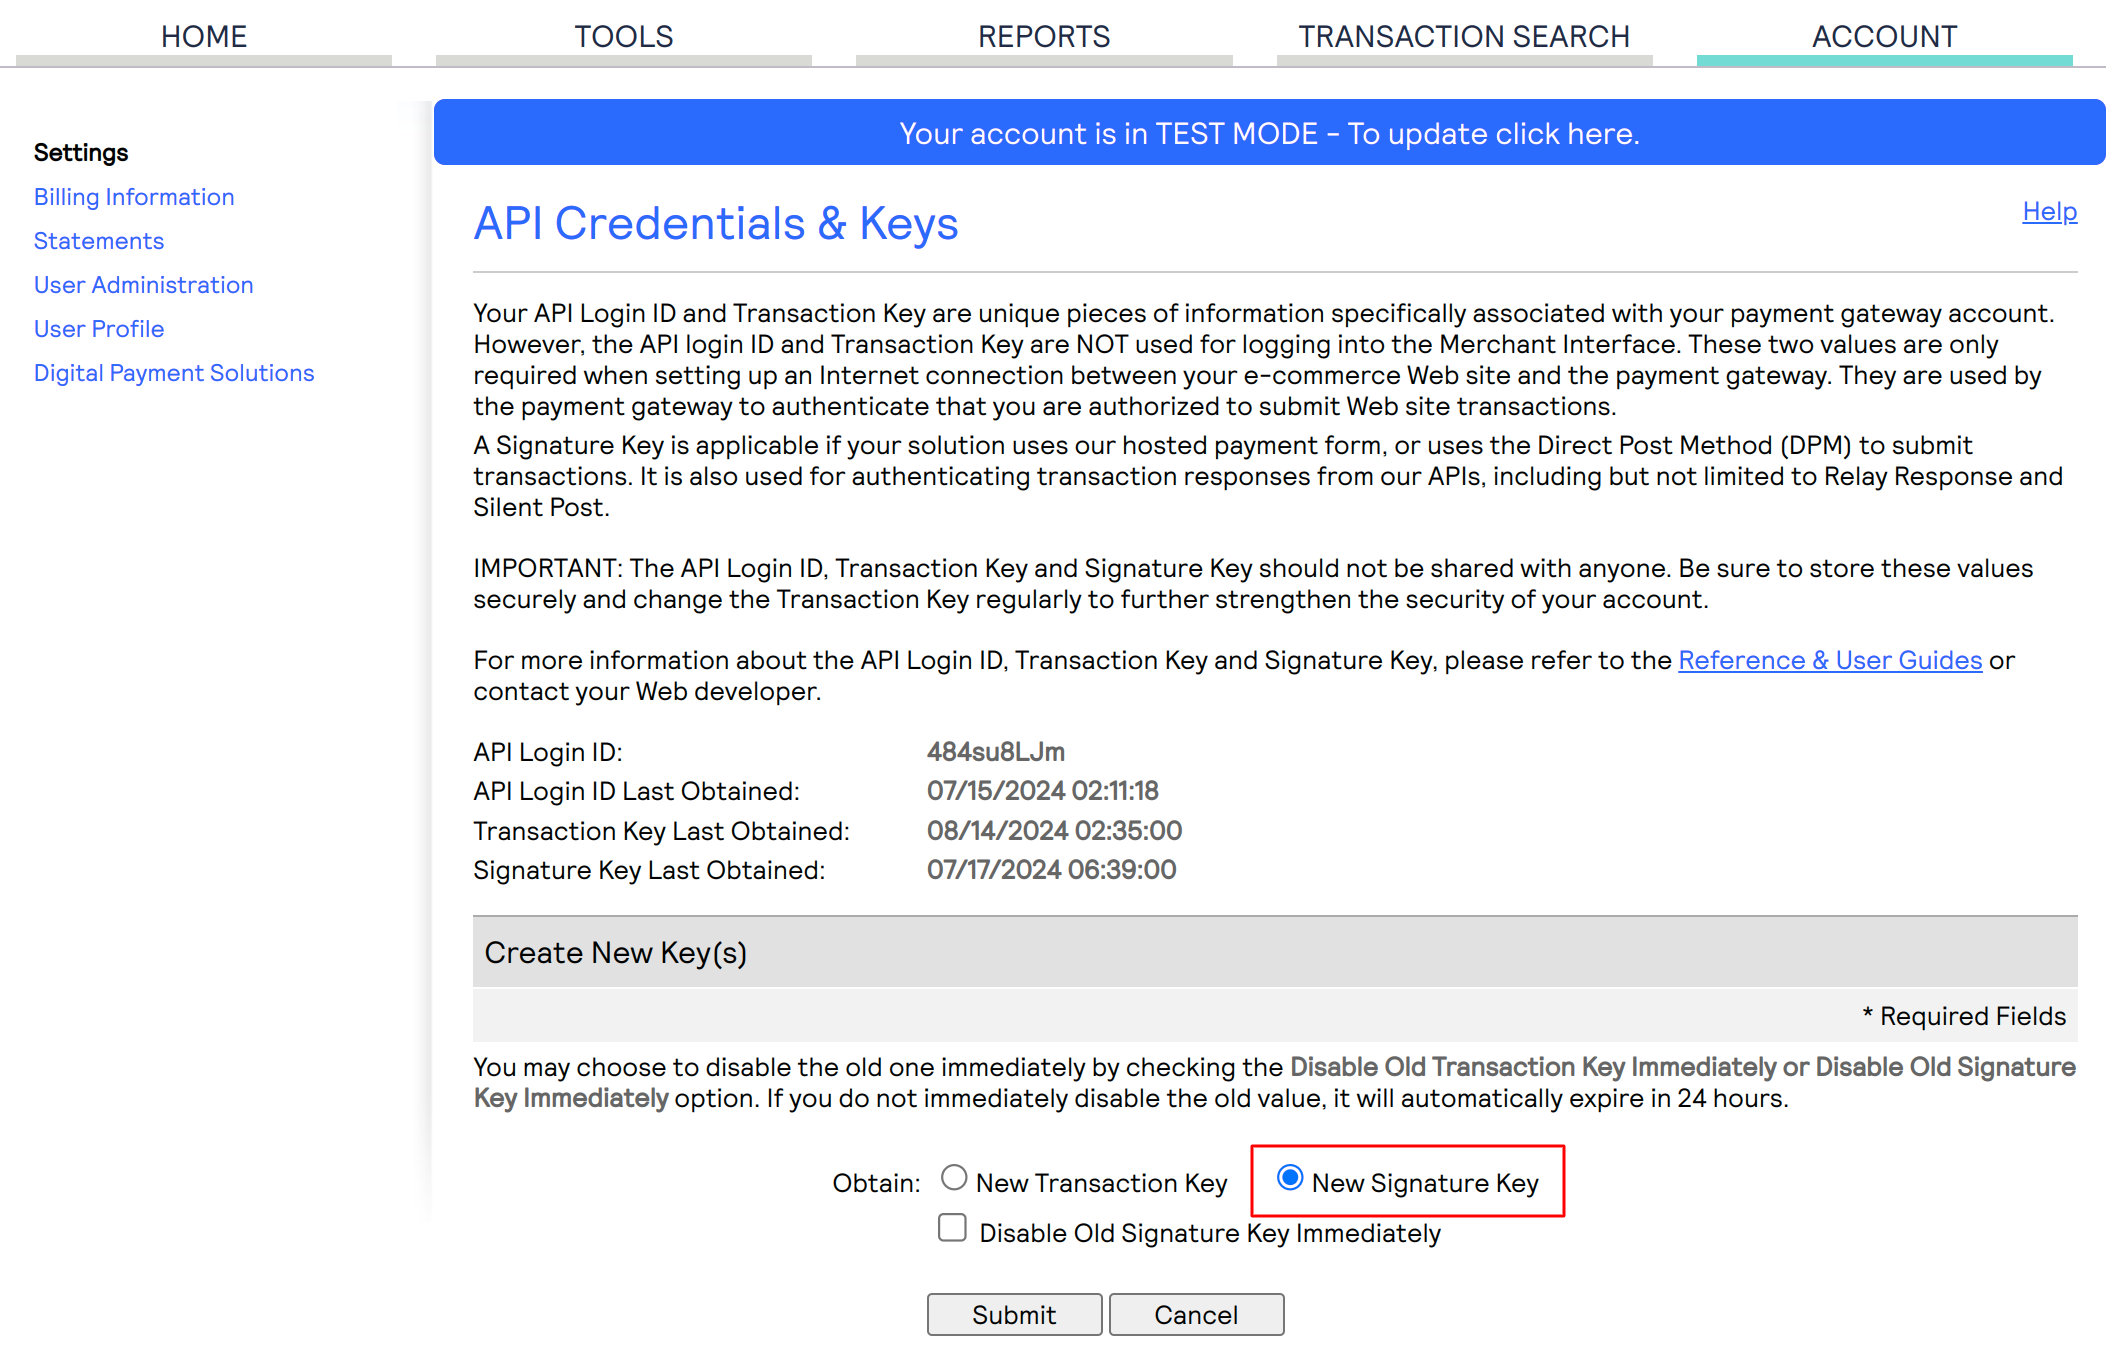
- Now, generate a new signature key as well to connect the webhook.
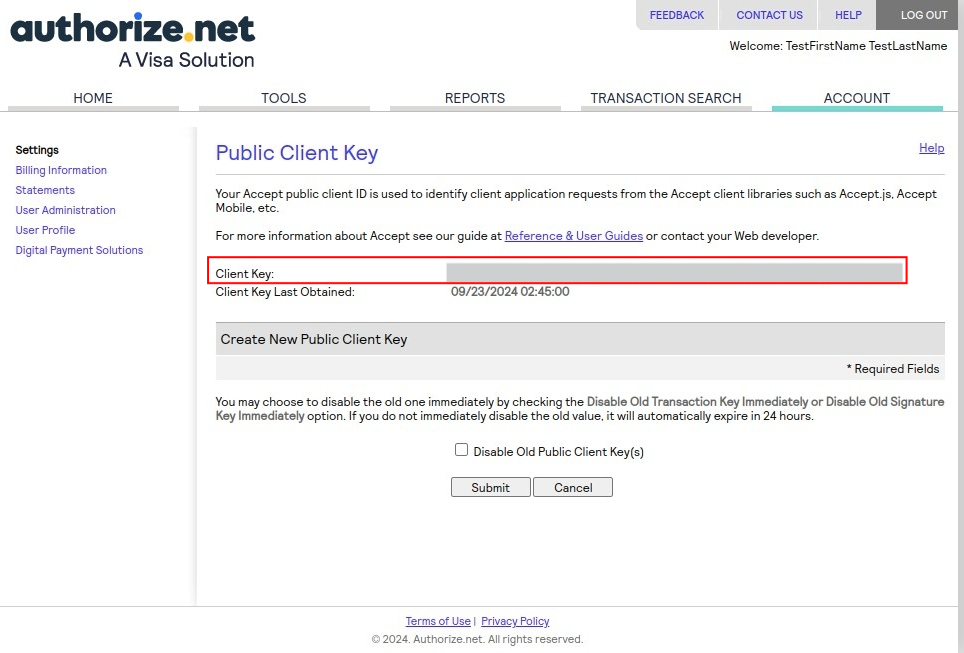
- Next, To obtain the Public Client key, click on “Manage Public Client Key” under the Account tab.
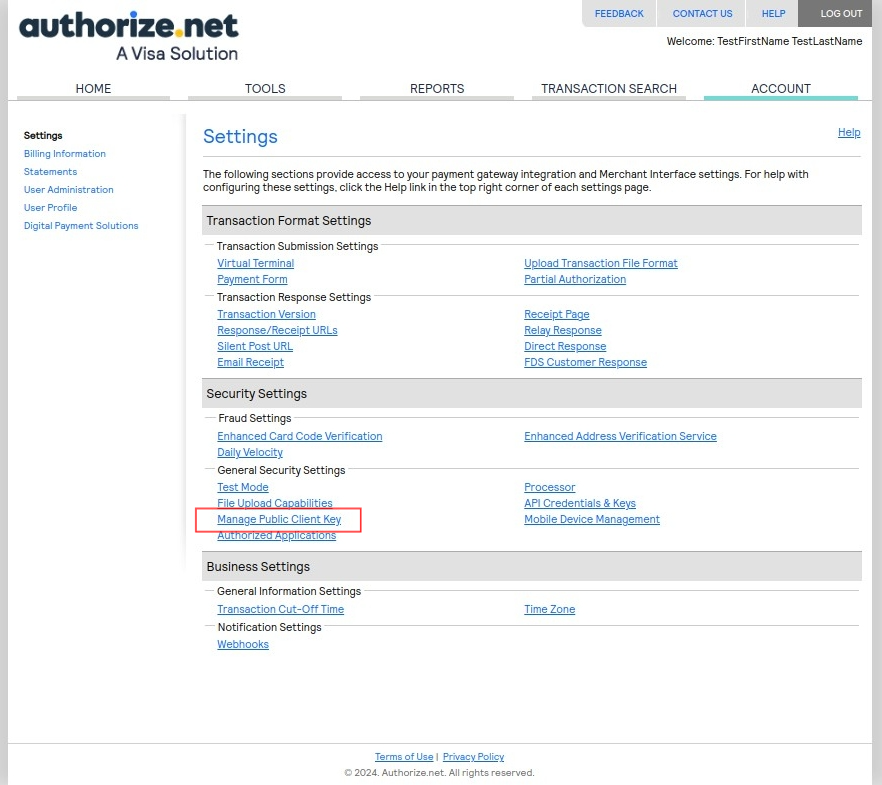
- Lastly, Obtain the Client key and create a new Public Client Key.
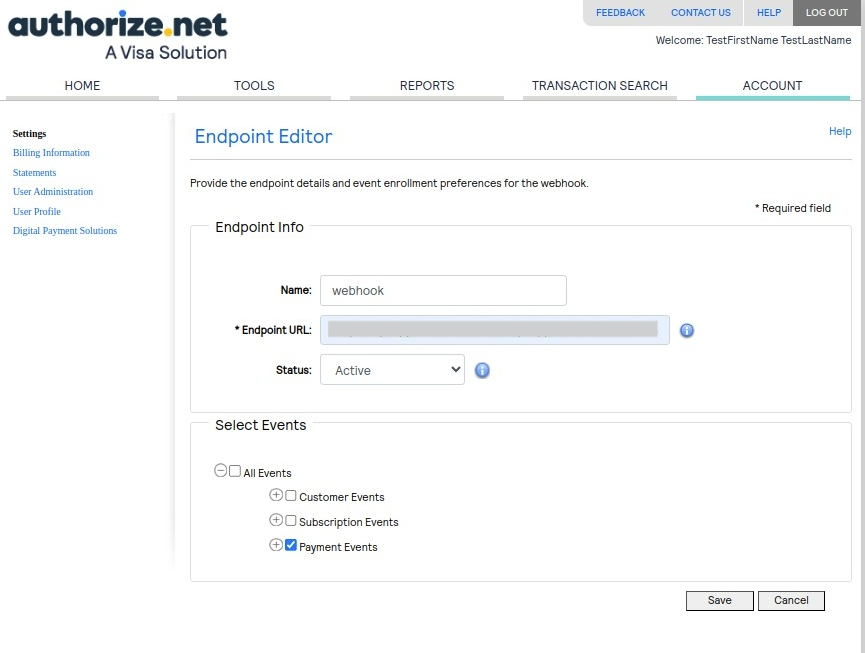
- To get the notification, you need to add the Webhook URL to your Authorize.net merchant account.

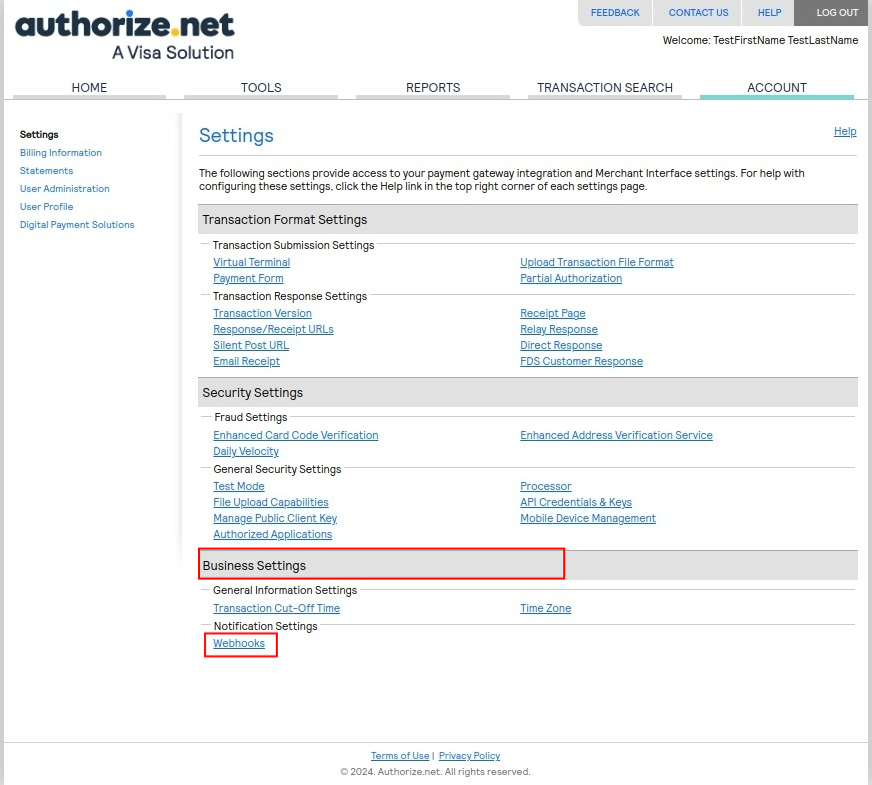
- Go to the Account section of Authorize.net, then select Business Settings.
- In business settings choose Webhooks.
- Click on Add Endpoint under the Webhooks section.
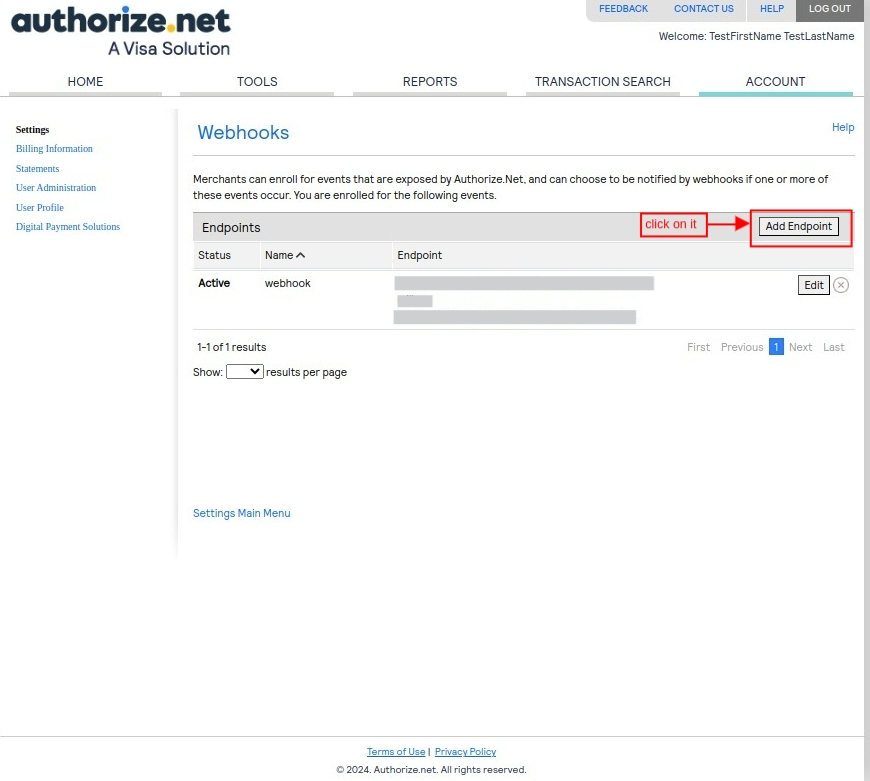
- Lastly, filling the details and selecting the payment event.
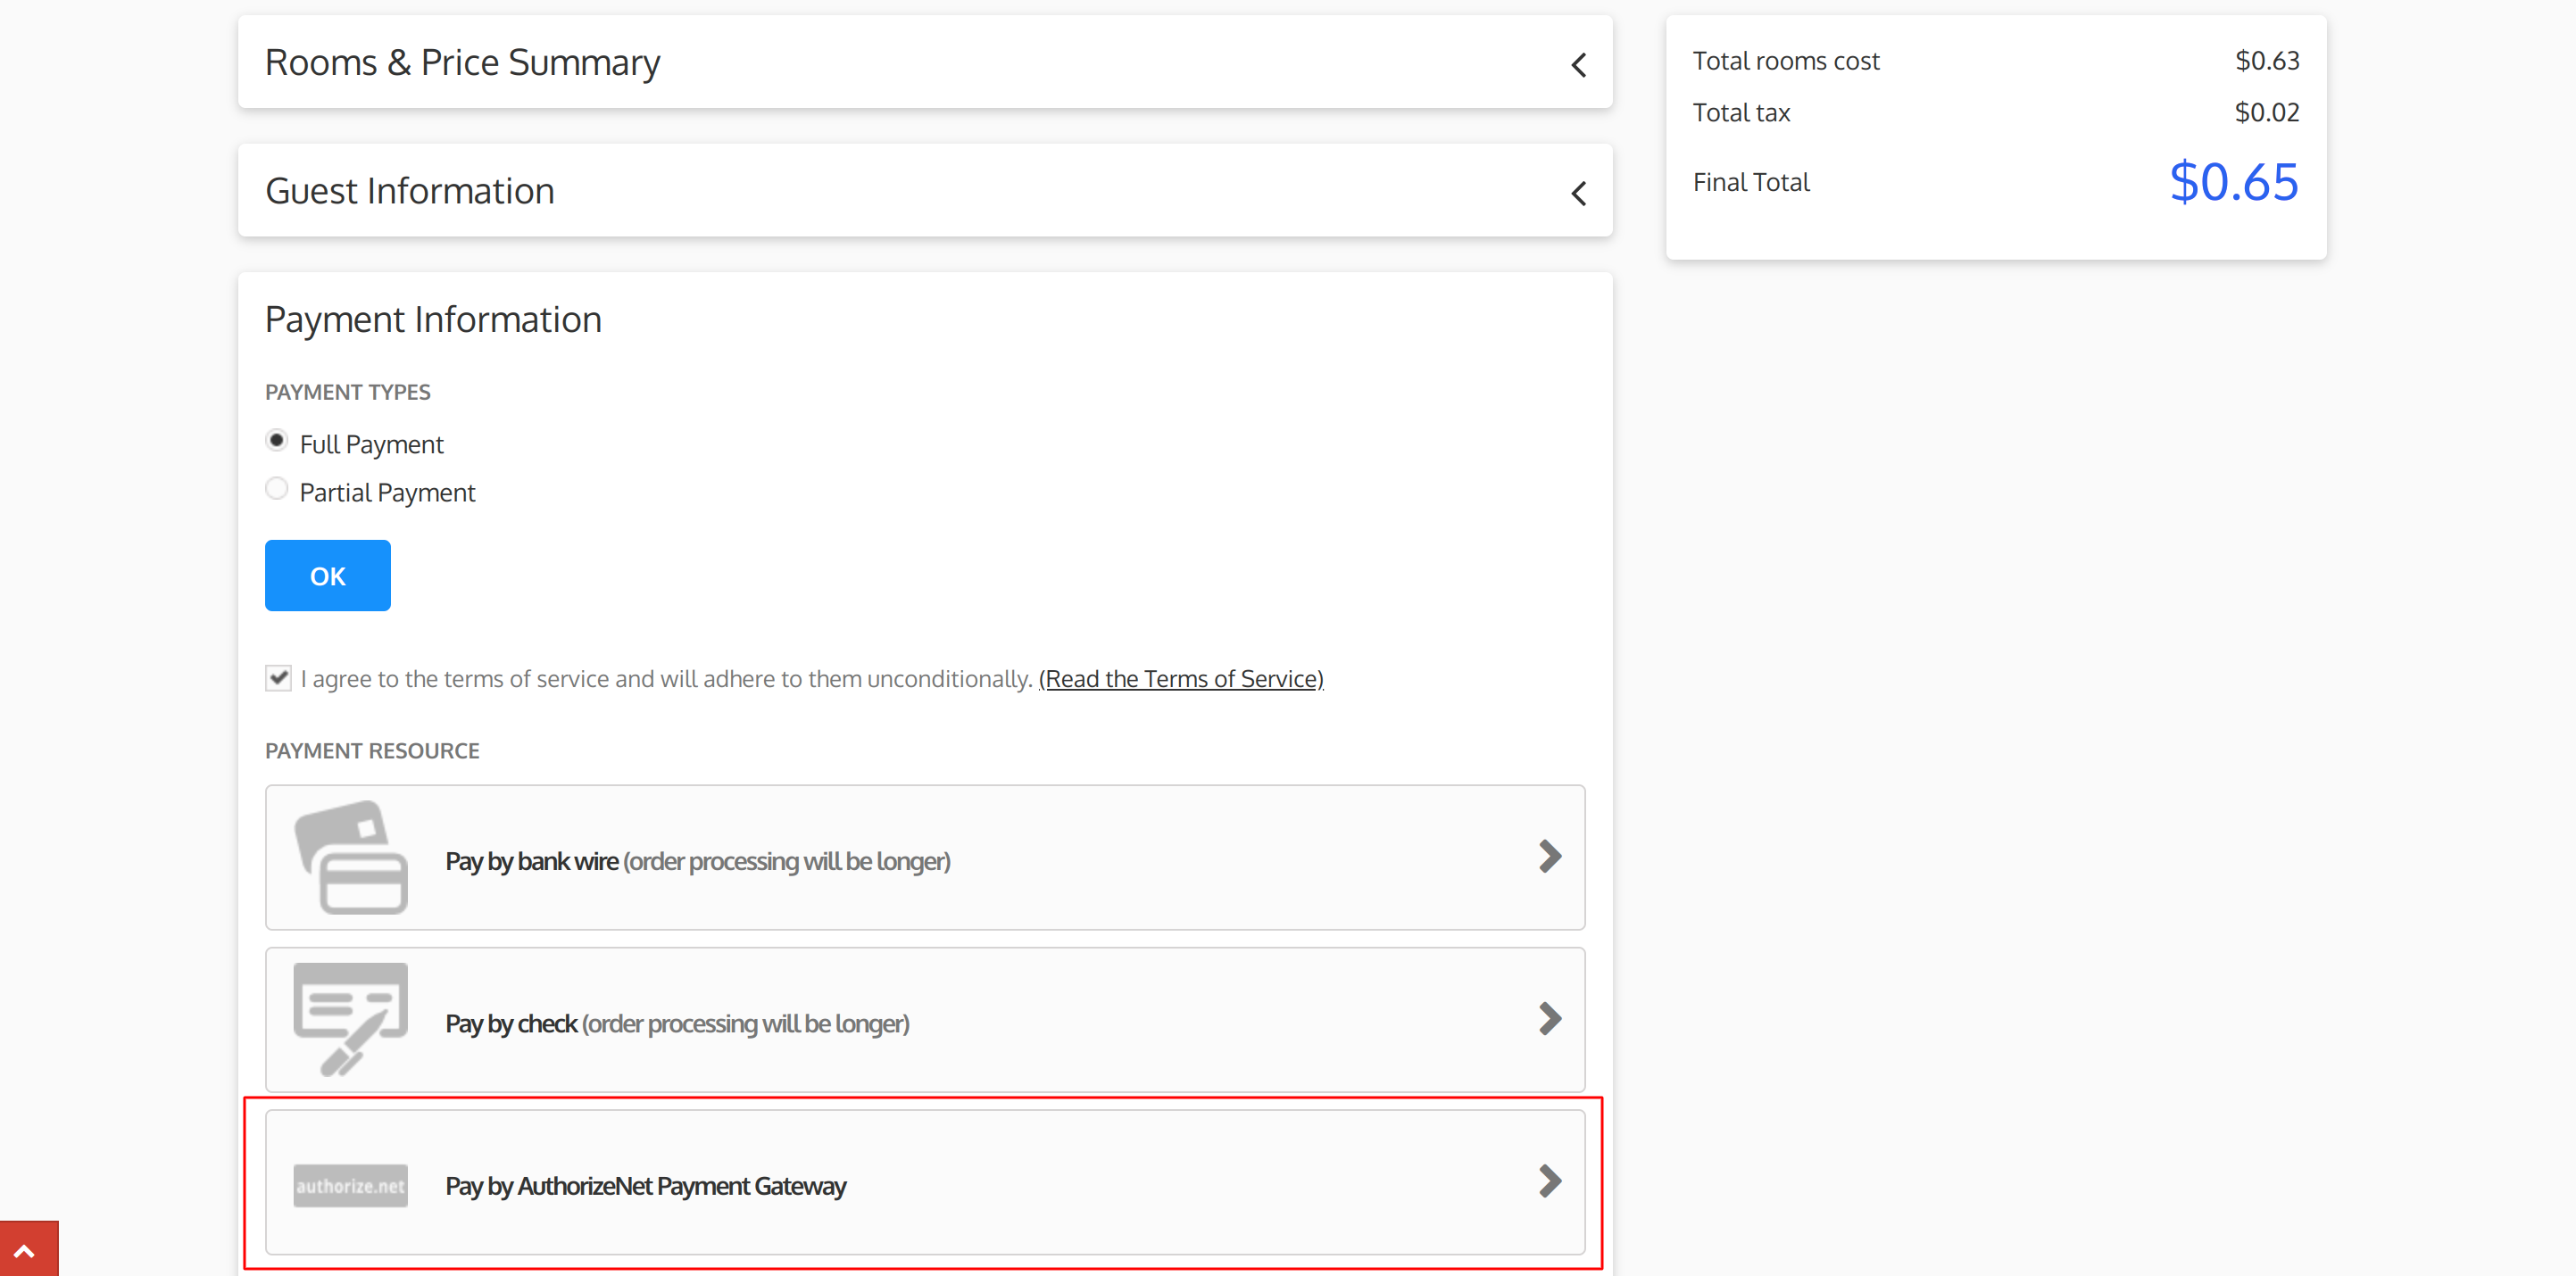
Frontend Workflow of QloApps Authorize.net Payment Gateway
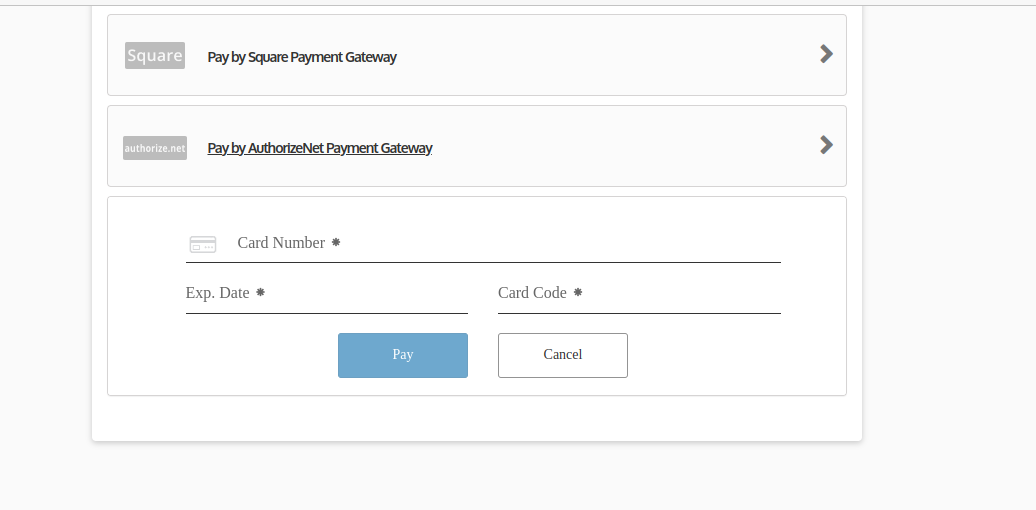
Once you configure the addon, the QloApps Authorize.net payment gateway will be added to the payment sources option on the checkout page.
As per your selected payment display type, there will be three flows through which your guests can pay for their bookings using QloApps Authorize.net Payment Gateway.
Payment Display Type: Redirect
When you select Redirect Display Type, guests will be redirected to the Authorize.net payment gateway page when they click “Pay by Authorize.net Payment Gateway”.
Payment Display Type: Embedded
When you select Embedded Display Type, then guests will not be redirected to the Authorize.net payment gateway website.
When they click on “Pay by Authorize.net Payment Gateway”, the payment details form will be opened on the checkout page using which guests can pay for their bookings.
Payment Display Type: Pop-Up
When you select Pop-Up Display Type, guests will automatically get a pop-up on the screen to the Authorize.net payment gateway page when they click “Pay by Authorize.net Payment Gateway”.

Back Office View
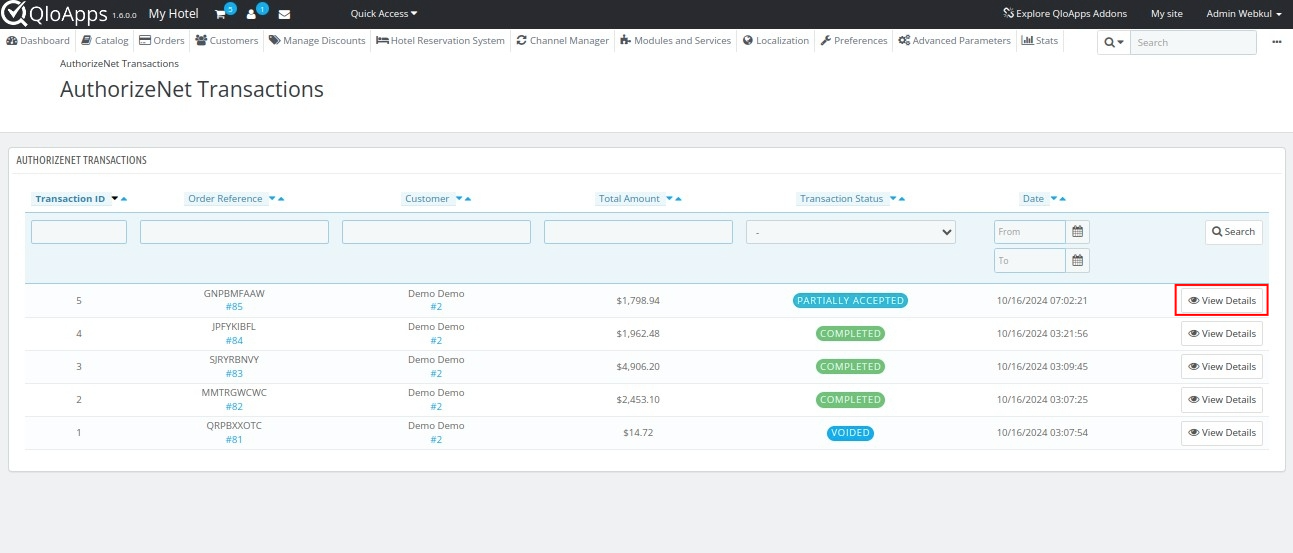
After you install the add-on, a new tab for Authorize.net Transactions will be added to the QloApps Back Office menu.
Once you click on this tab, the admin will see a list of all the transactions made by guests using the Authorize.net payment gateway.
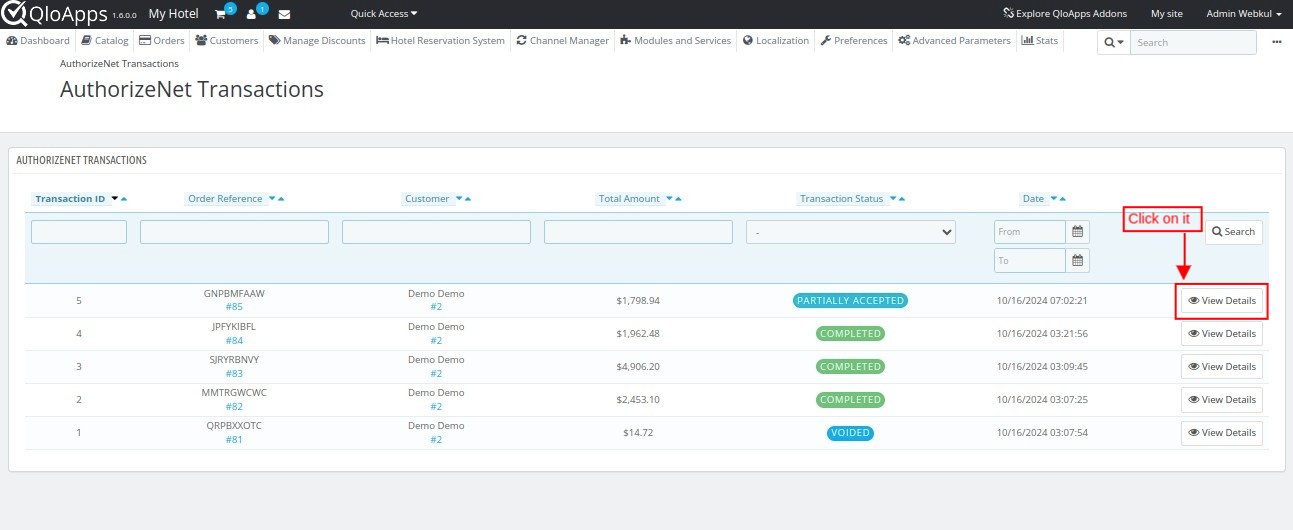
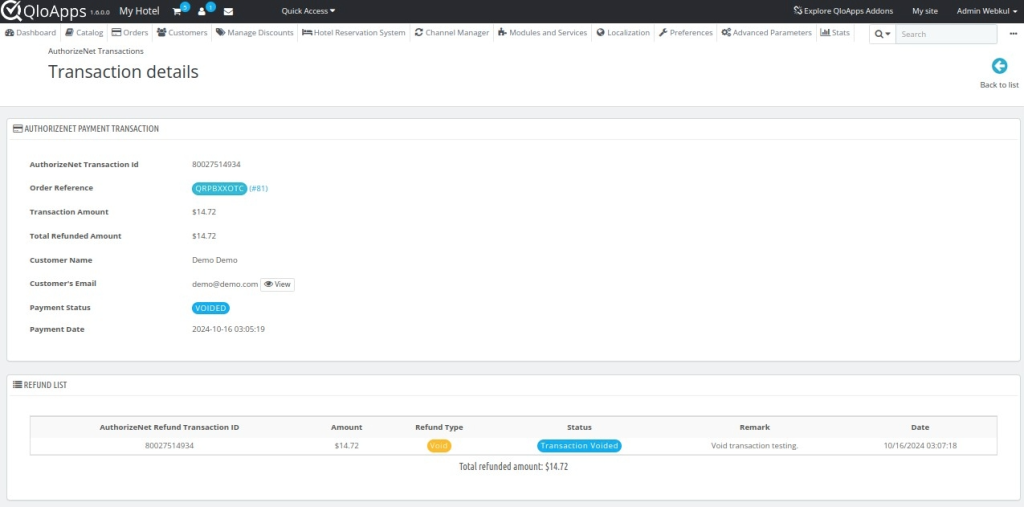
The admin can view the details of each transaction by clicking on the “View Details” button.

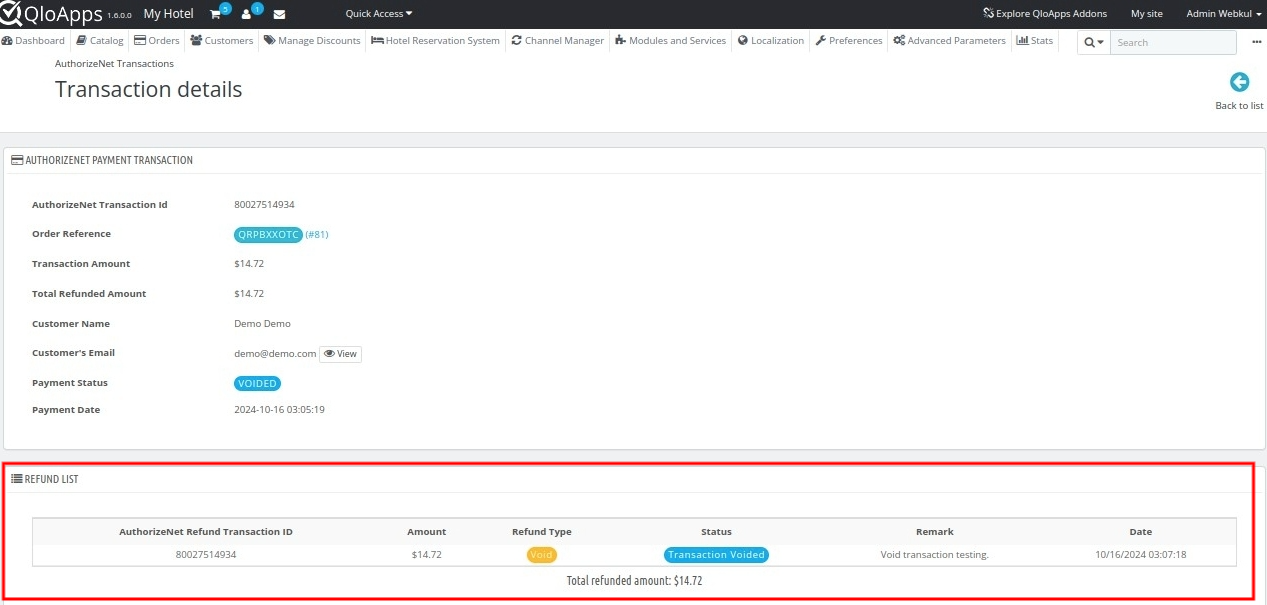
Refund Process
The admin can easily process the guest’s refund requests using the refund option.
Follow the below-mentioned steps to provide a refund for the booking:
- Go to the Authorize.net Transactions tab
- Next, click on the “view details” button to proceed with processing the refund for the particular transaction.
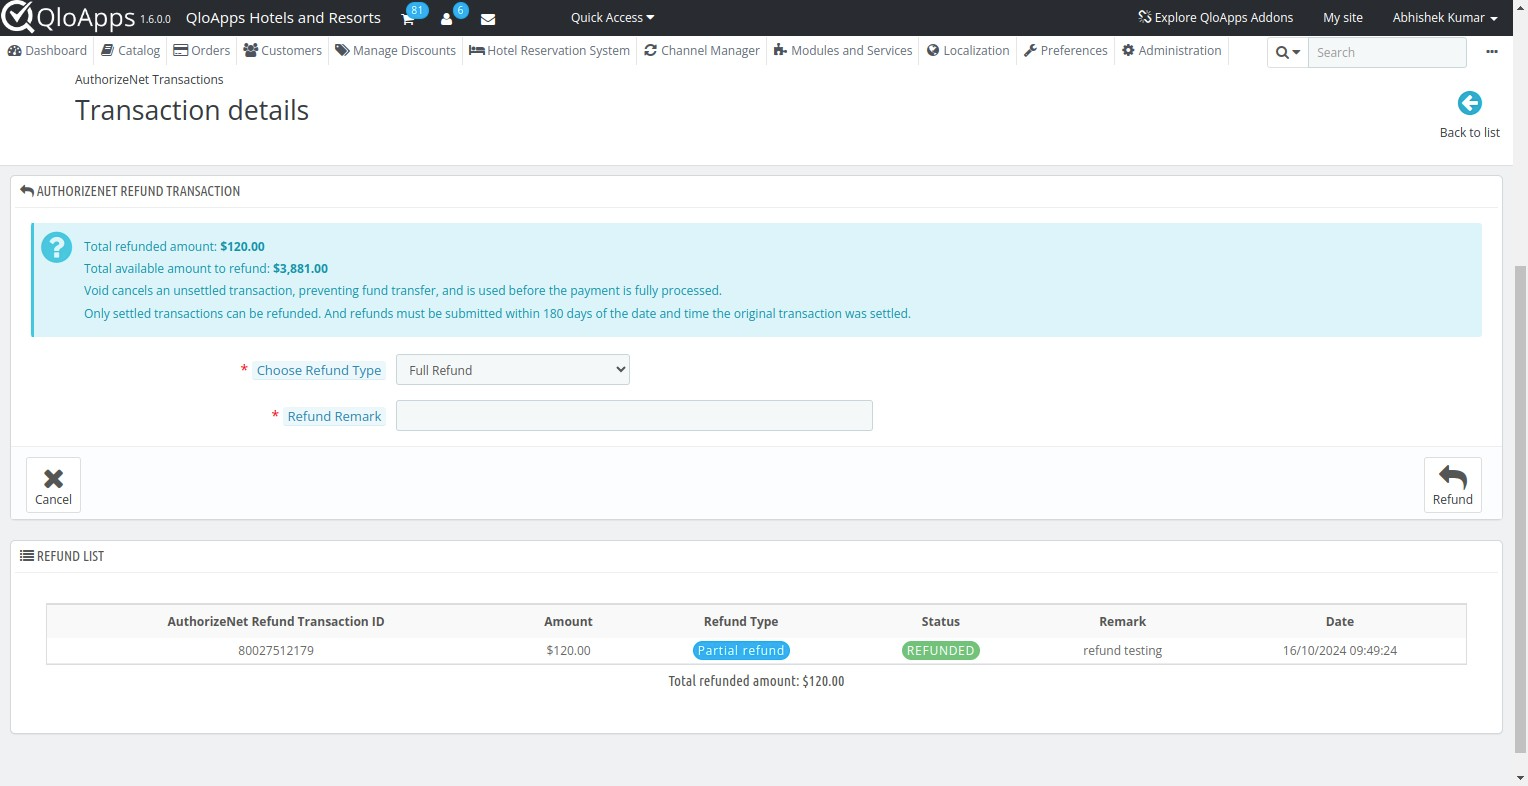
- Now, Go to the Refund Transactions section.
- To transfer the refund to your guest, first, select the Refund Type. There are three refund types available:
- Full Refund
- Partial Refund
- Void
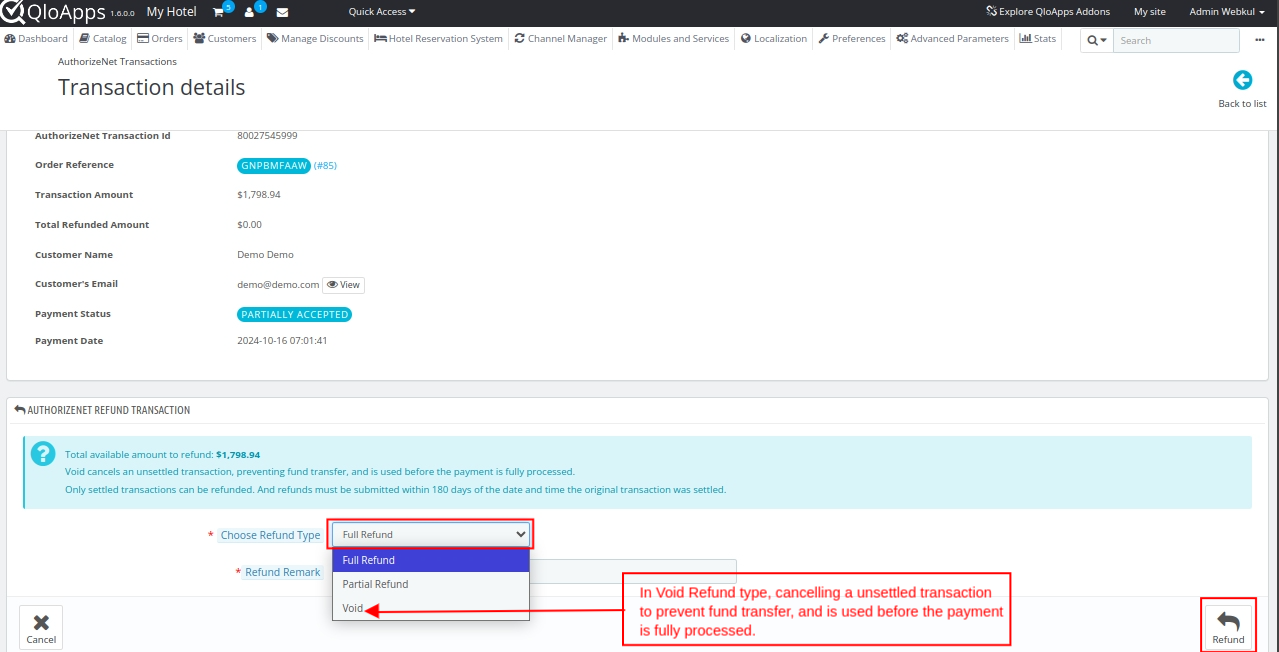
- Then add the Refund Remark and click on the Refund button and then within a few minutes, your refund will be processed.
- Once the refund is processed, the admin can see the details under the Refund List section.
Conclusion
I hope this user guide of QloApps Authorize.net Payment Gateway will ease your setup and usage process of the addon.
Don’t hesitate to get in touch with QloApps Forums with any further questions or queries.
To manage your hotel efficiently, start using the QloApps Management System.
Current Product Version – V 4.0.0
Supported Framework Version – QloApps 1.7.x & 1.6.x

Be the first to comment.