QloApps 2Checkout payment gateway is an add-on that allows integration of QloApps website with the 2Checkout payment gateway.
The payment gateway is secure and reliable.
Customers will pay for their bookings immediately by using 2checkout as a payment method.
It also saves time for customers by completing payments on the QloApps checkout page rather than having to navigate to another page.
The bookings information can be viewed in the QloApps backend in the “2Checkout transactions” tab.
As well as in the 2checkout Merchant Portal.
Features
- 2CheckOut Payment supports MasterCard, Visa, American Express, JCB, Discover and Many more.
- The payment processing is secure.
- Easy to configure by admin in the backend.
- The customers are not redirected to the 2checkout site while making the payment.
- Admin can view details of all the transactions made from the 2Checkout payment gateway.
- It manages refund directly from the admin account.
- Refund is only allow one time whether full or partial does not matter.
Installation of QloApps 2Checkout Payment Gateway
The installation of any module is very simple in QloApps.
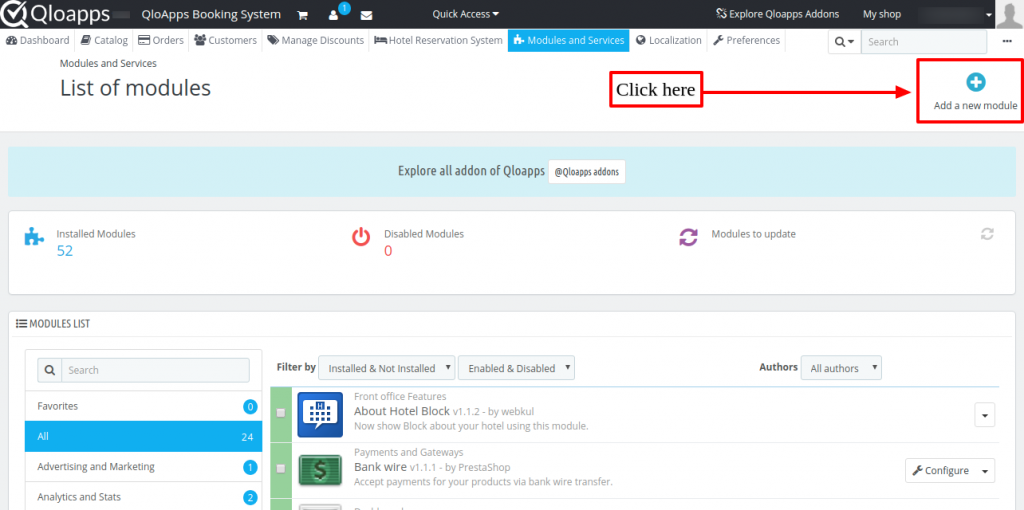
- Go to the “Module and Services” tab.
- Click on “Add New Module”.
Now upload the Zip file of module and click on install.
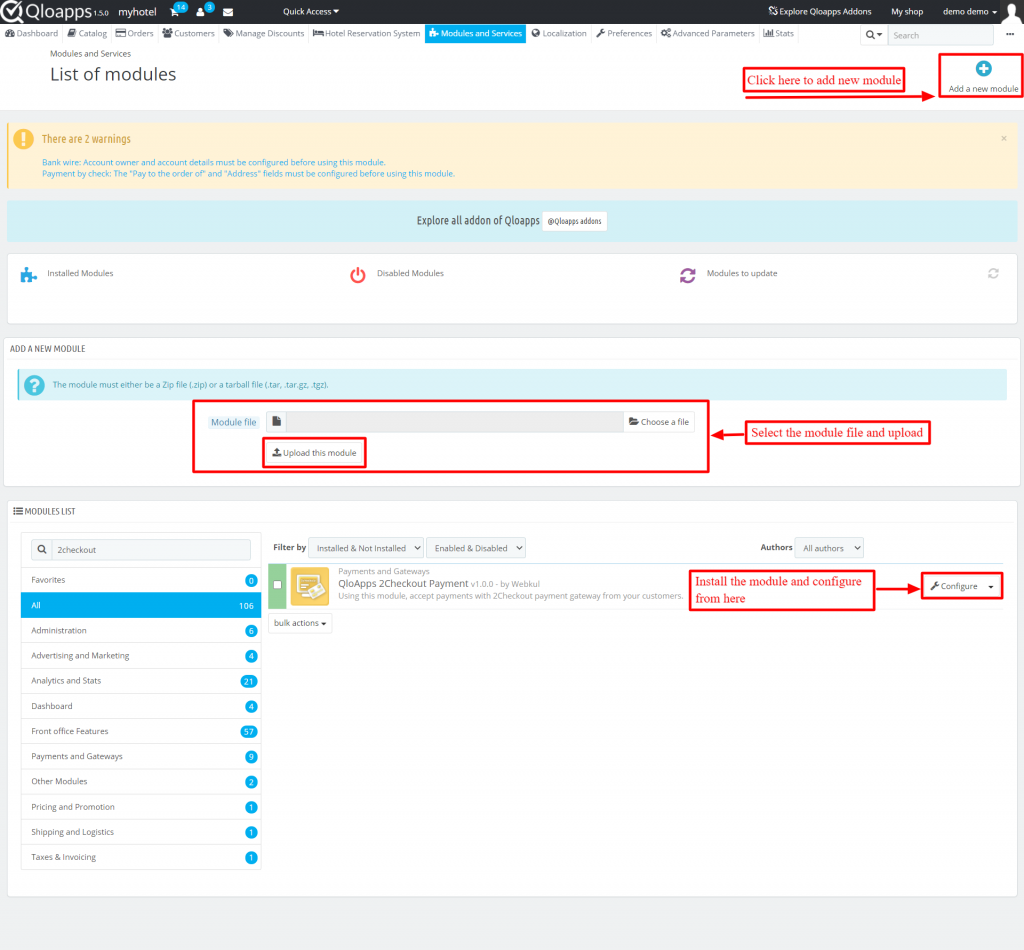
Now you have installed the module. So let’s check how to configure it.
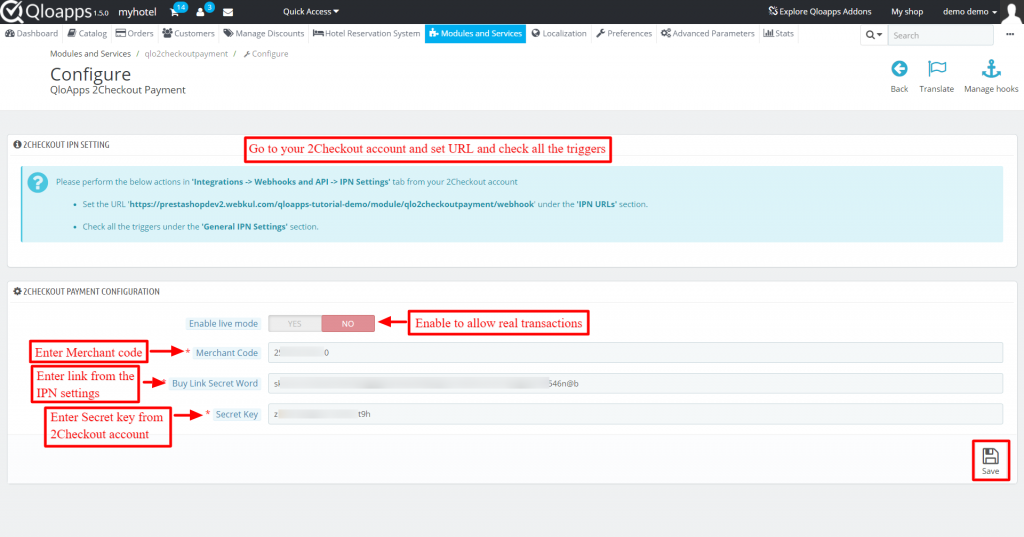
Configuration of 2Checkout payment gateway
To configure the module, enter the API keys, enable/ disable live mode.
In the live mode, you will have the option to use the module in Sandbox mode or Live mode.
Sandbox mode is used to test the system in which Live mode accepts the real payment.
Further, go to your 2Checkout account. In that go to Integrations and click on Webhooks and API.
In that set URL and check all the triggers in IPN Settings to configure the module.
How to get API Keys?
To get the API of 2Checkout Payment Gateway, the admin has to create an account on the 2Checkout payment gateway.
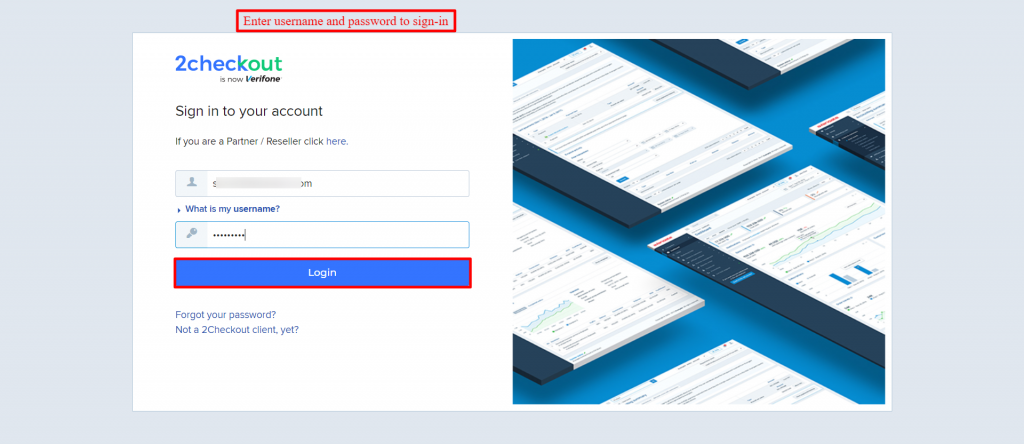
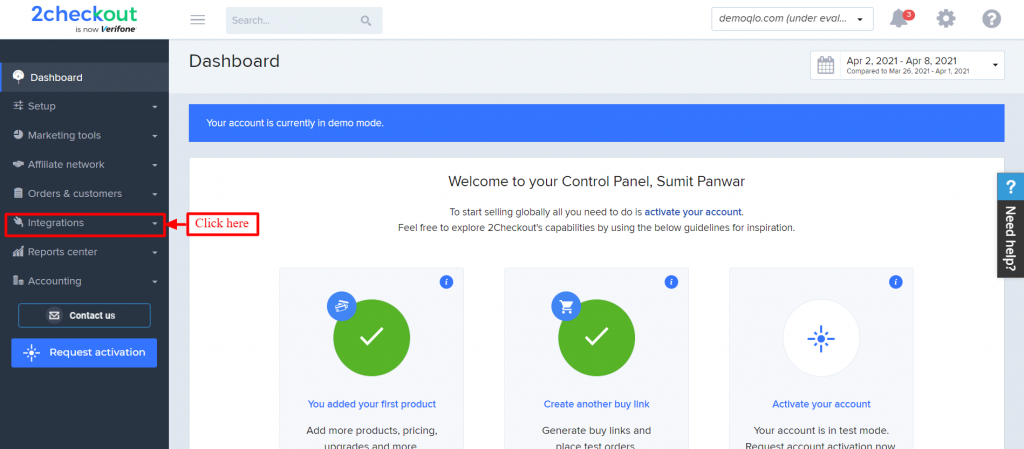
After signing in, you will be redirected to dashboard page. In the left hand side click on Integrations.
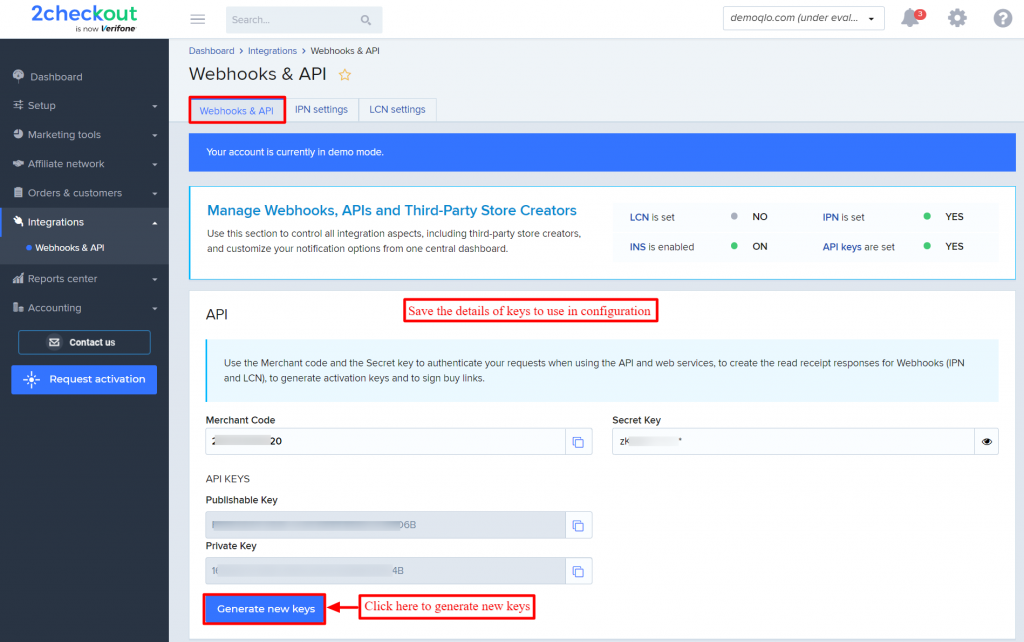
In that click on Webhooks and API to get the API keys.

Here you will see a button to Generate new keys. Click on it to generate new keys and save the details of keys.
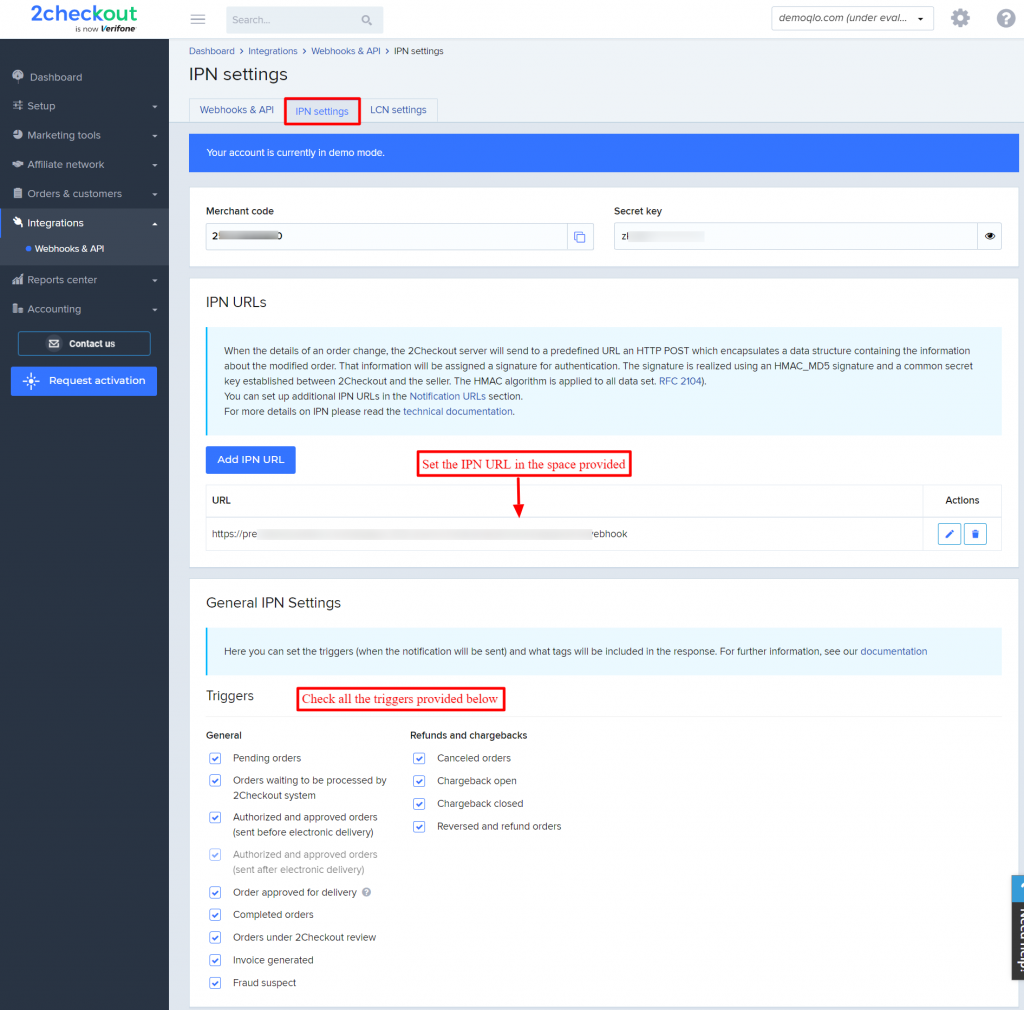
Under “IPN Settings” you will find space to add IPN URL. In that space enter IPN URL which is given on Configuration settings of QloApps Module 2Checkout Payment gateway.
Moreover, check on all the triggers provided below.
Workflow of 2Checkout payment gateway
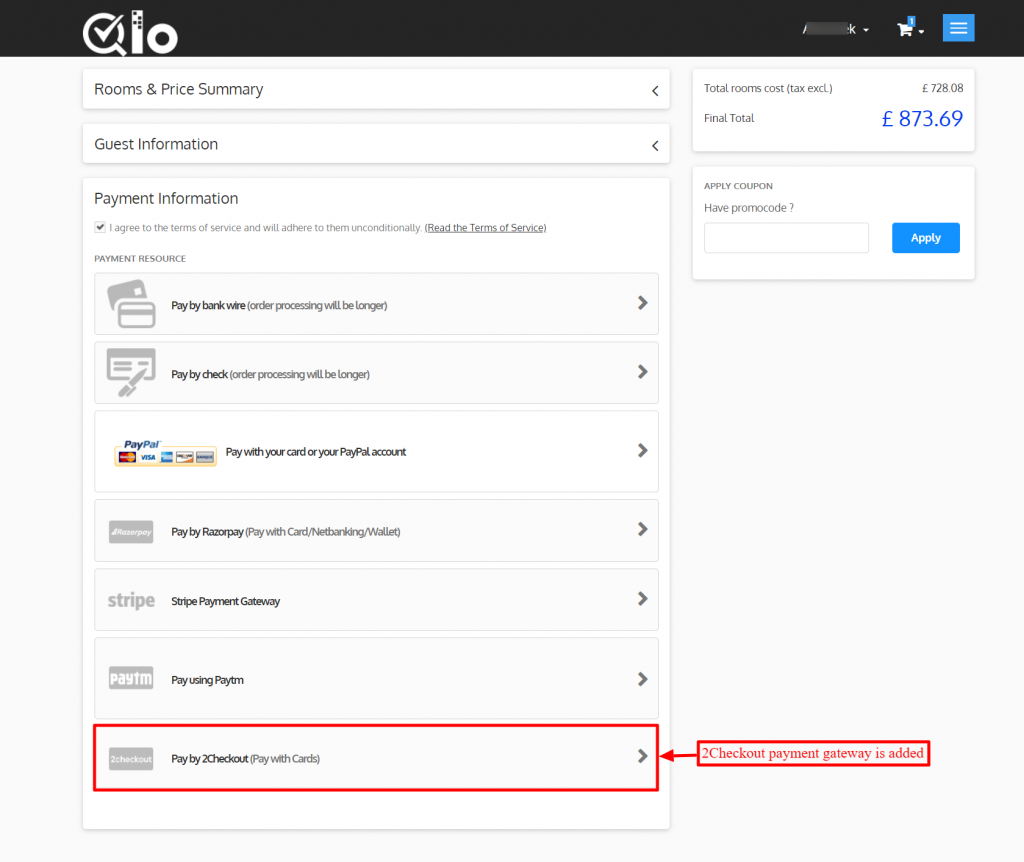
Once the module is configured successfully, the guest will be able to view the 2Checkout payment gateway at the time of checkout.
Click on the 2Checkout payment option to pay from this particular payment gateway.
In this, you will have to enter details like the name on the card, the number of card, its expiry date and security code.
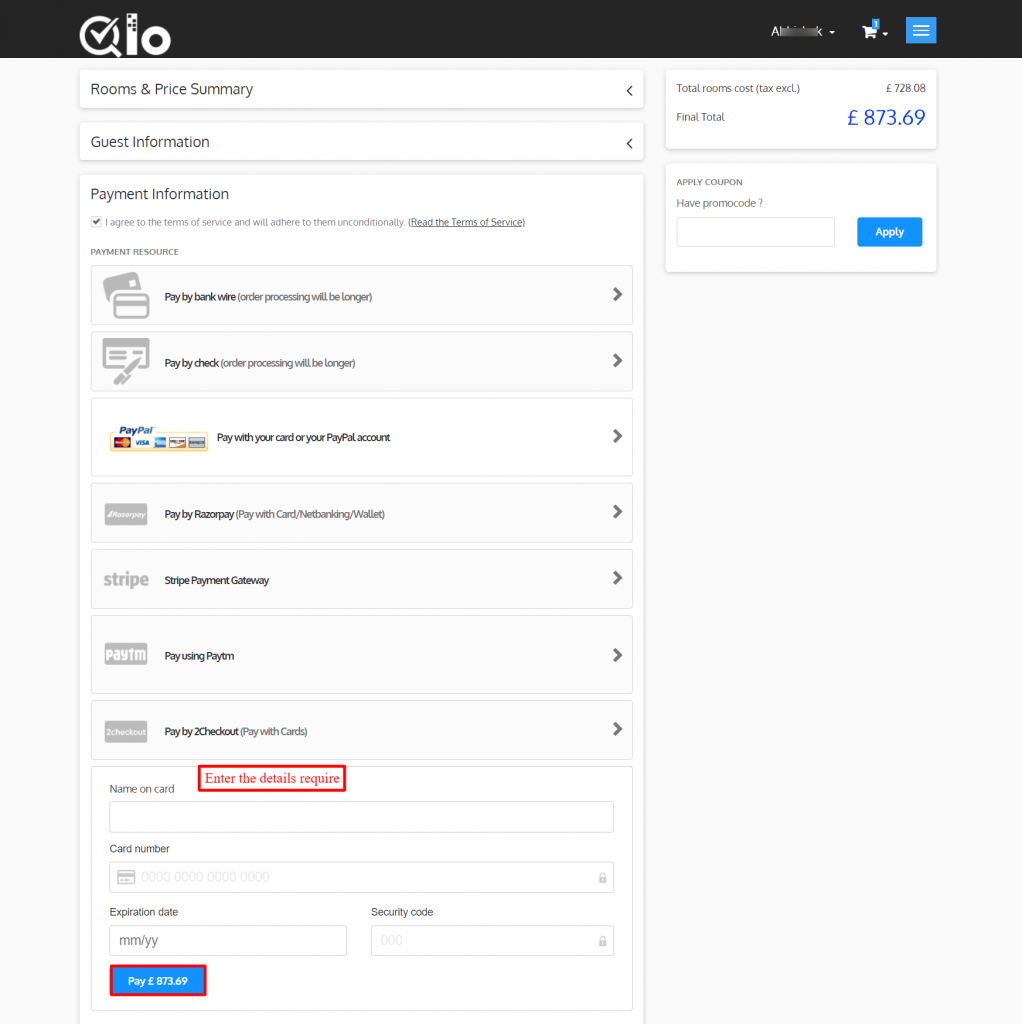
Hence, after filling details one can process the payment.
Backend
A new tab “ 2Checkout Transactions” is added at the backend.
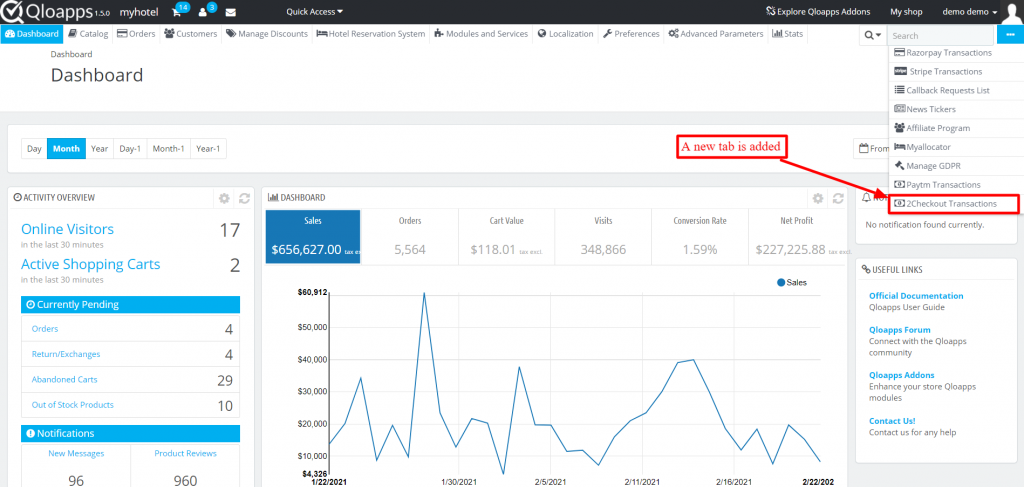
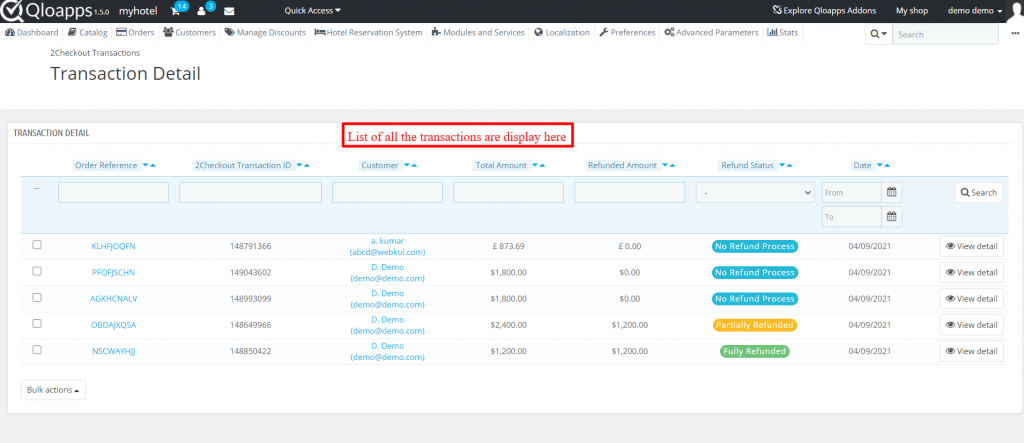
From here admin can view the list of all the transaction made through the 2Checkout.
Click on view details to see the full details of the transaction.
Afterwards, you will have the option to select full or partial payment option.
You can only process refund if the payment status is complete.
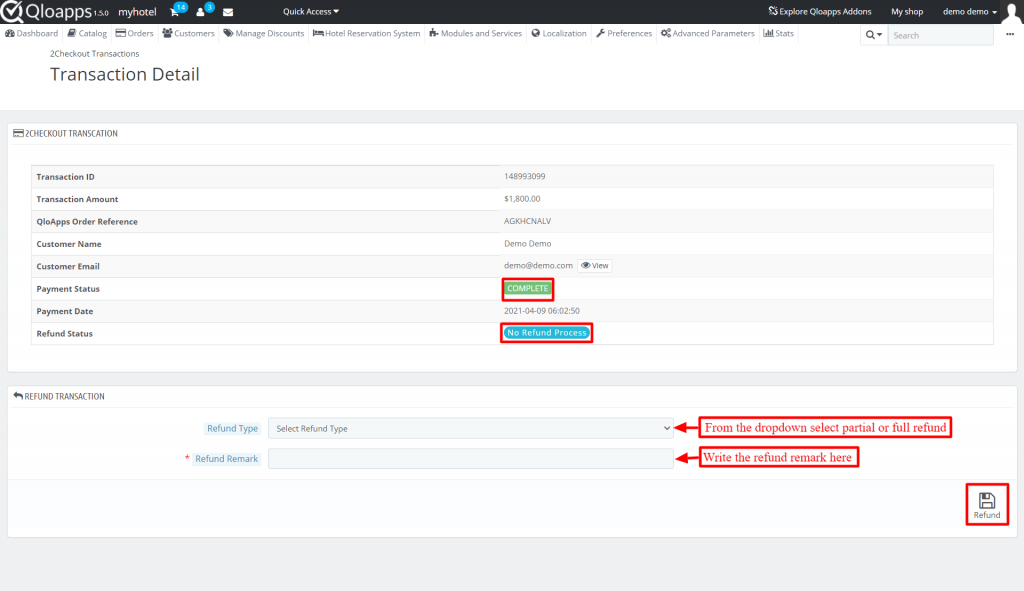
If admin selects partial refund option, he will have to enter the amount he want to refund.

Please note- You can only select a refund option at a time, whether partial or full refund.
Moreover, when the total cost is $1500 admin select the amount $500 as partial refund and refund it. Then $1000 is left.
Hence, he cannot refund the remaining amount in future.
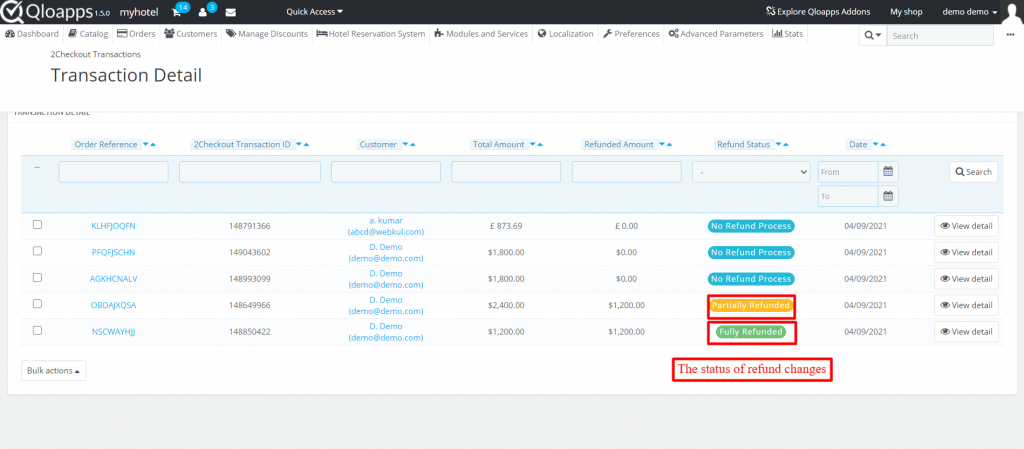
The status of payment will change after refund is made.
Conclusion
This was all from the QloApps 2Checkout Payment Gateway. I hope I was able to clarify the functioning of the module to you.
If you want to learn about the functionality of QloApps then you can visit this link: QLO Reservation System – Free Open-Source Hotel Booking & Reservation System
In case of any query, issue or requirement please feel free to raise it on QloApps Forum
Current Product Version – V_4.0.0
Supported Framework Version – QloApps 1.7.x

Be the first to comment.