Qloapps makes a hotelier’s online presence and enables them to take the online bookings from around the world.
The business of a hotel largely depends on its international guests. Travelers from around the world comet to visit a palace and provide business to the tourism sector of that place.
The Localization feature helps in Qloapps helps you to work on the local settings of different regions.
Localization
Click on Localization Tab to go to the main localization page.
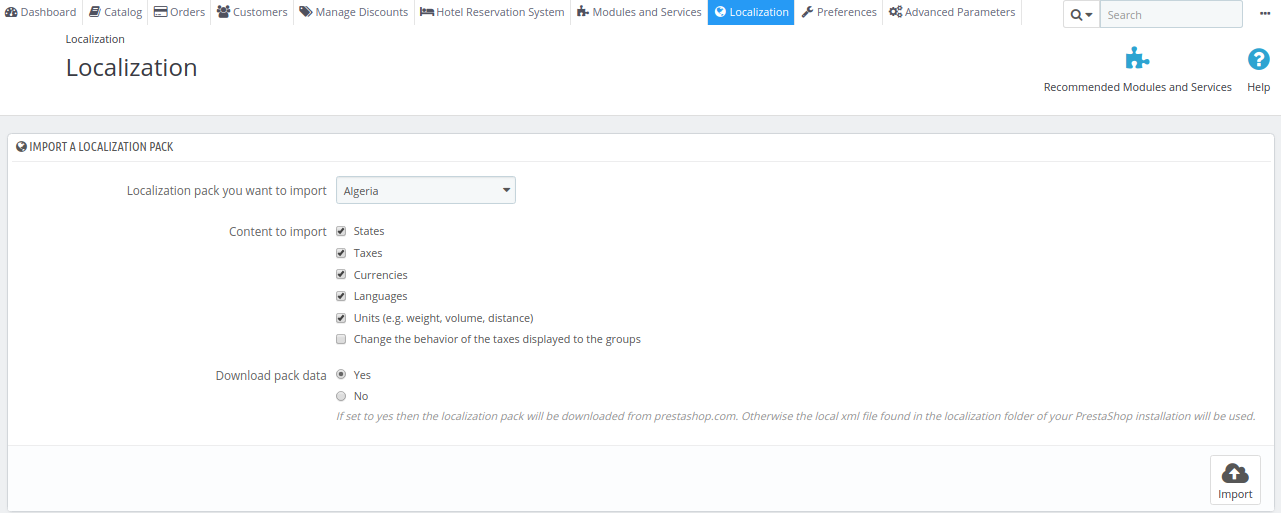
IMPORT A LOCALIZATION PACK
The main Localization Page allows you to download Localization Packs of different countries which includes the country’s
States: Different Countries have different regulations regarding States. Hence, states play important roles in tax regulations and or you can also apply different discount rules depending upon the states of the customer.
Taxes: The localization Tab becomes very important because of local taxes, and there can be numerous and varied depending on the country or the state.
Currencies: Qloapps allow you to deal with customers with different currencies.
Languages: Your customers can be of different countries and hence, they know a different language. Present your website to your customers in their language.
Units (e.g. weight, volume, distance). The local units of a country.
Configuration
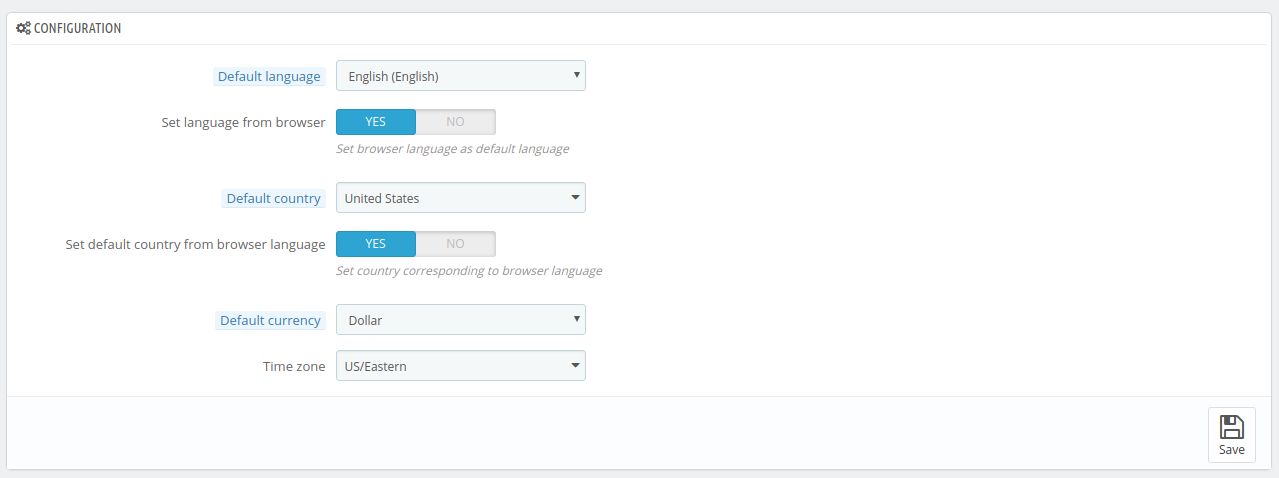
This section contains default local settings of importance:
- Default language. This is the main language for your website. This setting will affect your back-end as well as front end. Note that the front office’s language might adapt to the setting of the customer’s browser.
- Default country. The location of your hotels. If you have hotels in many countries, use your main or original country.
- Default currency. The currency of your country. Currencies are added by importing and activating a country’s currency.
- Time zone. Your time zone. This is useful for a check-in, check-out giving discounts etc.
Advanced

This section allows you to set your server’s local language and country, as ISO code:
- For the language: ISO 639-1 code (http://en.wikipedia.org/wiki/List_of_ISO_639-1_codes).
- For the country: ISO 3166-1 Alpha 2 code (http://en.wikipedia.org/wiki/ISO_3166-1_alpha-2).
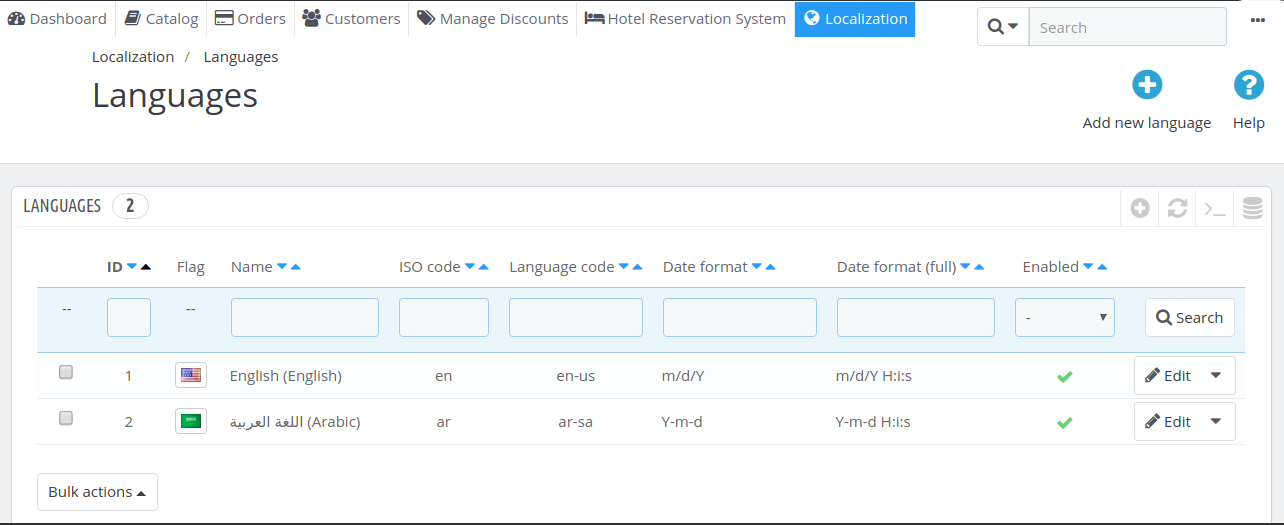
Languages
QloApps is multilingual software, one language is there by default ( which you selected at the time of installation) and others are available to download.
The “Languages” page manages the languages you will see in your back-end and front end.
The page shows and manages languages installed in your shop. The list is present with some information: ISO code, language code, date format (short and full). You can enable or disable a language by clicking on the icon in the “Enabled” column.
Creating a Language
To create a language click on Add New Language button.
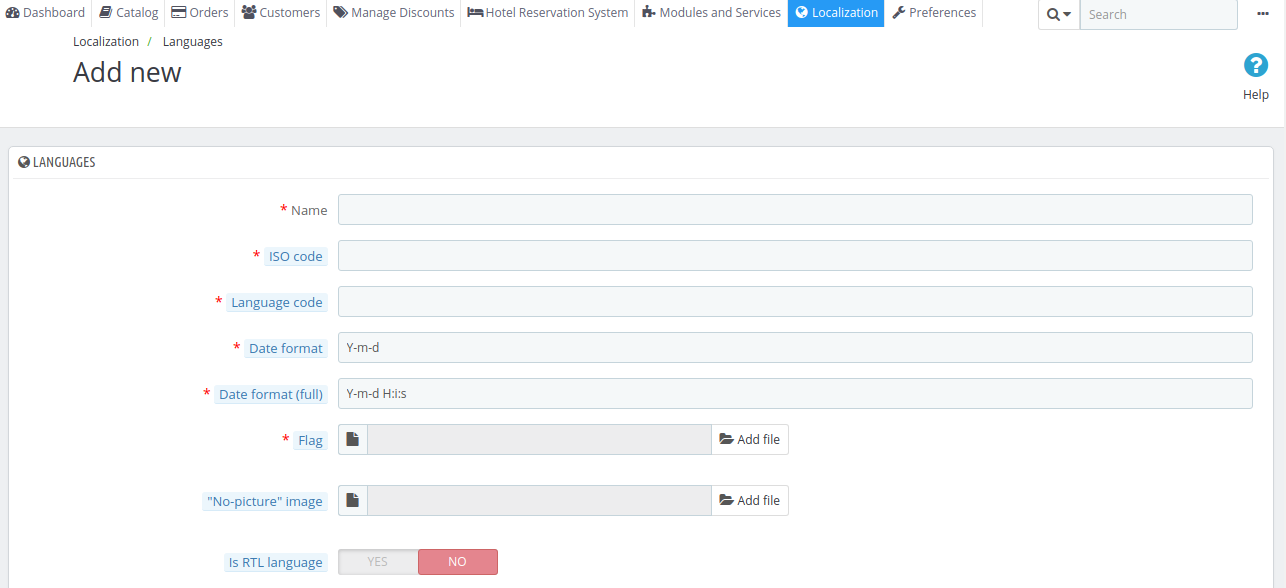

In order to create a new language, you must fill as many of the form’s field as possible:
- Name. The name is public.
- ISO code. Enter the adequate 2-letter ISO 639-1 code. See http://en.wikipedia.org/wiki/List_of_ISO_639-1_codes for more information.
If you are importing a language pack, this code should exactly match the one for the pack. - Language code. Enter the adequate 4-letter language code, in the form,
xx-yyxxbeing the language ISO code (same as above), and theyycountry ISO code, using ISO 3166-1 alpha-2 (http://en.wikipedia.org/wiki/ISO_3166-1_alpha-2). See http://en.wikipedia.org/wiki/IETF_language_tag for more information. - Date format. Countries do not always share the same date format. So select the appropriate format
- Date format (full). Same as the date format above, but including the hour-minute format.
- Flag. Upload an image of the flag which best matches the language you want to add. It should be of the 16*11 pixel.
- No-picture” image. Upload an image which will be displayed when a product does not yet have a picture.
- Is RTL language. Some languages are written from right to left, most notably those using Arabic script or the Hebrew script.
- Status. You may disable a new language until you are ready to translate everything.
Zones
The world is divided into subcategories called zones. They help in categorizing the countries.
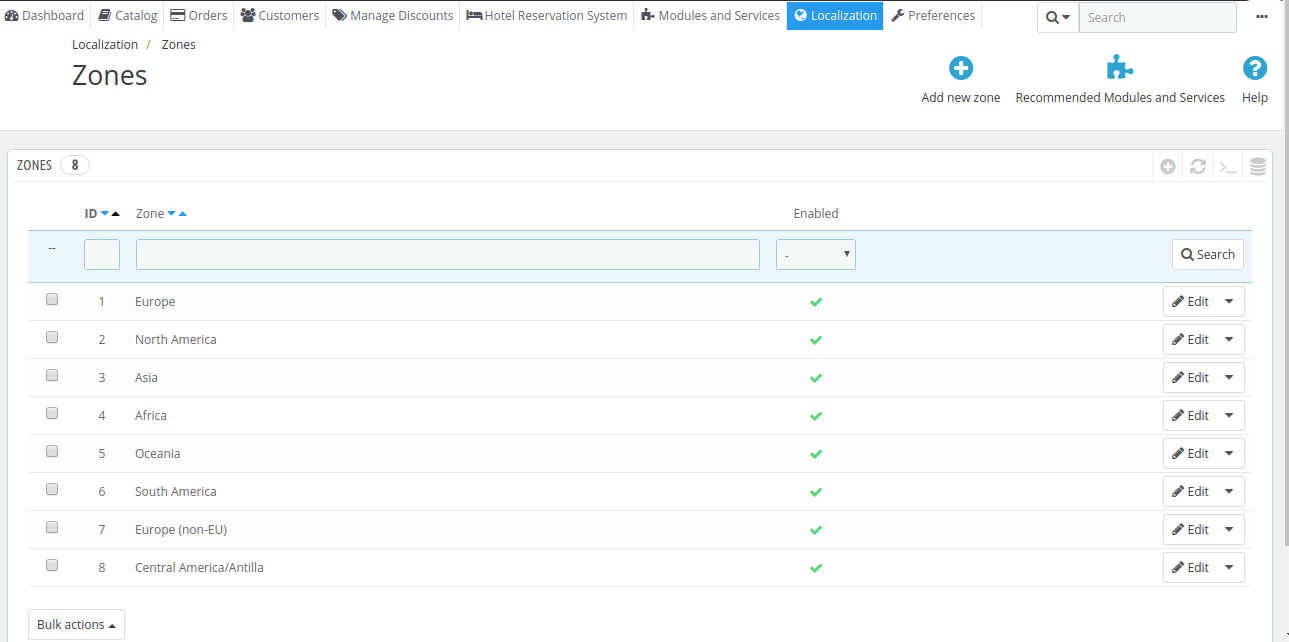
There are eight zones by default on Qloapps. But you can create zones according to requirements.
To create a zone click on Add new zone button and the following page will appear.
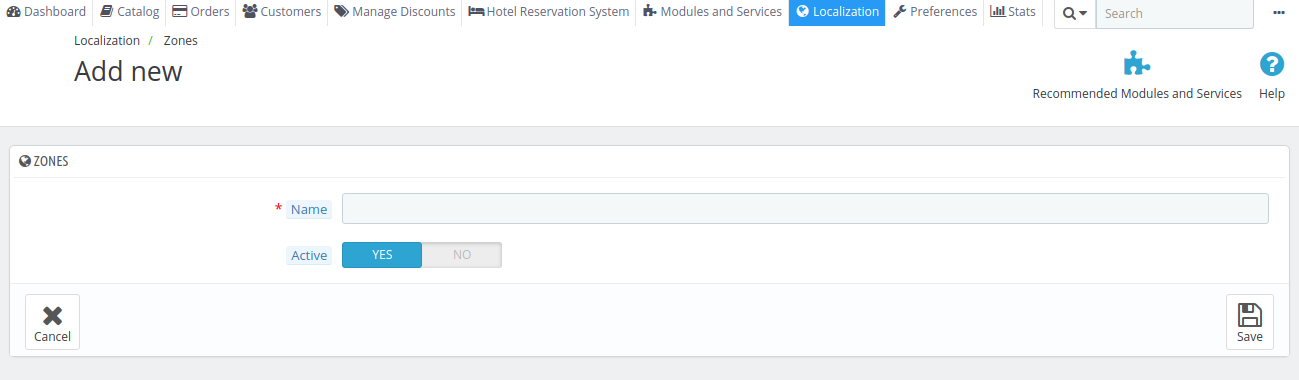
The name of the zone and click on save button.
Countries
This section includes all the countries around the globe. All the countries are present in the list with their details like ISO code, Zone and Call Prefix. You can also enable or disable a country.
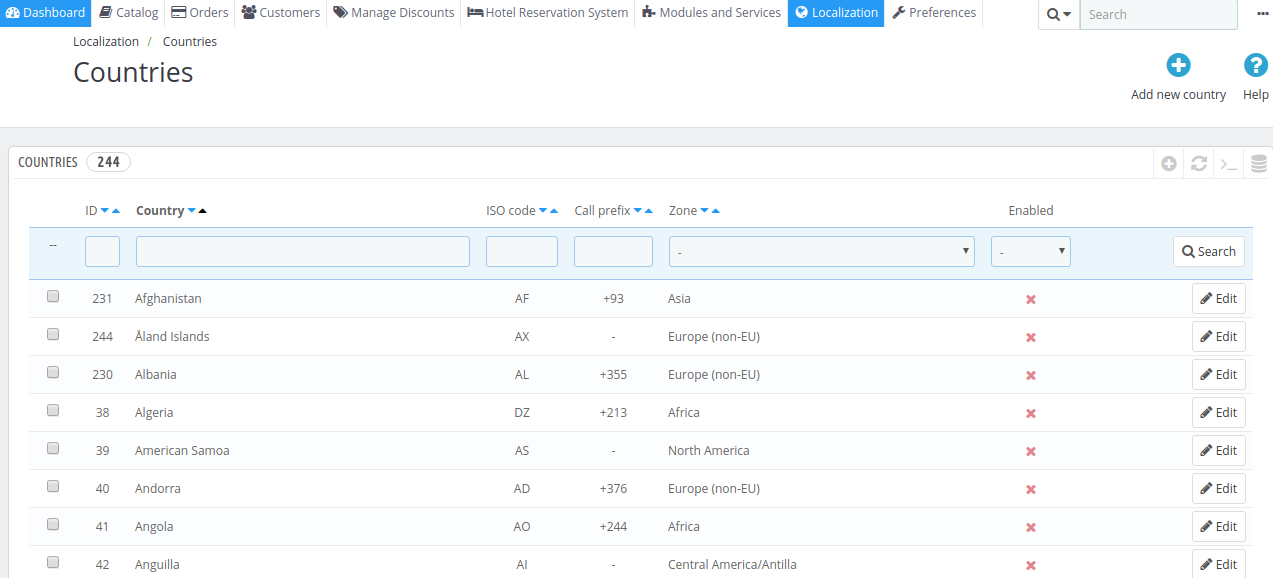
Creating/ Editing a country
To create a country click on add new country button and to edit it click on edit button in front of the country you want to edit.
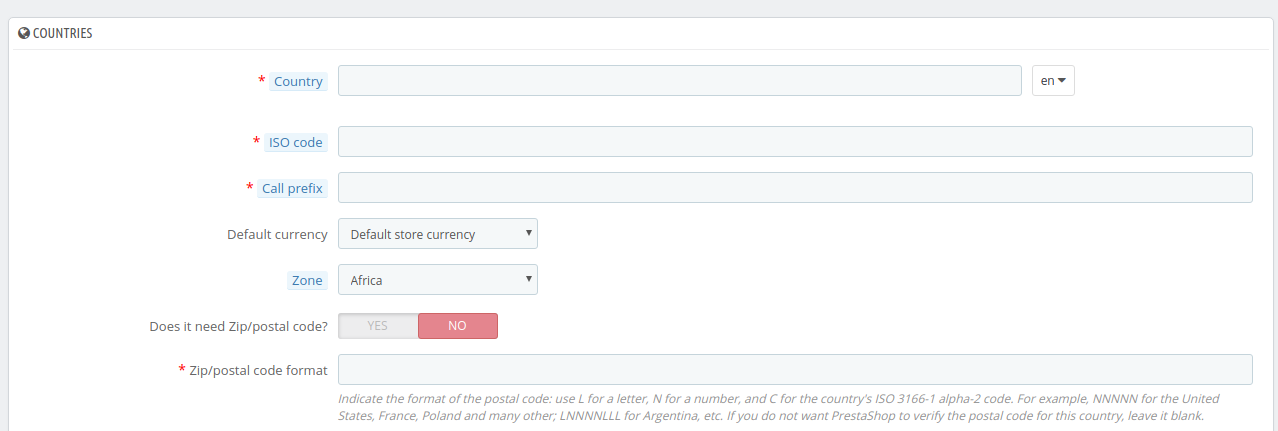
- Country. The name of the country which you want to add
- ISO code. The country’s ISO-3166 code, which you can find on the official ISO page: http://www.iso.org/iso/country_codes/iso_3166_code_lists/country_names_and_code_elements.htm.
- Call prefix. Its international call code page: http://en.wikipedia.org/wiki/List_of_country_calling_codes.
- Default currency. The currency which is used in the country which you are going to add..
- Zone. Select which zone this country belongs to.
- Does it need zip/postal code? Select whether the customer from this country has to provide a zip code or not.
- Zip/post code format. You may also give more detail on the format of the postal code (or zip code).
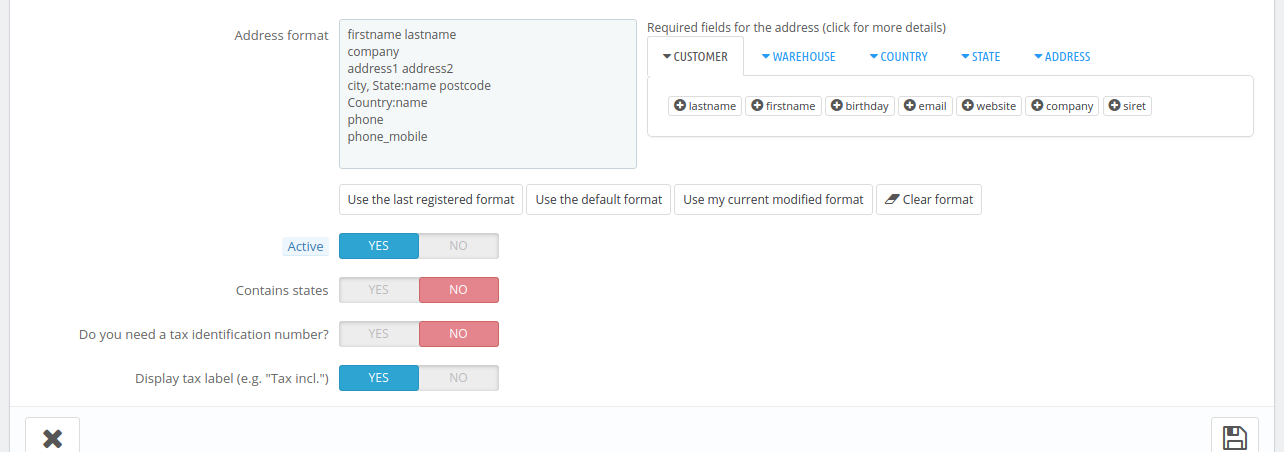
- Address format. You can select the address format for the country. Select fields which a user has to fill while registering his address.
- Active. A disabled country will not be suggested as an option when a visitor wants to register and create a new account.
- Contains states. Indicates whether the country has “states” or not.
- Do you need a tax identification number? . A Tax Identification Number is an identification number used by the country’s revenue service in the administration of tax laws. Not every country needs of even has such a number for business.
- Display Tax Label: Select whether you want to show tax labels to the customers of this country.
Then click on save button to save the country.
States
States are the first-level administrative divisions of a country. On the main page of states you will see a list of states with their details.

Creating/ Editing a State
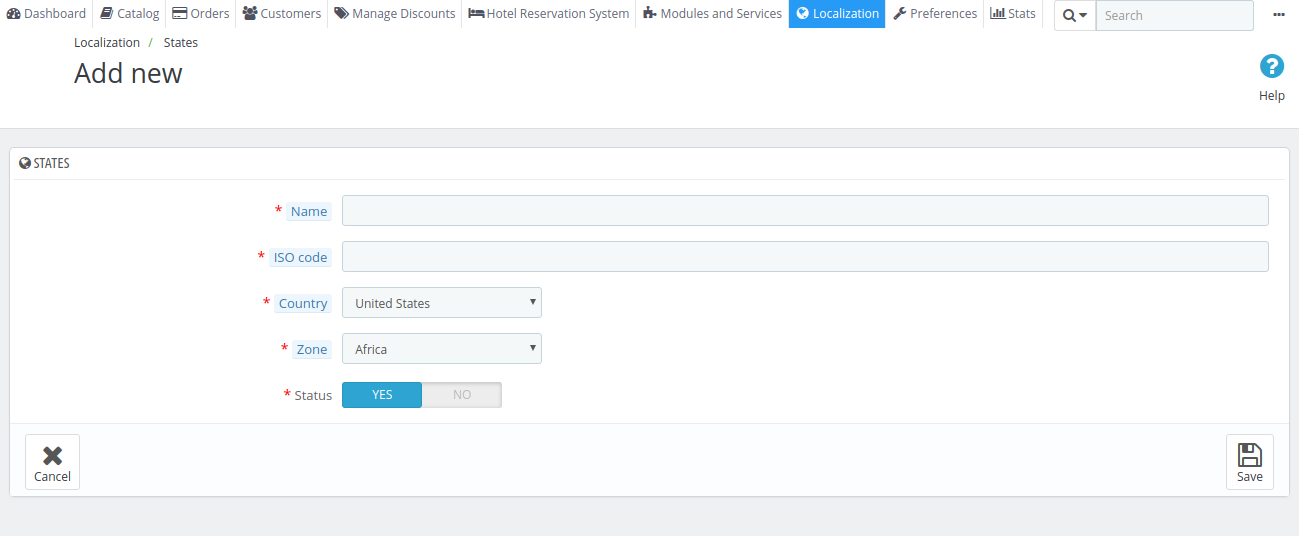
- Name. Give the name to the state you are creating.
- ISO code. The state’s ISO-3166-2 code
- Country. Indicate its country using the drop-down list.
- Zone. Indicate its geographical zone using the drop-down list.
- Status. A disabled state will not be suggested as an option when a visitor wants to register and create a new account.
Support

For any kind of technical assistance, just raise a ticket at http://webkul.uvdesk.com/
and for any doubt contact us at [email protected]

Be the first to comment.