Before adding the Agoda channel to a property in QloApps Channel Manager, the user must go through a few steps.
Make a connection With Agoda.
For your property, you must have a direct contract with Agoda; please sign up with them. After that upload your details, images, and required fields here.
When the property is available to connect, please seek support in the Extranet message system to connect to Channex, or you can do it individually using their interface.
How to Make a Connection to Provider
For current Agoda partners:
- Navigate to YCS > Settings > Property Settings to begin.
- Select Optional settings
- To add or delete a channel manager, check or uncheck the enable channel manager mode box.
- Choose Channex from the drop-down menu.
- Save the file
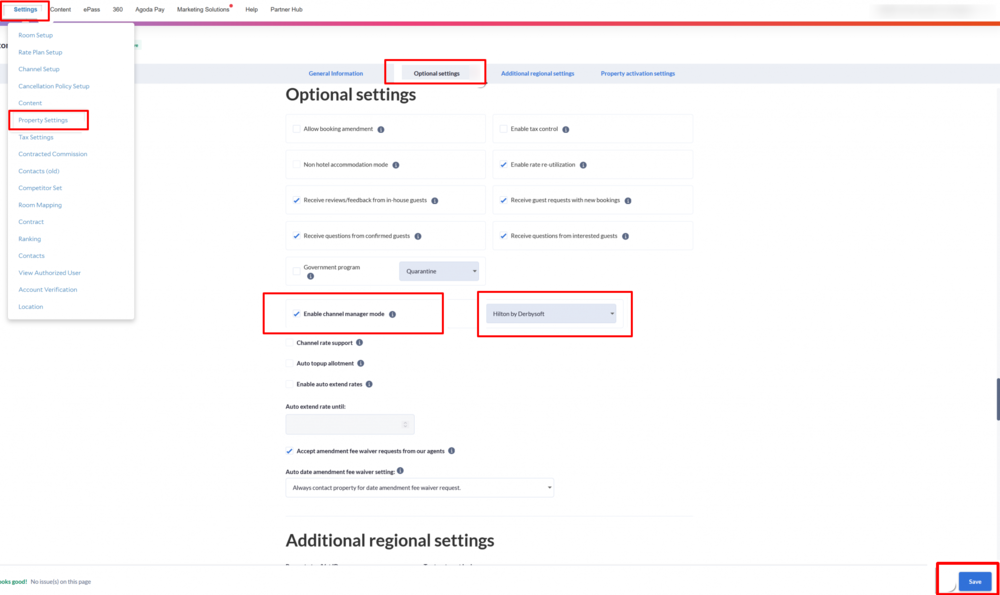
Note: Channex is our connectivity partner for Agoda Channel.
Add Agoda Channel
Users can add the channel Agoda by the given steps.
From the Main Menu:
- Go to channels.
- Click On Add Channel
- Here in the Select Channel from drop-down click on Agoda.
- Then click on Proceed.
Now Fill in the General Settings.
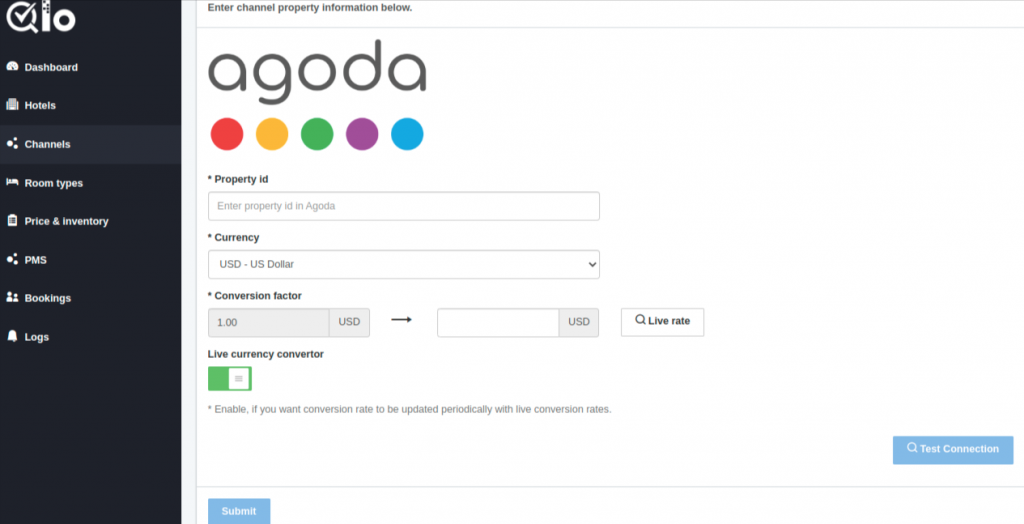
- Property ID: The ID of the Hotel used in the Agoda OTA.
- Currency: Currency used for the Property Agoda OTA.
- Conversion Factor: Enter the currency conversion rate. This conversion rate is between the Agoda OTA. Property’s Currency and the QloApps Channel Manager Property’s Currency
- Live Currency Converter: Here you can enable the live currency converter. This will automatically update the conversion rate. After that, click on Test Connection.
- Test Connection: By clicking on test connection we can check channel property is successfully established or not.
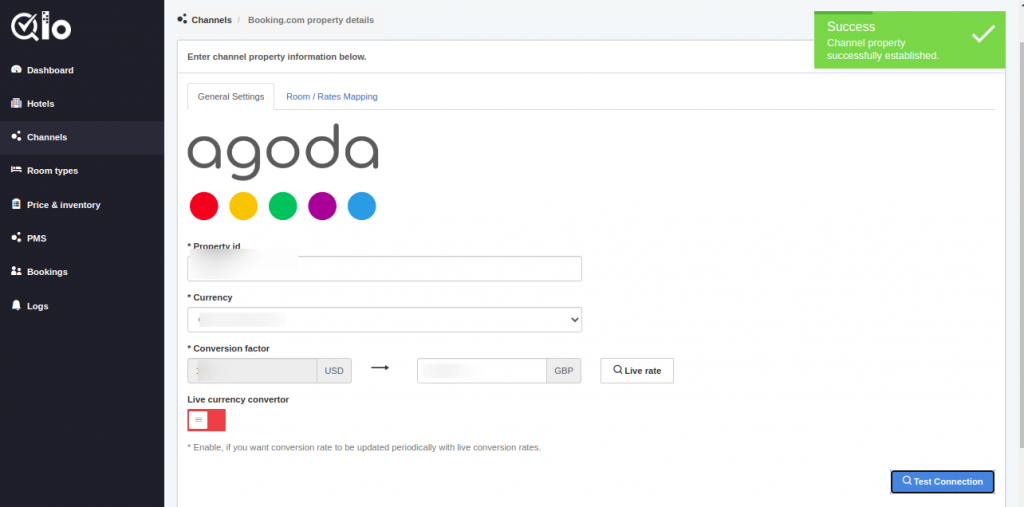
After that, once the connection is tested successfully user can click on Submit button for establishing the channel and proceed with Mapping.
Room/Rates Mapping
Here the mapping is done between the QloApp channel manager room type and the Agoda OTA room type. Also, between the QloApps Channel Manager room rate and Agoda OTA room rate.
For Reference See the below image:
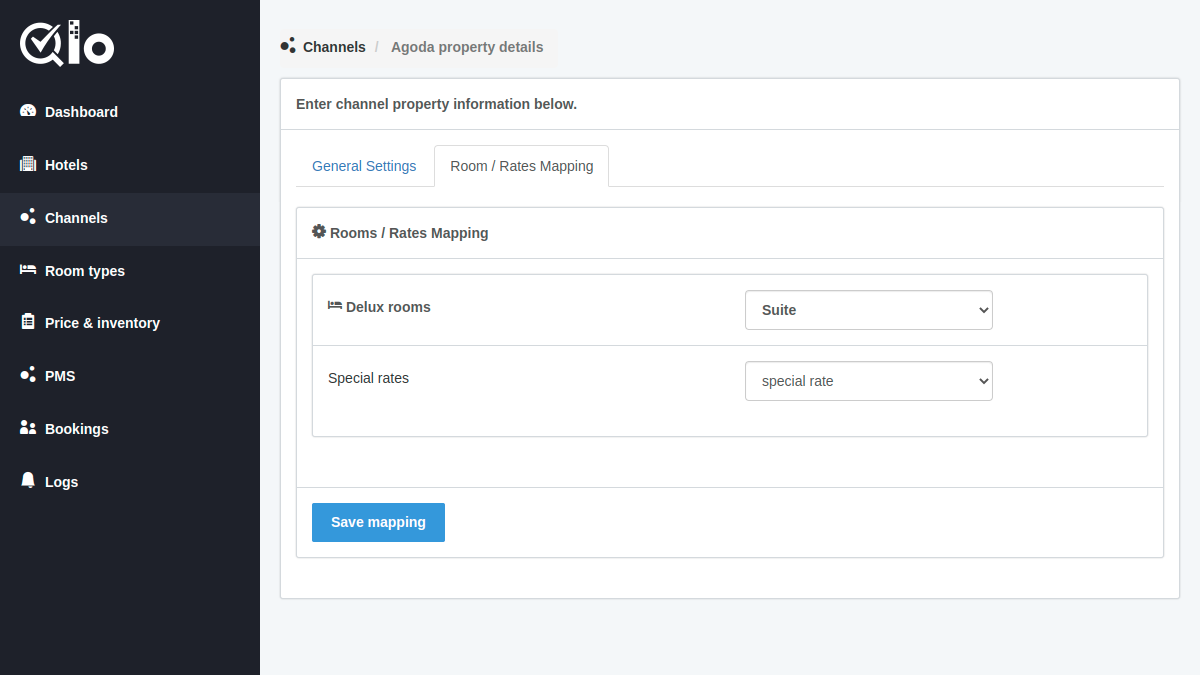
Then click on Save Mapping.
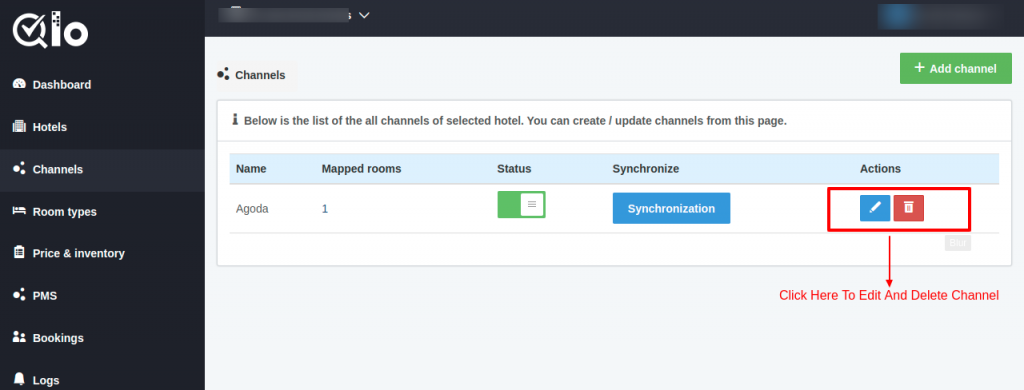
Once the channel is added successfully and mapping is done. The channel can be seen on the channel list page.
From the Actions, column users can edit and delete the channel.
Note: The user can only delete the channel when the Status is Disabled.
Synchronization
The user can synchronize each channel by clicking on the synchronization button.
By clicking on the “synchronization” button inventory, rates, and bookings will get synchronized.
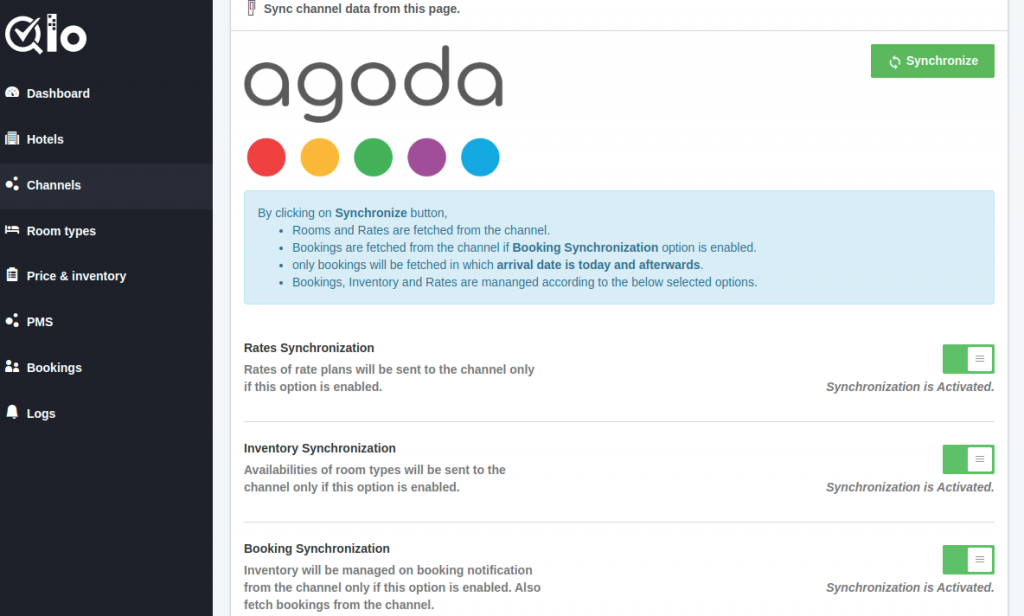
Given processes can be performed by clicking on the Synchronization button.
By clicking on Synchronize button,
- Rooms and Rates are fetching from the channel.
- Bookings are fetched from the channel if the Booking Synchronization option is enabled.
- Only bookings will get fetched in which arrival date is today and afterward.
- Bookings, Inventory, and Rates get managed according to the below-selected options.
Rate Synchronization
Rates of rate plans will be sent to the channel only if this option is enabled.
Inventory Synchronization
Availabilities of room types will be sent to the channel only if this option is enabled.
Booking Synchronization
Inventory will get managed on booking notification from the channel only if this option is enabled. Also, fetch bookings from the channel.
Once you synchronized the channel successfully then you can proceed further with Price And Inventory In the QloApps Channel Manager.
Conclusion
This was all from the process of setting up Agoda for QloApps Channel Manager. I hope I was able to clarify it for you.
If you want to learn more about QloApps Channel Manager then click here.
If you want to learn about the functionality of QloApps then you can visit this link: QLO Reservation System – Free Open-Source Hotel Booking & Reservation System
In case of any query, issue, or requirement please feel free to raise it on QloApps Forum

Be the first to comment.