QloApps Advance Blog is an add-on for QloApps that allows you to publish blogs on your website.
In today’s marketing context, it is touted that Content is king, and it is. Content brings value to your hotel booking website.
Blogs on your website can increase your brand awareness.
When you provide information through your blogs, you open gates to new opportunities. Your blog posts get ranked on search engines, thereby generating more leads.
Content helps you in driving sales by providing your potential guests with what they are looking for. And hence adding credibility to your brand.
And to allow you to publish content on your website, we have made the QloApps Advance blog module. So let us understand the features and working of this module.
Features of the Advance Blog module
For Admin
- Add an unlimited number of posts in multiple languages.
- Admin can display posts either in list view or grid view (in 2 or 3 columns).
- Set the position of the sidebar.
- Set the number of posts displayed per page.
- Show or hide tags on the sidebar and decide how many tags you want to show.
- Show or hide categories on the sidebar and decide how many of them you want to show.
- Enable/disable the display of recent posts on the sidebar and decide which posts you want to show there.
- Display popular posts on the sidebar and decide how many posts you want to show there.
- Admin can enable either the Disqus comment system or the default comment system.
- On enabling the default comment system, the admin can enable/disable the display of the comment system on the posts globally.
- If comments are displaying globally, then the admin can enable/disable the display of the comment system for individual posts.
- Set the publish date for posts.
- Display related products and posts with a post.
- Enable/disable the display of a particular post.
- Add unlimited categories according to need.
- Set the featured image with the category.
- Add a thumbnail image to the blogs.
- Describe the category.
- Enable/disable the category anytime.
- Set one category as the default category.
- Edit/delete category according to need.
- If the admin wants to delete the associated category, then the admin will get a notification.
- Provide group permission to the categories.
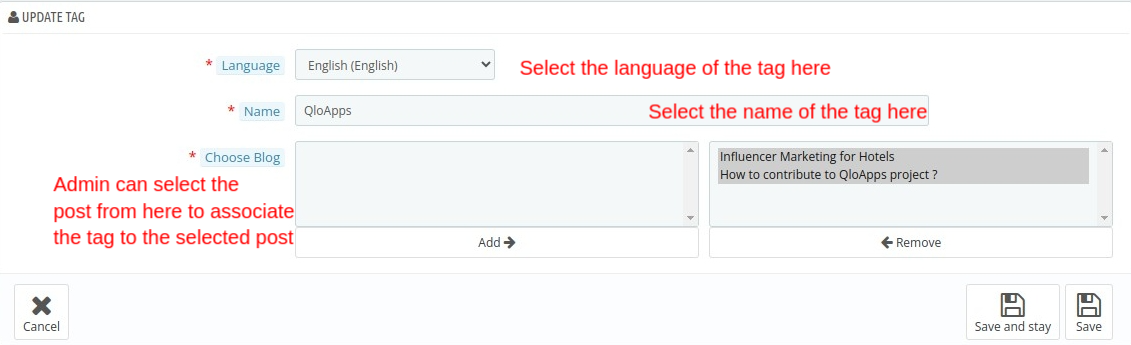
- Add an unlimited number of tags.
- Assign the new tag to the number of posts while creating a new tag.
- Add tags in any language.
- Manage the comments given by the default comment system in the “manage comments” tab.
- Manage the comments given by the Disqus system in your Disqus account.
Features for Users
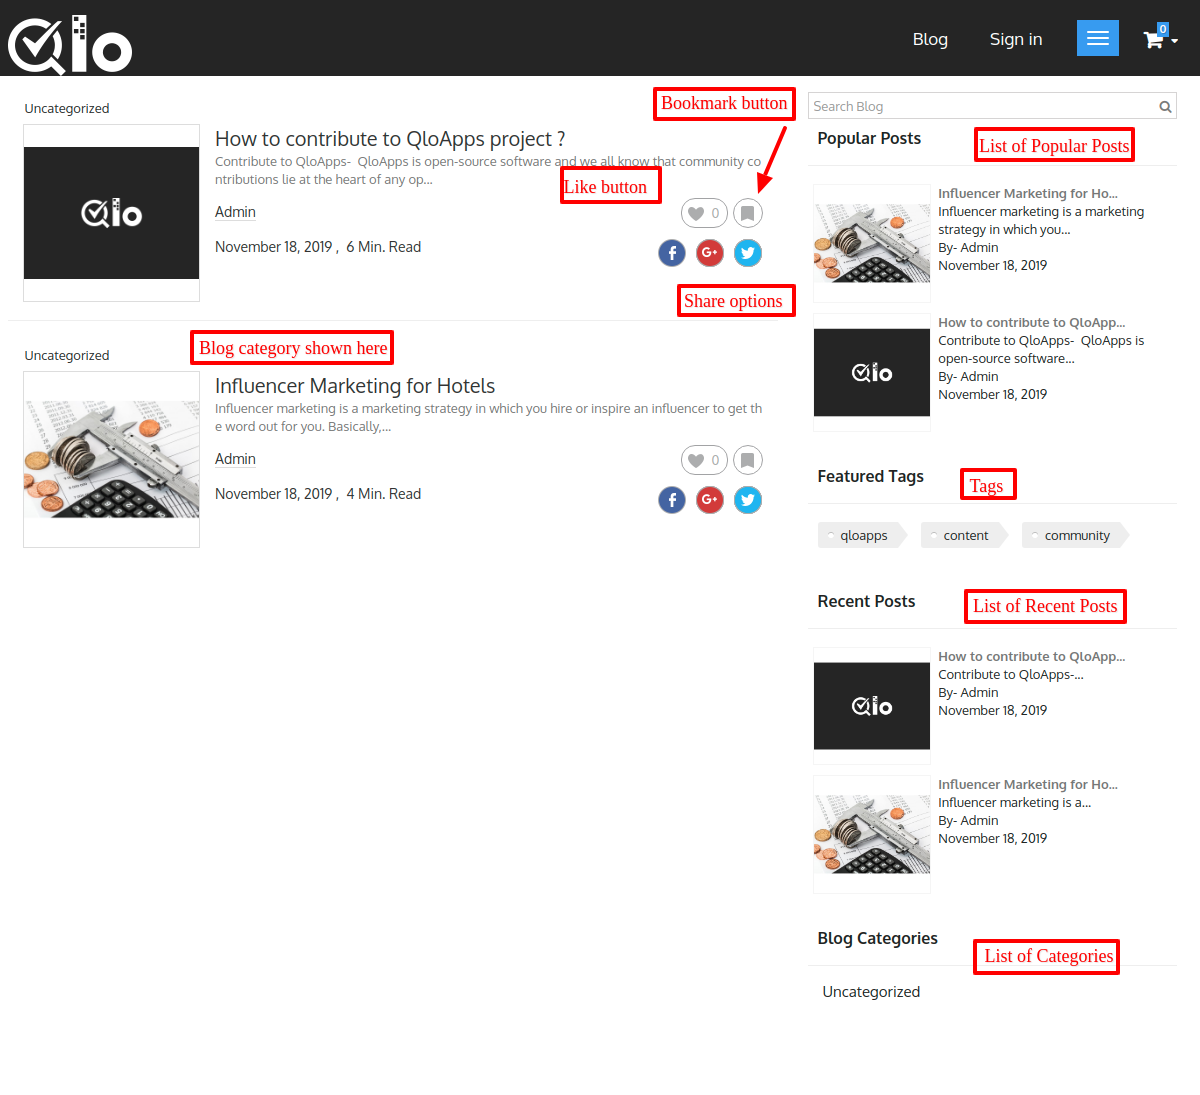
- The buyer can view the categories, tags, recent posts, and popular posts on the sidebar.
- Users can bookmark blogs.
- Readers can mark the blogs as a favorite.
- Share the blogs via Twitter, Facebook, & google.
- Filter the posts according to language, categories, and tags
- Comment & give reviews through emojis.
- Blog reading time is also displayed on the blogs.
- If the reader filters the posts according to the language, then the reader will see the list of posts written in the selected language and the default language.
Installation Of QloApps Advanced Blog
The installation of any module is very simple in QloApps.
- Go to the Module and Services tab
- Click on Add New Module
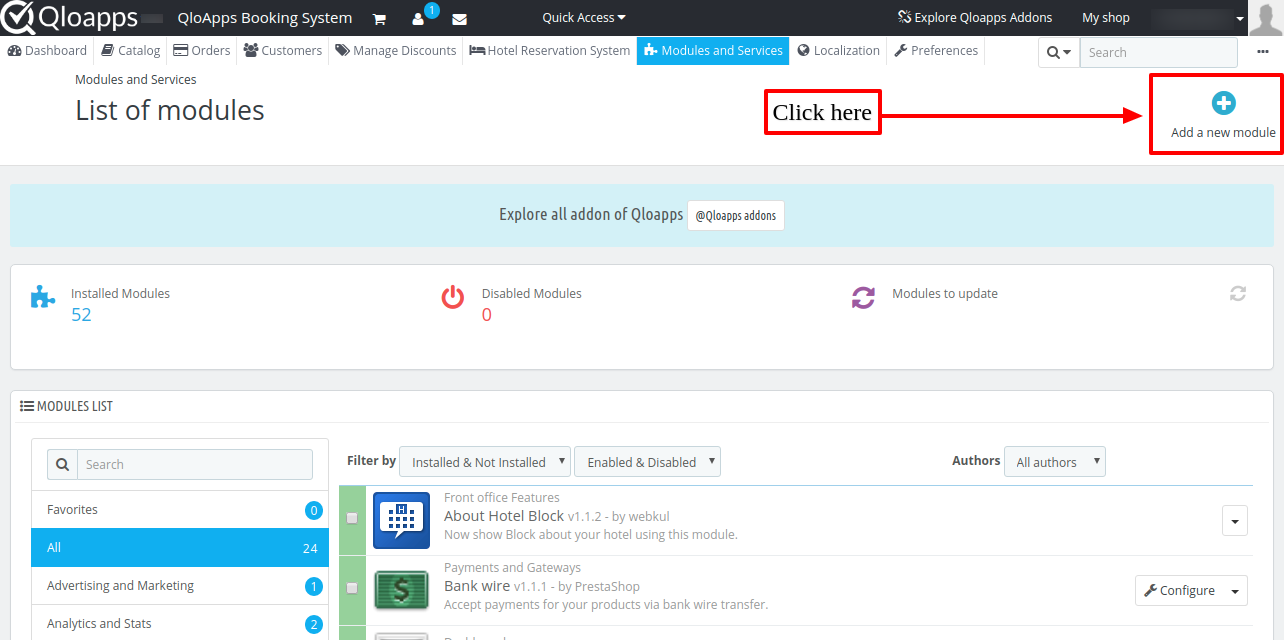
- Now upload the Zip file of Module and click on Install
Now You Have Installed The Module. So Let Us Check The Module Configuration.

Now You Have Installed The Module. So Let Us Check The Module Configuration.
Configuration Of QloApps Advance Blog Module
After the module installation, a menu will be created in Hotel Reservation–> Settings for the configurations.

Also, a menu will be created in the Menu bar from where you can go to the configuration page.
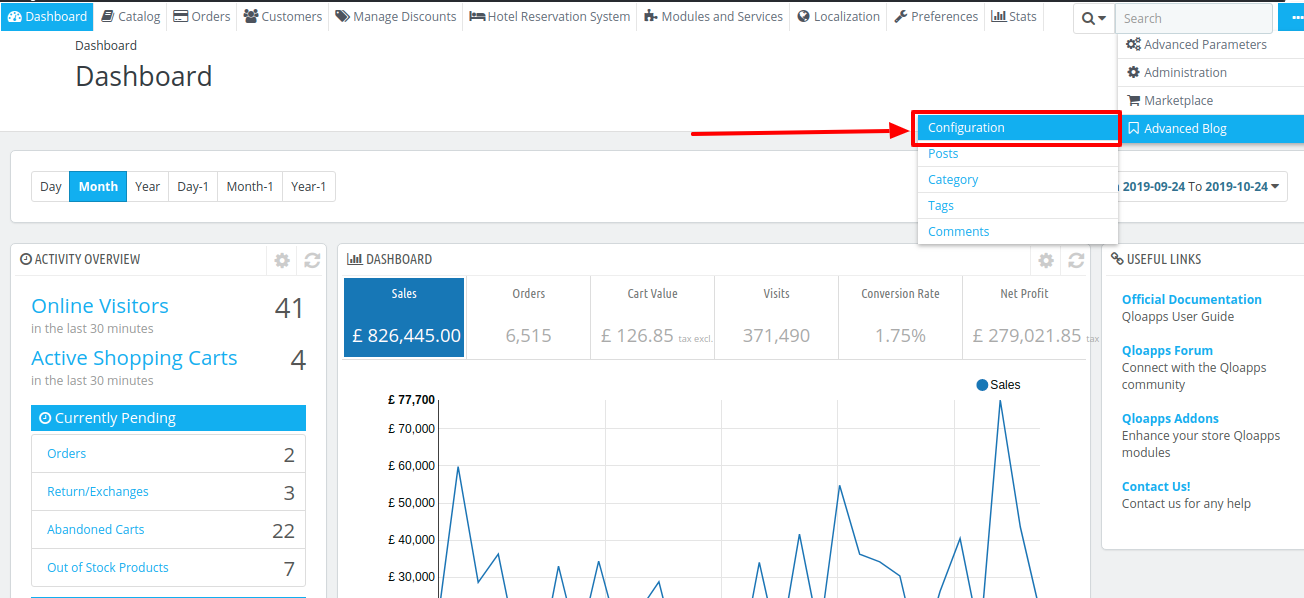
Once you click on Configurations you will land on Configuration Page.
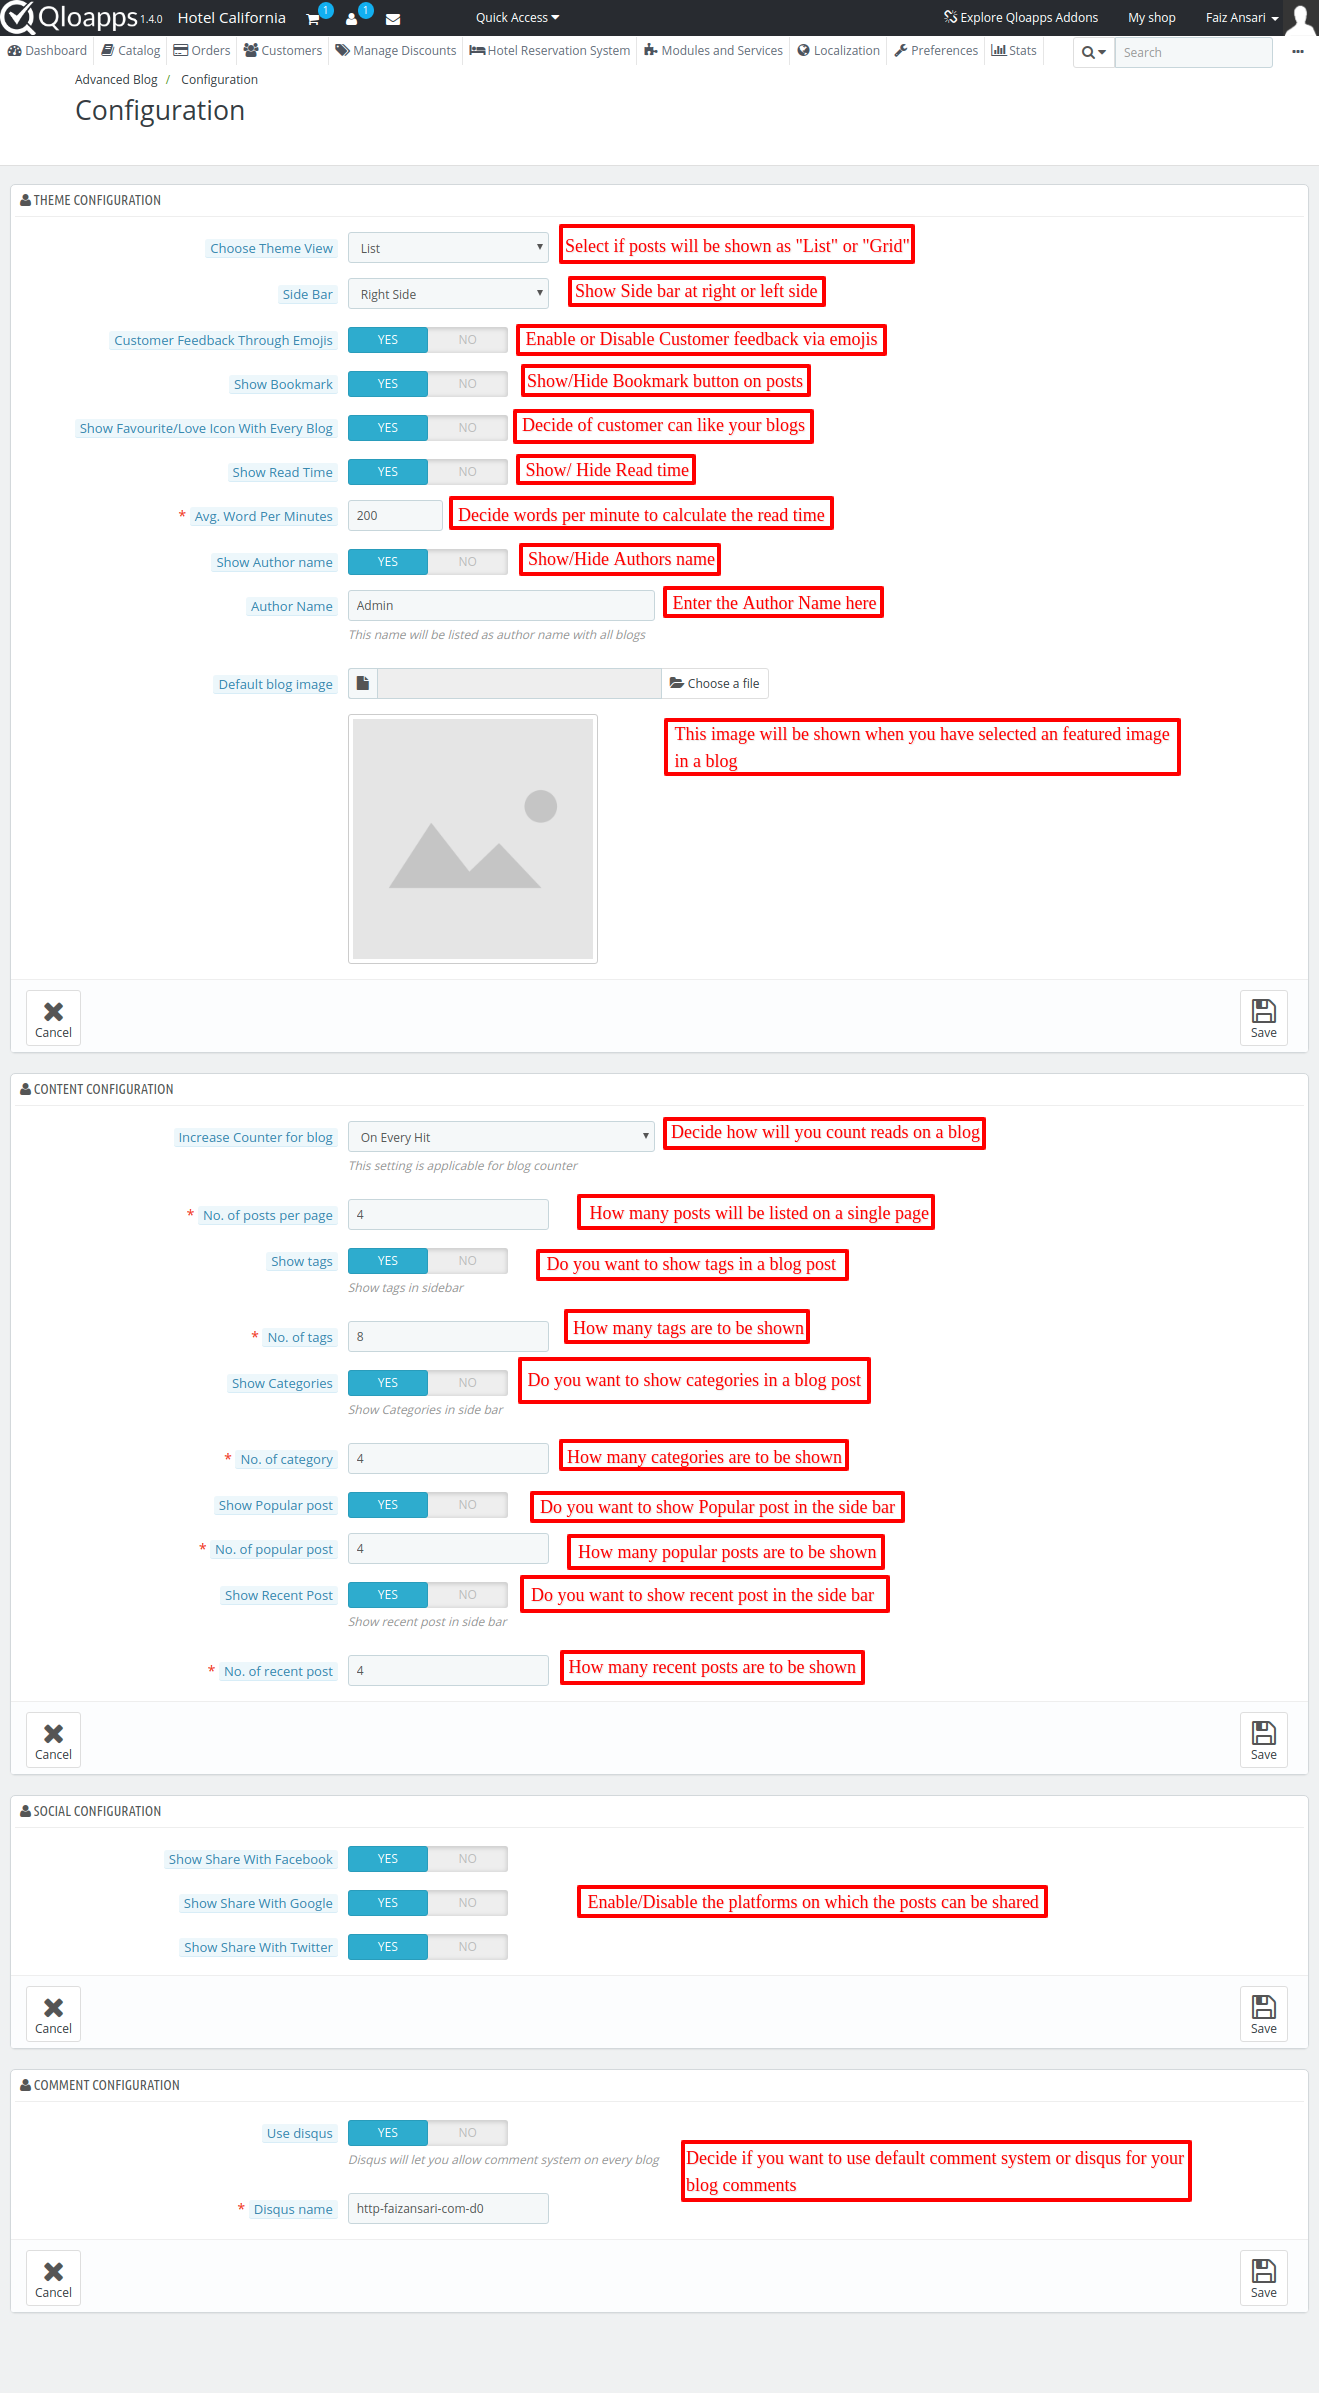
Note:- If admin disables the Disqus forum, you need to enable the comments to display them on the blog.
In Grid view select to show posts in 2 or 3 columns.

In this way, the module will be configured successfully.
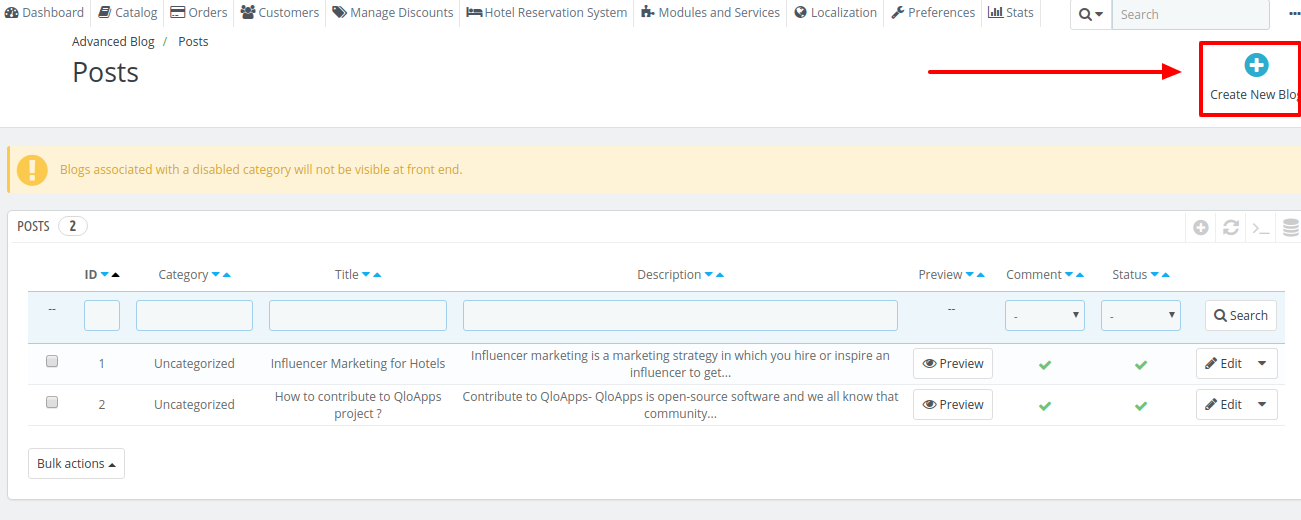
Write a Post
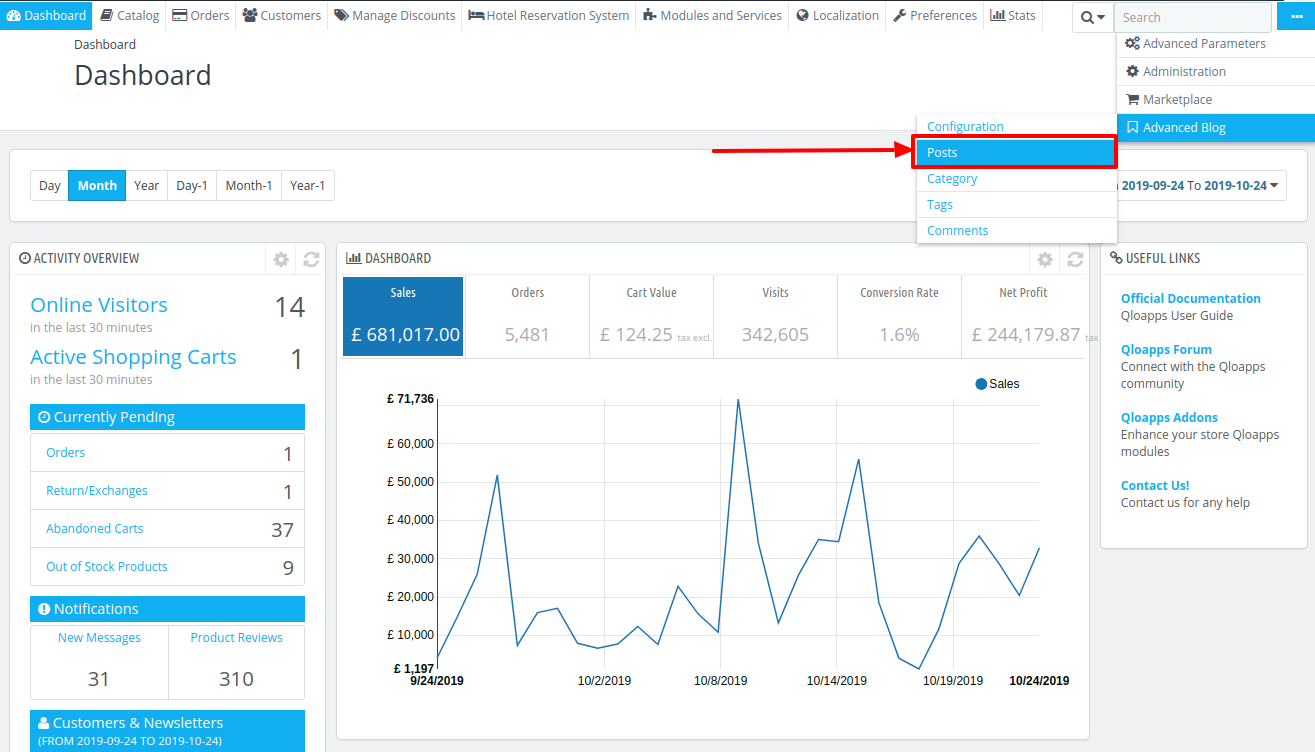
To create a blog select Posts from the Advance blog dropdown.
Then Click on Add New blog to write a Blog.
Now you will have an interface to right the blog.
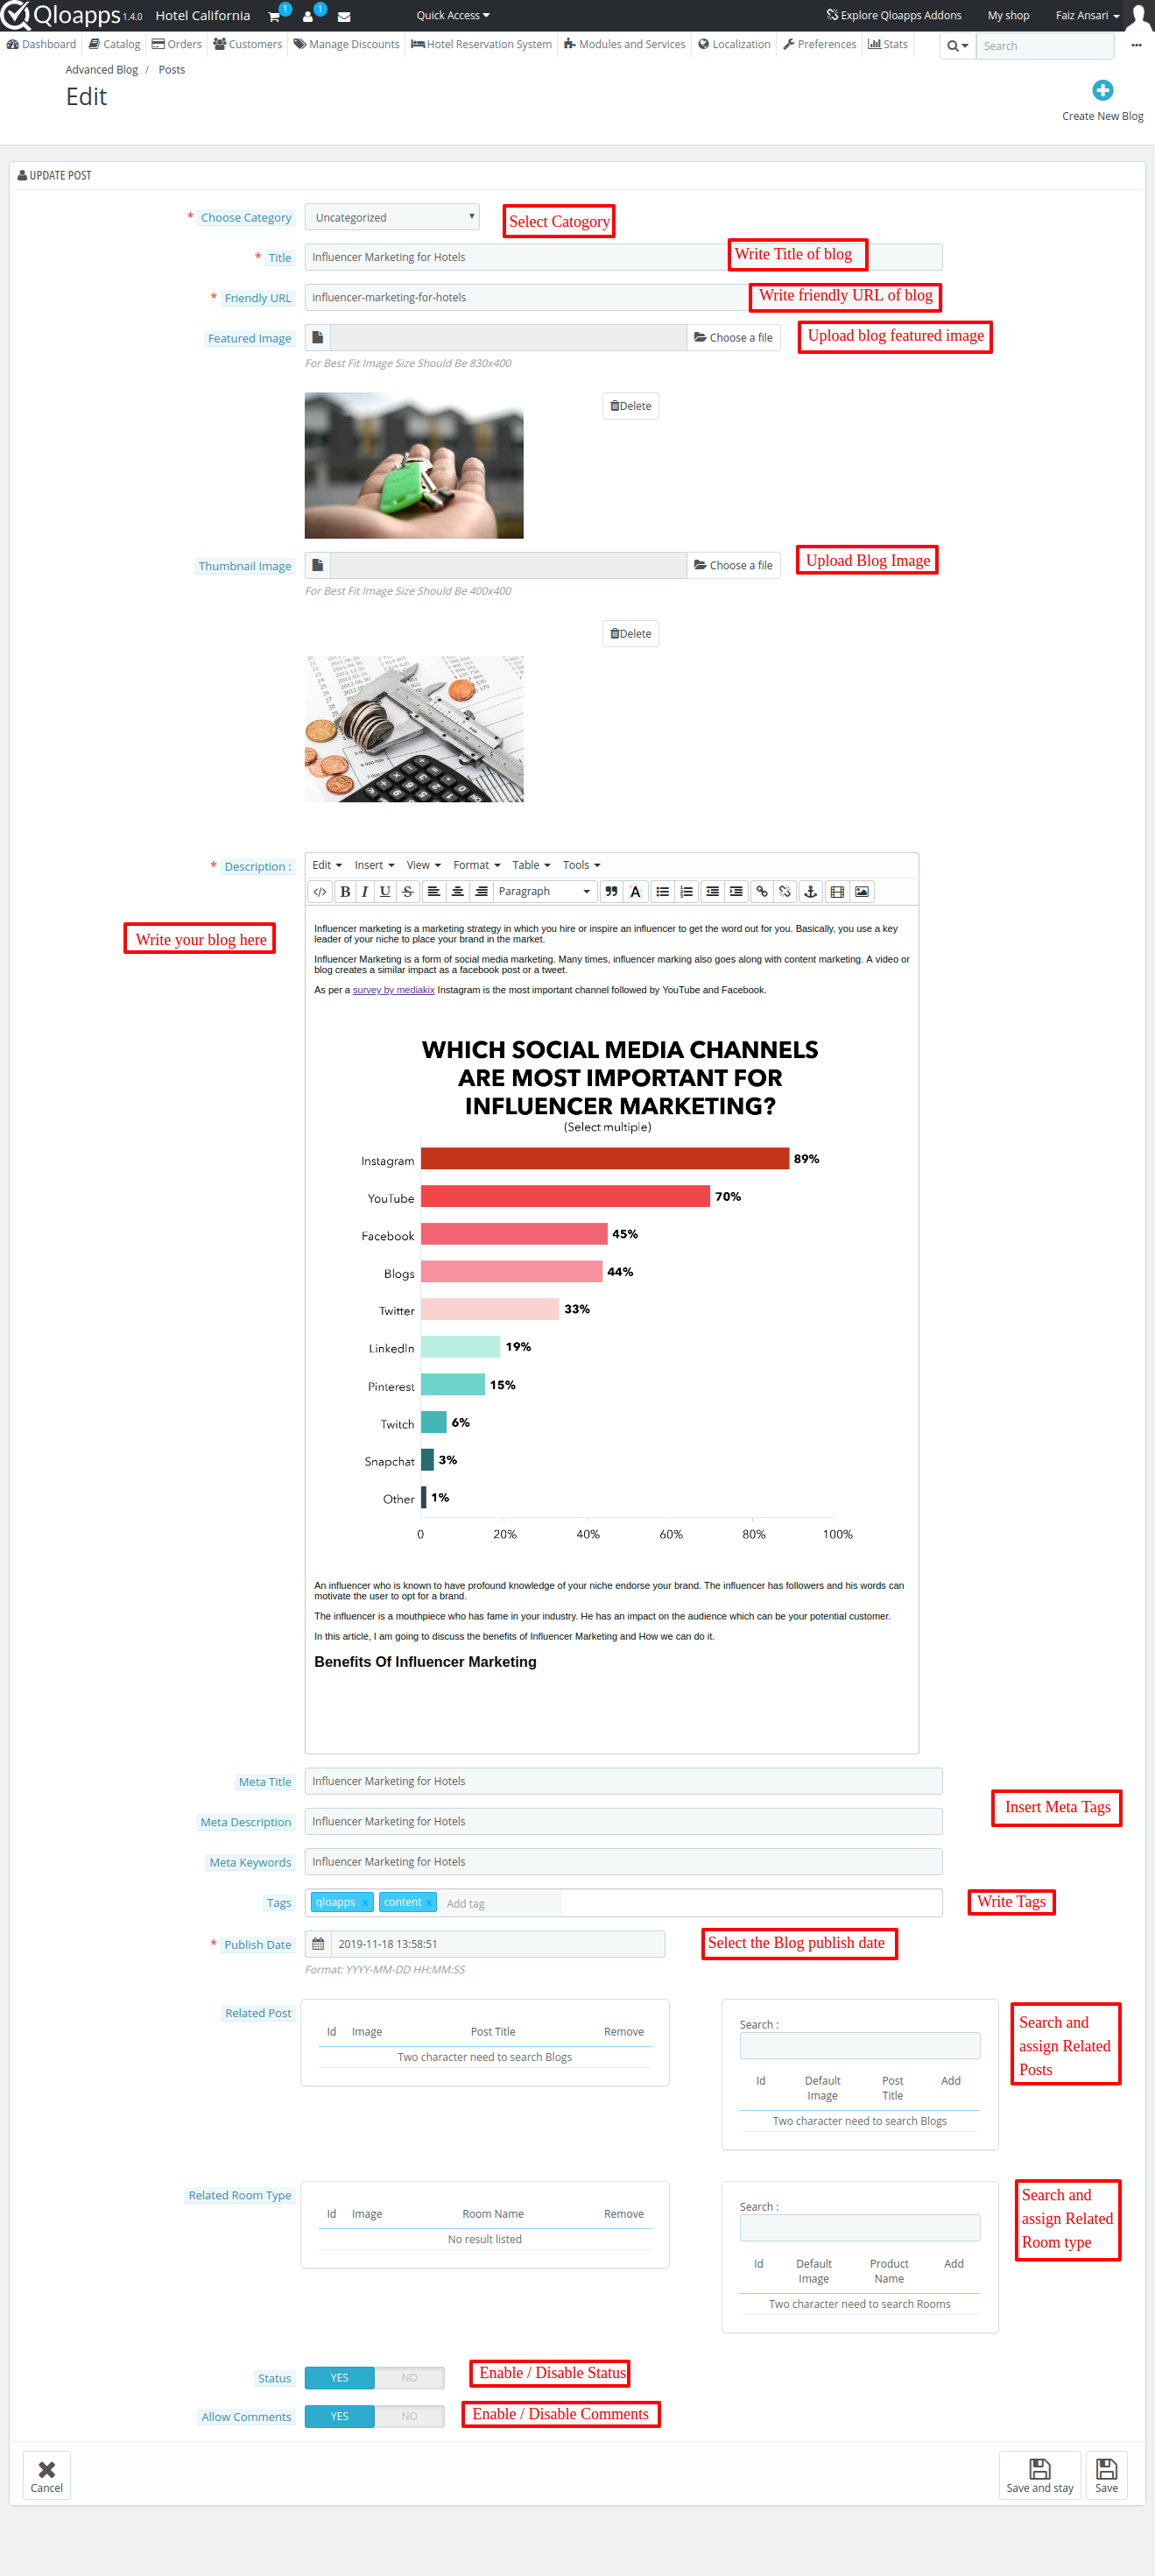
Now click on Save to post the blog.
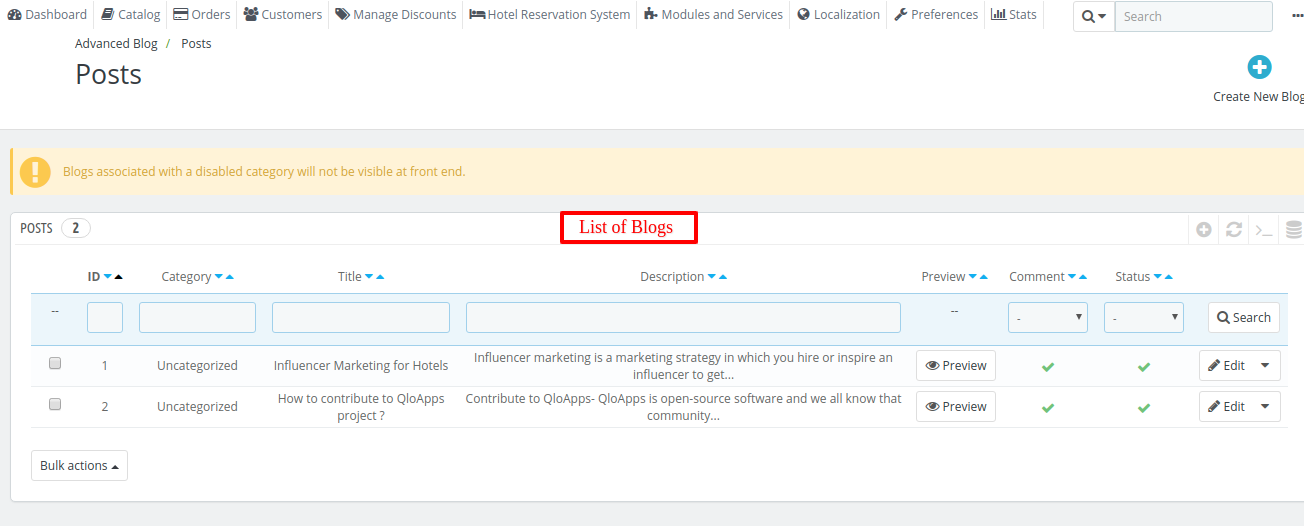
You also have the blogs listed in the Post section where you can delete, preview and enable or disable the blog.
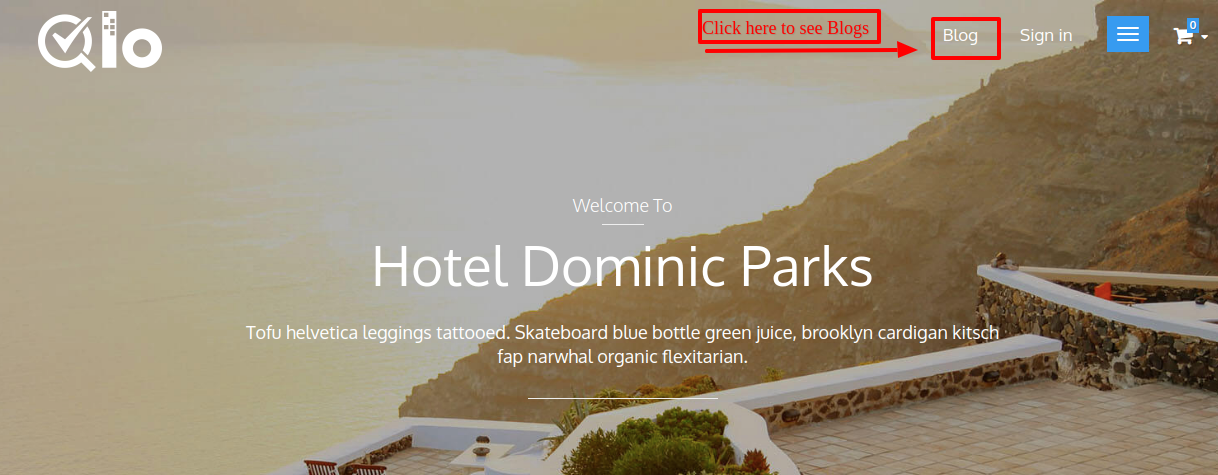
Frontend View
Manage Categories
To add a category in the post admin will create a category in the “Manage Category” tab first.


 Note:- Admin can not delete all the categories, and cannot disable all the categories. One category has to be set as the default category.
The default category will get associated with all those posts whose category has been disabled or deleted from the “manage categories” list.
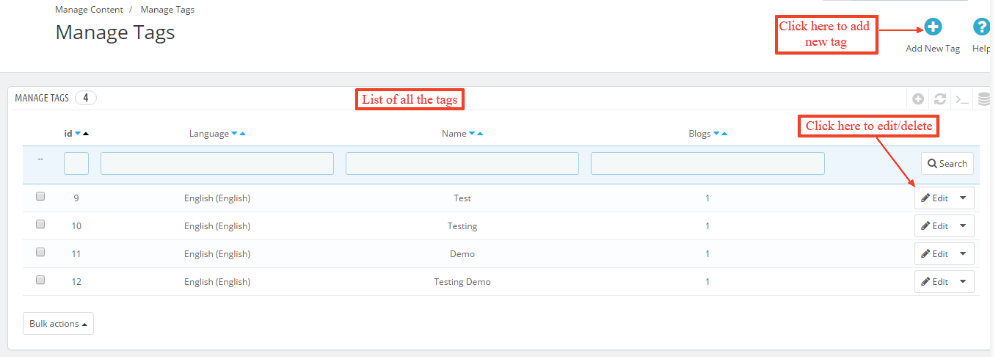
Manage Tags
Admin can add the tags from the “manage tags” and assign the tag to different posts altogether.
All the tags added to any posts will also be displayed in the tag list.
If the customer clicks on any tag at the front-end, then the customer can view only the posts which have been added to the selected tag.
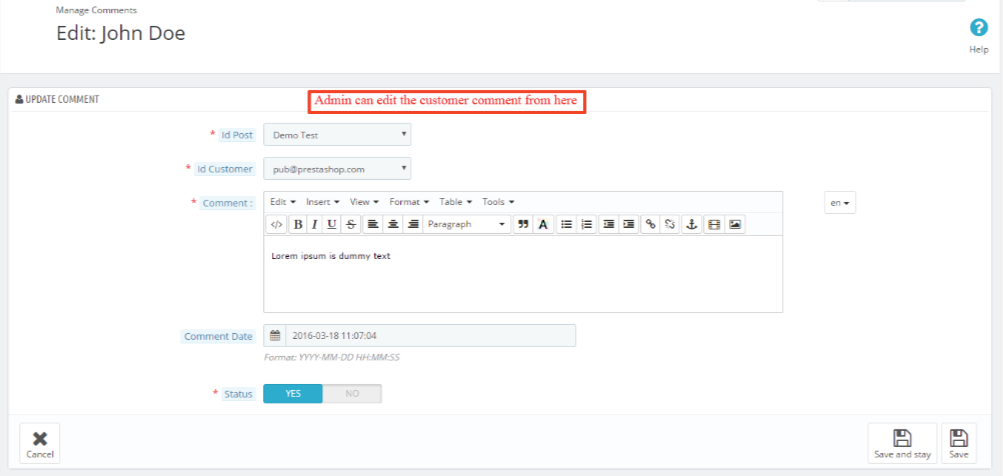
Manage Comment
Now, when the customer clicks on any post, the customer can read the whole post and can also comment on the post.
There are two types of comment system which has been integrated into the module. They have to be enabled accordingly by admin from the module configuration.
1) Disqus system- This is the comment system which has been integrated into the Blog module, so that customer can give comment through Disqus.
To do that the customer has to create an account on Disqus.

Note:- The comment provided by the “Disqus system” on the blogs is managed through “Disqus account”
2) Default comment system- This system has been integrated into the module itself. The customer does not have to create an account. Customers can provide their name, email and comment directly.
Now, admin can view the list of comments given by the customer in the “manage comment” tab. The default comment system displays a list of all comments for the admin to view.

Now once anyone submits a comment you will have to approve it from the backend.

Conclusion
This was all from the QloApps Advance Blog Module. I hope I was able to clarify the functioning of the module to you.
If you want to learn about the functionality of QloApps, then you can visit this link: QLO Reservation System – Free Open-Source Hotel Booking & Reservation System
In case of any query, issue, or requirement, please feel free to raise it on QloApps Forum
Current Product Version: V 4.0.0
Supported Framework Version: 1.7.x