Accept secure, real-time payments through WePay, a Chase-backed payment gateway trusted by marketplaces and SaaS platforms.
With QloApps WePay Gateway, guests can securely pay for hotel bookings via credit card or bank, ensuring a smooth and reliable checkout on your property website.
⚠️ Important Note:
- WePay is available only to merchants registered in the United States and Canada.
- If you’re operating in Canada, you must create a separate Canadian WePay merchant account. U.S. accounts cannot be used for Canadian operations.
While your guests may be international, your business must be based in the U.S. or Canada to use WePay.
🔑 Key Features
💳 Accept Credit Card Payments
Enable secure payments through major credit cards, including Visa, Mastercard, American Express, and Discover.
🔒 PCI-Compliant and Secure
All payments are processed through encrypted channels with WePay’s PCI-DSS compliant infrastructure and Chase’s fraud protection.
🔁 Full and Partial Refunds
Easily issue refunds (full or partial) directly from the QloApps admin panel. Refunds must be made within 60 days of the original transaction.
📊 Transaction Management
A dedicated WePay transactions section in the QloApps back office allows you to track, search, and manage all payments.
🧪 Test and Live Modes
Switch between sandbox (test) and live environments to validate your integration before going live.
🌍 Multi-Currency Note
WePay only supports payments in USD (U.S. Dollar) and CAD (Canadian Dollar). Payments in other currencies are not accepted.
🛡️ Risk & Compliance
WePay automatically handles KYC, fraud checks, and compliance requirements to keep your business protected
How to install QloApps WePay Payment Gateway
The installation of any module is very simple in QloApps.
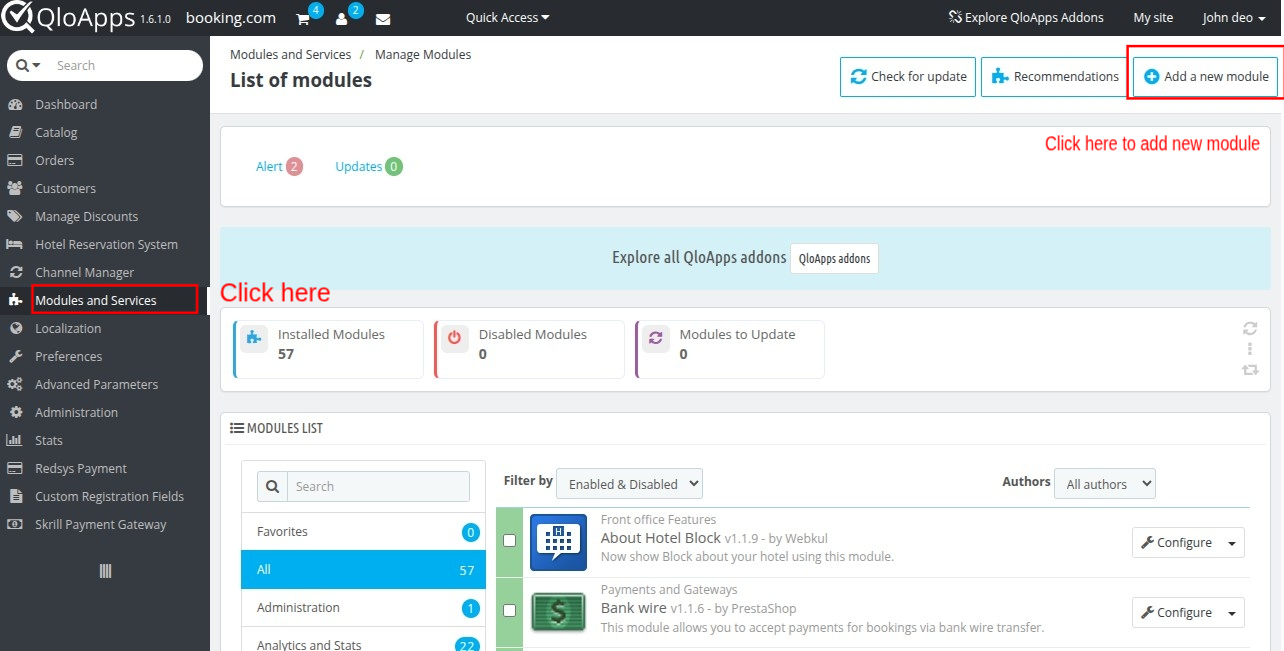
- Go to the Module and Services tab
- Click on Add New Module
- Click on Choose a file and upload the zip file of the module.
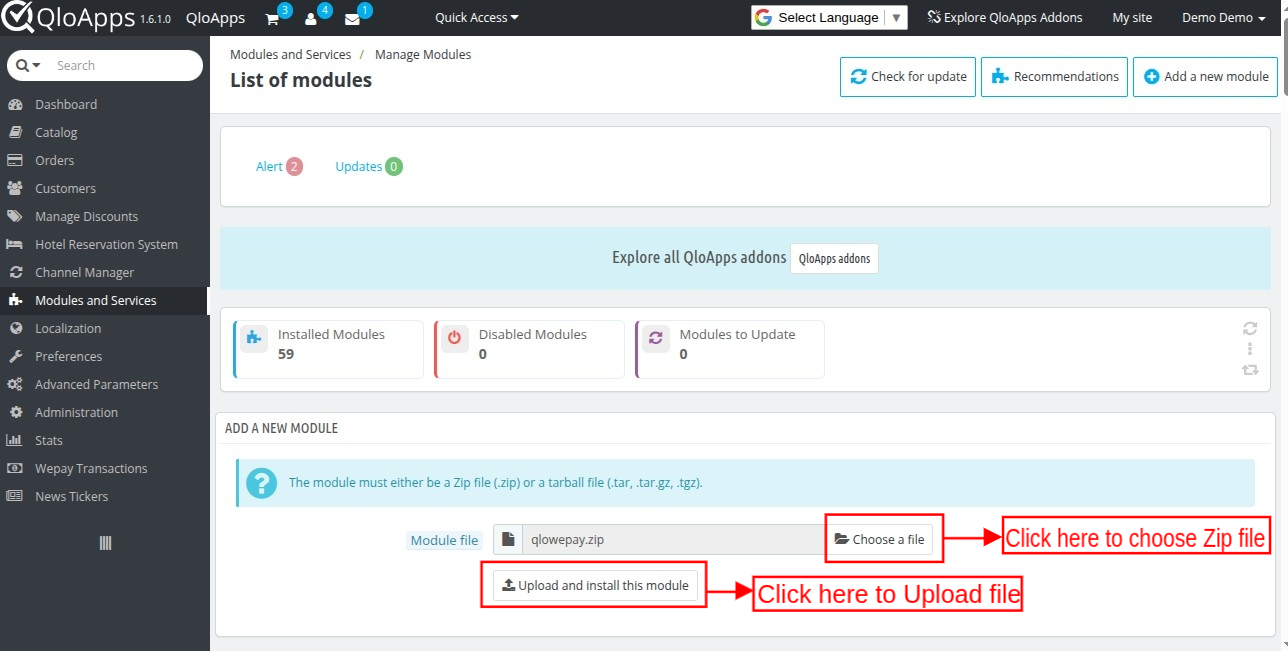
- After uploading the ZIP file the module will start installing automatically.
How to configure QloApps WePay Payment Gateway
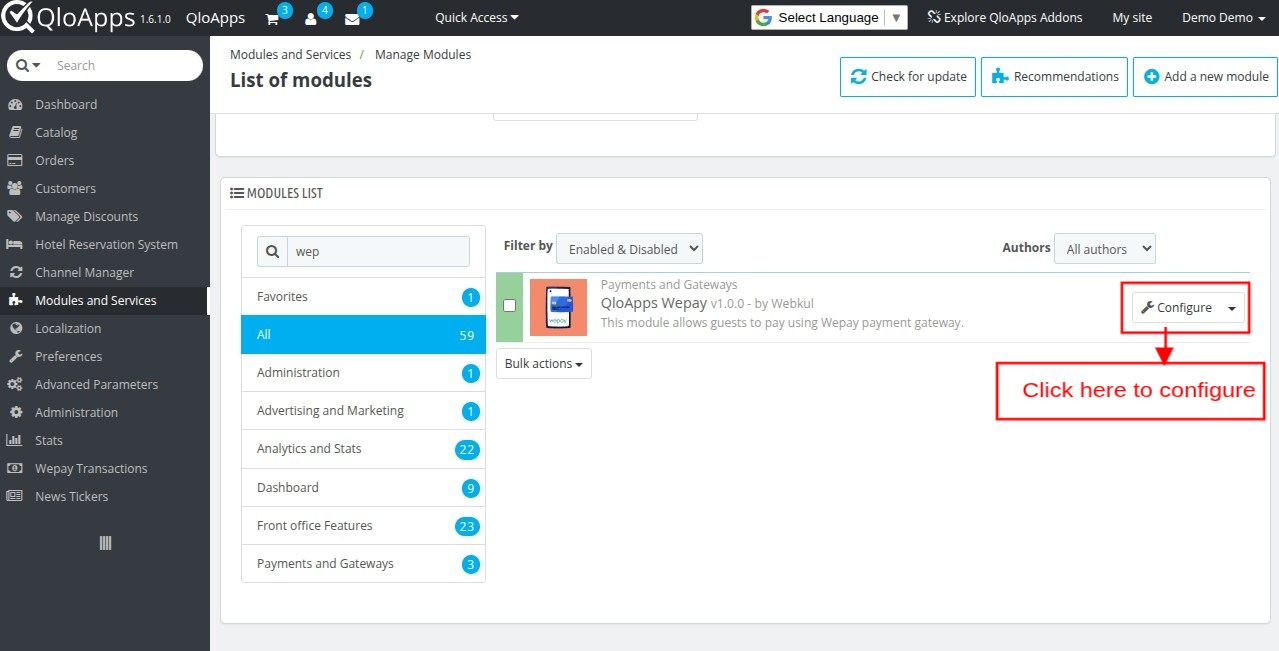
- Log in to QloApps as Admin, go to the Module and Services tab, and search for your module.
- Then click on configure.
Here, in the WePay payment configuration block, the admin needs to enter the following information:
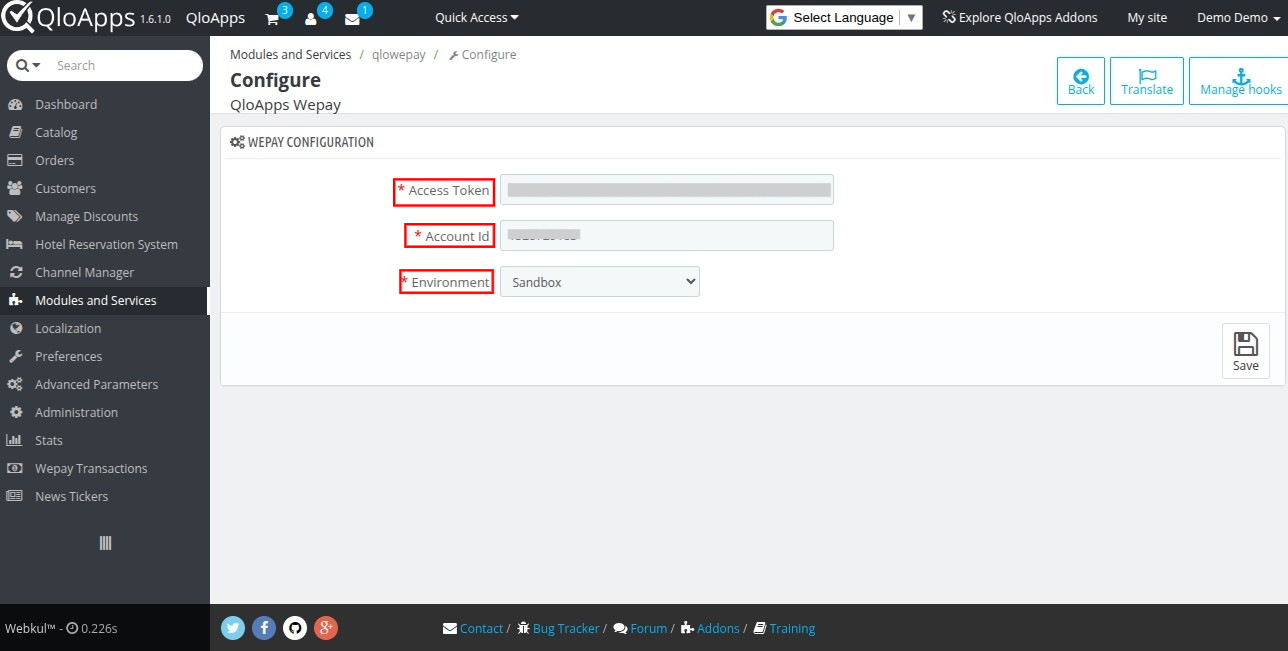
Step 1: Select the Environment
The Admin needs first to select the appropriate environment for the WePay Payment Gateway configuration.
Environment Dropdown
This dropdown allows you to choose between two modes:
- Sandbox (Testing Mode):
This is a testing environment used to simulate transactions without using real money. It is ideal for development, debugging, and integration testing. - Production (Live Mode):
This is the live environment used for processing real customer payments. Once your setup is tested and verified in Sandbox, switch to Production for actual transactions.
These environment options help you ensure a smooth and secure integration of the WePay Payment Gateway in QloApps.
Step 2: Enter the details
These are the required fields for configuring the WePay Payment Gateway:
NOTE: 👉 To generate the required credentials (Access Token and Account ID), please refer to the official WePay documentation: https://developer.wepay.com/
🔐 Access Token
The Access Token is a unique and secure credential generated from your WePay developer account.
It acts as an authentication key that allows QloApps to connect and communicate with your WePay merchant account.
Without this token, transactions cannot be initiated or managed through the module. Ensure it is kept confidential and only used in the backend settings.
🆔 Account ID
The Account ID represents your specific WePay merchant account where all payments will be processed and deposited.
This ID links QloApps to your live or sandbox WePay account, ensuring that booking payments are routed to the correct destination.
Make sure to enter the exact Account ID provided by WePay, especially if you have different IDs for U.S. and Canadian accounts.
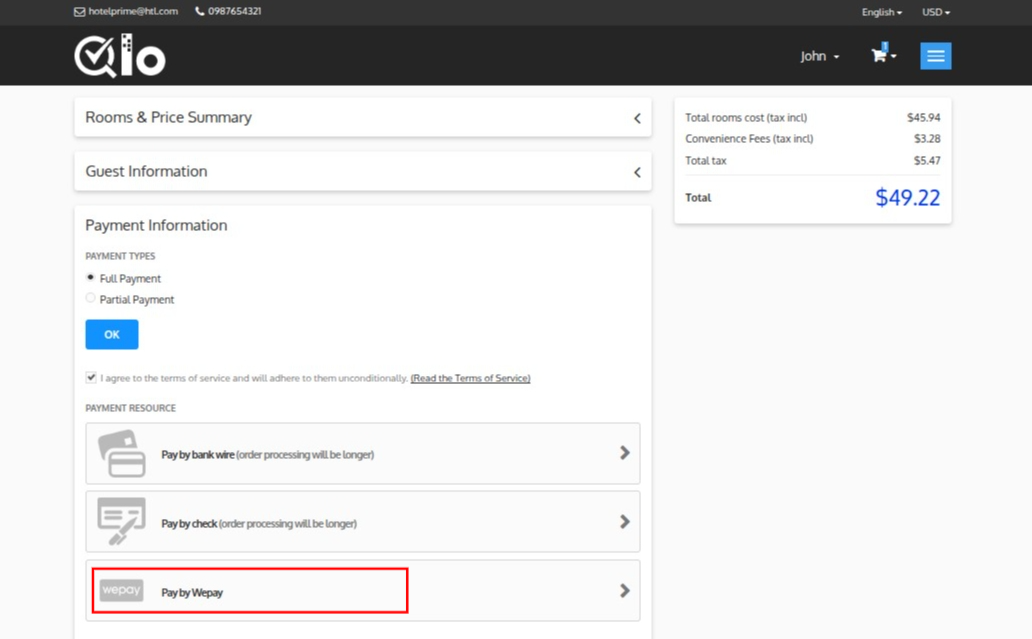
How the QloApps WePay Payment Gateway Works on the Frontend
When a guest books a room and reaches the checkout page, they will see the WePay payment gateway option available to them. They can choose the Pay by WePay option for their payments.
- After you choose Pay by WePay, the system takes you to the official WePay payment page.
- On the WePay site, you’ll see your payment info and different methods to make payment, like by Card or Pay with a bank. Choose any of them.
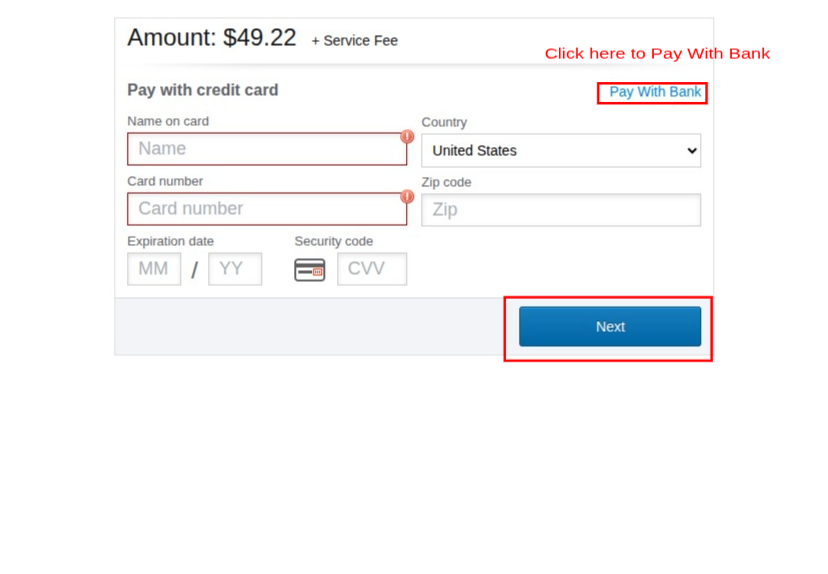
- After choosing your Preferred payment method, enter your details and click on Next to complete the payment.
After clicking next, you’ll be redirected to the payment confirmation page.
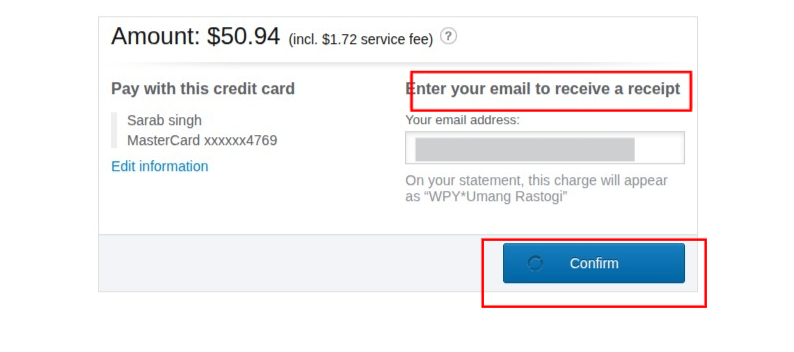
After entering your email click to confirm.
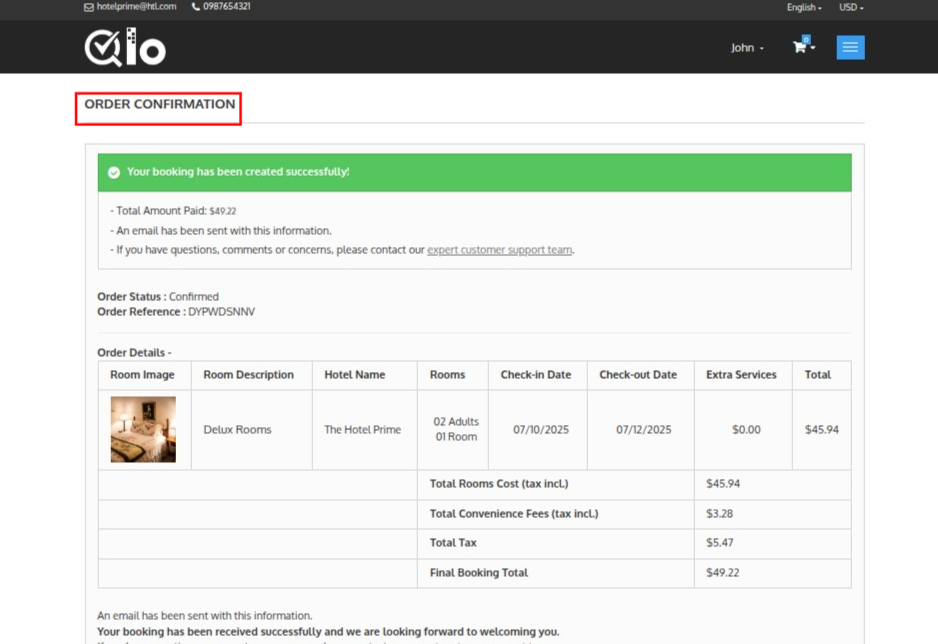
- The system lists each transaction with the following key details (highlighted in red):
How the QloApps WePay Payment Gateway Works on the Backend
Viewing WePay Payment Transactions in QloApps
- Log in to the QloApps Admin Panel
- Click on ‘WePay Transactions’
- A table with all WePay transactions. Each column provides detailed information and comes with filter options to help you quickly find specific records:
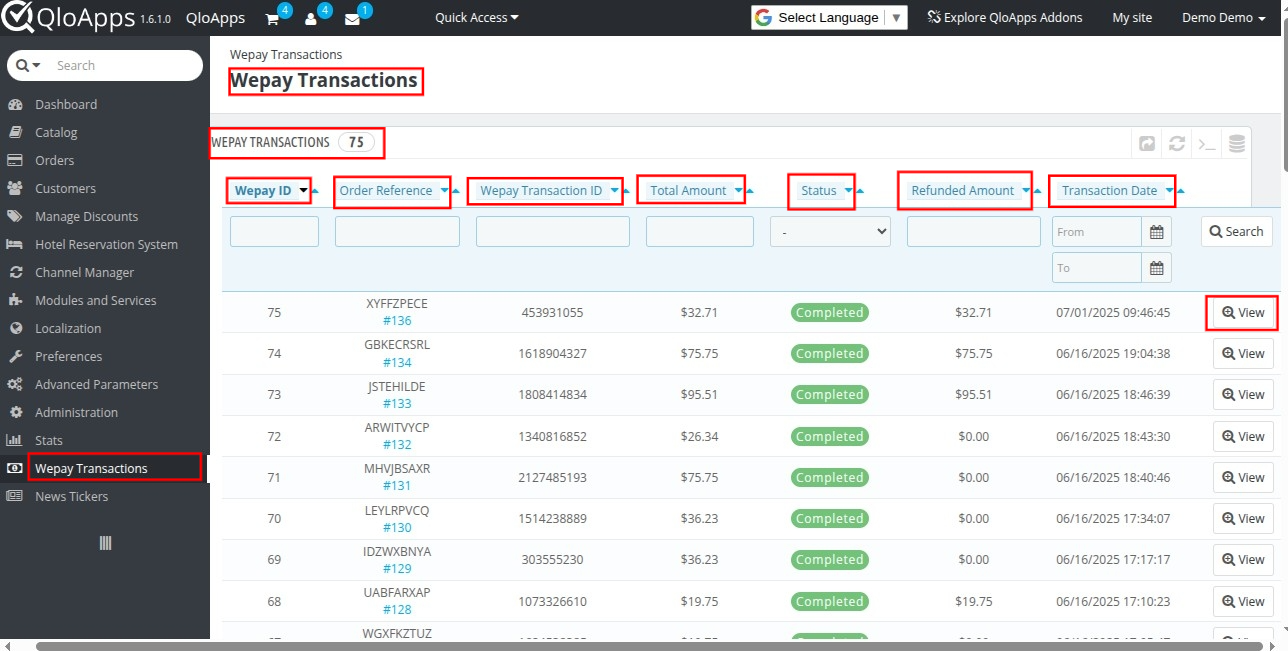
This section provides a detailed overview of all payment transactions processed through WePay on your hotel booking platform.
The system lists each transaction with the following key details (highlighted in red):
- WePay ID: A unique identifier assigned to each transaction entry in QloApps.
- Order Reference: Links the transaction to the specific hotel booking or order placed by the customer.
- WePay Transaction ID: The transaction identifier generated by WePay for reference and tracking.
- Total Amount: The complete payment amount received from the customer.
- Status: Shows the current payment status of the transaction (e.g., Completed).
- Refunded Amount: Displays the amount refunded, if any, to the customer for that transaction.
- Transaction Date: The exact date and time the transaction occurred.
- View Button: Allows admin to view full transaction details, including breakdown, status, and refund actions.
When you click on View on the Payment Transaction page, the system redirects you to the Transaction Details page.
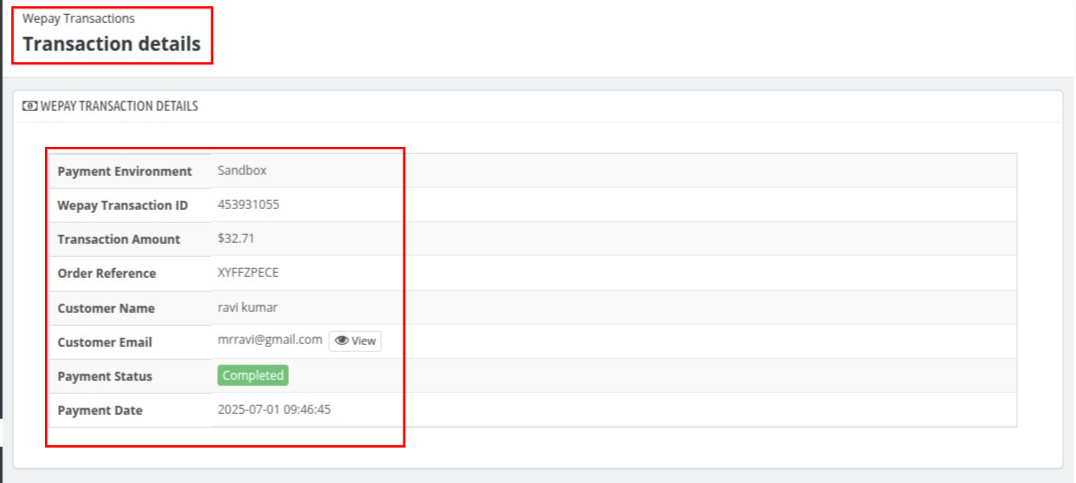
Here are all the details related to the transaction.
How to Refund Transactions Made via the WePay Payment Gateway in QloApps

Check the Refund Transaction Section
At the top, you’ll see the total refundable amount displayed.
Select Refund Type
Use the Refund Type dropdown to choose between:
- Full Refund – Refunds the entire transaction amount.
- Partial Refund – Refunds only a part of the total amount.
Enter Refund Remark (Optional)
You can write a remark or reason for the refund in the Refund Remark field.
Click “Process Refund”
Once you fill in everything, click on the “Process Refund” button to execute the refund.
Track Refund in the Refund List
After processing, the refund will appear in the Refund List below with:

- Refund ID
- Refunded Amount
- Refund Type
- Status
- Reason
- Date
Conclusion
That was all about “QloApps Wepay payment gateway”.
Above all, if you want to learn about the functionality of QloApps, then you can visit this link: QloApps Reservation System.
If you have any questions or face issues, don’t hesitate to post them on the QloApps Forum.
Current Product Version – V 4.0.0
Supported Framework Version – QloApps 1.6.x And 1.7.x

Be the first to comment.