At QloApps, we understand the importance of providing a seamless and secure payment experience for your hotel booking website.
That’s why we’re excited to introduce the QloApps Square Payment Gateway, a robust and reliable solution that simplifies the checkout process for your customers.
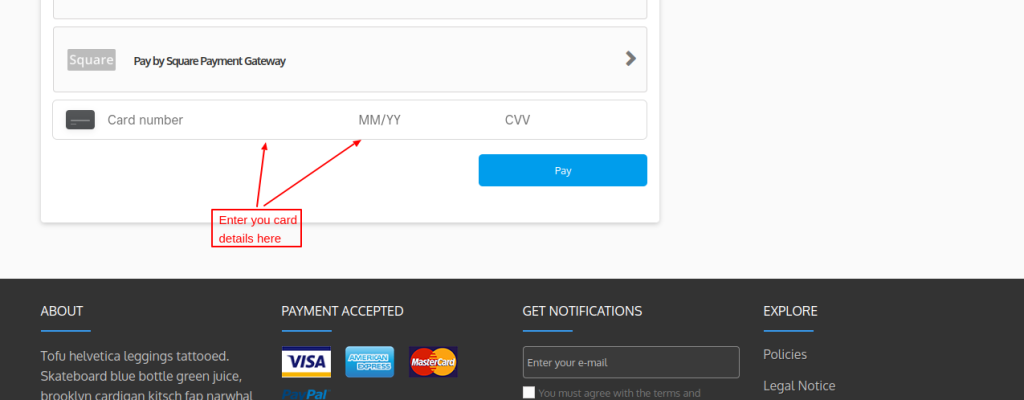
Unveil the Game-Changing Features of QloApps Square Payment Gateway for Seamless Transactions
- Multiple Payment Options: Accept payments via credit cards and debit cards
- Card Support: Supports major cards including Visa, Mastercard, American Express, Discover, JCB, and UnionPay International.
- Postal Code Requirement: Requires postal code for cards issued in the US, Canada, Australia, Japan, the United Kingdom, the Republic of Ireland, France and Spain.
- Refund Management: Effortlessly handle both partial and full refunds for transactions.
Step-by-Step Guide to Installing the QloApps Square Payment Gateway for Hassle-Free Payments
Installing the QloApps Square Payment Gateway is a straightforward process. Here’s a step-by-step guide:
- Go to the “Module and Services” tab.
- Click on “Add New Module”.
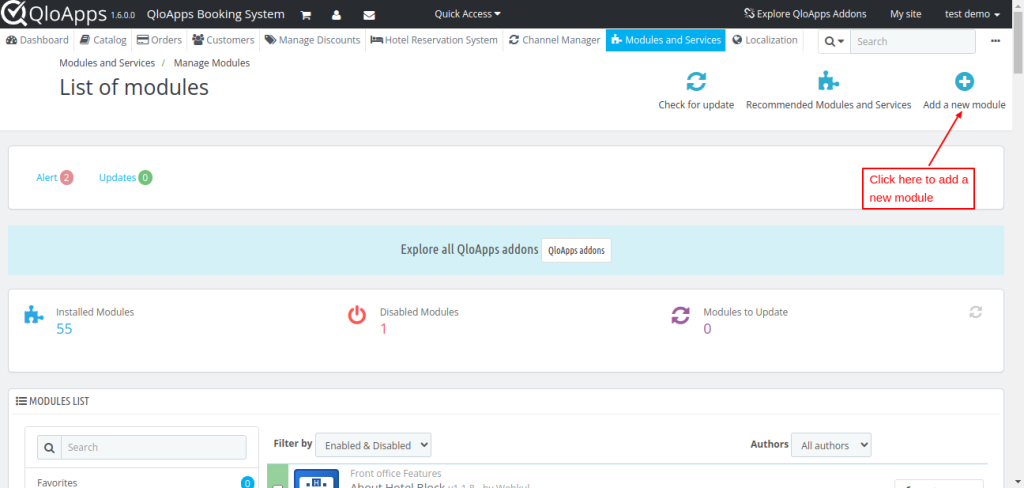
- Click on “Choose a file” and upload the zip file of the module.

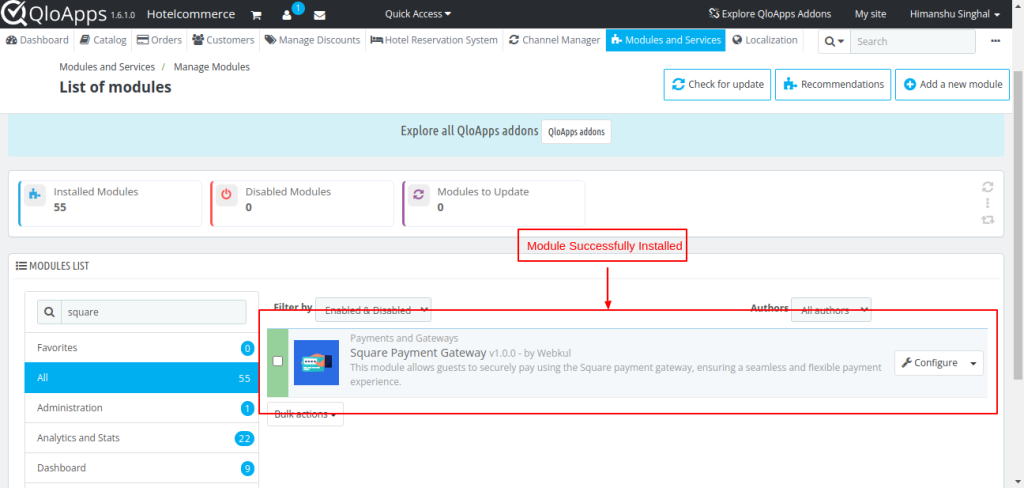
- Once the installation is finished, it will confirm that it was successful, followed by a display of the installed module below.
Simplify Payments: How To Configure QloApps Square Payment Gateway
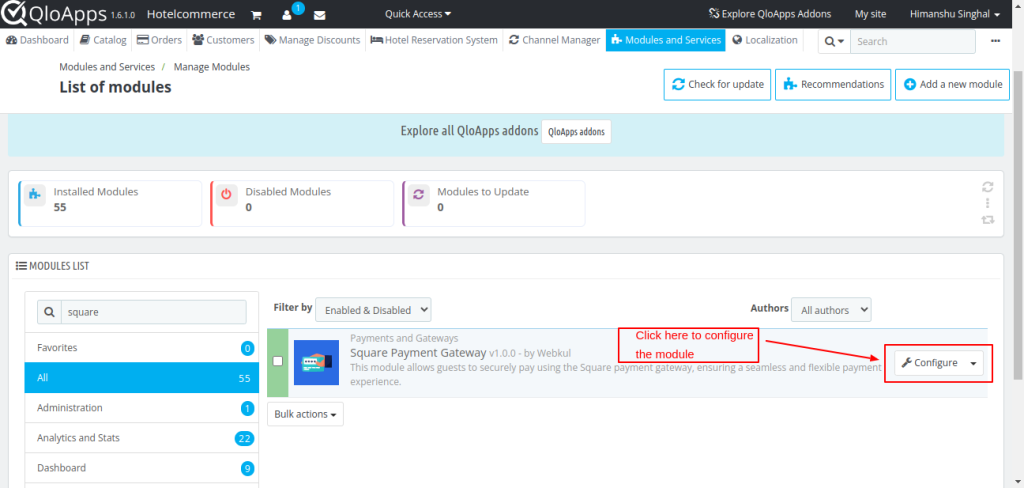
Once installed, you can configure the QloApps Square Payment Gateway by following these steps:
Click on the “Configure” button to access the configuration page.
Configuration Page
Environment:
Switches between production and sandbox modes for testing and production purposes. Production mode is for actual transactions, while sandbox mode is for testing and development.
Production/Sandbox Application ID:
Enter your Square API Sandbox/Production ID, obtained from your Square account, to enable transactions.
Production/Sandbox Access Token:
An API Sandbox/Production access token will be provided for authenticating and securing transactions.

Easy Instructions For QloApps Square Payment Credentials & webhook
To get the API Credentials, the admin needs to have an account at https://squareup.com/us/en
After that login to your account from

Enter your login credentials

After logging in click on “Developer Dashboard”.

Now click on the “+” sign

Enter your application name and agree to the terms and conditions then click next.

After clicking on the next button select the “Accept Payments” option.

Then for the audience choose the “A company” option and click on Complete.

Your application ID and Access token are now generated.
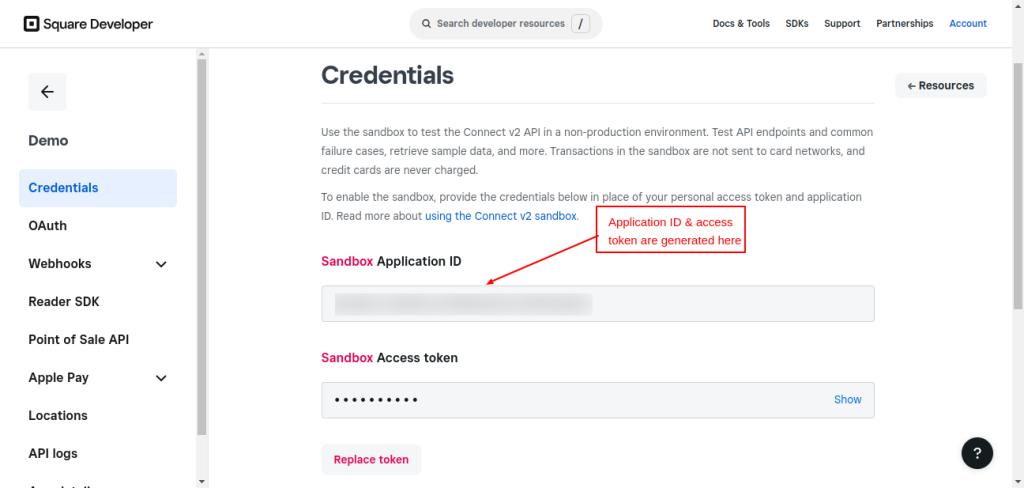
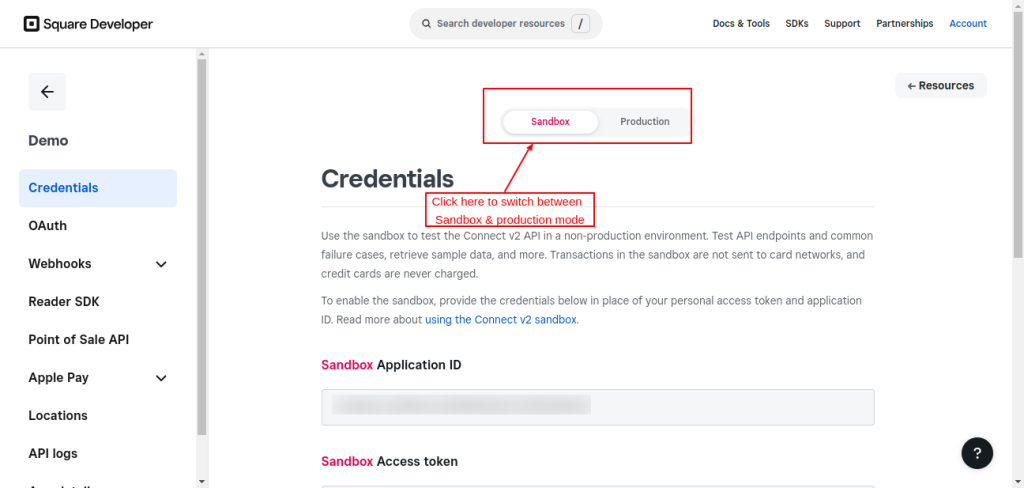
These were for the sandbox mode, you can generate the same way for the production mode
The admin needs sandbox credentials for testing purposes and the production credentials for the live site.
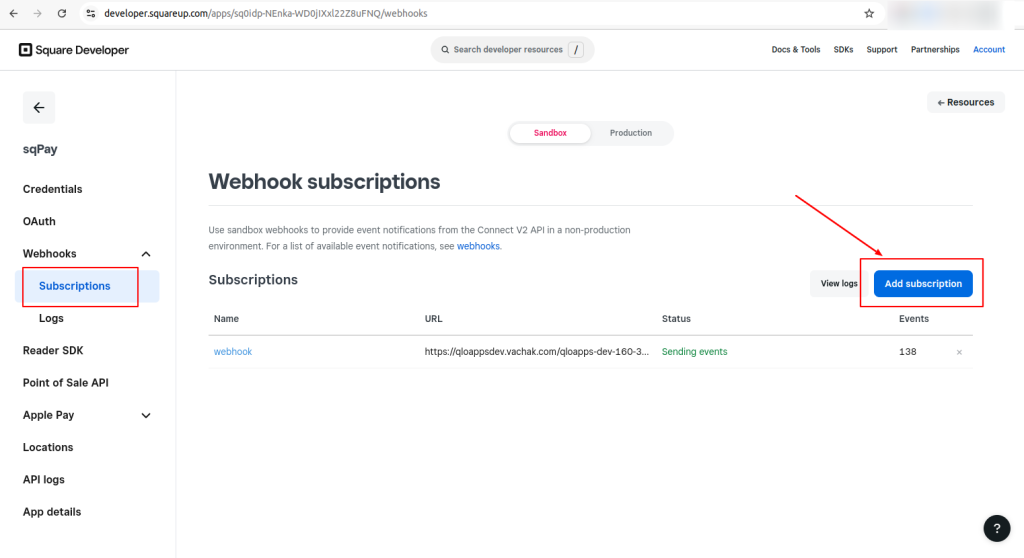
Add the webhook URL to Webhooks -> Subscriptions to receive transaction responses.
Mastering The Art Of Front End Workflow
When you configure the QloApps Square Payment Gateway correctly, your customers can pay using the Square Payment Gateway on the checkout page. Here’s how it works:
On the checkout page, customers can select the Square payment option and fill in their card details to proceed.

Once the payment is processed, the customer will be redirected to the order confirmation page.

Streamline Processes With An Effective Back Office View
After installation, the Square Payment Gateway adds a new tab “Square Transactions” to your QloApps dashboard.
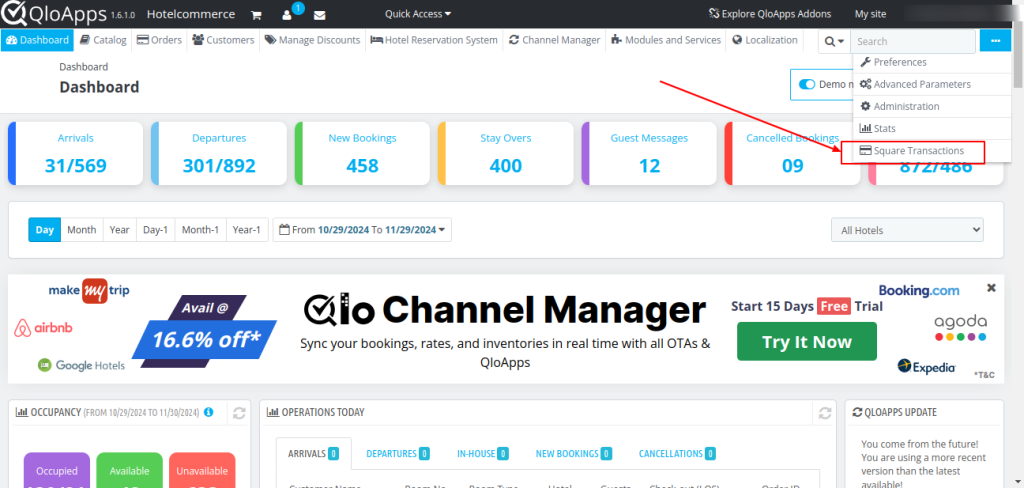
Here, you can view the list of all bookings done through the Square payment gateway.
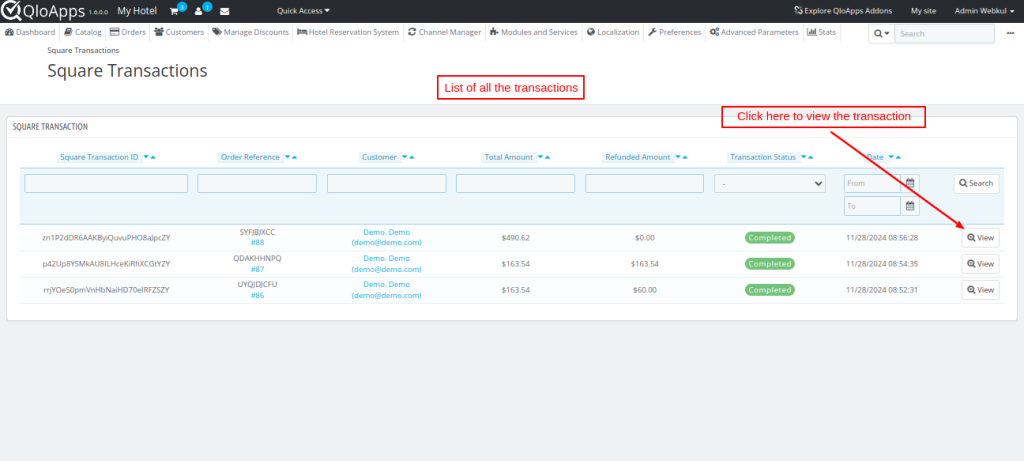
Manage Refunds
Using the Square Payment Gateway, you can easily manage the refund process of your customers. Here’s how:
- Go to the “Square Transactions” page and select the transaction you want to refund.
- Click on the “Refund” button to initiate the refund process.
- Choose the refund type: full refund or partial refund.
- Enter a remark for the refund.
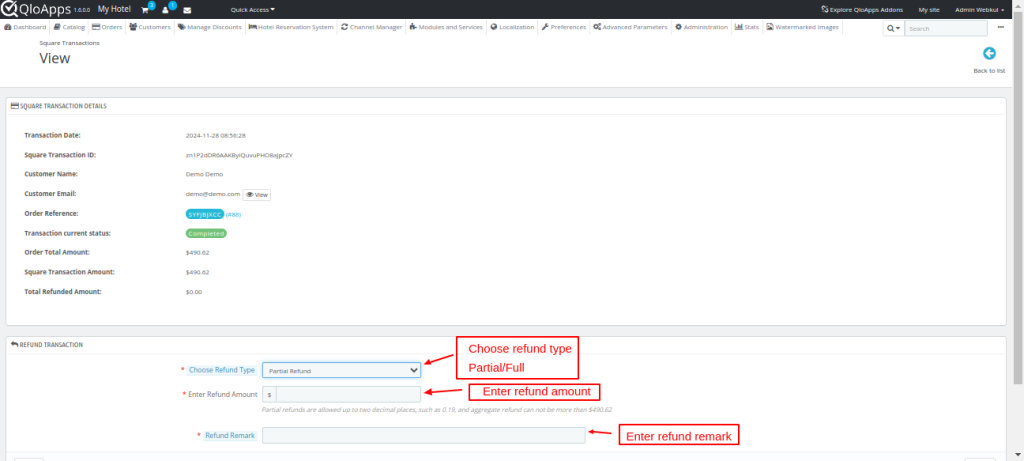
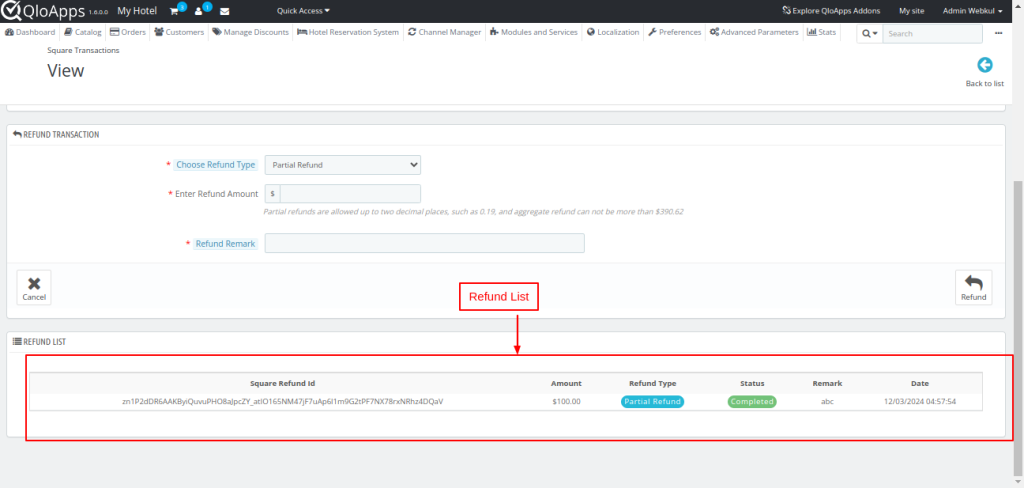
5. Once you’ve processed the refund, a record for that refund will be created on the “Square Transactions” page.
Conclusion
“I hope this user guide for the QloApps Square payment Gateway will simplify the setup and usage process of the addon for you.”
Get in touch
If you need a free tool to manage your property, QloApps is a perfect fit.
QloApps provides a range of features to streamline your hotel operations, including:
100+ Add-ons
To get started, download QloApps and add your property.
For suggestions, visit the QloApps forum.
If you need technical support, please raise a ticket for assistance.
Current product version– V4.0.0
Supported Framework version– QloApps 1.7.x and 1.6.x

Be the first to comment.