QloApps Sum Up payment is an add-on that integrates Sum Up payment gateway to your hotel booking website.
Hence, allowing your guests to pay for their bookings through the Sum Up payment gateway.
It is easy to use and convenient for small to big businesses. It delivers money to your account in 1-2 business days.
The payment gateway is hassle-free and supports both debit and credit cards.
It is 3D secure authenticated. Thus, it protects your customer’s data from potential attacks
Note: It only works with Euro currencies (EUR). So you need to install the EUR currency from Localization –> Currencies.
Features
- Complimentary payment method for guests.
- It accepts debit and credit cards.
- Admin has the choice to display card details in the drop-down form.
- Guests can easily process the payment at the time of checkout.
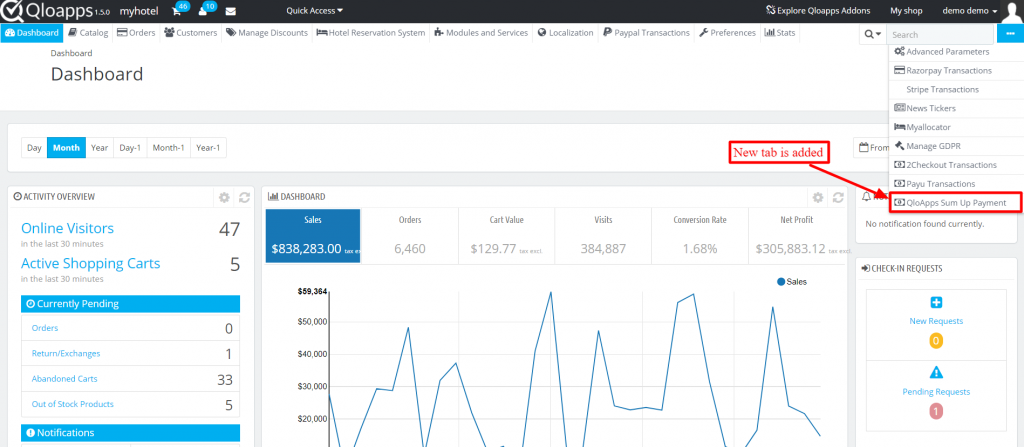
- A new tab QloApps Sum Up payment is added from where admin can check all the transactions process from Sum Up payment method.
- Easy to install and configure from the backend.
Installation of QloApps Sum Up Payment
The installation of any module is very simple in QloApps.
- Go to the “Module and Services” tab.
- Click on “Add New Module”.
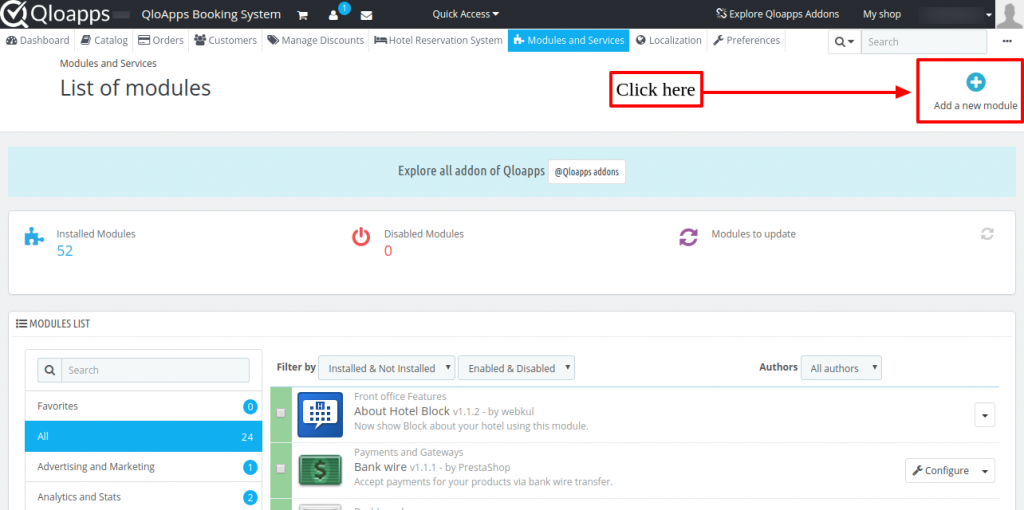
Now upload the Zip file of the module and click on install.
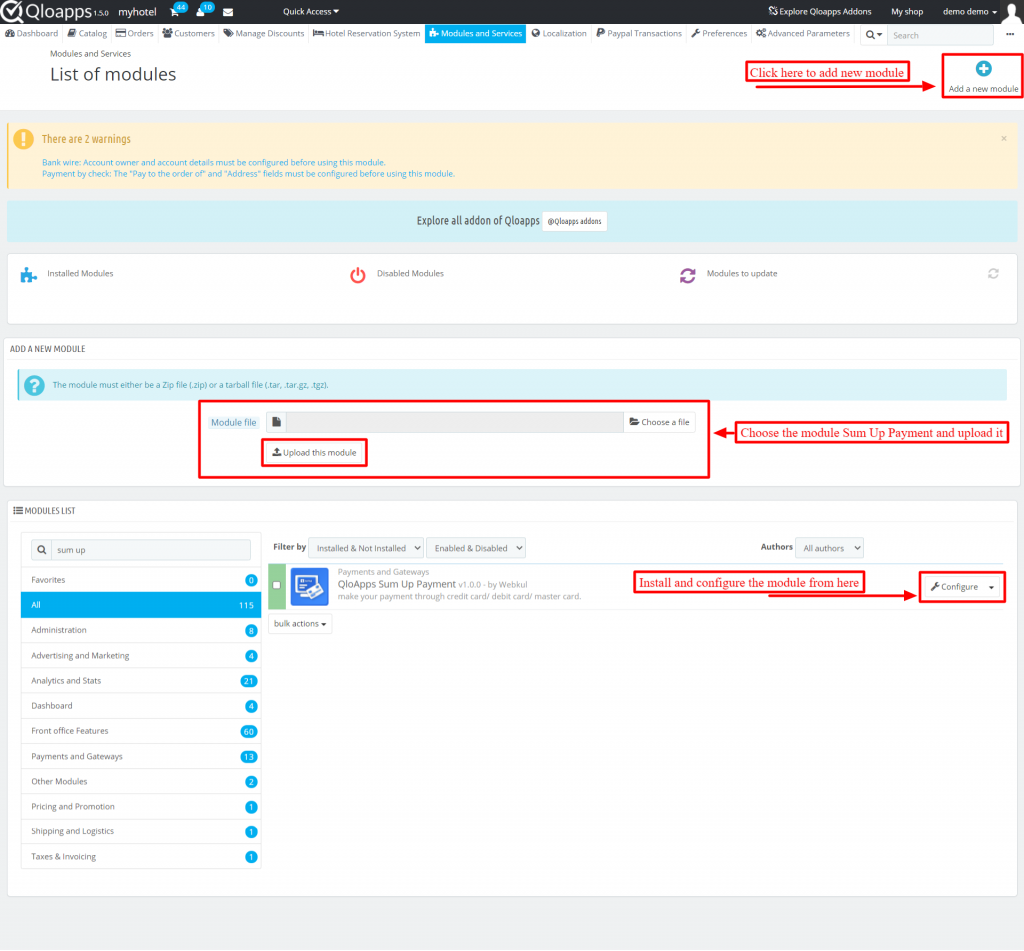
Now you have installed the module. So let’s check how to configure it.
Configuration of the Sum Up Payment
After clicking on the configure button, you will redirect to the configuration page.
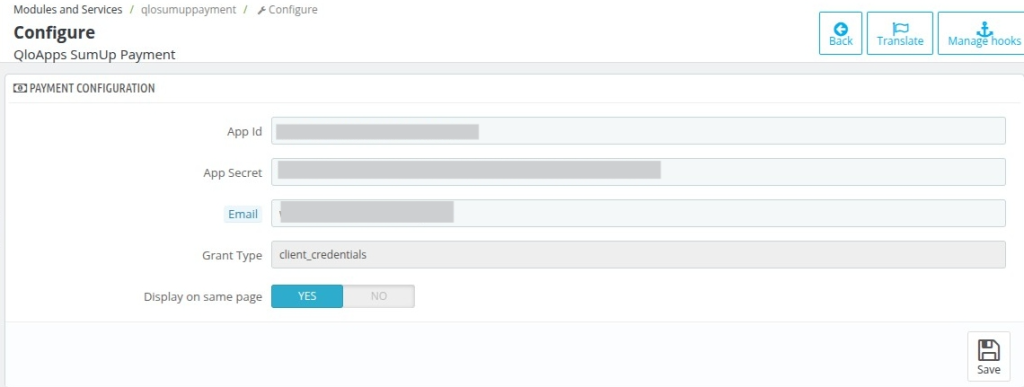
- App ID -> Enter App ID that you obtain after creating an account on Sum Up.
- App Secret -> Enter App secret.
- Email -> Enter the same email address that you have registered in Sum Up payment.
- Grant Type -> Write the grant type.
- Display on same page -> Enable to display card details in the drop-down form.
How to get the API keys?
To get the API keys, go to the Sum Up account by clicking on the link me.sumup.com.
Create an account or if you already have an account then login.
Below are the steps for creating an account:
Firstly, to create an account choose the language in which you want to proceed further.
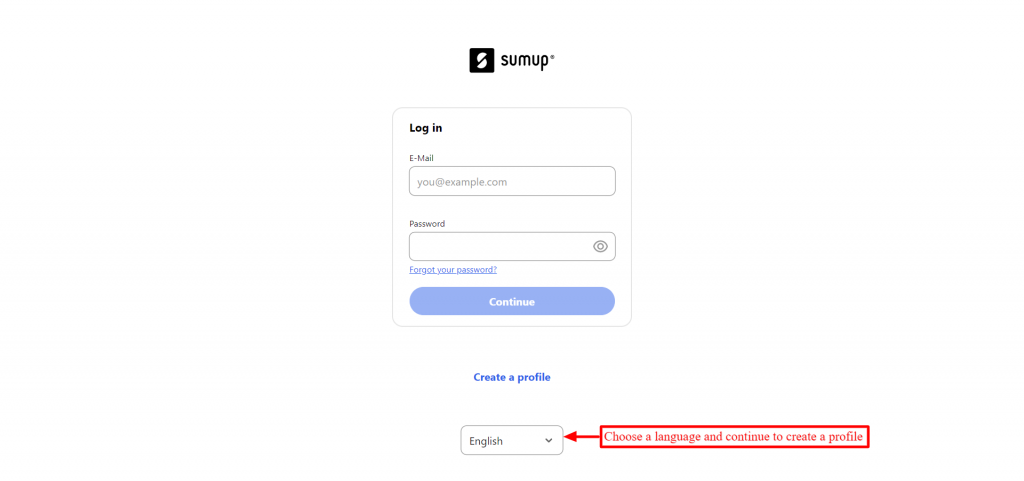
Next, you have to select the country and enter the email ID and password to register.
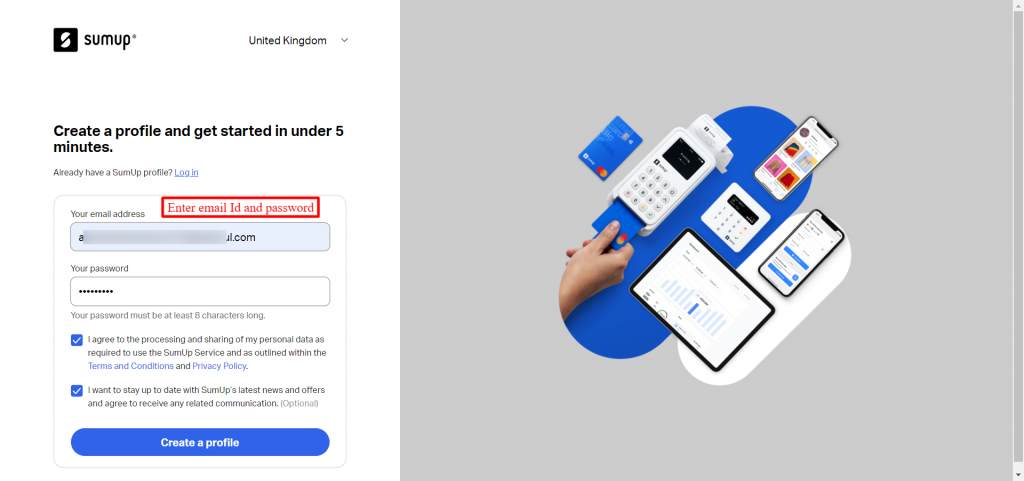
You will land on a new page. In this, you have to select ‘Profile Details’ on the left-hand side and fill in all the details.
It will ask following details:
- Business information
- Personal Details
- Bank Details
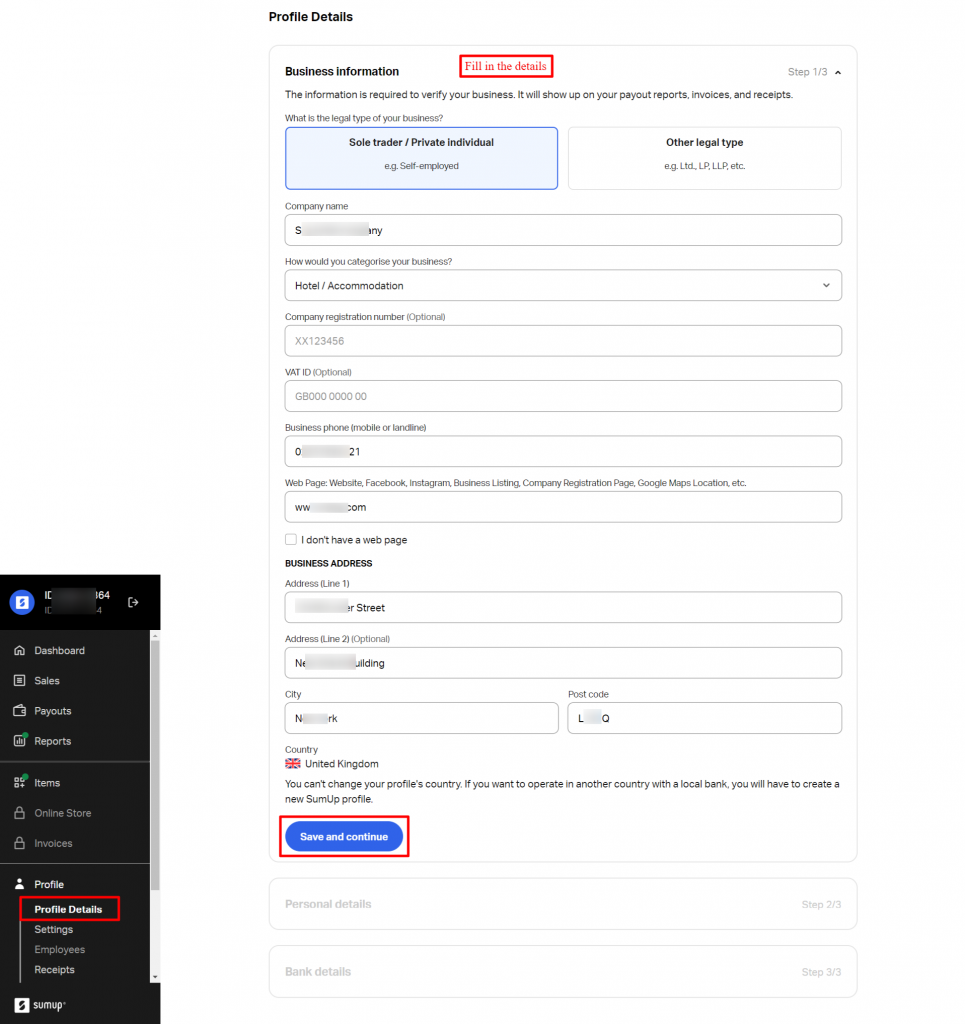
Business Information: Give the information about your business.
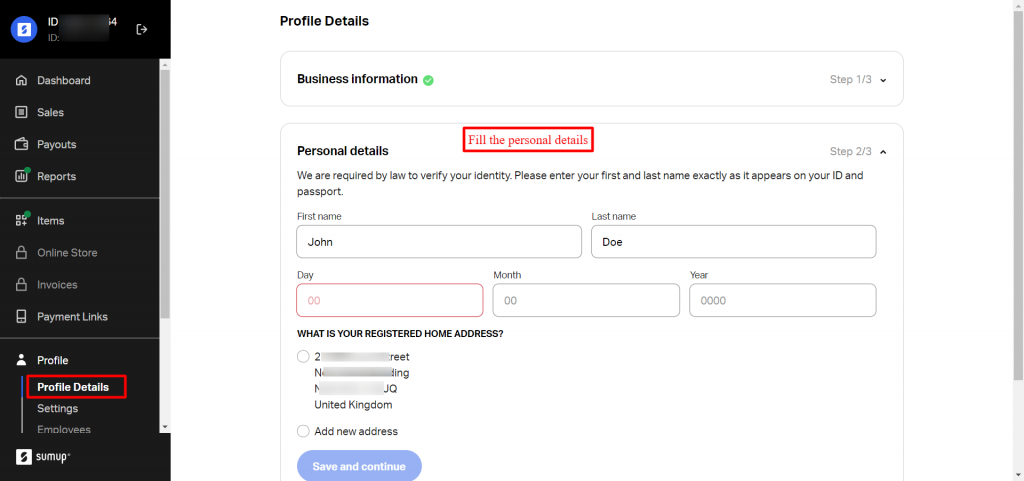
Personal Details: Provide your personal information. like your name, address etc.
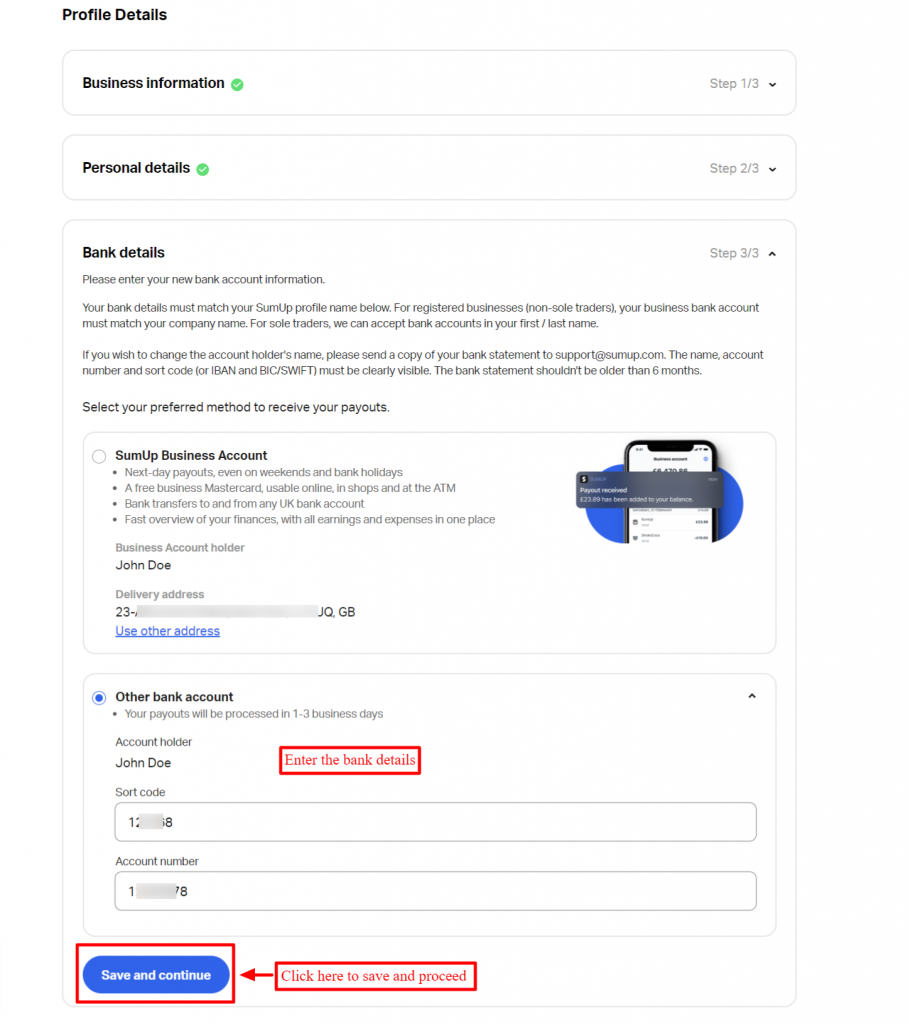
Bank Details: Fill in Bank account details to make transactions.
After saving all of your information, you’ll need to activate your account. Enter the cellphone number to obtain a verification code to validate the account.
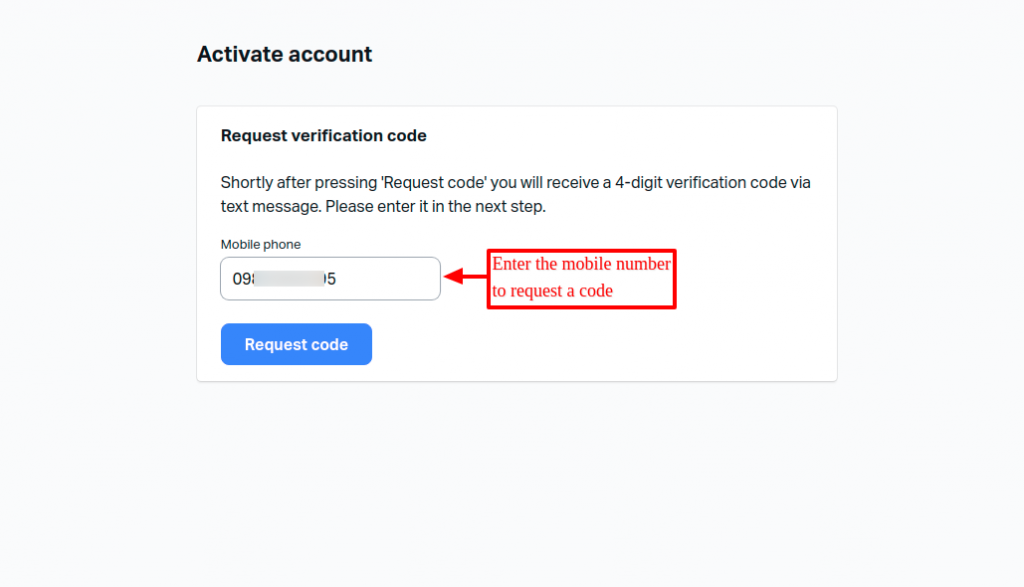
Now, your account is activated.
Create App ID and App Secret
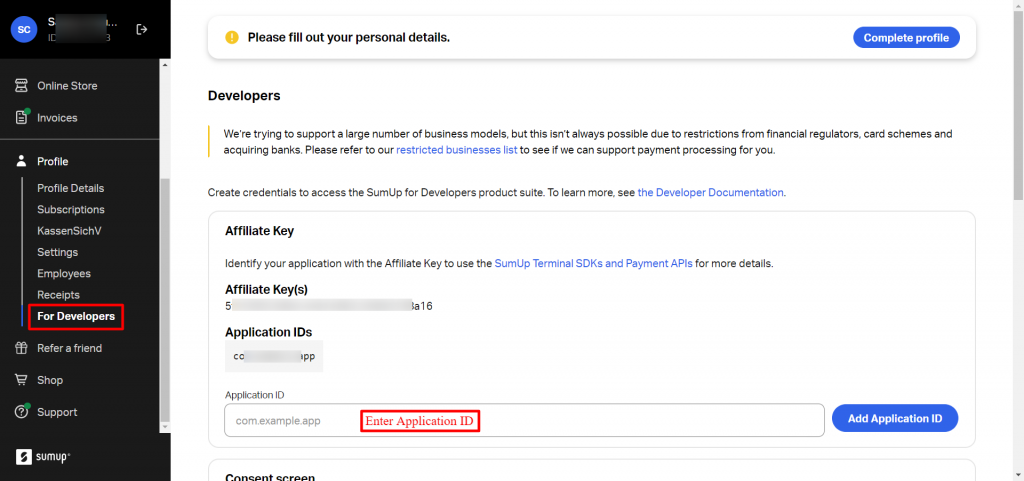
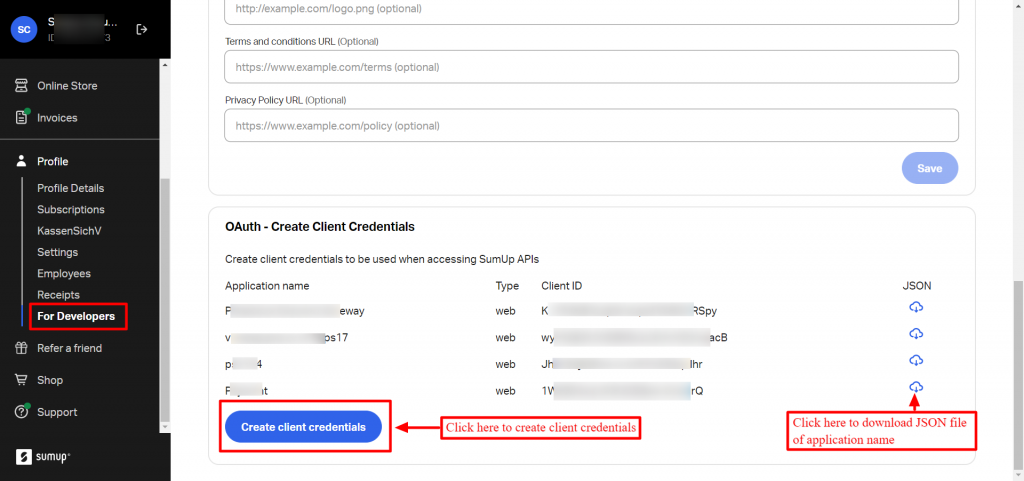
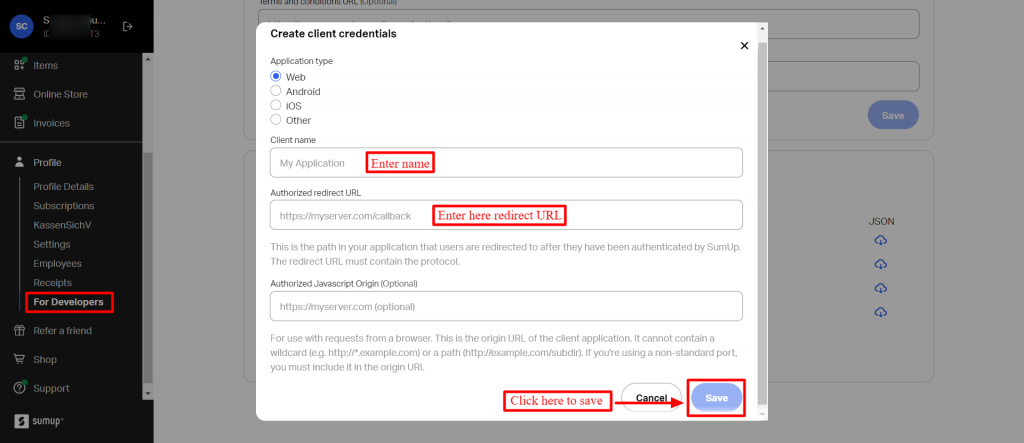
To obtain the App ID, go to the ‘For Developers’ tab first. Then, at the bottom of the page, proceed to the “OAuth- generate client credentials” section.
To continue, click the ‘Create client credentials’ button.
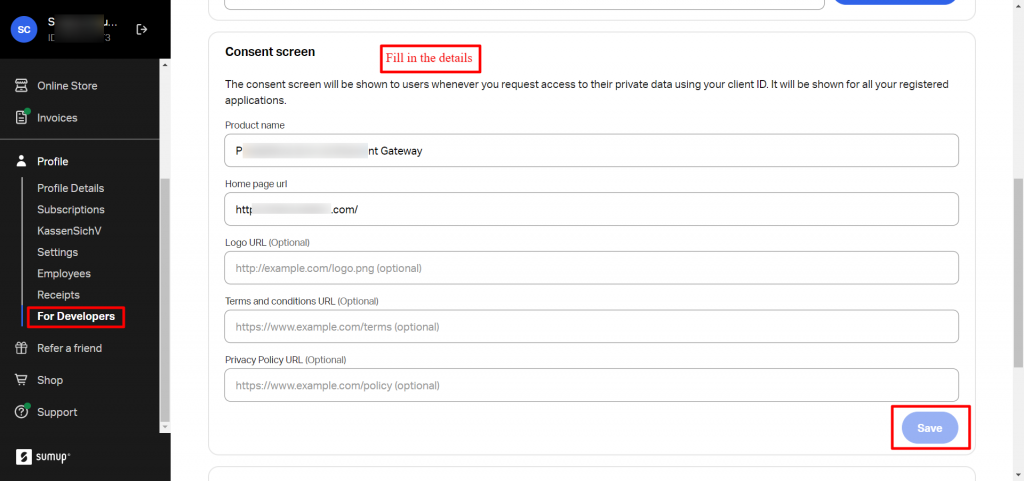
A pop-up box will appear, fill in the required details and save.
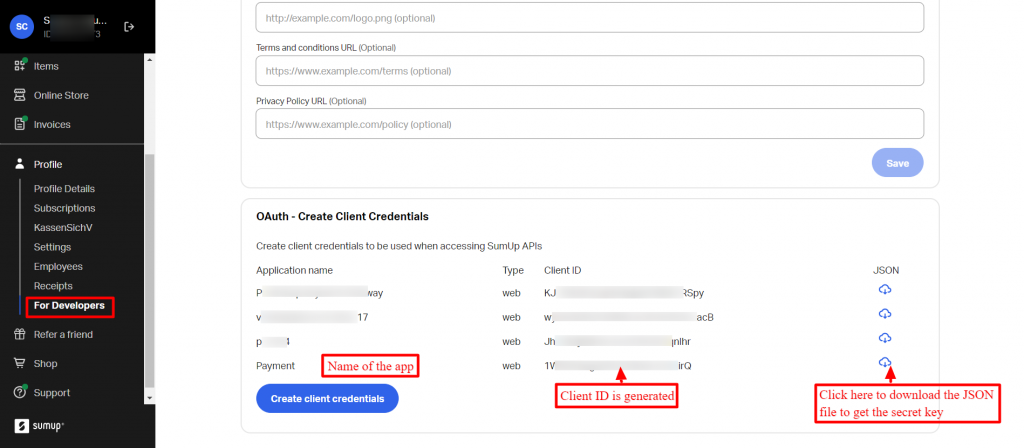
You will see and Client ID is generated beside the App name. Click on the JSON file to get the secret key.
Workflow of QloApps Sum Up Payment
Checkout Page
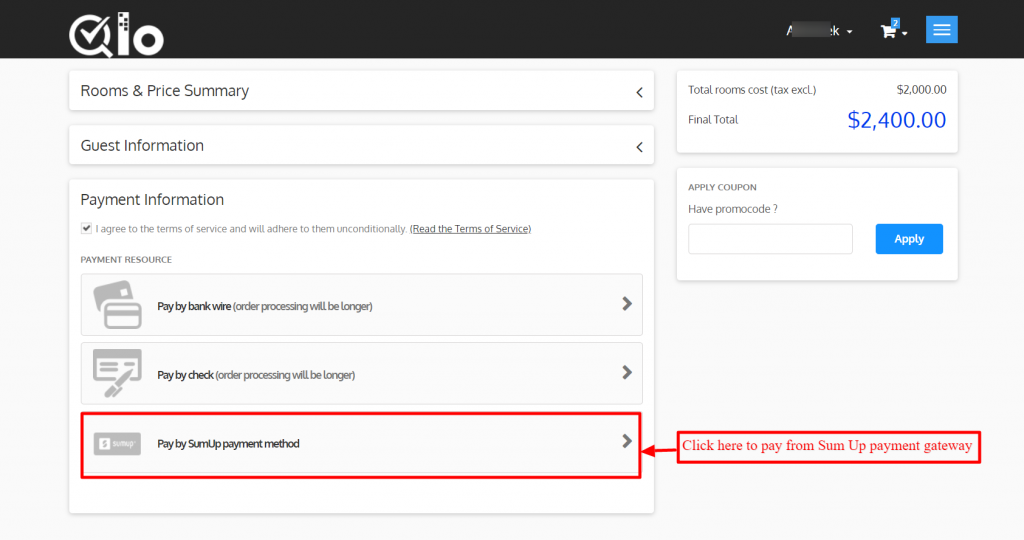
At the checkout page, you can see the Sum Up payment option is available. Click on it to pay from the Sum Up payment gateway.
After clicking on it you will be redirected to a new page where you have to enter card details.
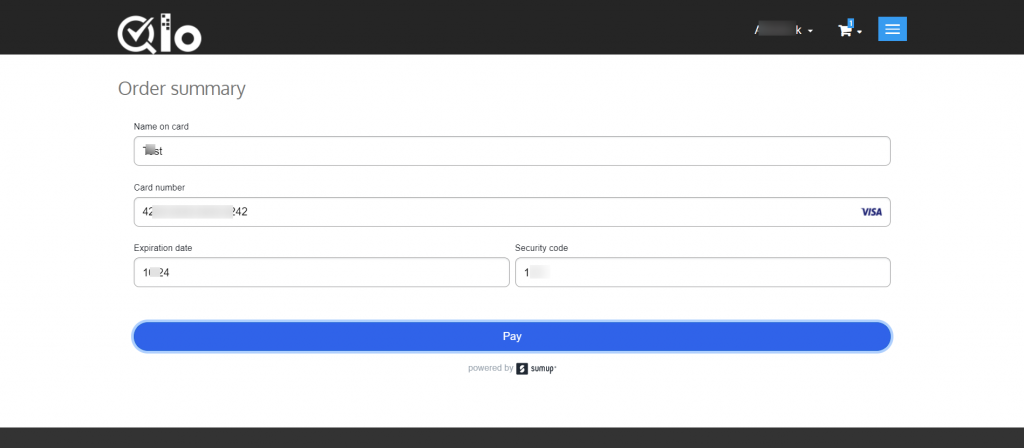
Card details in drop down:

At Admin’s end
On the backend, a new tab ‘Sum Up Payment’ is added.
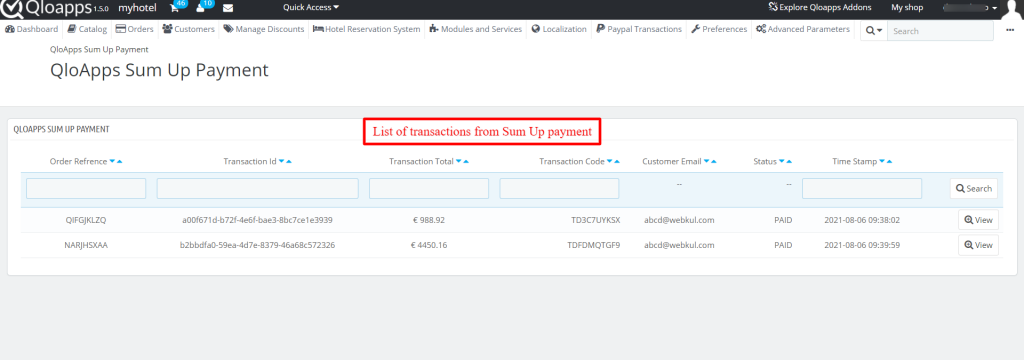
In this, the admin can view all the transactions that take place from the Sum Up payment gateway.
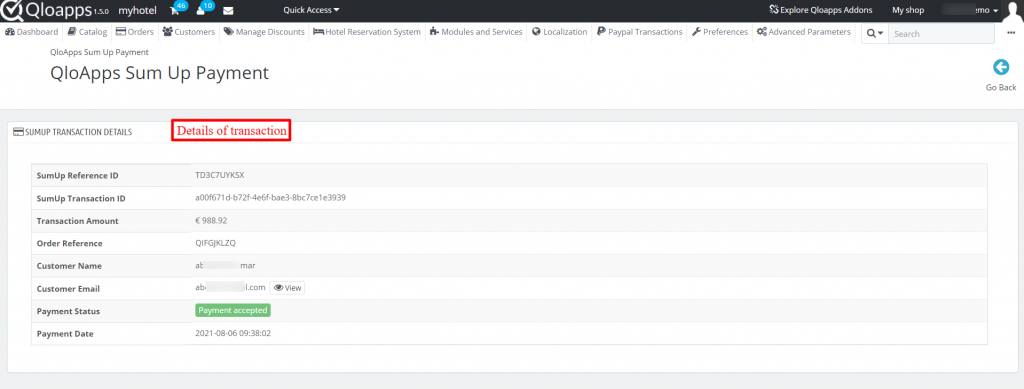
On clicking one of the transactions, the admin can view its full details.
Order Tab
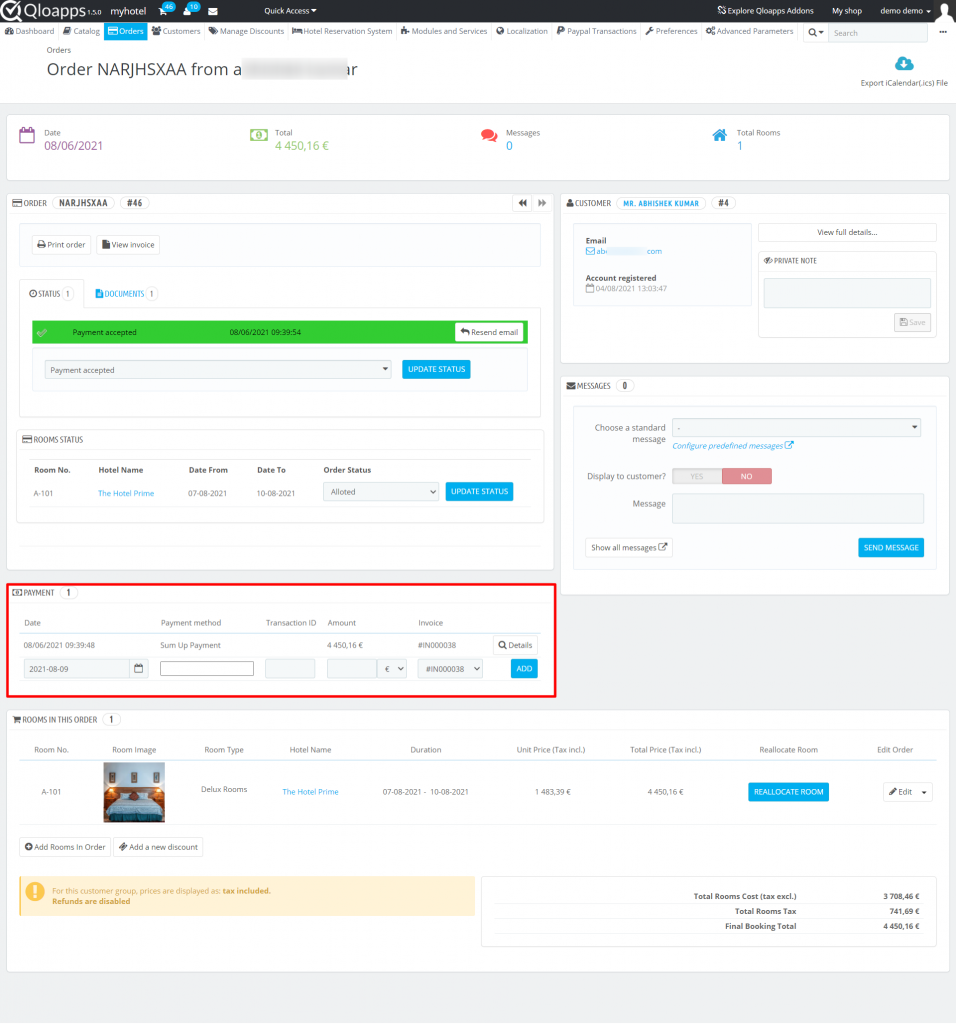
Under the ‘Orders’ tab, the admin can view the details of the order associated with that transaction.
Conclusion
This was all from the QloApps Sum Up Payment. I hope I was able to clarify the functioning of the module to you.
If you want to learn about the functionality of QloApps then you can visit this link: QLO Reservation System – Free Open-Source Hotel Booking & Reservation System
In case of any query, issue, or requirement please feel free to raise it on QloApps Forum
Current Product Version – 1.0.4
Supported Framework Version – QloApps 1.6.x and 1.7.x

Be the first to comment.