QloApps Mobile and Email Verification is an add-on for verifying the phone numbers and emails of customers
Protecting your company and users from spams is important to ensure the growth of your business.
By adding an option of phone number or E-mail verification you can prevent your brand and your web and mobile app users from fraud.
QloApps Mobile and Email Verification module help in the authentication of your customers. This module allows you to verify your customers through a verification code (OTP) or a link.
Feature
- Give assurance to your customer for secure registration on your website
- Admin can set verification either by email or phone number
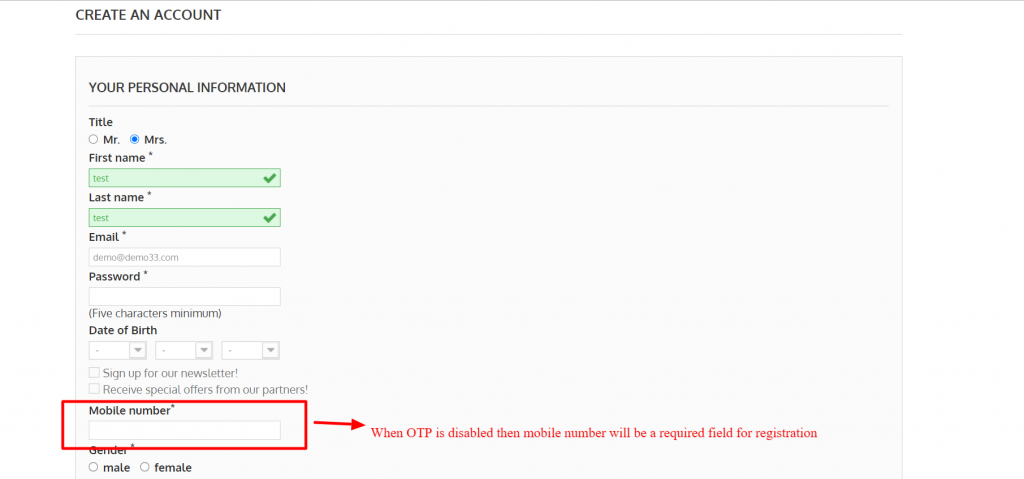
- The phone number will become just a required field if you disable OTP in mobile verification.
- Phone number can be verified by sending an OTP
- Send OTP via SMS using Twilio API.
- Admin can decide the length of OTP
- The admin can set the default message to be sent with the OTP.
- It can be set how many times a user can request OTP
- Admin can decide time interval between two OTP request
- Email can be verified either by OTP or verification link.
Installation
The installation of any module is very simple in QloApps.
- Go to the Module and Services tab
- Click on Add New Module
Now upload the Zip file of the Module and click on Install

Configuration Of QloApps Mobile and Email Verification
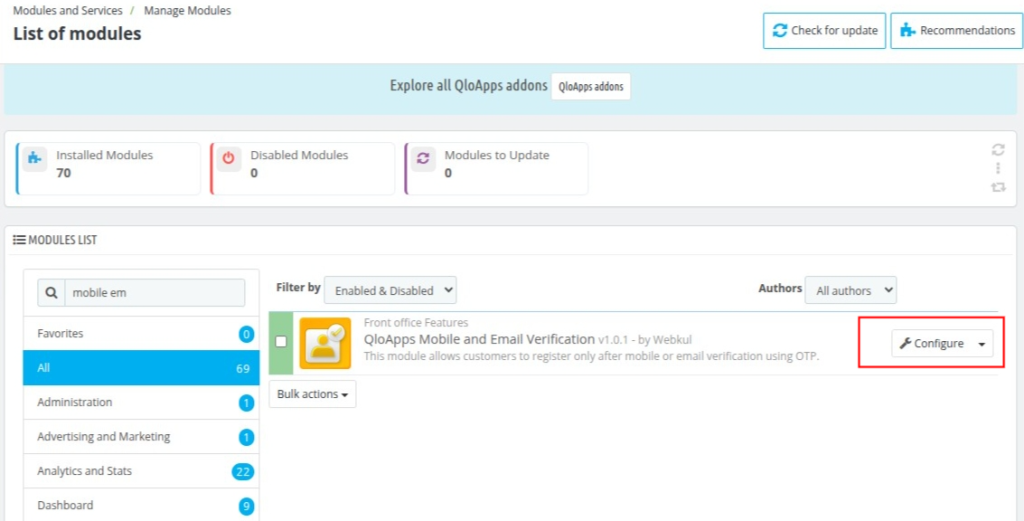
After successfully installing the module, click on Configure to be redirected to the configuration settings.
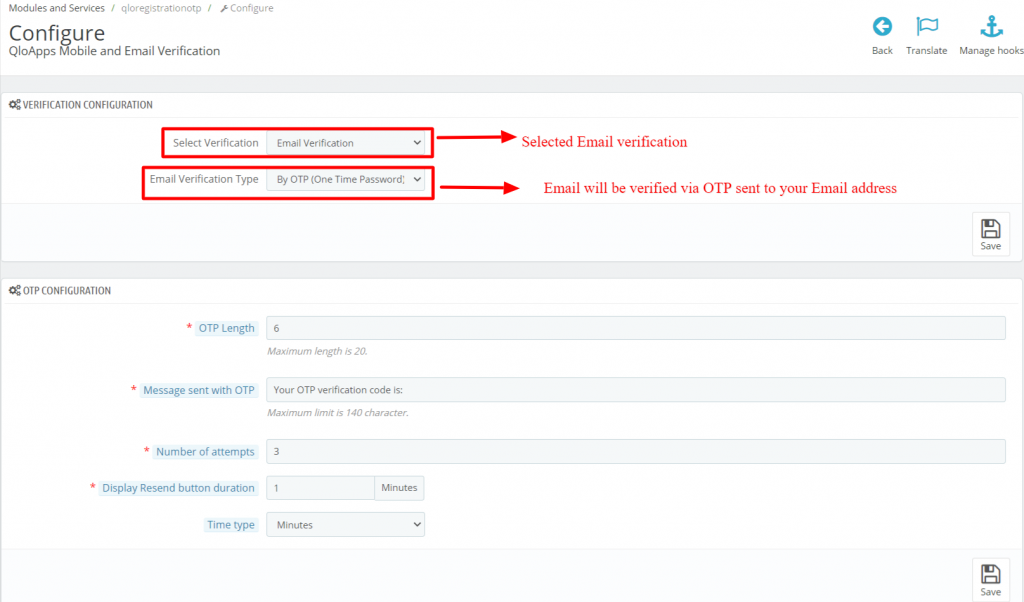
In this module, at first, the admin will have to set types of verification from the following-
- No verification
- Mobile Verification
- Email Verification
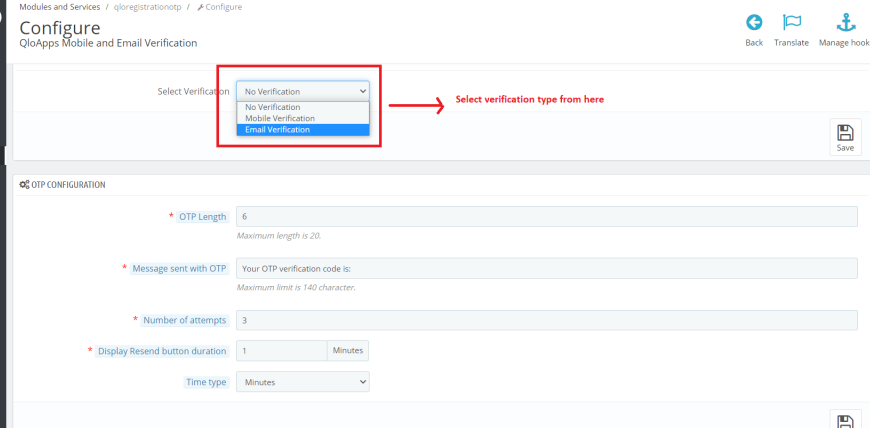
And from the OTP configuration tab, the admin can set different configurations for the verification process by OTP.

The workflow for Mobile Verification
Mobile number can verify by sending an OTP via SMS and admin can also disable OTP in Mobile verification.
When admin disables OTP then the mobile number just becomes a required field.

When admin disables OTP then during registration customers will have to enter their Phone number but they will not receive any OTP.
Another case is when OTP is enabled in mobile verification.
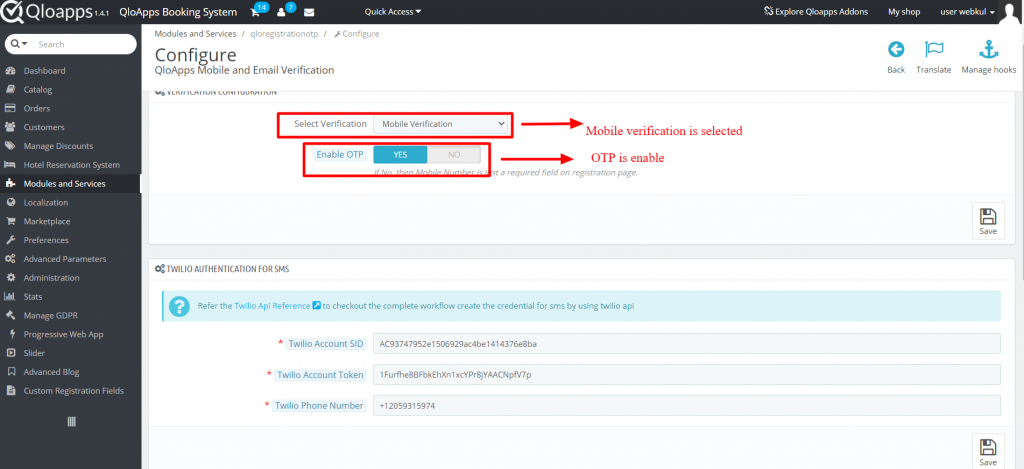
Admin will have to enter Twilio account details for sending the OTP via SMS to his customers while registering on the website.

On the front, it will show the following option.
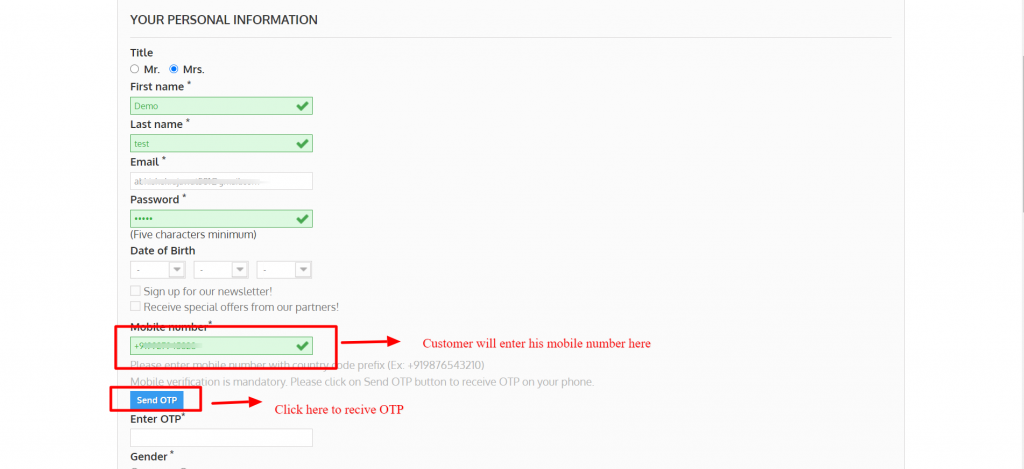
After this customer will receive an OTP via SMS, by entering this OTP he will be able to verify his account.
The workflow of Email verification
Under Email verification, there are two types of option –
1 Verification by OTP
2 Verification by Link
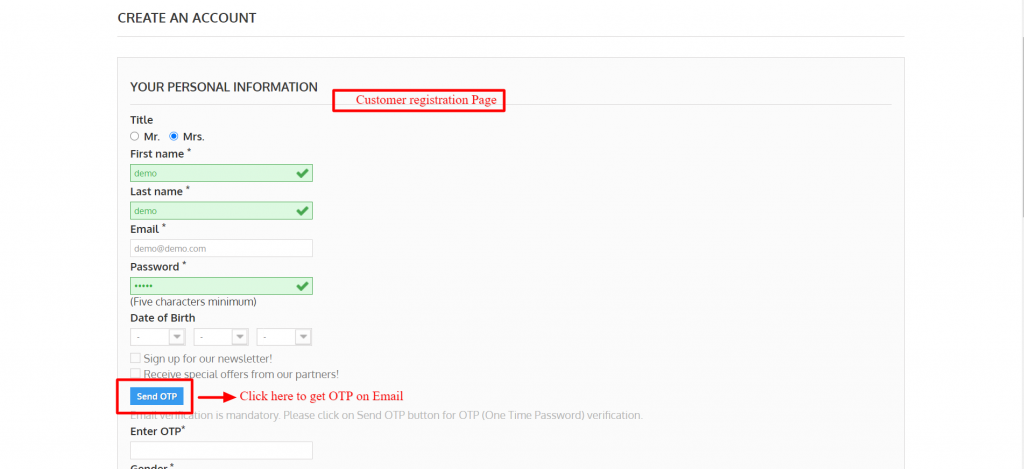
When an admin sets the Email verification type by OTP then the customer will verify his mail by OTP which he has received on his Email.
On the Front end of the customer registration page, the customer will have to request for OTP by clicking on ‘Send OTP’.
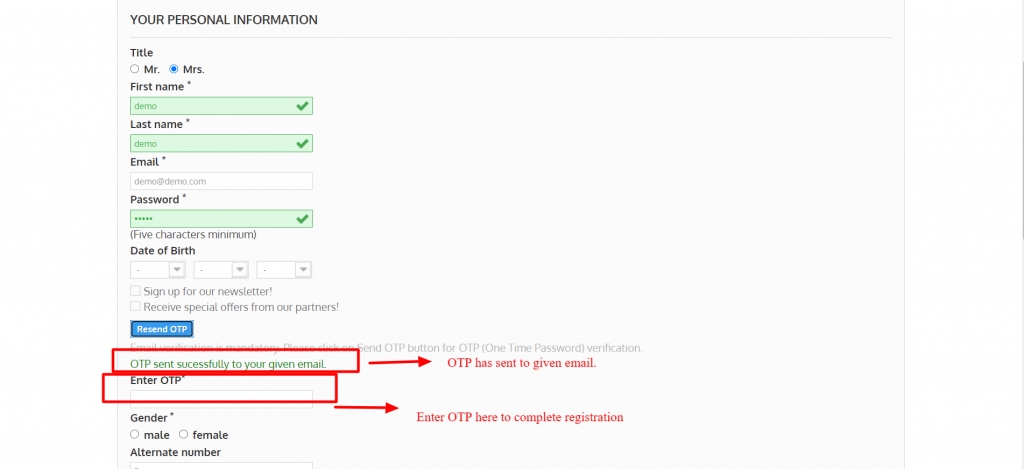
Now the customer will receive an OTP on his email, enter this OTP to complete registration.
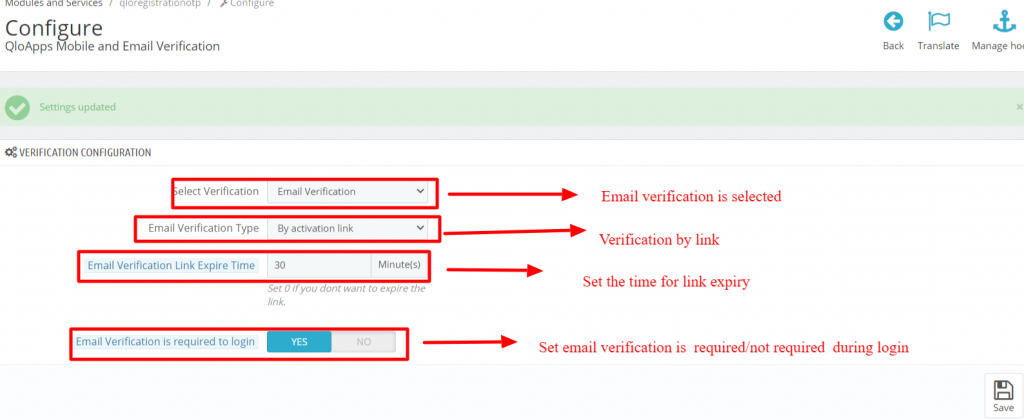
When an admin sets the type of email verification by link, the customer will verify his e-mail with an e-mail link.
And he will have the configurations to set the link expiry time and restrict/allow that email verification is a requirement to log in.
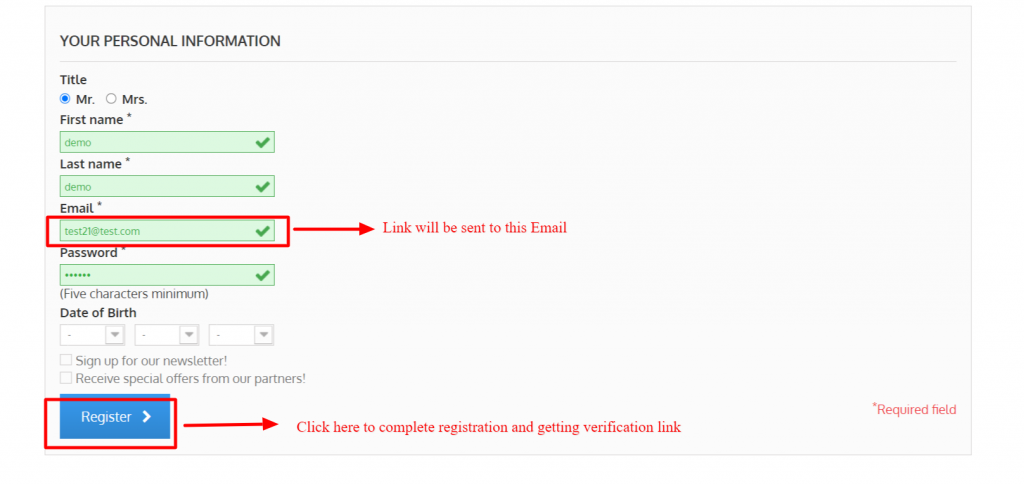
The customer will click on the ‘Register’ button on the customer registration page to get the verification link at his email address.
After this customers will see the following page. It will show that the verification link has been sent to their email and will also show a button for getting the verification link again.

In this way, the client will be able to verify his email through the link.
Verify mail for already registered customer
If a customer is already registered and the admin installs the module later then to verify his mail, the customer will have the option in his account.
The option will show on the top of the account. By clicking here customer can verify his mail.

After clicking on this button verification link will be sent to his mail address. And there is another option to get the verification link again.

The customer will be able to verify his email by the link in this way.
Conclusion
So this was all from the Mobile and Email Verification module. I hope I was able to explain all the functions of this module.
If you want to know more about the functionality of QloApps click on this link https://qloapps.com/qlo-reservation-system/
If you have any queries or for getting more information write on our forum.
Current Product Version – V_4.0.0
Supported Framework Version – QloApps 1.7.0

Be the first to comment.