Are you still following the manual process of adding your Google Reviews to your hotel website?
If the answer is yes, then it’s time to stop this rigorous process and simplify it by using the QloApps Google Review addon.
QloApps Google Review Addon will allow you to easily import your Google reviews onto your website.
After completing the basic configuration of the addon, it will automatically import your hotel’s Google reviews and display them in sliders on various pages of your hotel website.
This user-friendly and easy-to-use addon also empowers you to specify the pages on which you want to display the review and customize the slider as well.
Features Of QloApps Google Review Module
- Quick and easy installation Process
- The admin can edit the display configuration to manage the positions where reviews will be displayed on the website
- The admin can select the redirection type with the reviews to redirect the guest from their website to Google reviews.
- The admin can configure the slider settings to customize the review slider
- Elegant display of Google reviews on various pages of the hotel website
- Automatic Import of Google Reviews to your QloApps hotel website
How To Install The QloApps Google Review Module?
You can install the QloApps Google Review Module by following the steps:
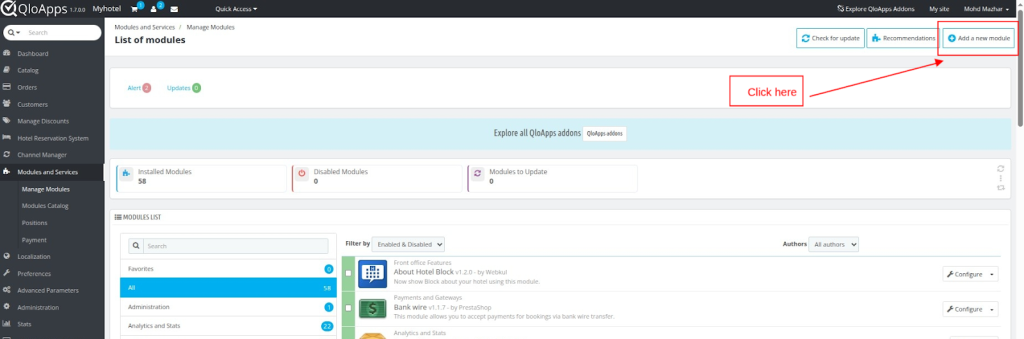
- Login to the back office of QloApps
- Go to the Modules and Services tab present in the menu bar
- Click on Add a new module
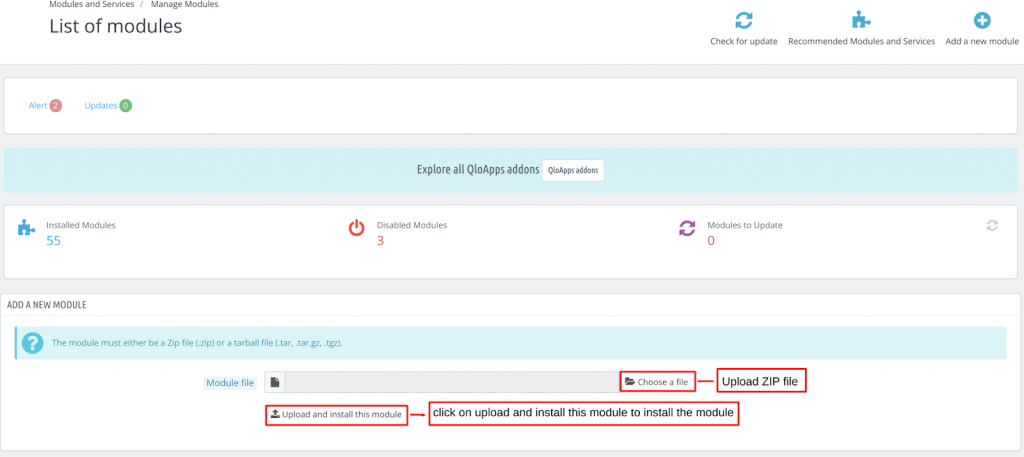
- Upload the ZIP file of the module.
- Now upload the ZIP File of the module and click on the “upload and install this module” option.
By following these steps the Admin can successfully install the “QloApps Google Review Module” in QloApps.
Configure QloApps Google Review
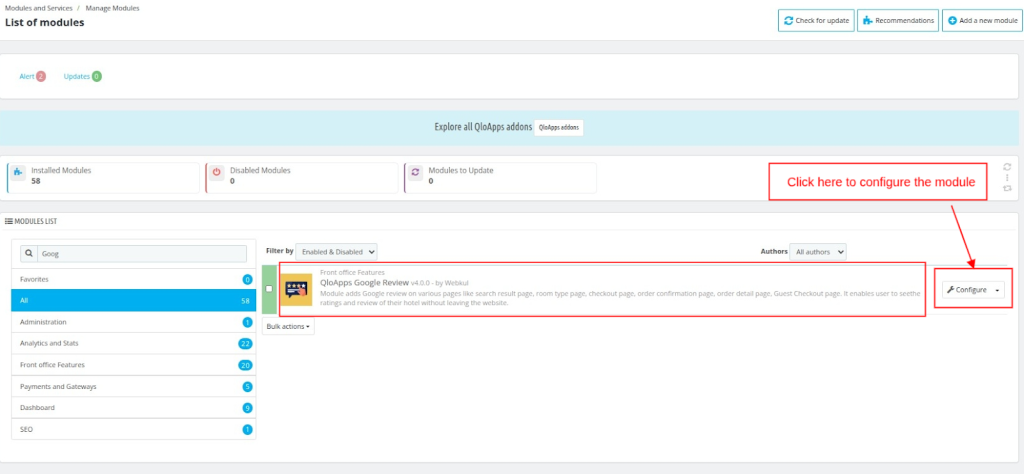
After completing the installation of the module, it will be added to the list of “manage modules”.
To configure the addon, search for the addon and click on the configure button.
Once you click on the configure button, the configuration page will open using which we will configure the addon.
There are three sections on the configuration page that we have to configure:
– Google API Credentials
– Google Review Display configuration
– The Google Slider Settings
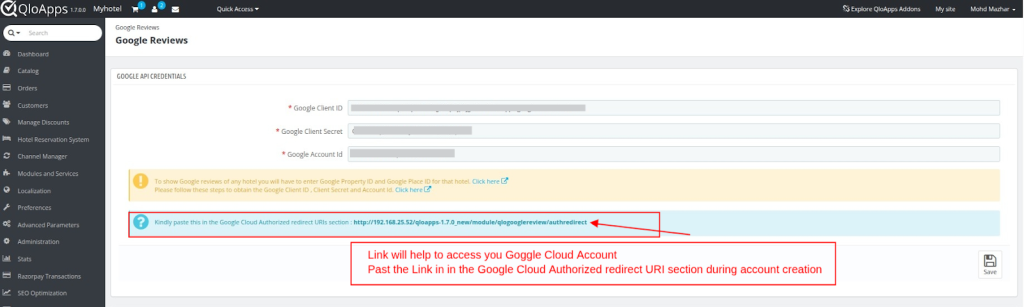
Section 1: Google API Credentials
In this section, you have to enter the following details from your Google Account:
- Google Client ID: Enter the client ID
- Google Secret Key: Enter the secret key
- Google Account ID: Enter the account ID
Note: To access your Google Cloud Account, kindly copy the Link provided, and then you have to paste that Link in the Google Cloud Authorized redirect URI section.
How to enable and configure Google Review Hotel Wise?
After configuring the addon on the configuration page, you have to enable Google Review for your particular property and add property credentials by following the below-mentioned steps:
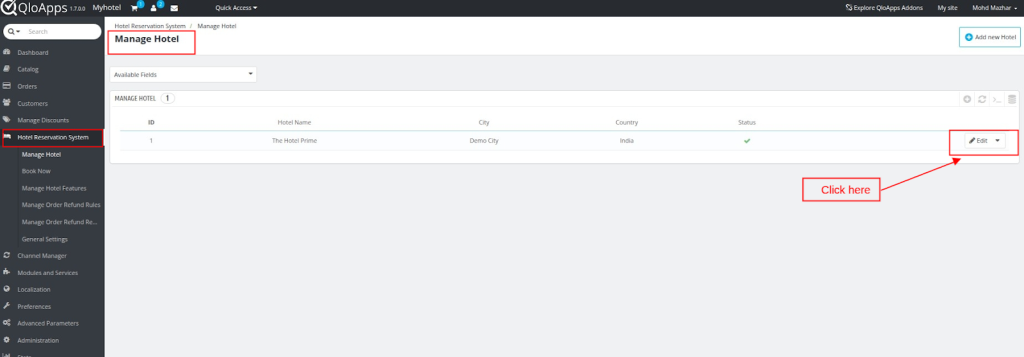
- Go to the Hotel Reservation System Tab in the menu bar and select Manage Hotel From drop down.
- Select the hotel for which you want to enable Google Review and click on the edit button
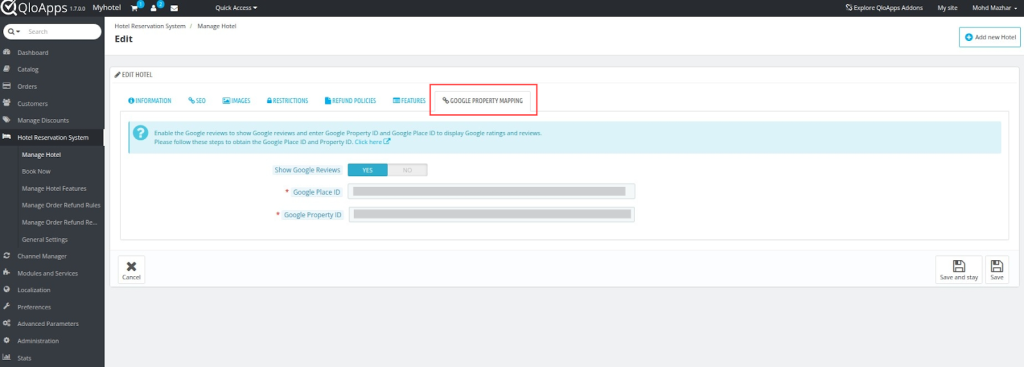
Select Google Property Mapping Section and configure the following options :
- Show Google Review: Select yes if you want to show the Google review for this property
- Google Place ID: Enter the Place ID
- Google Property ID: Enter the property ID
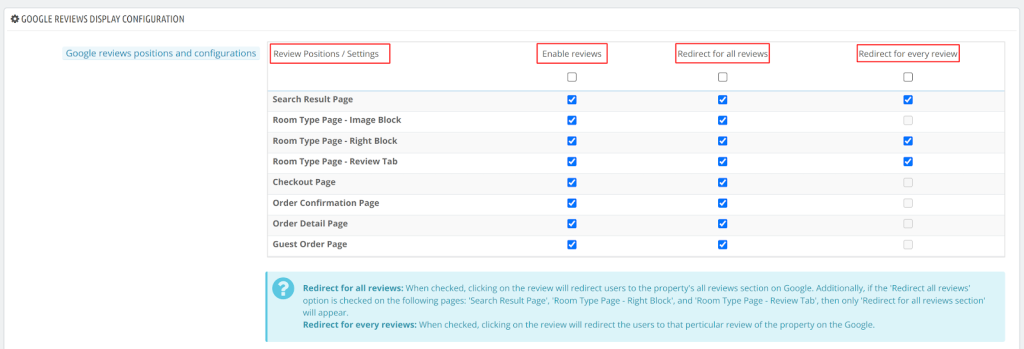
Section 2: Google Review Display Configuration
Google Review Positions and Configurations
In this option, you have to select the pages where you want to enable reviews and for which reviews you want to redirect your guests by checking the box for the respective column.
- Review Position / Settings: This column displays the list of all pages on which you can display Google Reviews
- Enable reviews: Check the box for all pages on which you want to enable reviews.
- Redirect for all reviews: Check the box for all those pages on which you want to redirect your guests from the hotel website to Google Reviews
- Redirect for every review: Check the box for all those pages on which you want to redirect your guest to that specific review on Google when they click on a specific review
Show the Google Review image on the footer
- Show Google Review Image on Footer: Enable this option to enable image display in the footer
- Enter the Google review logo Url: Enter the Absolute URL of the logo that you want to display in the Footer.
- Google review logo Position: Select the position on which you want to display the logo in the footer section. There are 4 positions in which you can add the logo image:
- Display footer most left block
- Display footer payment info
- Display footer notification hook
- Display footer explore section hook
Note: You can click on the preview button to view the positions of the image in the footer.

Section 3: Google Slider Settings
You can configure the slider of Google review by following options:
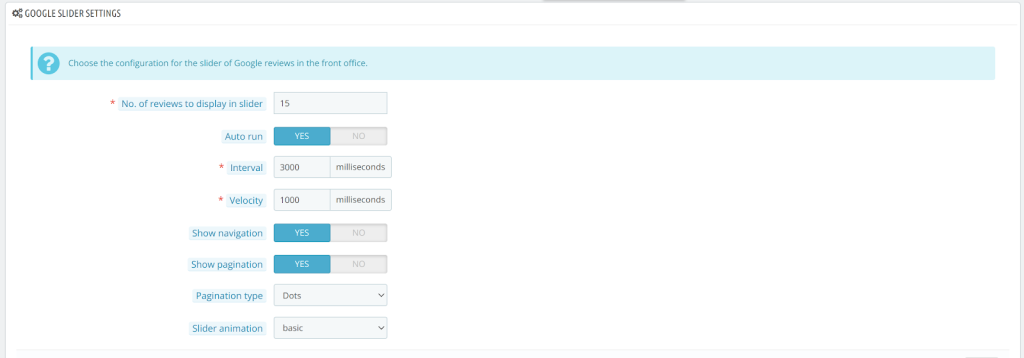
- No. of reviews to display in slider: Enter the count for the number of reviews you want to display to your guests.
- Auto run: Enable this option if you want the slider to run automatically.
- Interval: Set the interval speed of the auto-run
- Velocity: Set the speed of the slider in Milliseconds. (1 Second = 1000 Millisecond)
- Show Navigation: Enable this option to display the navigating arrows for the review slider.
- Show Pagination: Enable this option to display the number of reviews pagination.
- Pagination Type: select the pagination style from Dots or numbers.
- Slider Animation: Choose the animation style for the slider from basic, overflow, flip, and cube style animations.
Process to Obtain Google API Credentials for Configuration
You can refer to the prerequisite document of Google to learn about the prerequisites of the process.
To obtain the credentials for Google API Configuration, follow the below-mentioned steps:
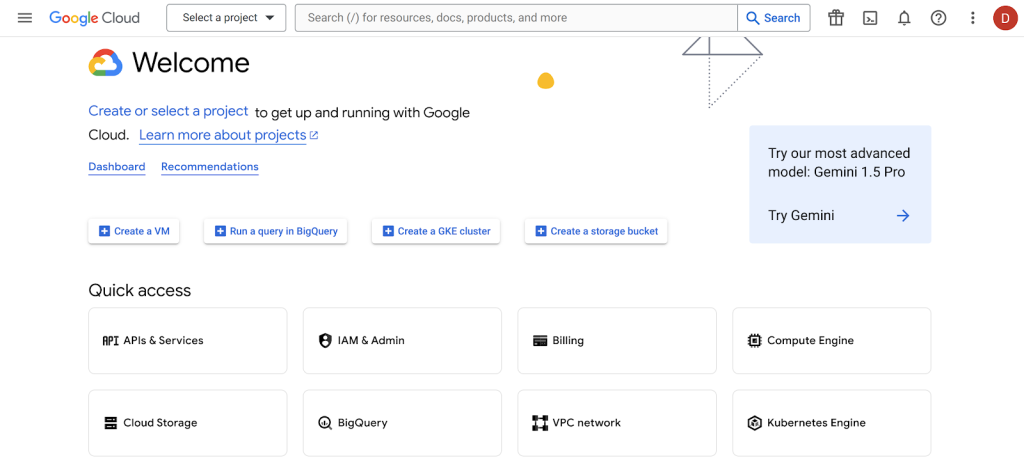
- Go to the Google Cloud Platform Console: To obtain the client ID and client secret key, log in to your Google Cloud Console account. If you do not have an account then you have to sign up.
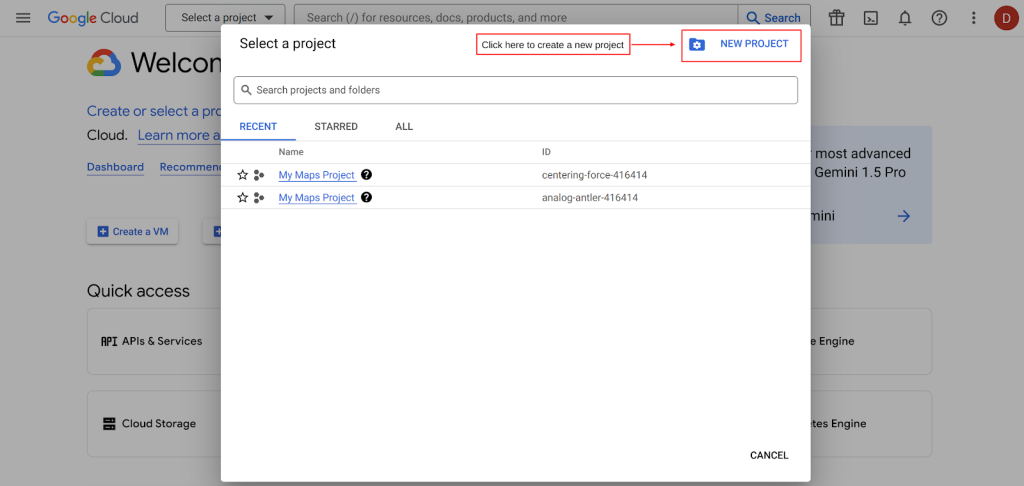
- Select your project or create a new one if needed. To create a new project click on “New Project”.
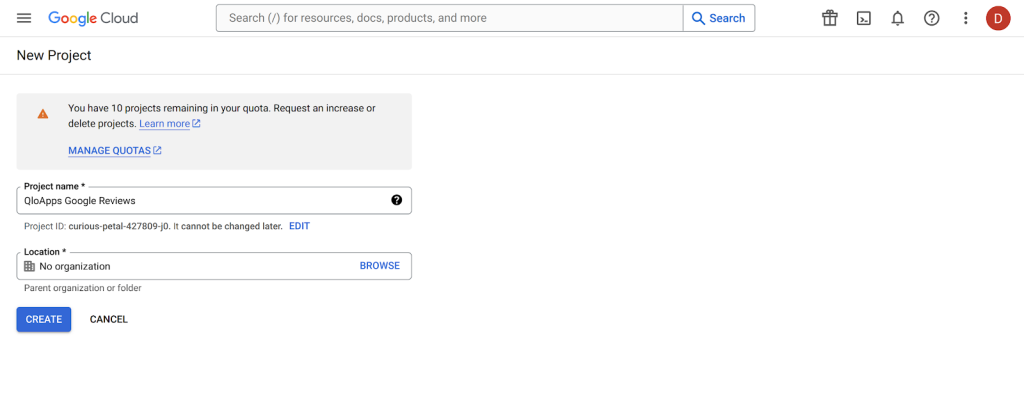
- Once you click on the new project, a new project window will appear. On this page, enter the project name and from “Location” select the location from the dropdown. Then click on the “Create” button.
- Now click on the select project button in the header and select the created project in Google Console.

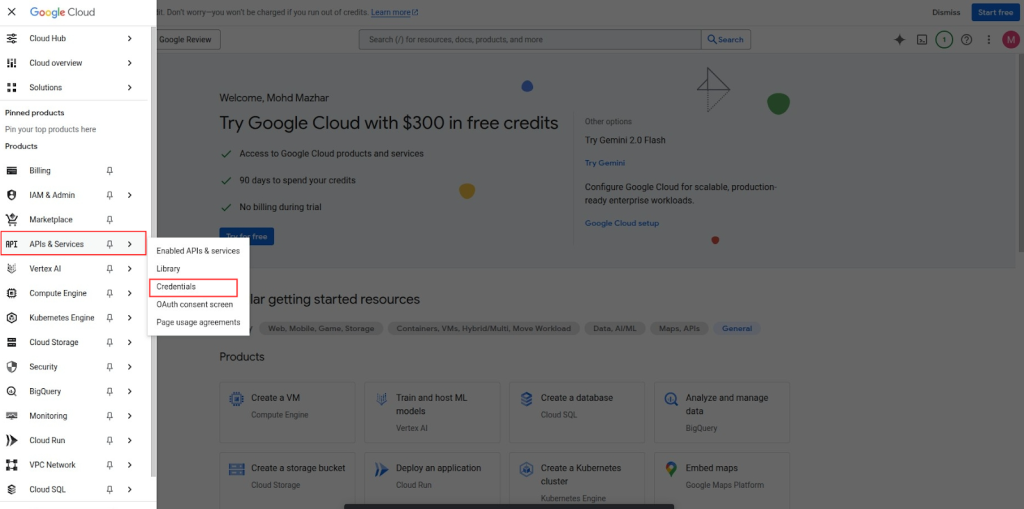
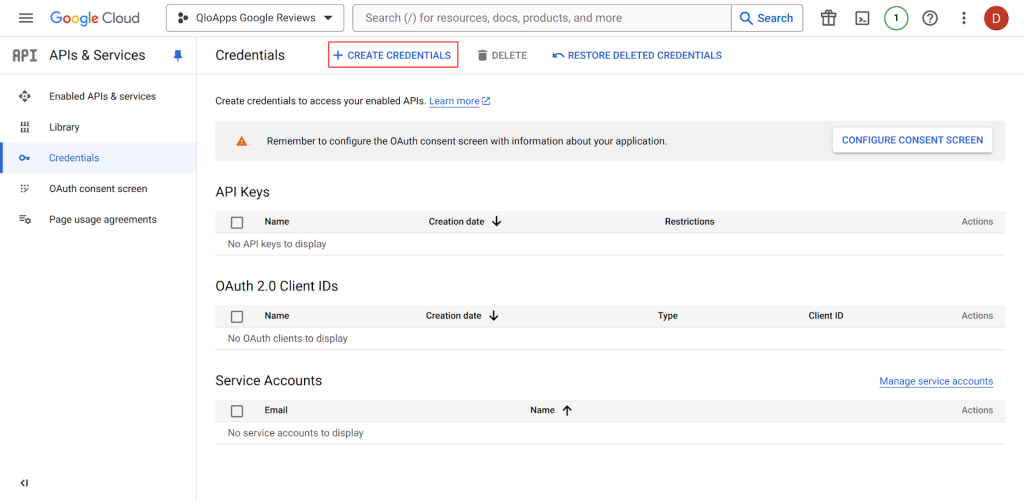
- Open the left side menu and select “APIs & services” and then click “Credentials“.
- Click on the “Create Credentials” button on the credentials page.
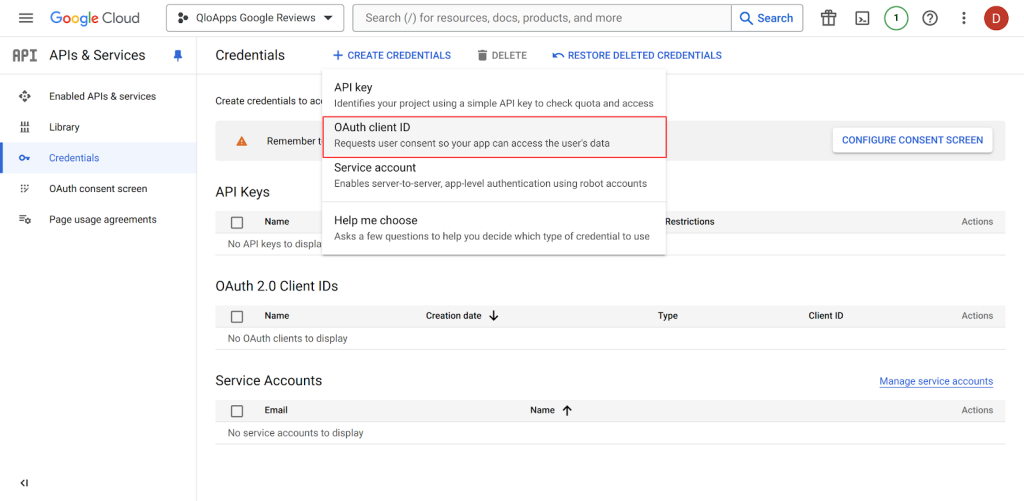
- Now choose “OAuth client ID” from drop down.
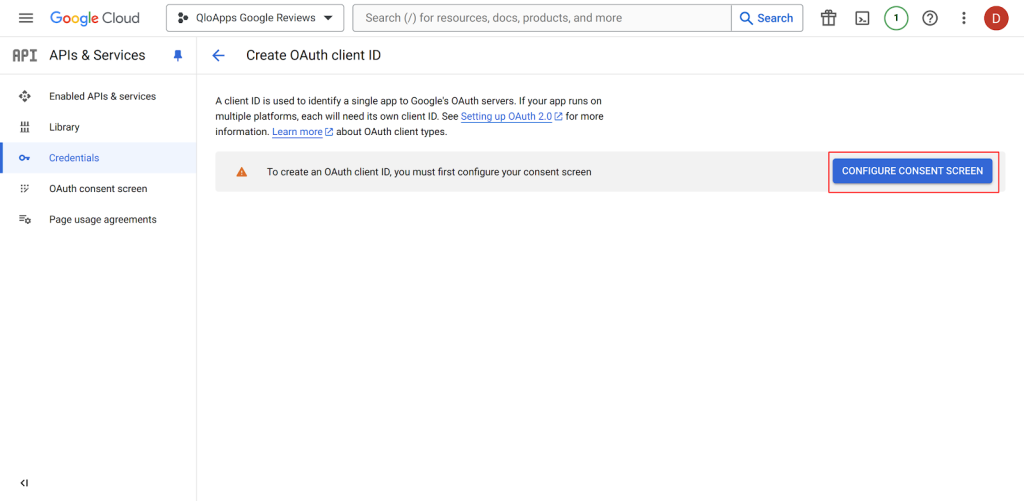
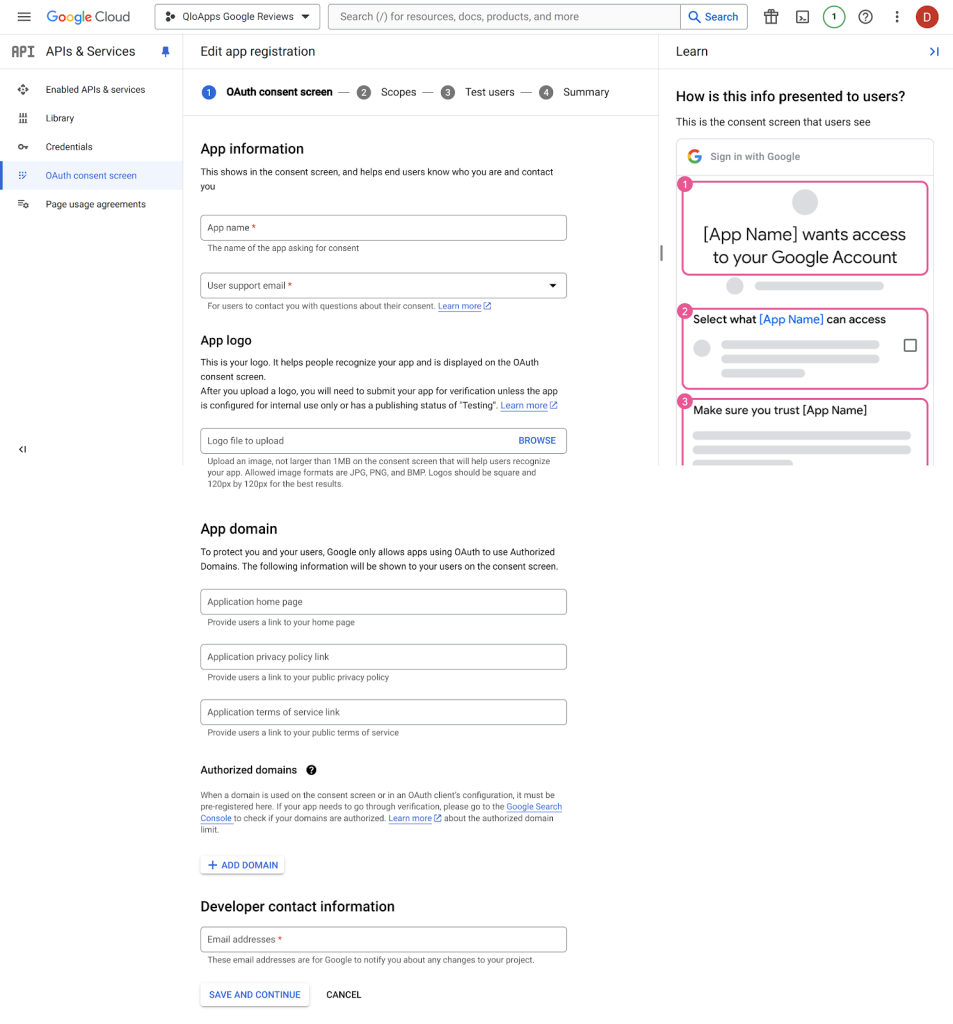
- Now, before creating credentials you have to configure your consent screen. For this click on “CONFIGURE CONSENT SCREEN“.
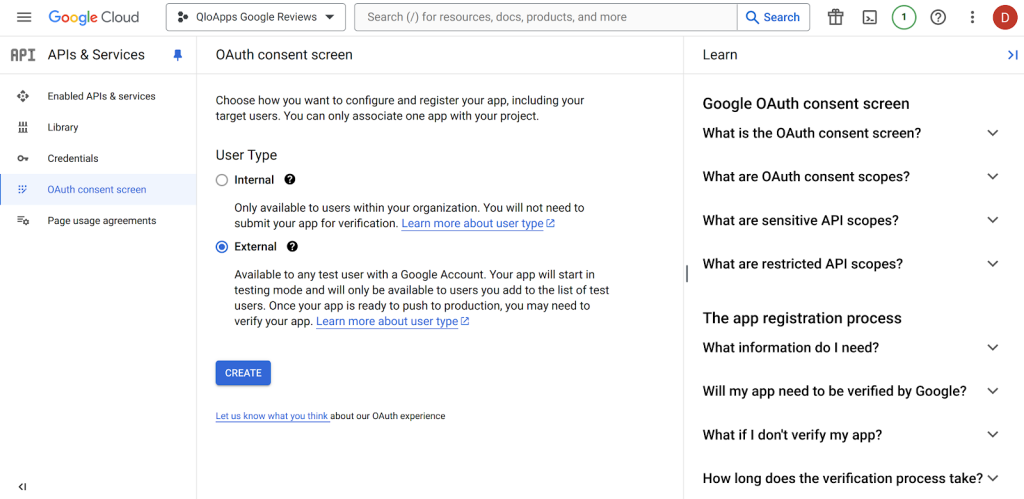
- Select “External” in the consent screen option.
- Fill in the details of app information, app domain, and app authorized domain and click on save and continue till the summary section.
- Fill in the required information for your application, including the authorized JavaScript origins and redirect URIs.
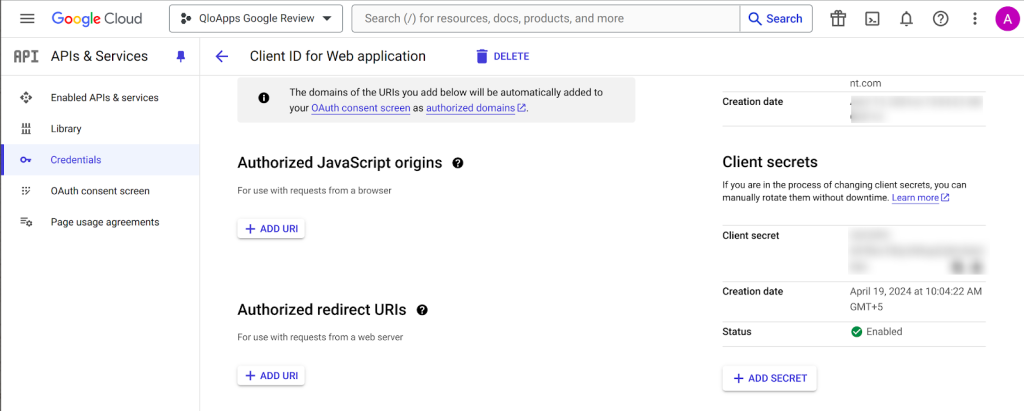
- Click “Create” to generate your OAuth 2.0 client ID and client secret.
Note: Under the Authorized redirect URIs, add the link that was provided on the configuration page in back office to create a connection with your Google Cloud account.
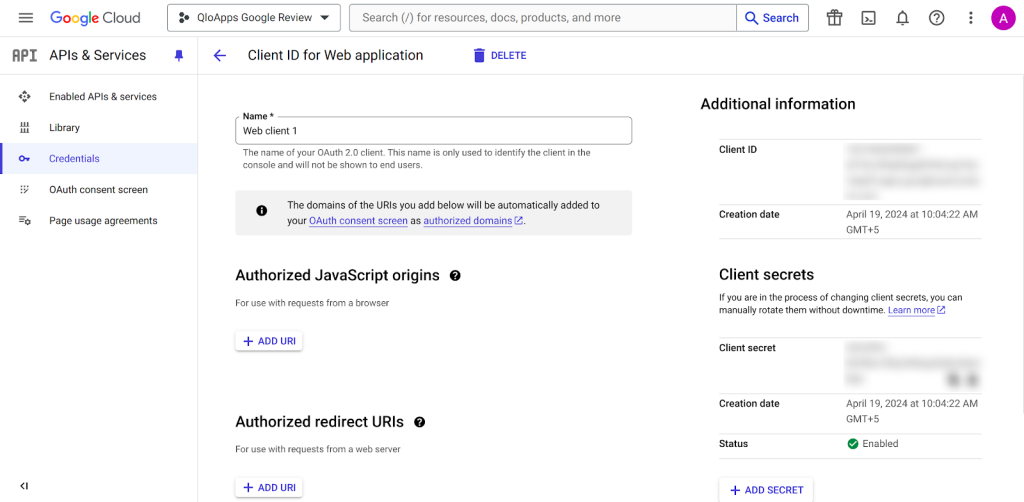
- Save the client ID and client secret securely, as you will need them for authentication.
Note: You can refer to the basic setup doc of Google to learn the business setup process.
Front End Workflow of QloApps Google Review addon
After successfully configuring the addon, the Google Review will be displayed on selected pages of the QloApps hotel website.
Here is the front-end view for every available position on the hotel website.
Search Result Page
Display Google Review of your property on the Room Type Search Result Page.
Room Type Page
Display Reviews on the Room Type Information page on the following positions:
Image Block
Display Google Review in the image Block on the Room Type Information Page.
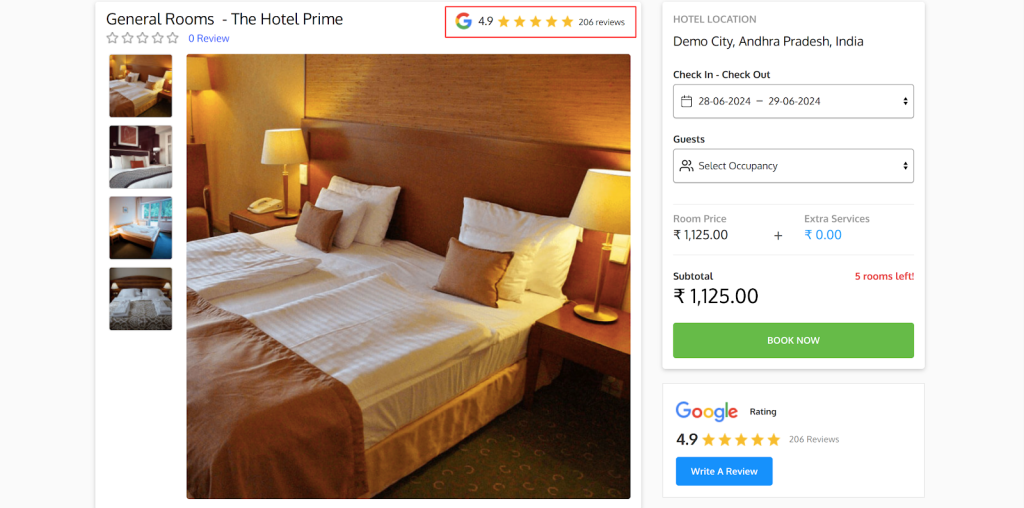
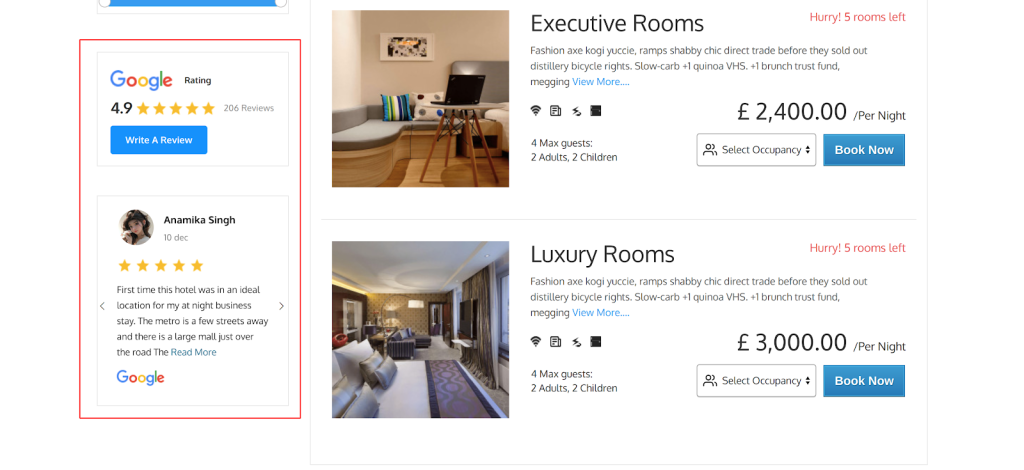
Right Block
Display Google Review in the right block on the room type information page.
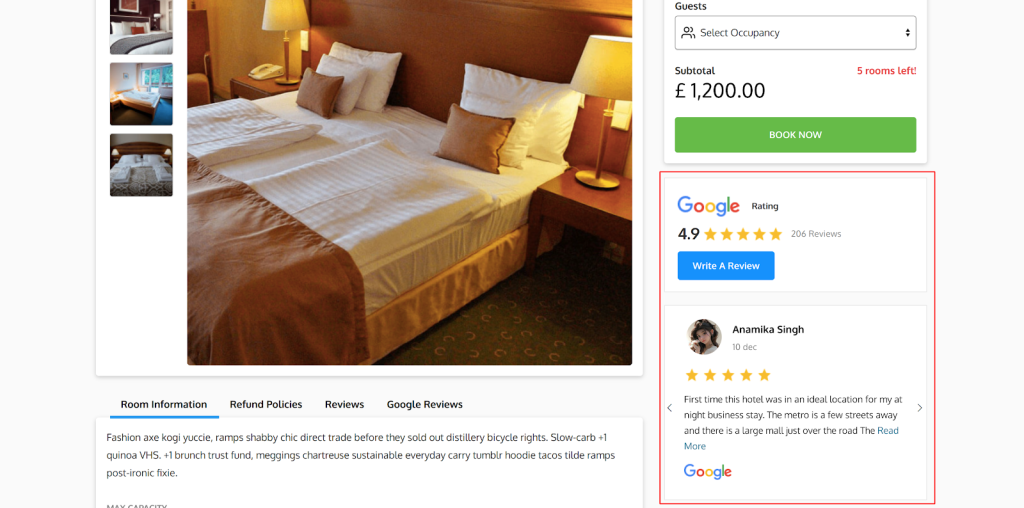
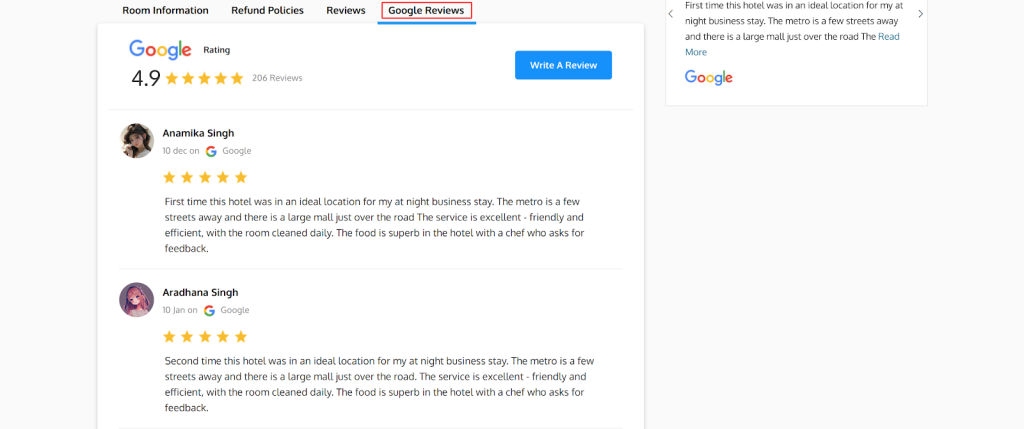
Review Tab
Display Google Review in the review block on the room type information page.
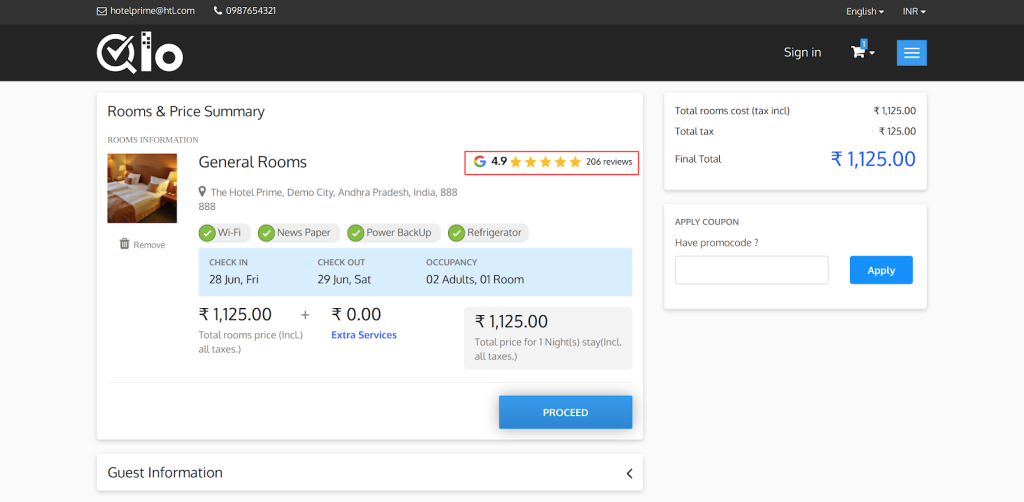
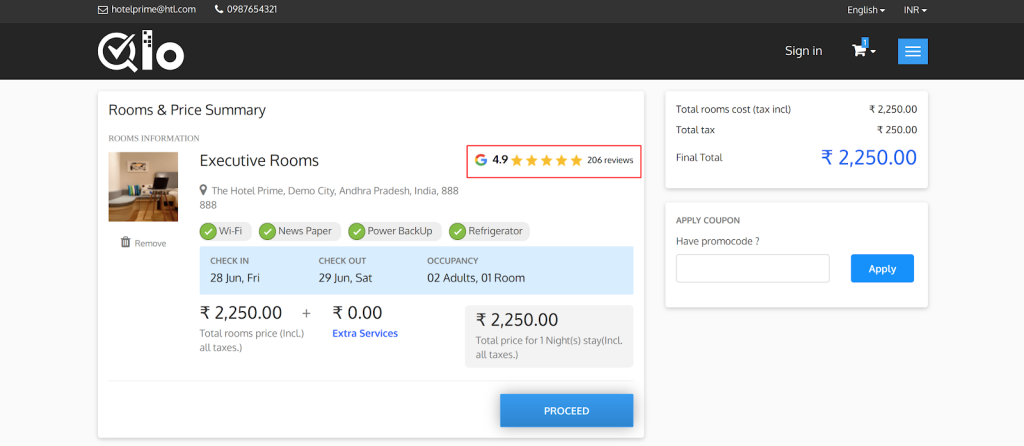
Checkout Page
Display the overall review ratings on the checkout page.
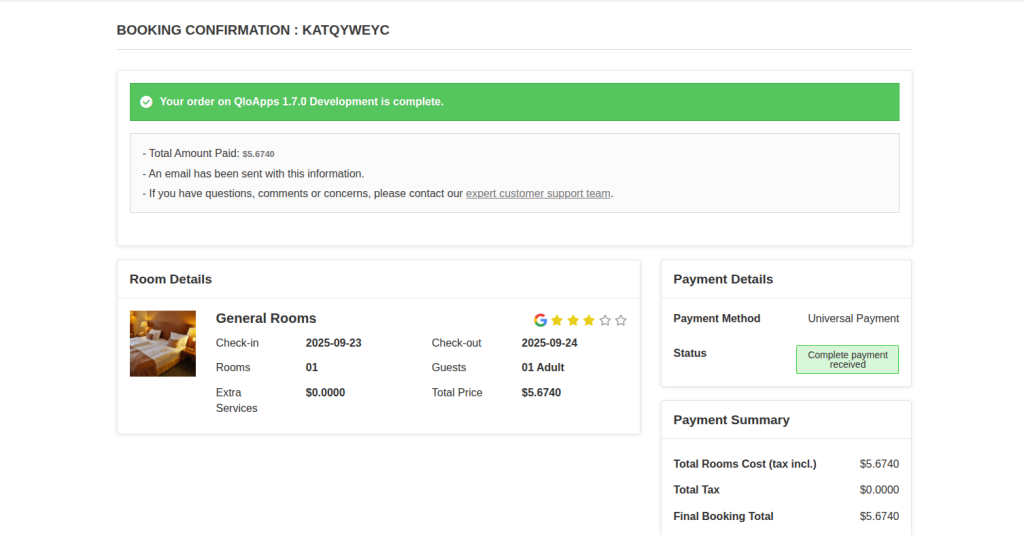
Order Confirmation Page
Display the overall ratings on the order confirmation page.
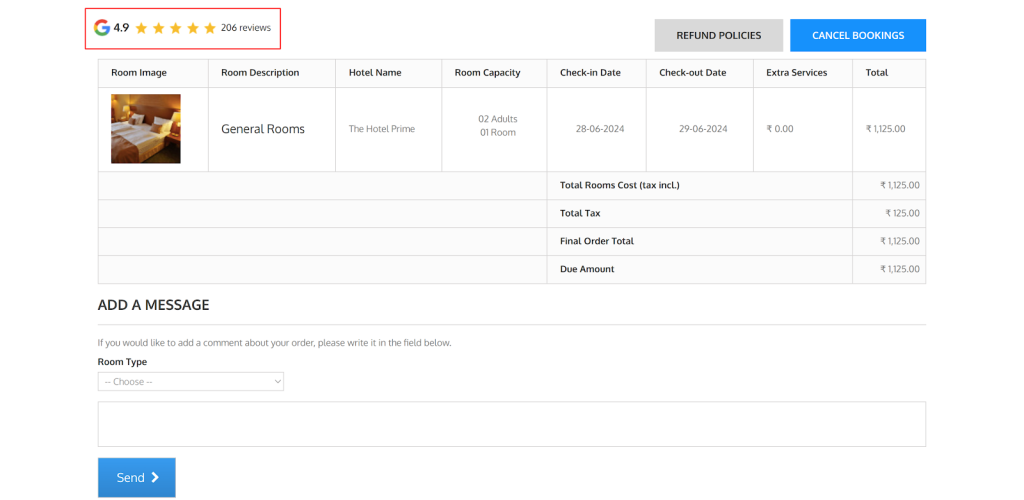
Order Details Page
Display the overall ratings on the order details page.
Guest Checkout Page
Display the overall ratings on the guest checkout page.
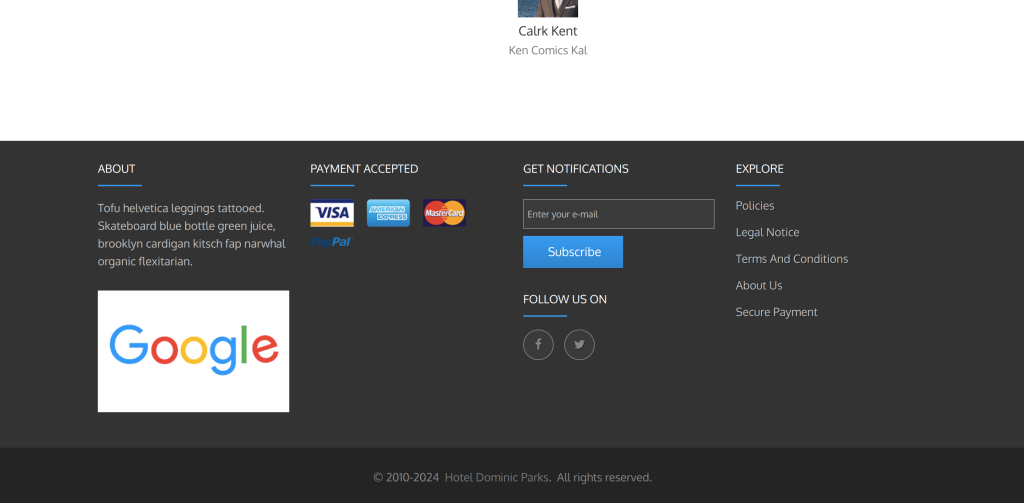
Logo Image in Footer Section on Home Page
Display the image in the footer section on the home page of the QloApps hotel website.
Conclusion
I hope you were able to understand the functioning of QloApps Google Review through this blog post.
If you want to learn about the functionality of QloApps, then you can visit this link: Qlo Reservation System – Free Open-Source Hotel Booking & Reservation System.
In case of any query, issue or requirement please feel free to raise it on QloApps Forum
Current Product Version – V 4.0.0
Supported Framework Version – QloApps 1.7.x

Be the first to comment.