QloApps Frontpage Slideshow
QloApps Front Page Slide Show addon will help you make your hotel booking website attractive and informative.
With this addon, you can effortlessly enhance your website by integrating slideshows across multiple pages and at diverse positions, providing a dynamic visual experience for your visitors.
We’re well aware that a visually appealing website captivates users, driving increased traffic and elevating the likelihood of successful conversions.
QloApps Front page slide show helps you redirect your customers to specific pages and track the statistics of your guest’s impressions and clicks on your sliders.
Hence, if you aim to captivate your website visitors and elegantly display your hotel images, this addon is the perfect solution for you.
Features of QloApps Front Page Slide Show
- Admin has the flexibility to integrate sliders at various positions across multiple pages of the QloApps Booking website such as Landing Page, Search Result Page, Room Type Page, Order Confirmation Page, Order History Page, Checkout Page, and Guest Tracking Page.
- Admin can set the size and position of the slider.
- Admin can set the static or progressive nature of the sliders.
- Admin can customize the alignment and content of slider title and description.
- Admin can select from a diverse range of slider animation options.
- Admin can customize the slider overlay content including the title, description and button by changing its font size, font weight, and font color.
- Admin can add links with each slider image to redirect guests to any desired page they want.
- Admin can add multiple images in the slider and give each image a title, description and link.
- Admin can track the statistics of each slider, including impressions and clicks on every image within the slider.
- Additionally, the admin can access detailed information about the user who clicked the image, including the user’s name, email ID, IP address, and customer details, especially if the user is an existing customer.
Installation of QloApps Front Page Slide Show
Admin can conveniently install the module in QloApps. The process of installation of the Front Page Slide Show module in QloApps is very simple.
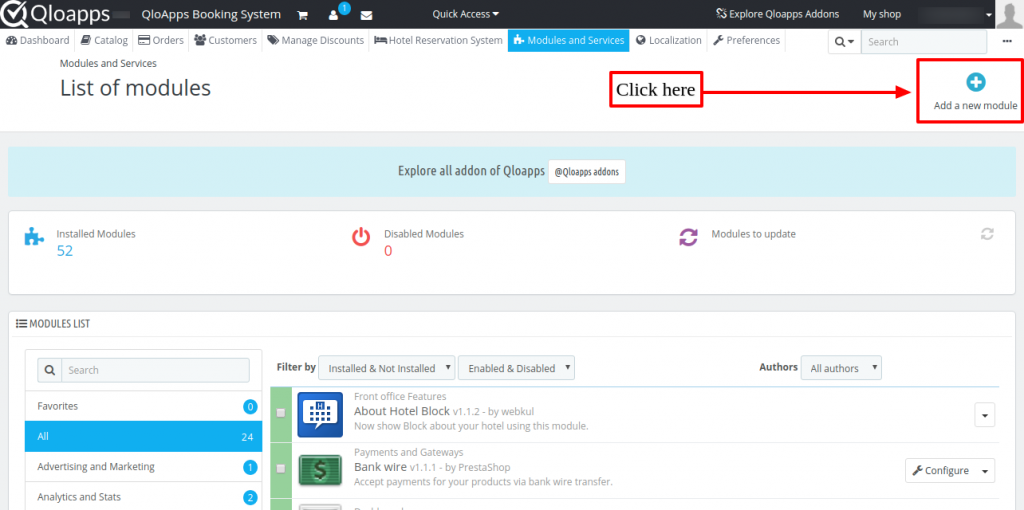
- Go to the “Module and Services” tab
- Click on “Add New Module”

Now, choose the zip file of the QloApps Front Page Slide Show module and click on “Upload and Install this Module”.

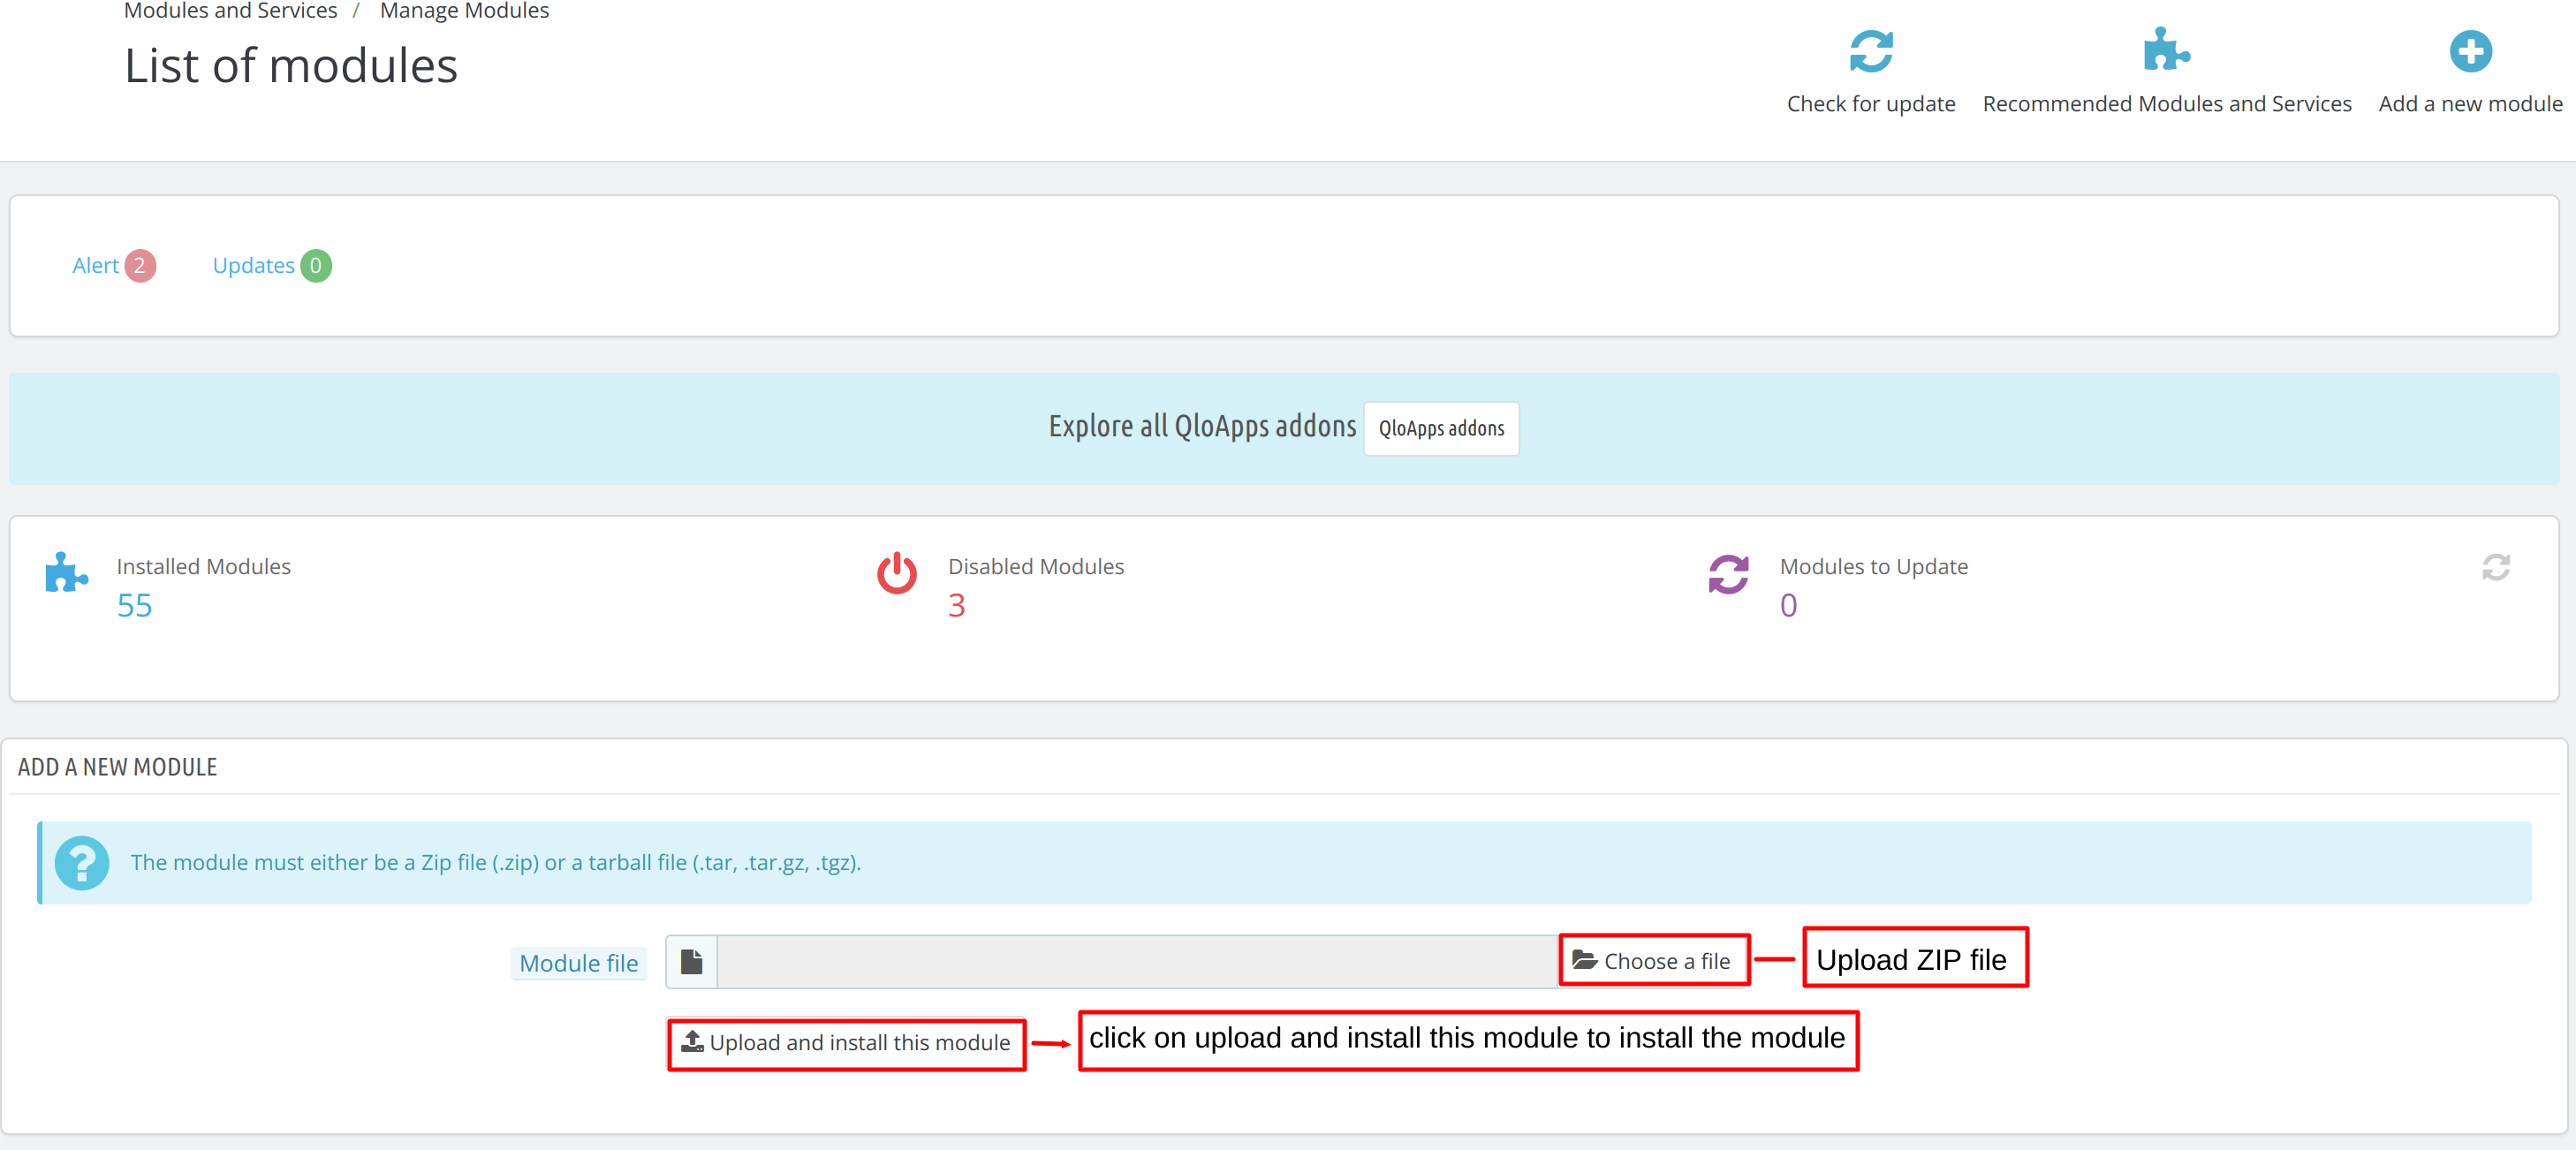
By following these steps the Admin can successfully install the QloApps Front Page Slide Show module in QloApps.
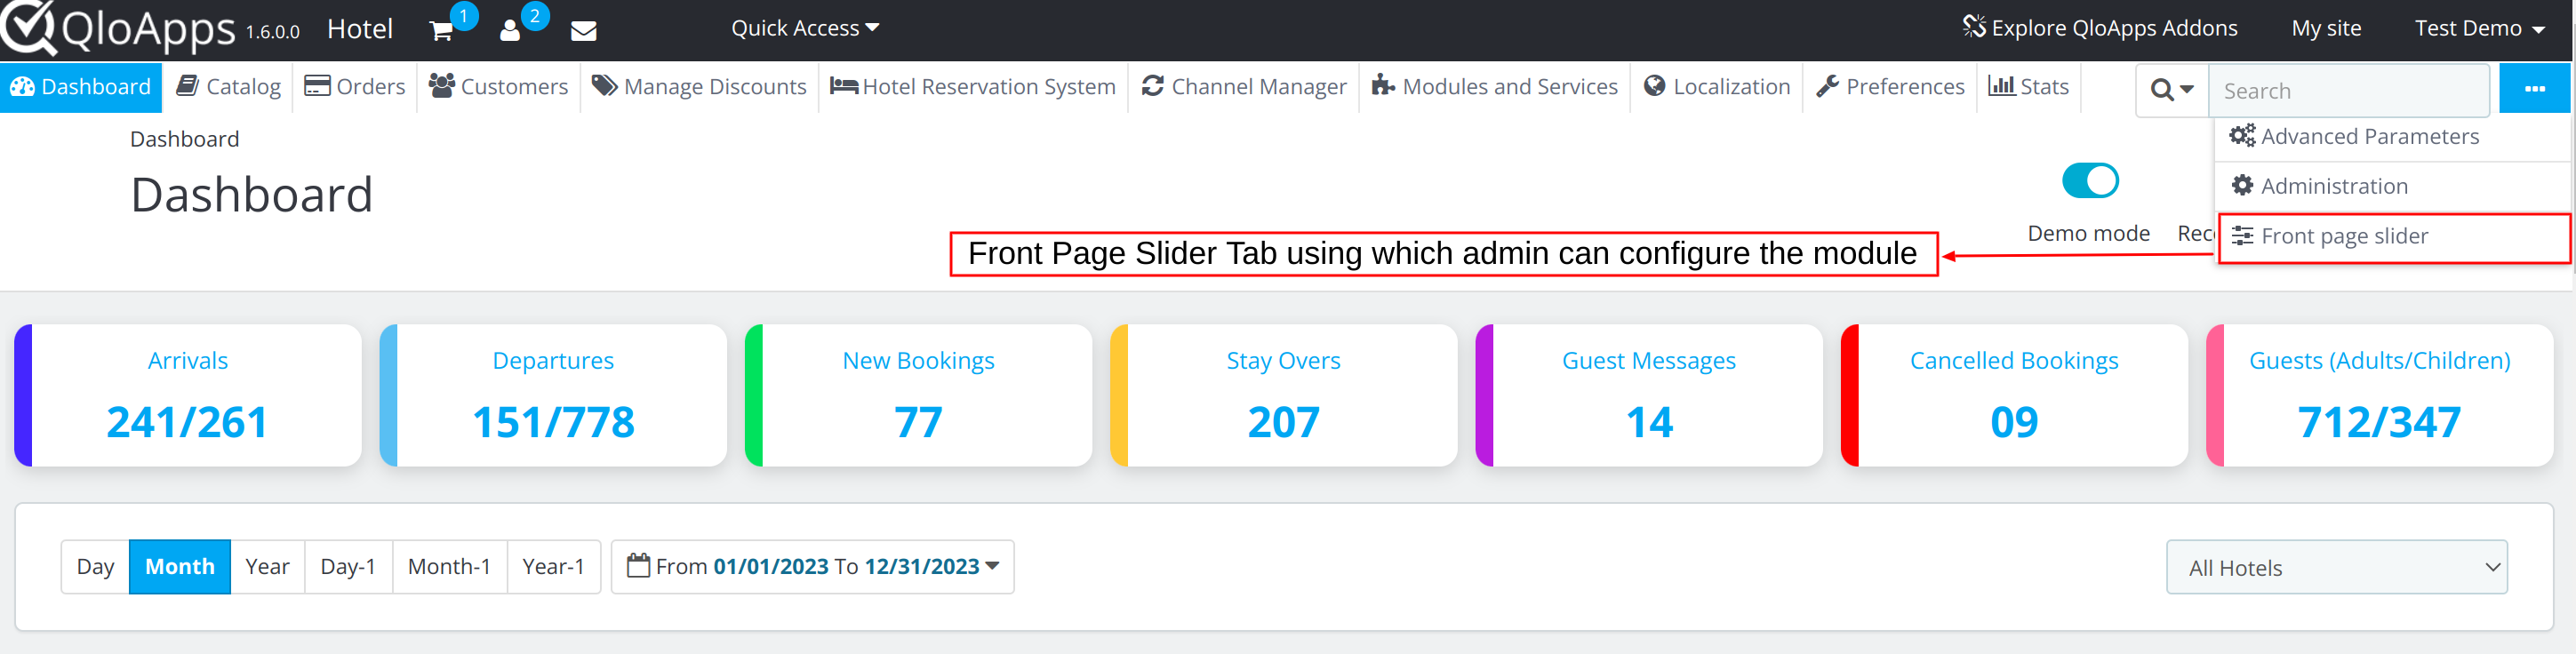
After successful installation, a new “Front Page Slider” tab appears in the QloApps menu bar.
The admin can use this tab to configure the module and create various sliders for the website.

The process to configure QloApps Front Page Slide Show Module
To create and edit the QloApps Front Page Slide Show module in QloApps, the admin will go to:
Front Page sliders -> Manage Sliders

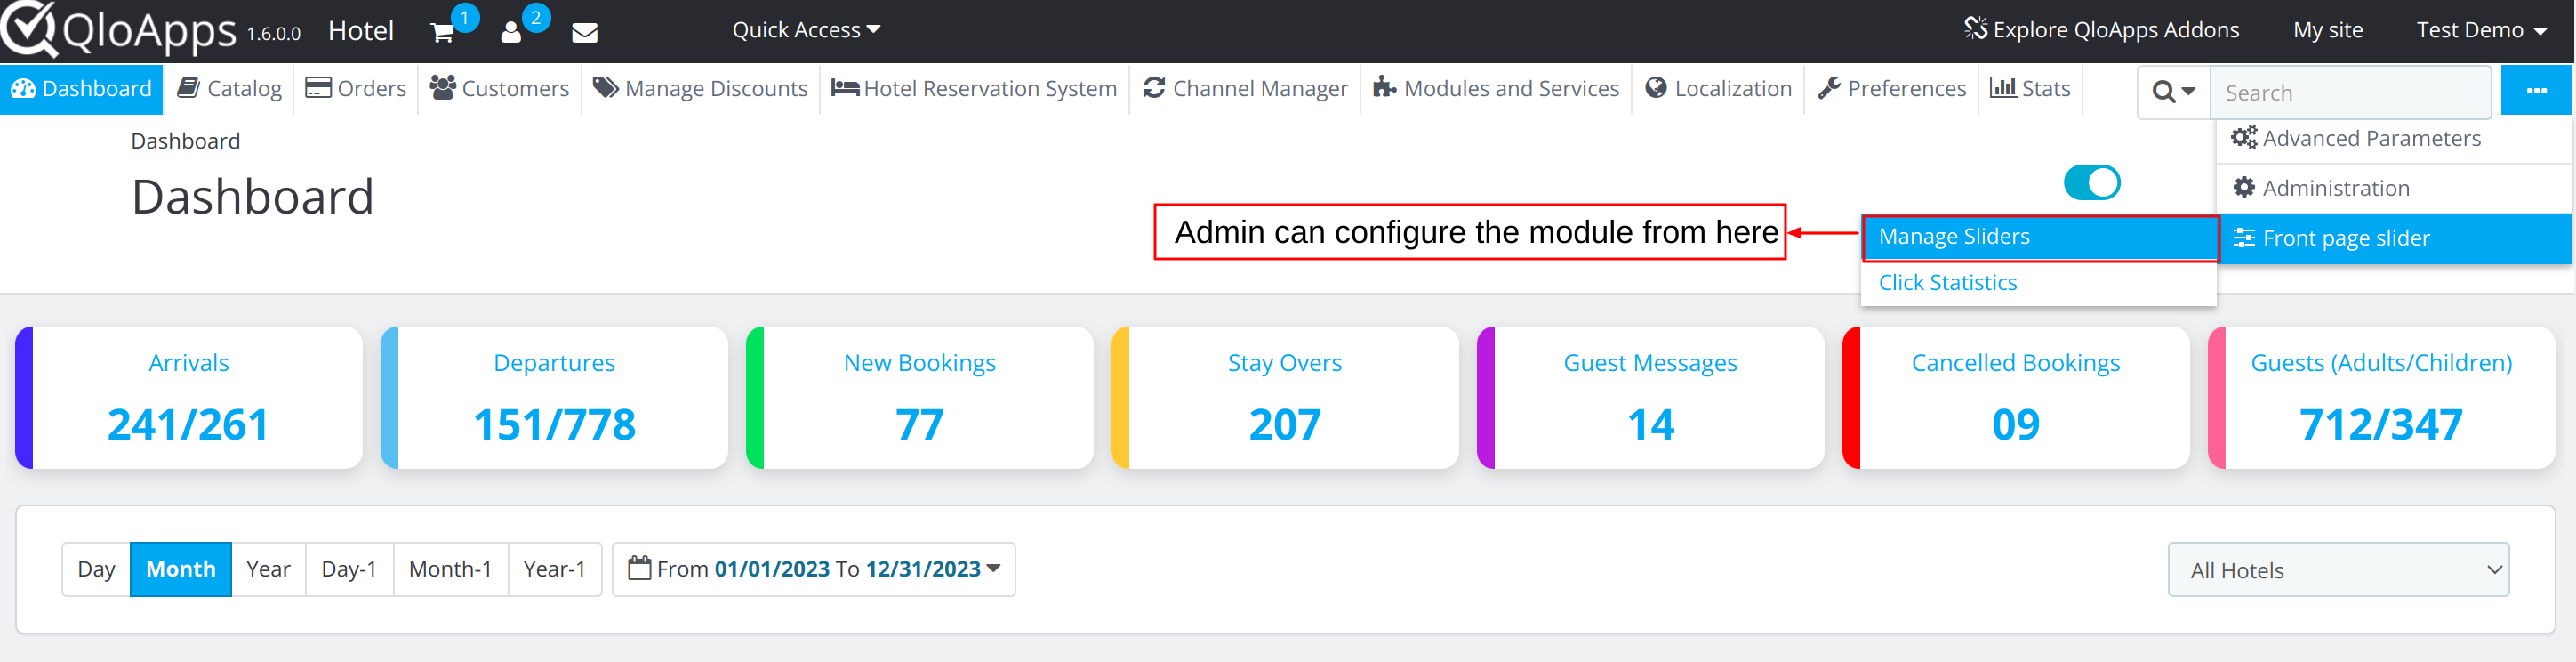
Manage Sliders
Within this section, the admin can effortlessly generate new sliders and modify existing ones to adjust the visual presentation of their website.

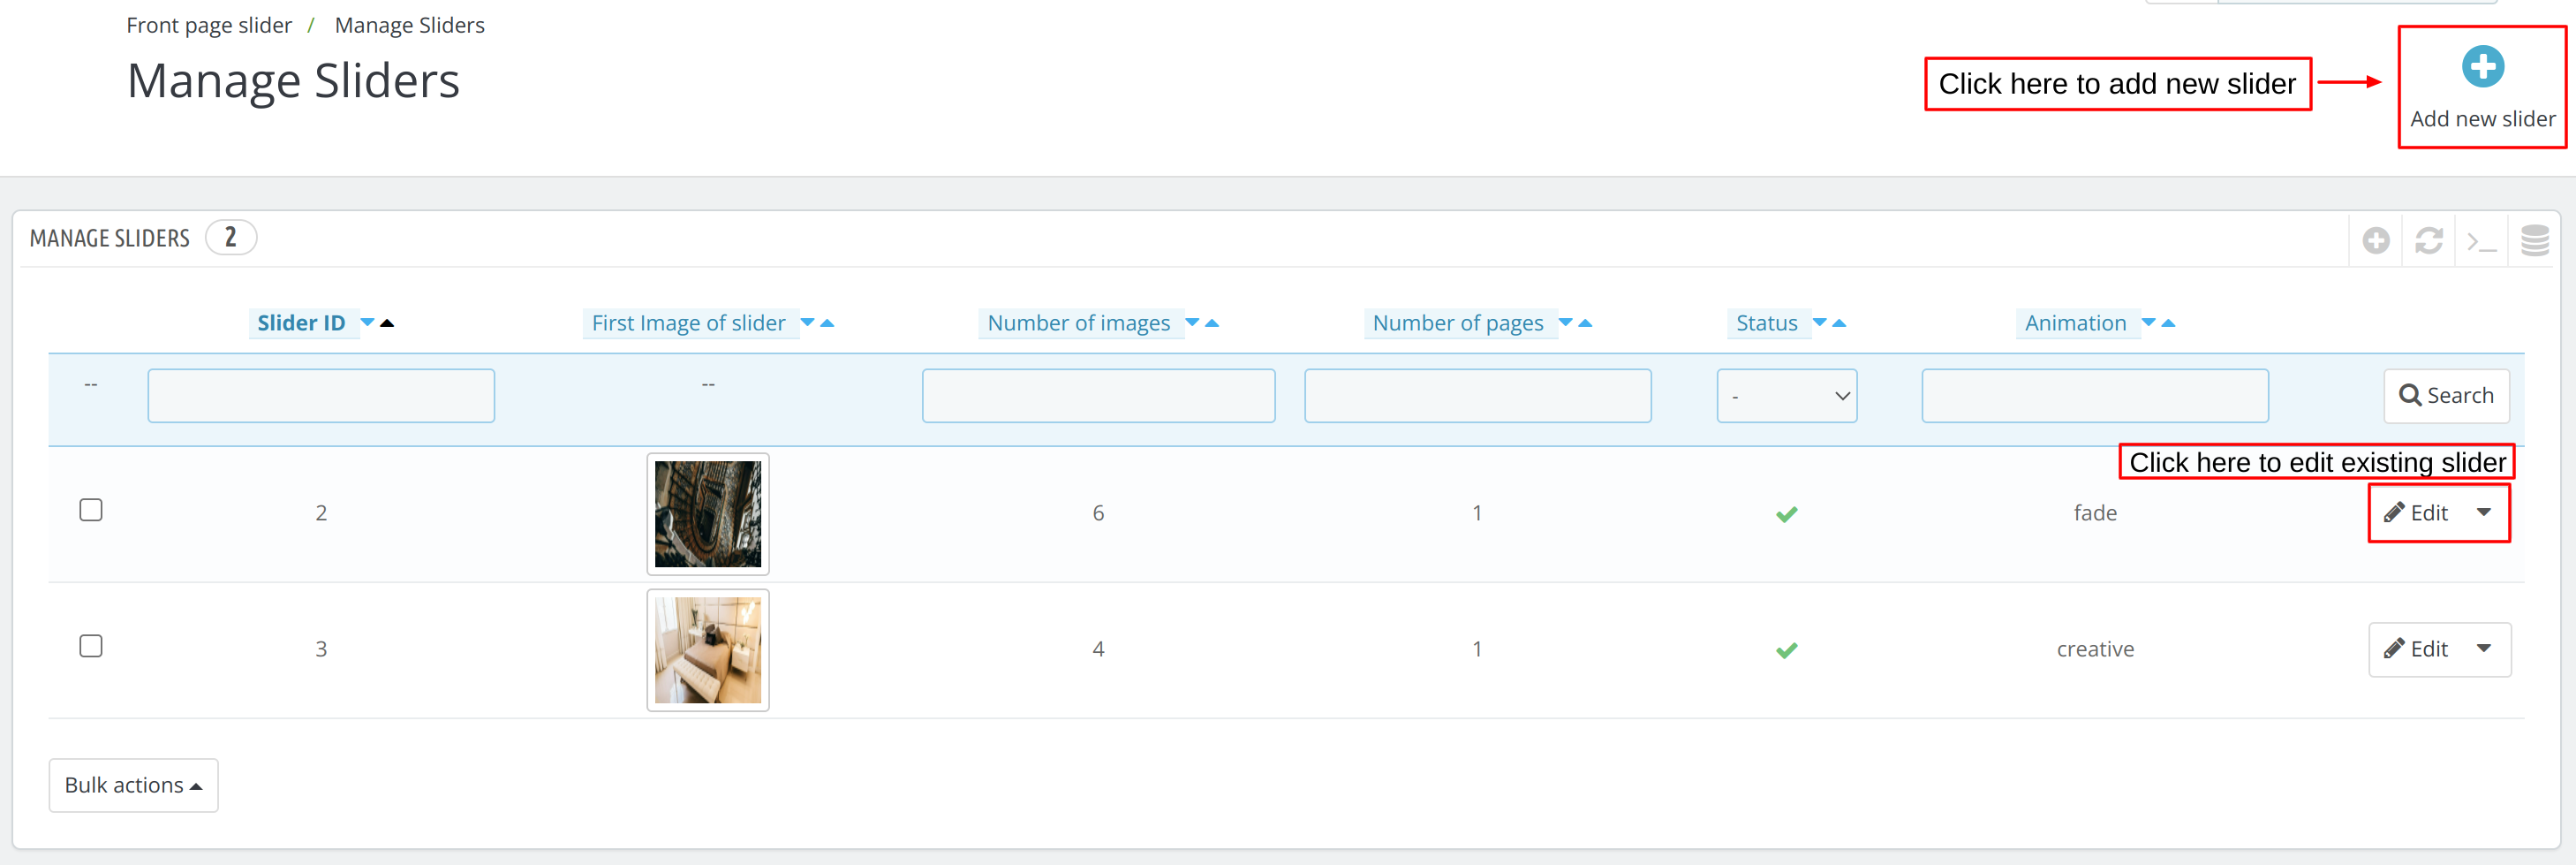
To create a new slider the admin will first click on “Add new Slider“.
Next, the admin will add details of the slider in two sections:
- Slider Configuration
- Slider Images
Slider Configuration
Through this section, the admin can enable or disable the various settings of the slider and add a slider title and description through the various options.

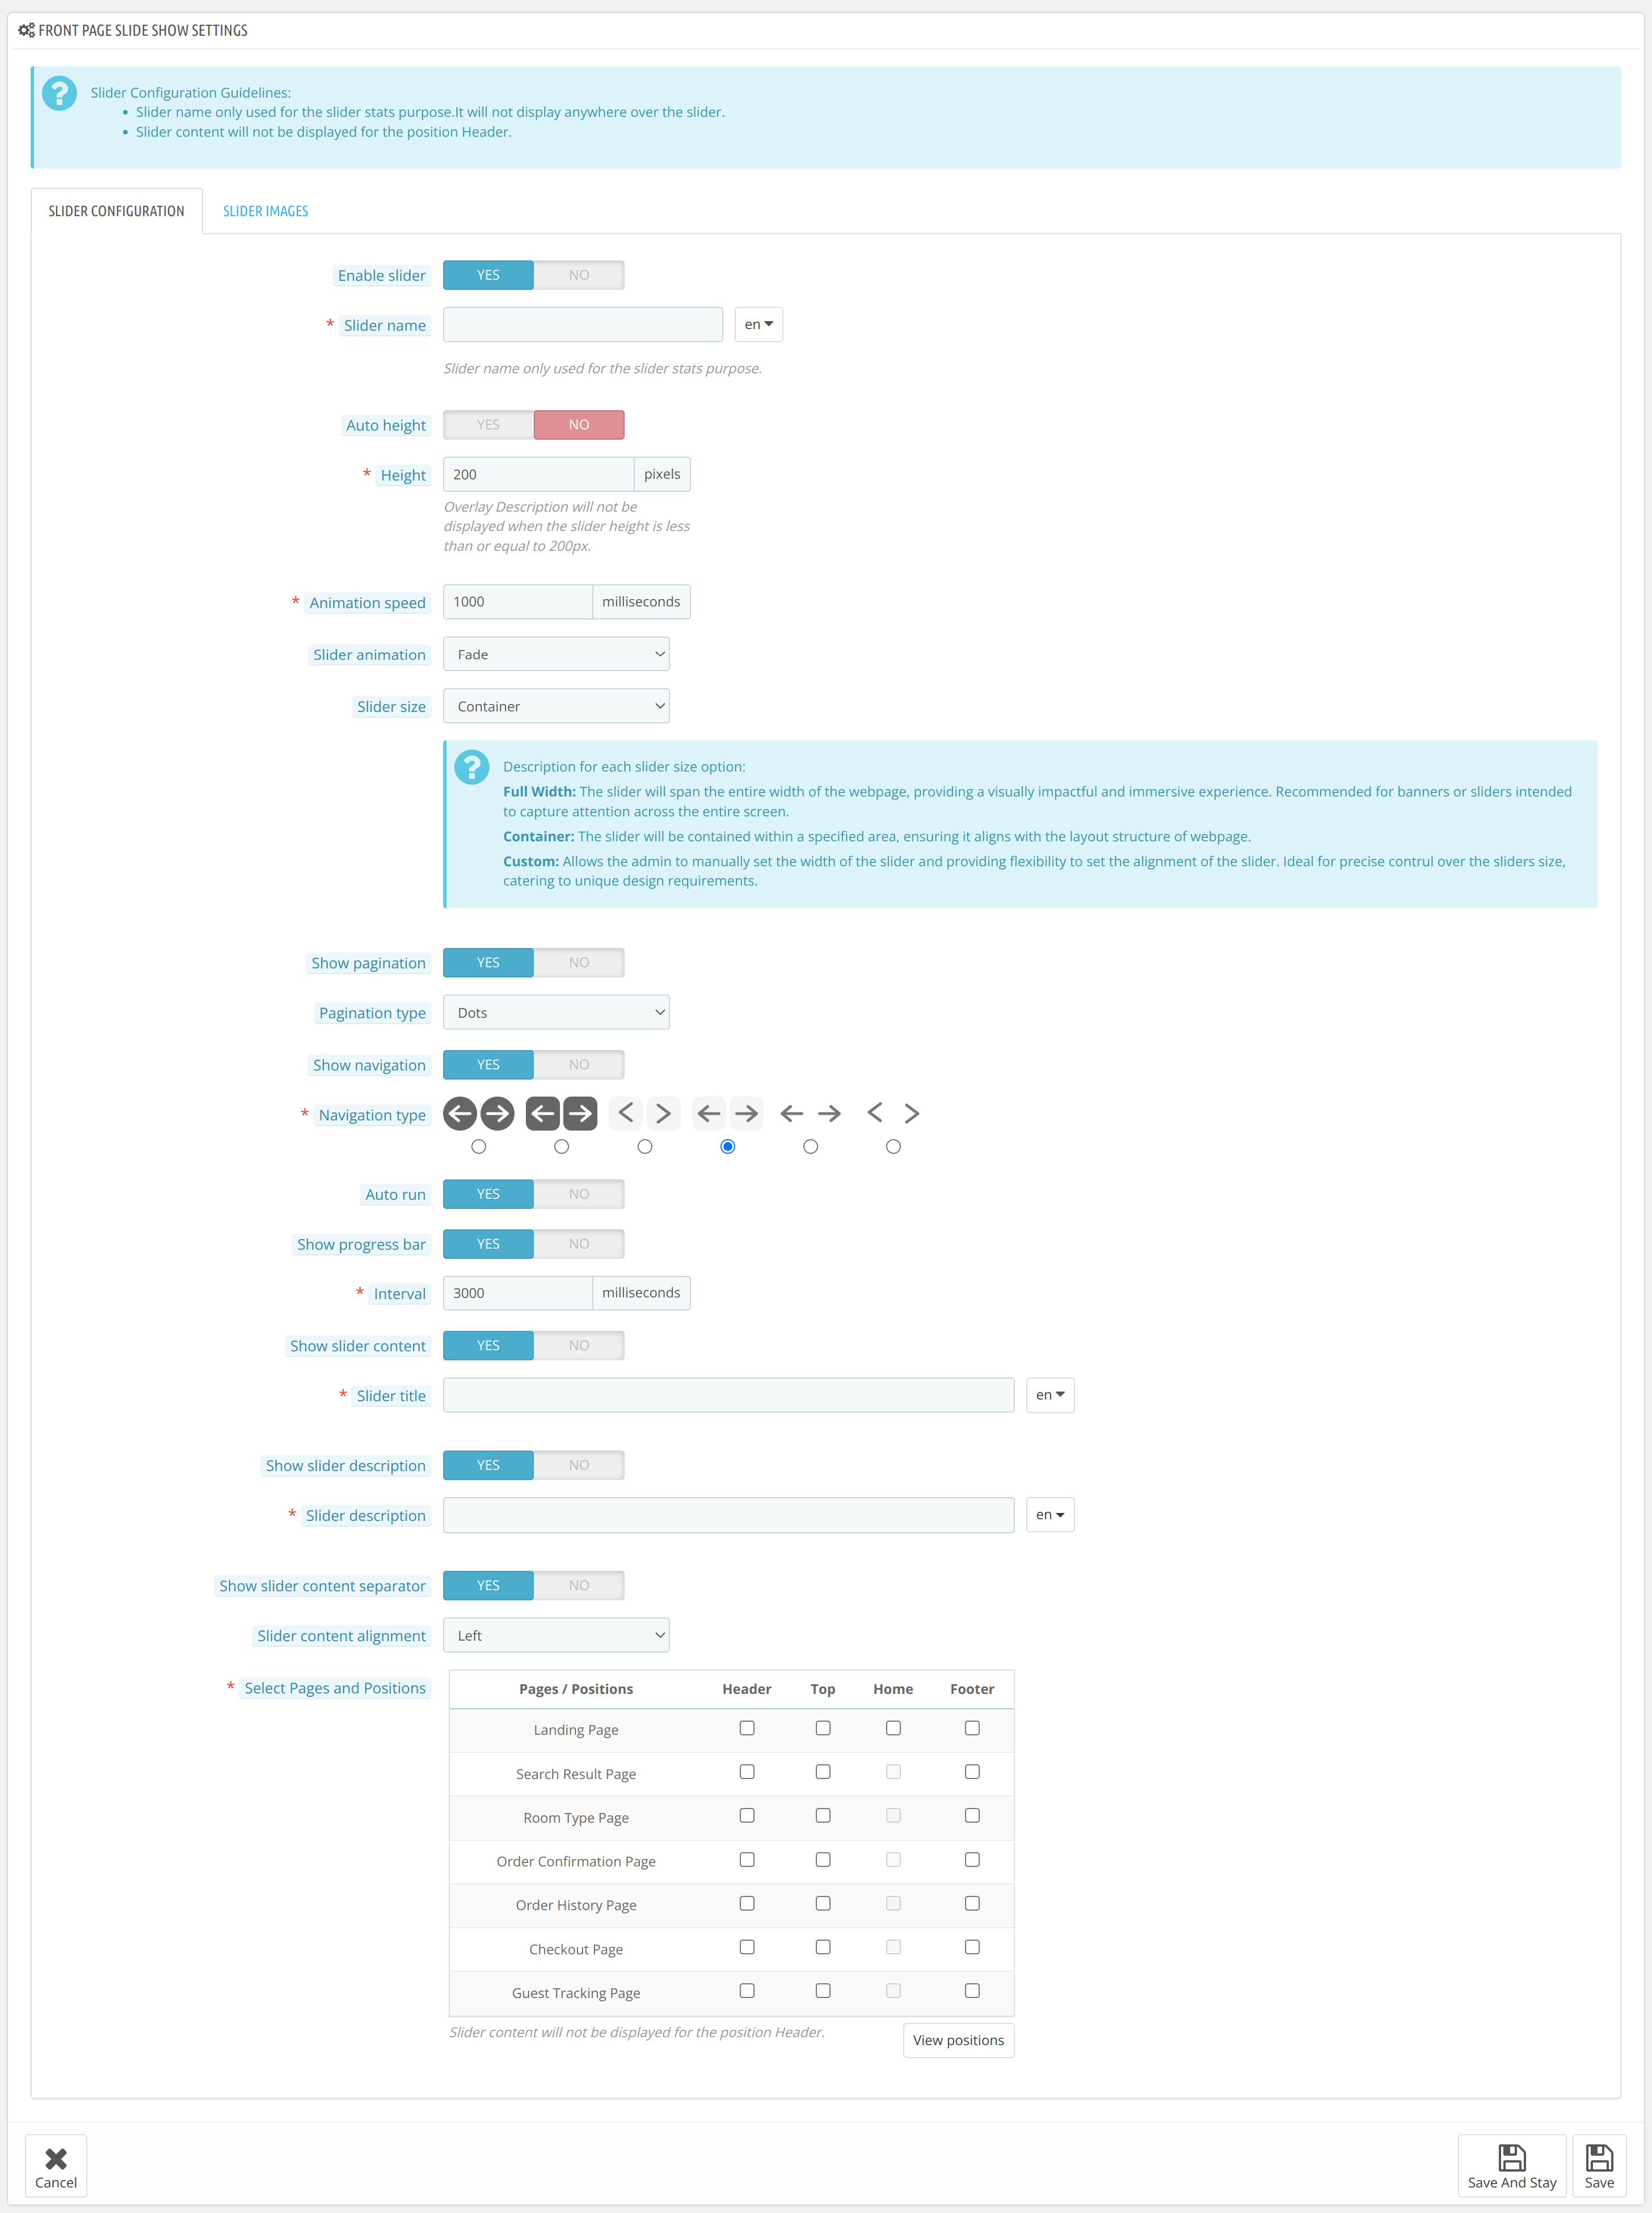
Let’s discuss the function of each configuration option.
- Enable Slider: Select yes to enable the slider on the website.
- Slider Name: Enter the name of the slider. (The name of the slider will not be displayed with the slider on the website, this will be only used for the slider stats purpose).
- Auto Height: Enable this option if you prefer to auto height for the slider. Disable this option to customize and set the height of the slider according to your preferences.
- Height: Set the height of the slider.
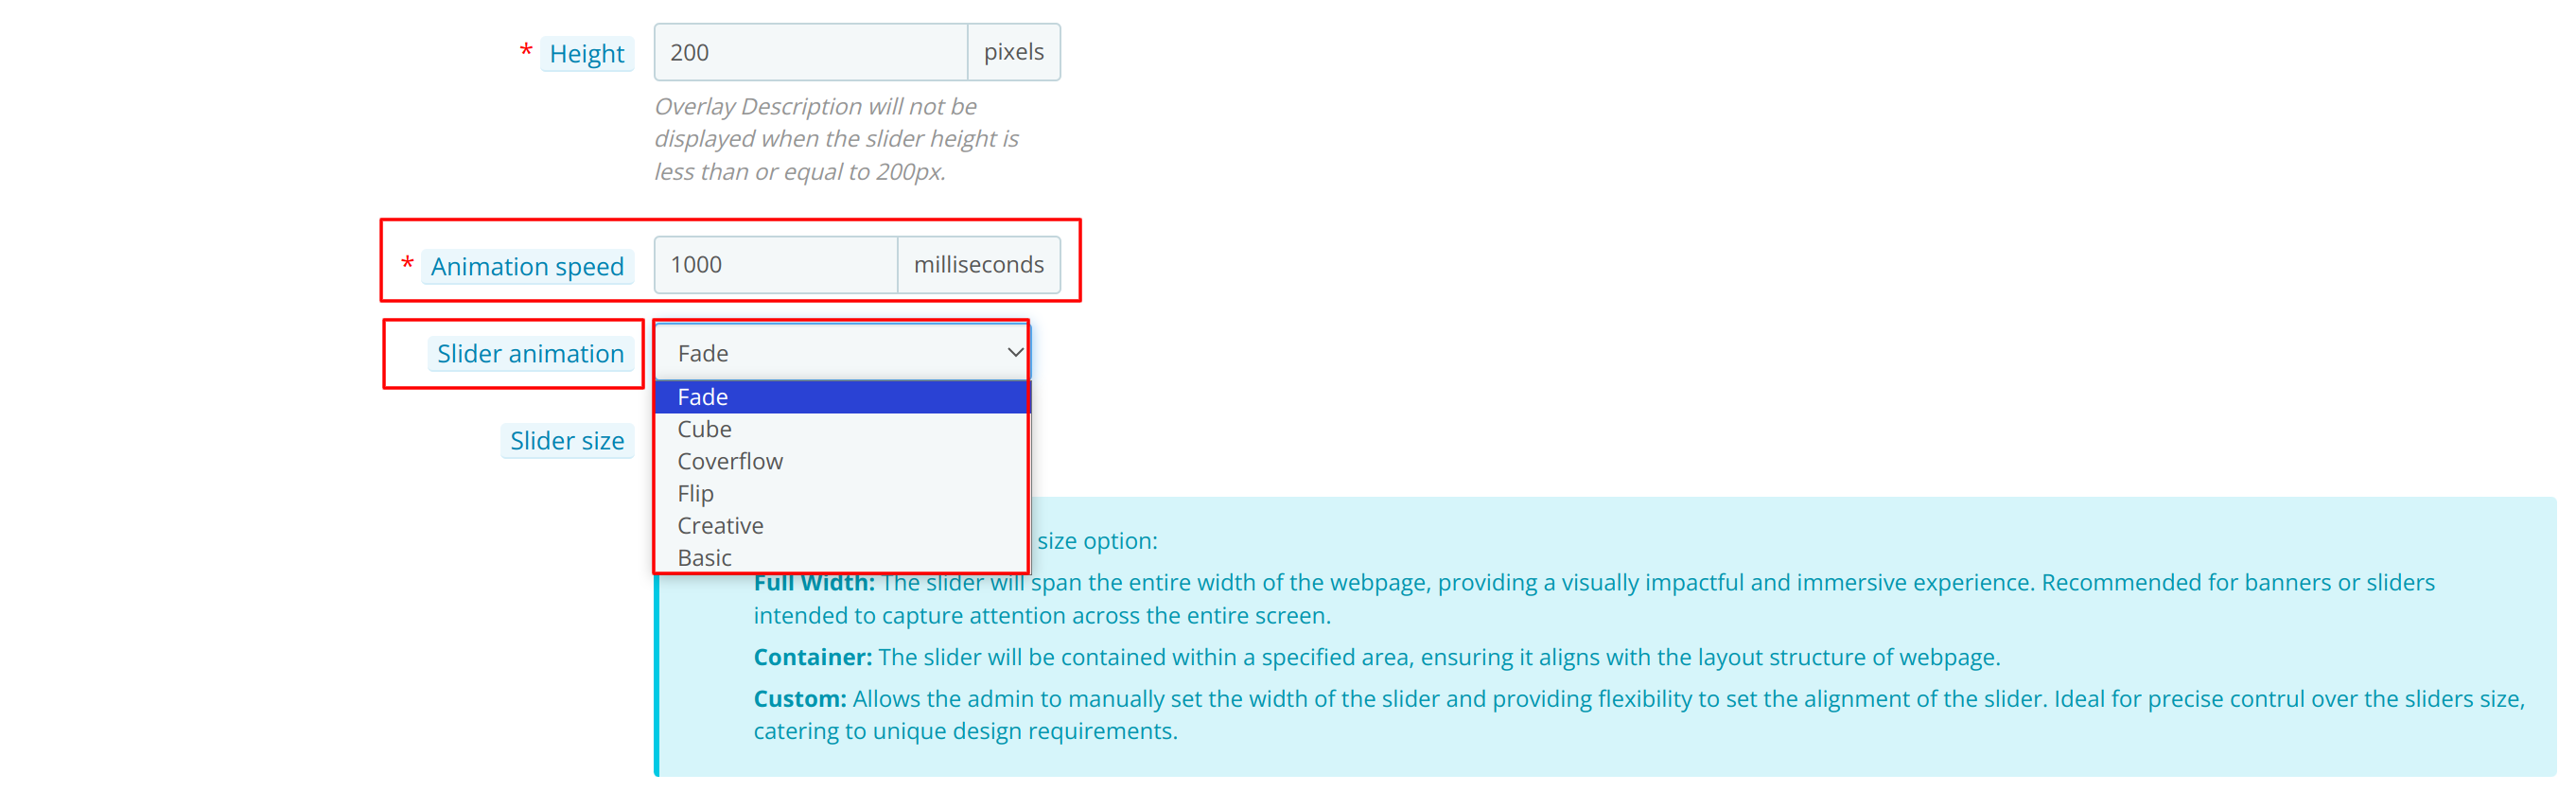
Animation Configuration
- Animation Speed: Set the duration of the animation for a seamless visual experience.
- Slider Animation: Allows admin to select the type of animation for the slider.

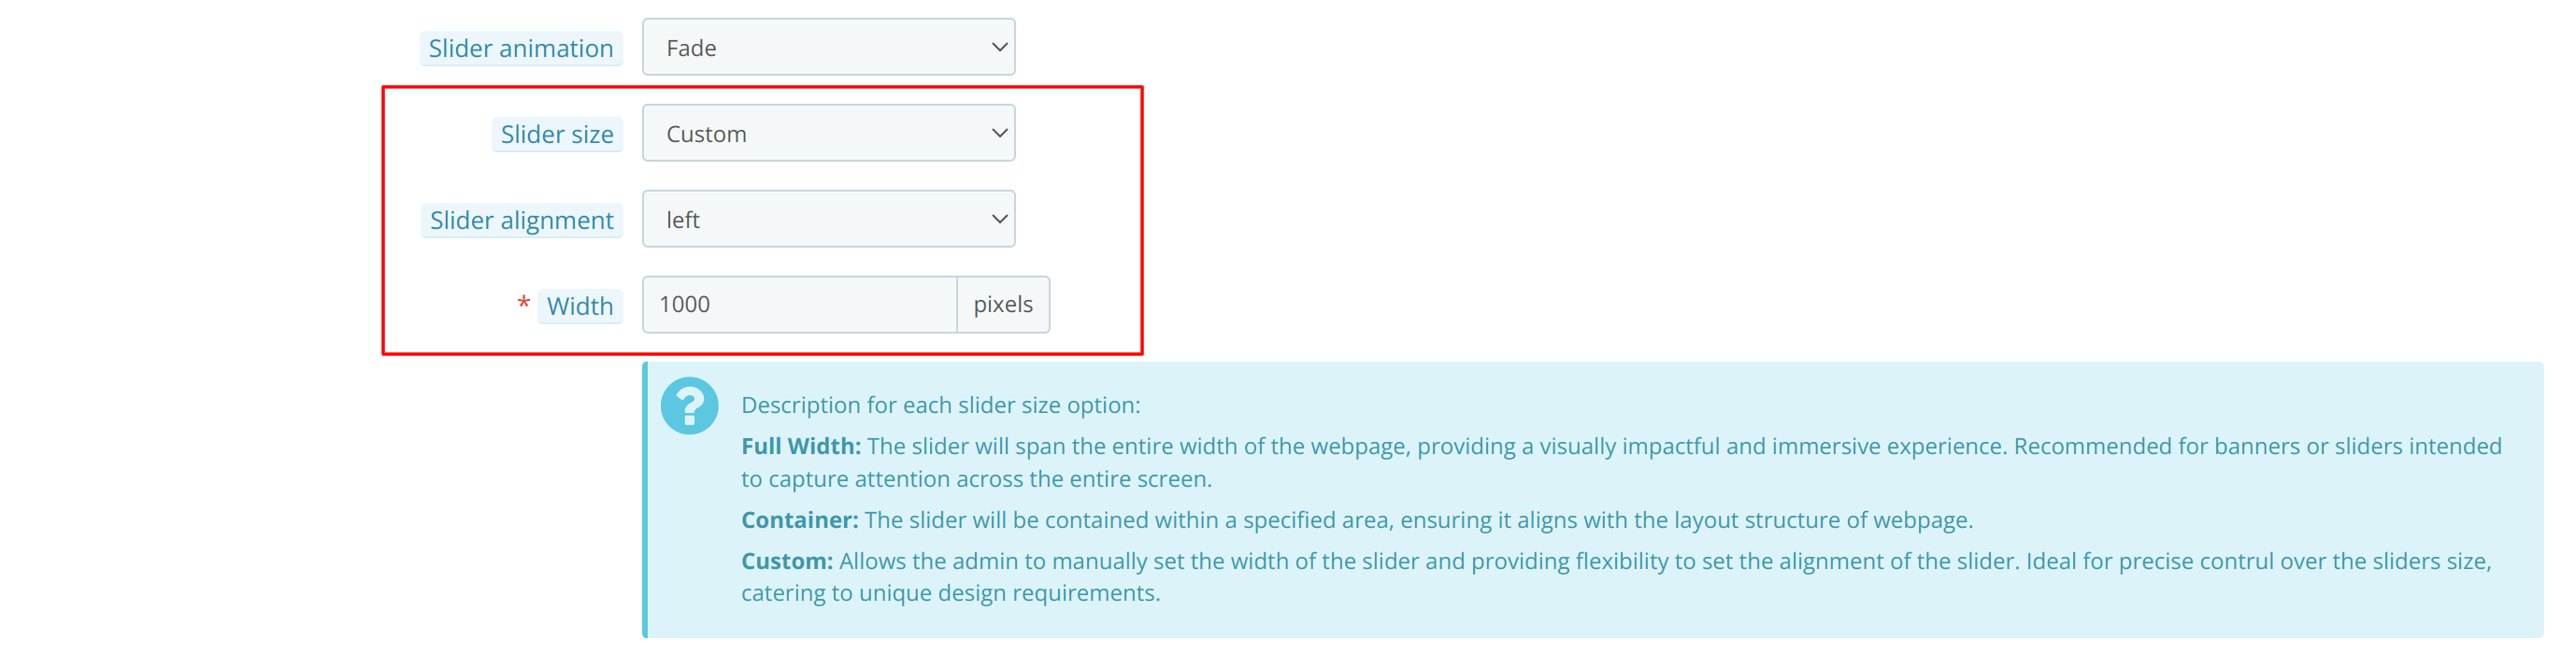
Size Configuration
- Slider Size: Select the desired size of the slider from this option.


- Container: A fixed-size slider will be displayed
- Full Width: Maximum size slider will be displayed covering the full width of the website page
- Custom: Set the custom value of width and the alignment of the slider.

Motion Configuration
- Show Pagination: The admin can enable this option to display the pagination of the slider images.
- Pagination Type: Once the admin allows pagination display, he can choose the type in which he wants to display the pagination by selecting one of the three types from the drop-down.


- Show Navigation: Allows admin to enable or disable whether he wants to display the navigation buttons on the slider
- Navigation Type: Once the admin allows to display navigation button, he can choose the type of navigation button with this option.


- Auto Run: Using this option the admin can decide whether slider images should change automatically or by manual click of user. Once the admin enables this option, he can then configure the auto-run settings using the following options:
- Show Progress Bar: Using this option you can configure whether you want to display the progress bar to your guests above the slider or not.
- Interval: The admin can set the time interval between the display image and the upcoming image of the slider image changes using this option. (Note: 1000 = 1 sec, so enter time accordingly )


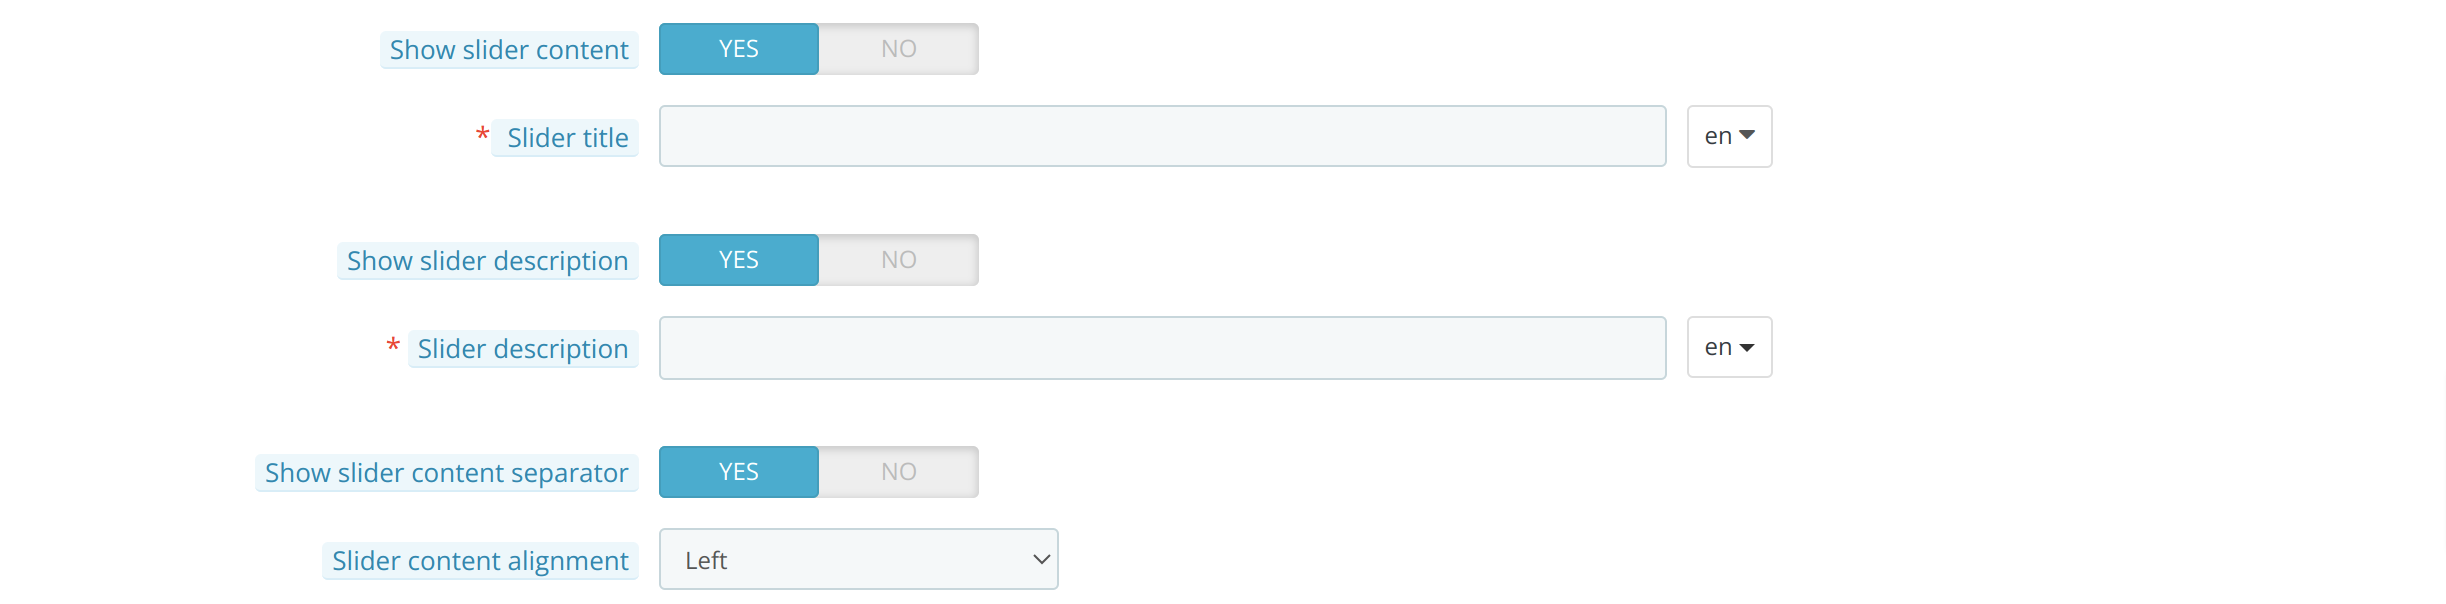
Content Configuration
- Show Slider Content: The admin can enable/ disable whether he wants to add content with the slider or not using this option. When the admin enables the option, he can then customize the slider title and description content and their alignments.
- Slider Title: The admin can add a slider title here.
- Show Slider Description: The admin can enable/ disable the slider description display.
- Slider Description: After the admin enables the option to show the slider description, he can add the content of the description here.
- Show Slider Content Separator: The admin can add a line of separation between slider and slider content by enabling this option.
- Slider Content Align: The admin can adjust the alignment of the slider content from here.

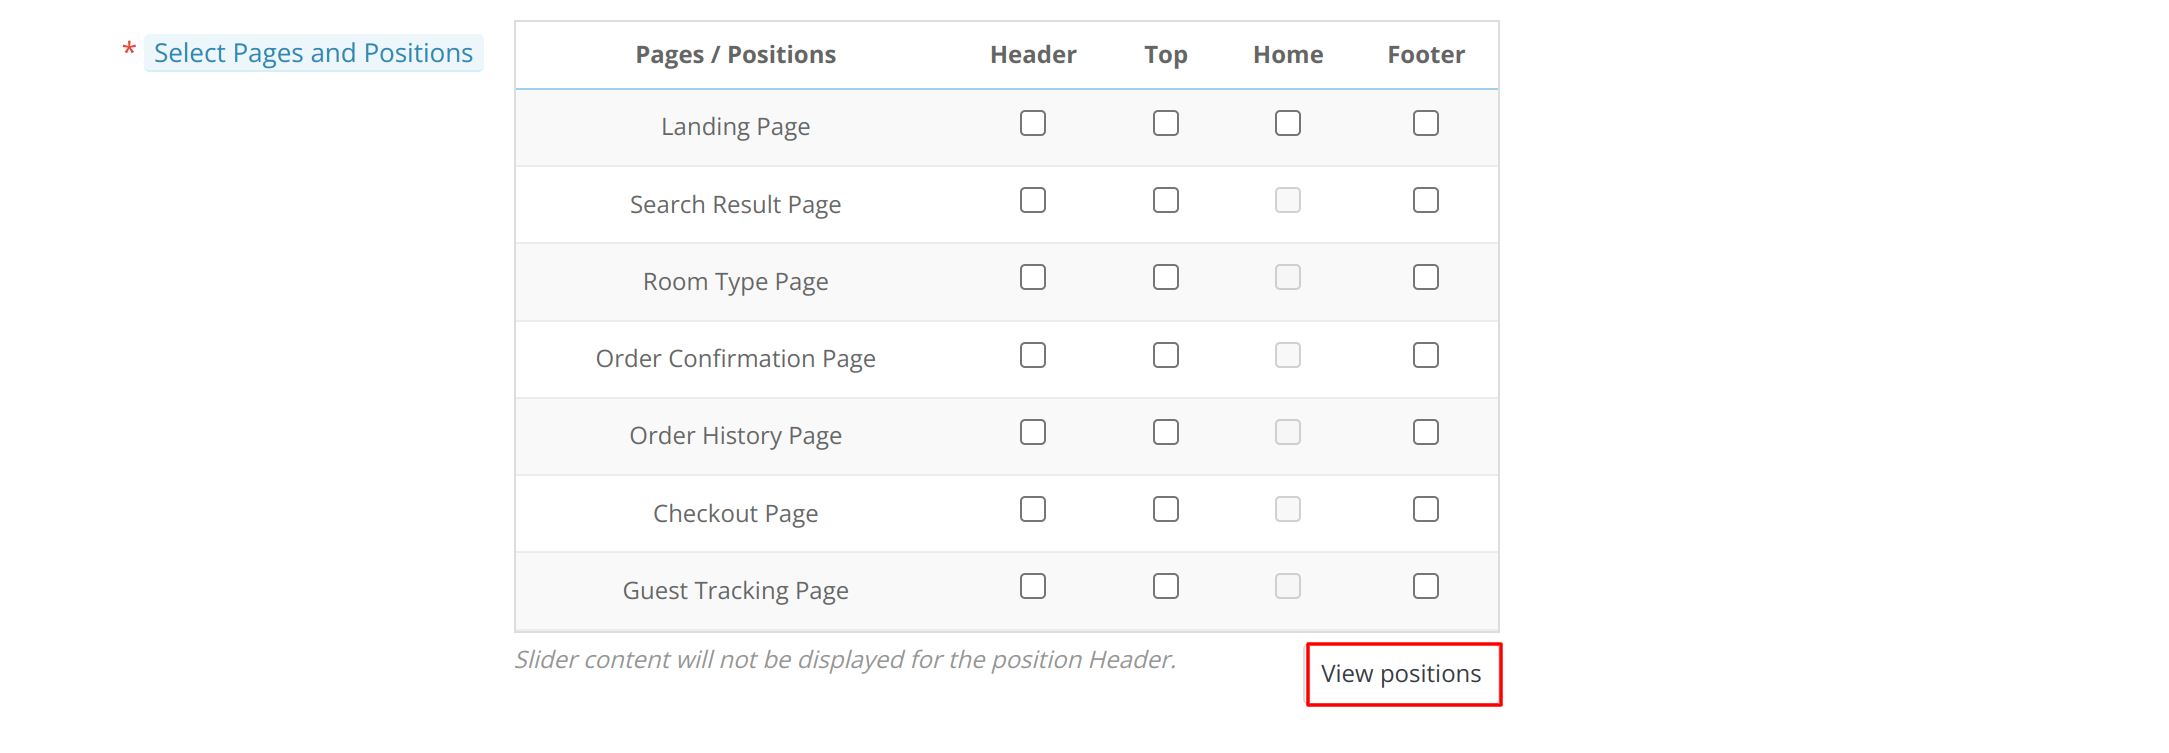
Position Configuration
- Select pages and positions: Admin can choose the position and page on which he wants to add the slider from this section.
Note: The admin can preview the various positions available to add a slider by clicking on the view positions button.

Slider Images
In this section, the admin can upload slider images and set up the overlay content. This includes adding an overlay title, description, and button for each image.
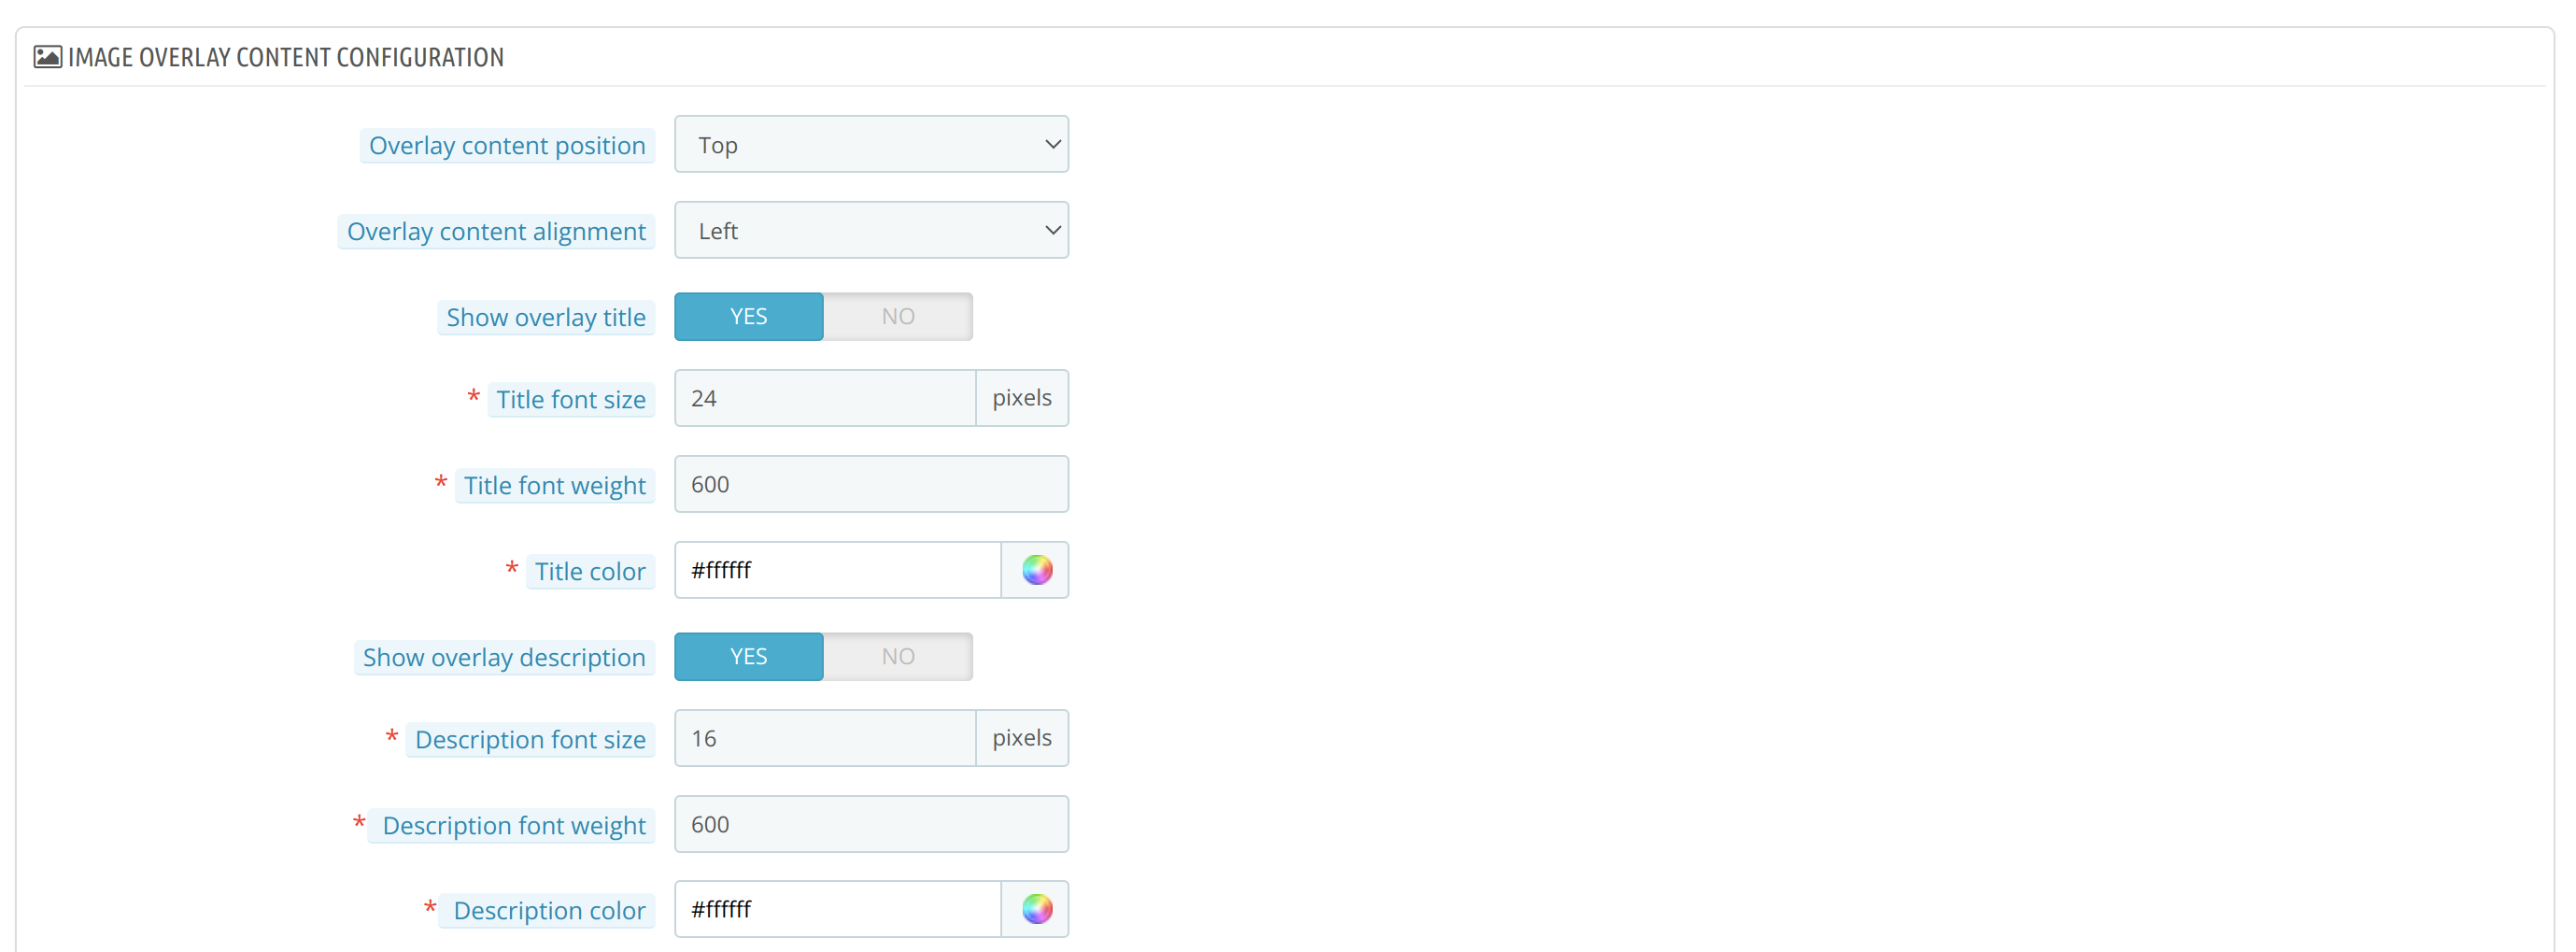
Slider Image Overlay Content Configuration
- Overlay Content Position: Allows the admin to specify the placement of the slider image content on the slider.
- Overlay Content Alignment: Enable admin to determine the alignment of the slider image content.
- Show Overlay Title: The admin can enable this option to display the overlay title on the slider images.
- Title Font size: Admin can set the font size of the slider image title from this option.
- Title Font Weight: The Admin can set the font weight of the slider image title from this option.
- Title Color: Admin can set the color of the title text using this option.
- Show Overlay Description: Allows admin to enable /disable the display description of the slider image.
- Description Font size: Admin can set the font size of the slider image title from this option.
- Description Font Weight: The admin can set the font weight of the slider image title from this option.
- Description Color: Admin can set the color of the title text using this option.

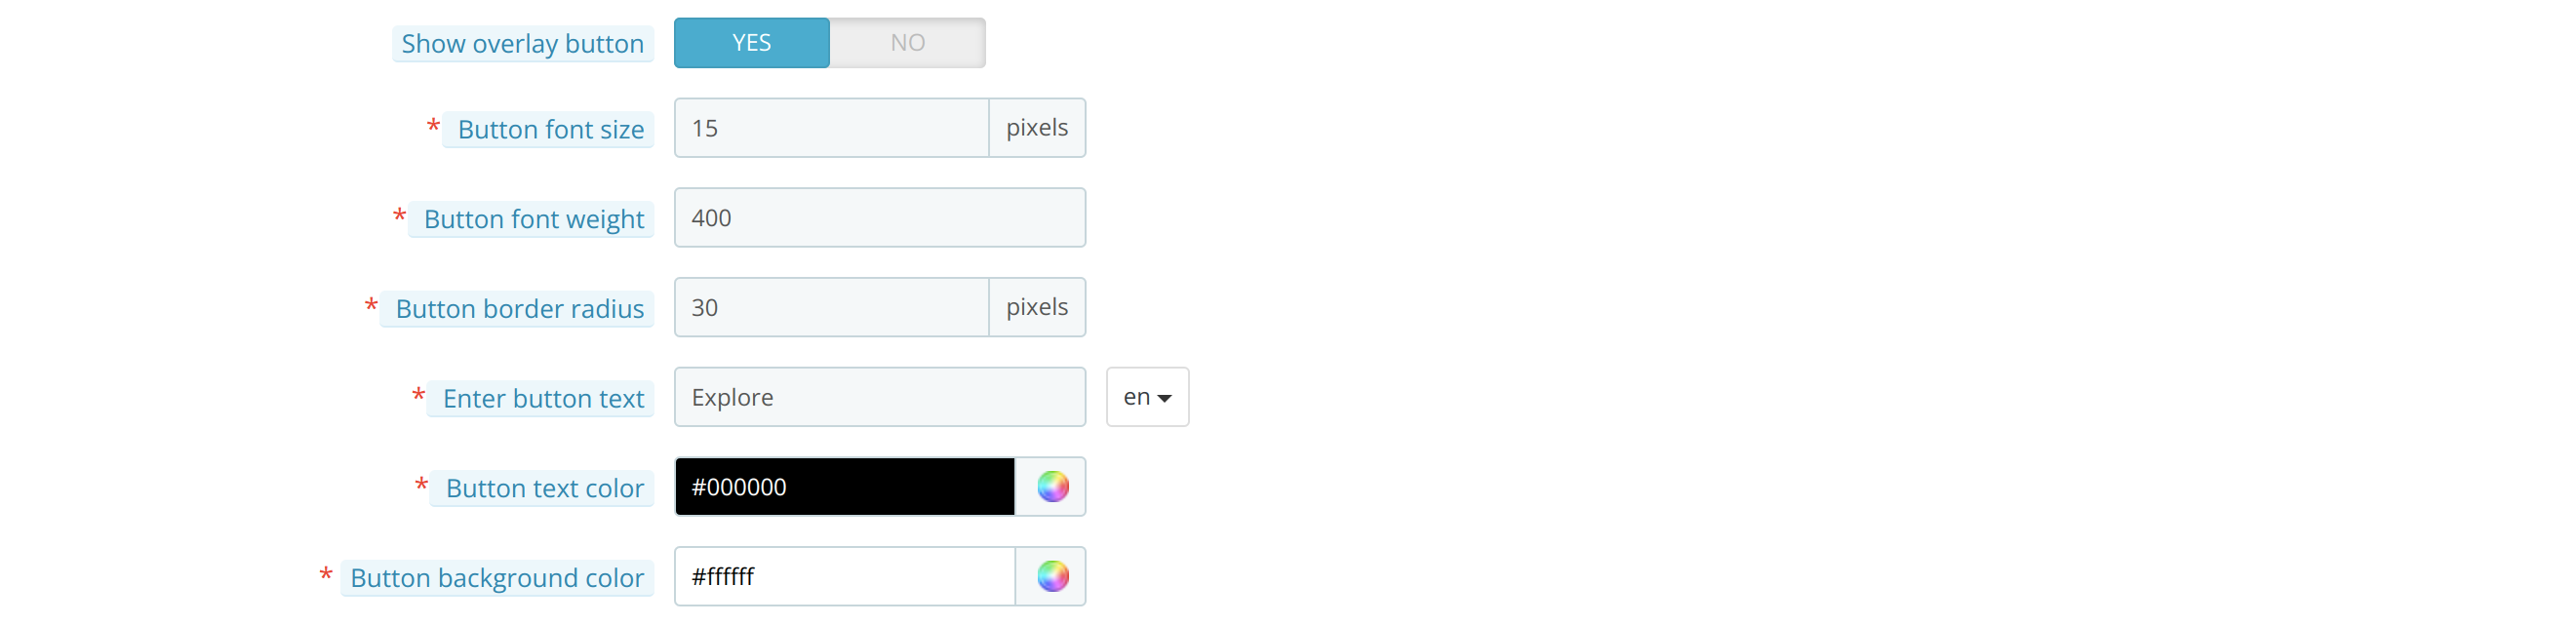
Slider Image Overlay Button Configuration
- Show Overlay Button: Allows admin to display a button using which their guests can be redirected from the slider image to the added backlink of the image.
- Button Font Size: Admin can set the font size of the text of the button.
- Button Font Weight: The admin can configure the font weight of the button.
- Button Border Radius: The Admin can set the border radius of the button.
- Enter Button Text: Admin can edit the text of the button from this option.
- Button Text Color: Admin can choose the color of the button.
- Button Background Color: Admin can set the background color of the button using this option.

How to Add Images in Slider?
You can add the images in the slider by following the below-mentioned steps:
- To add a new image to the slider, click on the “add slider image” option.

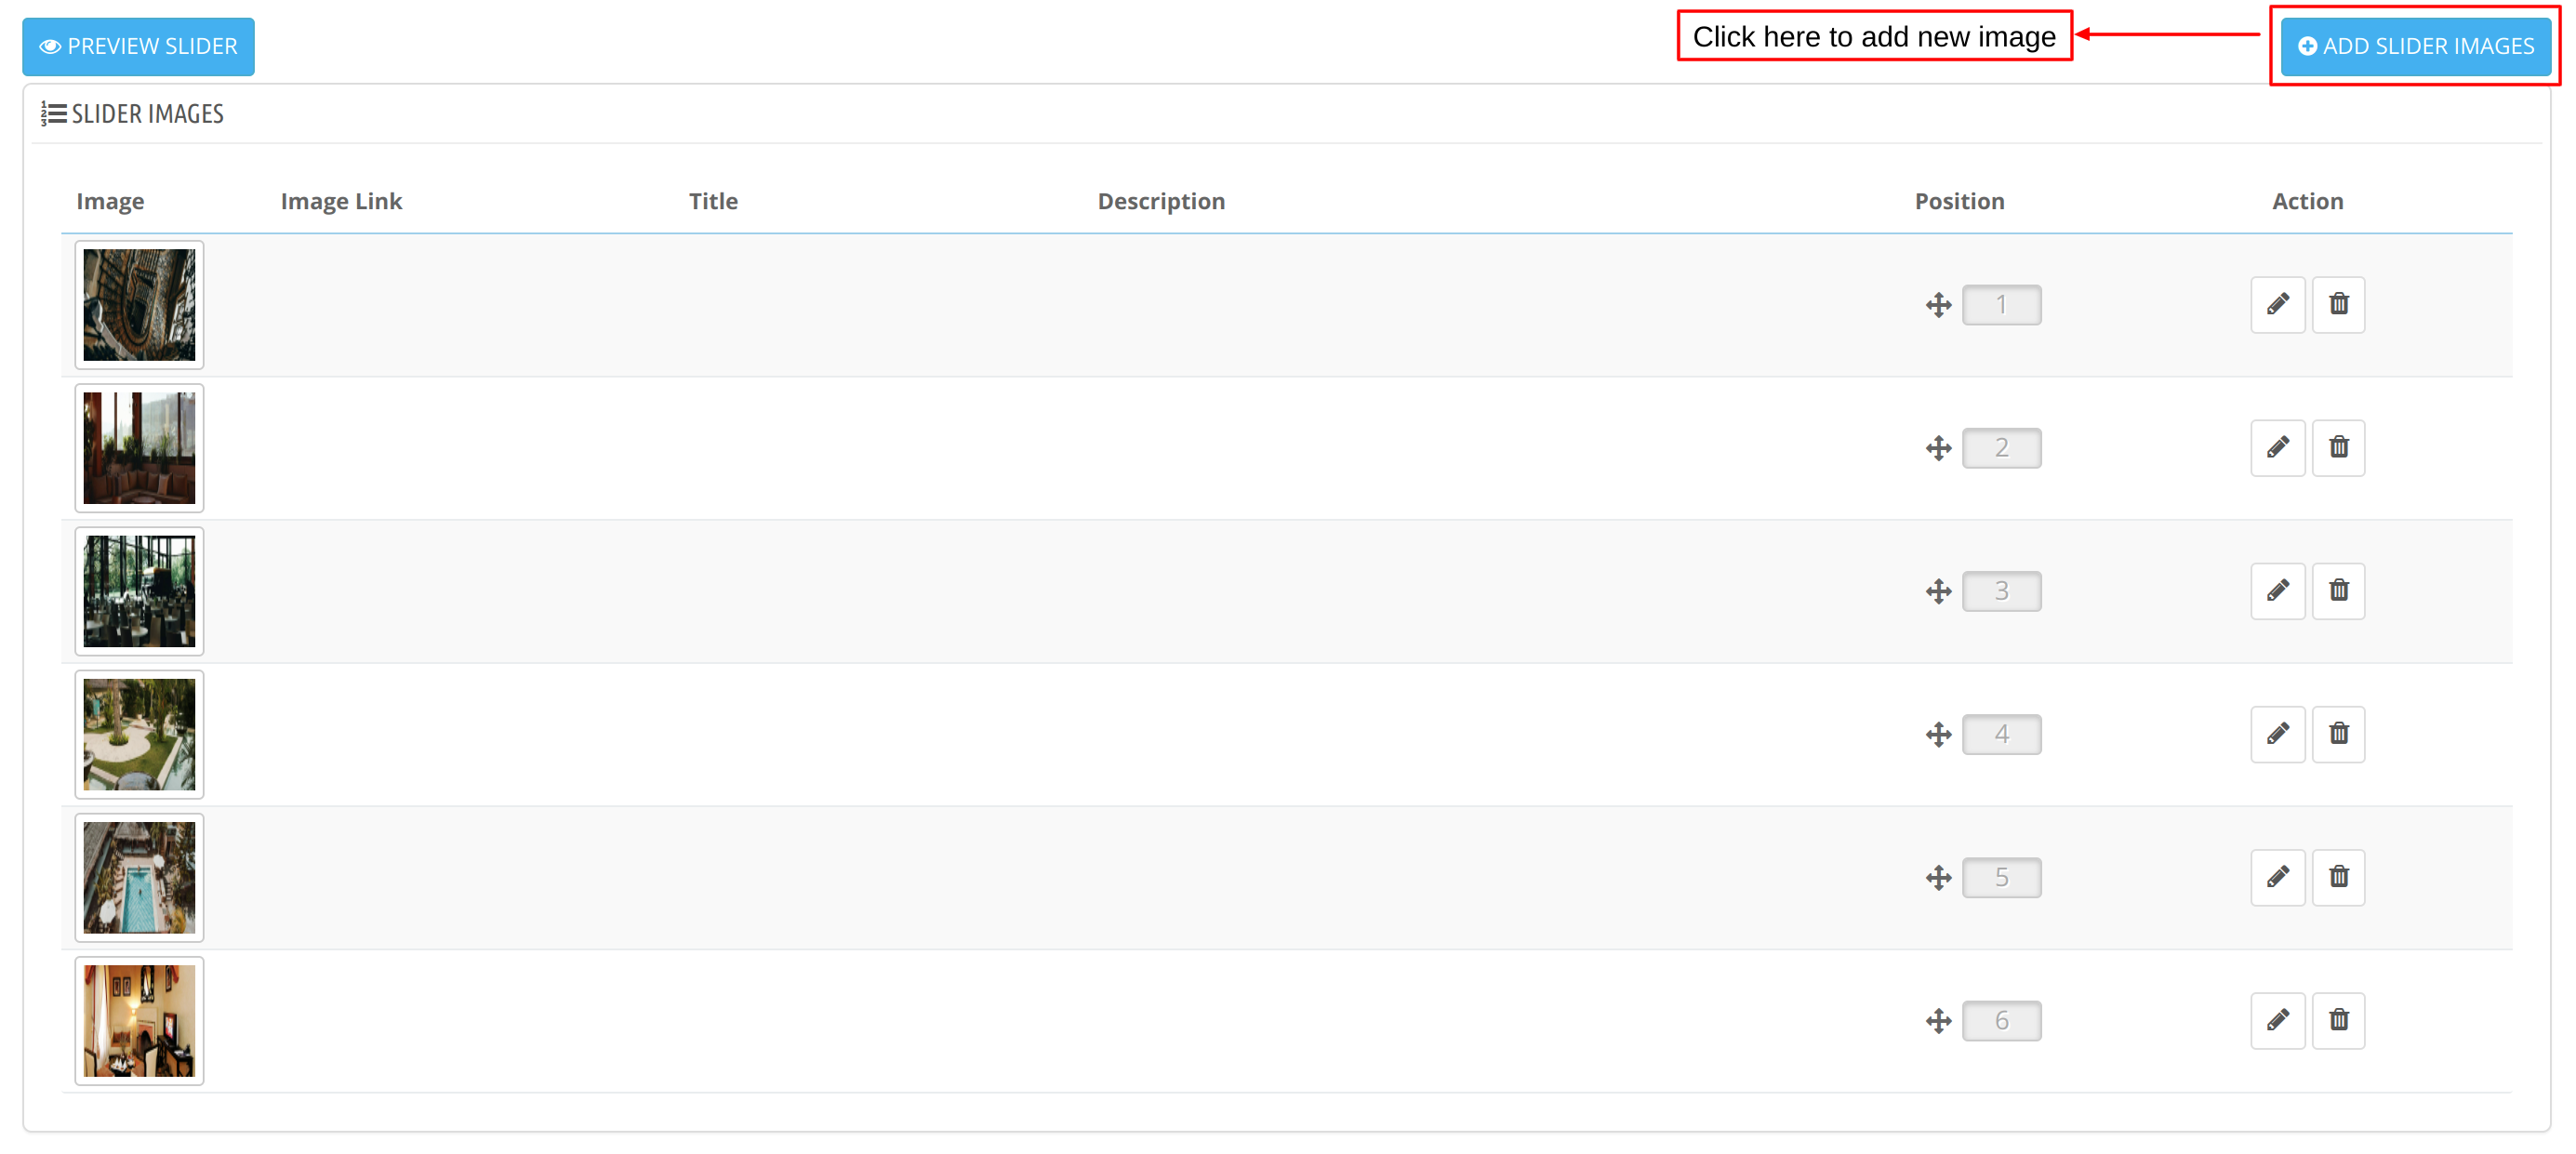
- Once you click on add slider image, a popup will open with various below-listed options using which you can add slider image:
- Image File: Choose and upload the image you want to add to the slider.
- Image Name: Enter a suitable name with the image. This image name will not be displayed on the website, this name will be used for maintaining a statistics record of this slider image.
- Overlay Title: Enter the title of the slider image.
- Overlay Description: Enter the description of the slider image.
- Image Link: Add the link of the page on which you want to redirect your guest from this slider image.

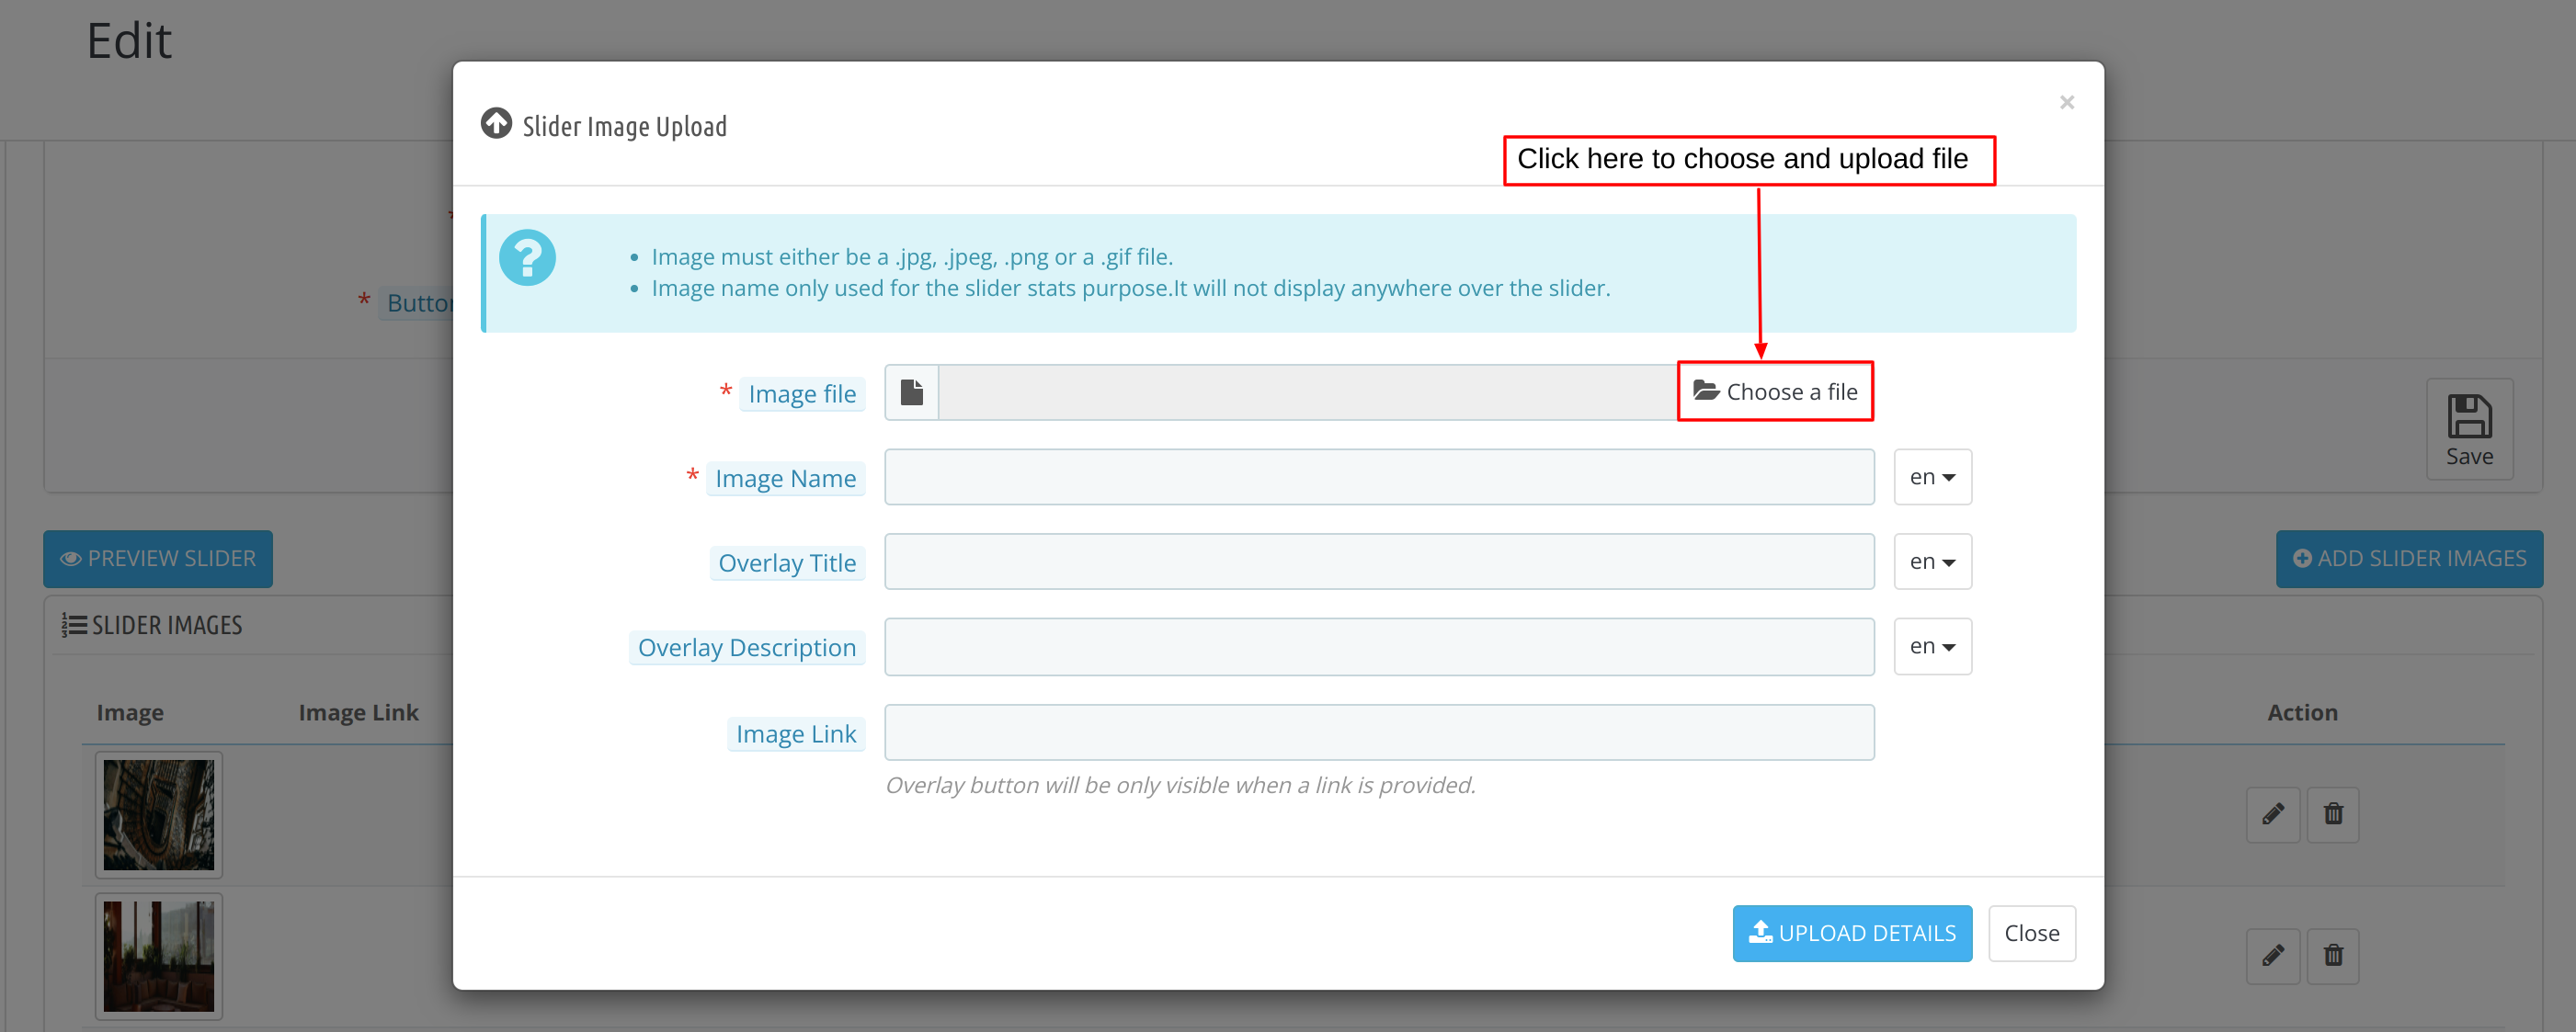
- After adding the image and all relevant details of the image in the popup, click on the upload details button and the slider image will be added successfully.
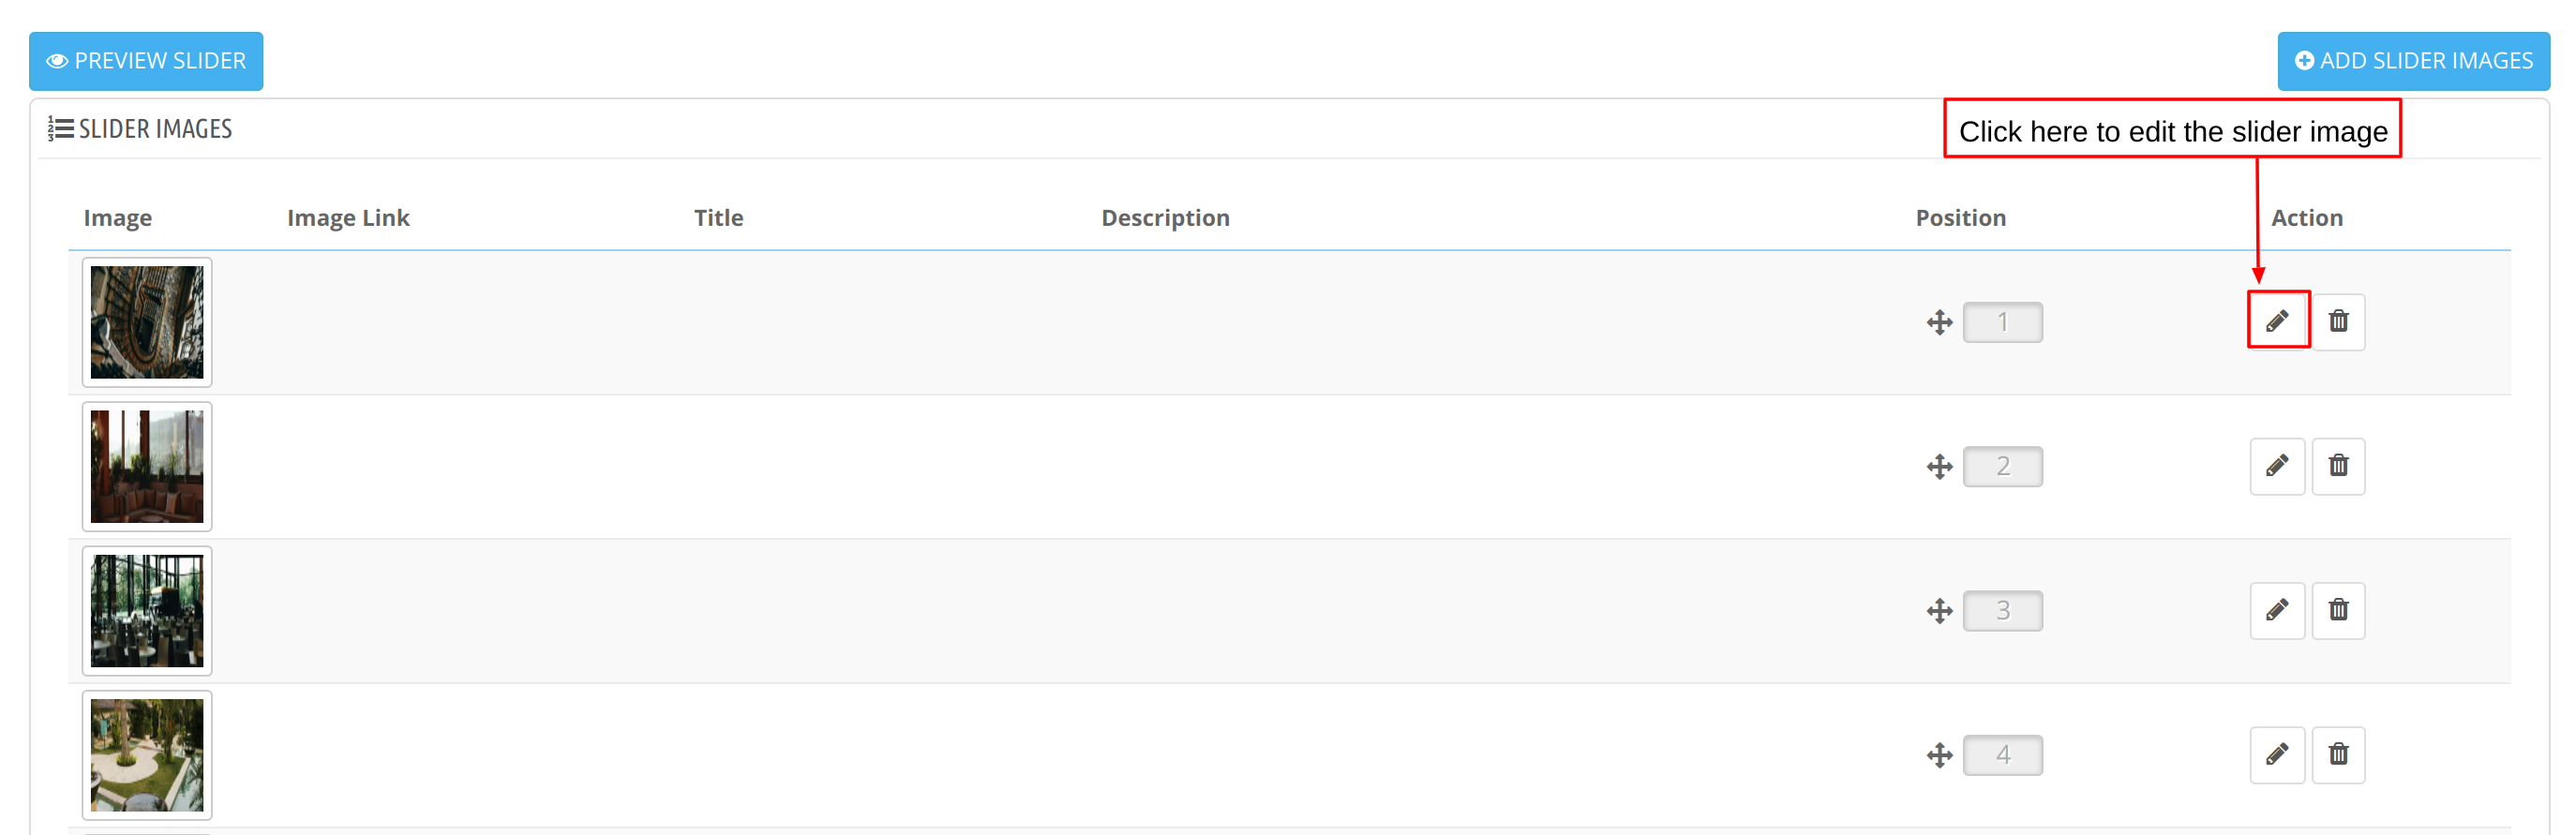
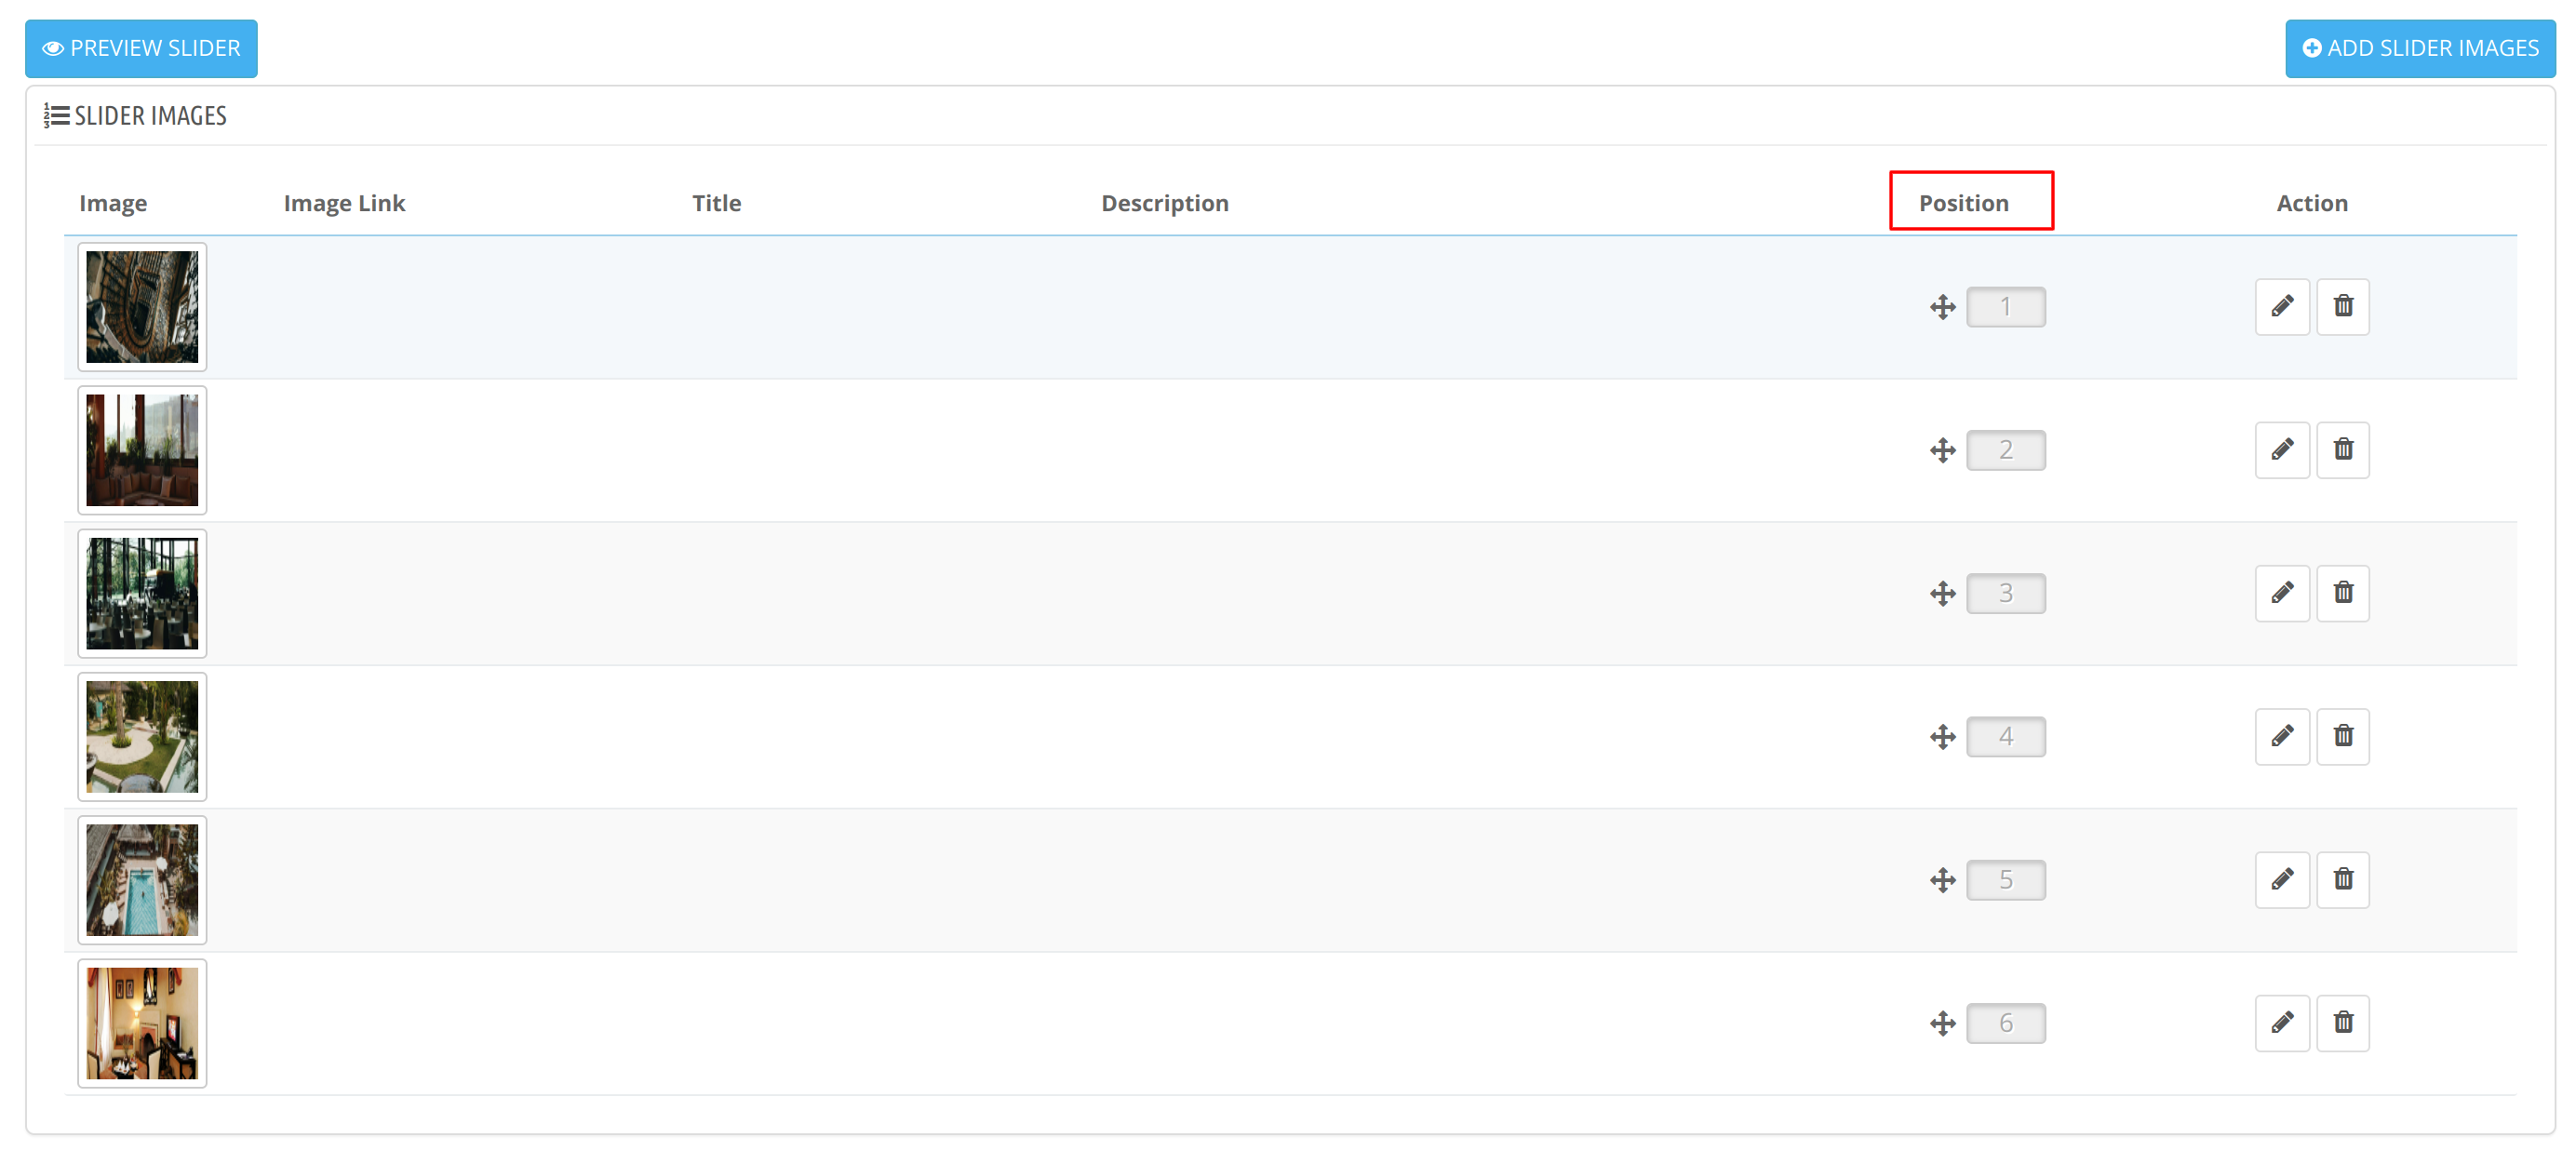
How to edit the existing slider images?
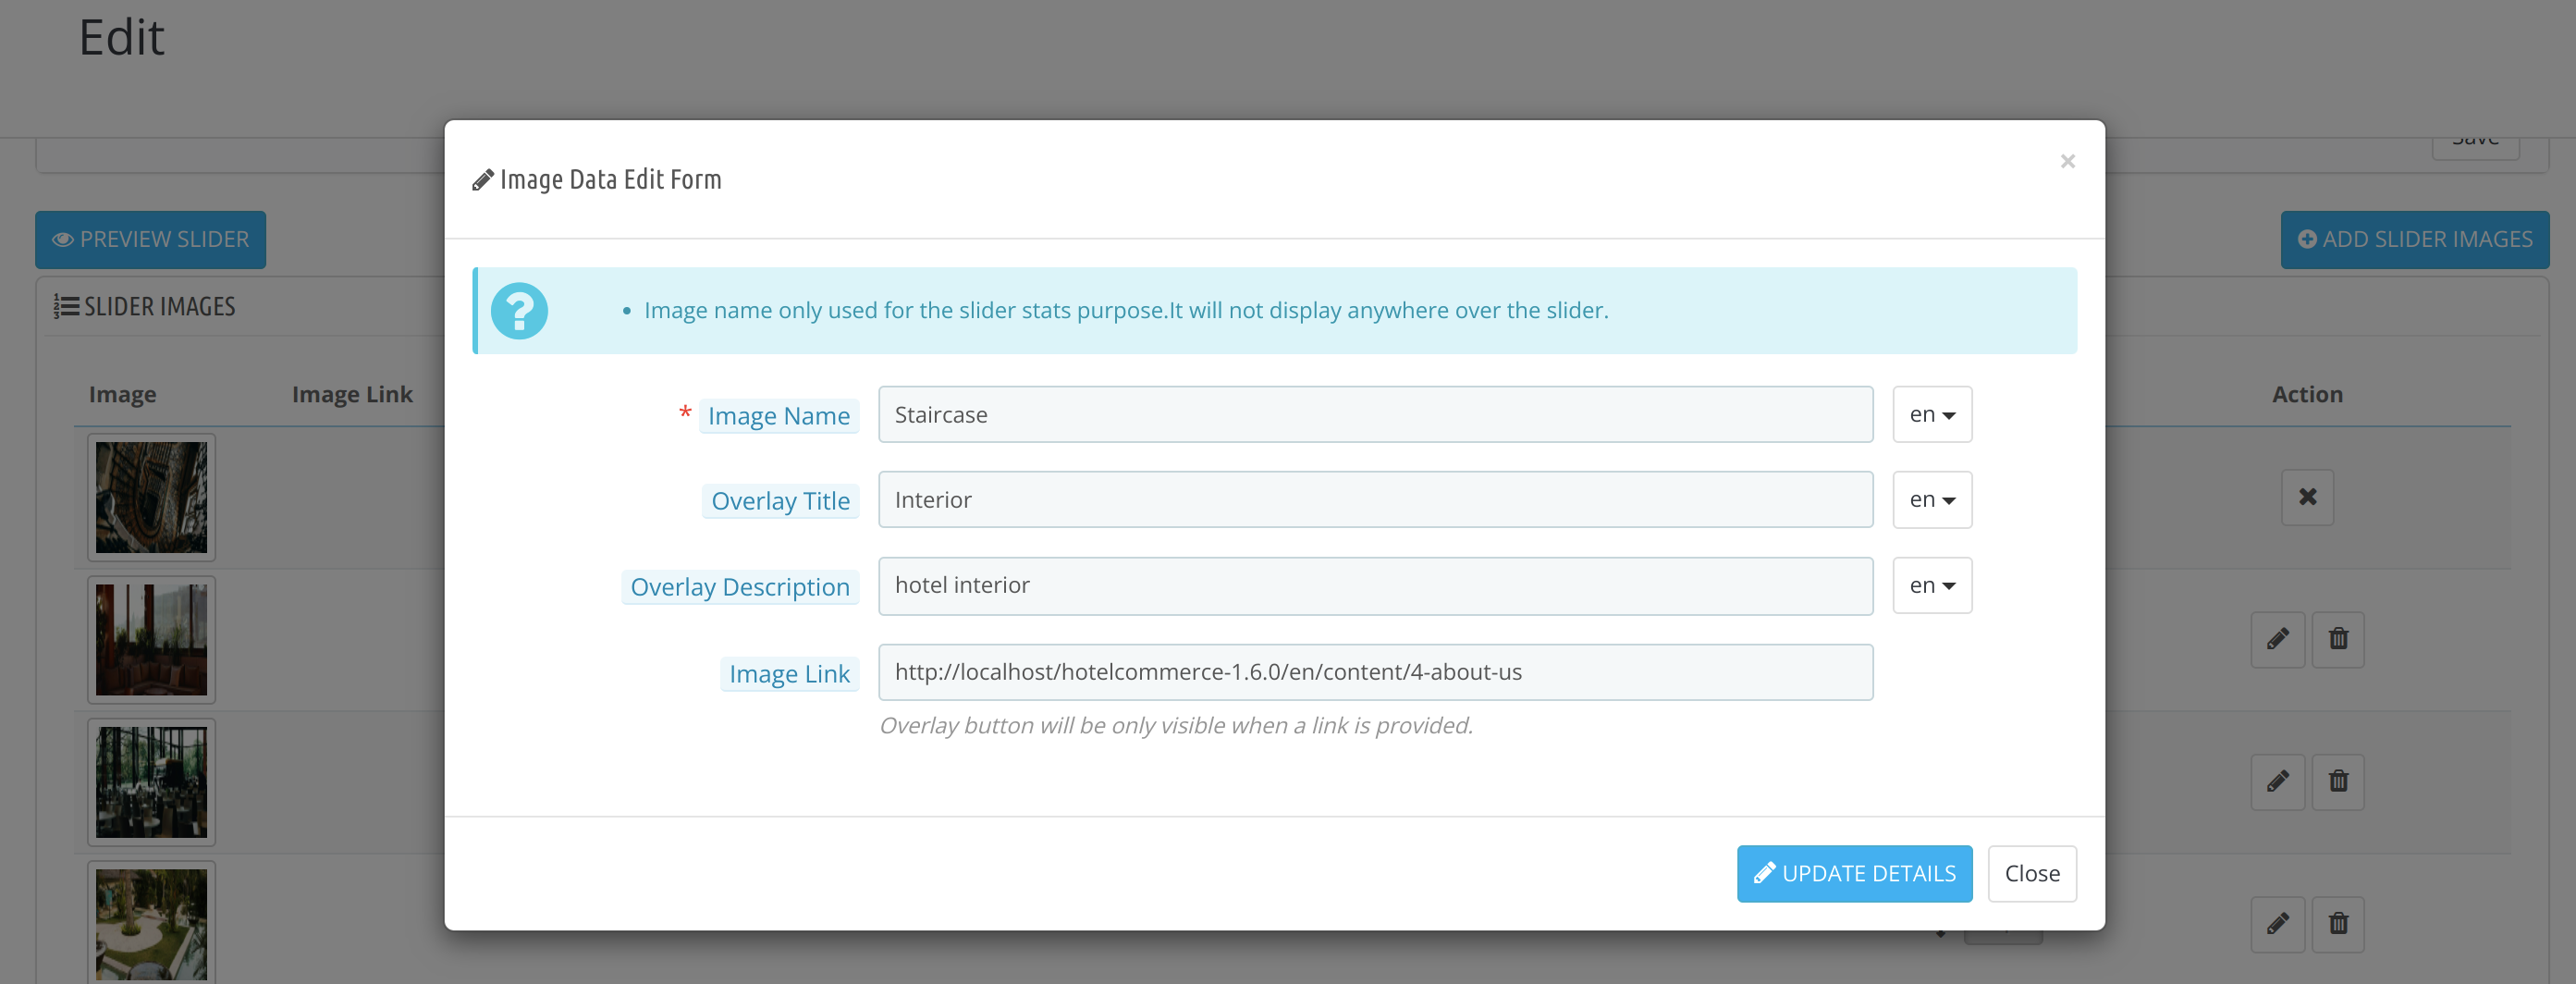
The admin can edit the image name, overlay title, overlay description, and link of the existing images by clicking on the edit symbol and updating the relevant details in the pop-up window.


The admin can rearrange the positions of the images in the slider through the Position section. This determines the display sequence of slider images.

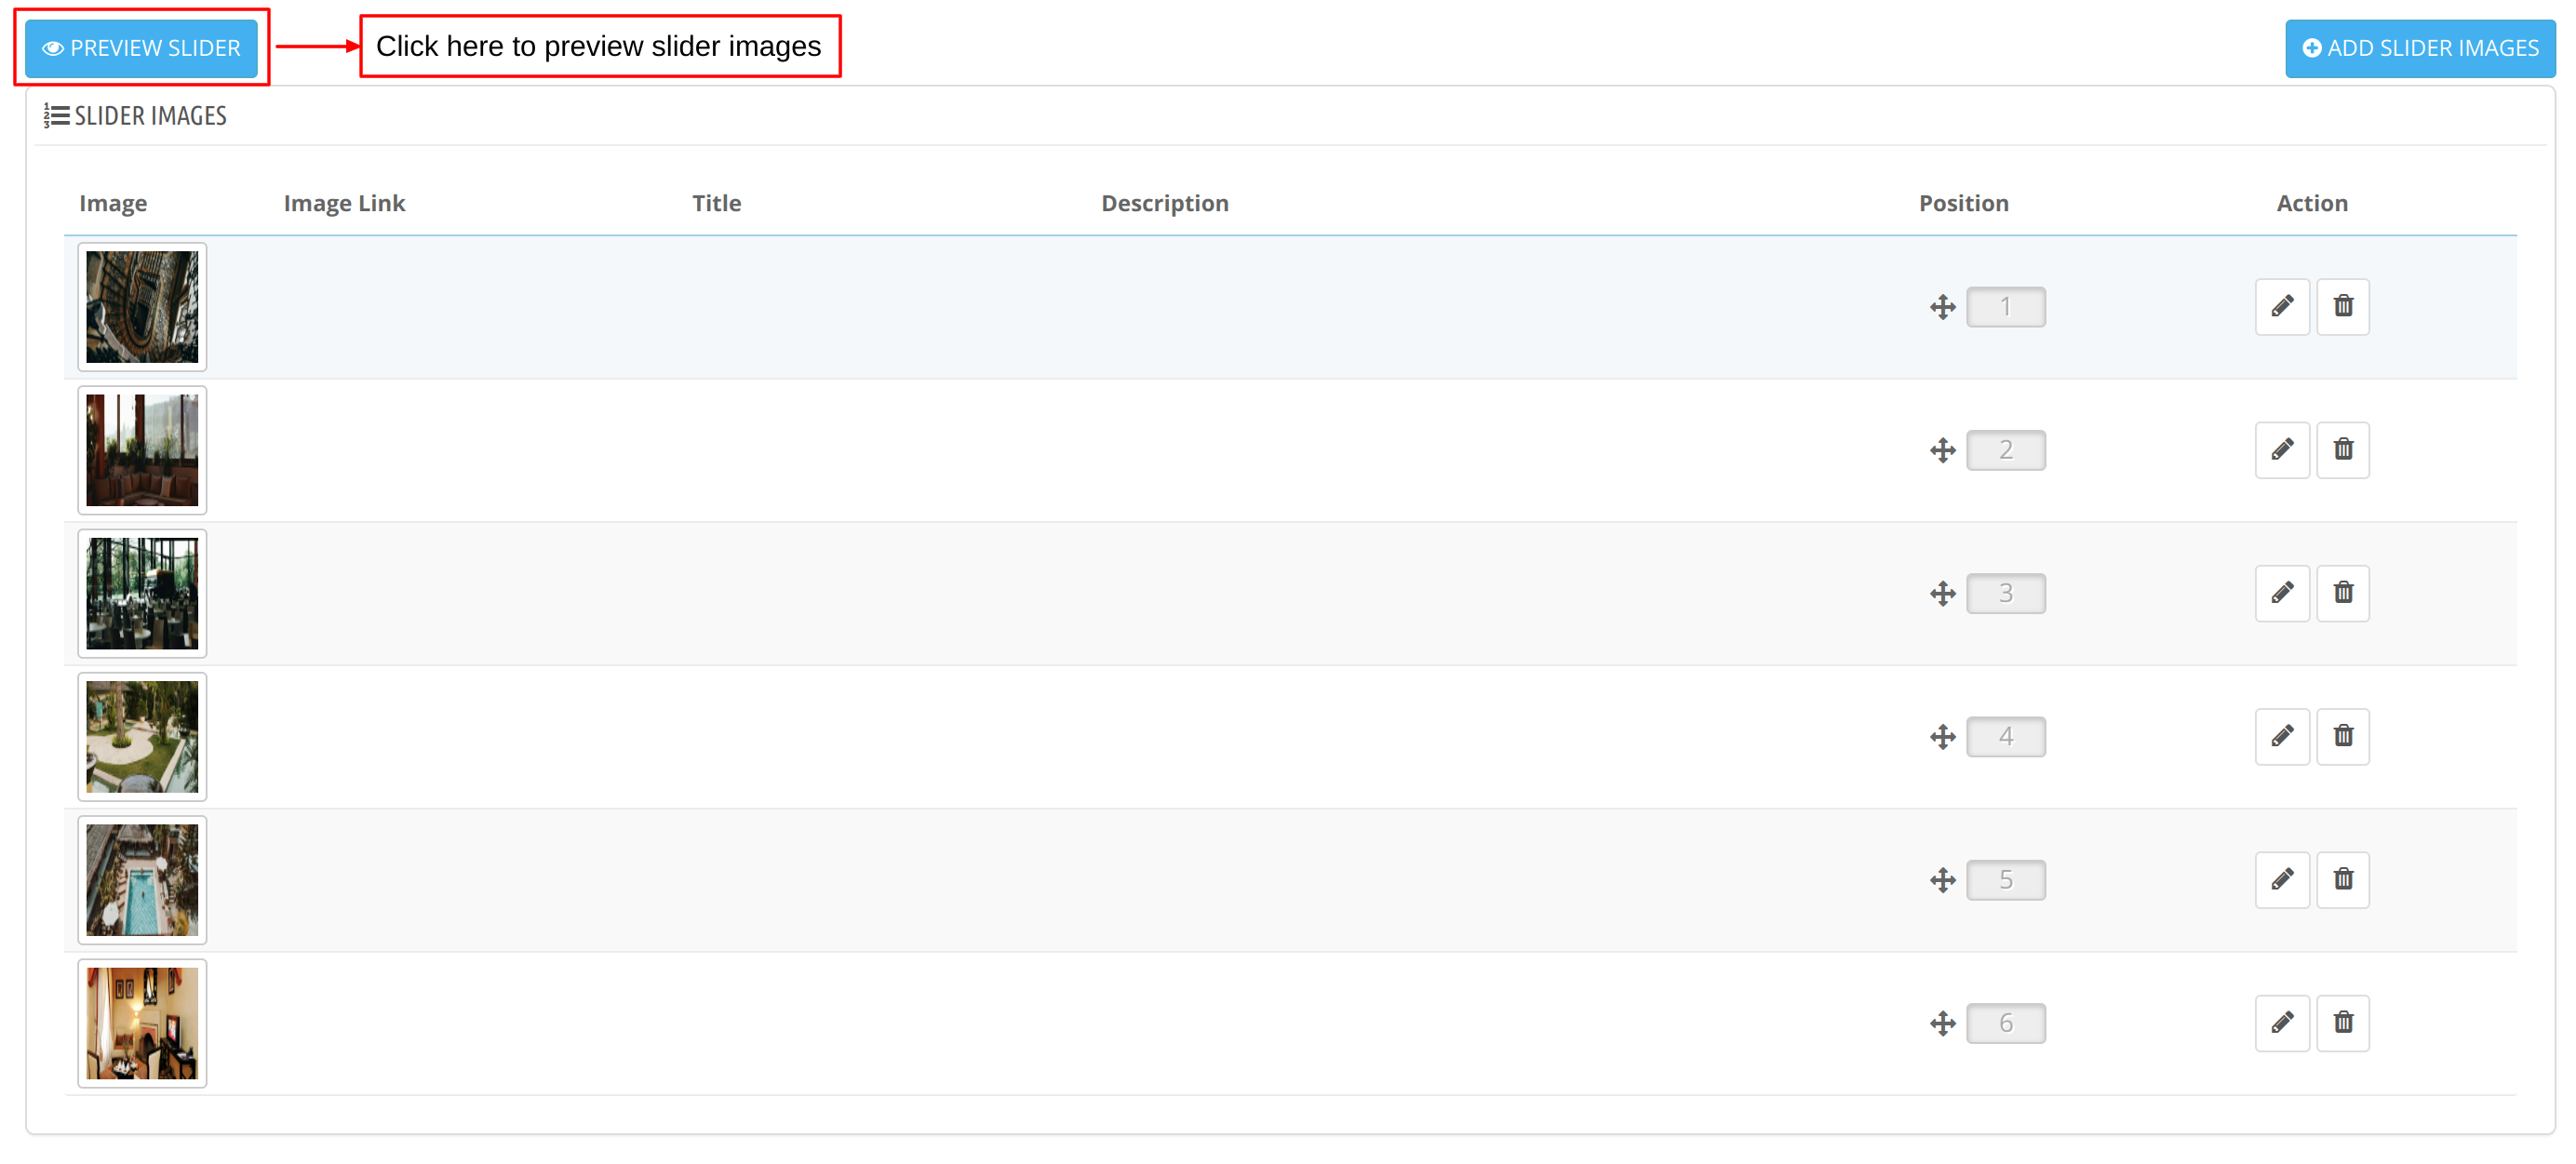
The admin can preview how the added images will appear in the slider by clicking on the “Preview Slider” button.
Note: The preview may not be as accurate as the actual display on the front end.
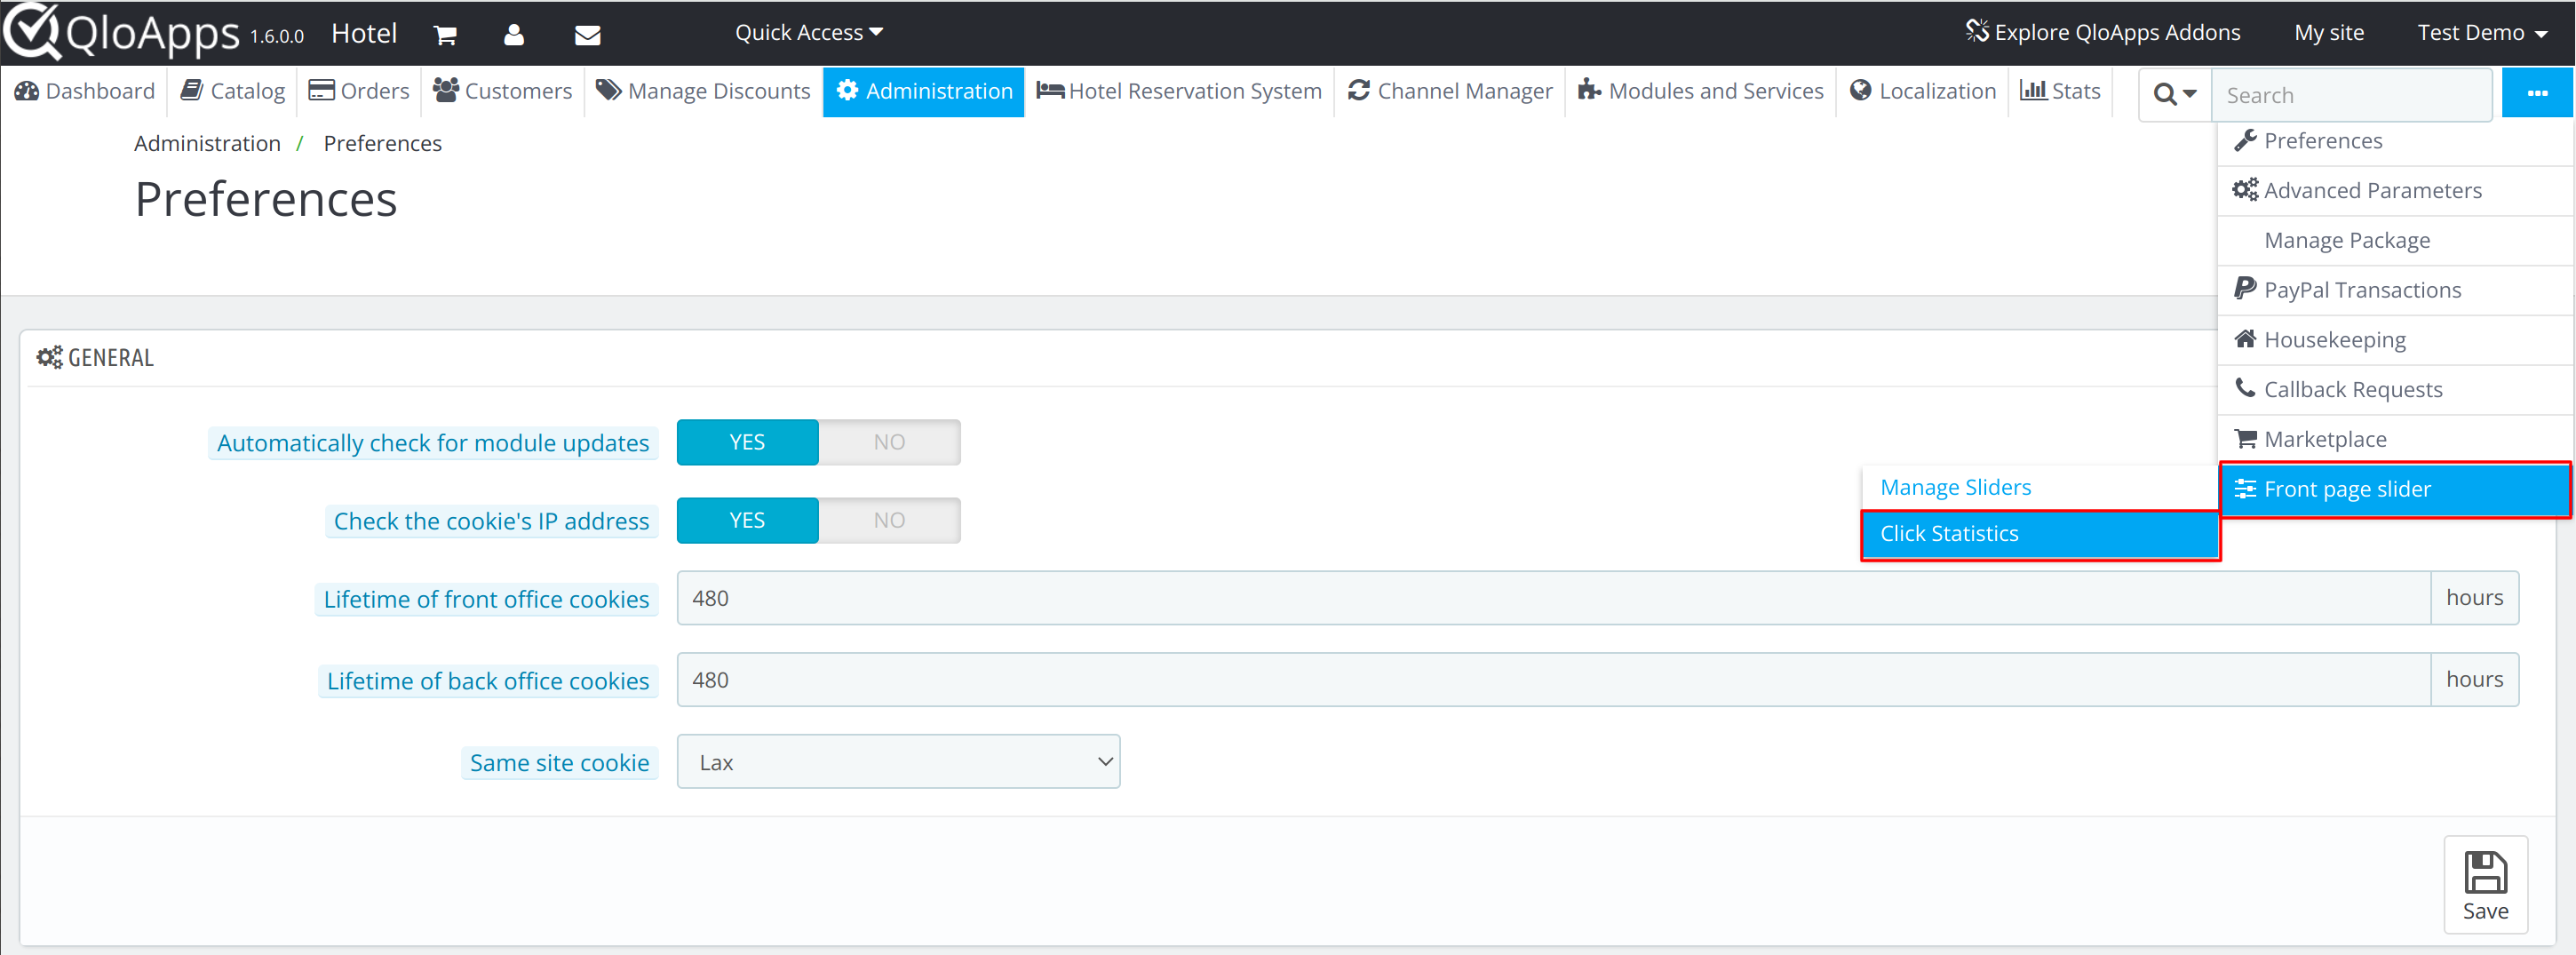
How to monitor the performance of your sliders?
Admin can monitor the data of users who have clicked the link which they have added with images of sliders using the click statistics tab.
To open the click statistics tab, Go to the Front Page Slider Menu Tab -> Click Statistics.

Click Statistics
This section displays a list of all sliders that have links attached to their images and the statistics of that link.
It highlights the total number of clicks on the slider and the status of the slider. The admin can view the details of the number of clicks and users who have clicked the link using the view button.


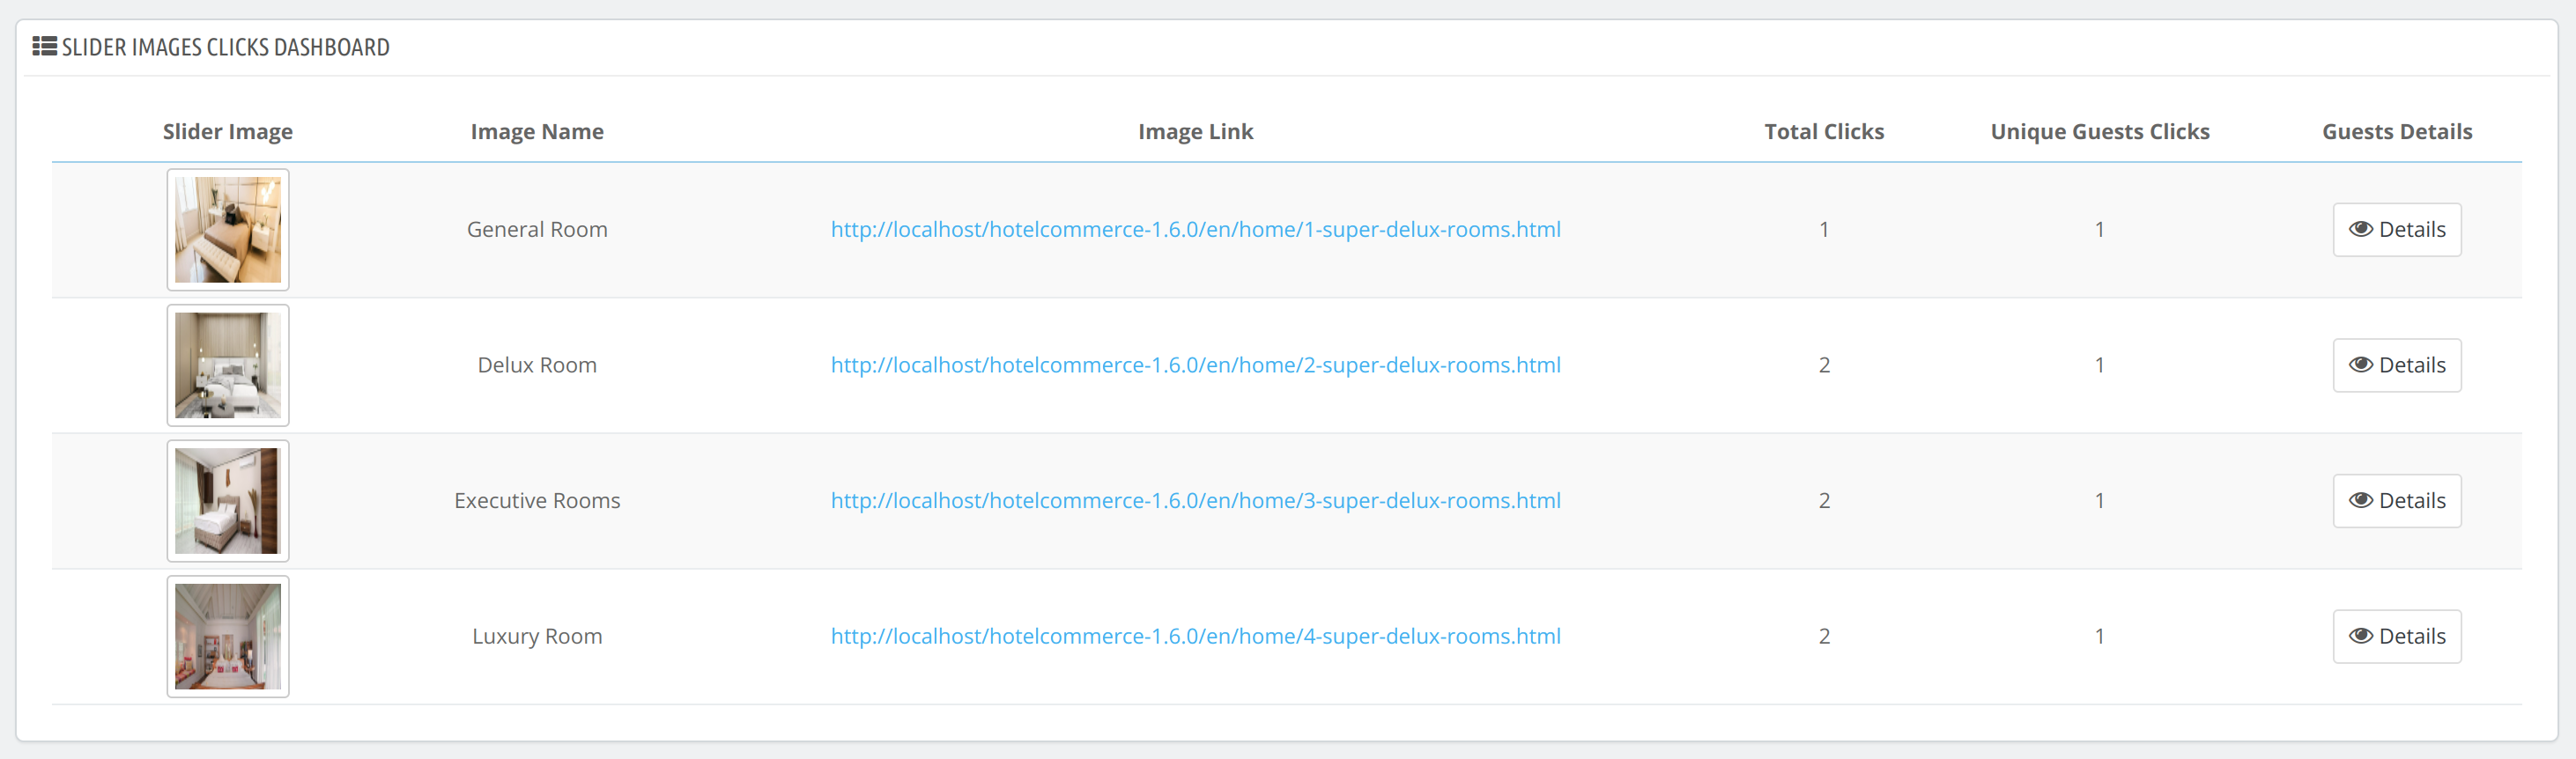
Slider Click Data Dashboard
Once the admin clicks on the view statistics button, the slider images click dashboard will open. It displays the following data:
- The image with which the link has been attached
- Image Name
- Link of the image
- Total number of clicks on the image
- Guest details button: The admin can view the details of the guests who have clicked this link with this button

Guests Details
The admin can click on the user details button to view the details of the users who have clicked on the link.


The details displayed about the users include:
- Customer ID
- Name
- Email address
- IP Address
- Customer Details
If the guest is an existing customer, then the admin can further view all the details of the customer by clicking on the “View Customer” Button.
Front End View of the Sliders
In accordance with the configured settings, the sliders will be presented to your guests across multiple pages and diverse positions on the website.

Conclusion
This was all from the QloApps Frontpage Slideshow. I hope I was able to clarify the functioning of the module to you.
If you want to learn about the functionality of QloApps then you can visit this link: QLO Reservation System – Free Open-Source Hotel Booking & Reservation System
In case of any query, issue or requirement please feel free to raise it on QloApps Forum
Lastly, do not forget to drop your thoughts in the comments.
Current Product Version – 4.0.0
Supported Framework Version- QloApps 1.7.x