Protect all of your forms against spammers, bots, and hackers by integrating your QloApps with Cloudflare Turnstile.
Cloudflare Turnstile is a modern alternative to CAPTCHA that blocks spammers from interfering with forms such as login, registration, or contact forms.
Features Of QloApps Cloudflare Turnstile
- Display Turnstile on back office login, customer login, registration, and contact us pages and many other pages.
- Multiple theme options for Turnstile to choose from i.e. auto, light, or dark.
- Select the size of the Turnstile as normal or compact.
How To Get Site And Secret Keys
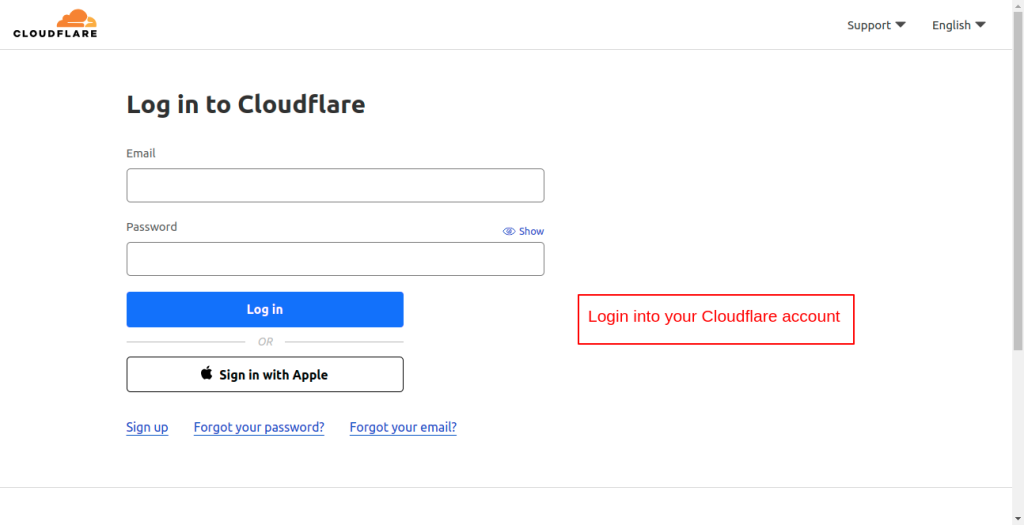
To obtain the Site and Secret keys, you need to log in to your Cloudflare account.
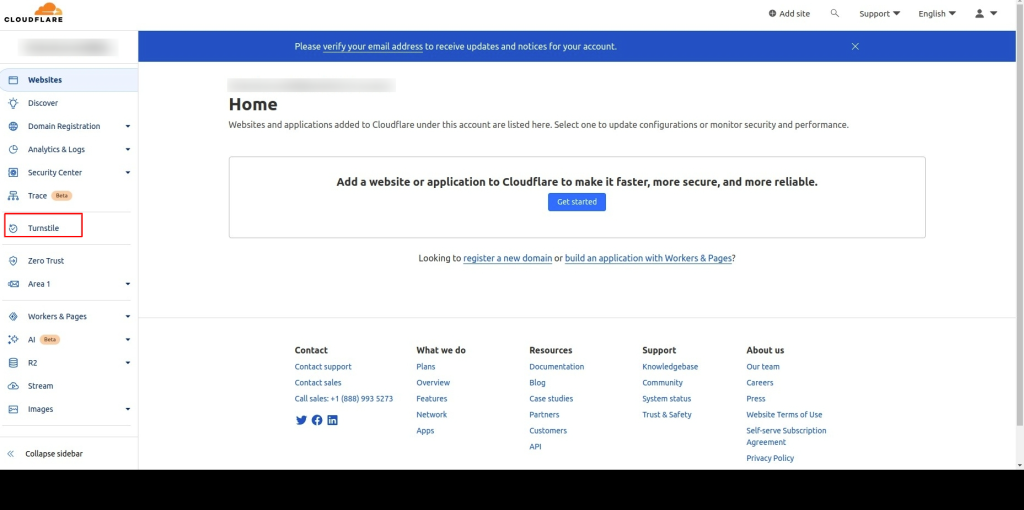
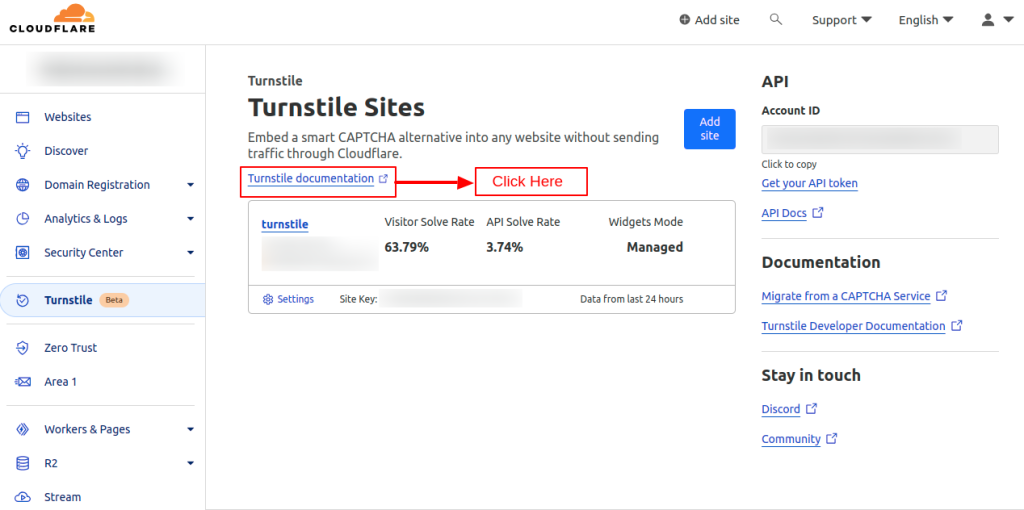
Once you have logged in, click on Turnstile on the dashboard page.
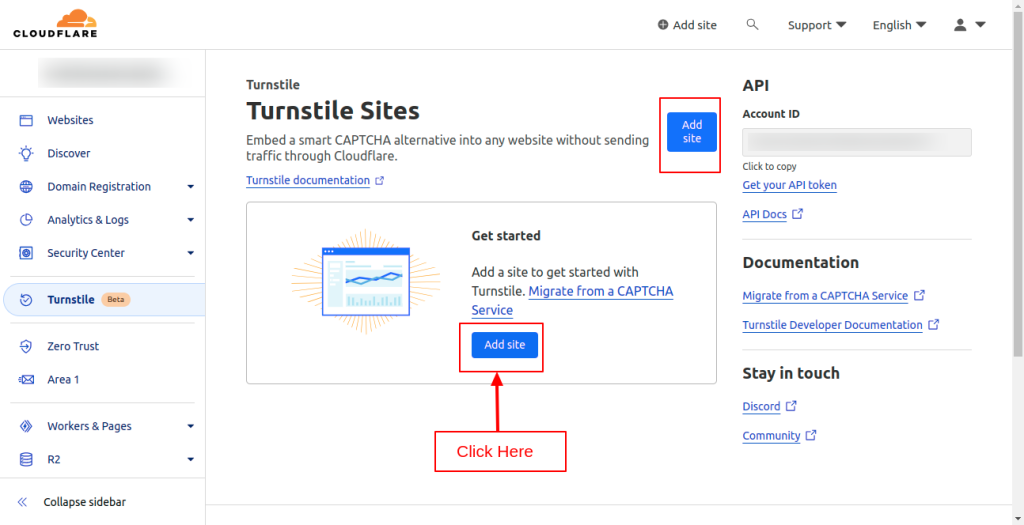
Now click on the Add Site button on the Turnstile page as shown below.
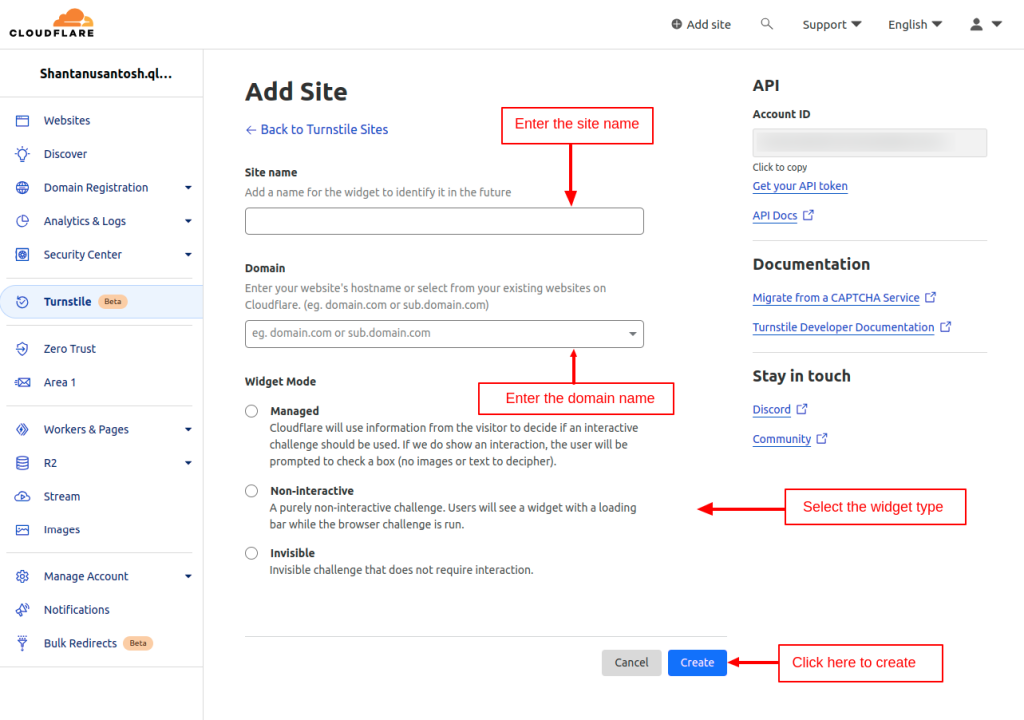
After clicking on the button, you can:
- Enter the site name for the widget to identify it in the future.
- Enter the domain where you want to allow Turnstile.
- You can select the widget type as managed, non-interactive, or visible. (Recommended: Managed)
- Once you have entered the site name and domain, and selected the widget type, click on the Create button.
Upon clicking the create button, you will be redirected to the Turnstile page where you can view:
- Domain
- Visitor Solve Rate
- API Solve Rate
- Selected widget type
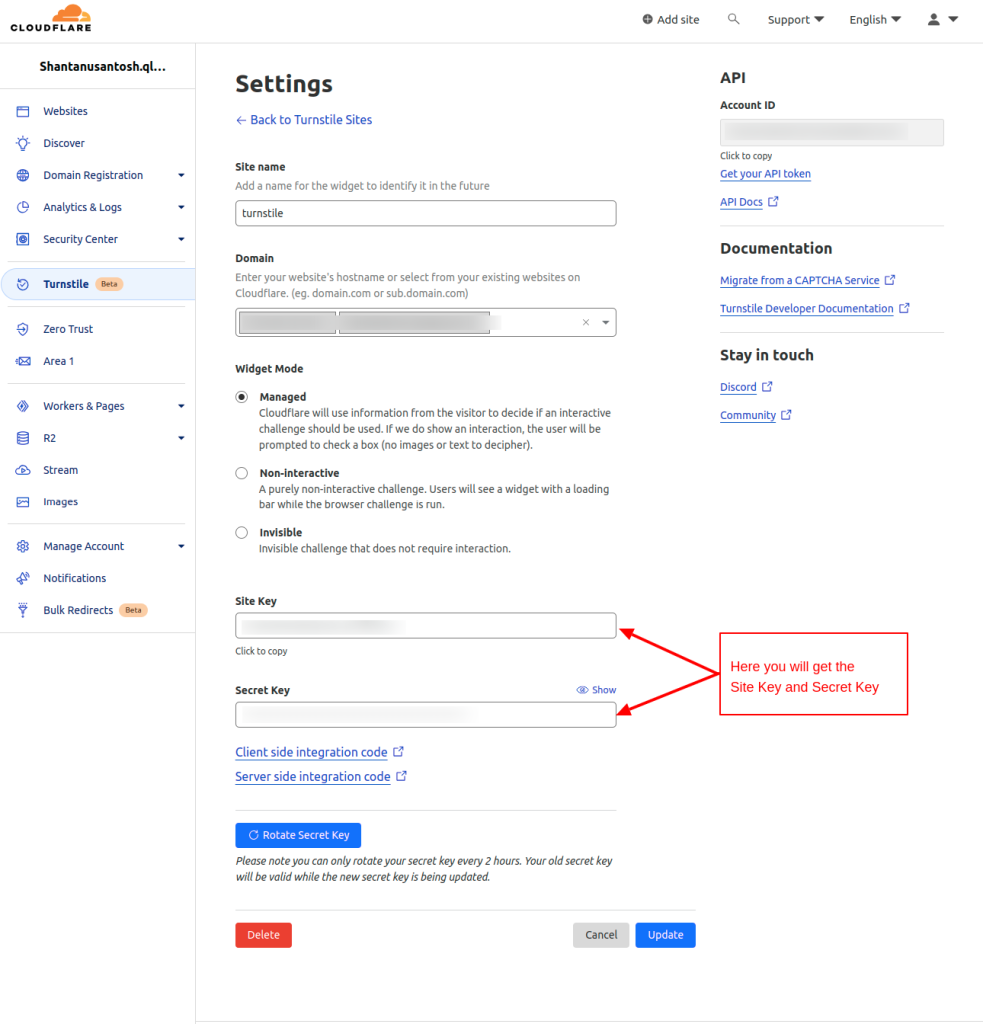
Click on the settings button.

Here, you will get the Site Key and the Secret Key
Prerequisite Of Installation Of QloApps Cloudflare Turnstile Module
Prior to installing the QloApps Cloudflare Turnstile Module, you must make a few changes in the core files for the proper functioning of the module.
Note: There is no need to add hooks in QloApps versions above 1.6.0.
The step is very simple, you just have to replace the mentioned codes in the following hooks for the proper functioning of the module.
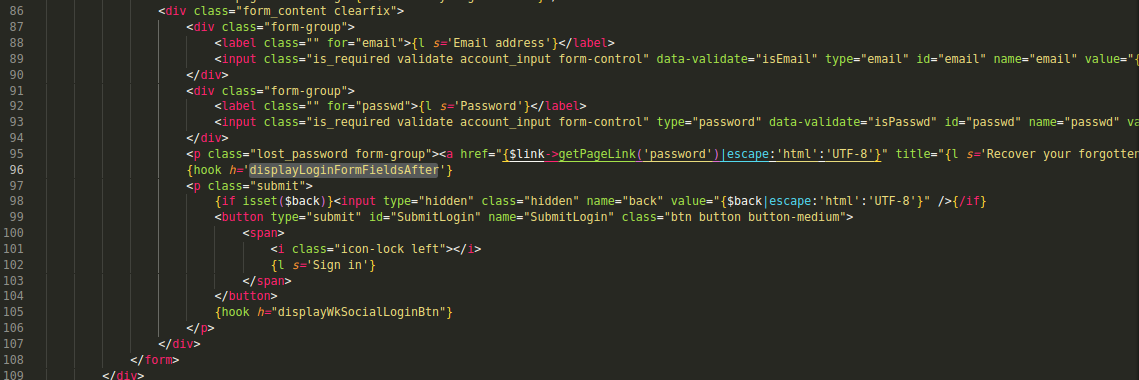
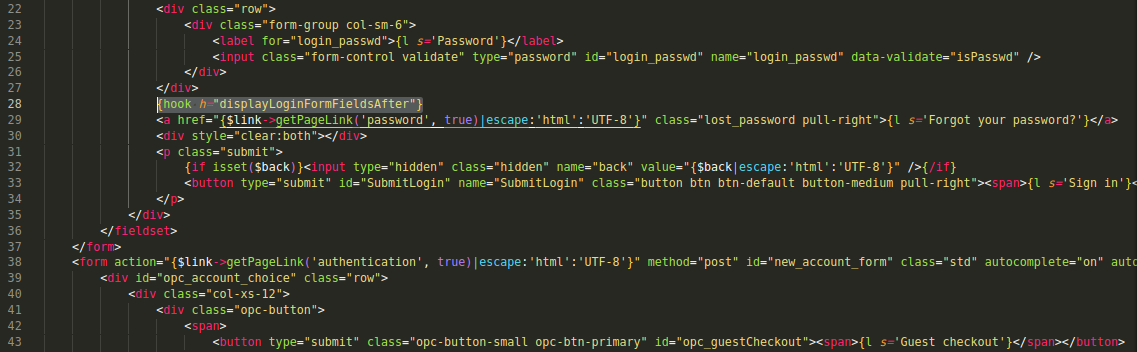
Hook 1:
Locate the following path and add the mentioned hook at line number 96 (Line may vary).
Path:
themes/hotel-reservation-theme/authentication.tpl Add hook:
{hook h='displayLoginFormFieldsAfter'}
Kindly refer to this screenshot:
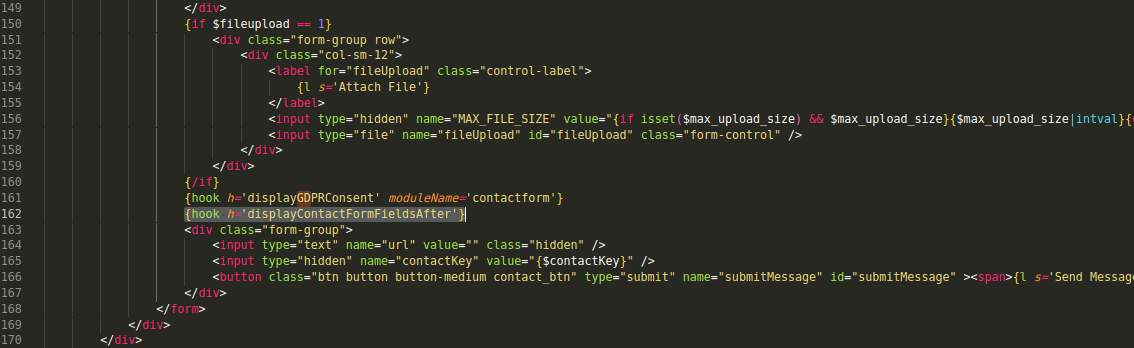
Hook 2:
Add hook code below line number 162 (may vary)
Path:
themes/hotel-reservation-theme/contact-form.tplAdd hook:
{hook h='displayContactFormFieldsAfter'}
Kindly refer to this screenshot:
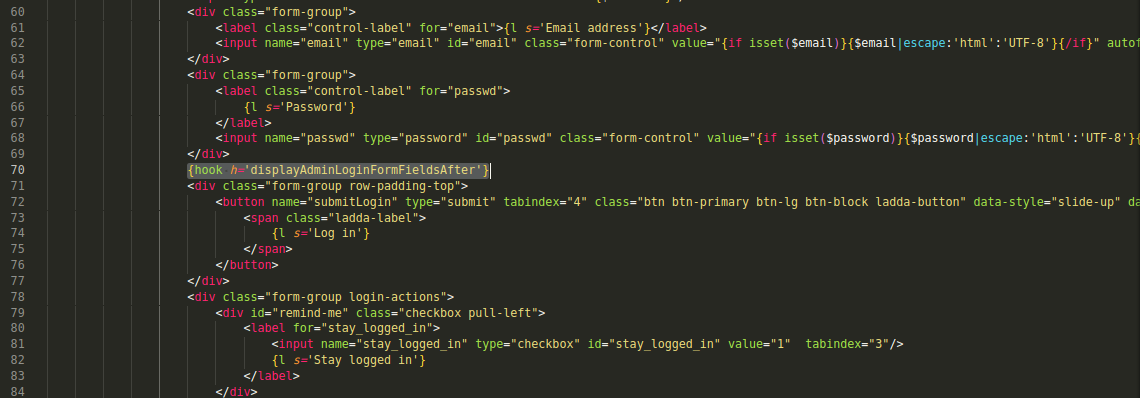
Hook 3:
Locate the following path and add the mentioned hook at line number 70 (Line may vary).
Path:
adminhtl/themes/default/template/controllers/login/content.tpl Add hook:
{hook h='displayAdminLoginFormFieldsAfter'}
Kindly refer to this screenshot:
Hook 4:
Locate the following path and add the mentioned hook at line number 28 (Line may vary).
Path:
themes/hotel-reservation-theme/order-opc-new-account.tplAdd hook:
{hook h="displayLoginFormFieldsAfter"}
Kindly refer to this screenshot:
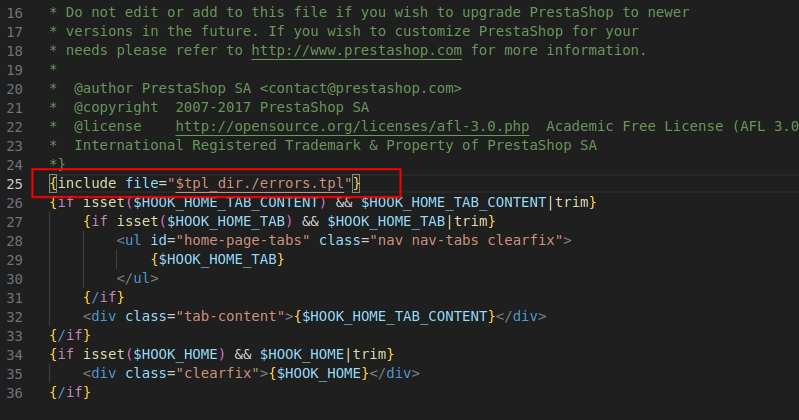
Hook 5
Added a code on line number 25 to show an error message during turnstile validation at the time of getting a block newsletter subscription.
Path:
themes/hotel-reservation-theme/index.tpl Add Hook:
{include file="$tpl_dir./errors.tpl"}
Kindly refer to this screenshot:
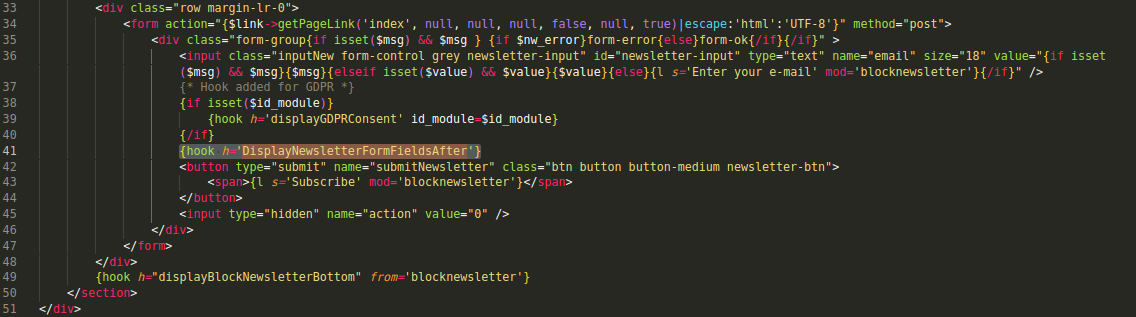
Hook 6:
Add the mentioned hook at line number 41 (Line may vary).
Path:
themes/hotel-reservation-theme/modules/blocknewsletter/blocknewsletter.tpl Add hook:
{hook h='displayNewsletterFormFieldsAfter'}
Kindly refer to this screenshot:
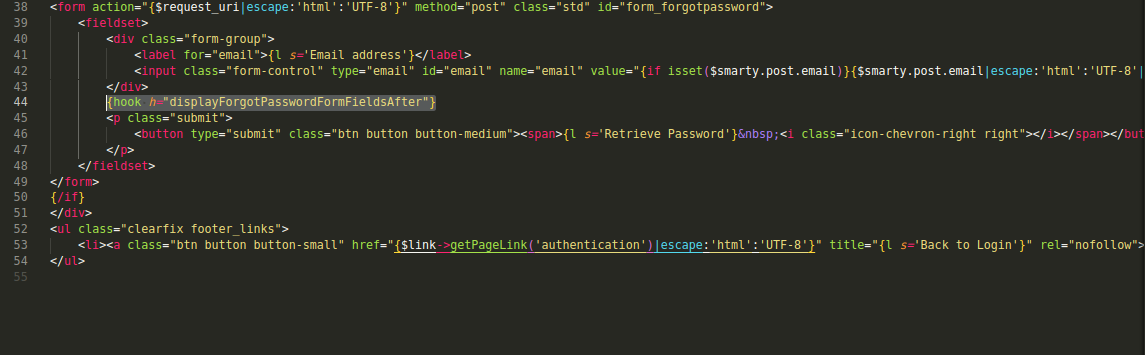
Hook 7:
Locate the following path and add the mentioned hook at line number 44 (Line may vary).
Path:
themes/hotel-reservation-theme/password.tplAdd hook:
{hook h="displayForgotPasswordFormFieldsAfter"}
Kindly refer to this screenshot:
How To Install QloApps Cloudflare Turnstile
The Installation of any module is very simple in QloApps.
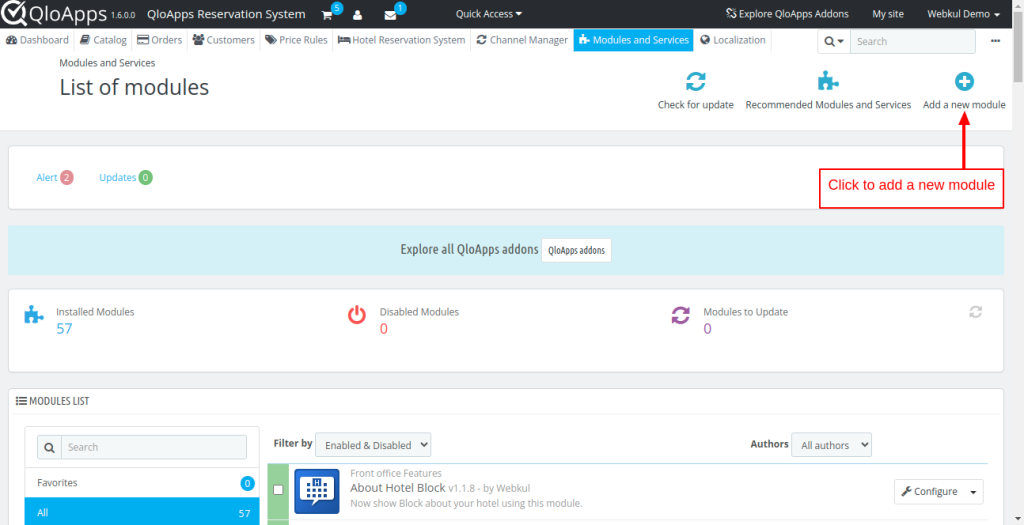
Go to the ‘Module and Services’ tab in the back office.
Click on ‘Add a New Module’.
Click on the ‘Choose a file’ and upload the zip file of the module.
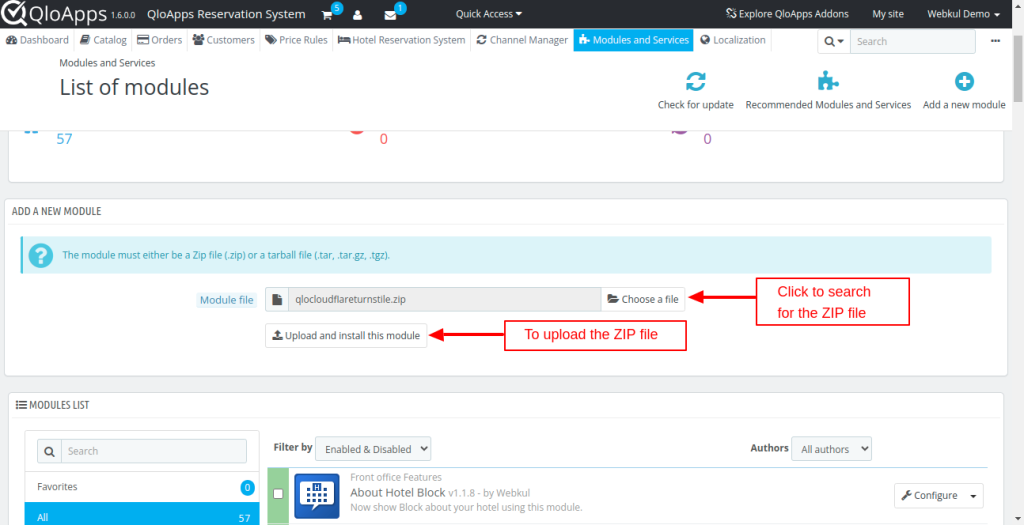
After uploading the ZIP file the module will start installing automatically.
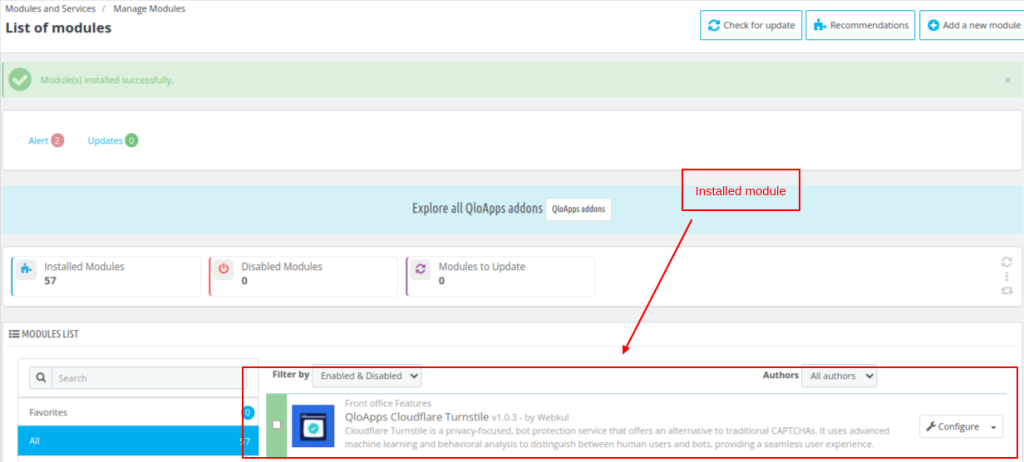
Once the module is installed, the user can see the prompt for successful installation and the module will be listed below.
How To Configure QloApps Cloudflare Turnstile
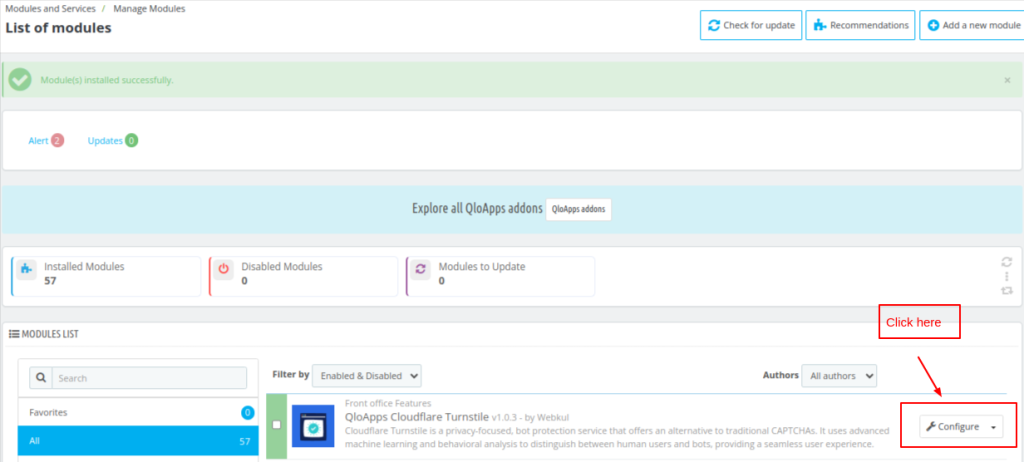
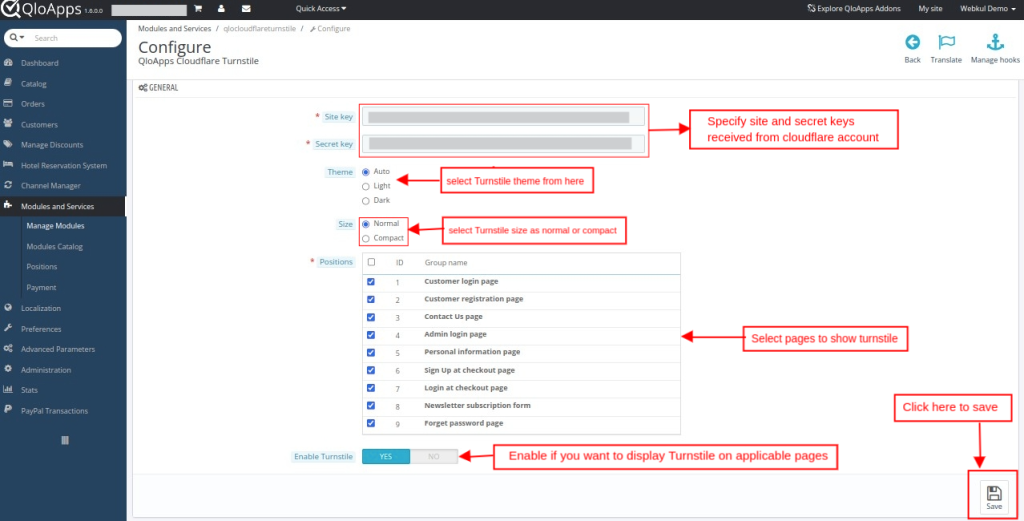
To configure the module go to the Module and Services tab, search for the “Cloudflare Turnstile” module, and click on Configure.
On the configurations page, you need to enter the following information.
- Site Key: You can get the site key from the Cloudflare Turnstile dashboard after adding sites
- Secret Key: You can get the secret key from the Cloudflare Turnstile dashboard after adding sites.
- Theme: Select the Turnstile theme as auto, light, or dark.
- Size: You can select size options for Cloudflare Turnstile from Normal or Compact.
- Positions: You can select pages where Cloudflare Turnstile will be displayed.
- Enable Turnstile: Enable if you want to display Turnstile on applicable pages.
Click on Save to save the settings.
Front End Workflow
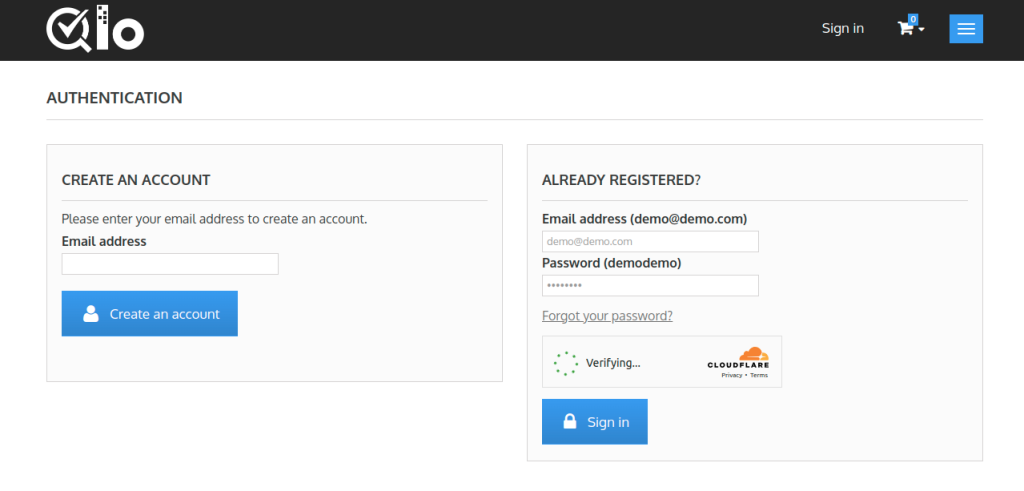
Turnstile will display on the store pages selected by the admin while configuring the module settings.
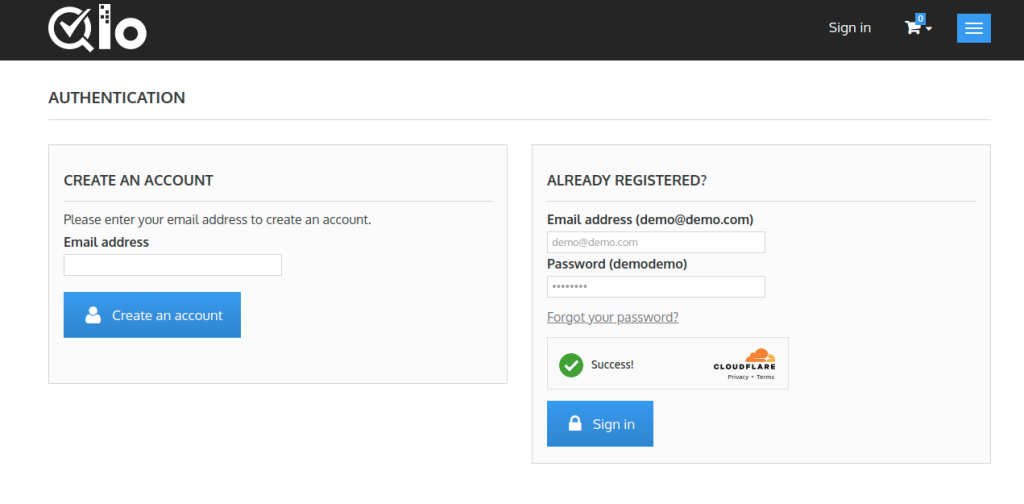
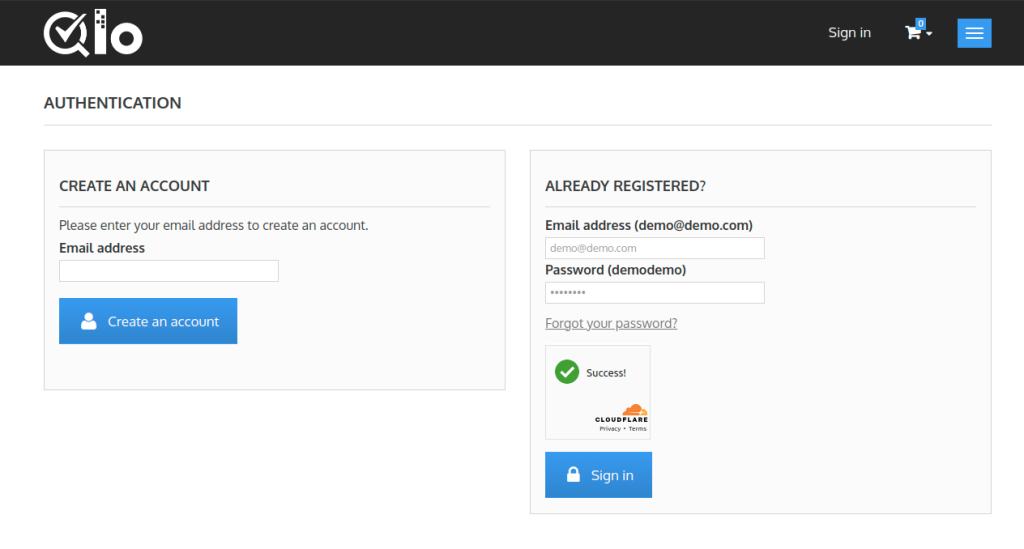
Customer Login Page
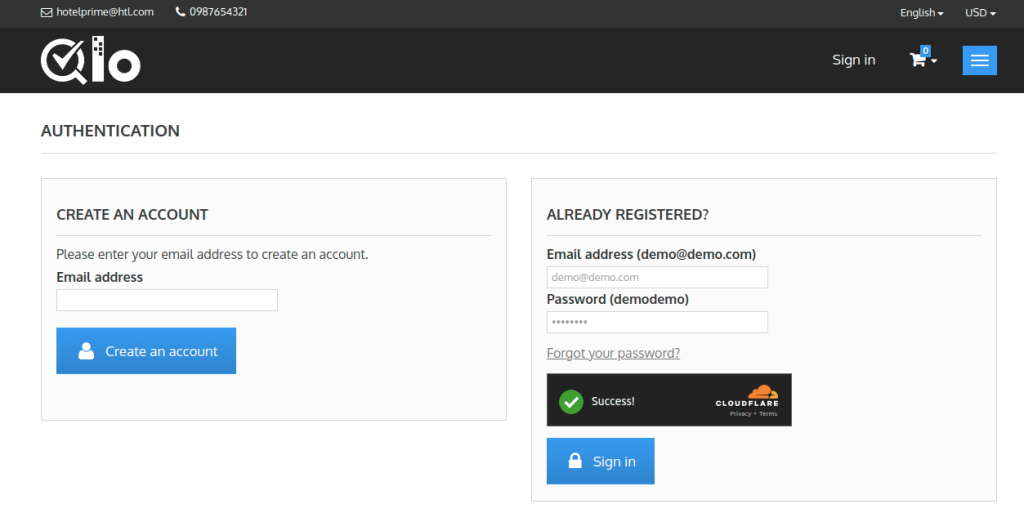
Dark Theme View
Turnstile Compact View
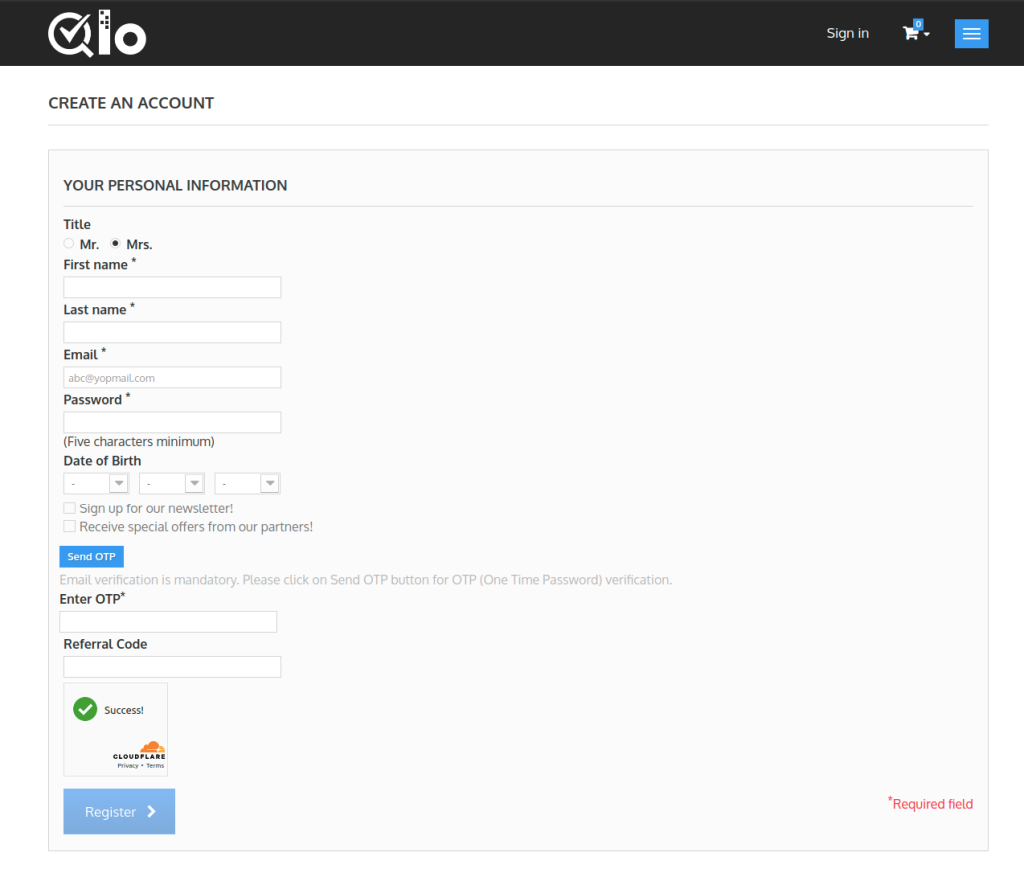
Customer Registration Page
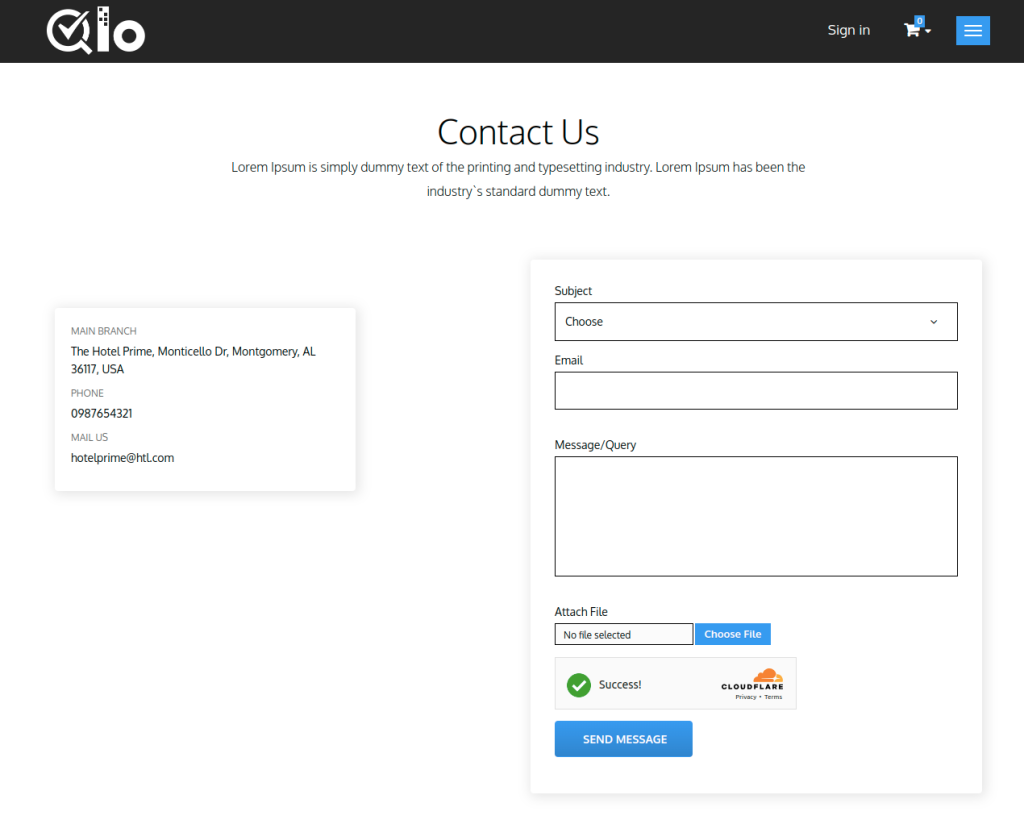
Contact Us Page
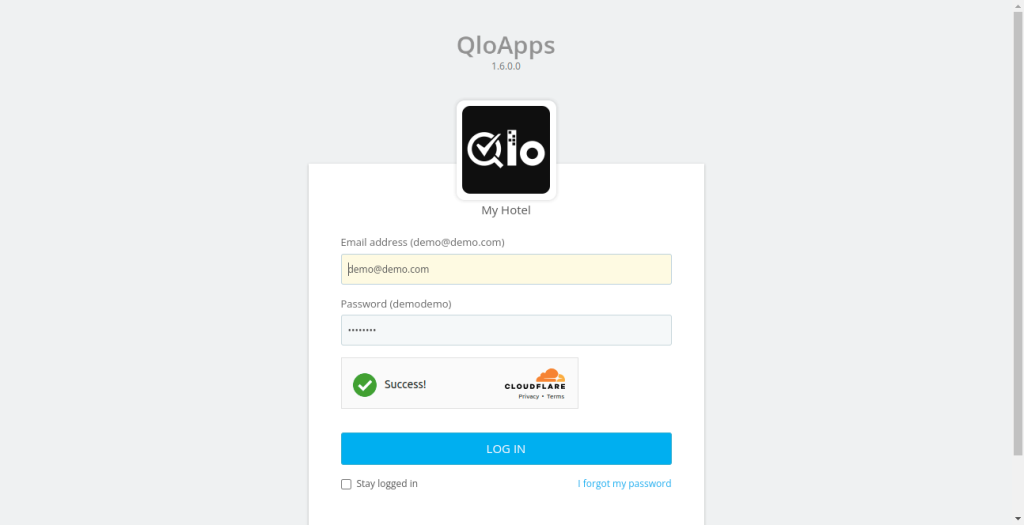
Admin Login Page
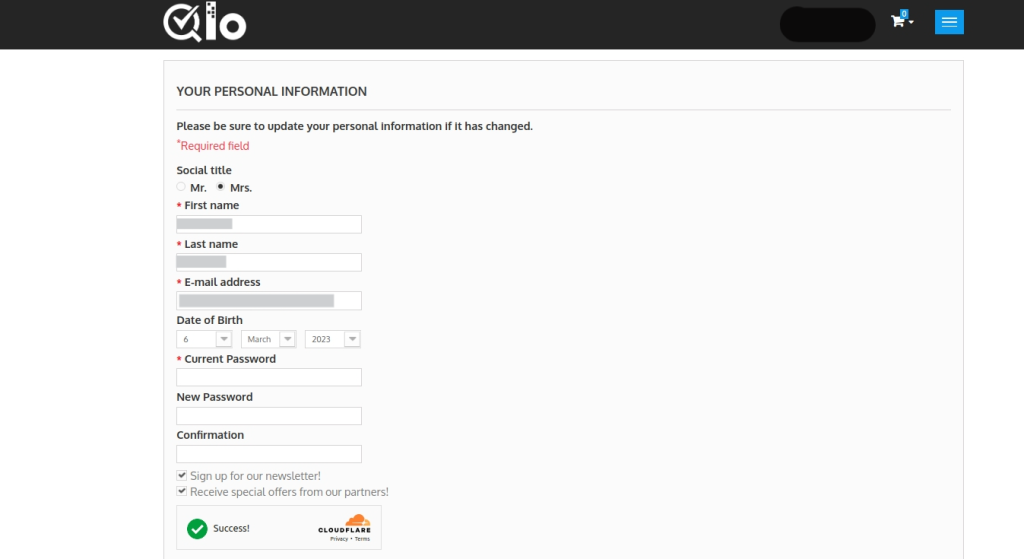
Personal Information Page
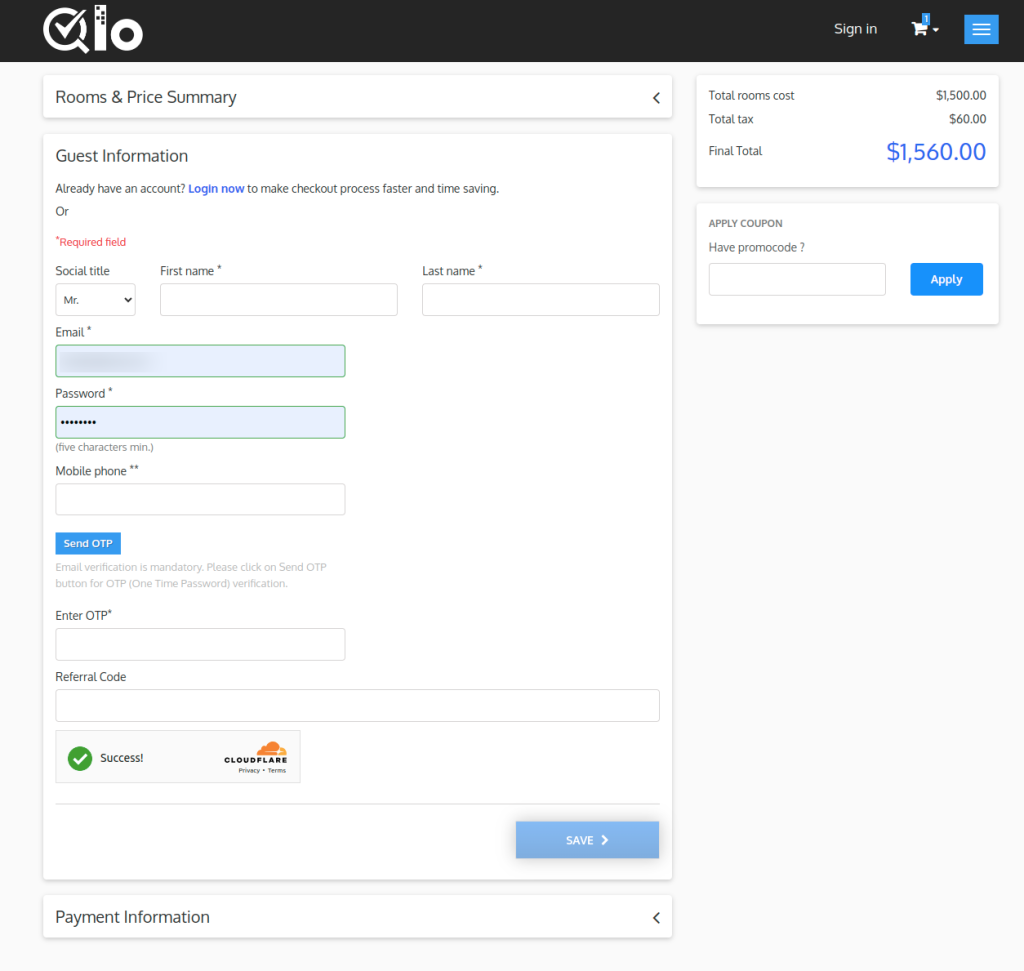
Sign Up at the checkout Page
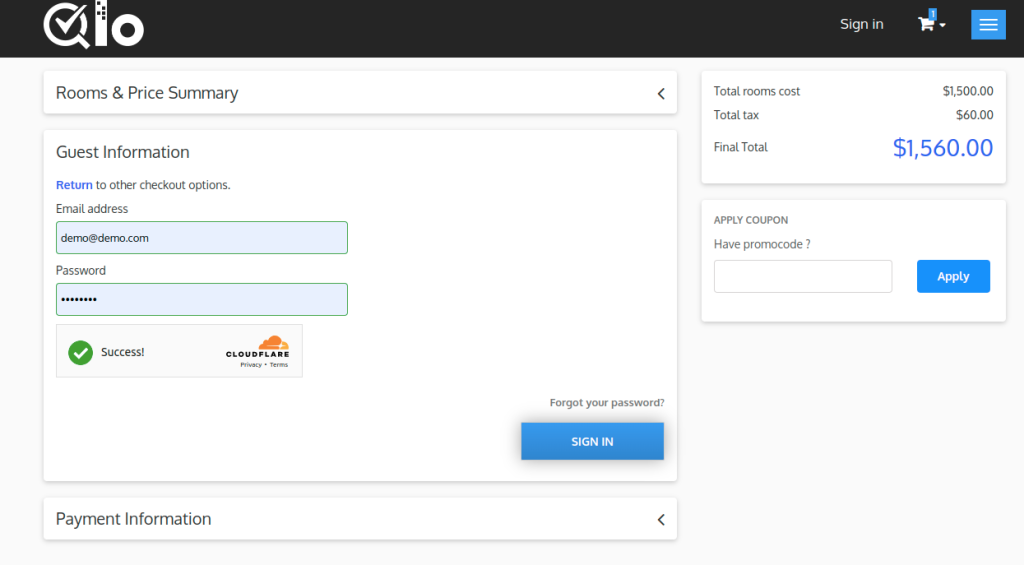
Login at the Checkout Page
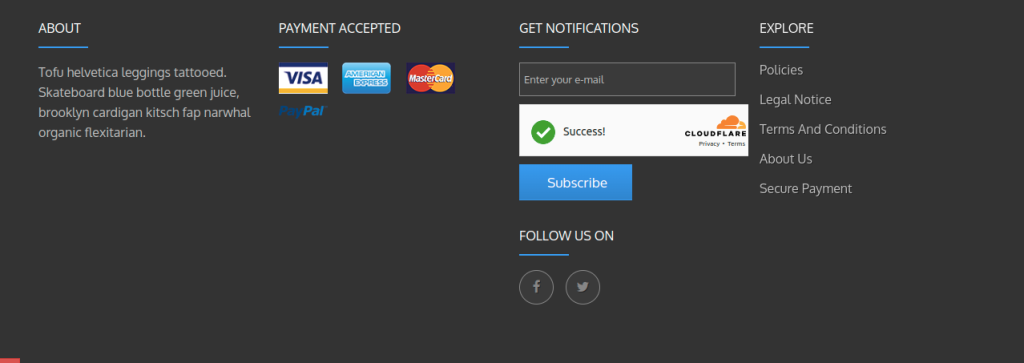
Newsletter subscription form
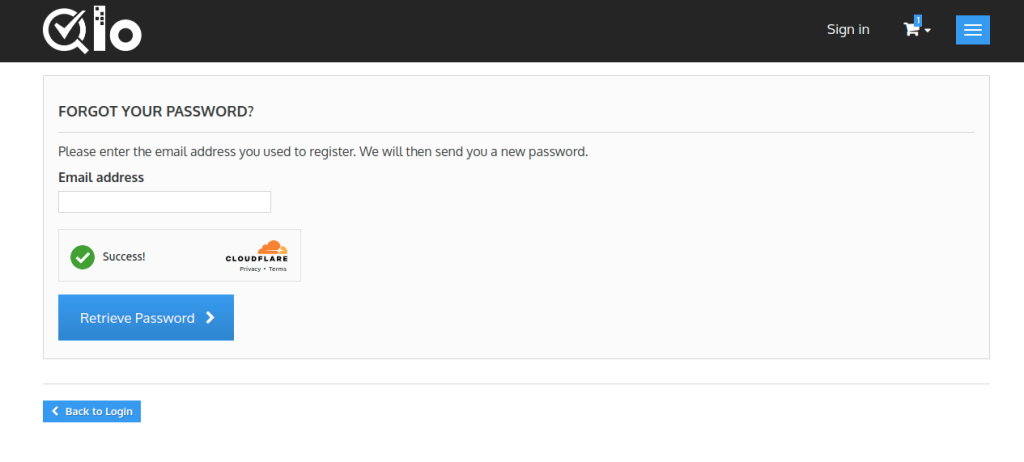
Forgot Password Page
Website Analytics
On your Cloudflare account, you can check the analytics of your website like challenges issued, visitor solve rate, and API solve rate. Click, as shown below.
On clicking the link, the Dashboard will open where you can view the analytics.
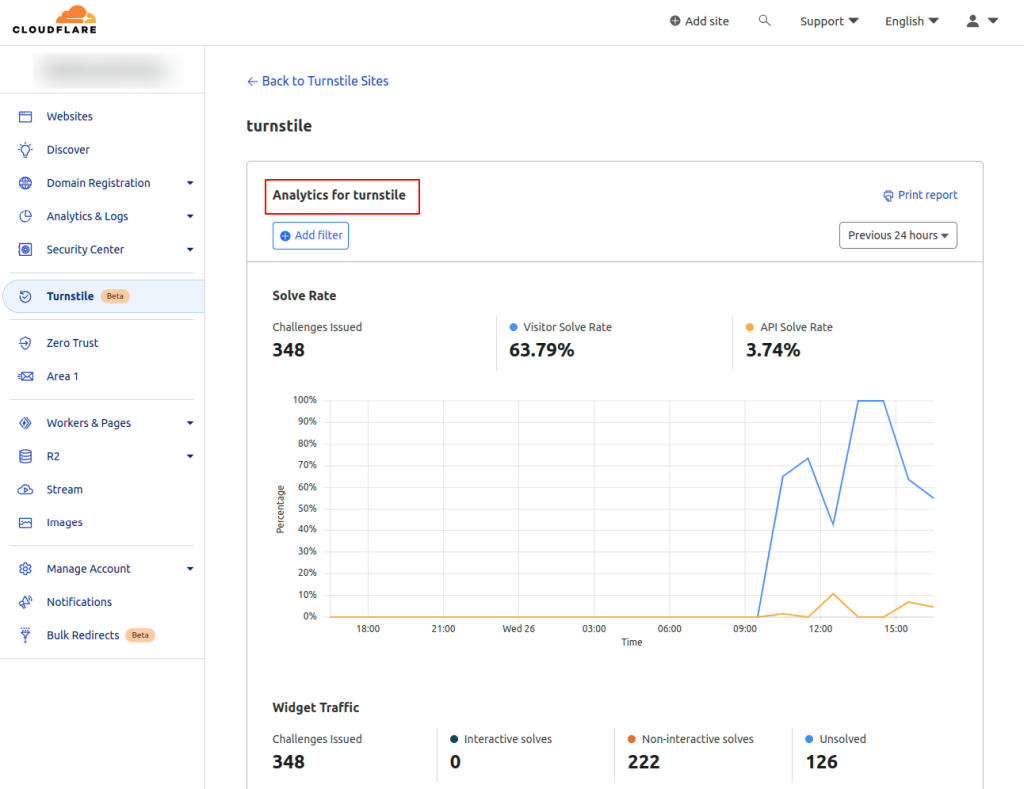
Challenges Issued: This means the number of times the widget has been displayed on the website.
Visitor Solve Rate: Percentage of users who have seen the widget and completed it.
API Solve Rate: Percentage of users who have completed the widget and then performed the action on the page successfully like login on completing the registration.
Conclusion
This is the complete process of Setup and use of QloApps Cloudflare Turnstile. I hope I was able to clarify the functioning of the module for you.
If you want to learn about the functionality of QloApps then you can visit this link: QloApps Reservation System – Free Open-Source Hotel Booking & Reservation System.
In case of any query, issue, or requirement please feel free to raise it on QloApps Forum.
Current Product Version – V 4.0.0
Supported Framework Version – QloApps 1.7.X

Be the first to comment.