QloApps Bitpay Payment Gateway is an add-on for QloApps.
It will allow you to accept online payments through Bitpay Payment Gateway, accepting Blockchain Payments.
It accepts Customers who simply send cryptocurrencies (like Bitcoin, Ether, or Ripple) from their computer or mobile device directly to a payment address.
Thus, it creates a better experience for users and increases conversions.
Accepting payments through different gateways is a must for every website. And for this functionality, we are using Bitpay Payment Gateway.
Features
- Global Crypto Payments: Hotels can accept bookings from international travelers who prefer paying in Bitcoin, Ethereum, or stablecoins.
- Fiat Settlement: Even if a guest pays in crypto, the hotel owner can receive payouts in local currency (INR, USD, EUR, etc.), protecting revenue from crypto price volatility.
Seamless Website Integration: Easily integrates with booking engines or hotel websites - Multi-Wallet Support: Guests can pay with wallets like Coinbase, Trust Wallet, MetaMask, Bitpay, etc.
- Flexible Transaction Speed Settings
BitPay integration allows merchants to choose between Low, Medium, or High transaction speeds depending on their business needs.
Low speed ensures maximum security by waiting for full blockchain confirmations.
Medium speed balances speed and safety with partial confirmations.
High speed provides instant payment confirmations for low-value, high-volume orders. - This flexibility empowers businesses to strike the right balance between customer experience and payment security.
Installation of QloApps Bitpay Payment Gateway
The installation of any module is very simple in QloApps.
- Go to the “Module and Services” tab.
- Click on “Add New Module”.
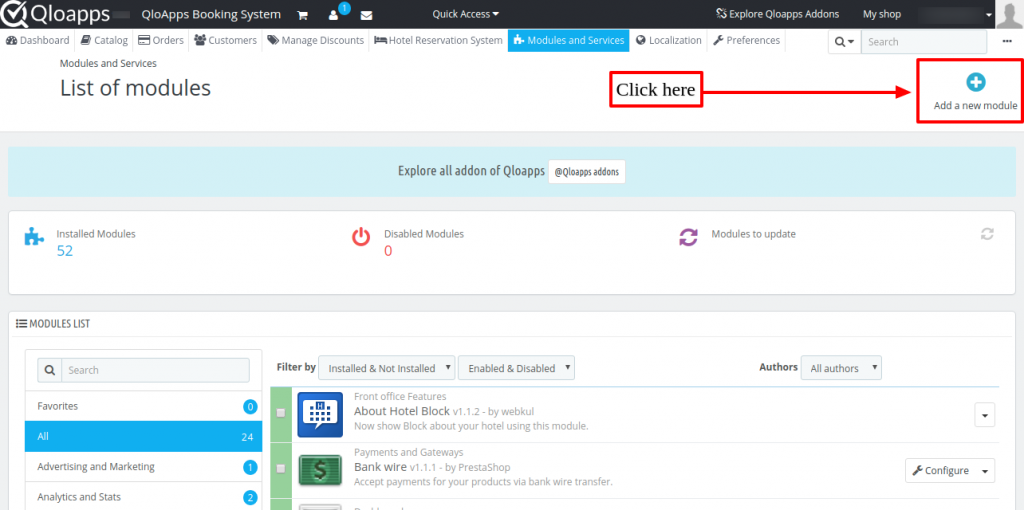
Now upload the Zip file of the module and click on install.
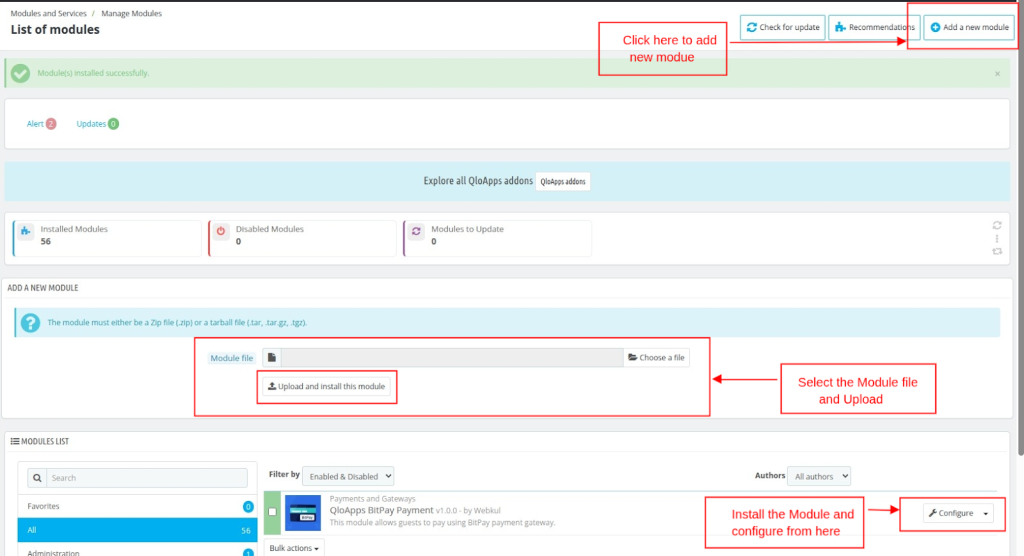
Now you have installed the module. So let’s check how to configure it.
Configuration of QloApps Bitpay Payment Gateway
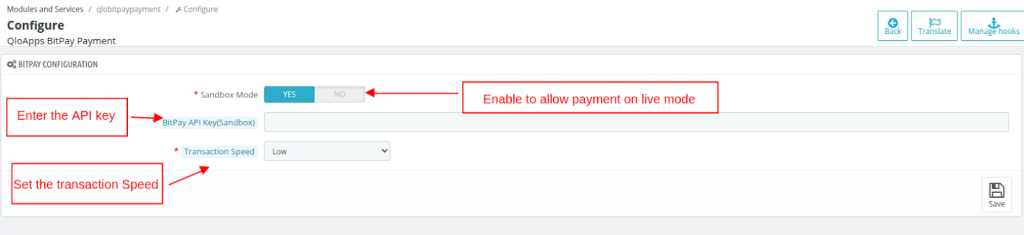
To configure the module, enter the API keys.
Switches between production and sandbox modes for testing and production purposes.
Production mode is for actual transactions, while sandbox mode is for testing and development.
How to Get the API Keys
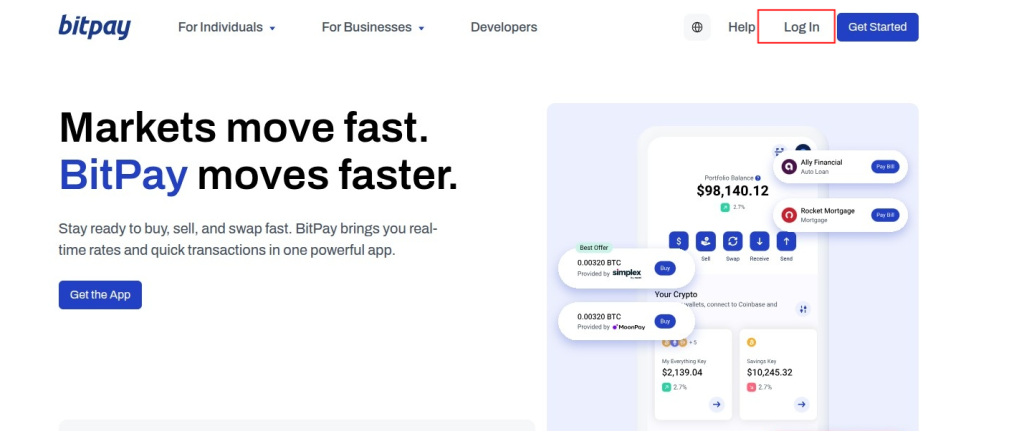
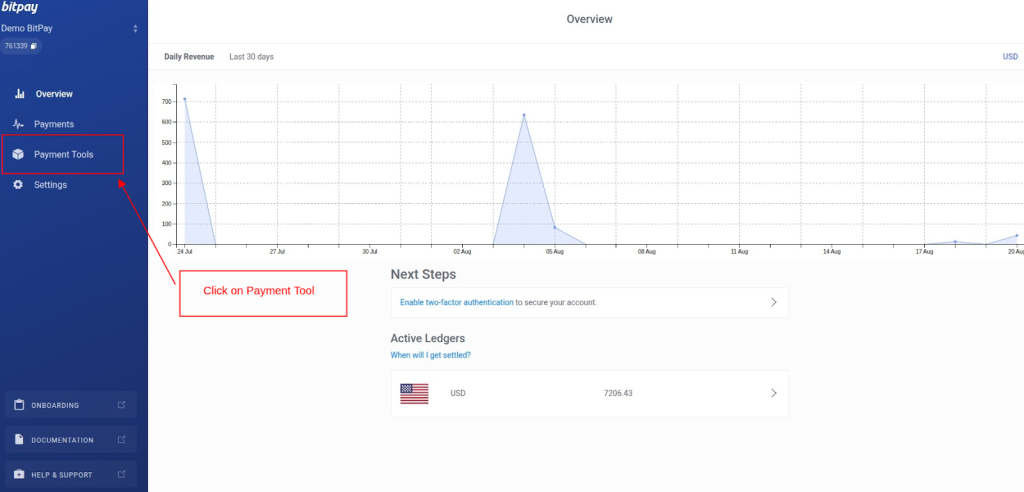
To get the API of Bitpay Payment Gateway, admin has to create an account on Bitpay Payment Gateway.
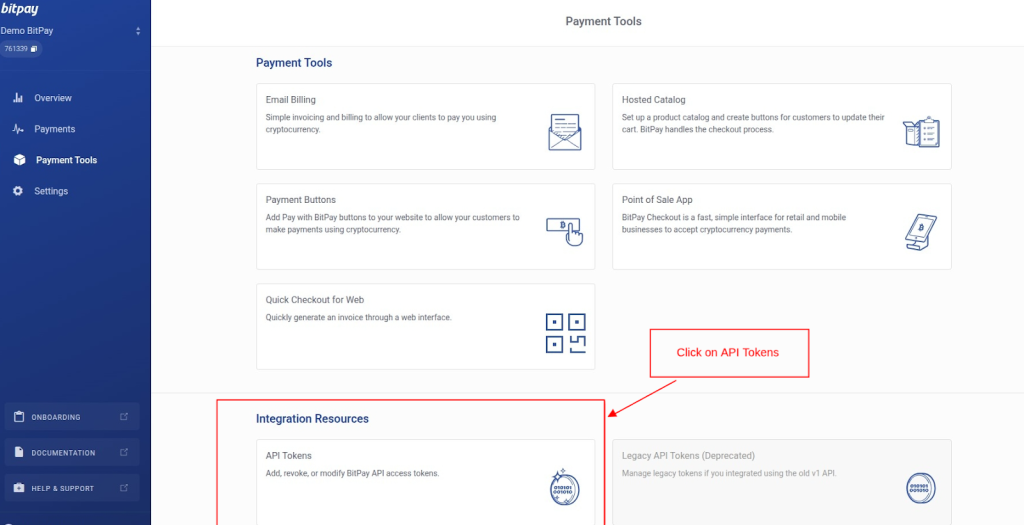
After successfully logging in, click on Payment Tools. In Payment Tools, under the Integration Resources section. Click on API Tokens.
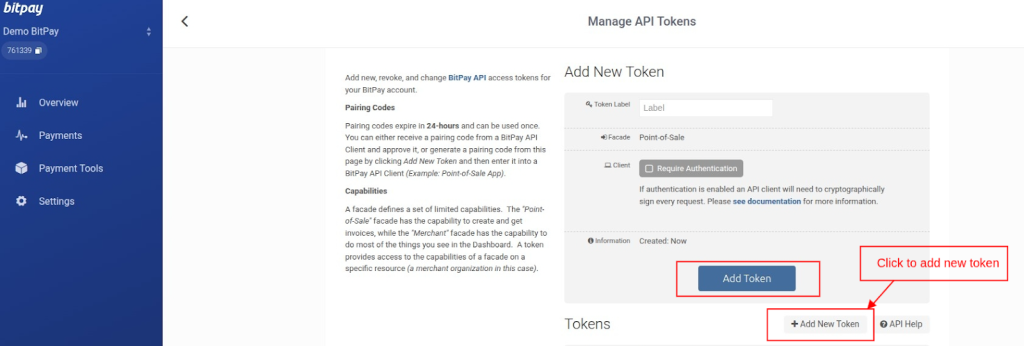
You can use the generate API key by clicking on Add New Token button. Add the token Label and then click on Add Token.
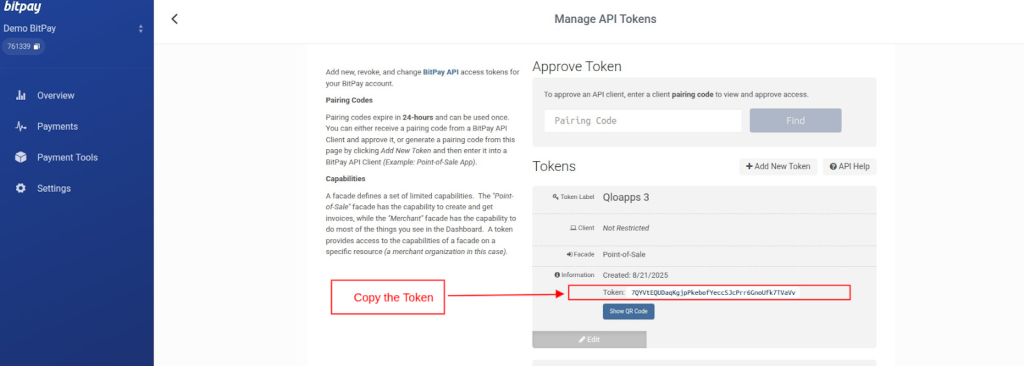
Copy the Generated Token and go to module configuration in the back office.
Fill the API keys in the module configuration, and set the transaction Speed as per your convenience (Low, Medium, High).
Click on the Save Button.

Front End View
Once the module is configured successfully, the guest will be able to view the BitPay payment gateway at the time of checkout.
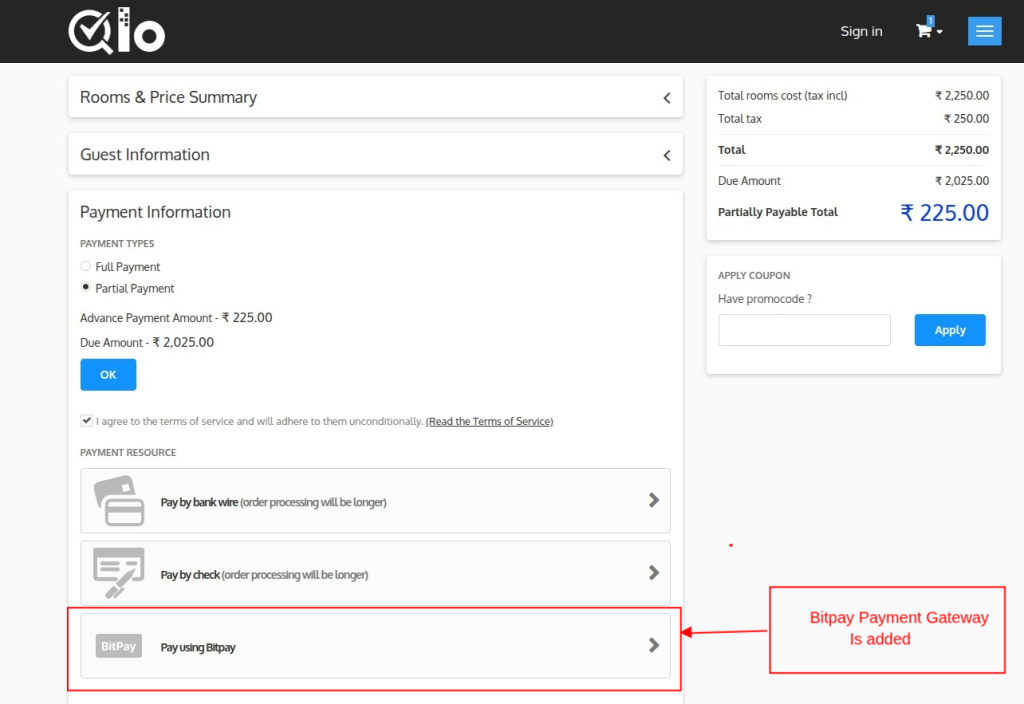
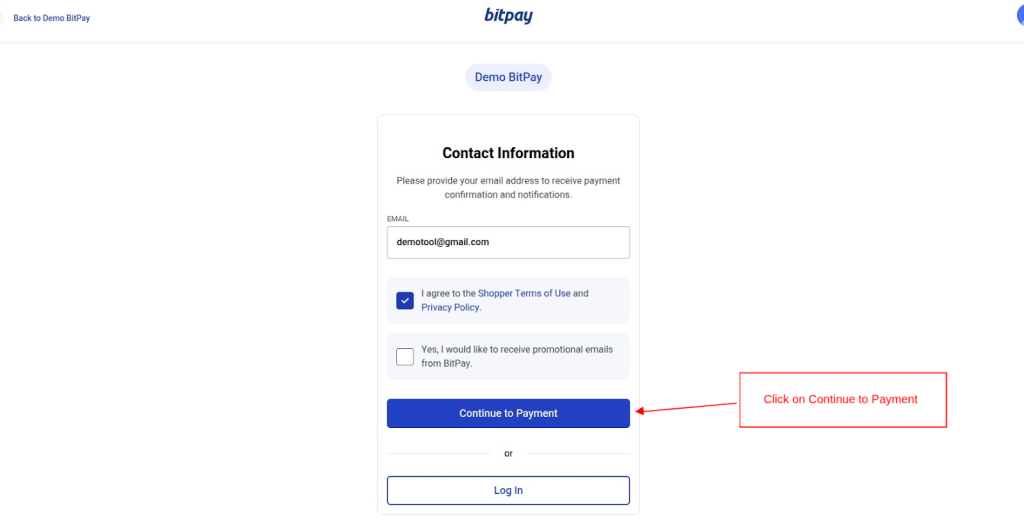
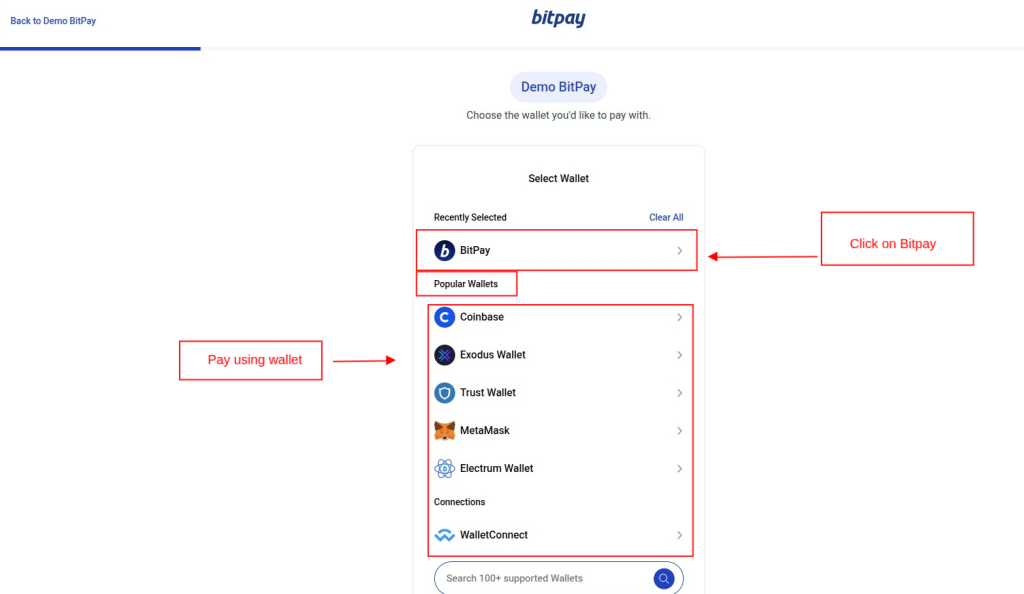
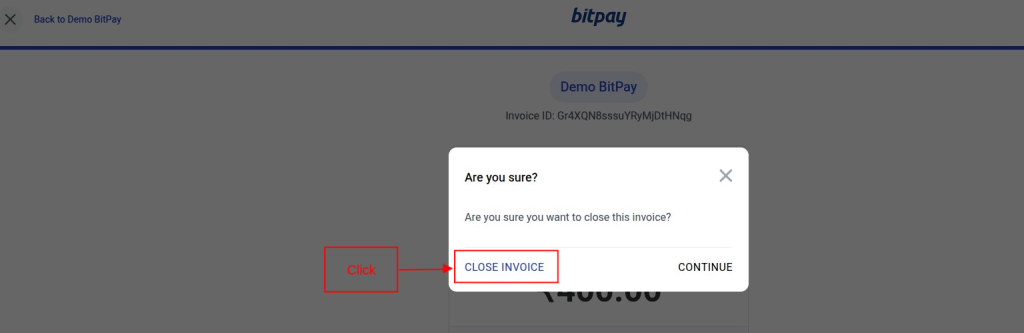
Once the user clicks on the Bitpay payment option, they will be redirected to the payment page from where they can complete the payment.

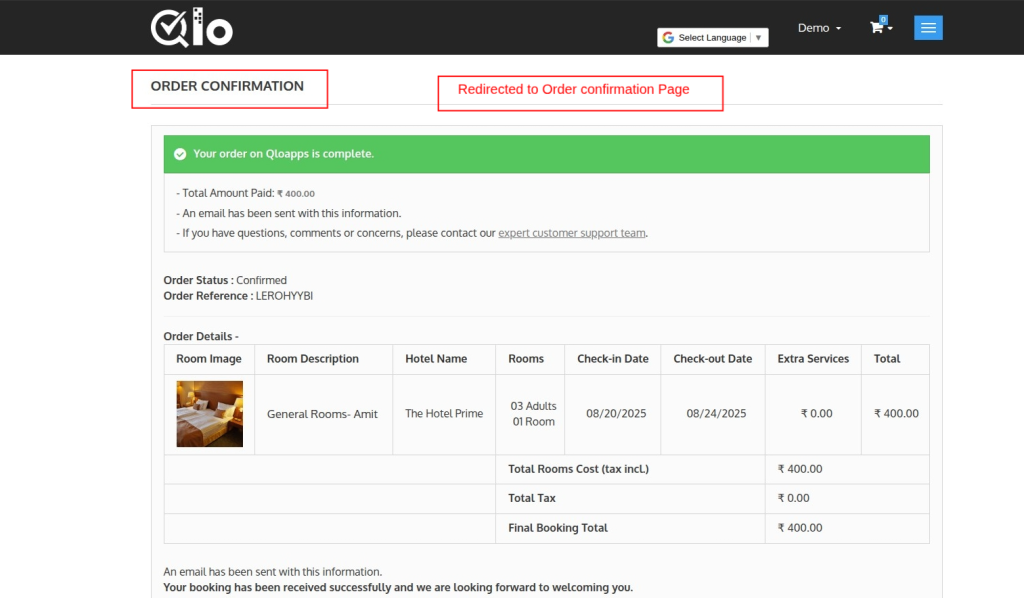
In this way, he can process the payment using the QloApps Bitpay payment gateway.
Back-end view
A new tab, “Bitpay Transactions,” is added at the backend.
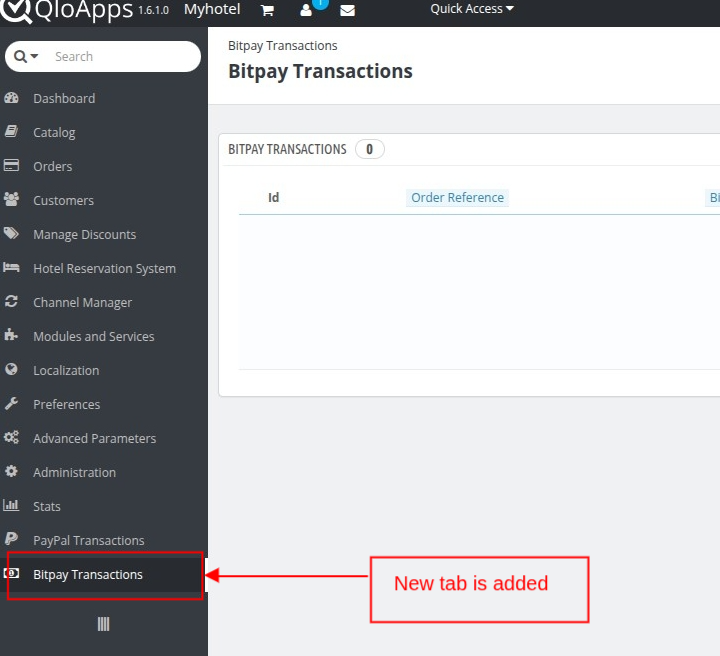
From here, the admin can view the list of all the transactions made through the Bitpay Payment Gateway.
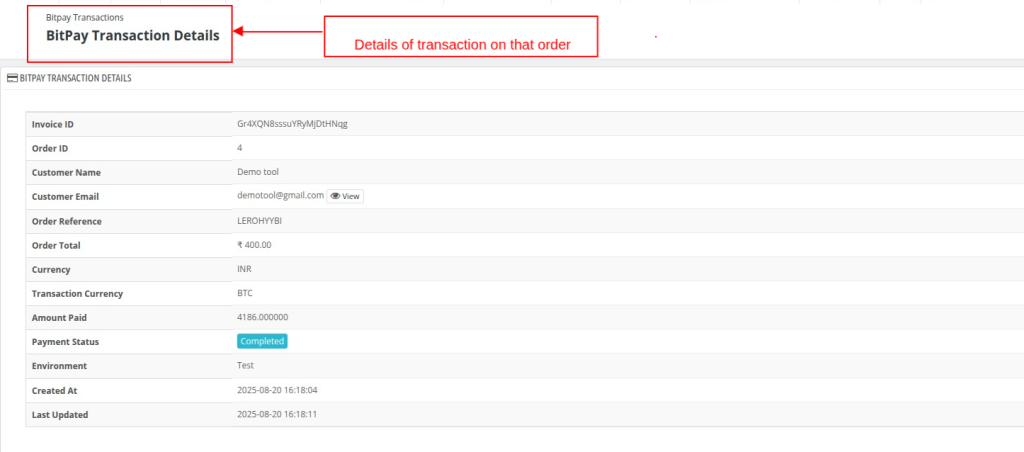
Click on view details to see the full details of the transaction.

Wrapping Up
This was all from the QloApps Bitpay Payment Gateway. I hope I was able to clarify the functioning of the module to you.
Reach Out: We’re Ready to Assist
If you want to learn about the functionality of QloApps, then you can visit this link: QLO Reservation System – Free Open-Source Hotel Booking & Reservation System
In case of any query, issue, or requirement, please feel free to raise it on the QloApps Forum
Lastly, do not forget to drop your thoughts in the comments.
Current Product Version – V 4.0.0
Supported Framework Version – QloApps 1.6.x and 1.7.x

Be the first to comment.