With the CCAvenue Payment Gateway module, the admin can let customers pay through the CCAvenue payment gateway.
Customers can quickly pay with several payment methods such as Credit Card, Debit Card, Net Banking, IMPS transfer, etc.
CCAvenue supports multi-currency payment processing, enabling merchants to accept payments not only in Indian Rupees (INR) but also in 27 major global currencies from international customers.
View More: https://www.ccavenue.com/payment-gateway
Note: To use CCAvenue, your business must be legally registered in India.
You are required to provide a valid Indian PAN card, an Indian bank account, and supporting registration documents to complete onboarding.
Features of CCAvenue Payment Gateway for Qloapps
- Customers can make payments with the use of debit and credit Cards.
- Customers can make payments with the use of net banking.
- Customers can make IMPS transfers.
- The list of all the CCAvenue transactions is available at the admin’s end.
- Use the addon in the sandbox mode or in live mode as per your requirement.
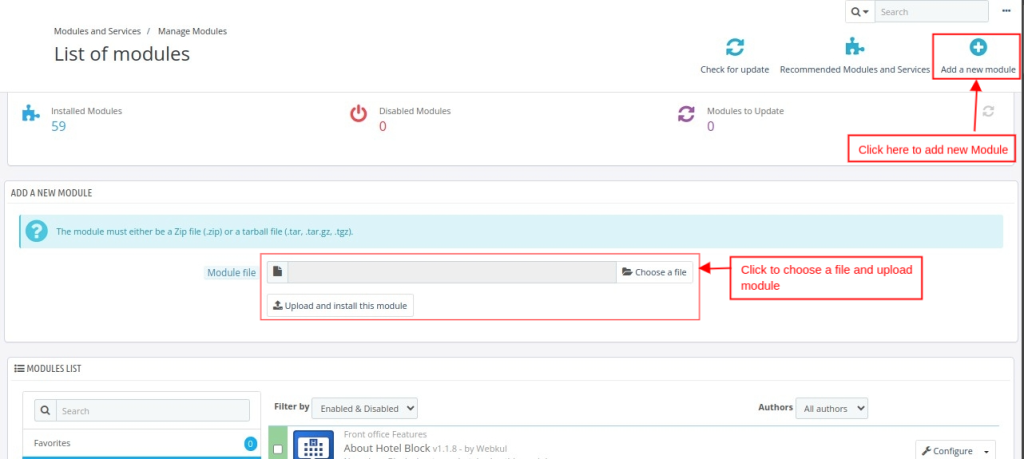
Installation of CCAvenue Payment Gateway for QloApps
- Log in to your QloApps Admin Panel.
- Navigate to Modules & Services > Manage Module
- Upload zip file of CCAvenue Payment Gateway Module
- The module will automatically get installed on your Qloapps
Configuration
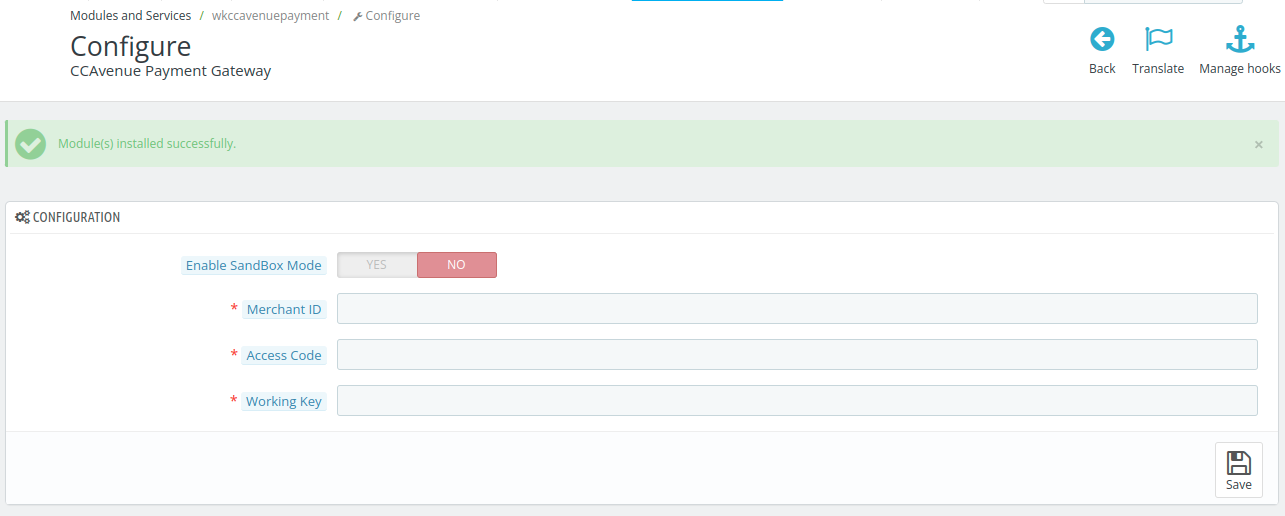
Once the module is installed successfully you can see the configuration page as shown below. Also, you can configure the module by clicking on “Configure”.
Once you click on configure, the module will need the API Keys – Merchant ID, Access Code, and Working Key. These details are available in the CCAvenue account.
To get the API Keys:
- Log into the CCAvenue account
- Go to Settings -> API Keys

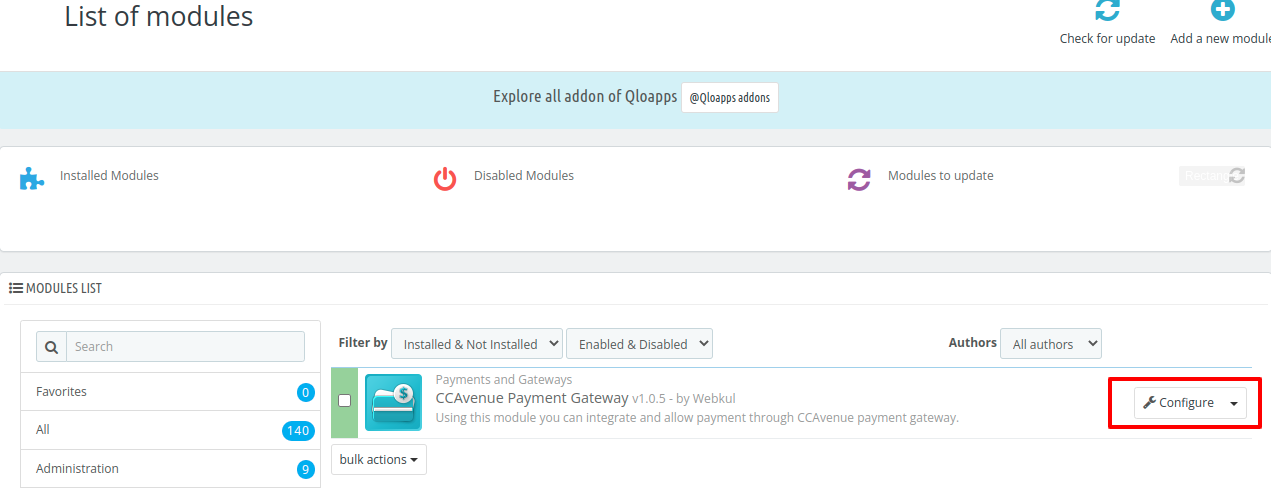
After getting the API keys you can start configuring the module.
- Go to the back-office -> Modules and Services
- Then go to CCAvenue Payment Gateway module -> Configure.
Now, enter the required details for each field and click the ‘Save‘ button to save. The “Enable SandBox Mode” allows you to activate the sandbox mode of the payment gateway.
Front-end View
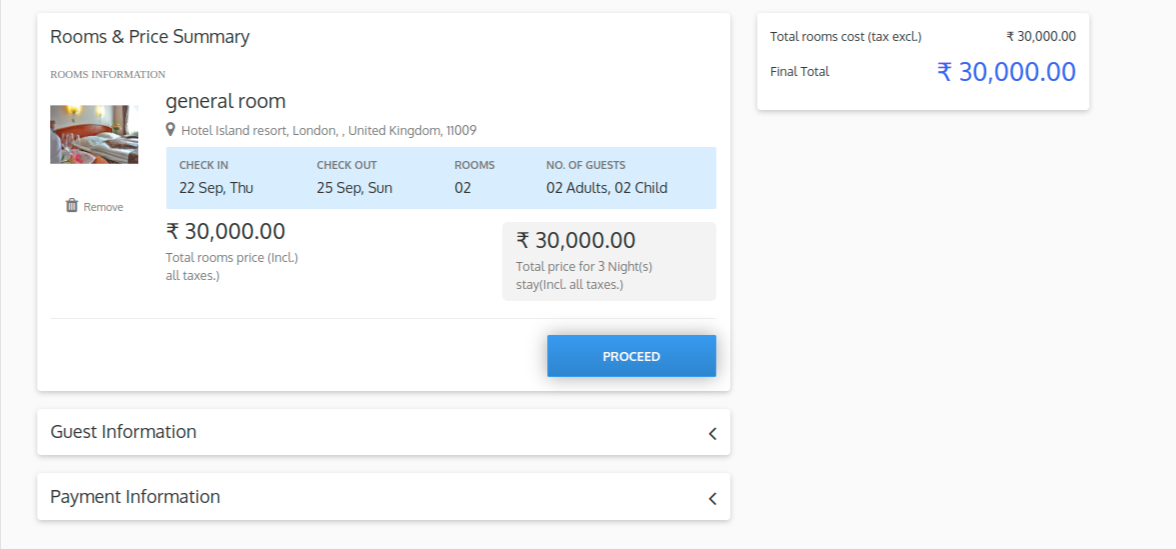
Once the payment gateway has been installed it will be available for customers to make online transactions. Click on “Proceed”.
Click on “Payment Information” for payment through the CCavenue gateway.
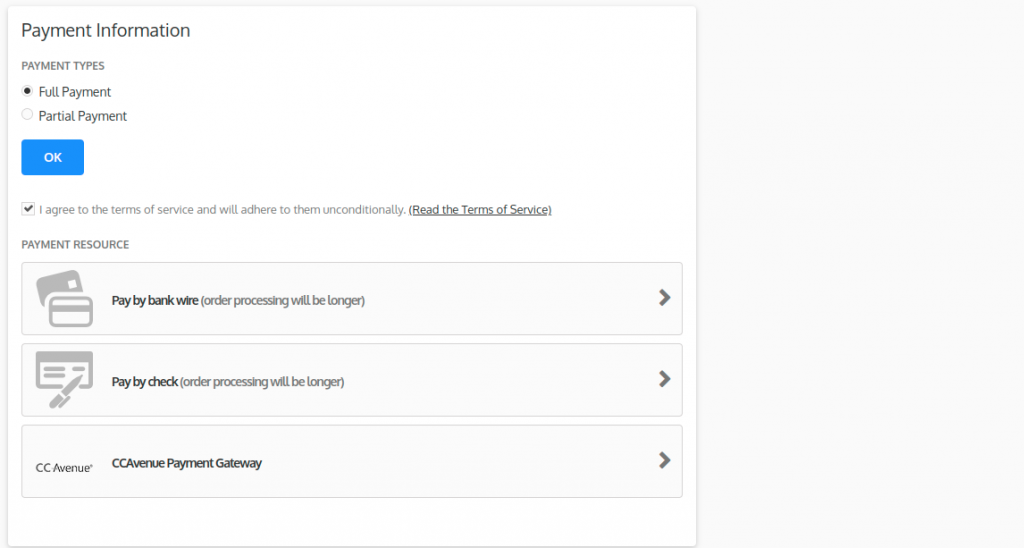
 In the payment information panel, accept the “Terms of Service” and payment method as “full payment or partial payment”. After this select the “CCavenue payment gateway” form “Payment Resource” Panel.
In this way, the admin can successfully provide the popular CCAvenue payment gateway to customers.
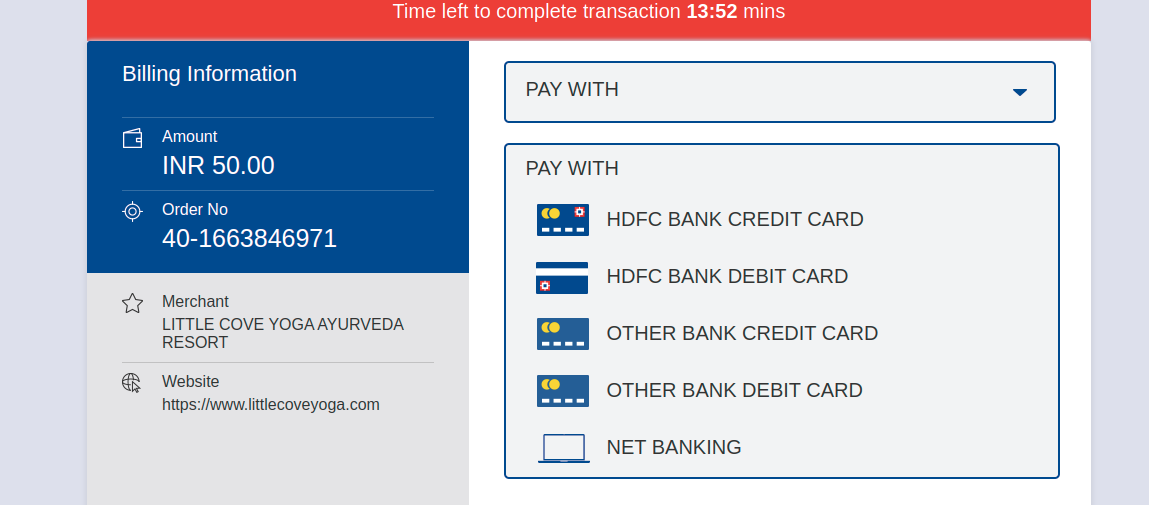
For instance, here we are selecting “Net Banking” from the “Pay with” dropdown. User can select their desired way. Then they can confirm the payment.

Once the payment is complete, the order confirmation page will appear in the order, as shown below.

CCavenue Transactions: Back End
From the QloApps Backed you can see the option of CCavenue payment. For that, go to the admin panel and select “CCAvenue Transactions”.
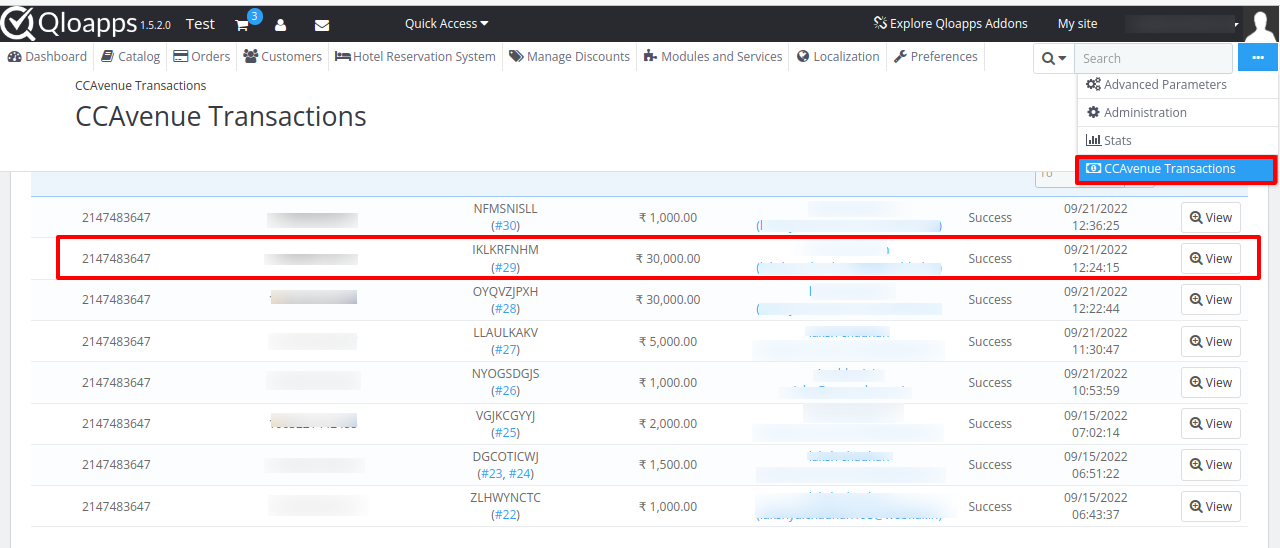
When the user clicks on “view” CCAvenue transitions details can be seen.

When users click on any Order reference ID, they will see the order detail page. On the order detail page in the “Payment tab” user can see the payment method as CCAvenue as given in the image below.

Conclusion
If you want to learn about the functionality of QloApps then you can visit this link: QLO Reservation System – Free Open-Source Hotel Booking & Reservation System.
In case of any query, issue, or requirement please feel free to raise it on QloApps Forum.
Moreover, for any support, you can raise a ticket from here.
Current Product Version – 4.0.0
Supported Framework Version- QloApps 1.7.x & 1.6.x

Be the first to comment.