QloApps PayU Payment is an add-on that integrates the PayU payment gateway to your hotel booking website.
Use this to give your customers the best payment experience.
Because integrating with PayU opens multiple options to receive payment from various channels.
The payment options include Cards( Debit/ Credit), Net Banking, and Wallets. EMI and UPI.
Apart from providing a seamless checkout experience, it is highly secure. Thus, it protects your customer’s data from potential attacks.
Ultimately, it will be fruitful for your brand name and image.
Features of QloApps PayU Payment
- The payment gateway provides 24*7 support.
- It has multiple payment options like cards, net banking, UPI, and wallets.
- The transactions from it are faster and smoother.
- It is secure and reliable.
- This module will work in live and test mode.
- Easy to install and configure by admin from the backend.
- Admin can check the customers who make payments from the PayU payment gateway at the ‘Orders’ tab.
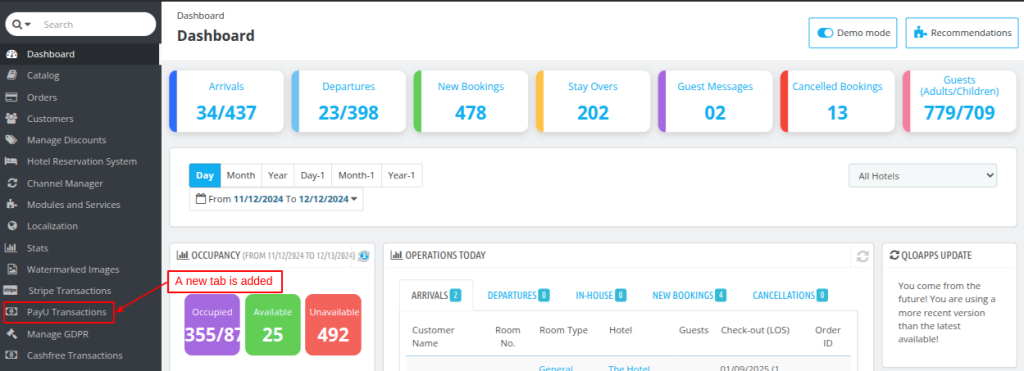
- A new tab called ‘PayU Transactions’ is added at the backend. Click on it to view all transactions from the PayU payment gateway.
NOTE- It supports INR currencies only.
Installation
The installation of any module is very simple in QloApps.
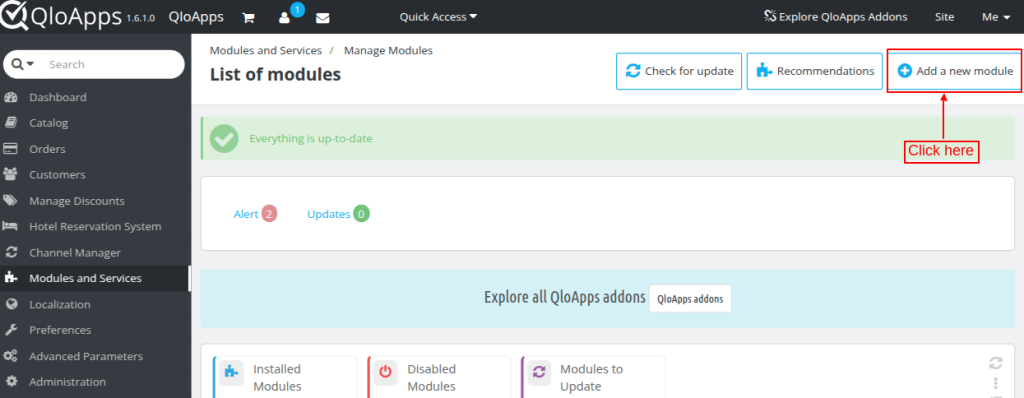
- Go to the “Module and Services” tab.
- Click on “Add New Module”.
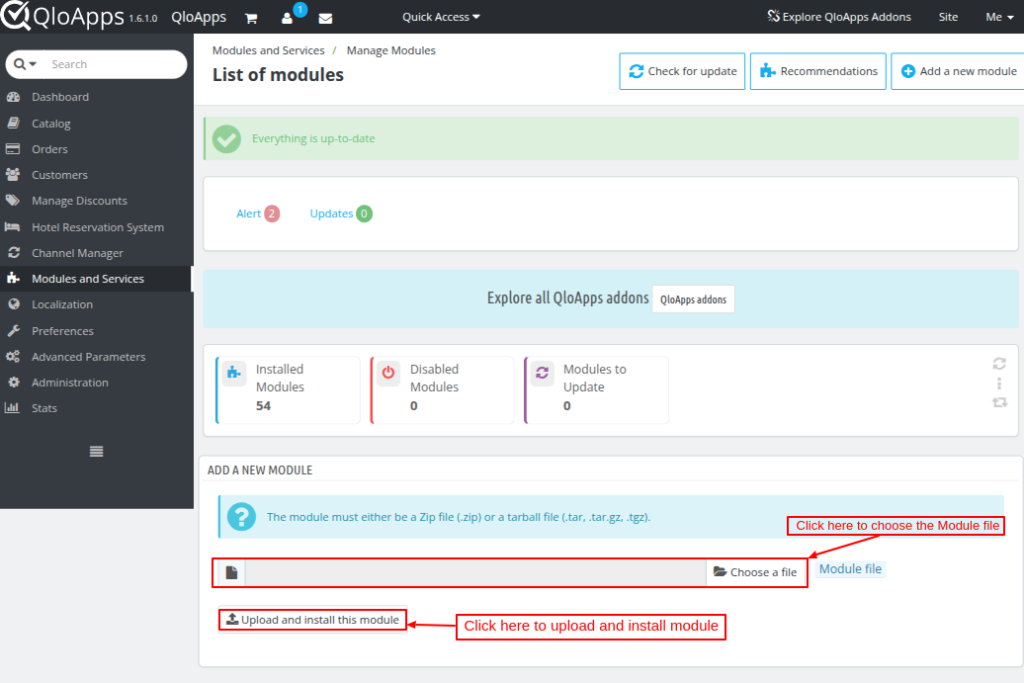
Now upload the Zip file of the module and click on install.

Now you have installed the module. So let’s check how to configure it.
Configuration of PayU Payment
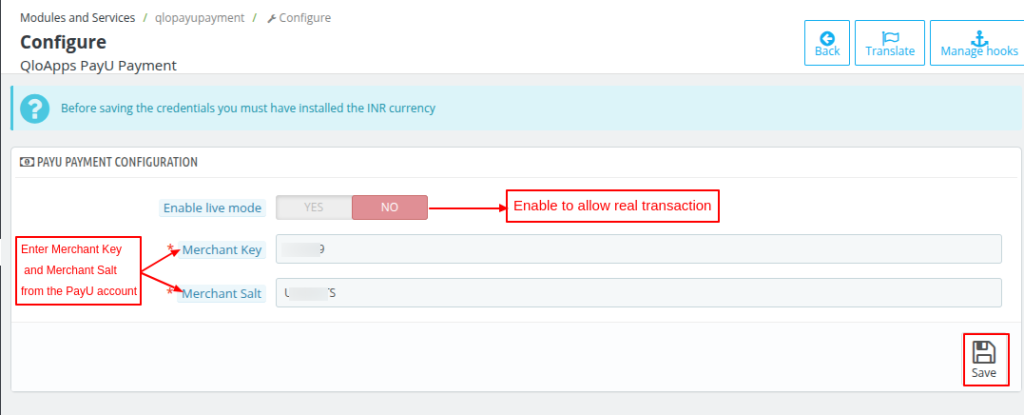
After clicking on the configure button, you will be redirected to the configuration page.
On this page, you will have the option to use the module in Sandbox mode or Live mode.
Sandbox mode tests the system whereas Live mode performs actual transactions.
Moreover, obtain Merchant Key and Merchant Salt from the PayU account and enter them in the space provided for the configuration of the module.
Please Note that the “SameSite” cookie must be set to “None” for the module to function correctly. Failure to do so may result in improper operation.
How to get the API keys?
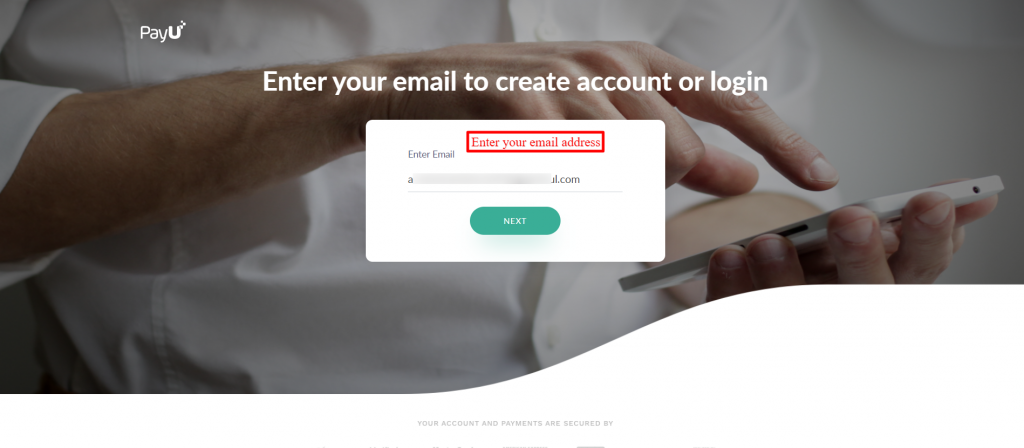
Go to the PayU website and create your account by clicking on ‘Sign Up’ or you may ‘Log In’ if your account is already created on the website.
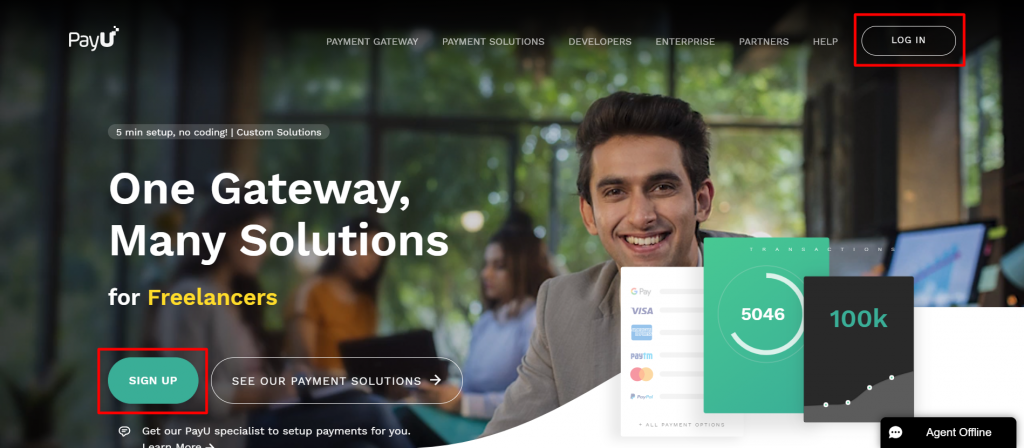
As our account is already created, so we are logging in.
Enter your email address and click on Next.
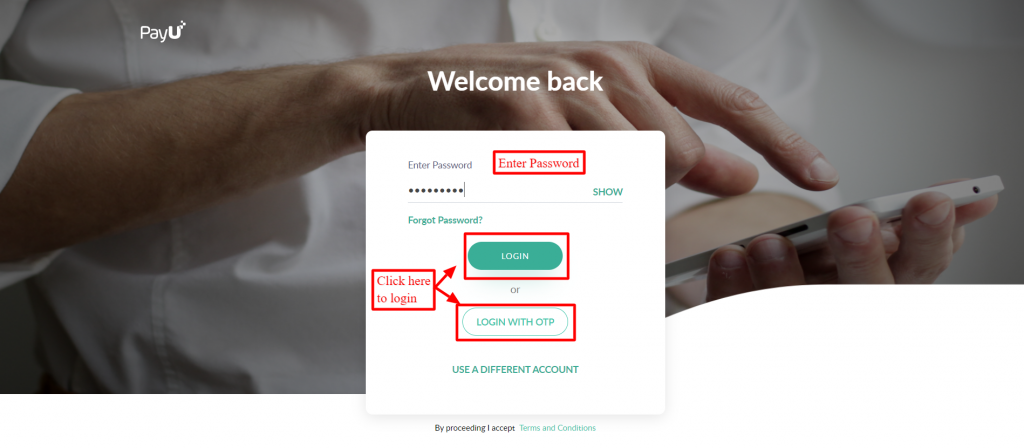
Enter your password and click on ‘Login’.
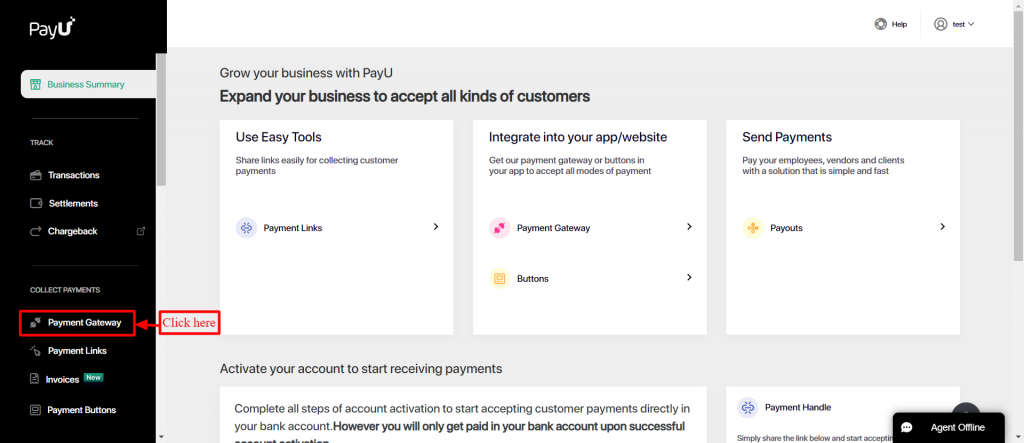
Afterward, you will be redirected to a new page. On the left-hand side, click on ‘Payment Gateway’.
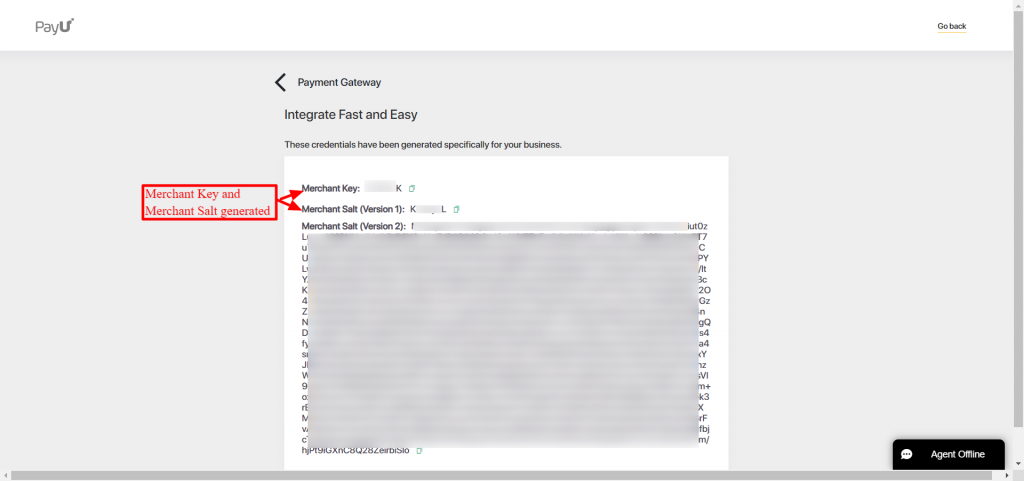
On the Payment Gateway page, you will find a button ‘Generate Merchant Key”. Click on the same to generate keys.
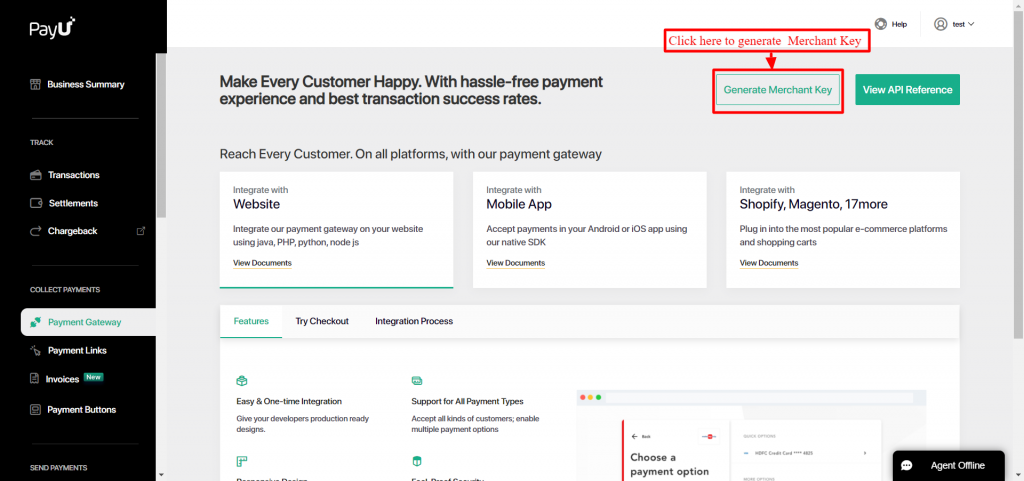
Henceforth, the ‘Merchant key‘ and ‘Merchant salt‘ are generated. Copy and paste them onto the module configuration page.
Workflow
Checkout Page
On the front end, the user will find the option to pay with the Pay by PayU payment gateway at the checkout page.
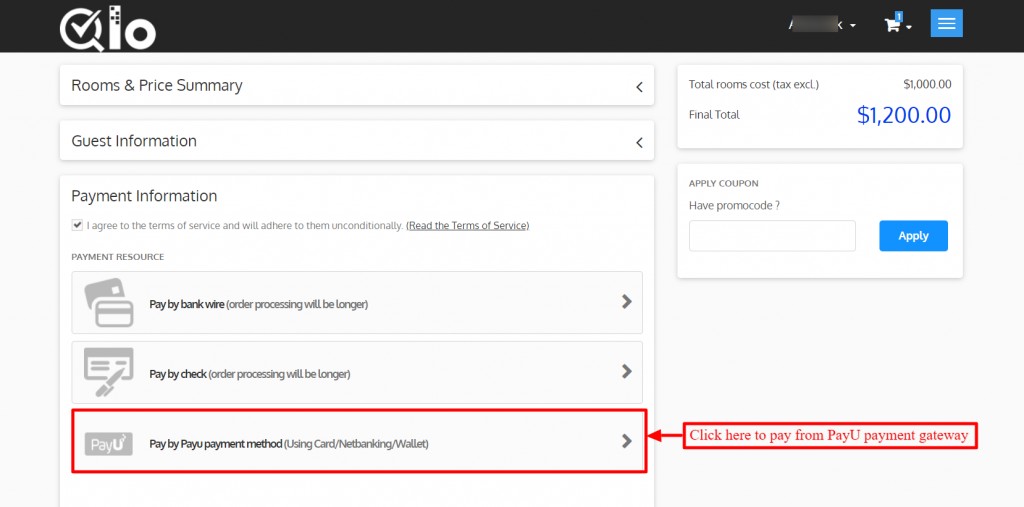
After clicking on the ‘Pay by PayU payment method’, you will get redirected to a new page.
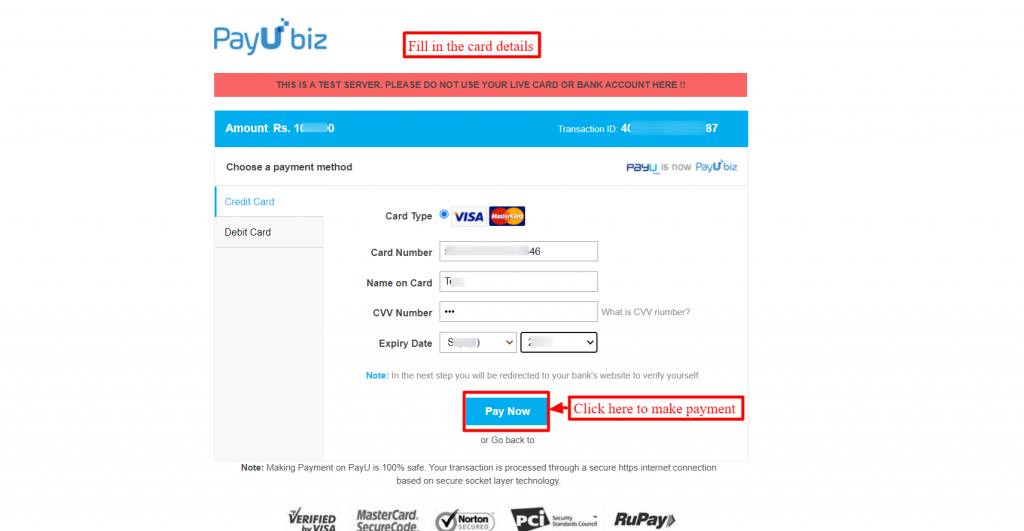
On that page, you will have to enter payment details and click on the ‘Pay Now” button to process the payment.
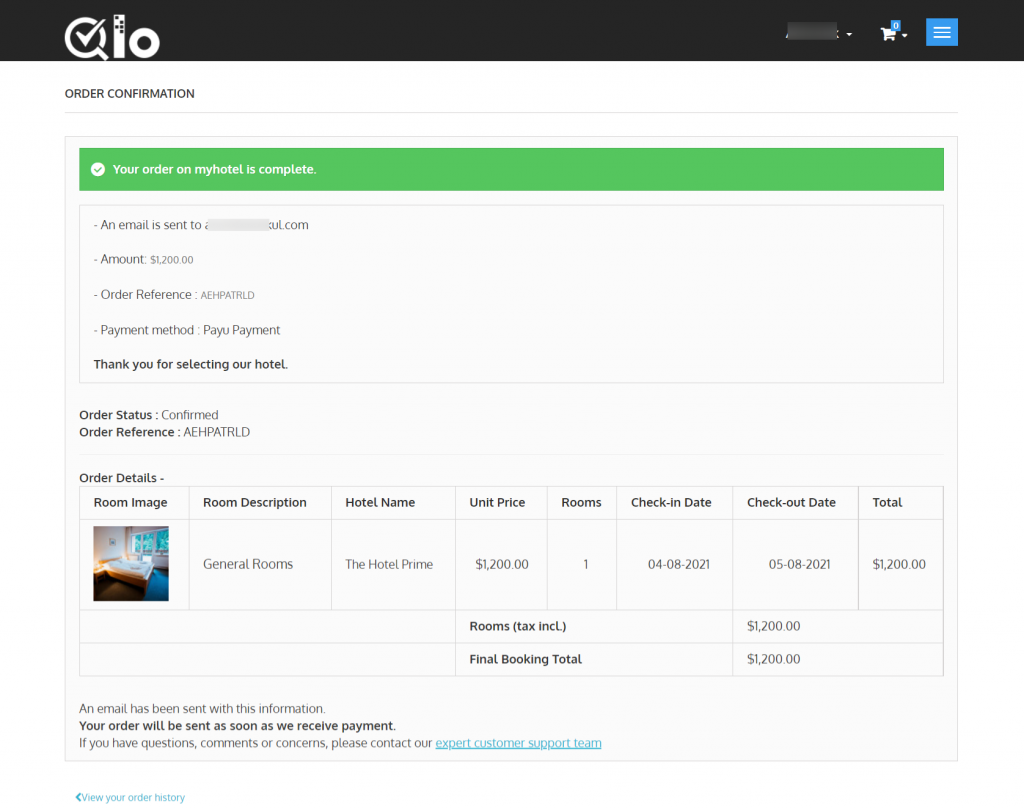
After the successful processing of payment via PayU Payment Gateway, you can view your order status.
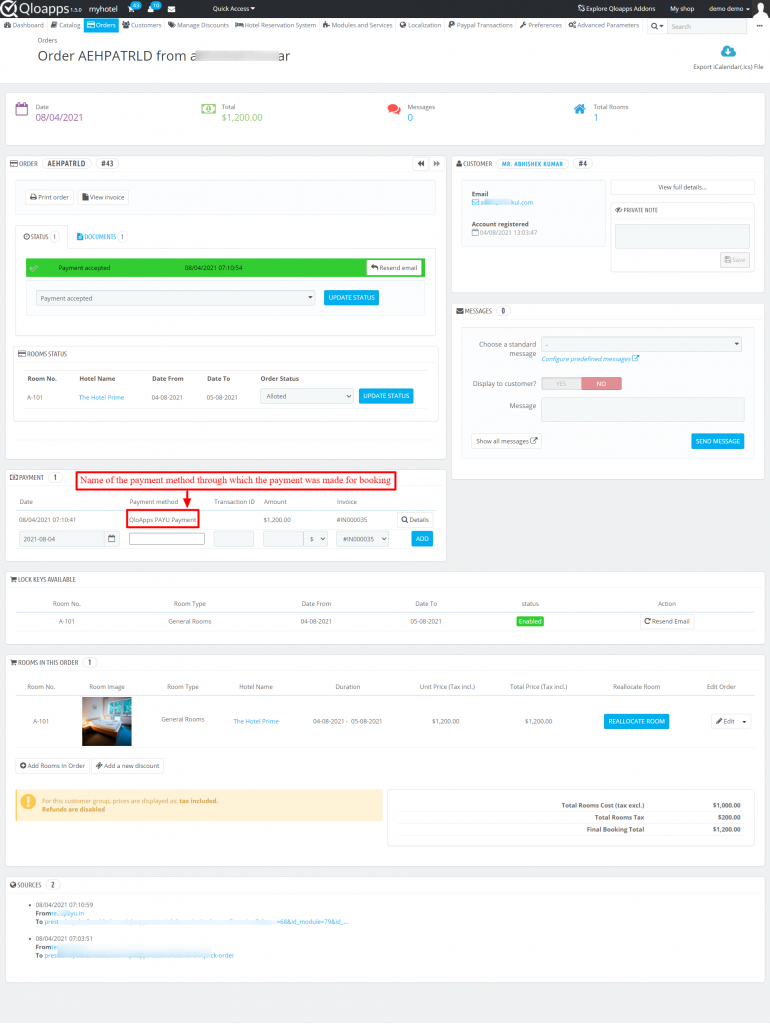
Order Details page
At the back end, go to the ‘Orders’ tab and click on ‘Orders’. Here you can check the customer who has made a payment through the PayU payment gateway.
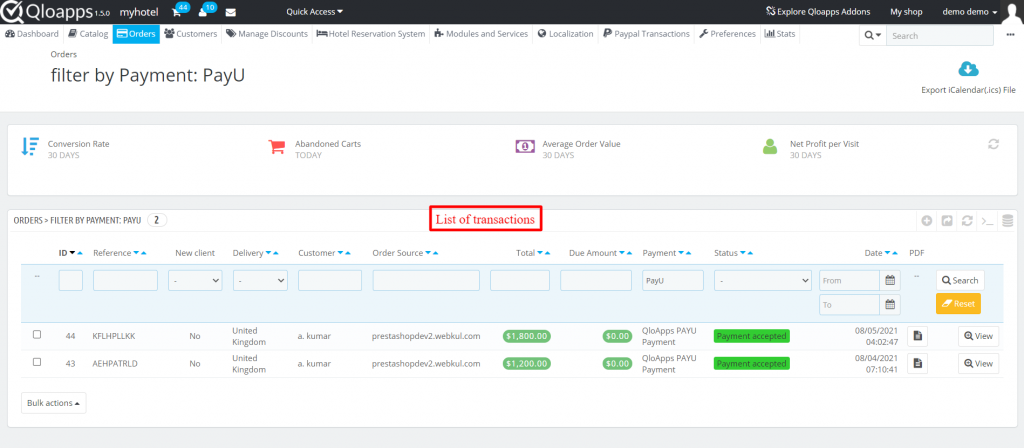
Moreover, you can also see the details of the customer and the reservation he made.
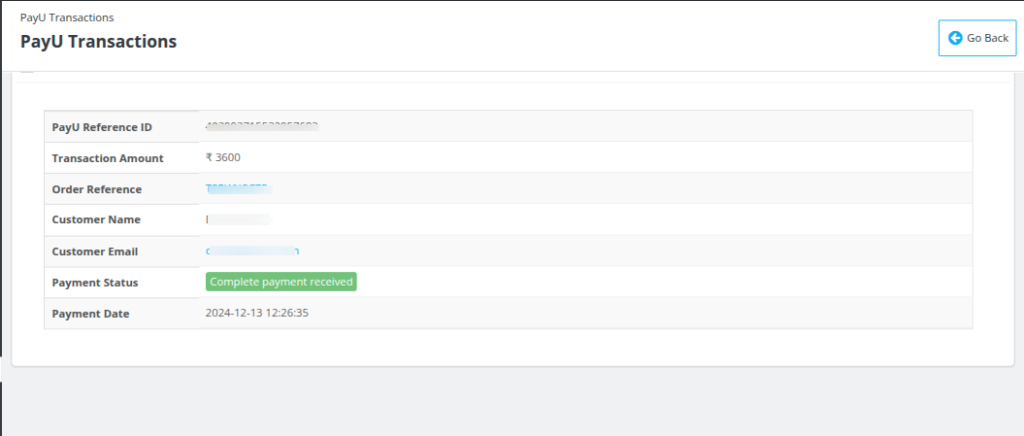
PayU Payment Gateway Transactions
Admin can view a new tab called ‘PayU transactions’.
Click on it to view all the transactions from the PayU Payment Gateway
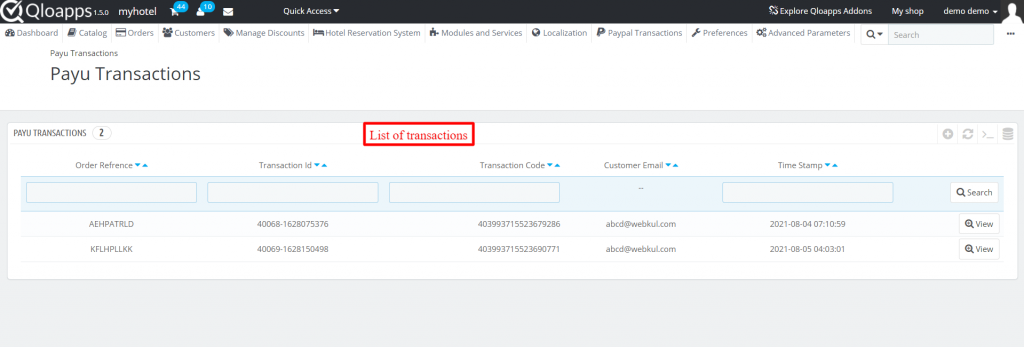
Click on ‘View’ to check its details.
Conclusion
This was all from the QloApps PayU Payment Gateway. I hope I was able to clarify the functioning of the module to you.
If you want to learn about the functionality of QloApps then you can visit this link: QLO Reservation System – Free Open-Source Hotel Booking & Reservation System
In case of any query, issue, or requirement please feel free to raise it on QloApps Forum
Current Version 4.0.0
Supported Framework Version 1. 7.x & 1.6.x

Be the first to comment.