QloApps Flutterwave Payment Gateway is an add-on for QloApps. It is a global payment gateway that helps businesses accept, process, and disburse payments worldwide.
providing APIs and tools that connect businesses to multiple payment methods — including cards, mobile money, bank transfers, and international wallets.
Flutterwave simplifies how businesses receive and send money by unifying all local and international payment systems under one platform.
QloApps Flutterwave Payment Gateway supports payments in multiple currencies, some popular ones are USD, EUR, ZAR, etc.
Unlock Seamless Transactions: Key Features of QloApps Flutterwave Payment Gateway
- Multi-currency support: Accept payments in multiple currencies, including USD, EUR, GBP, and key African currencies such as NGN, KES, GHS, ZAR, XOF.
- Multiple Payment Options: Accept payments via debit/credit cards (Visa, MasterCard, Verve), bank transfers, mobile money, USSD, POS, Apple Pay, Google Pay, and QR codes.
- Instant settlements to improve hotel cash flow.
- Real-time analytics for transactions, settlements, refunds, and chargebacks.
- International Payouts: Businesses can disburse funds to multiple countries and currencies using Flutterwave’s Payout API.
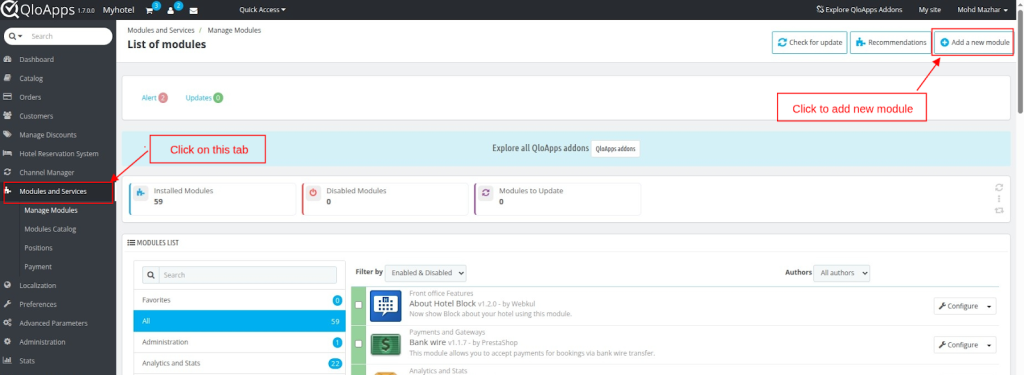
How to install QloApps Flutterwave Payment Gateway: A complete Guide
The installation of any module is very simple in QloApps.
- Go to the Module and Services tab
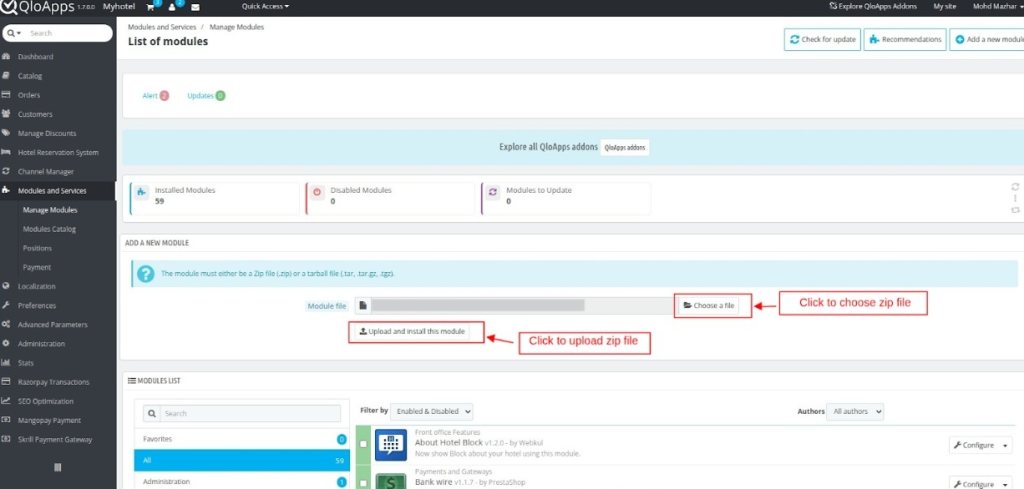
- Click on Add New Module
- Now upload the Zip file of the Module and click on Install
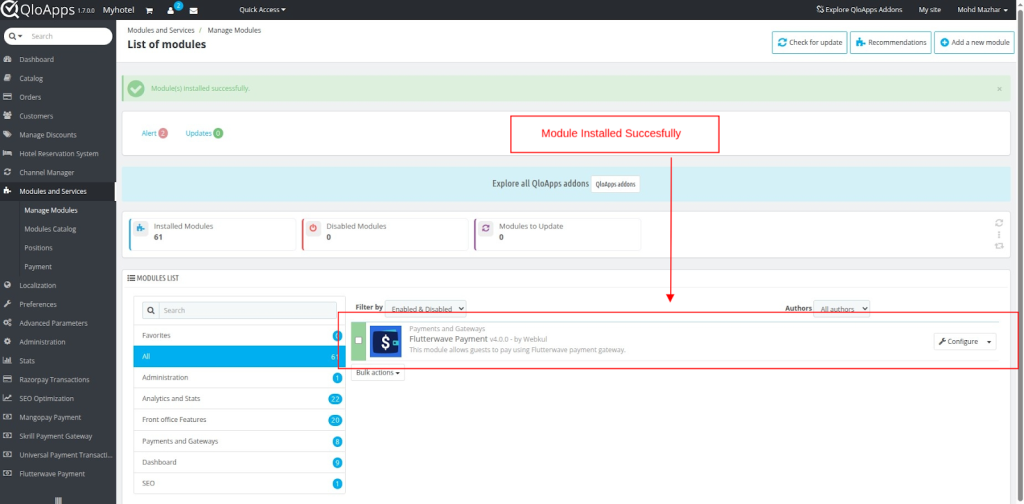
- Once the installation is finished, it will confirm that it was successful, followed by a display of the installed module below.
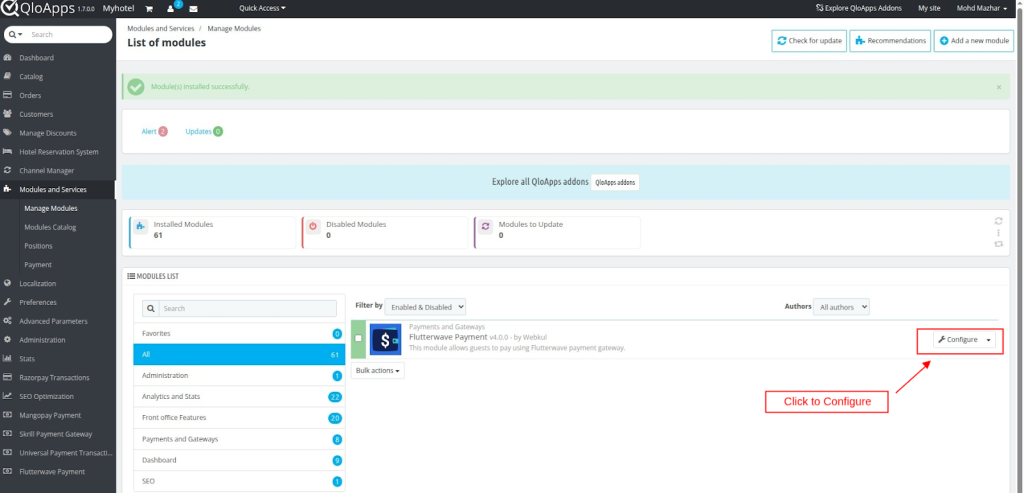
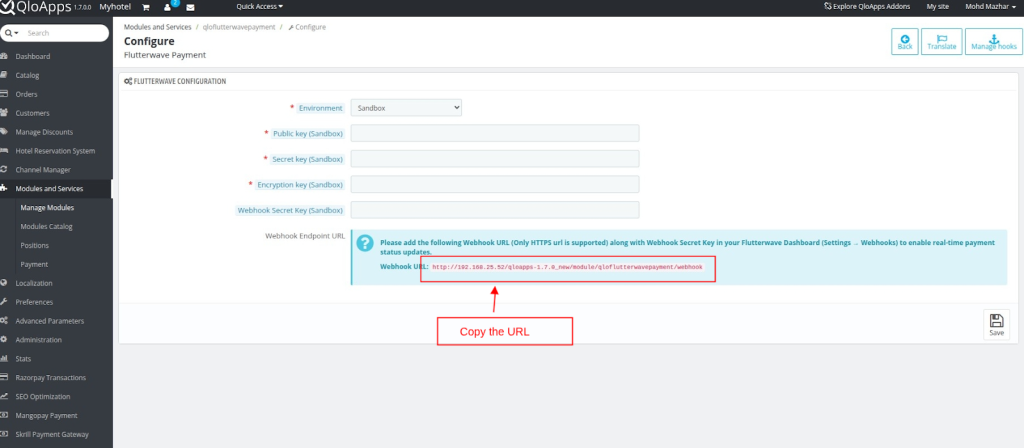
Configure QloApps Flutterwave Payment Gateway
Once installed, you can configure the QloApps Flutterwave Payment Gateway by following these steps:
- Click on the “Configure” button to access the configuration page.
- Enter the API Keys.
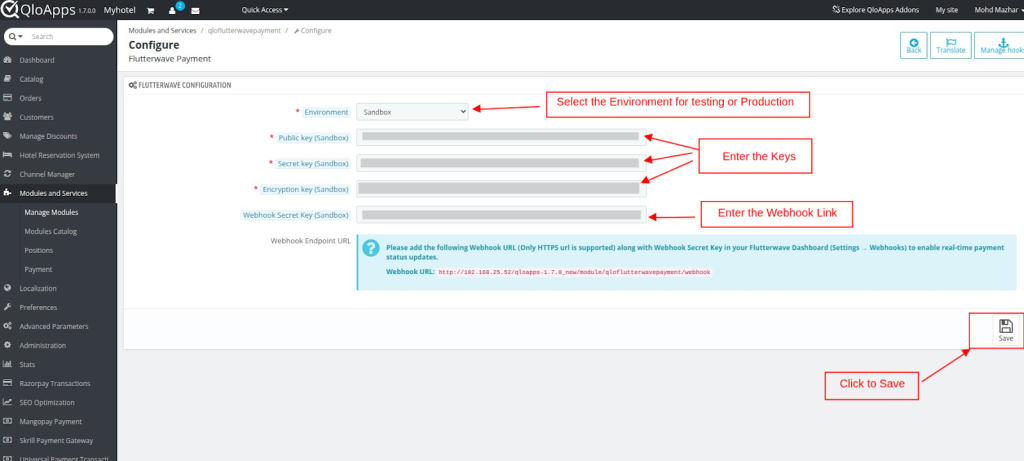
- Click on the Save Button
How to Easily Obtain Your API Keys for QloApps Flutterwave Payment Gateway
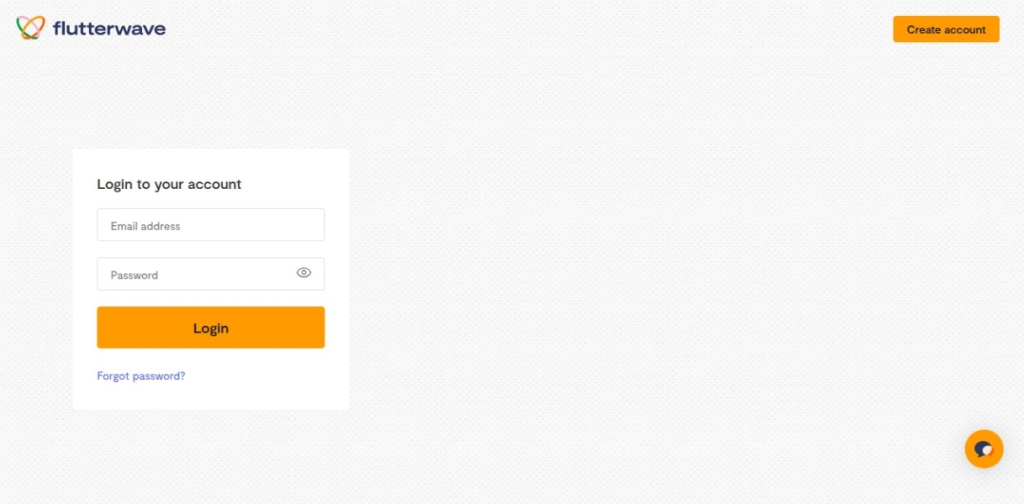
To Obtain the API Key.
Admin needs to create an Account on Flutterwave.
- Click on the API Tab to get the secret key
- Paste the URL of the webhook copied from the Configuration Page
- Enter the Secret hash key

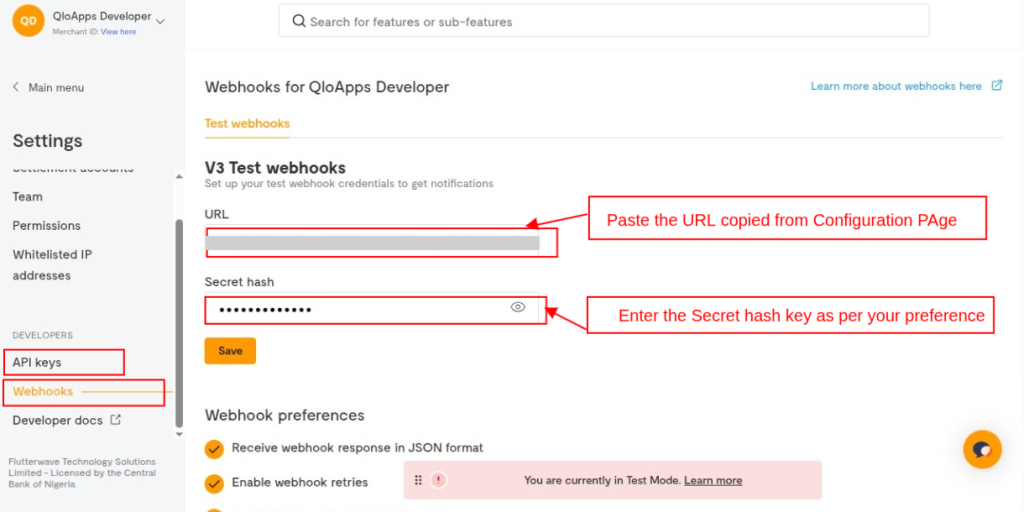
Note: The Secret hash key entered should be similar to one that has been entered on the configuration page.
- Click on the save button
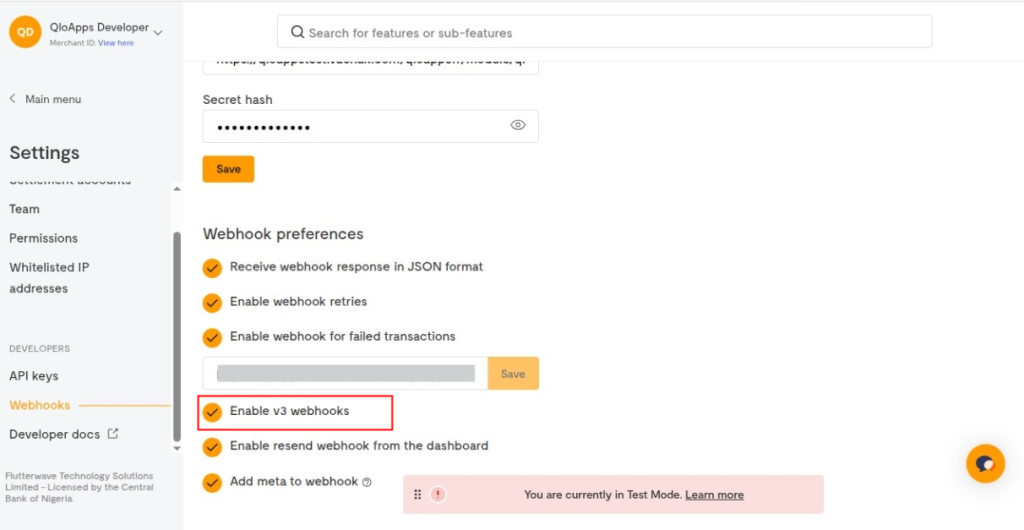
- Enable the Webhook Preferences
Note: Recommended to Enable V3 Webhook
Navigating The Frontend Workflow In QloApps Flutterwave Payment Gateway
On the front end, the user will find the option to pay with Flutterwave Payment Gateway at the checkout page.
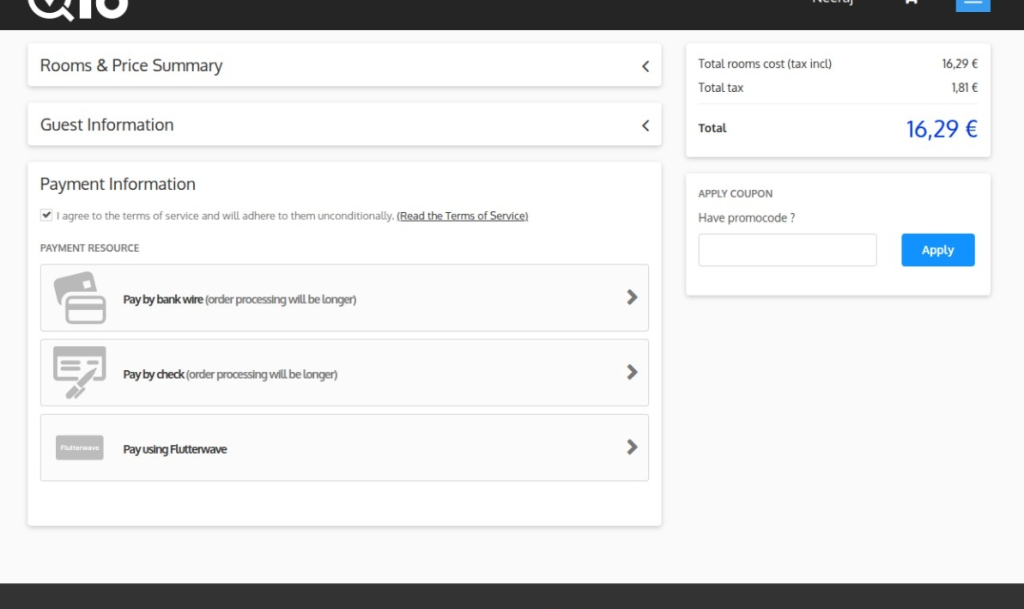
- Click on the Flutterwave payment option to initiate the payment.
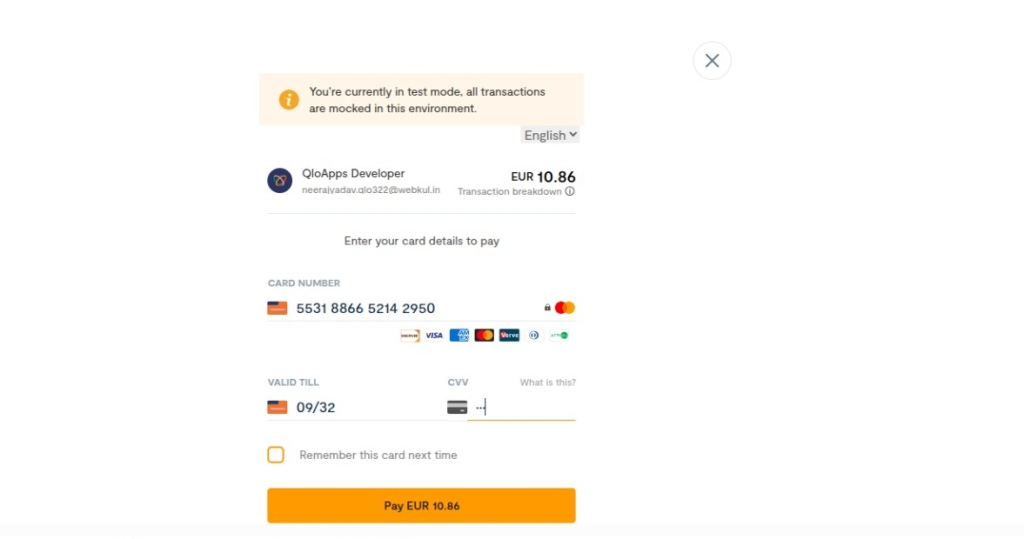
- Fill in the card credentials.
- Click to Pay
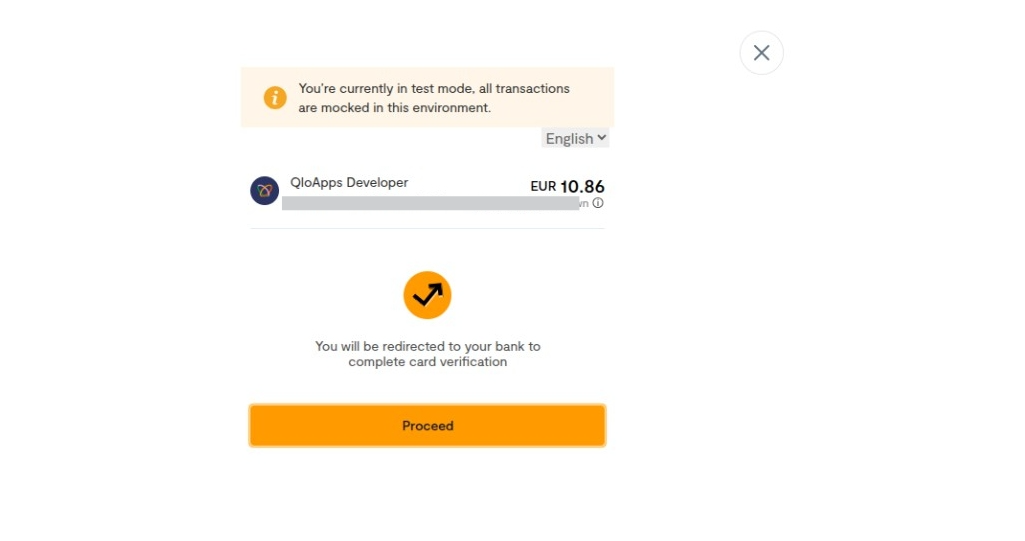
- Click on the Proceed Button
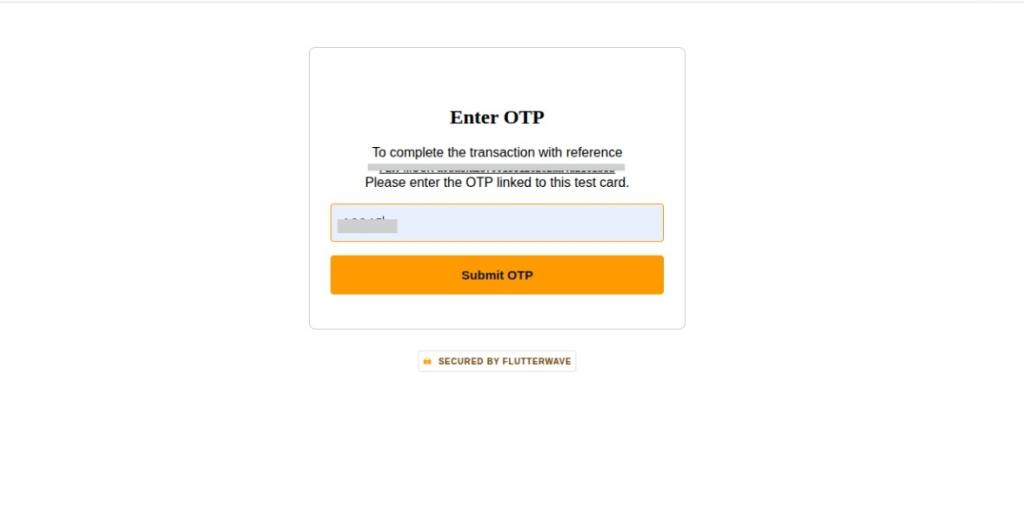
- Enter the OTP
After the payment is completed, details will be displayed on the Booking confirmation page.

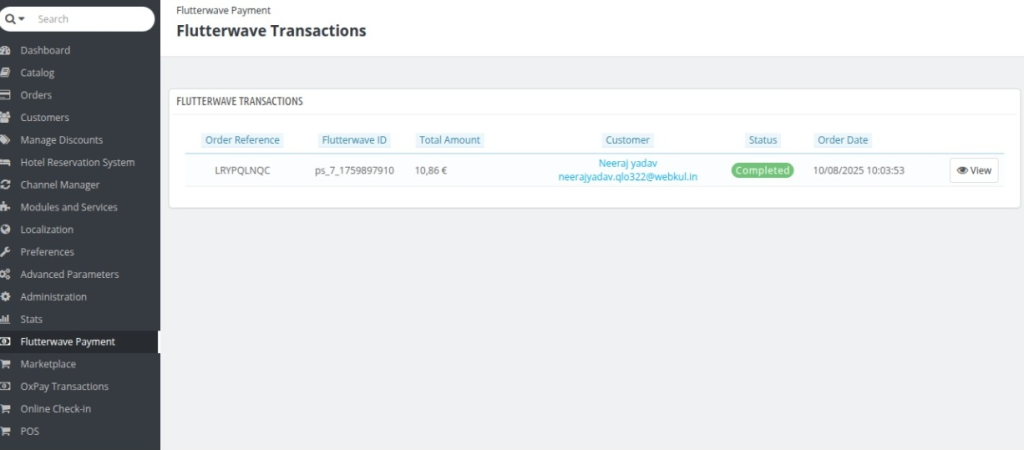
Backoffice
You can see all the transactions under the Flutterwave Payment Transaction Tab
Transaction: To view all transactions made with Flutter Payment Gateway.
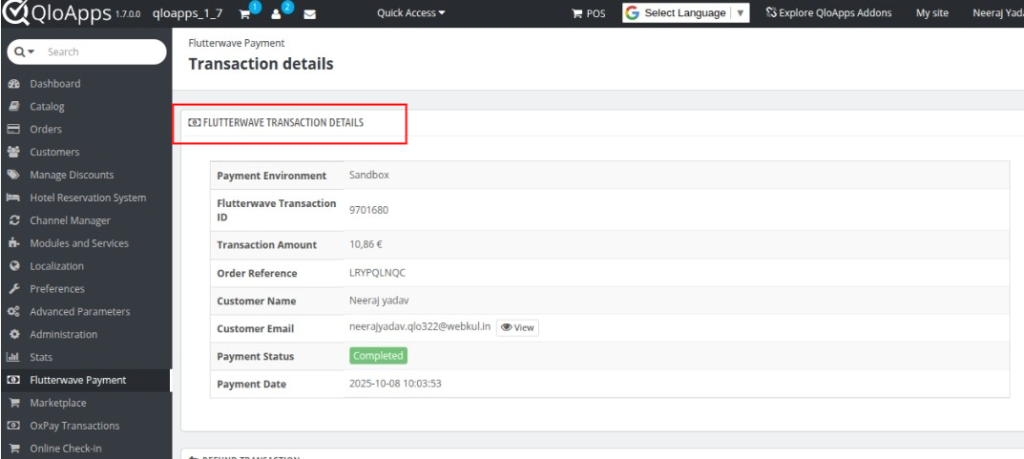
Click on the View button to see the details of the transaction.
Refunds Made Simple: How To Use The QloApps Flutterwave Payment Gateway for Refund
Under the Refund Transaction section
QloApps Flutterwave Payment Gateway allows full payment refunds and partial refunds.
- Enter the Amount to refund
- Enter the Remark
- Click on the proceed button to proceed refund.
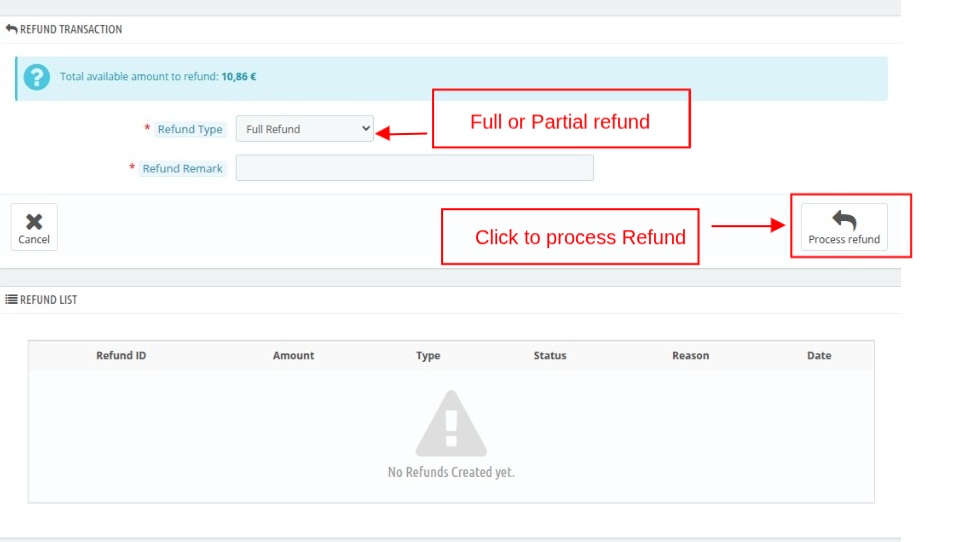
Once the refund is generated, you will see the status under the Refund List section.
Wrapping Up
This was all from the QloApps Flutterwave Payment Gateway. We hope this guide is able to clarify the functioning of the module to you.
Reach Out: We’re Ready to Assist
If you want to learn about the functionality of QloApps, then you can visit this link: QLO Reservation System – Free Open-Source Hotel Booking & Reservation System
In case of any query, issue, or requirement, please feel free to raise it on QloApps Forum
Current Product Version – v4.0.0
Supported Framework Version- QloApps 1.7.0

Be the first to comment.