Introducing QloApps Paystack Payment Gateway, a user-friendly payment solution that streamlines the checkout process for your hotel booking website.
Making it easier for customers to complete their transactions.
Paystack is a leading payment platform that enables hoteliers to accept payments from customers securely and conveniently.
With the QloApps Paystack Payment Gateway, you can offer your customers a fast, secure, and hassle-free payment experience that boosts customer satisfaction and loyalty.
Features of QloApps Paystack Payment Gateway
Secure Payment Processing: Paystack ensures secure transactions with industry-standard encryption and tokenization.
Multi-Currency Support: Paystack supports multiple currencies, including Ghana Cedi (GHS), Nigerian Naira (NGN), South African Rand (ZAR), Kenyan Shilling (KES), and United States Dollar (USD).
It allows businesses to accept payments globally.
Real-time Payment Notifications: Paystack provides instant payment updates, enabling businesses to automate payment processing and reduce delays.
Installation of QloApps Paystack Payment Gateway
The installation of the Paystack Payment Gateway is a straightforward process in QloApps.
1. Go to the “Module and Services” tab.
2. Click on “Add New Module“.
3. Click on “Choose a file” and upload the zip file of the module.
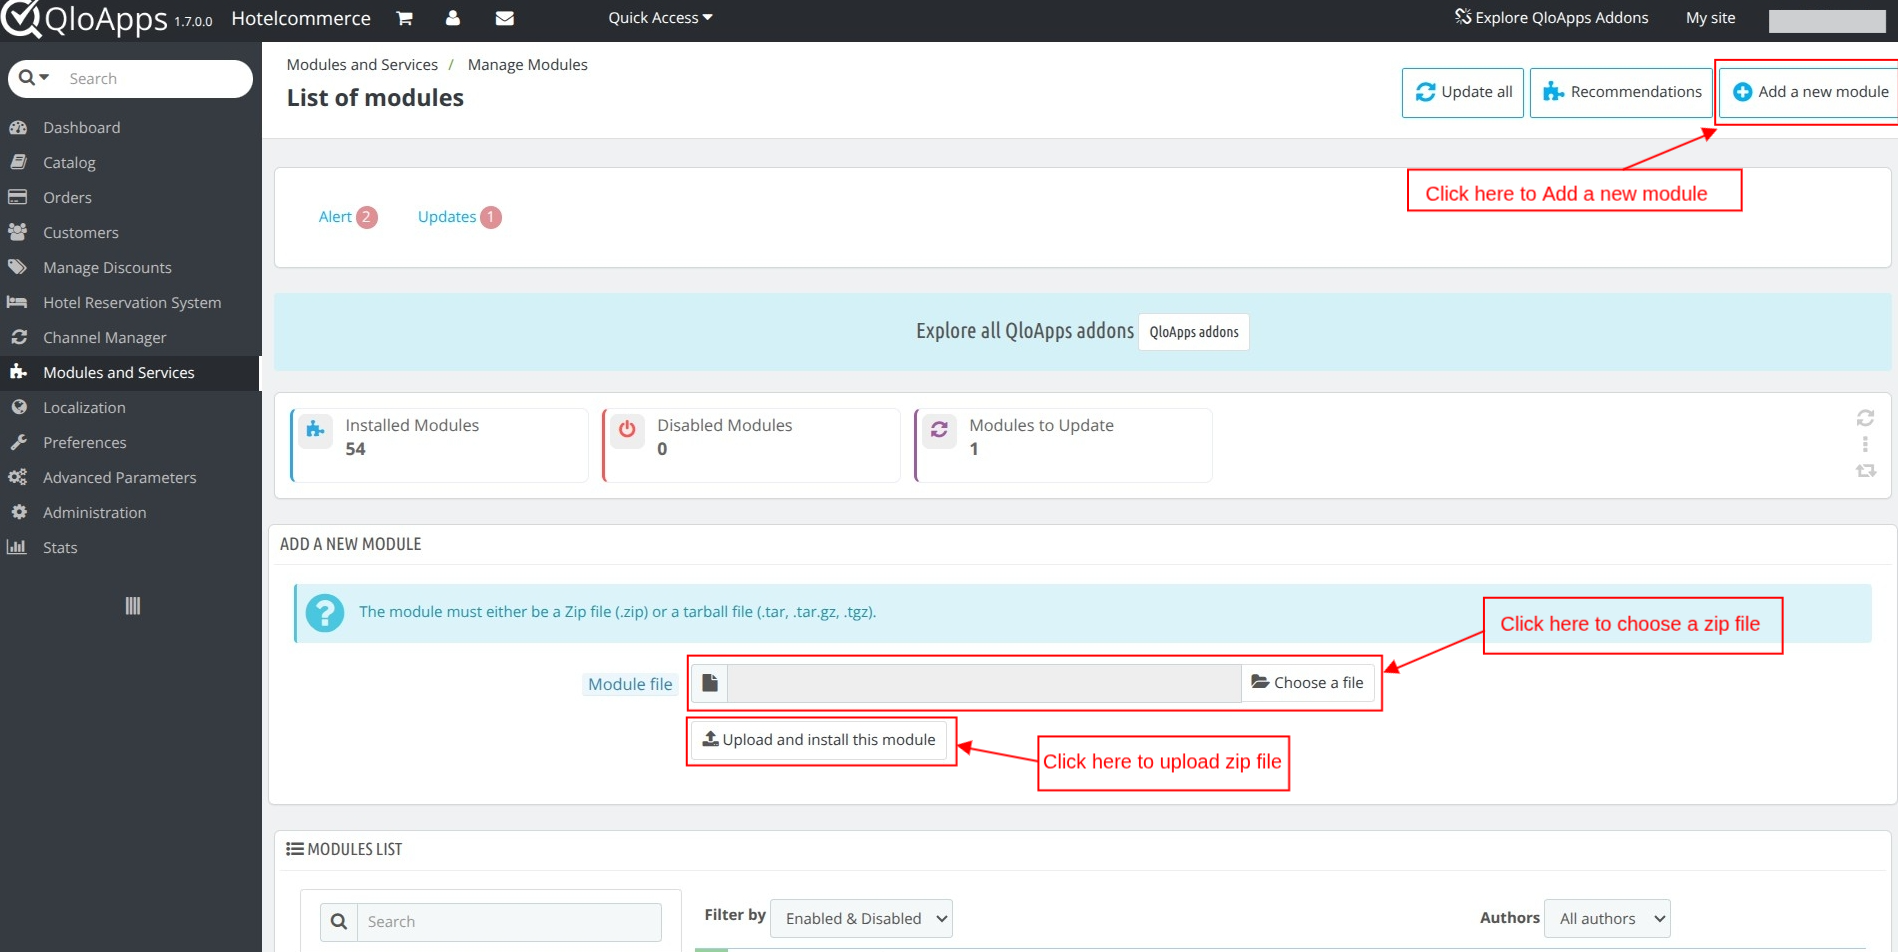
4. After installing the module, the user will see a prompt indicating successful installation, and the installed modules will be displayed below.
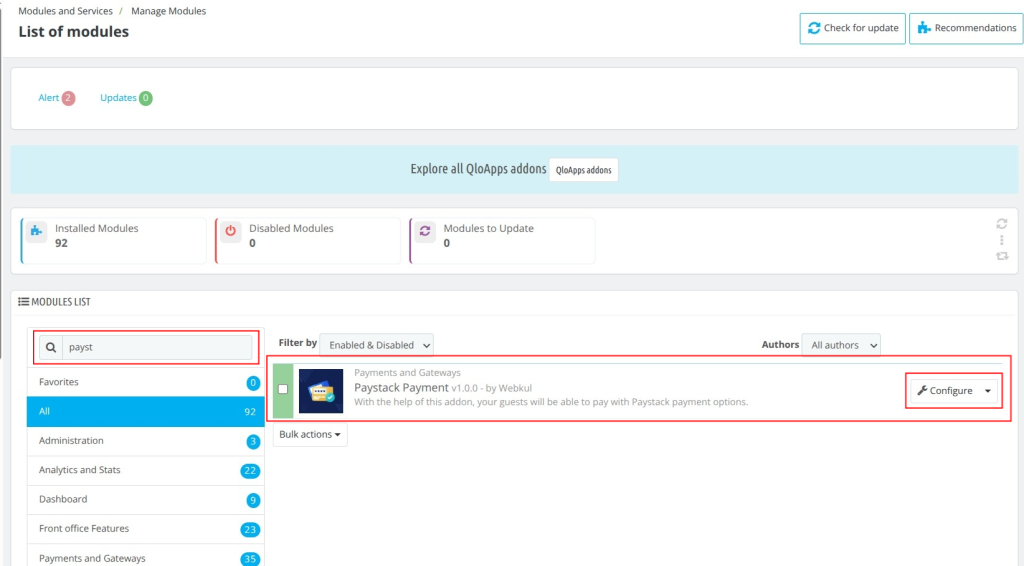
Configuration of Paystack Payment Gateway
To configure the Paystack Payment Gateway, follow these steps:
Click on the configure button to redirect to the configuration page.
Configuration Page
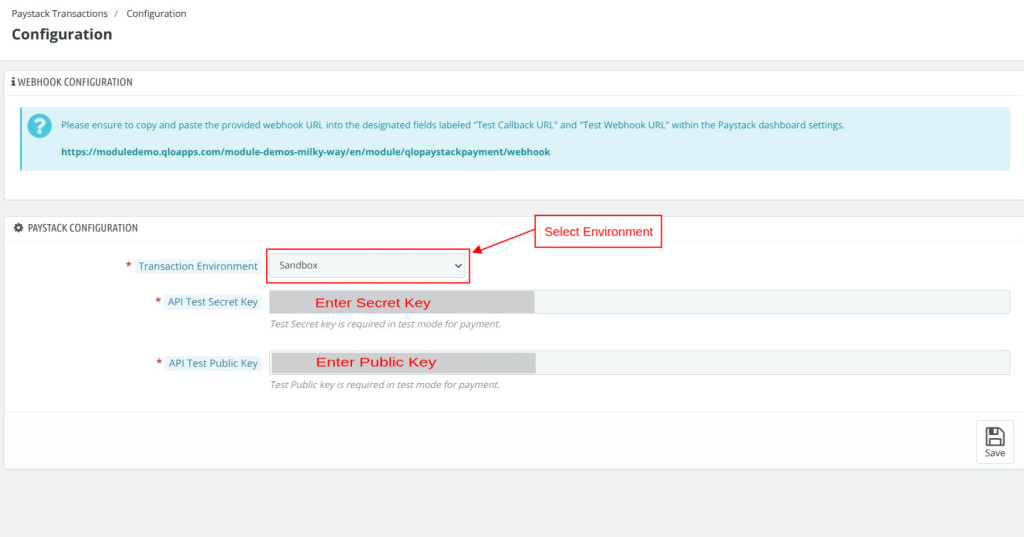
Transaction Environment: Switches between live and sandbox modes for testing and production purposes. Live mode is for actual transactions, while sandbox mode is for testing and development.
Secret Key: The unique key provided by Paystack for authenticating and securing transactions.
Public Key: The unique key provided by Paystack for encrypting and decrypting data.
Publicly accessible and can be shared with customers.
Callback URL Webhook
Copy and paste the provided webhook URL into the designated fields labeled “Test Callback URL” and “Test Webhook URL” within the Paystack dashboard settings.

How To Get API Keys
To get the API keys, the admin needs to have an account at https://dashboard.Paystack .com/#/login
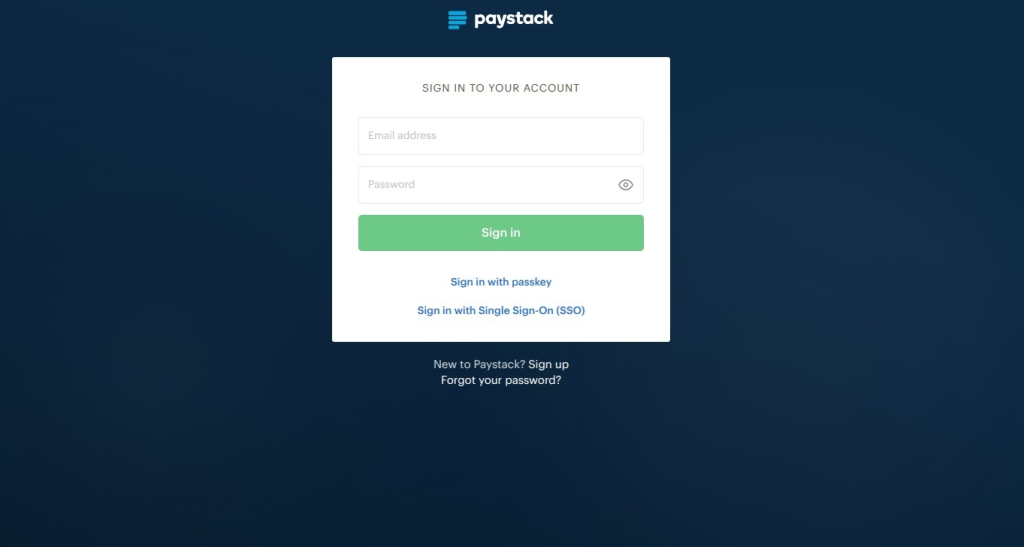
After logging in, go to “Profile” under Settings and choose the tab “API Keys and Webhooks”.
Here, the admin will find, the Test Secret Key, Test Public Key, and paste space for the Callback webhook URL.
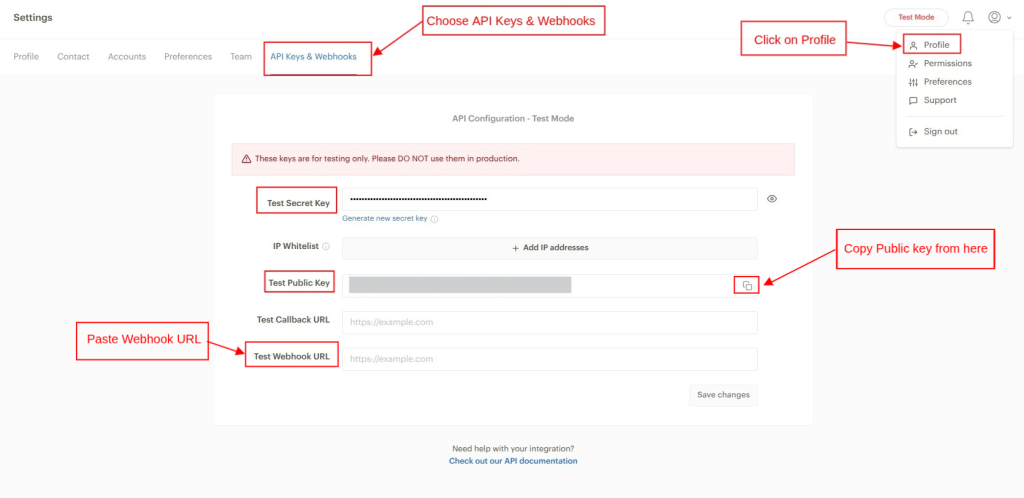
Copy and paste the Private Key, and Public Key from the Paystack Account to the payment gateway configuration page.
Front End Workflow
When you configure the module correctly, consumers can pay using Paystack on the checkout page.
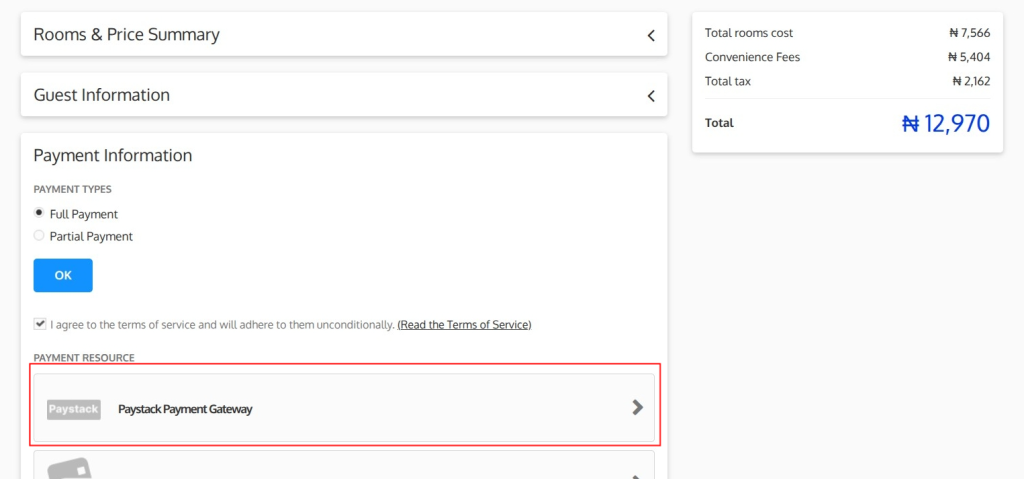
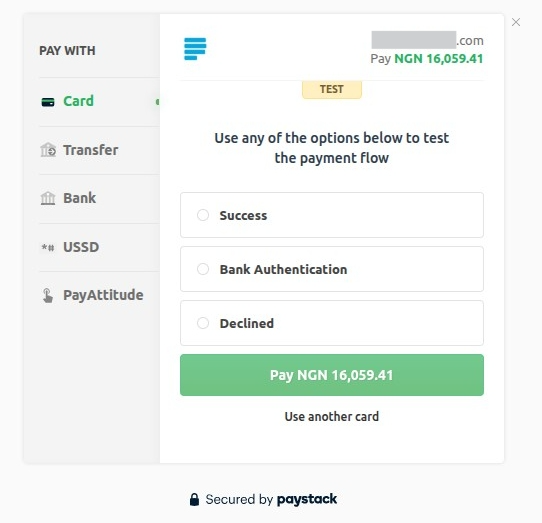
Once click on “Paystack Payment Gateway” you will get the following payment option:
- Card
- Transfer
- Bank
- USSD
Create Bookings from the Backend with Paystack
The Paystack payment gateway can also be used for front desk bookings which are created by the front office or the admin himself.
Creating a booking from the backend allows you to select occupancy details, including the number of rooms, adults, and children.
Once created, you can click on the “Choose” button, which will display an additional screen showing all the order details.
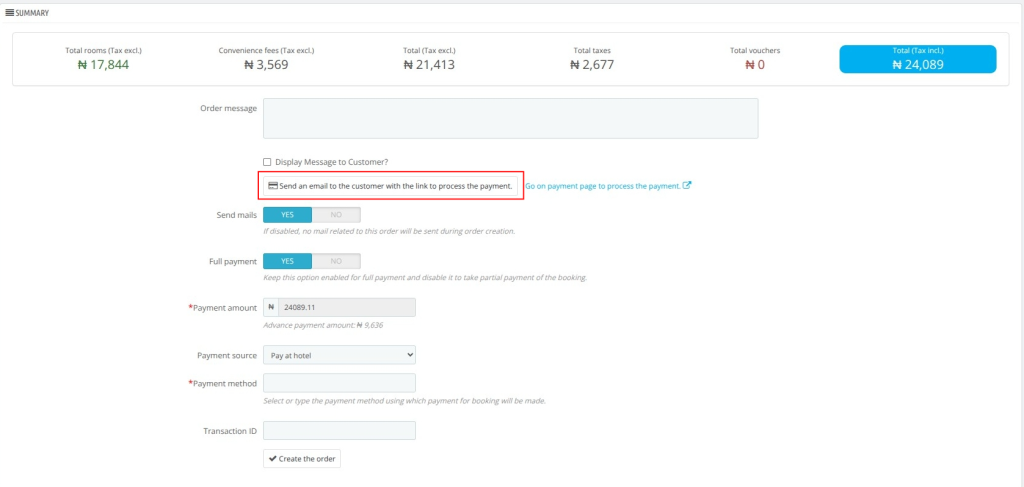
For payment, you can choose Paystack As the payment gateway and then you will have two options:
1) Sending Payment Links via Email
With the QloApps Paystack Payment Gateway, you can send payment links to your customers via email, making it easy for them to complete their payments.
When you choose the “Send an email to the customer with the link to proceed with payment” option, the system will generate a payment link and send it to the customer’s registered email address.
How the Payment Gateway will be Shown to the Customer
Once the customer clicks on the payment link, they will be redirected to the QloApps Checkout page.
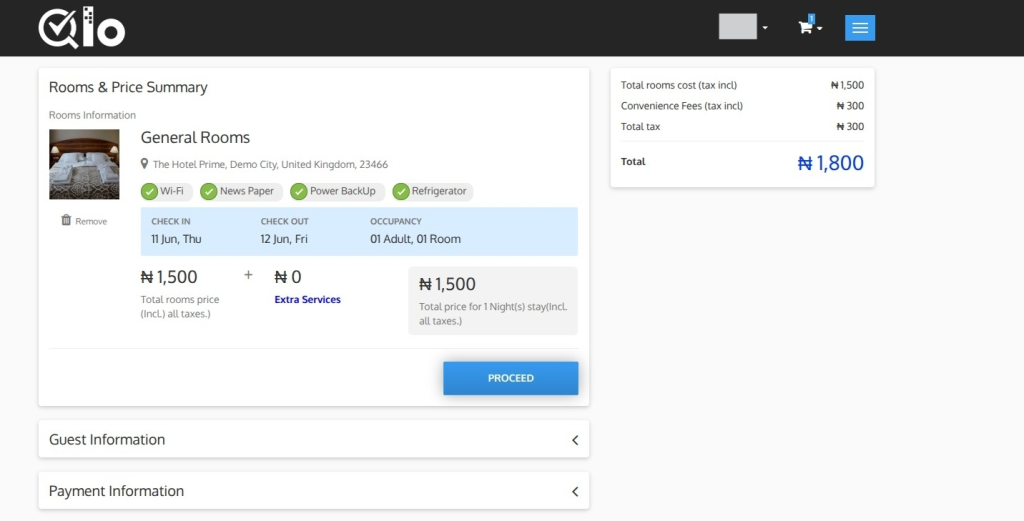
After reviewing the booking details in the Rooms & Price Summary section, the customer can click Proceed to open the Guest Information section.
Here, they can review their name, email address, and phone number. Once the details have been verified, they can click Proceed to continue to the Payment Information section.
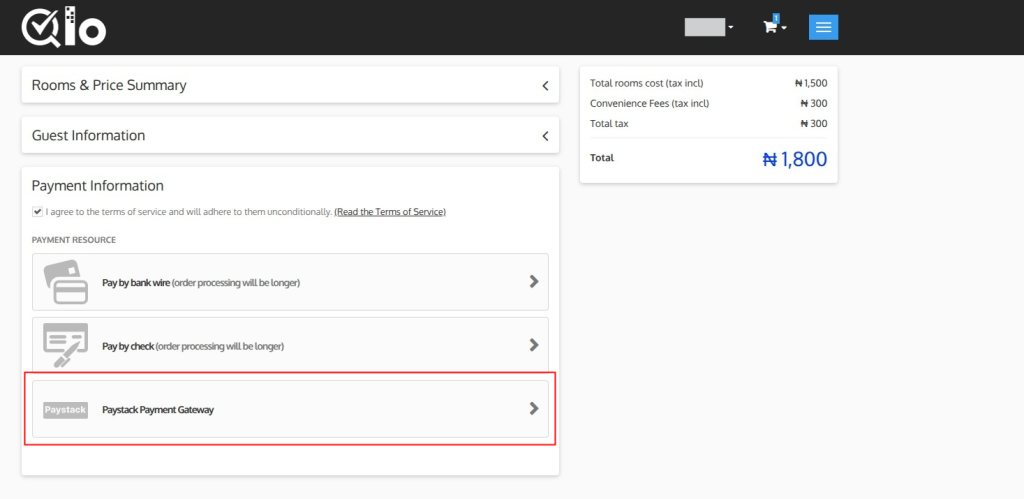
Once the customer selects Paystack Payment Gateway, they will be redirected to a secure payment page where they can view the payment amount, choose a payment method, and complete the transaction.
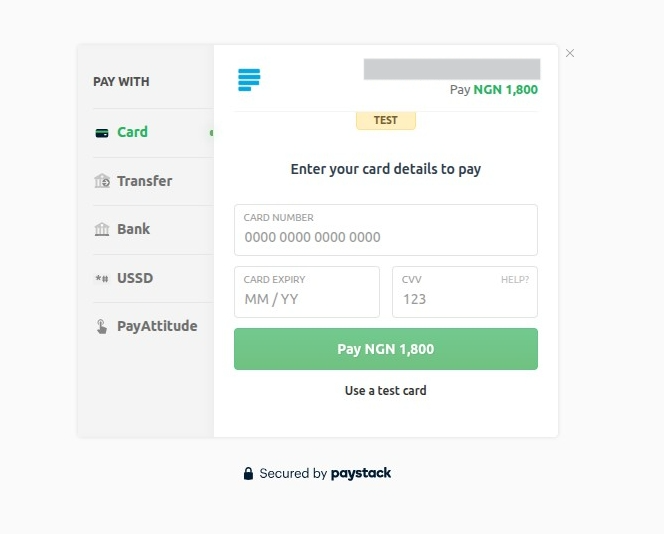
The customer can then enter their payment details, including their card number, expiration date, and security code, and complete the payment.
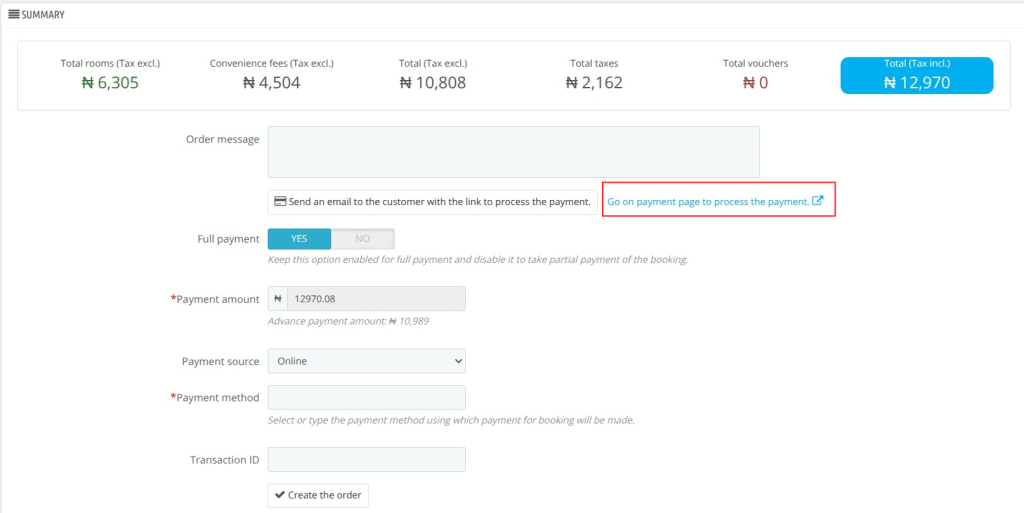
2) Paystack Payment as an Admin for booking
As an admin, you may need to make a payment on behalf of a customer.
In such cases, you can use the “Go on the payment page to process the payment” option to take you directly to the Paystack payment page.
Here, you can complete the payment process as an admin, using your payment details to make the payment.
Paystack Transaction
After installation, the module adds a new tab “Paystack Transactions”.
Here, you can see the list of all the transactions done through the Paystack payment gateway.
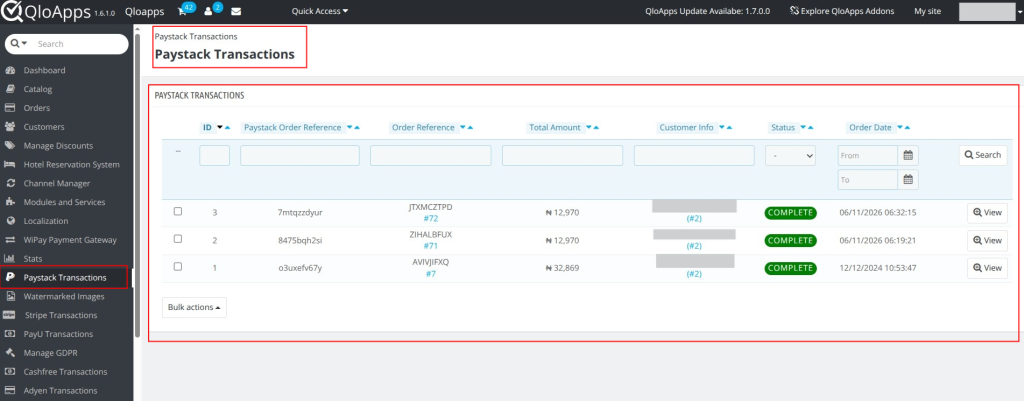
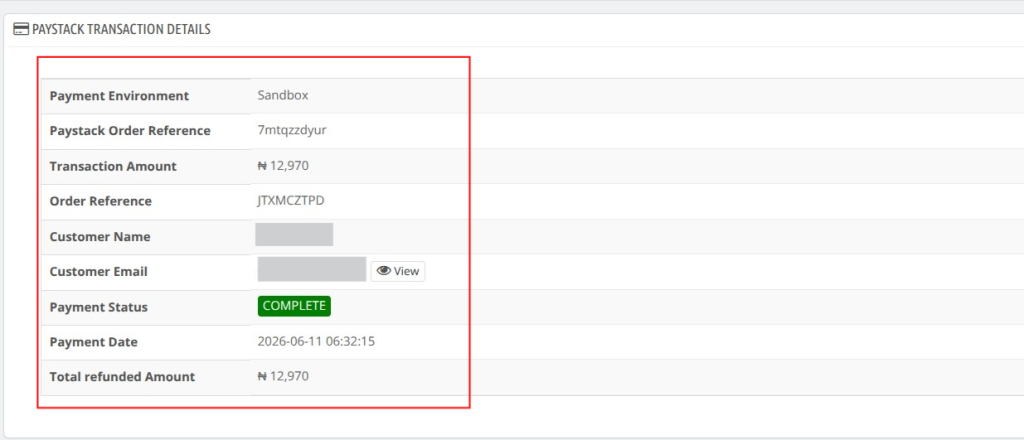
Click on the View button to see the complete transaction details.
Manage Refund With Paystack Payment Gateway
Using this payment gateway the admin can easily manage the refund process of the customers.
Refund
The money is transferred to the admin account once the payment status is completed.
Currently, if a customer requests a refund, the admin can process the refund by using the “Refund Transaction” option.
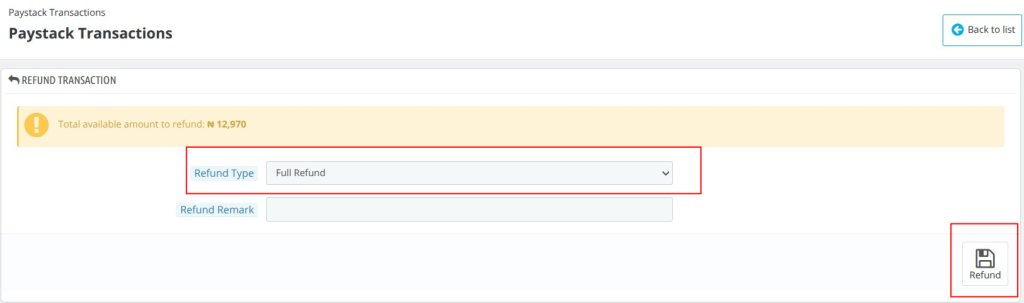
In the Refund transaction block, you can choose the refund type:
Full Refund: To refund the complete amount.
Partial Refund: Here, you choose the amount to refund. If you select a partial refund, the system displays a new field where you can enter the refund amount.
Refund Remark: Enter a remark for the refund.
Once you process the refund, the system creates a record for that refund on the “Paystack Transactions” page, as shown below:

Conclusion
That was all about the QloApps Paystack Payment Gateway. By choosing this Payment Gateway, you can make a significant step towards simplifying your payment process and growing your business.
Above all, if you want to learn about the functionality of QloApps then you can visit this link: QloApps Reservation System.
In case of any query, issue, or requirement please feel free to raise it on QloApps Forum.
Moreover, you can raise a ticket to connect with our experts for any assistance.
Current Product Version – 4.0.0
Supported Framework Version- QloApps 1.7.x

Be the first to comment.