
QloApps Auto-fill Address Form is an add-on for QloApps which makes it easier for customers and admin to complete the address field.
In this, they only have to hint the browser at the location name. It will give various options to them to select from.
Thus, enhancing user experience and eliminating the chance of error.
Filling out forms is time-consuming, especially on mobile devices.
Thus, by using this module guest only has to select a location then the city, zip code, and country name are automatically filled.
There are three significant functionalities of this module. These are:
- Auto-detect the location– By feature allows for detection of the current location of the user.
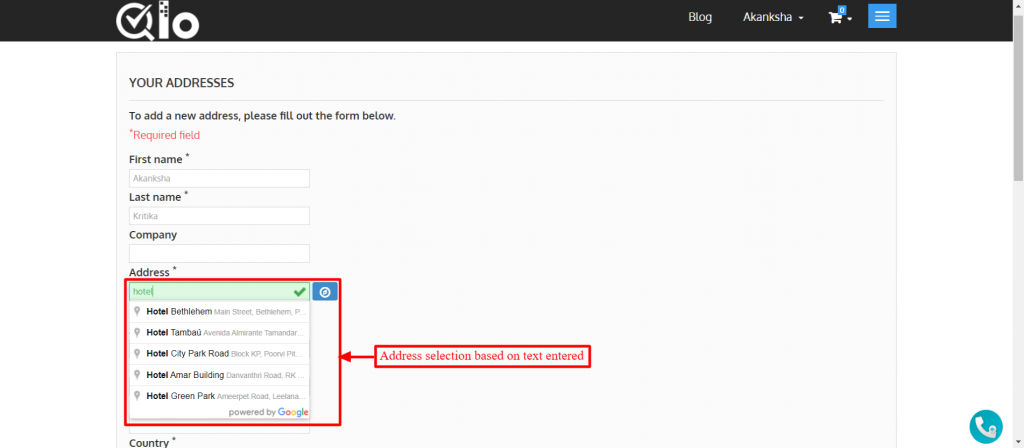
- Address Suggestions Based on the search, the JavaScript API retrieves the data from the Places library to display results.
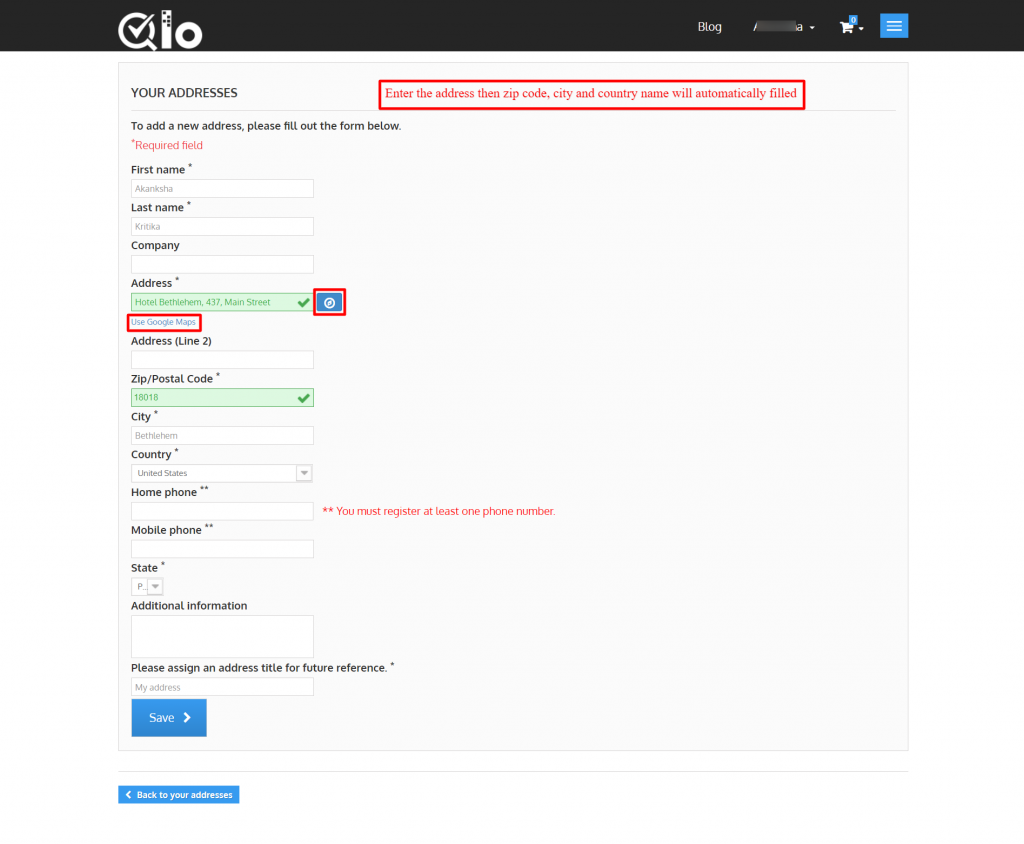
- Google Maps- Use Google maps and pinpoint the exact location on the map. The address of that location will be filled in automatically in the form.
Note: For the functioning of this module, billing must be enabled for the Google Cloud project created for Google Maps APIs in the Cloud Console.
You can create a new Google Cloud project from https://console.cloud.google.com/projectcreate or you can enable billing from https://console.cloud.google.com/project/_/billing/enable if you have already created a project.
Features of the QloApps Auto-fill Address Form
- Set the default zoom level to display Google Maps.
- Enable or disable address suggestions on the back-end as well as front-end.
- Choose to enable or disable the auto-detection of location(address).
- Show or hide the Google Maps for address selection.
- Enable or disable the automatic filling of the city, state country and zip-code based on the location.
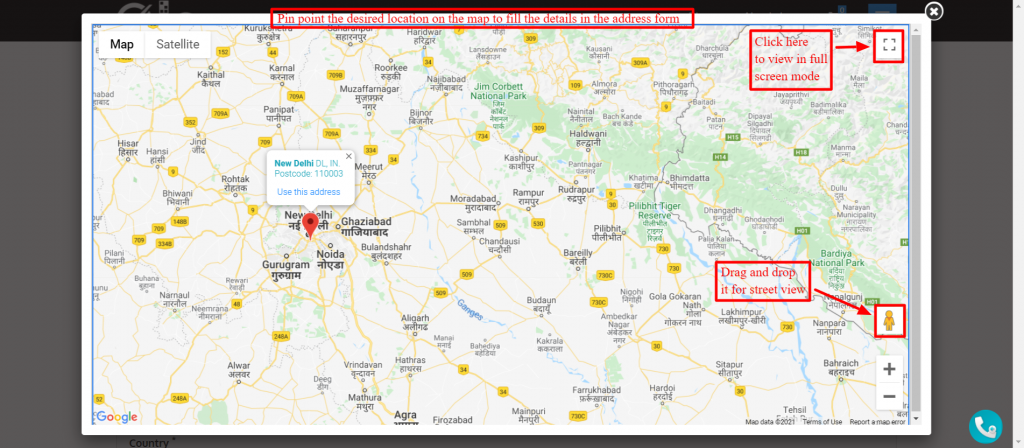
- To fill out the address details, pinpoint the location on Google Maps.
- Generate API keys to use these functionalities of the module.
Installation of QloApps Auto-fill Address Form
The installation of any module is very simple in QloApps.
- Go to the Module and Services tab.
- Click on Add New Module.

Now upload the Zip file of Module and click on Install.
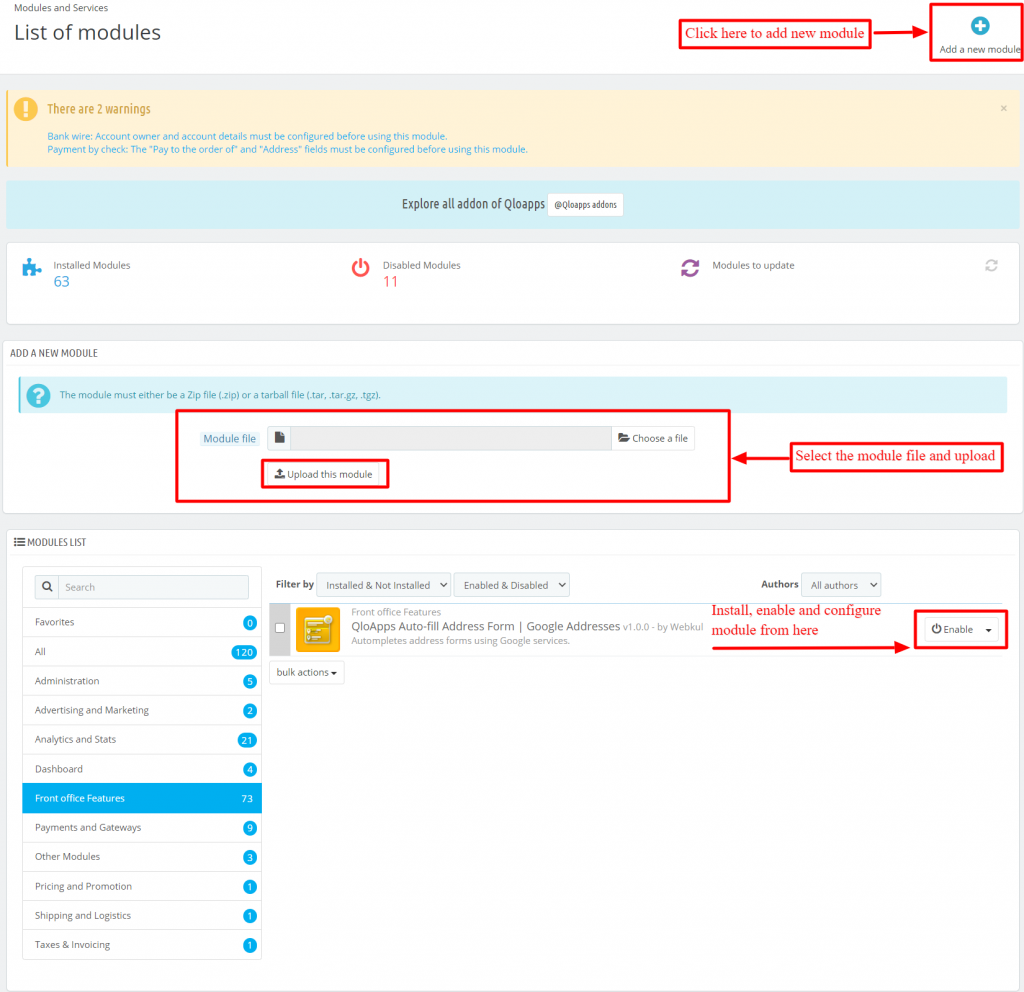
Now You Have Installed The Module.
Now, let’s see how to get the API Keys to the module.
How to get API keys of the module
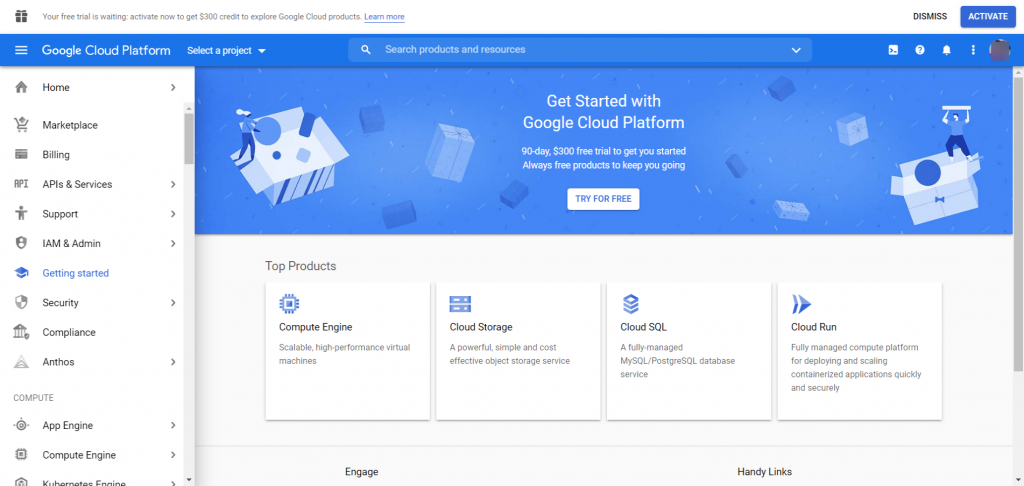
You need API keys for the configuration of the module. To get the API keys of the module go to the website by clicking on this link https://console.cloud.google.com/.
And sign in here with your Google account. After signing in, you will be redirected to home page.
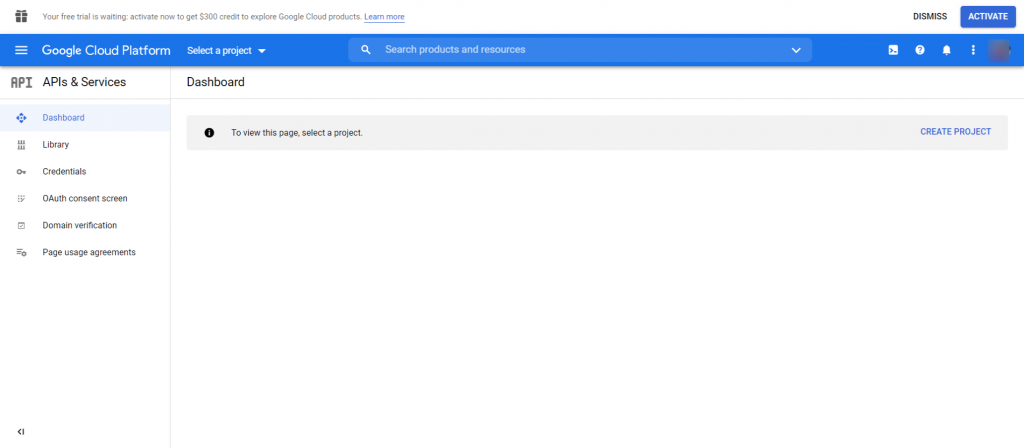
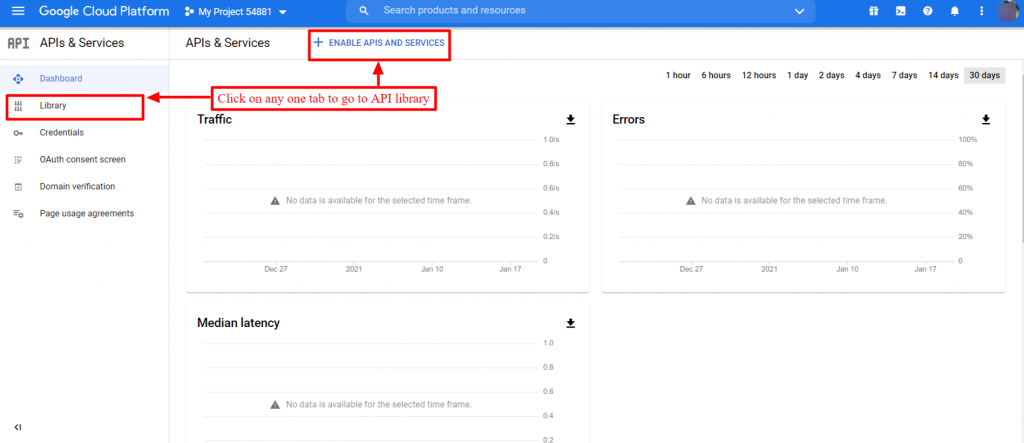
In that go to APIs & Services —> Dashboard

To go to the APIs library, click on the button “ENABLE APIS AND SERVICES” or ” library” as shown below.
Select the ‘Maps’ on the page and then continue to view all the map APIs.
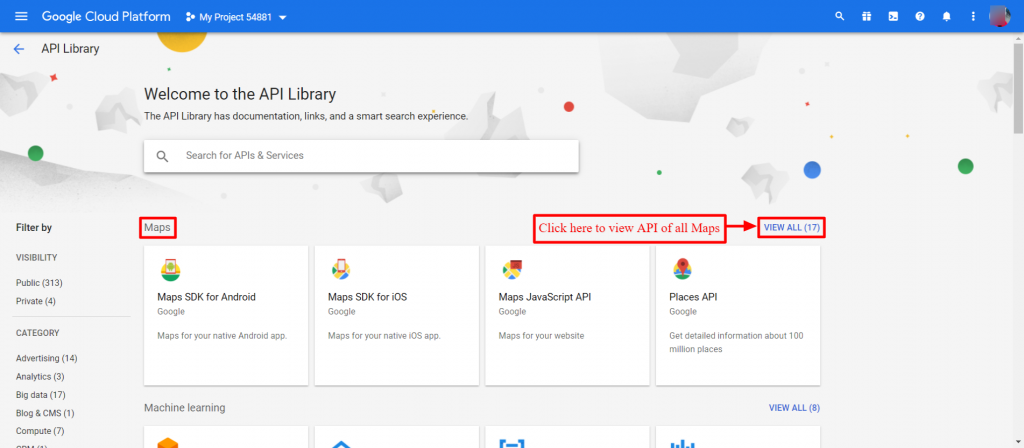
You’ll redirected on a new page after clicking on the “View all” tab.
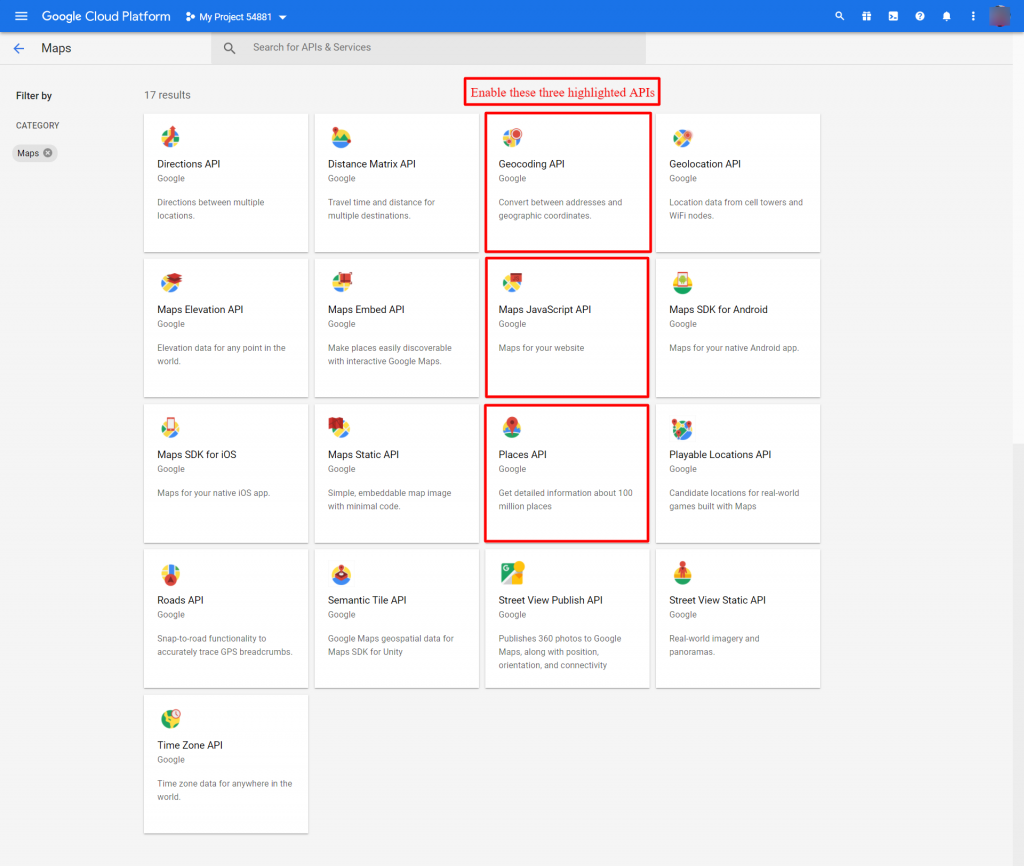
You will access all the APIs for maps on this tab. You need to find the following three APIs on this page:
- Geocoding API
- Maps JavaScript API
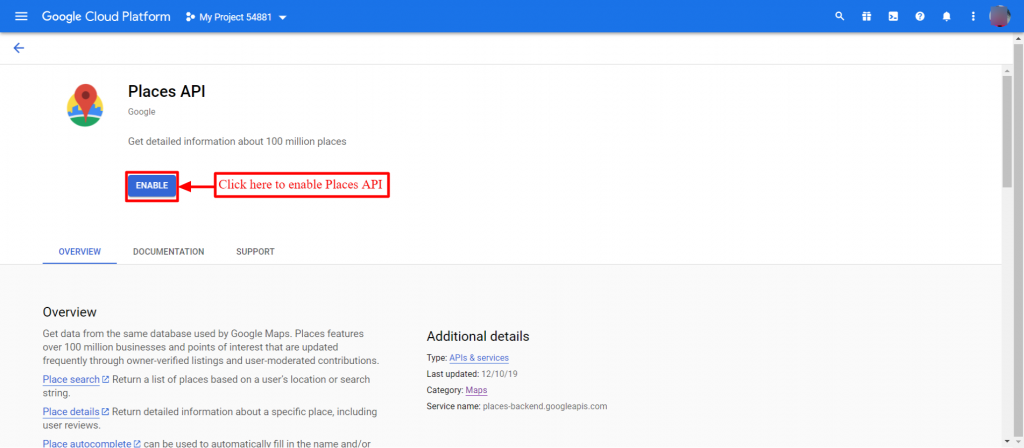
- Places API
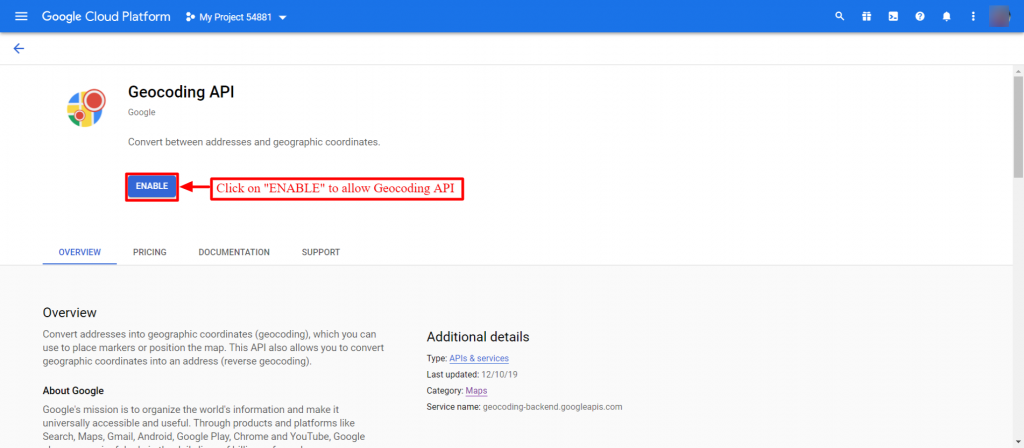
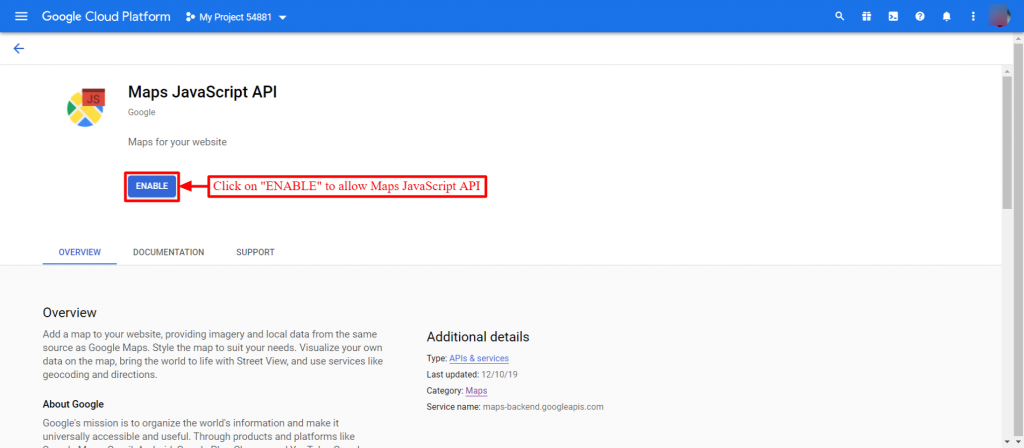
Click on each of the blocks & proceed to enable these APIs.
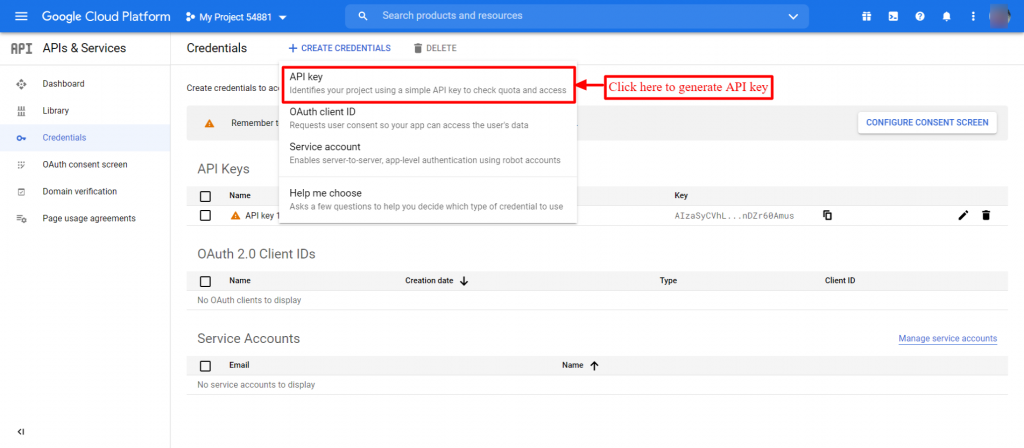
Go to APIs & Services->Dashboard after enabling all the three APIs. You’ll see a ‘Credentials’ tab there.
You can find a list of all the previously created APIs under ‘Credentials’.
Now, click on the “Create credentials” button from where you can generate a new API after clicking on the API key
The new API key will have all the three services enabled. You can see this newly created API key in the API keys list.
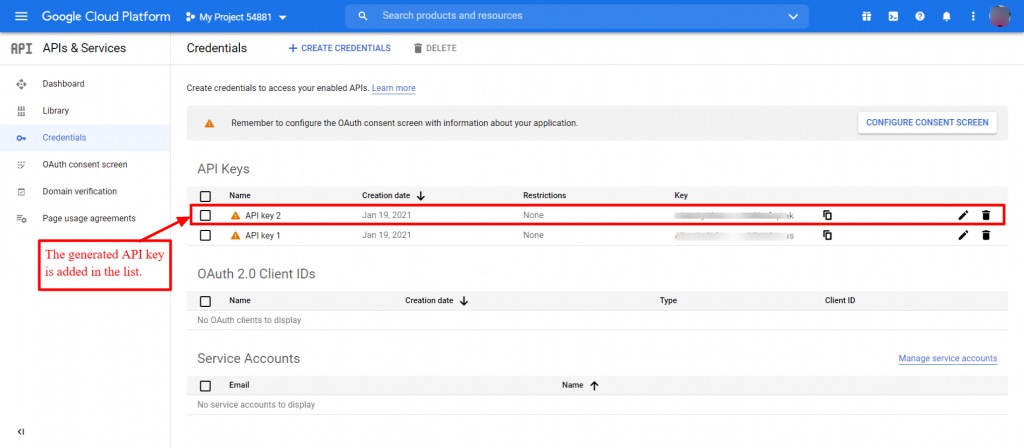
In this way, you can easily generate API keys.
Configuration of QloApps Auto-fill Address Form
To configure the module, enter the API keys & set the default zoom level.
In addition, you can opt to allow or disable these front-end and back-end settings.
Enter the API key generated in the Google API key and the default zoom value. And click on the save button.

After clicking, a new options appear on the same page as shown in the image below.
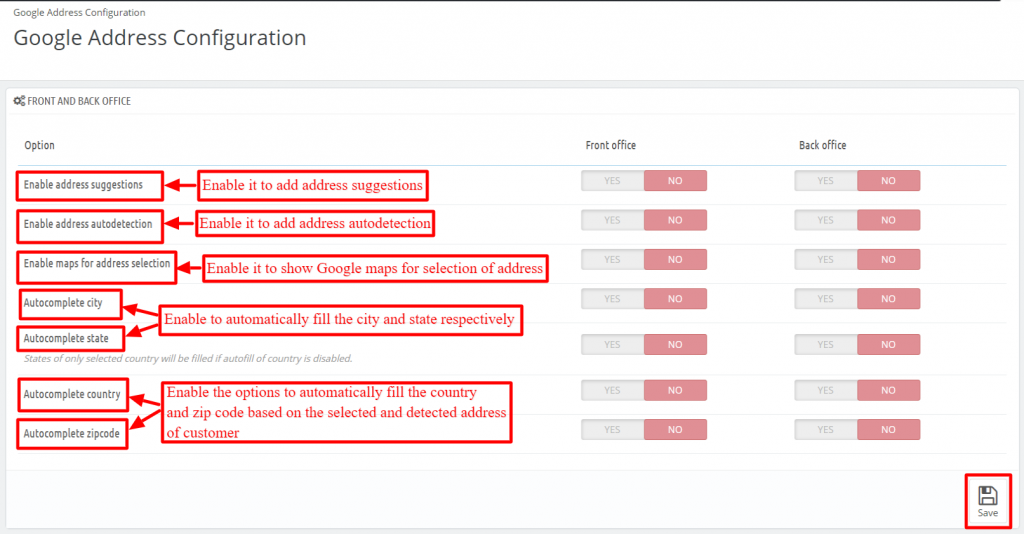
Enable/ disable the back-end and front-end options as save it.
Workflow
Address Forms at the Front end
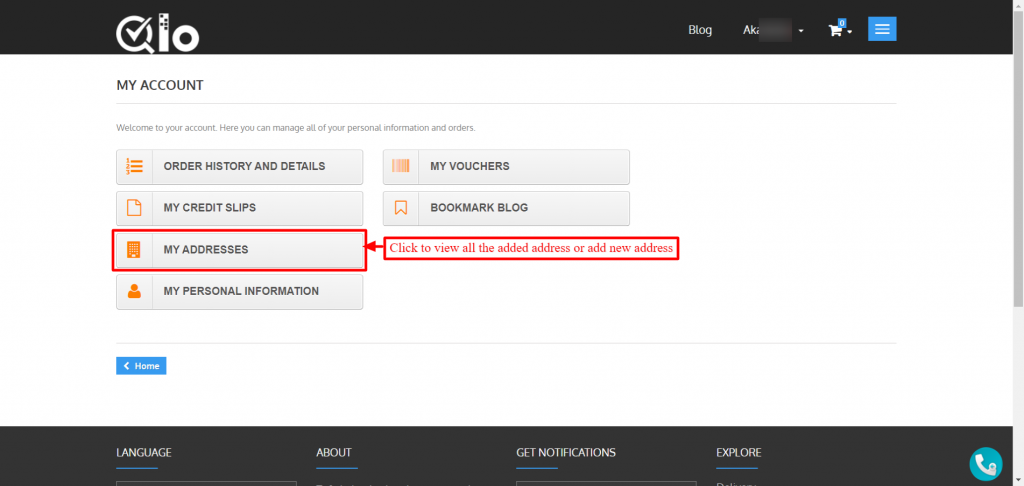
After clicking on the “Address“, a guest can see all the saved addresses. Either edit the existing address or proceed to add a new one.
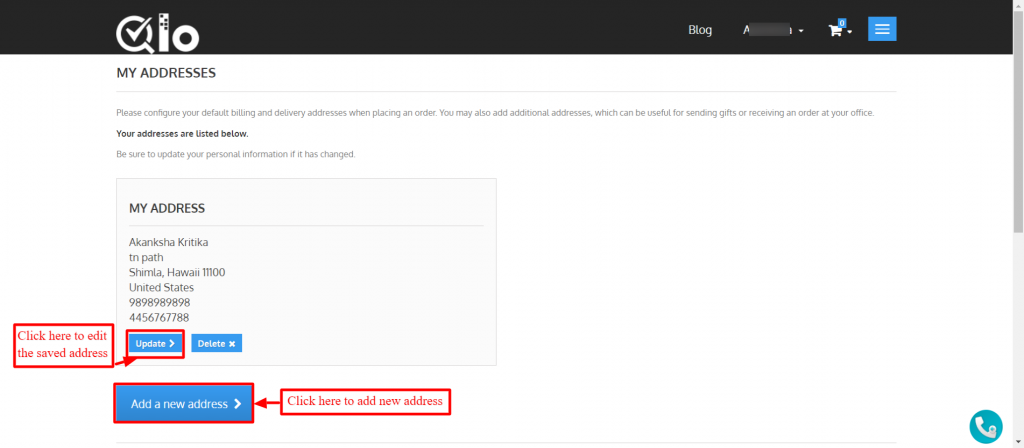
With the help of this module, guest can add address with the help of these three functionalities.
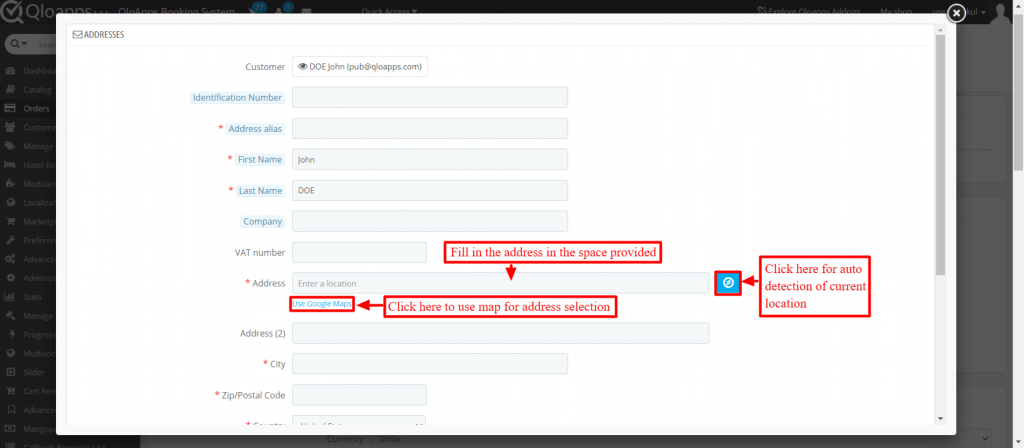
- By Automatically detecting the location with the help of the “locate me” button,
- By selecting a suitable address out of the suggestions, or
- Pinpoint the location on the Google Maps
Use Google Maps to pin-point the location
Checkout page
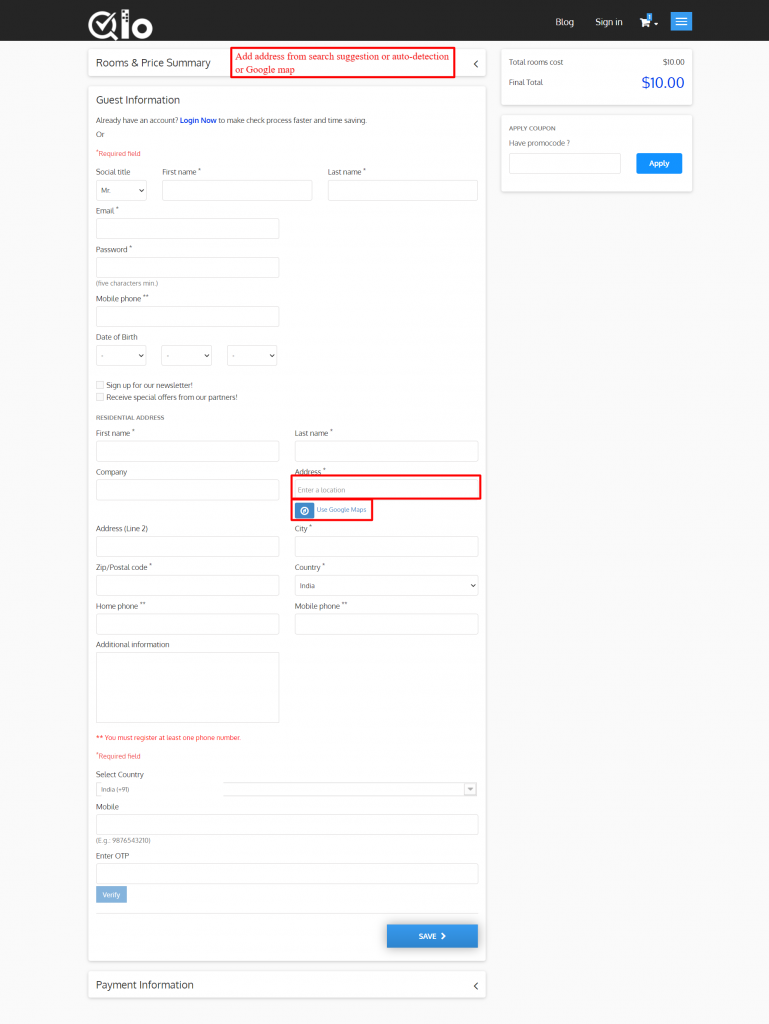
When a visitor has not created his/her accounts. So, during the time of check-out, he/she has to fill the guest information form.
In this form, guests can use auto-fill functionality to fill addresses.
At the back-end
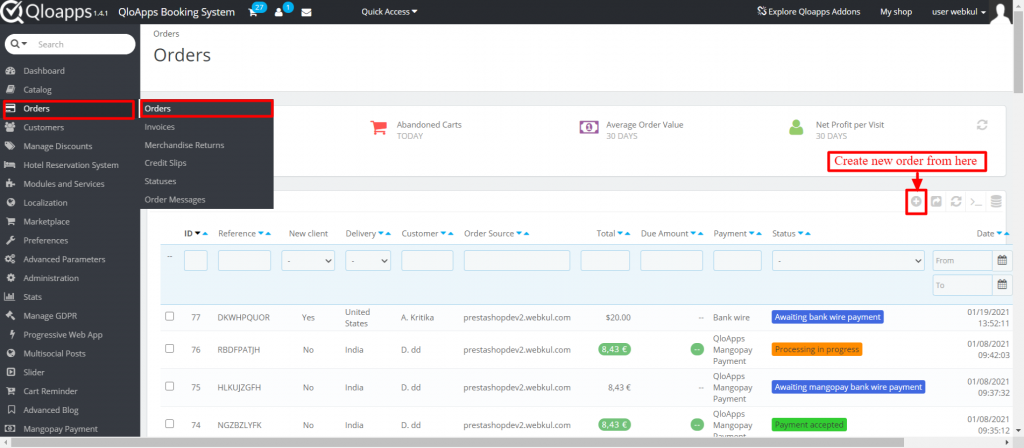
On behalf of the consumer, the admin can also create a new order.
To create a new order, go to order and click on “Add new order” button as shown below
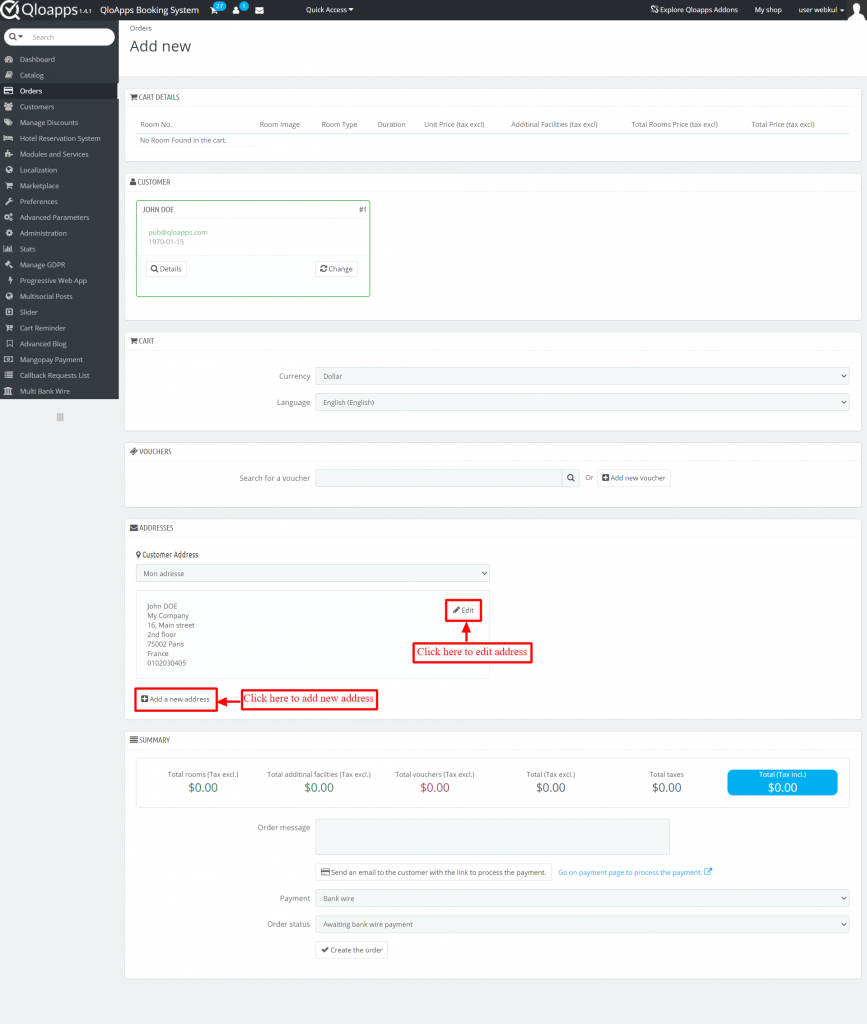
Search and choose customers from there or admin can also add a new customer.

The following page opens after the customer is chosen. As you can see in the address field option is to edit address or add a new address.
In either case, you get all three functionalities i.e., auto-detection of location, address suggestions based on search,
Or pinpointing of location on Google Maps.
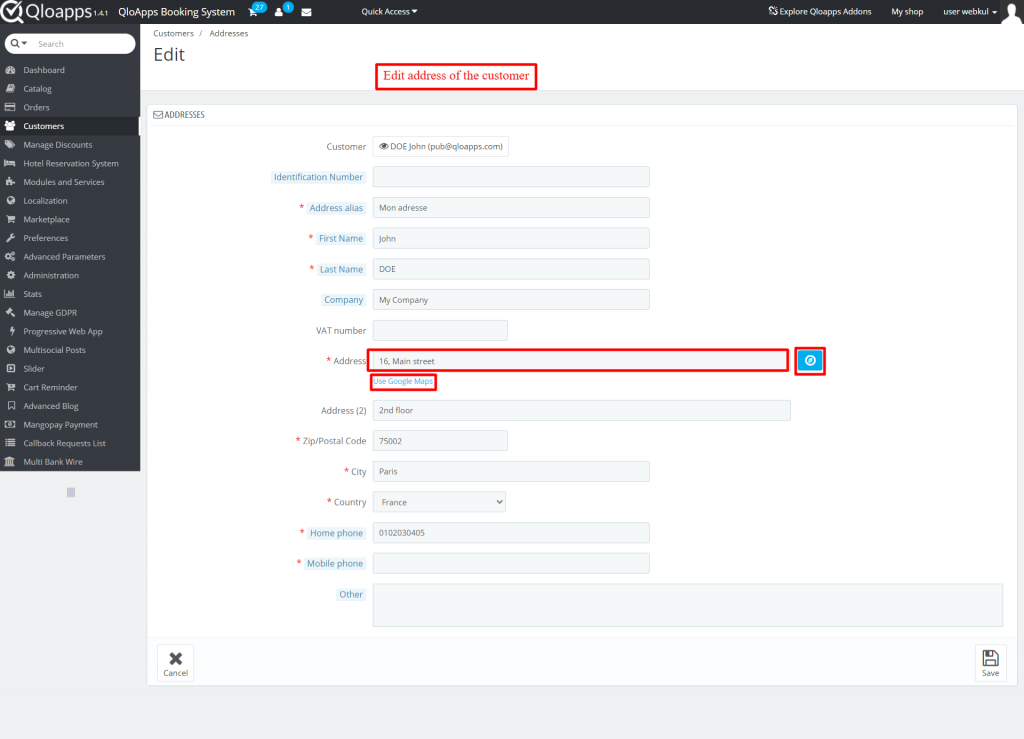
When the admin selects edit address, the following page appears.
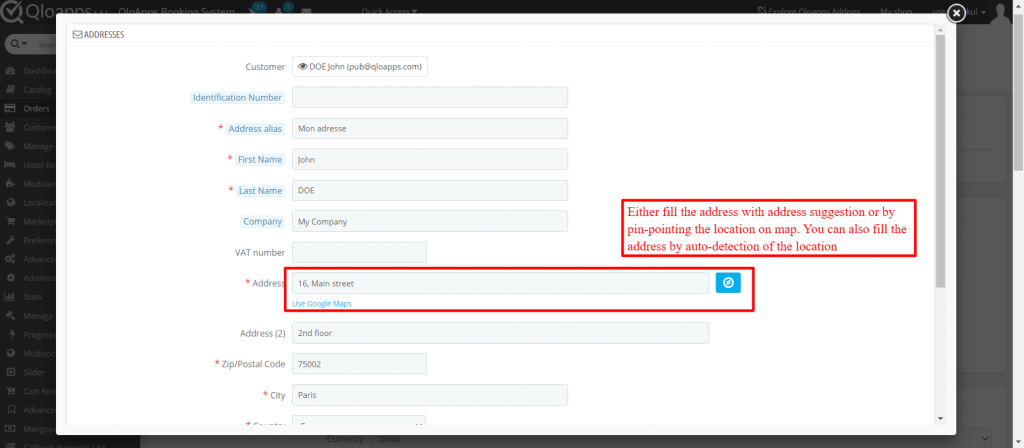
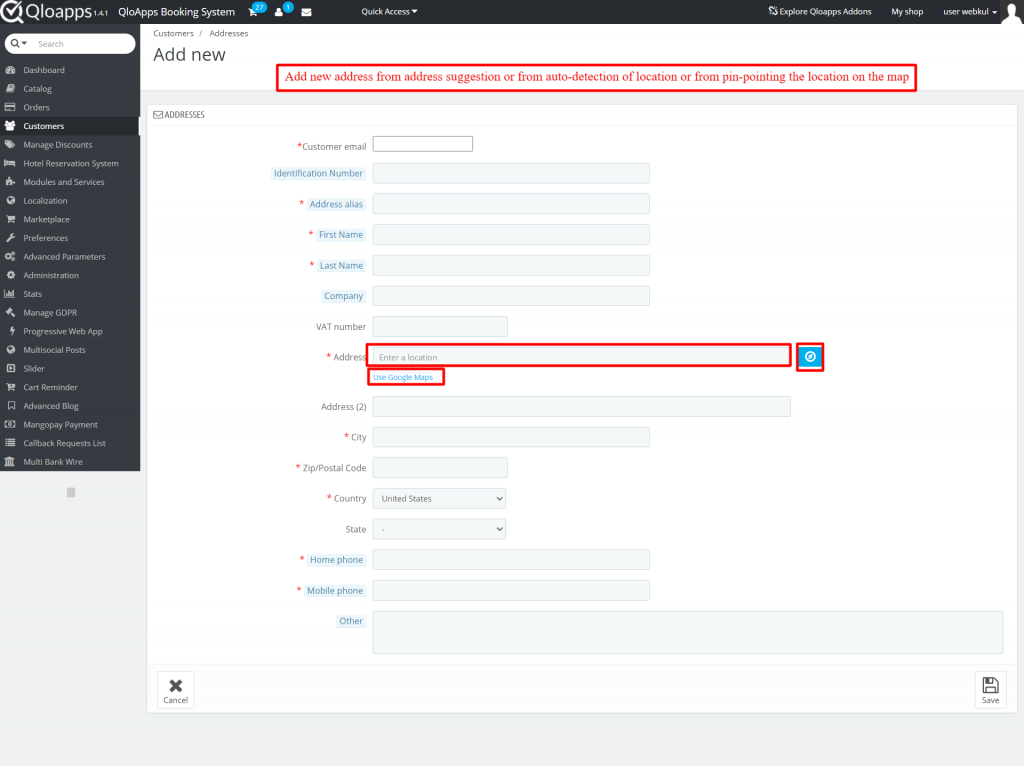
If admin select add new address then he can fill address with the use of Google map, or auto-detection or search suggestion.
Customer’s address
Admin can add or edit address from backend by clicking on “Address” on the “Customers” tab.
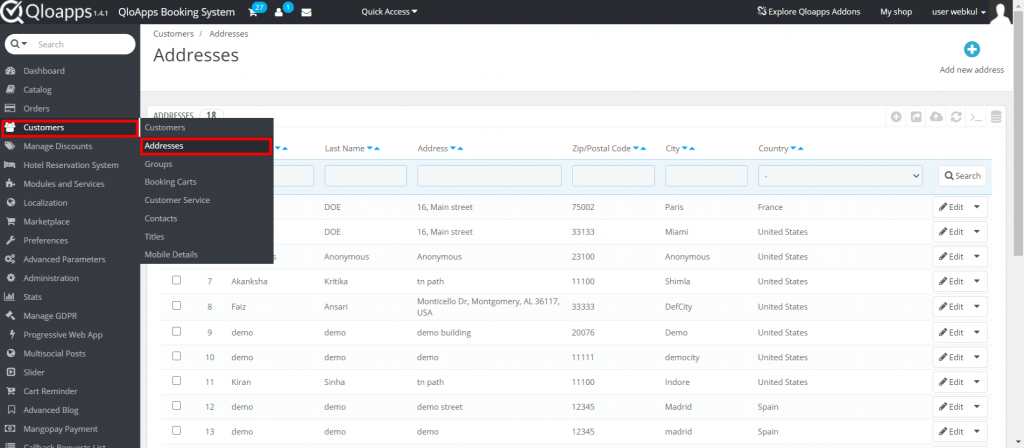
From here admin can add or edit the customer’s address.
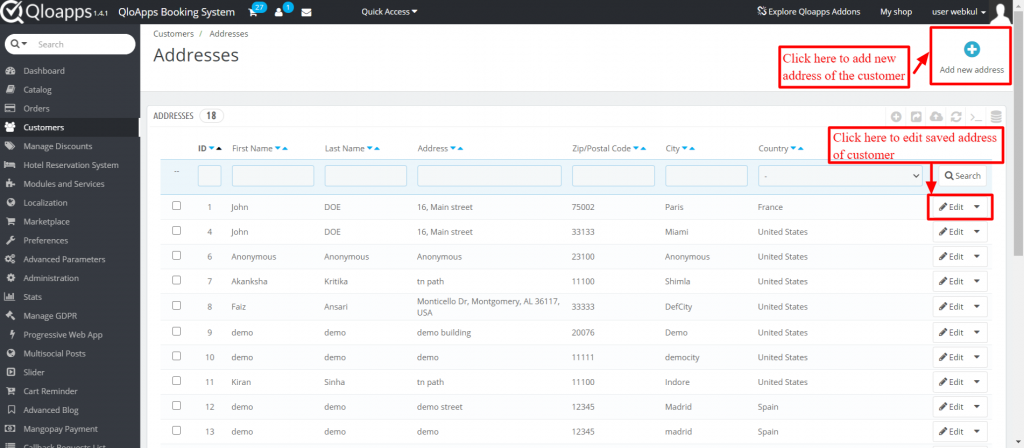
A new page appears when the admin clicks on the edit tab. From that page, he can edit the address of the customer as shown below.
When admin clicks on adding new address following page appears.
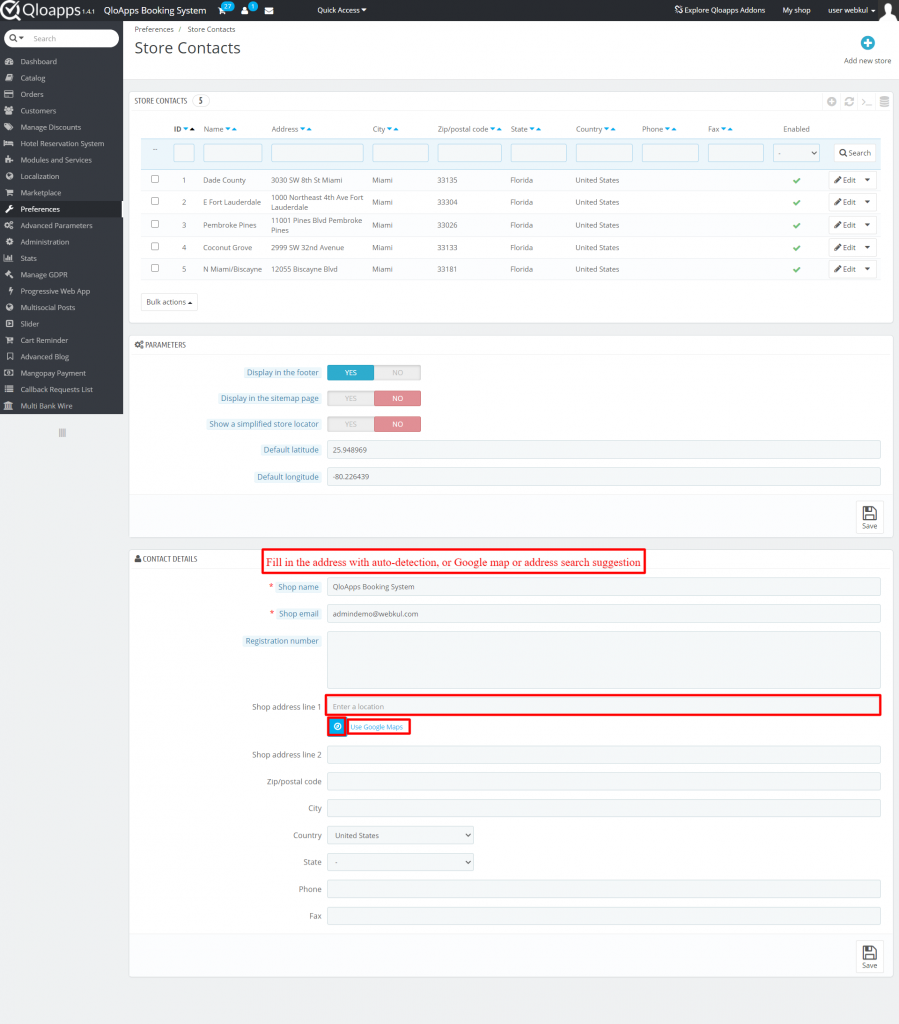
Store contacts
At last, admin can enjoy auto-fill functionality at the last “Store Contacts”.
For this he has to go to “Preferences” and select “Store Contact”.

All the three functionalities are available here in contact details.
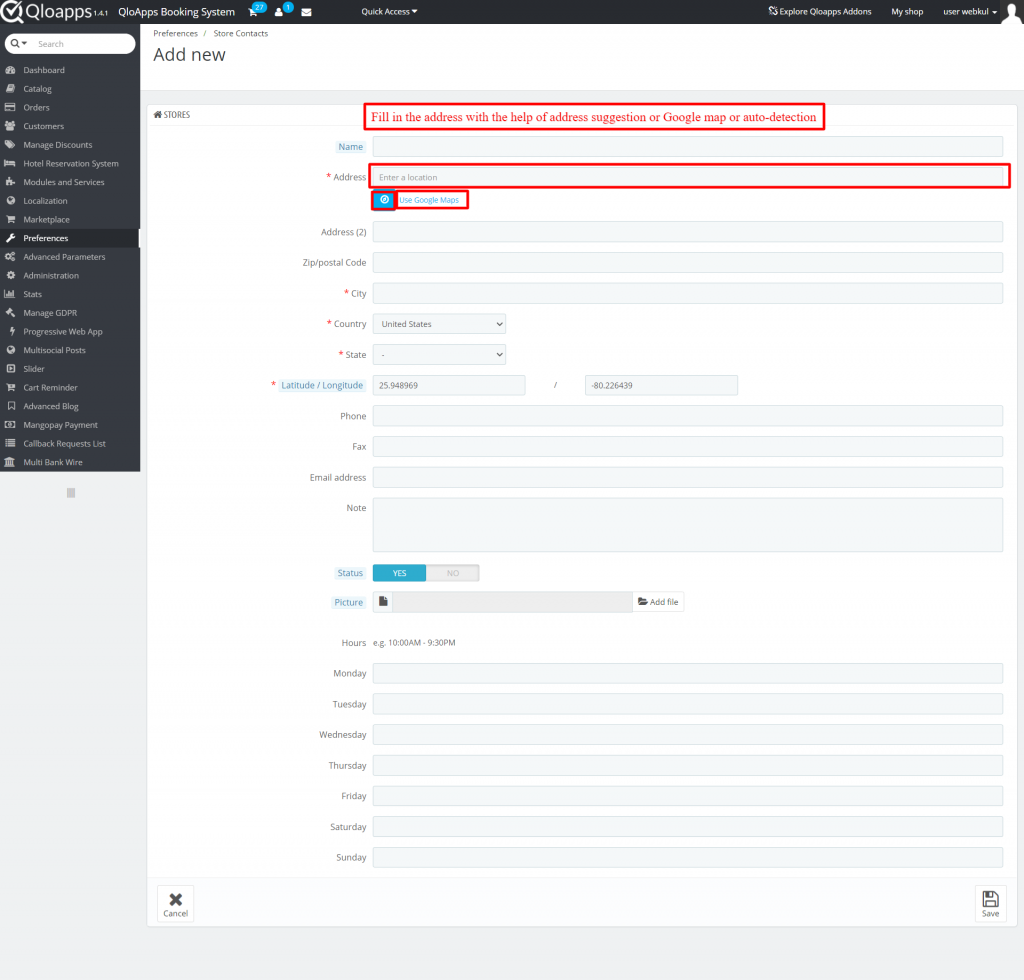
When adding the address of a new store.
Conclusion
That was all from the QloApps Auto-fill Address Form| Google Addresses.
I hope I was able to clarify the add-on in the best possible way.
If you want to learn about the functionality of QloApps then you can visit this link: QLO Reservation System – Free Open-Source Hotel Booking & Reservation System
In case of any query, issue, or requirement please feel free to raise it on QloApps Forum
Be the first to comment.